
We’ve looked at ASRock’s DeskMini range in the past, with in depth analysis of the B250 and Z370 series DeskMini GTX/RX models – with GTX1080 and GTX1060 GPUs included. These cater for the high end, with prices to suit. At the other end of the spectrum, we have the DeskMini 110 and 310 – Mini-STX rather than Micro-STX, and integrated graphics only.
The barebones market is an interesting one – DIY PC with less DIY, but better manufacturer support. Buy a barebones box, slap in a CPU, RAM and storage and you’re off – no power supply selection headaches, board installation challenges or other time killers. This is especially important when it comes to small business environment setups – where setting up 5-25 systems can take a load of time if you’re building entirely from scratch.
Aimed at a more regular user, business workstations and home theatre PC use, the DeskMini 310 is a mainstream barebones with an eye to competing with Intel’s NUC and similar products. Let’s see how the ASRock DeskMini 310 stacks up!
Table of Contents
The Specifications
| Model | DeskMini 310/COM Barebone |
| Dimensions | 155 x 155 x 80 mm (1.9 Litres) |
| CPU Support | Supports Intel 8th Generation Processors (Socket 1151, Coffee Lake)(Max. TDP 65W) |
| Chipset | Intel H310 |
| Memory | Supports DDR4 2666MHz, 2 x SO-DIMM Slots, Max. 32GB |
| Graphics | Intel UHD Graphics |
| Rear IO | – 1 x HDMI* – 1 x DP* – 1 x VGA* – 1 x USB 2.0 Type-A – 1 x USB 3.1 Gen1 Type-A*Three graphics output options : HDMI,DP ,VGA and supports up to 2 displays simultaneously. |
| Front I/O | – 2 x USB 2.0 Headers, 1 x Front Panel Header – 2 x 4-Pin fan connectors (CPU, SYS) – 1 x DC-In Jack (Supports 19V Power Adapters) – 1 x Internal Speaker Header (4-Pin) – 1 x Chassis Intrusion Header (2-Pin) |
| Network | -1 x M.2 (key E 2230) Slot for Wi-Fi + BT Module Support Intel® CNVi module, PCIe- Intel® Gigabit I219V LAN |
| Storage | – 2 x SATA3 with Power connectors – 1 x Ultra M.2 (2280) SSD Slot (PCIe Gen3 x4 / SATA6Gb) – 1 x Micro SD Card Reader (bottom side) |
Pricing – The ASRock DeskMini 310 Barebones is retailing for US$150 at NewEgg.com at time of writing.
The Unboxing
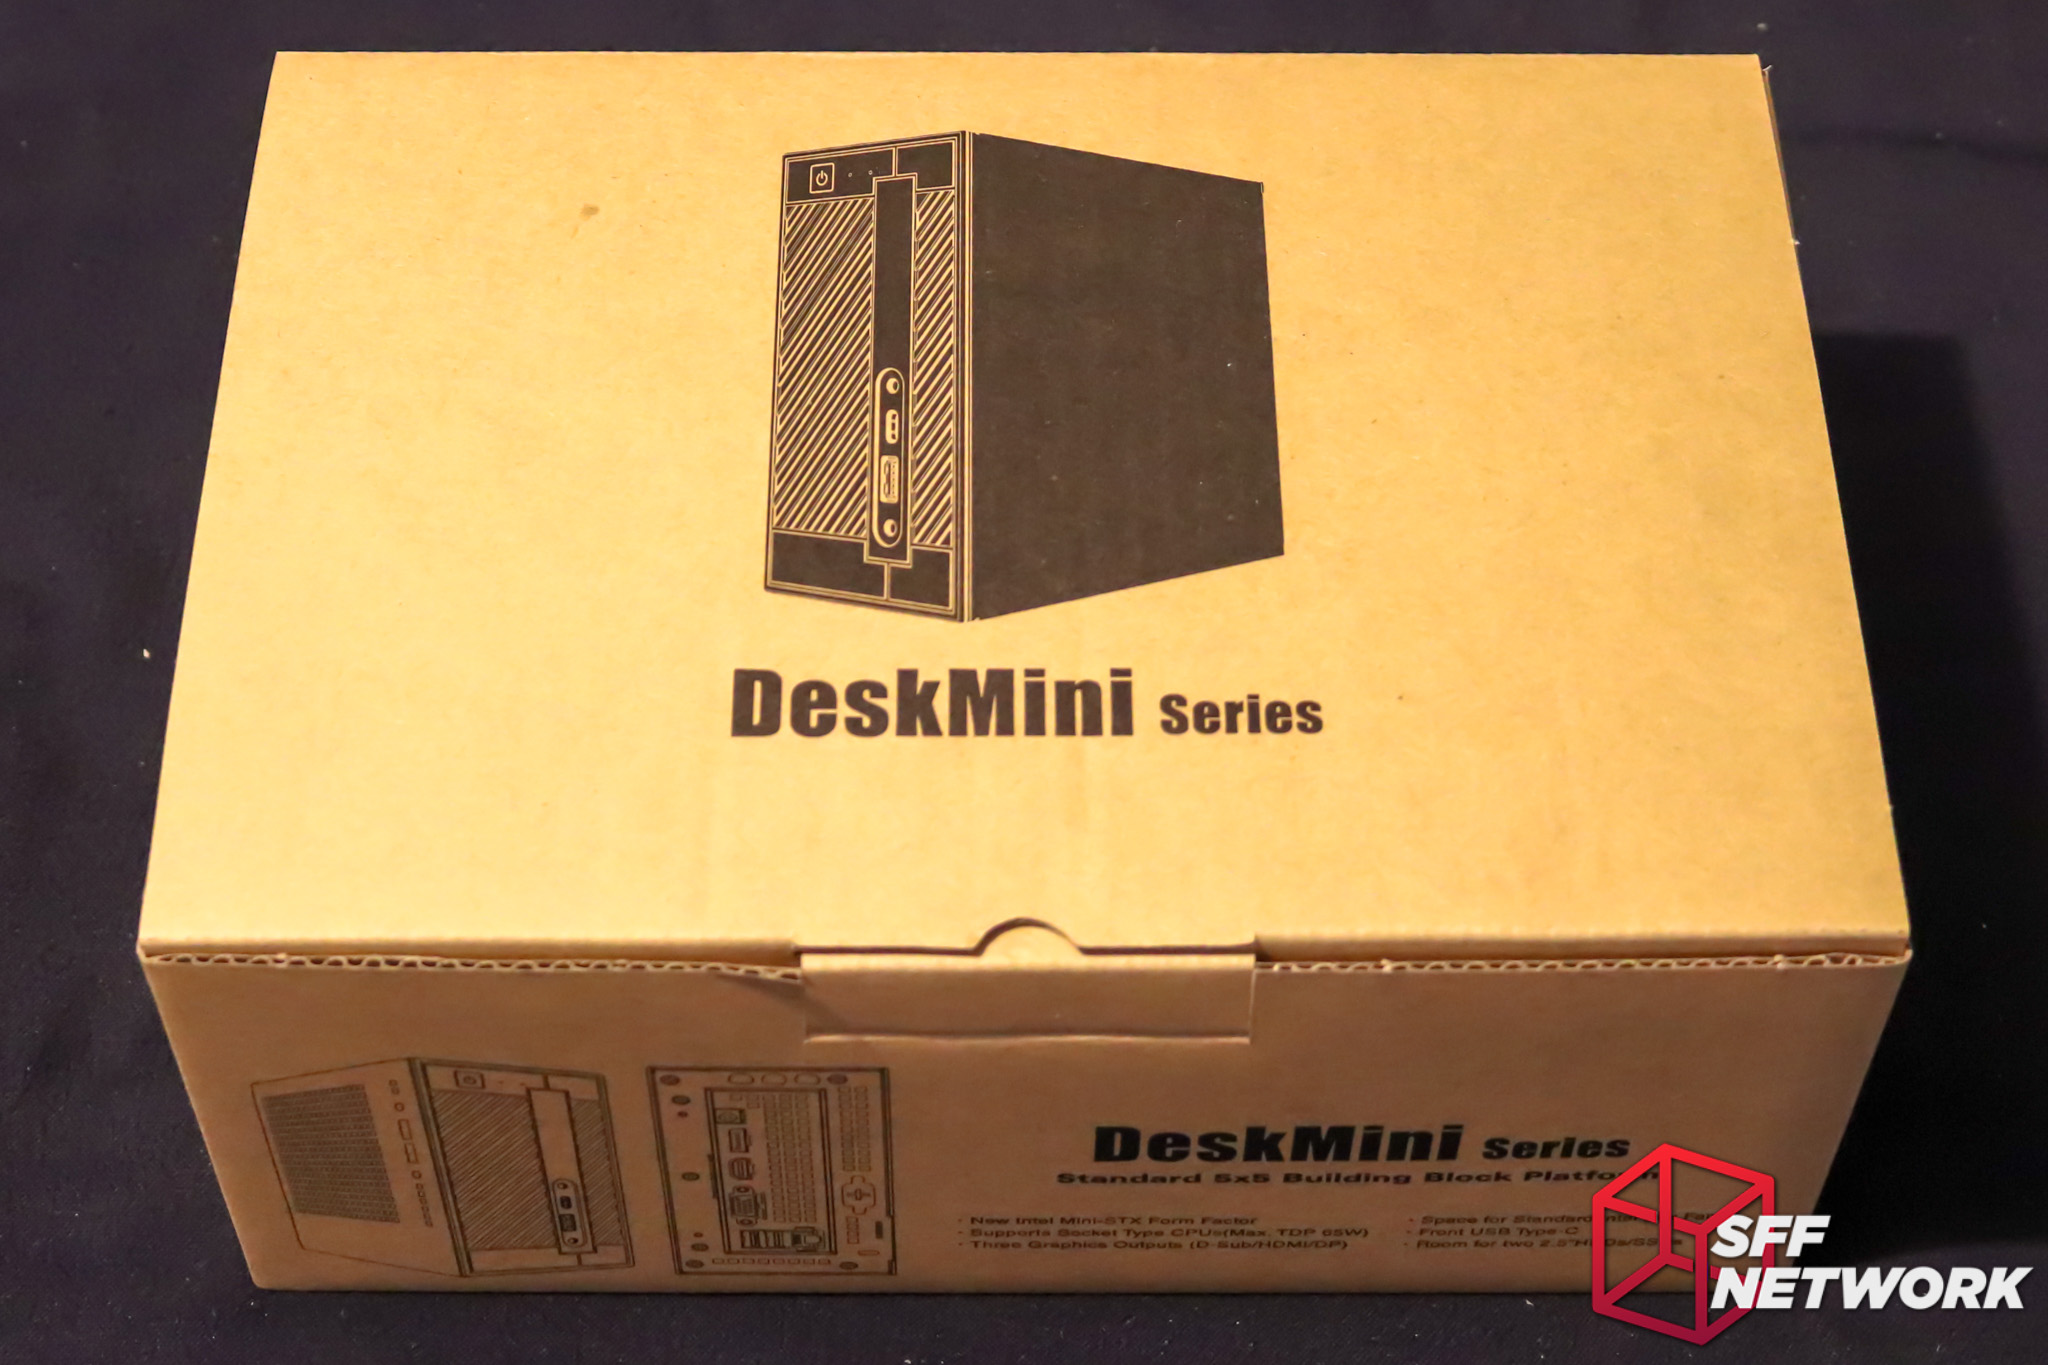
Simple, subtle, no gloss or glamour. This is definitely a step down from the gloss black of the DeskMini GTX/RX packaging. Reduced packaging costs means reduced cost to end users – not to mention the reduced cost to the environment of flashy colours and glossy coatings.
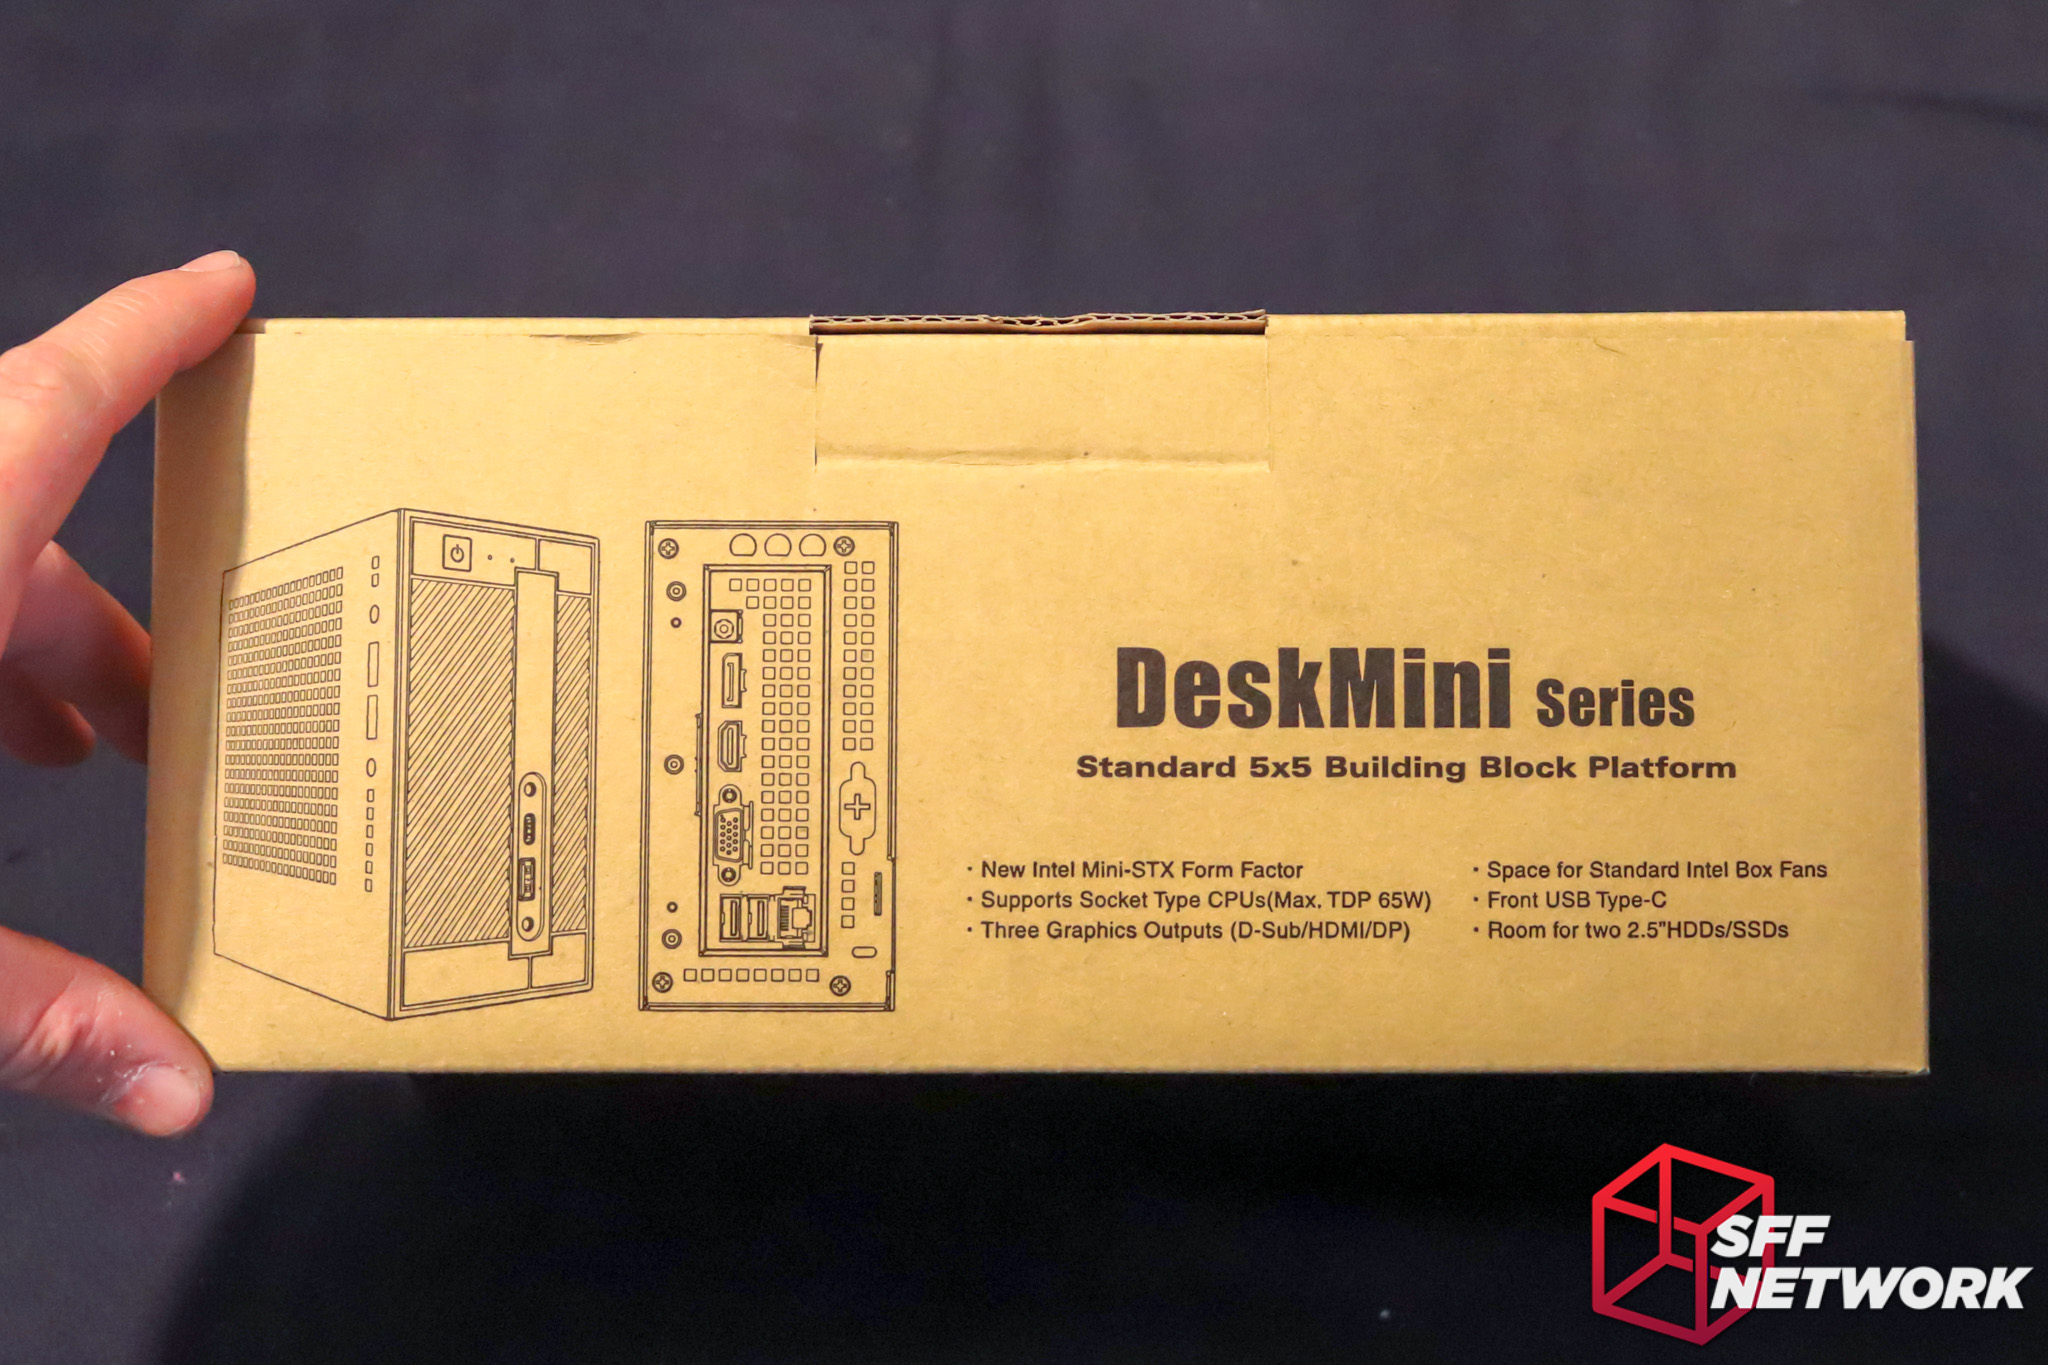
No flashy marketing here either. Just information. I’d suggest that this product is aimed more at business or SOHO rather than end users who buy with their eyes at a retail shop.
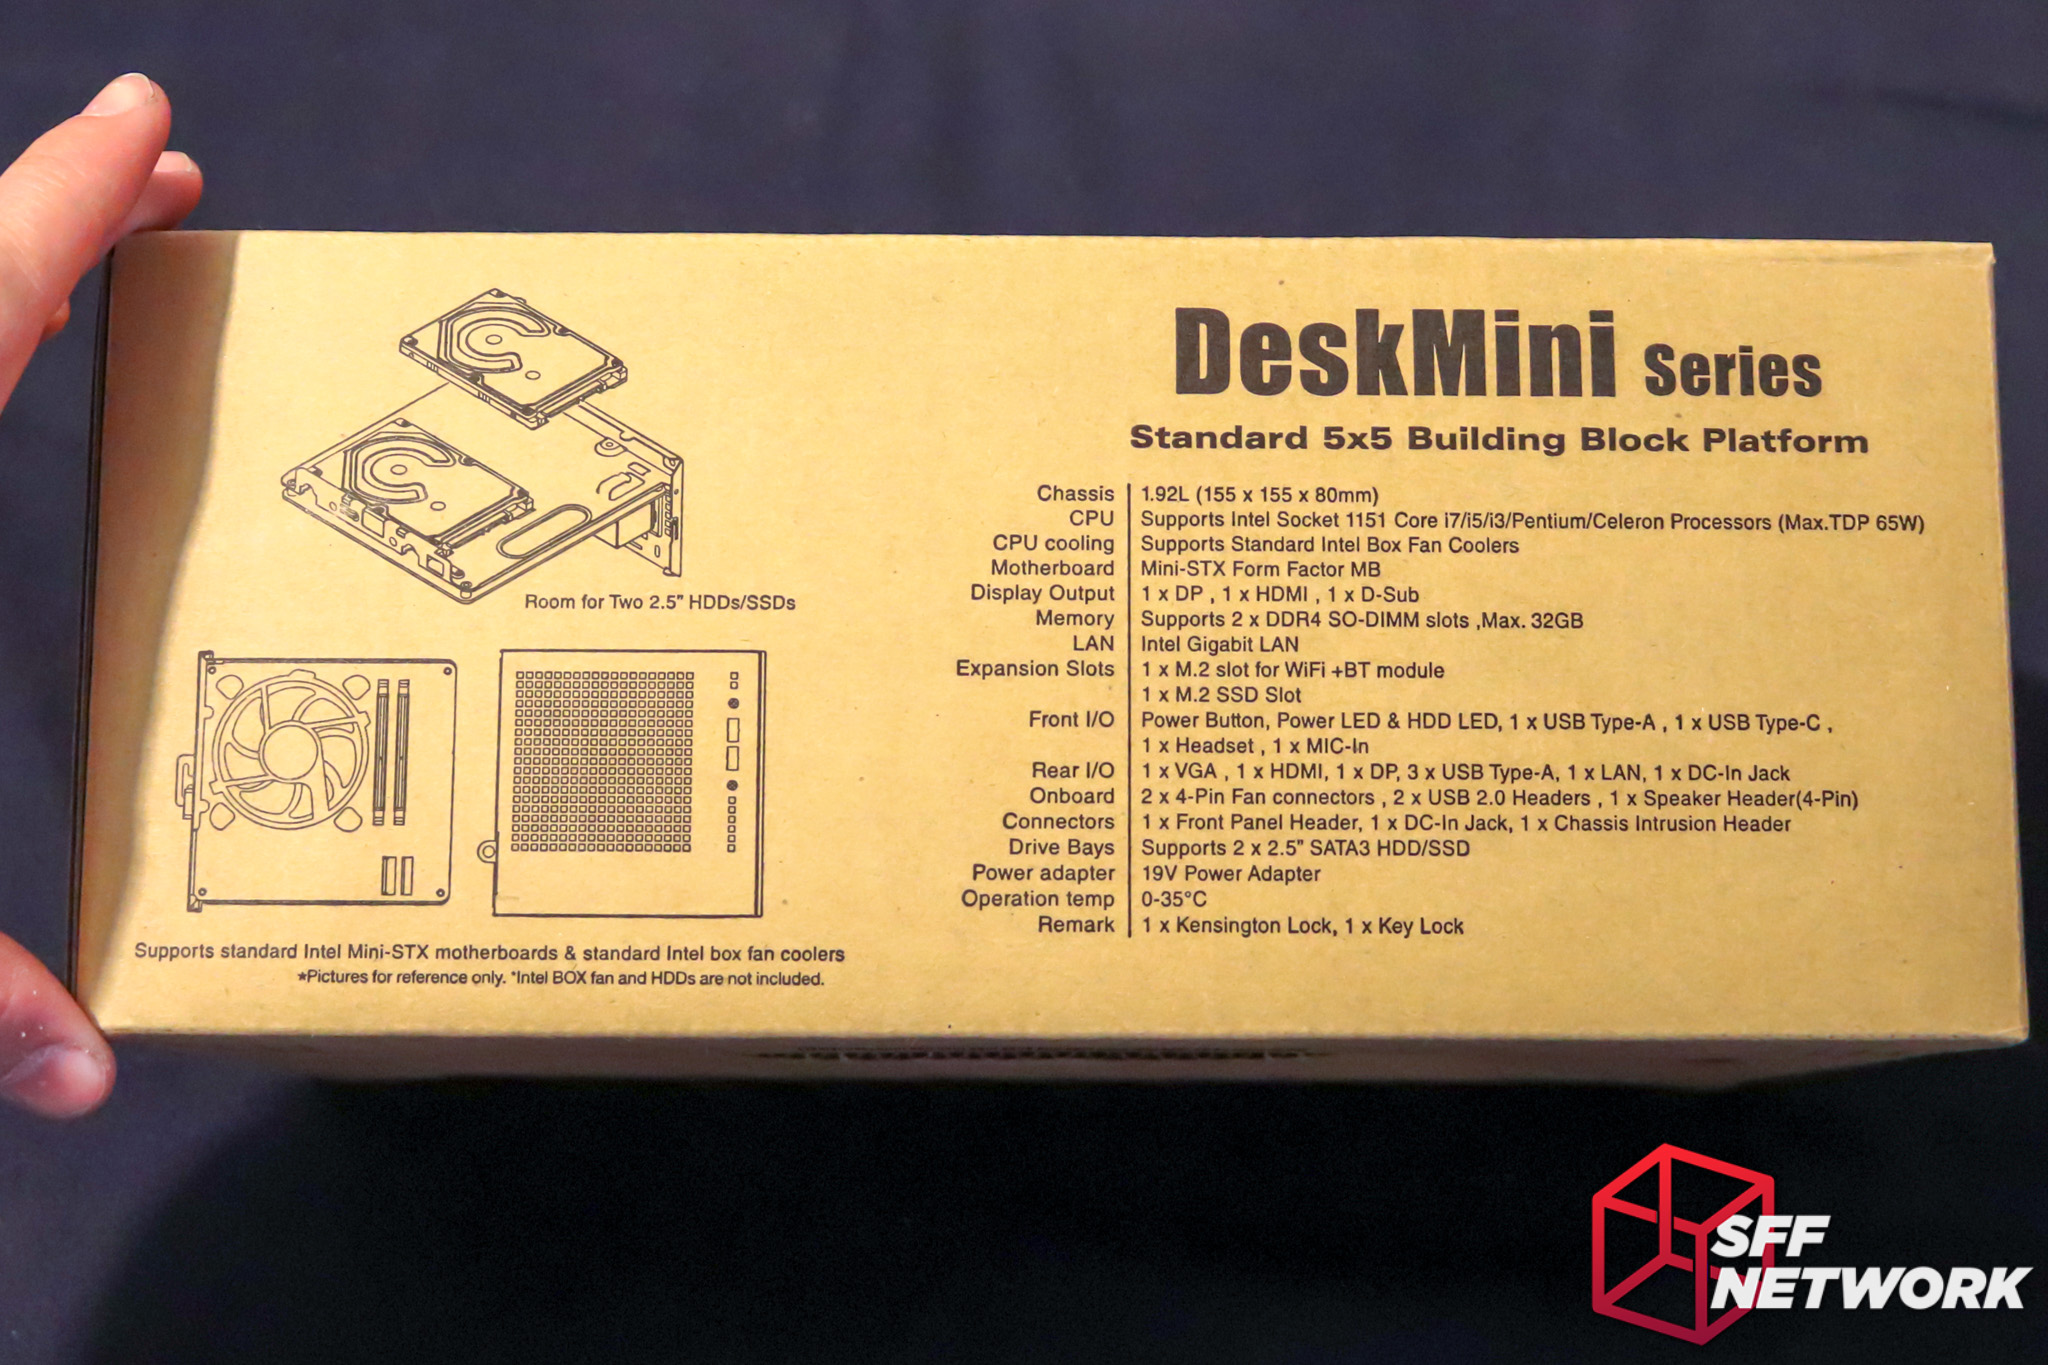
Specs, reproduced in the table above, as well as a few mechanical drawings.

Opening the box reveals a CD (amusing, as the DeskMini doesn’t support an internal optical drive!), and foam protecting the DeskMini 310 itself. The power brick and accessories hide under the cardboard cover to the right.
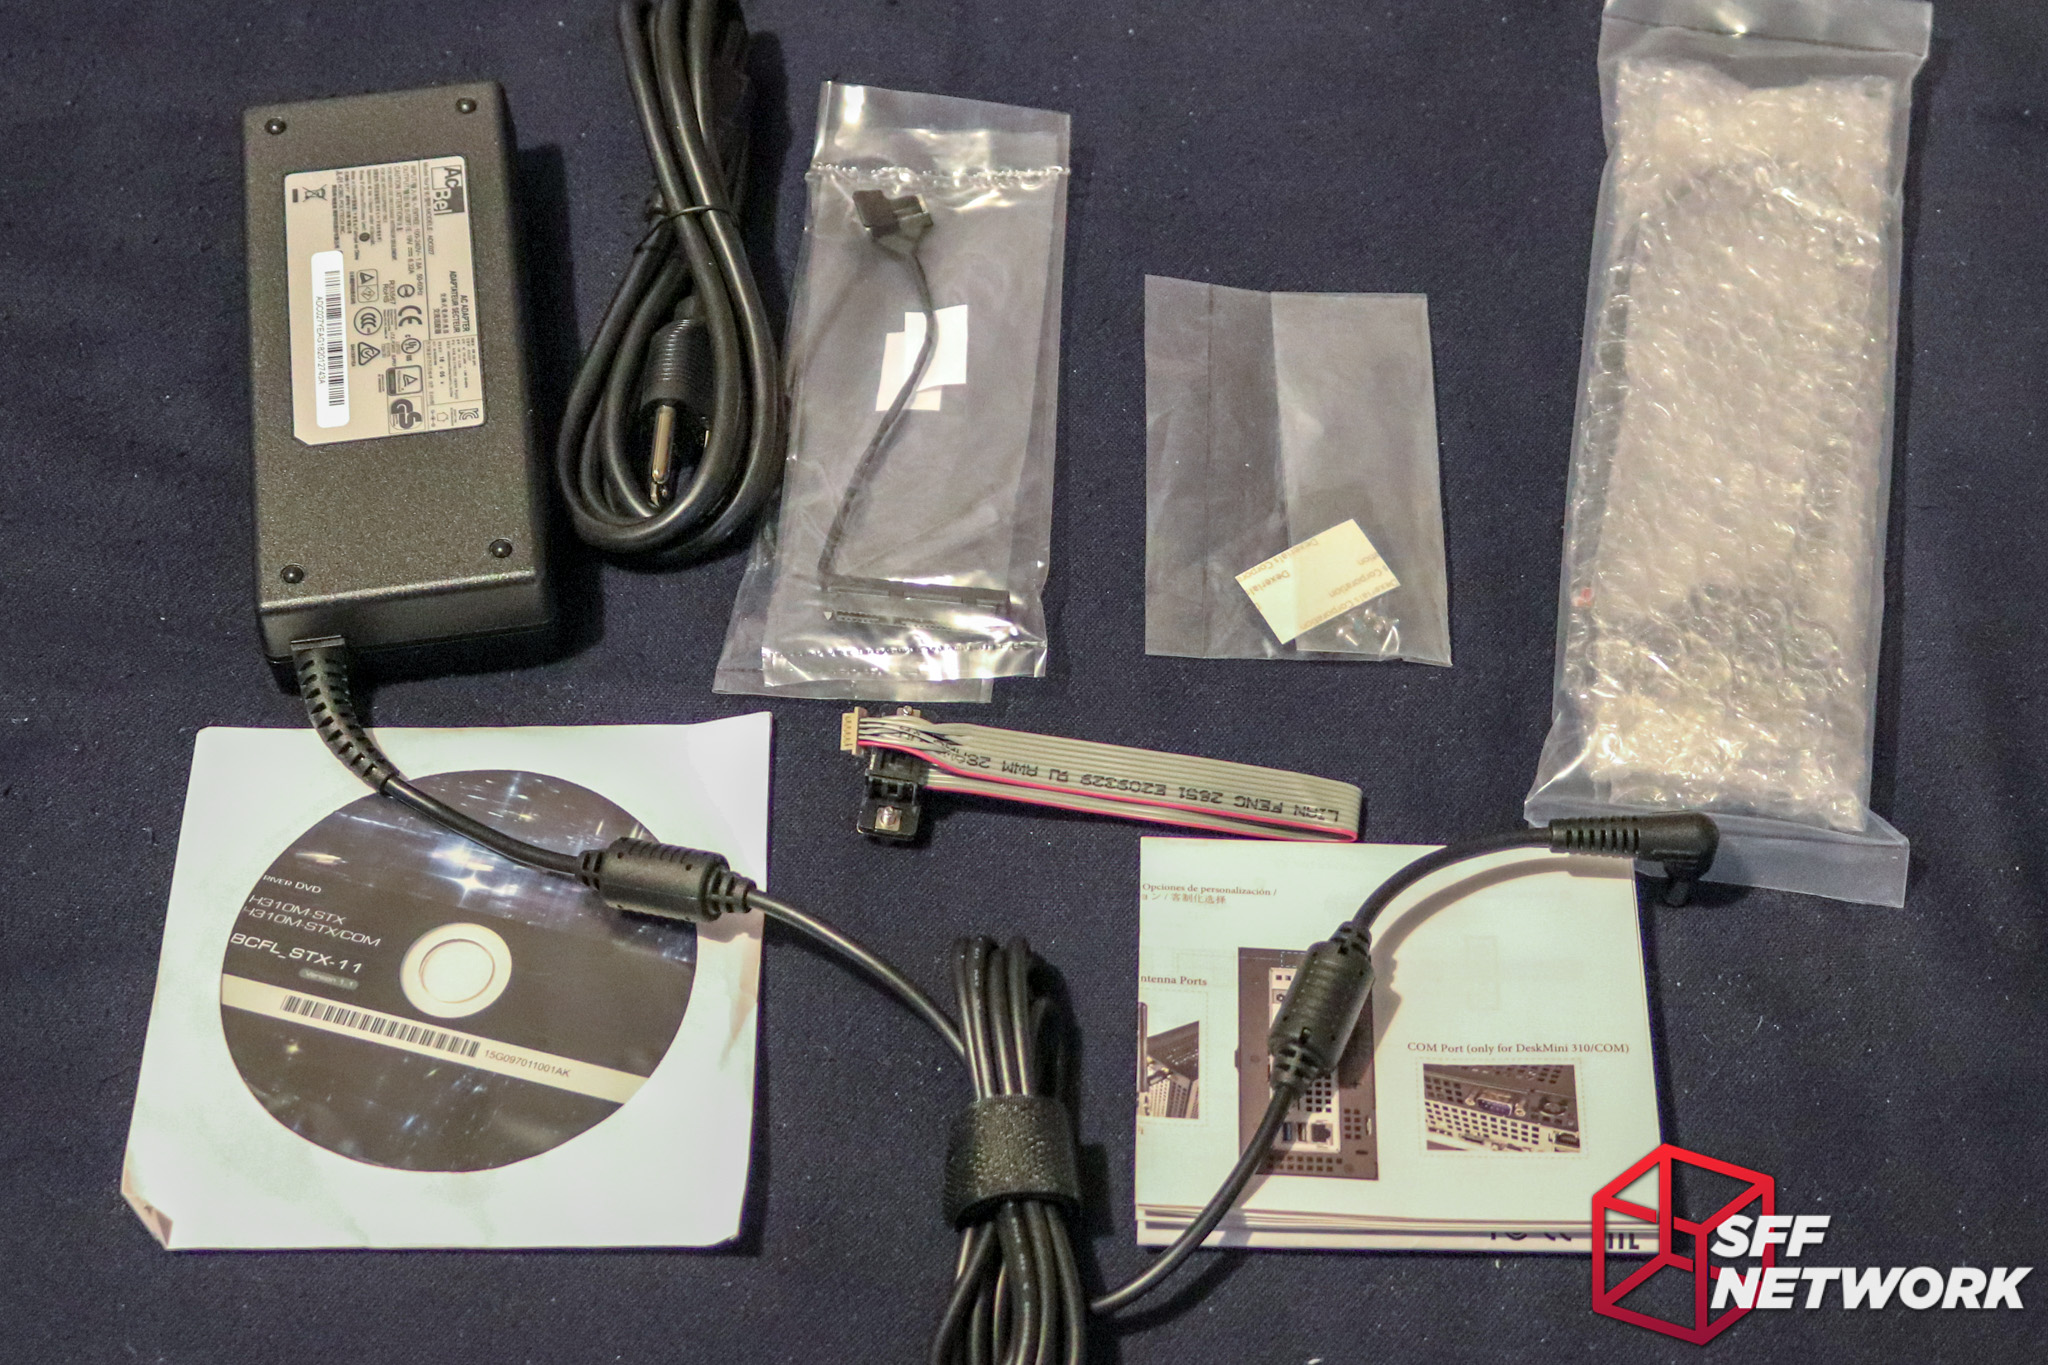
Wow, accessories galore! From the top left, in a clockwise fashion;
- Power Brick from AcBel
- Mains cable (not for the NZ market, alas, so I had to substitute my own)
- Pair of SATA power/data cables
- Adhesive feets!
- USB 2.0 cable for the front panel
- Quickstart manual
- RS232 COM cable with DE9 plug
- Driver CD.
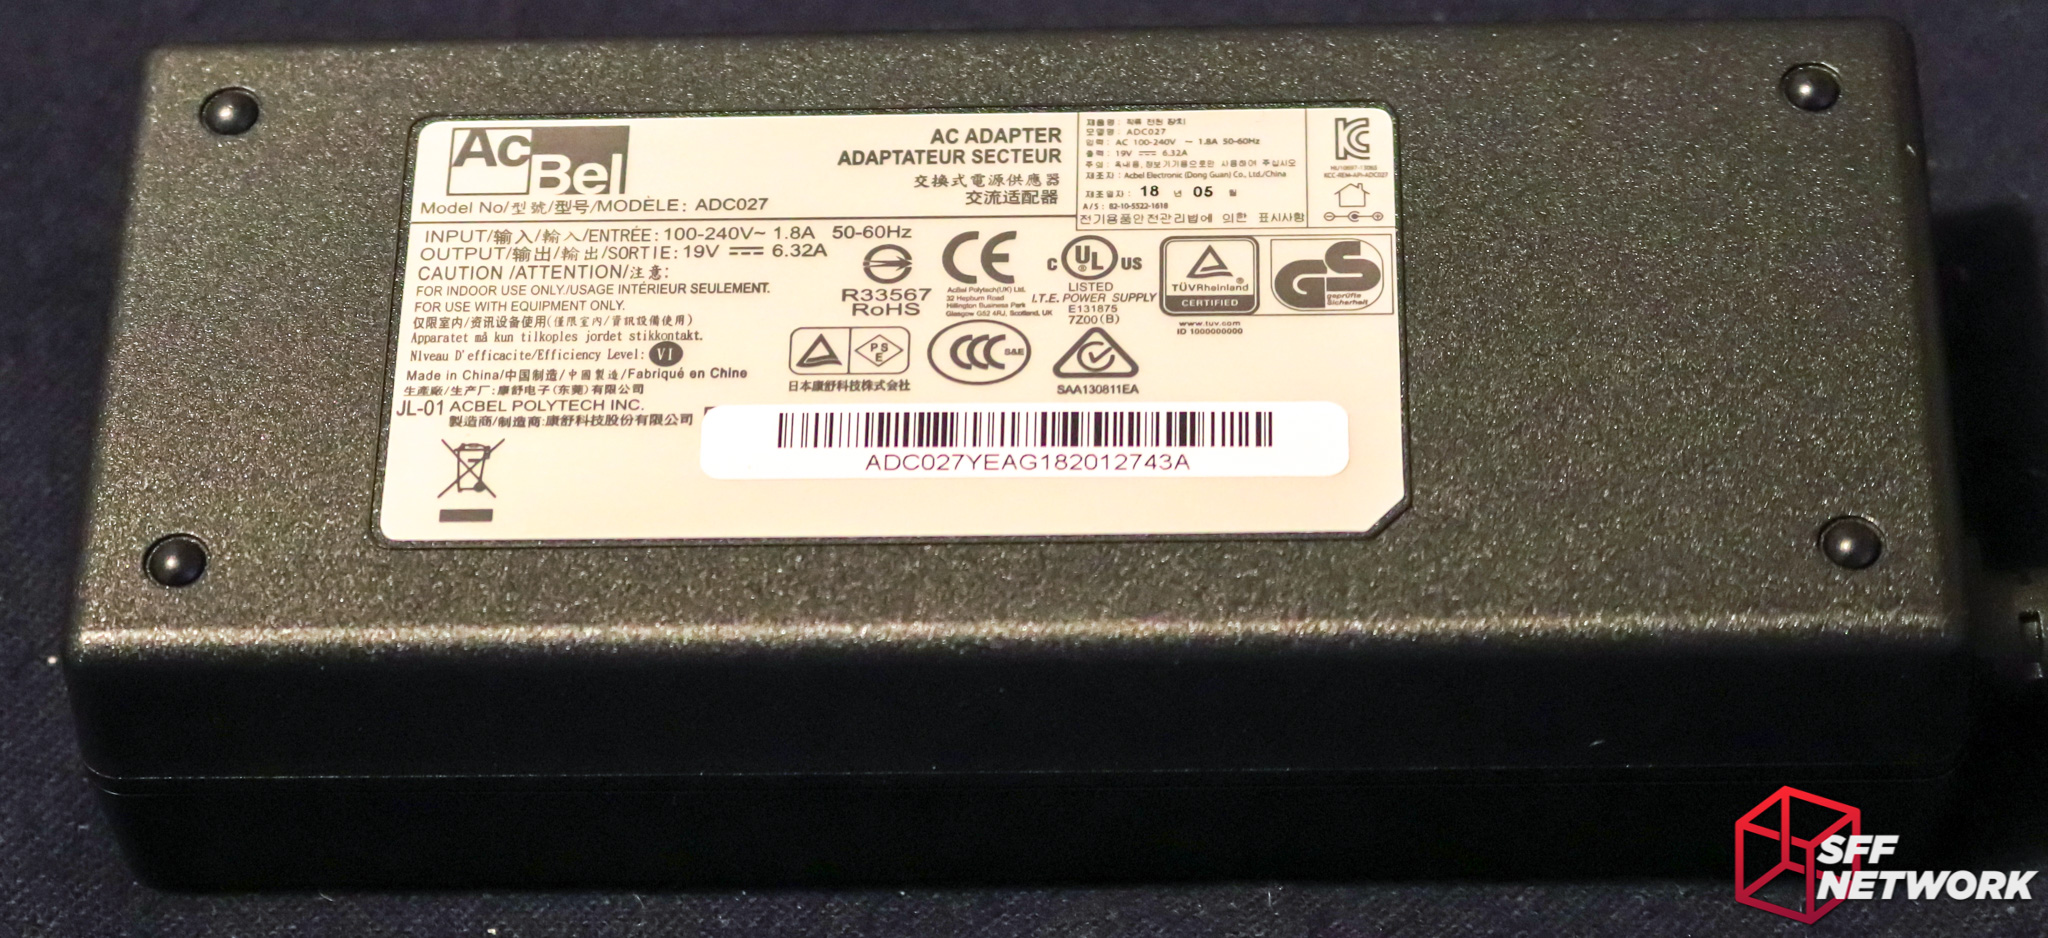
The AcBel ADC027 power brick (a well known brand, props to ASRock for not cheaping out here) pumps out 6.32A at 19V, or around 120 Watts, at 40 degrees C. A little overkill for a system limited to a 65W CPU, but we’ll take it! The power brick supports 100 to 240V, 50-60Hz, and carries a tonne of certifications.
Whilst the sticker quotes the above specs, the product page for the brick is a little more.. flexible with the input voltage, with 90-264V AC input supported. AcBel states the brick is 89% efficient at maximum load.
The power brick carries a standard 5.5×2.1mm, center-positive male barrel jack, meaning that replacement, should the unit fail outside of warranty, will be easy.
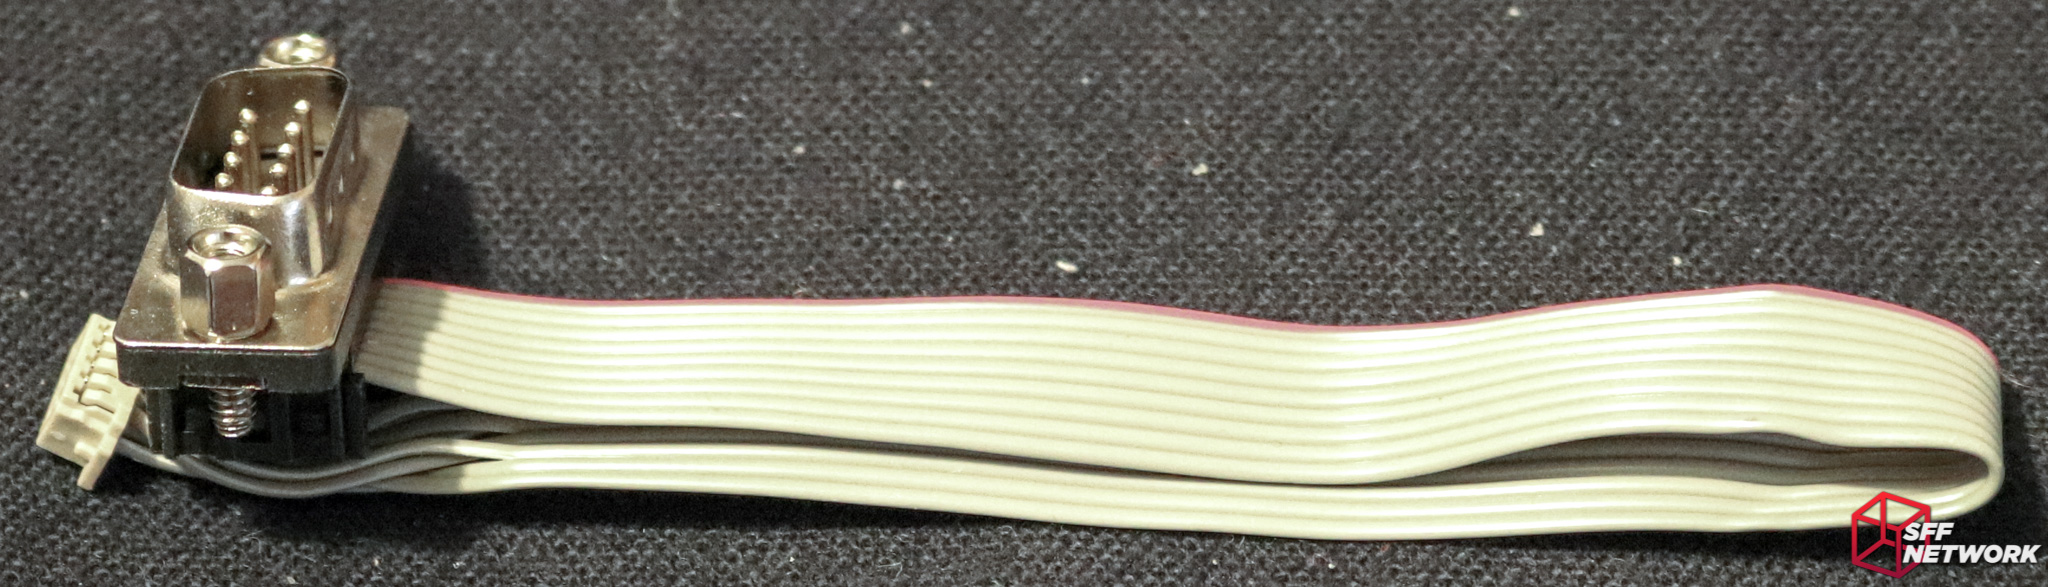
Whilst the serial port cable may seem to be an odd choice, the connection standard is still very widely used across various industries, from POS systems, CNC machines, as well as communicating with various embedded systems like network switches. The cable provided by ASRock mounts to the rear panel of the DeskMini 310’s case, as we will see later on. DeskMini on a datacentre crash cart? Yes please!
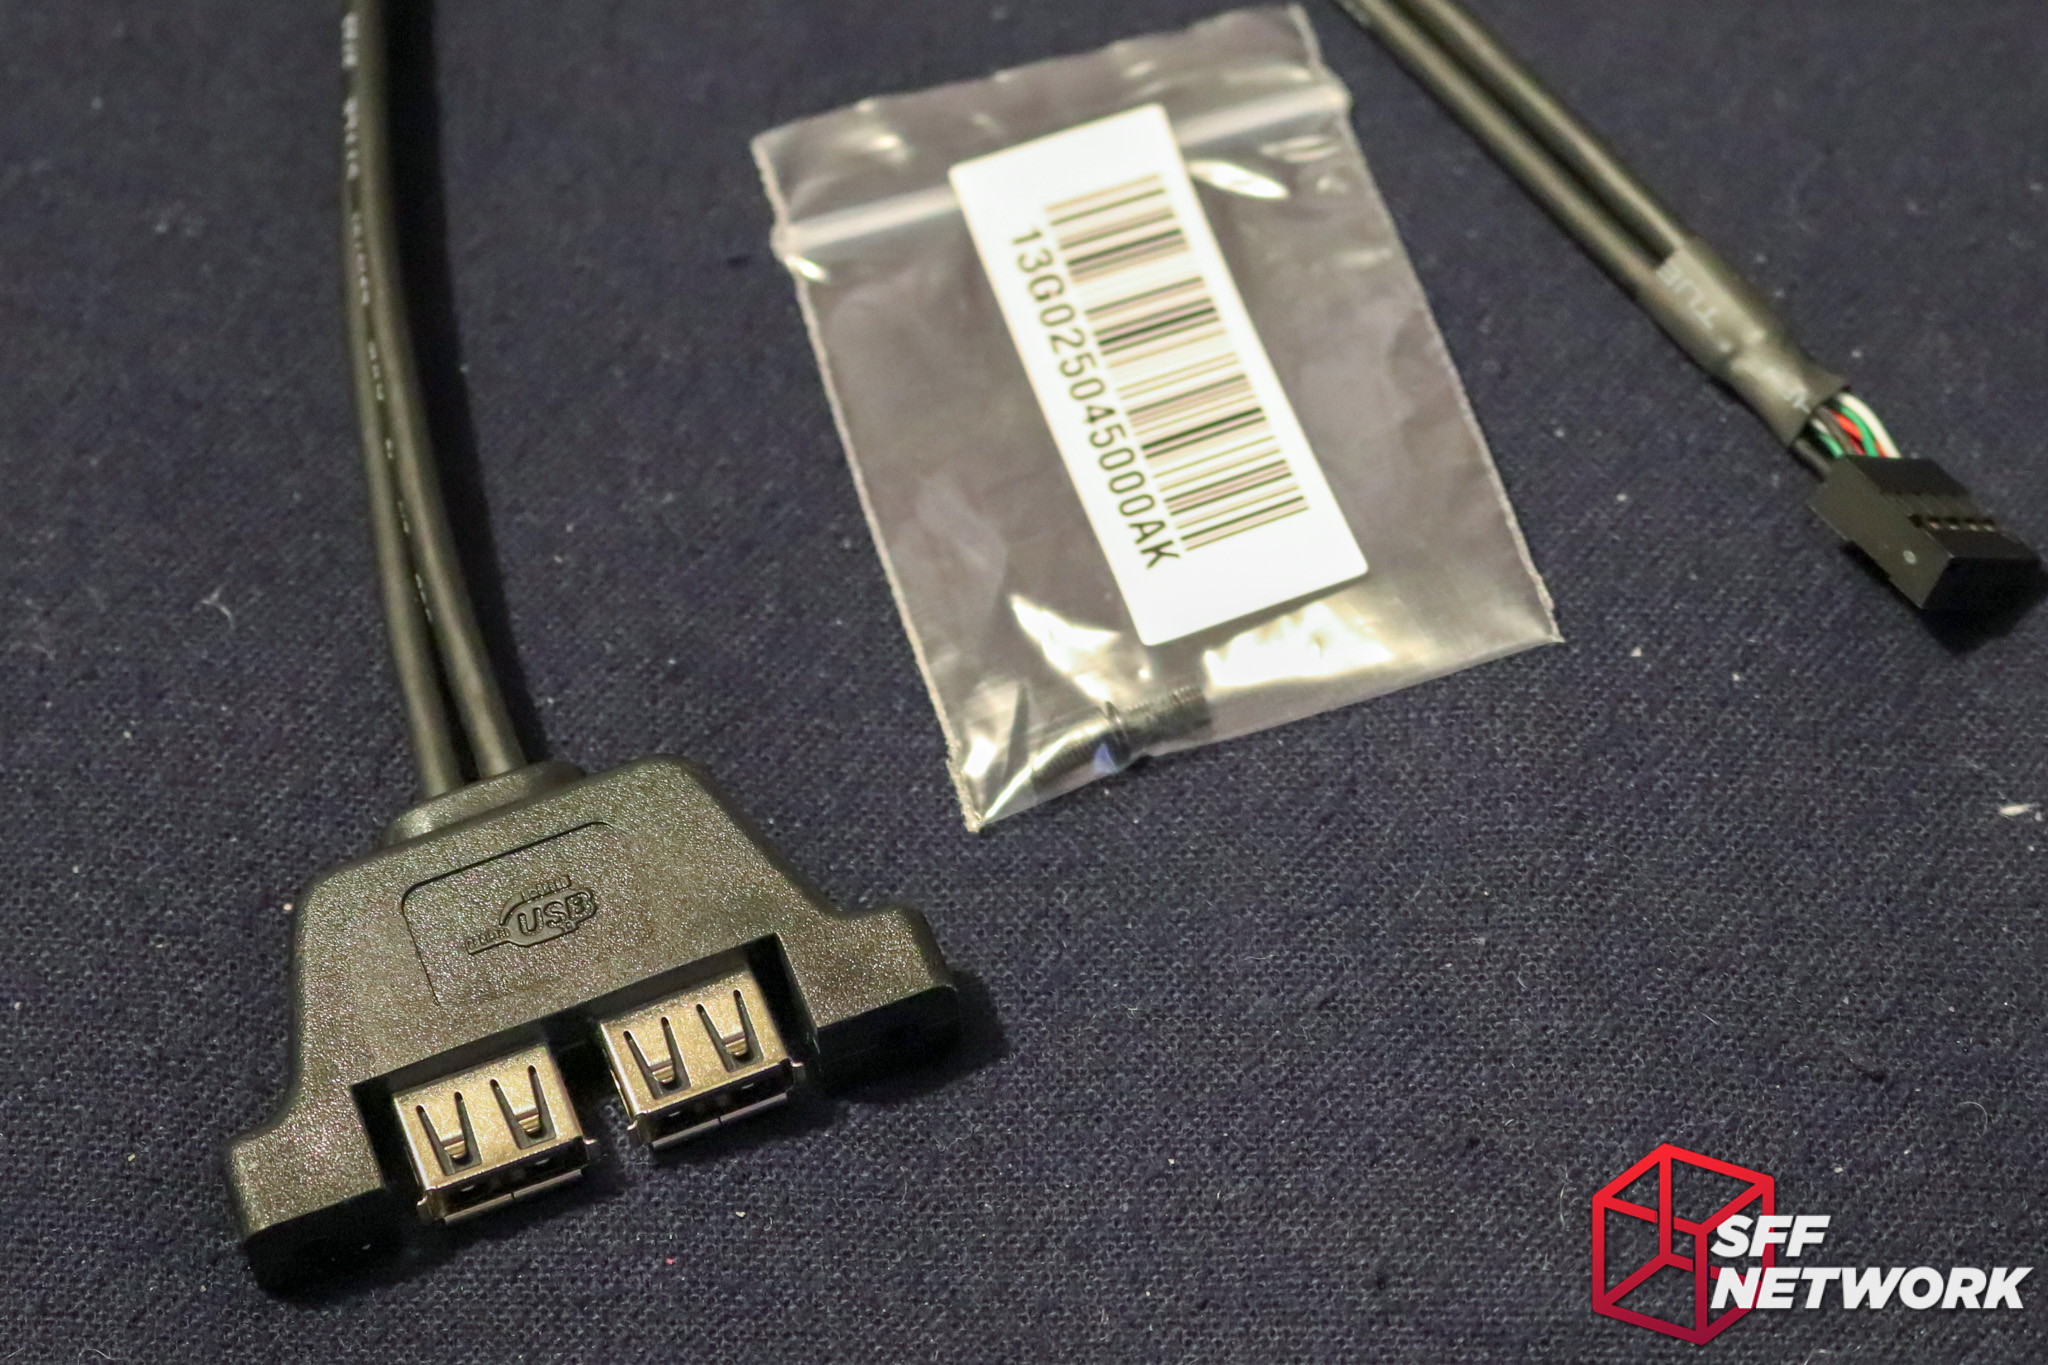
Also included is a side panel USB2.0 cable, meaning you can add an extra pair of USB ports to the front area of the system – very important to have considering the somewhat limited rear IO of the STX board family. What isn’t included for this, however, is instructions to install it.
The DeskMini 310
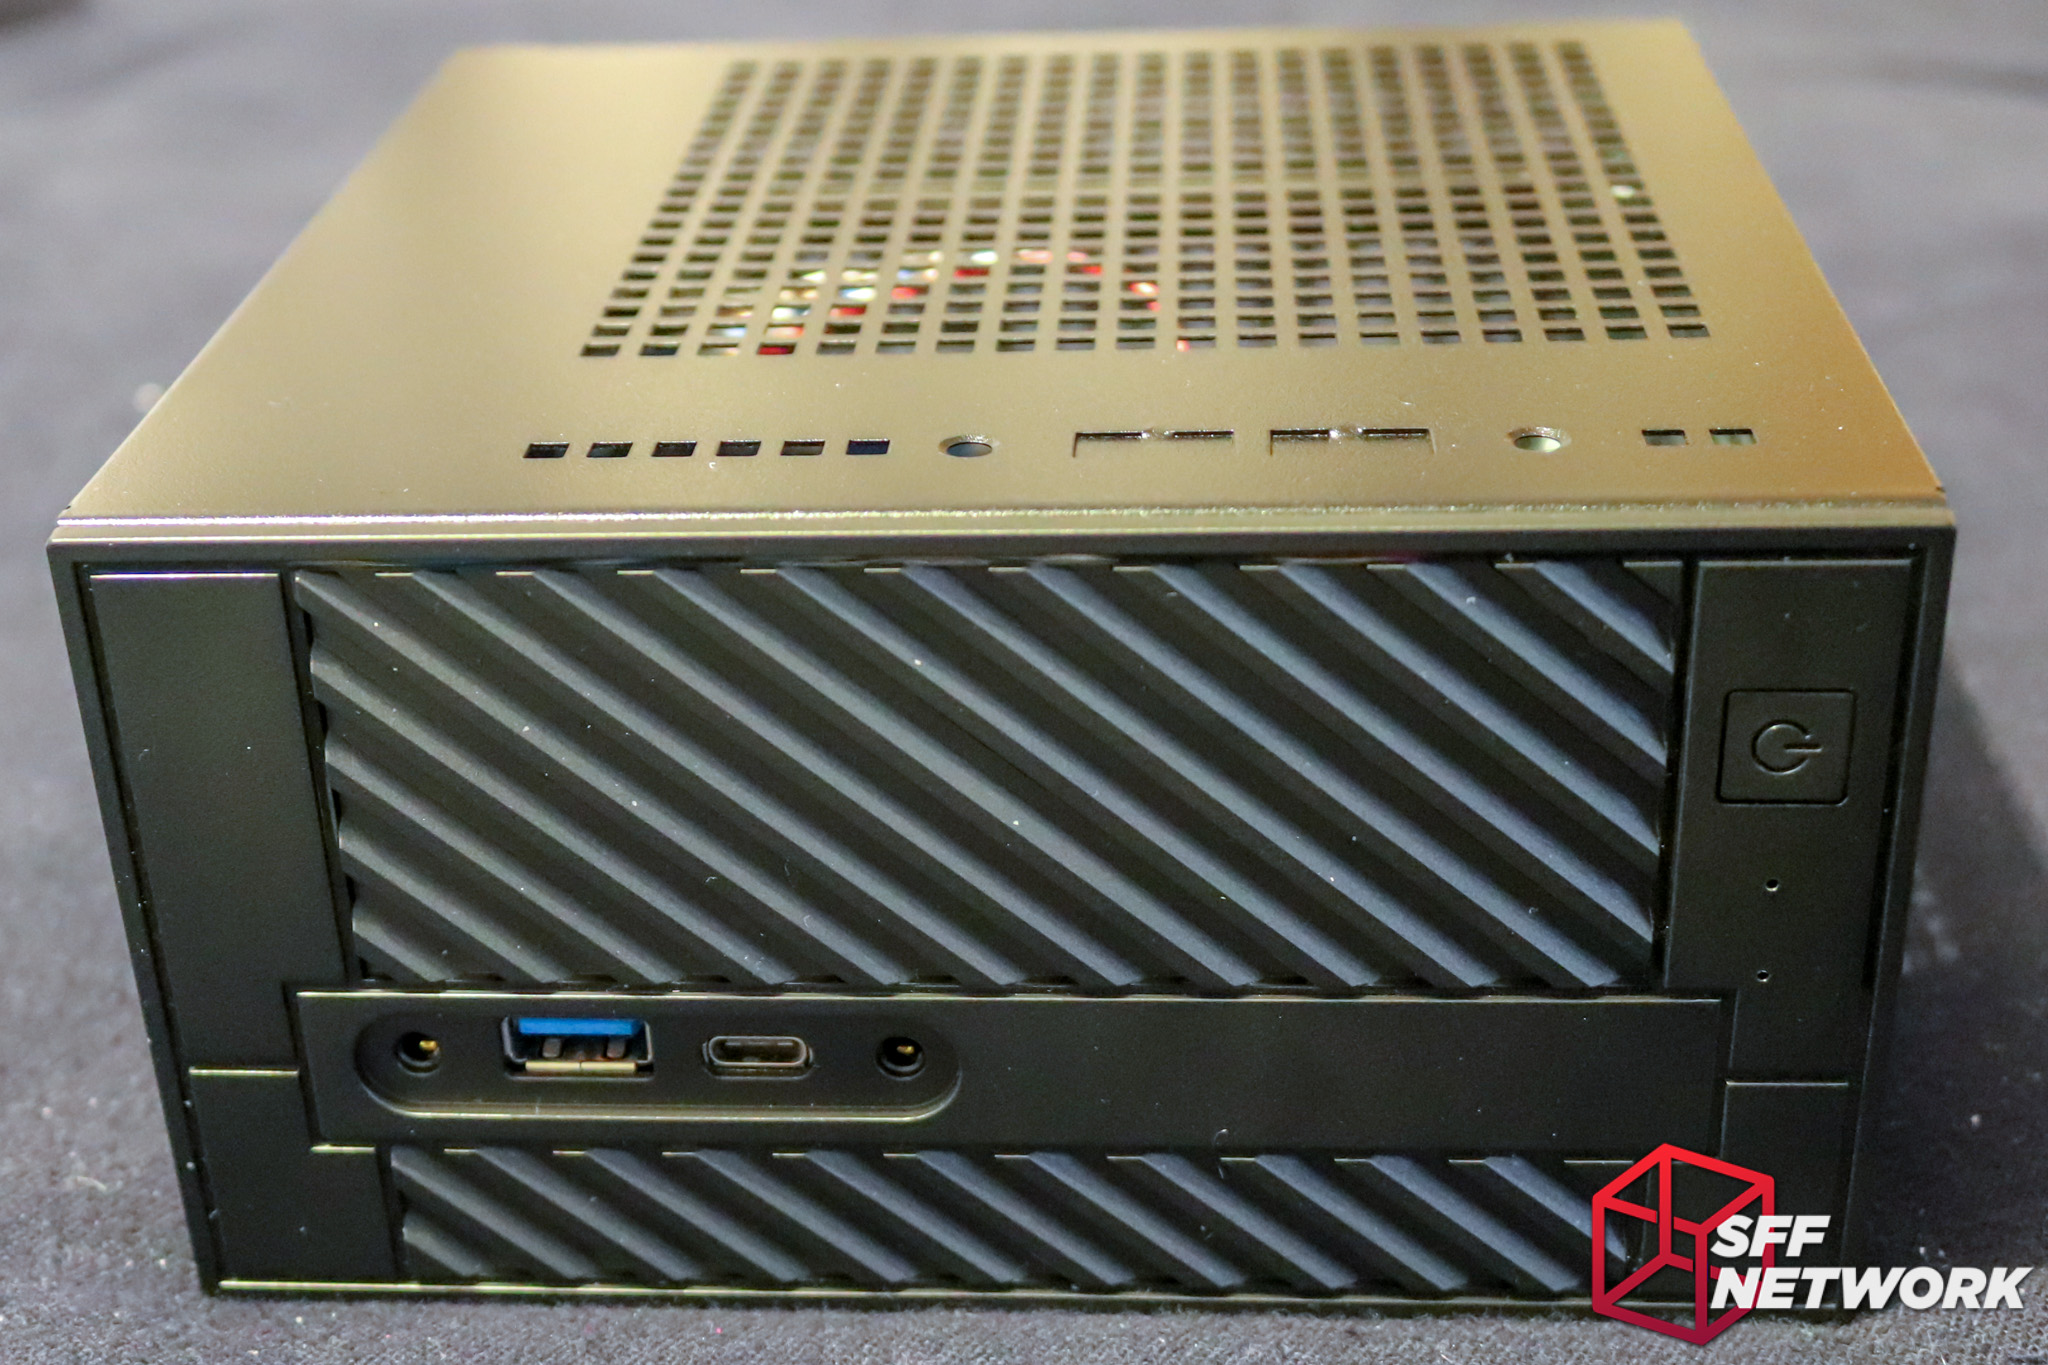
It’s so cute! Whilst not Intel NUC small, the DeskMini 310 is an uber small beasty. My first criticism of the DeskMini 310 lies here – the front fascia, unlike the machined aluminium panel on the GTX/RX big brother, is all plastic. Feels cheap, a feeling echoed in our community forums.
The standard STX family port loadout is present, being a 3.5mm headphone jack, a USB 3 Type A port, a USB3 Type C port and a 3.5mm microphone jack.
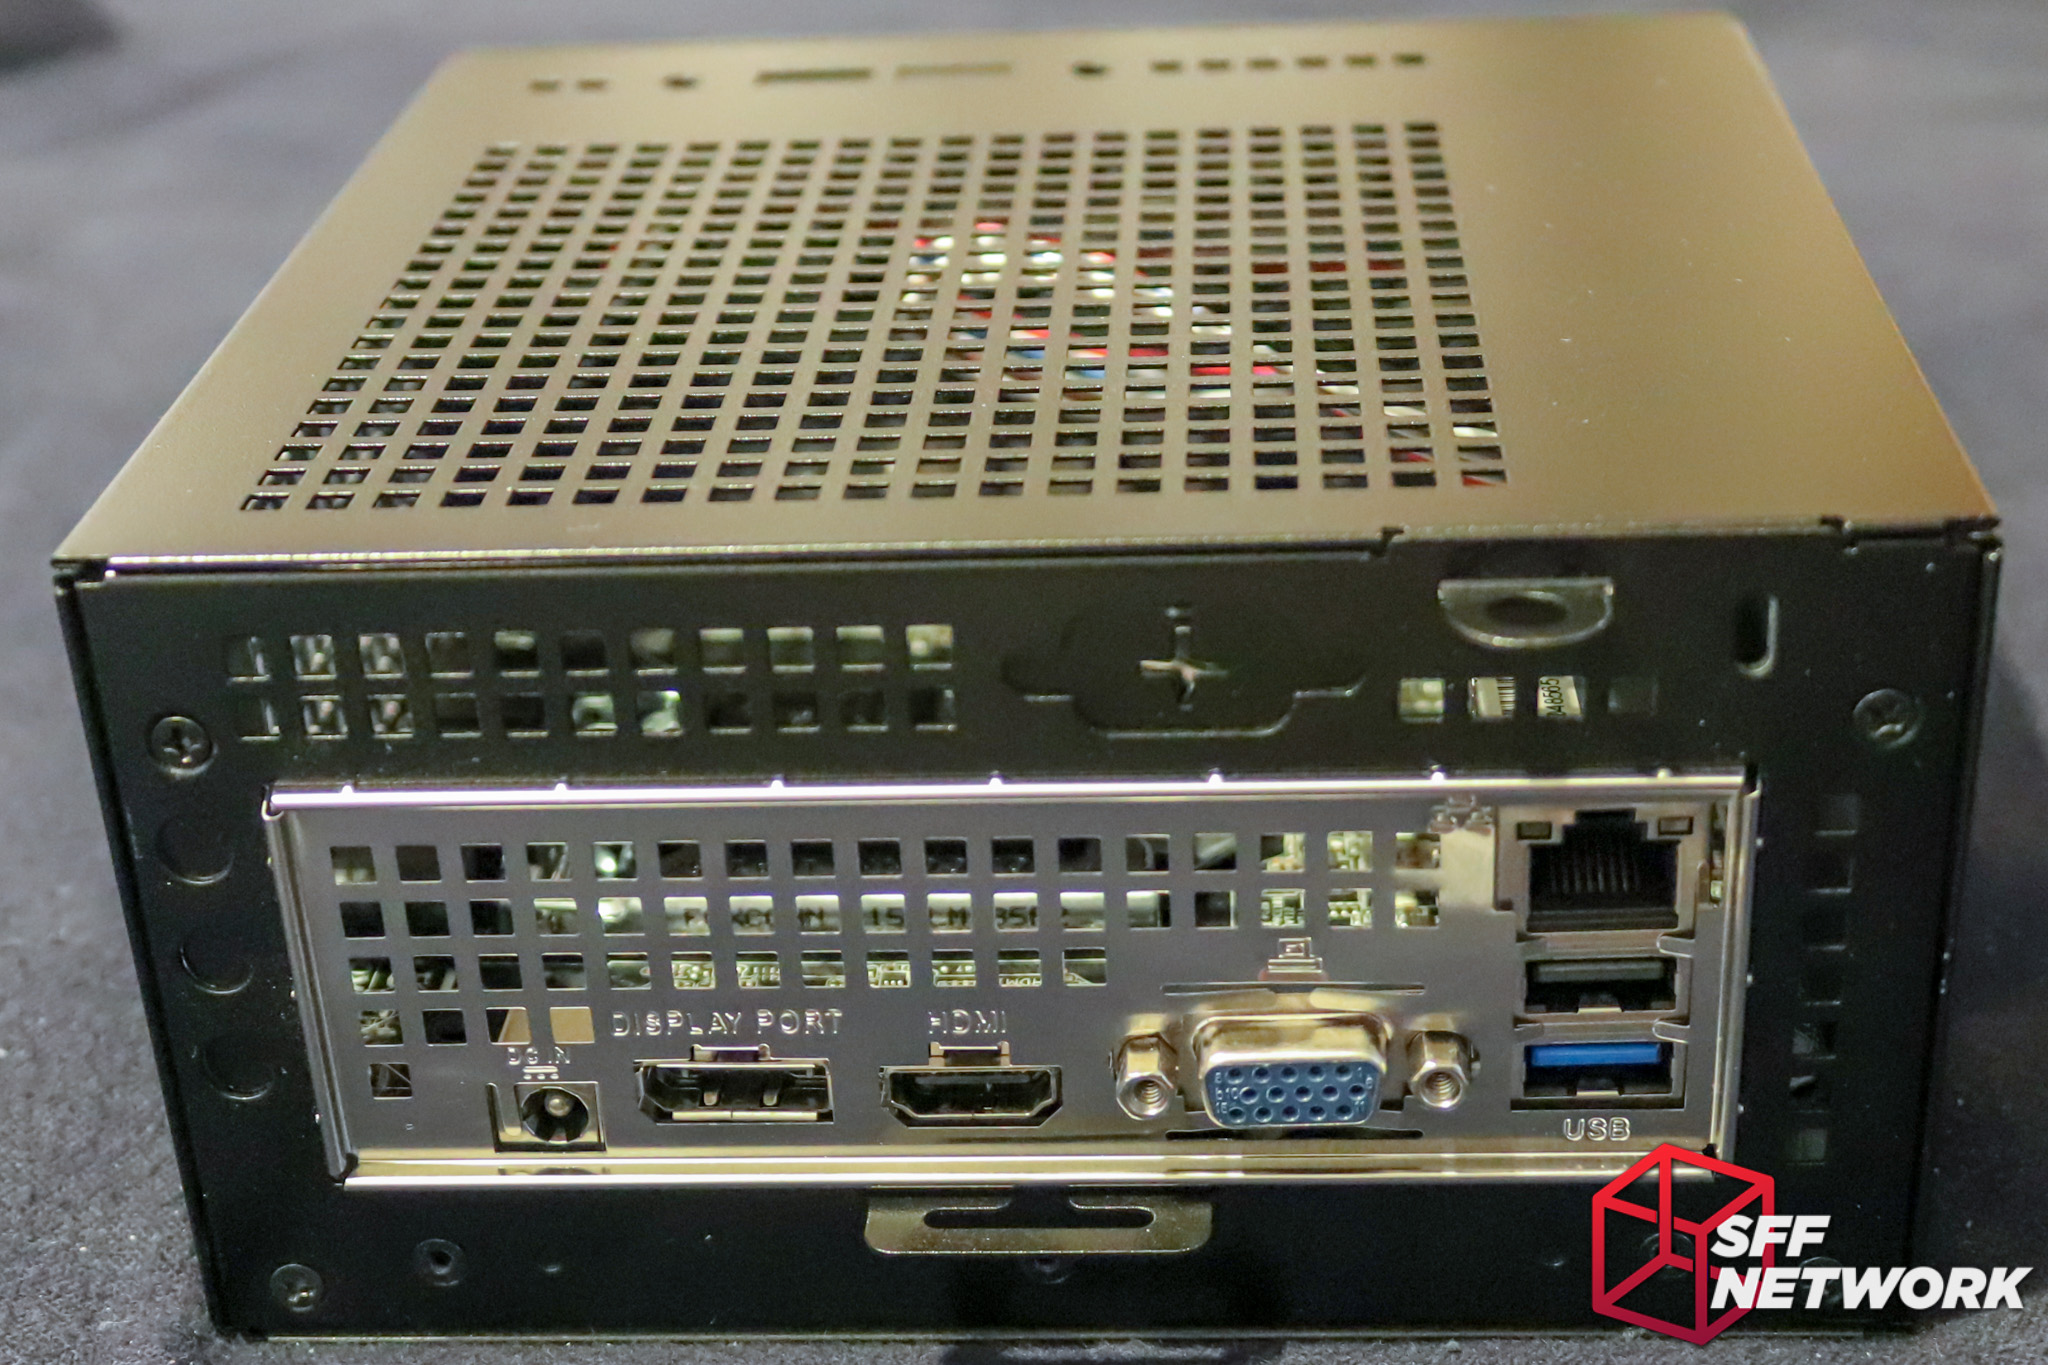
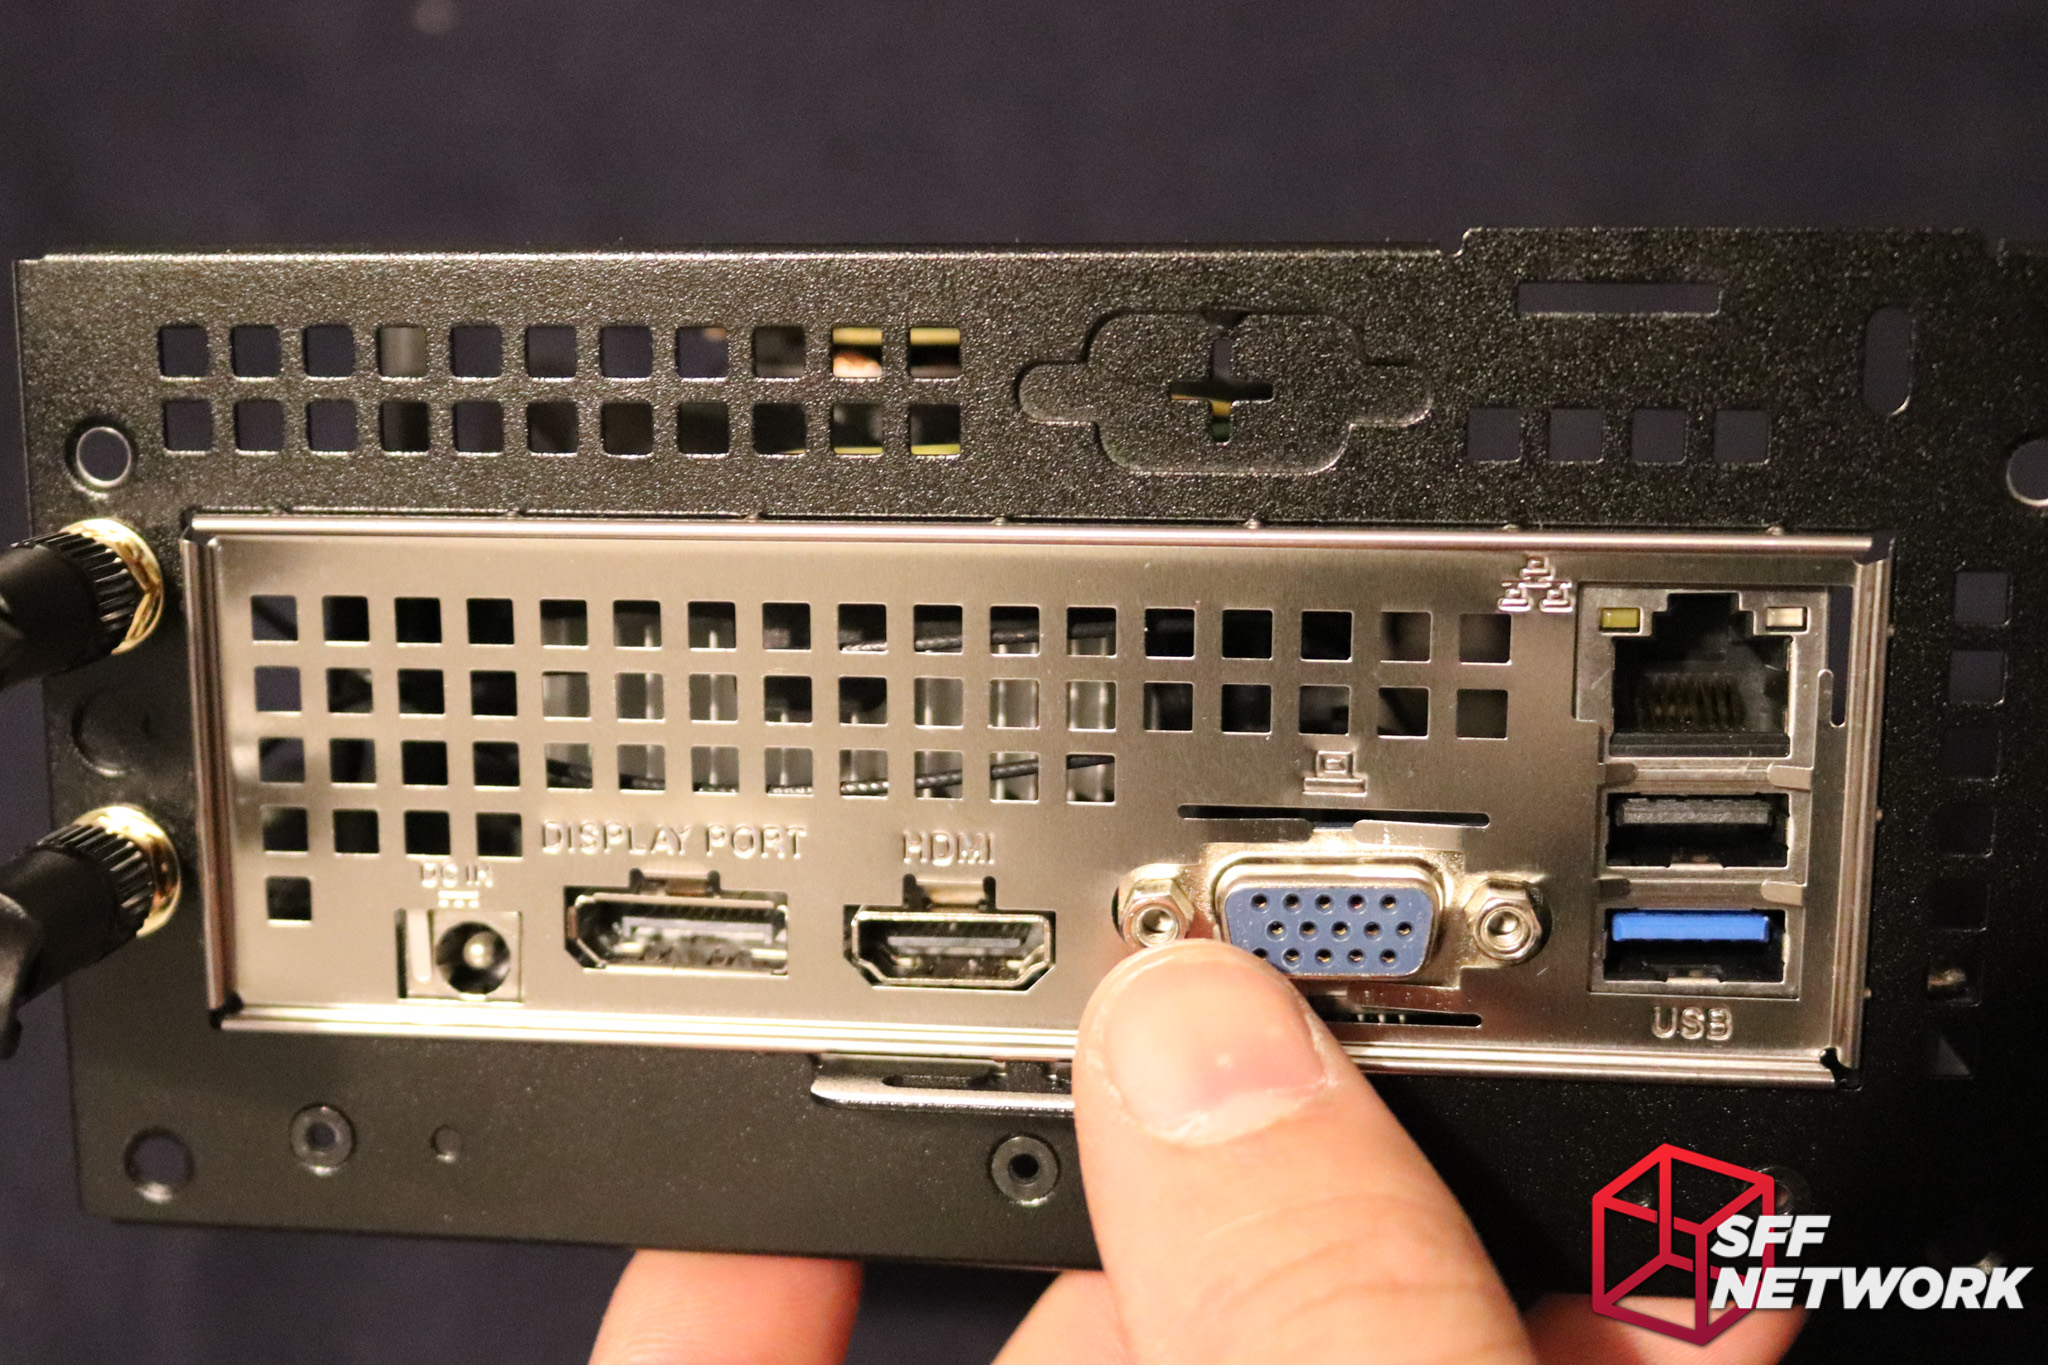
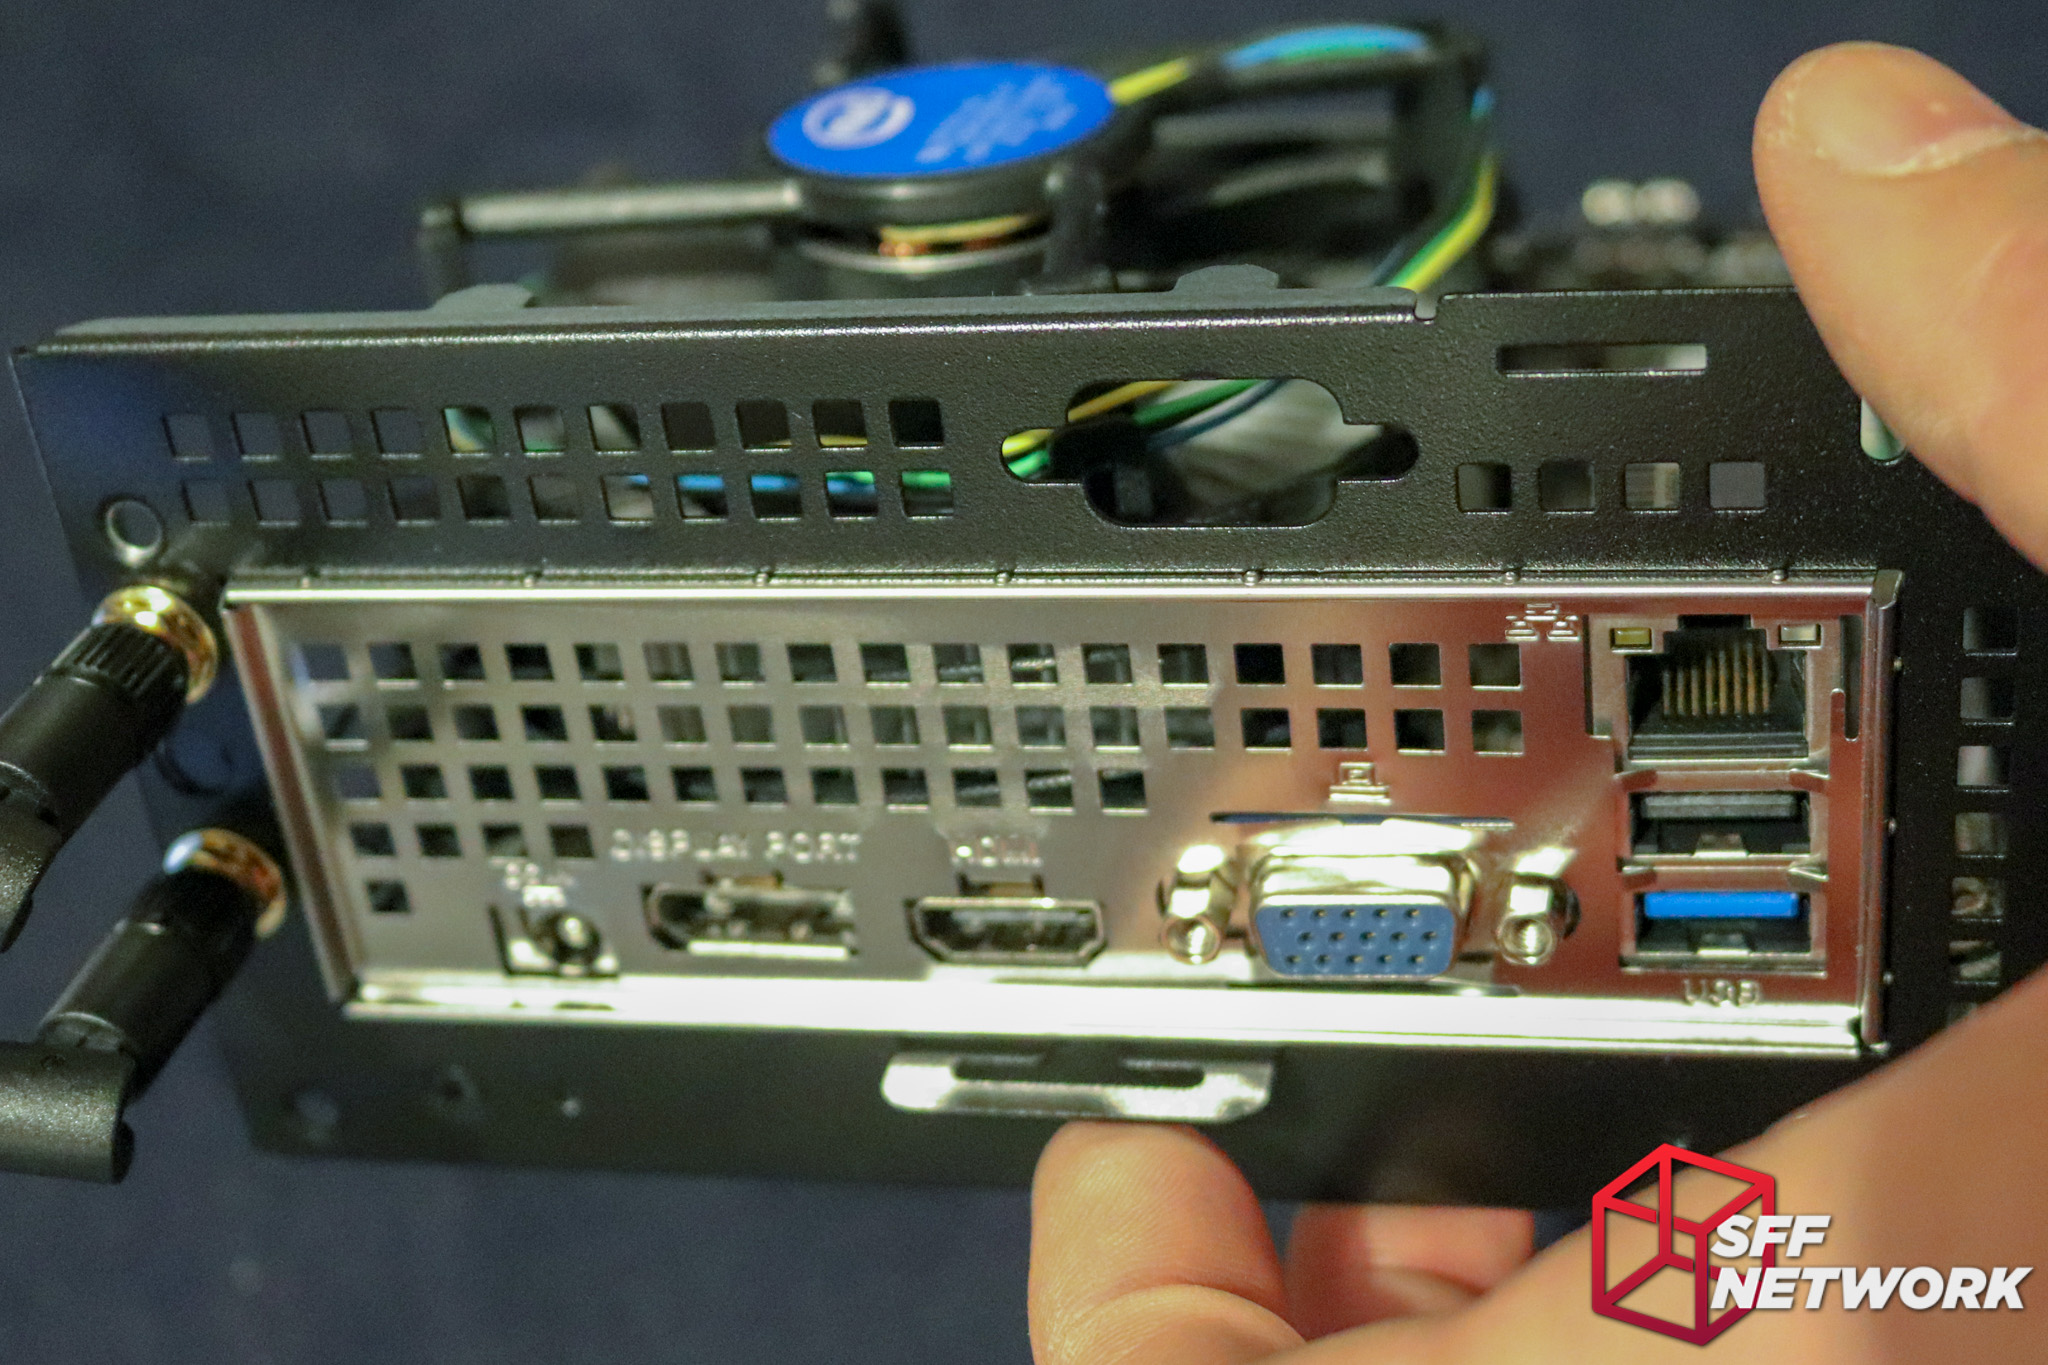
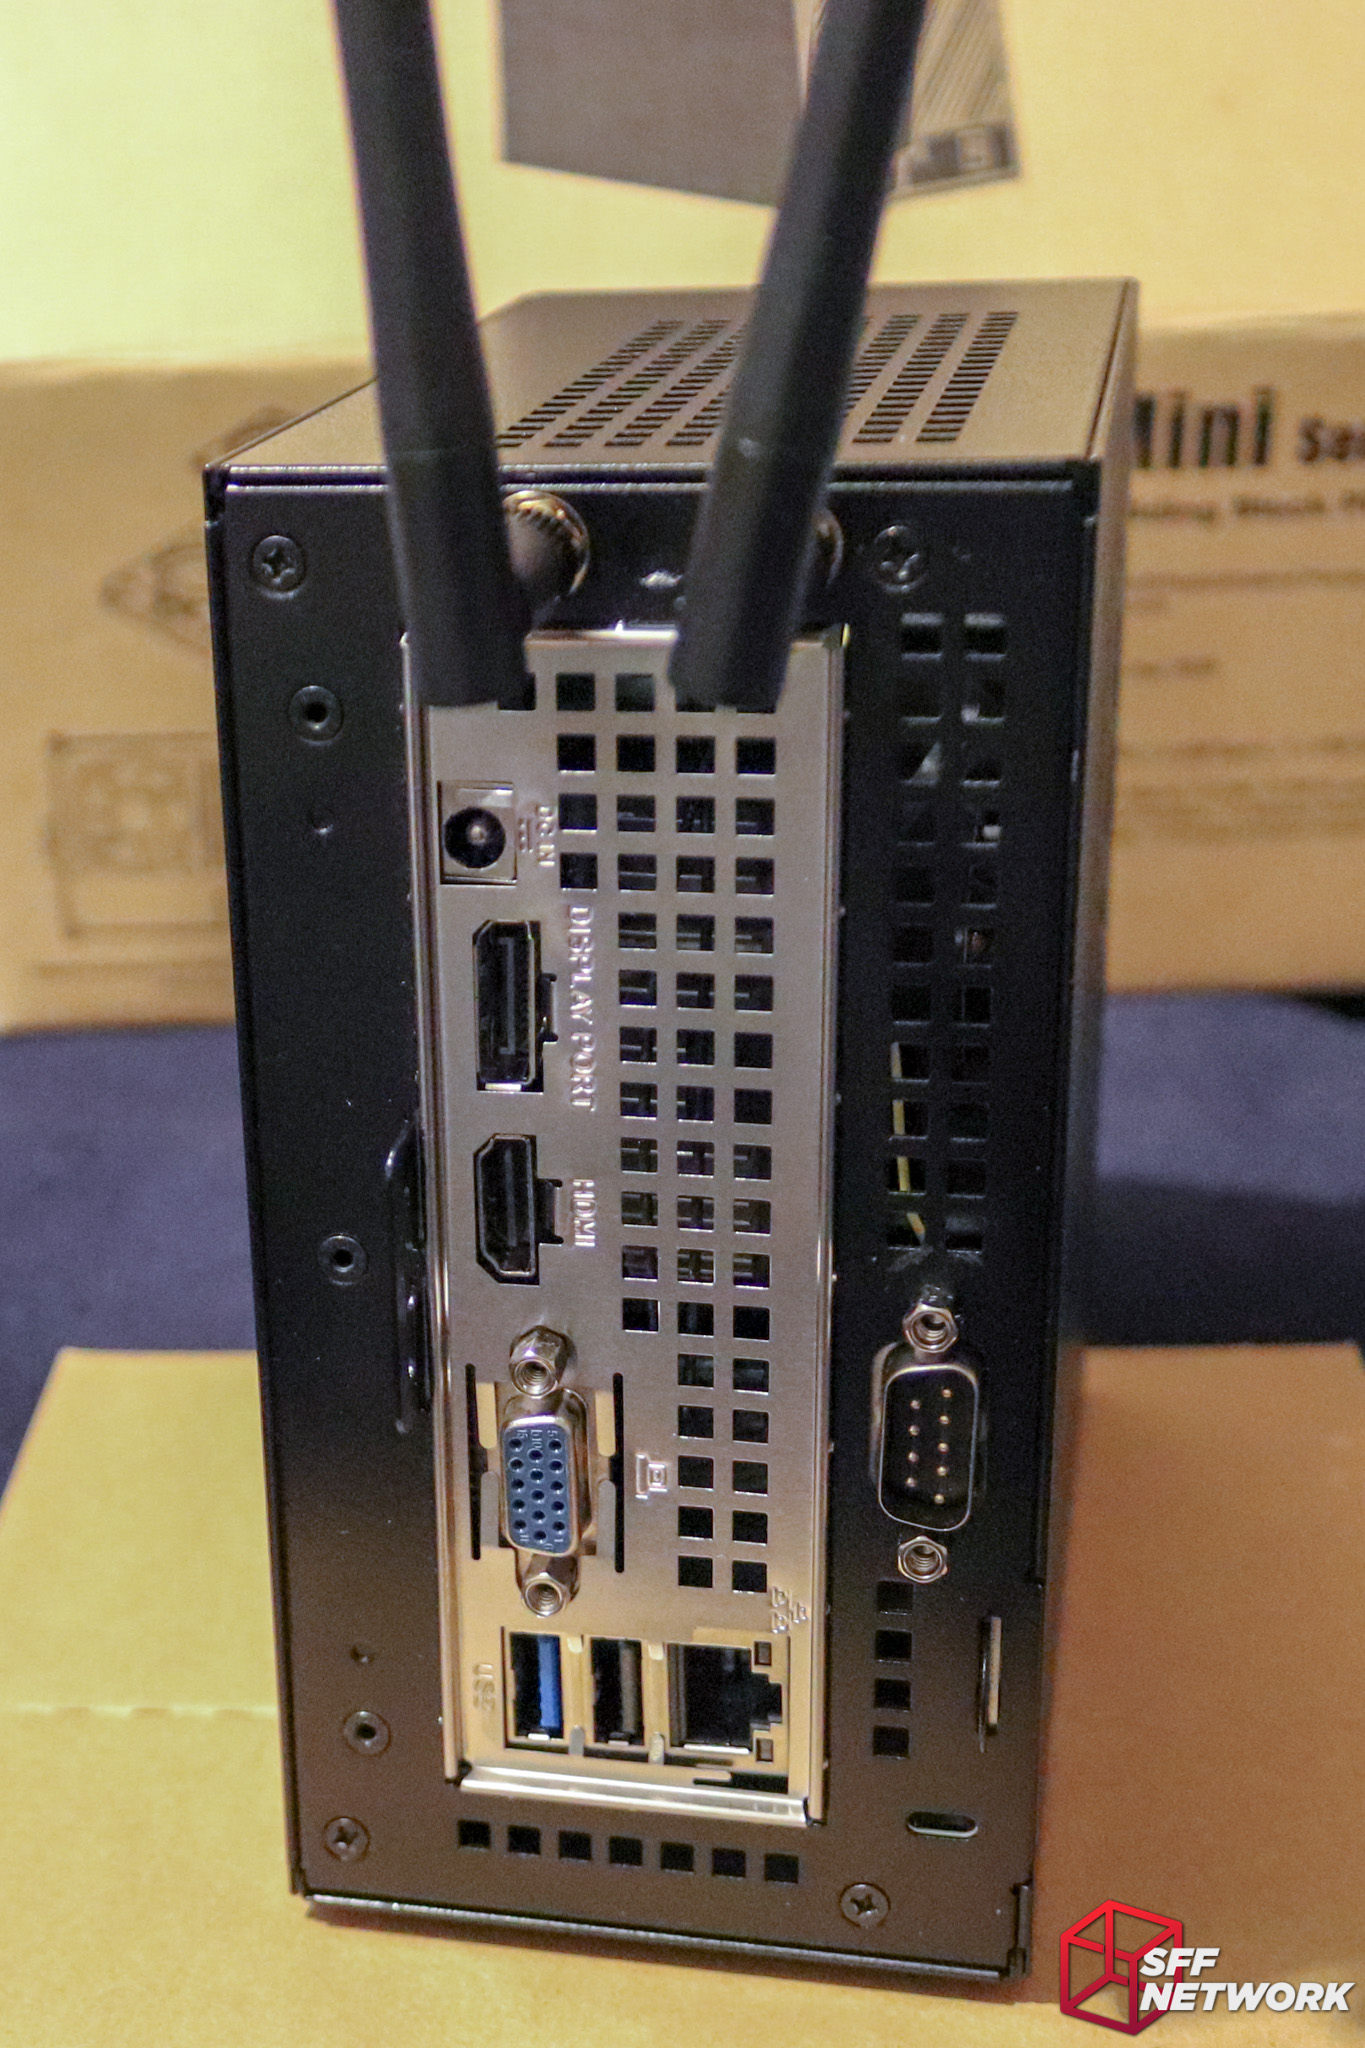
To the backside (insert joke here), and let’s see what we get for IO. From the left;
- Power input jack (DC, 19V)
- DisplayPort
- HDMI
- VGA
- RJ45 for gigabit ethernet
- USB2.0
- USB3.1 Gen1
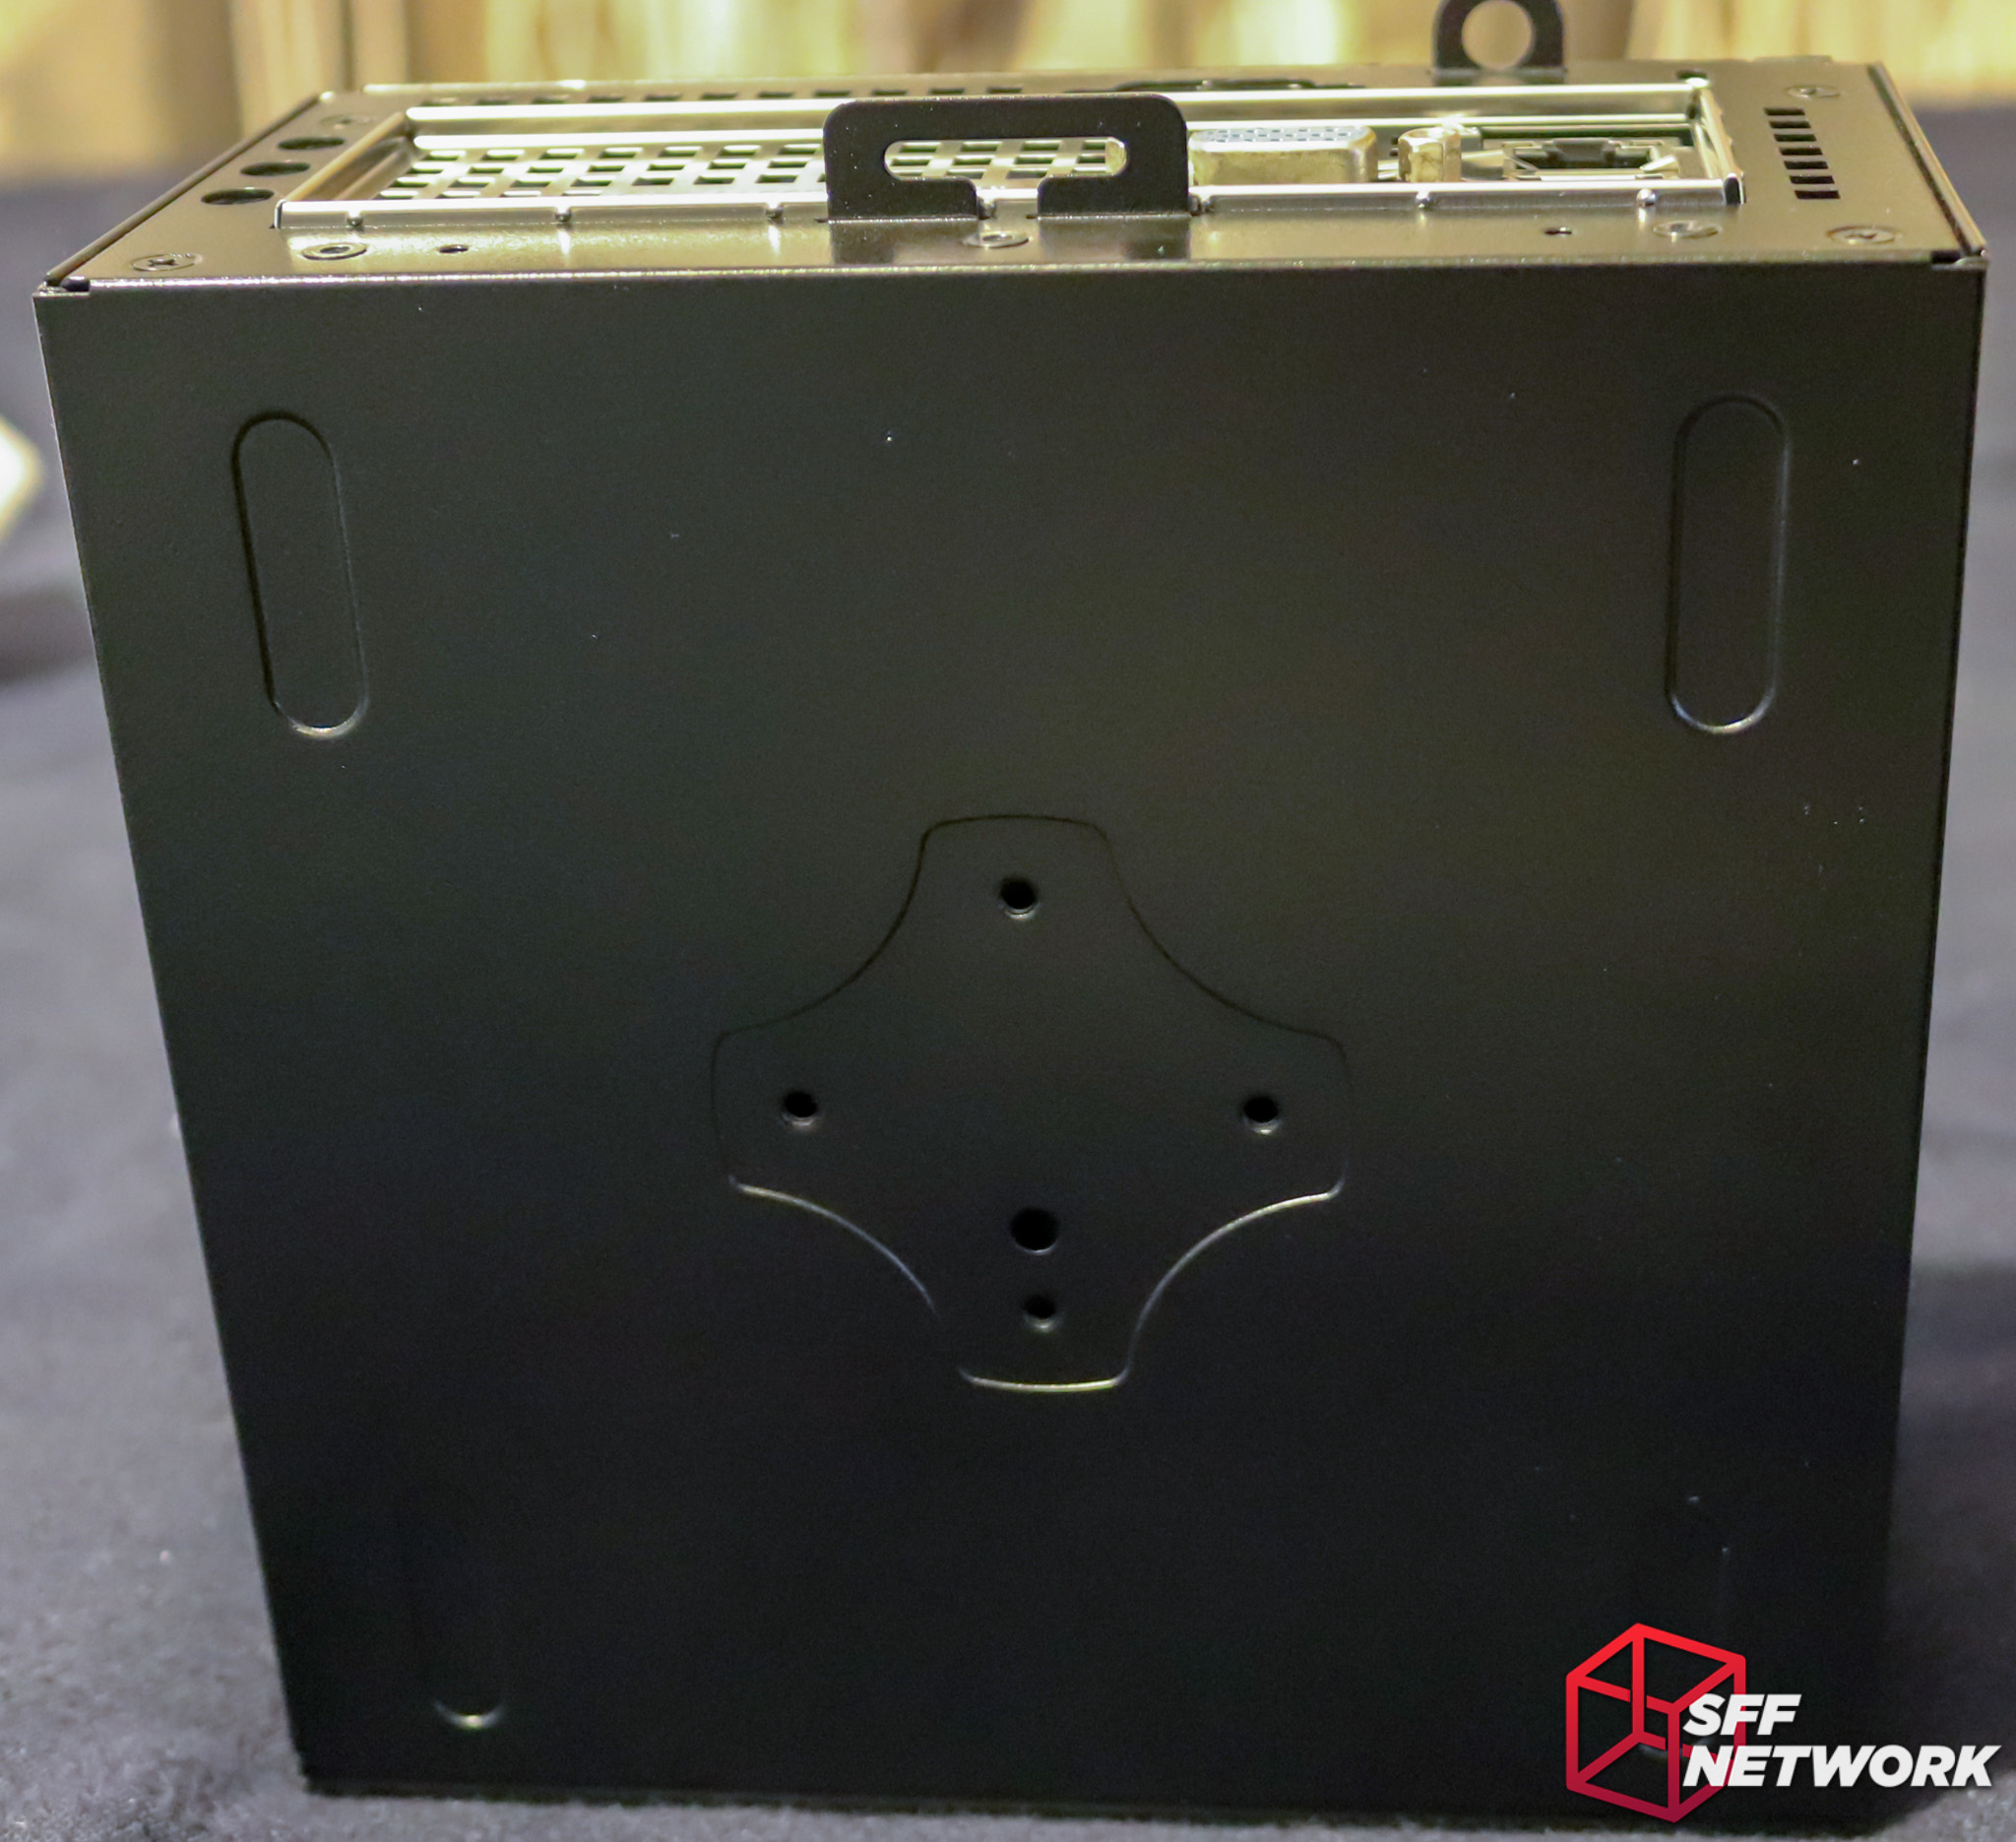
On the side.. underside.. err.. on this panel, we can see the VESA mount in a familiar style – turns out In-Win make the chassis for the DeskMini 310! The mount here matches the one on cases like the In-Win Chopin.

Accessories! The WiFi is an optional extra, and comes in this somewhat plain packaging. No frills, but no extra “prettiness” tax.
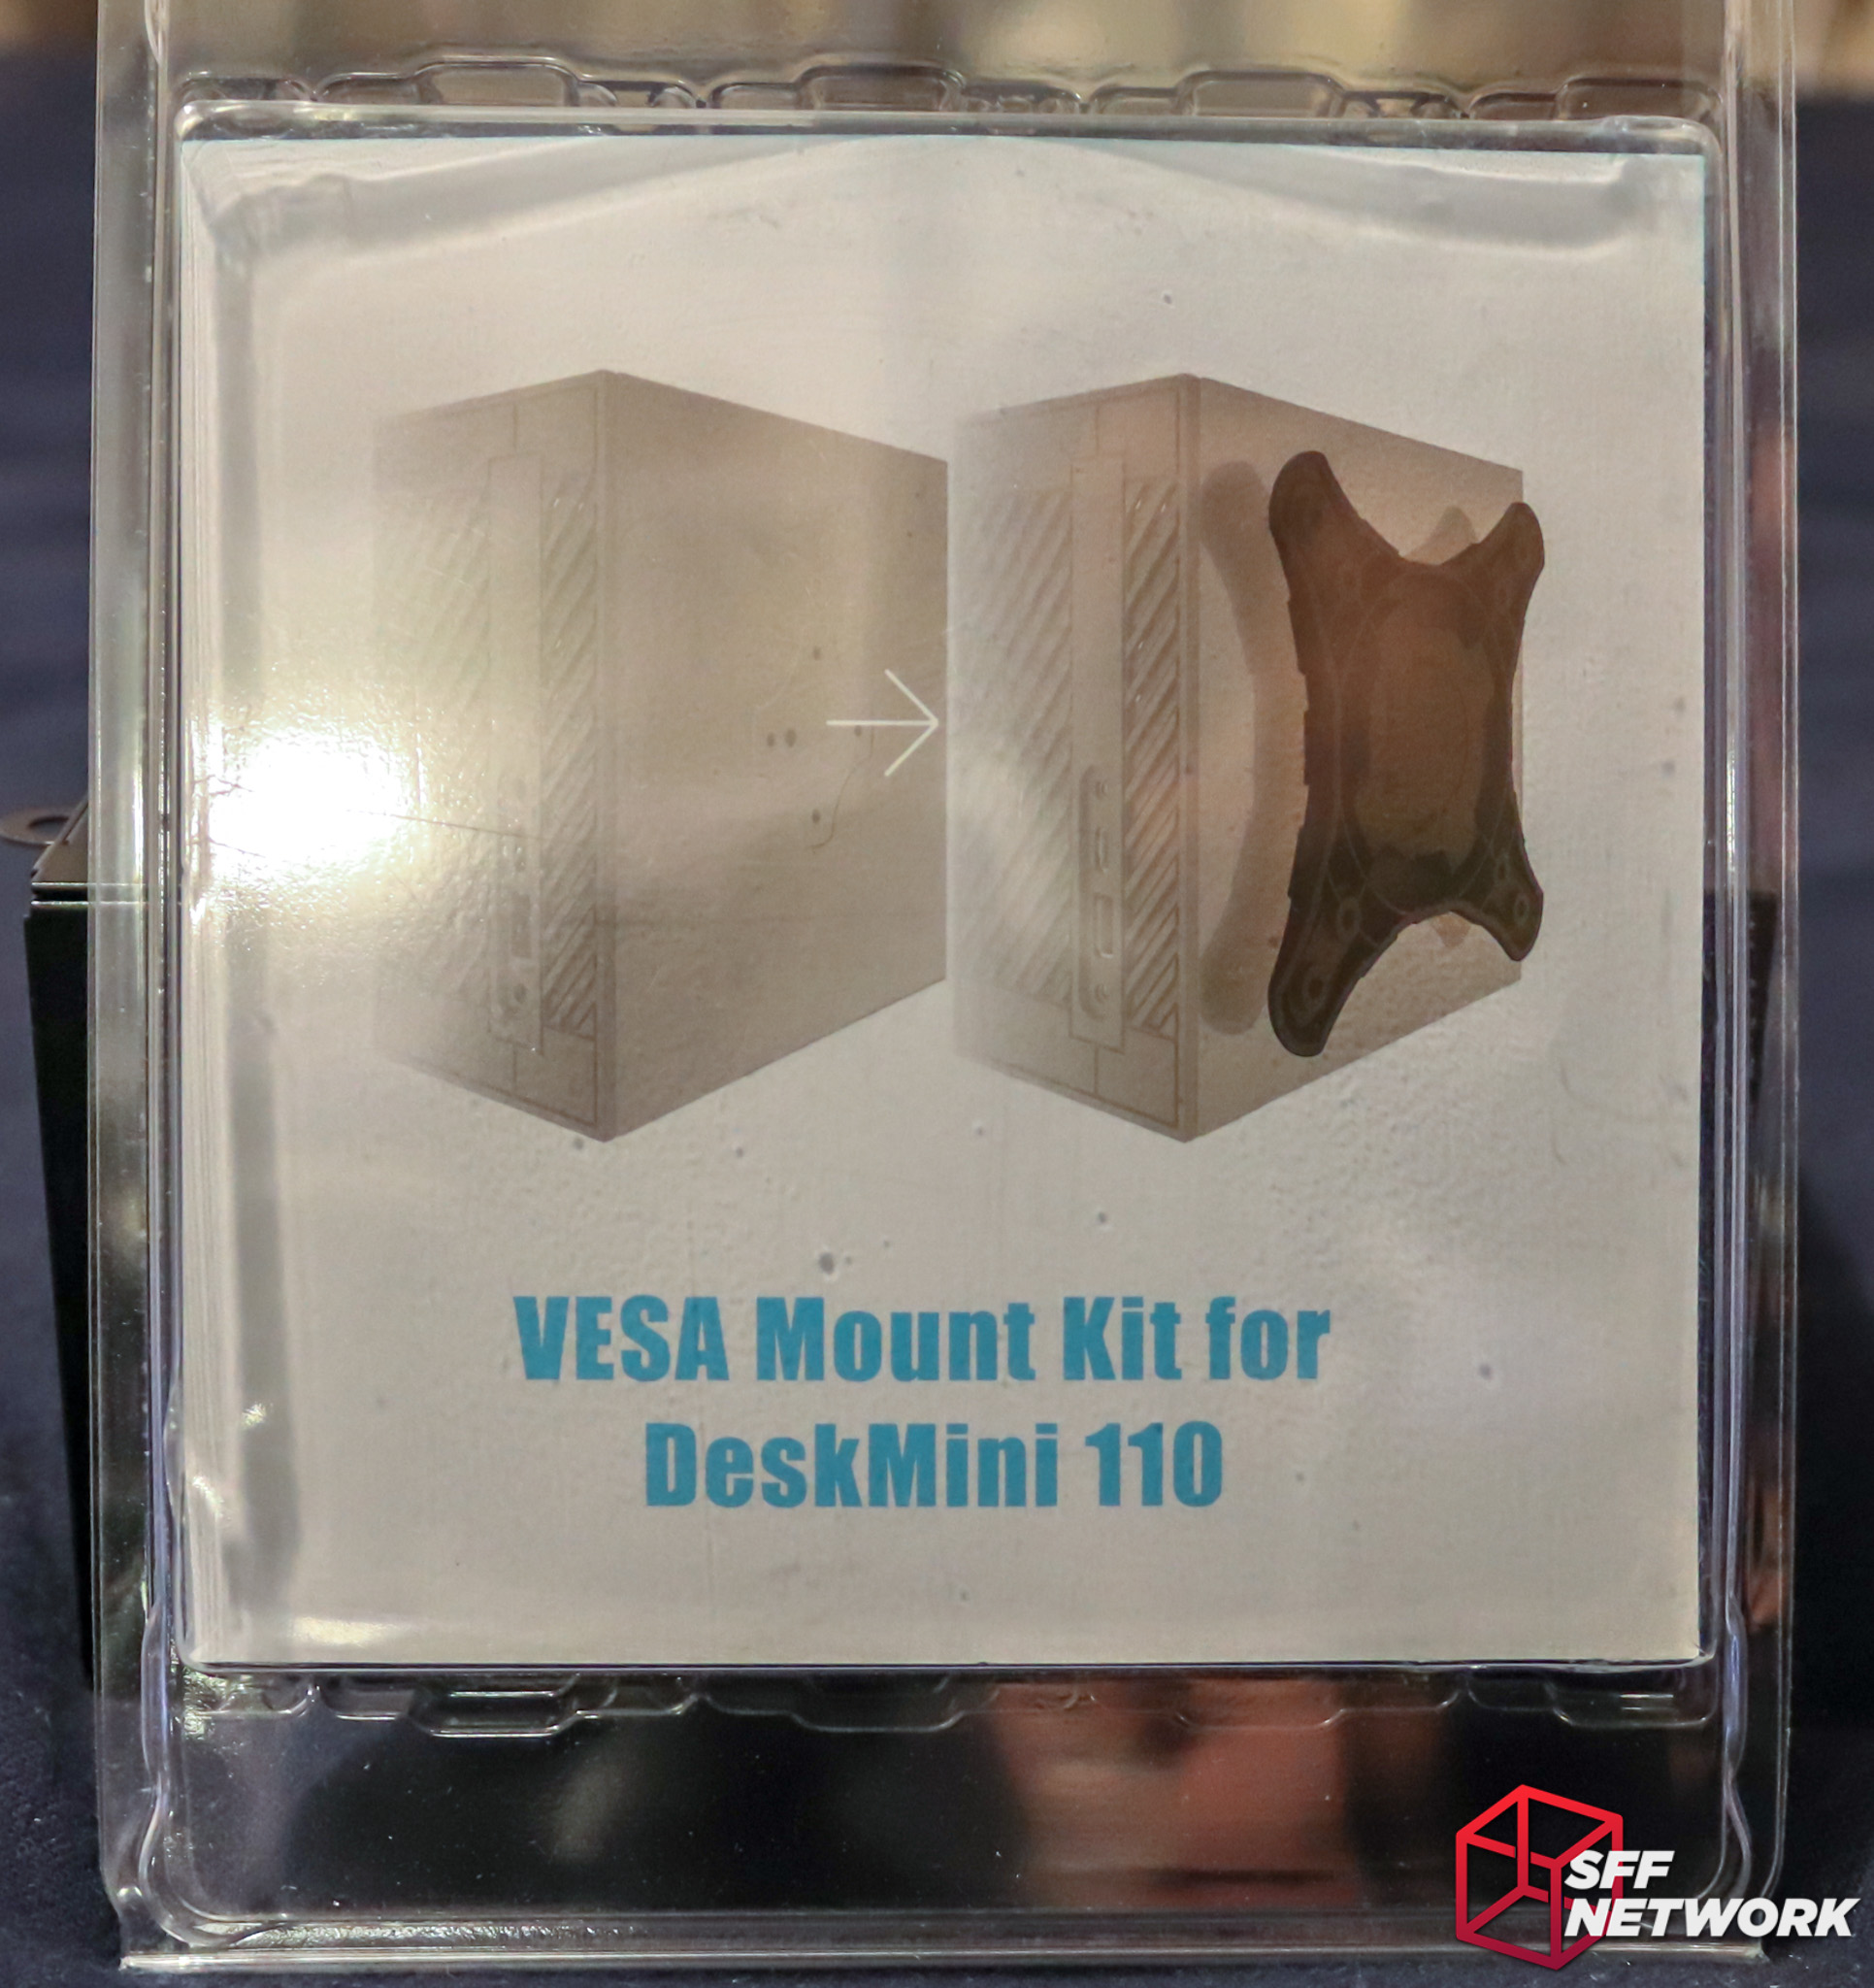
And, the aforementioned VESA mount kit. It’s spec’d for the 110 model, but same chassis, so it works.
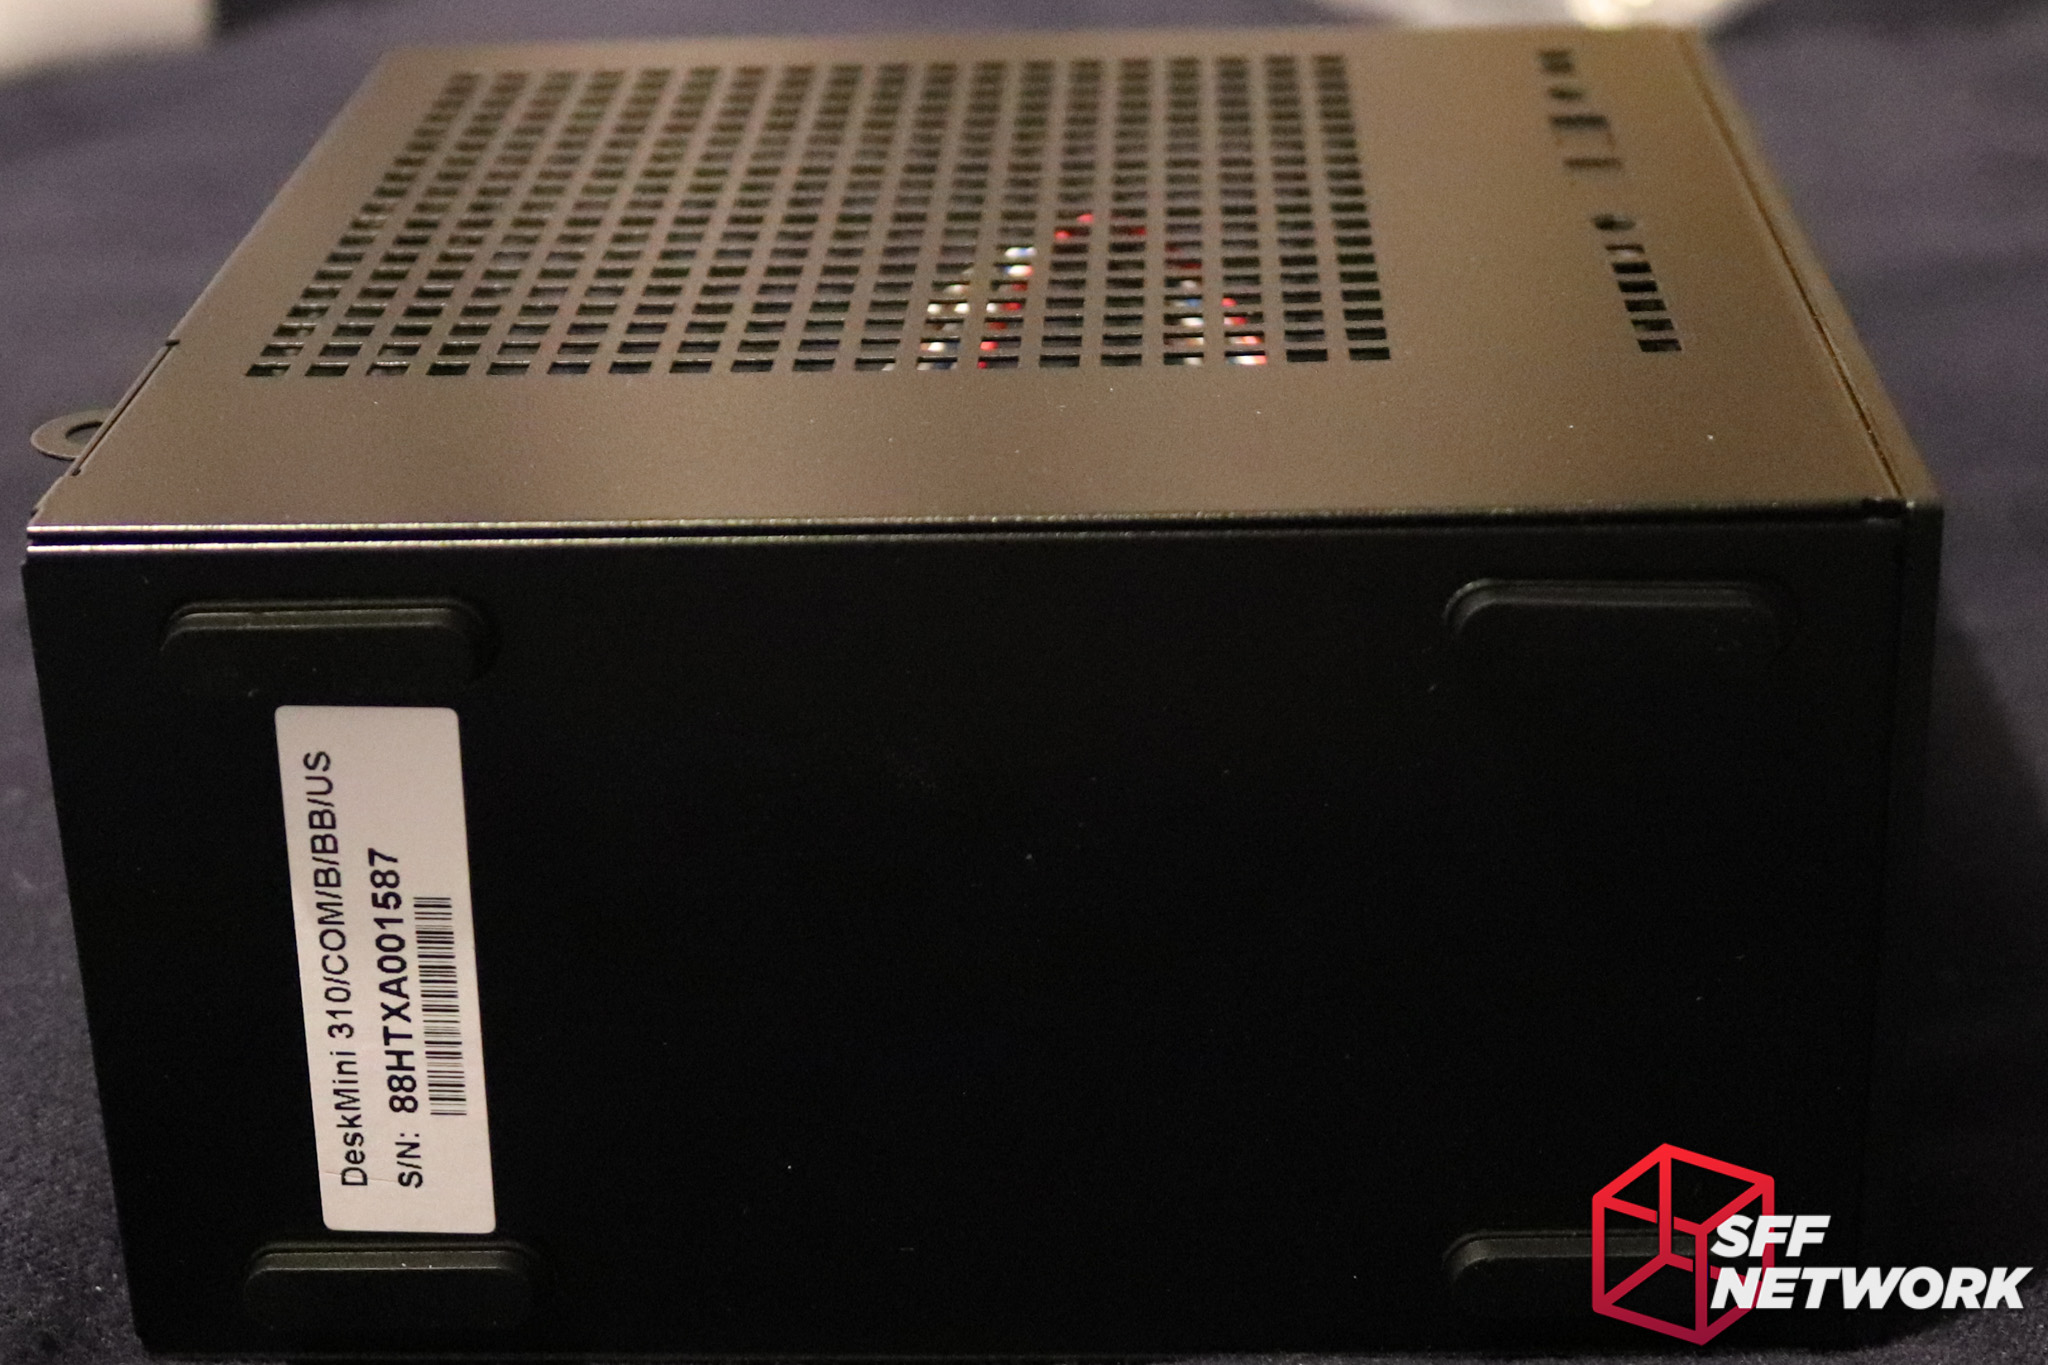
Feet. The case features two sets of impressions for the feet – four on this panel, and four on the panel we saw above. Also housed here – the model and serial sticker.
Four screws, and we’re in. Unlike the DeskMini GTX/RX’s chassis, the 310 uses a two part design. I have to say, this isn’t a great design idea – we’ll see why when we upgrade this unit.
The DeskMini 310’s motherboard is a Mini-STX board – originally known as Intel’s 5×5 concept. The form factor allows upgradeable memory, CPU and SFF expansion (namely M.2). Unlike the NUC, or other embedded formats, the upgrade options are an interesting bullet point – you’re not stuck with a single processor, and you have the ability to select the right chip for the job, be it a Celeron, or an i7 (or anything in between).
The form factor also allows the use of stock Intel coolers, as well as other coolers that are compatible with the case – a bonus for those who shun the extruded aluminium product that Intel ships with your processor.
Inside the …interestingly… designed chassis, we can see all the way to the front. The stock front panel cables are routed cleanly through the case, meaning that when sliding the motherboard tray in, the cable won’t get snagged. My concerns with the chassis lie in the design – the shell is difficult to disassemble, meaning that installing the USB 2.0 header accessory is rather challenging, and cable routing – impossible.

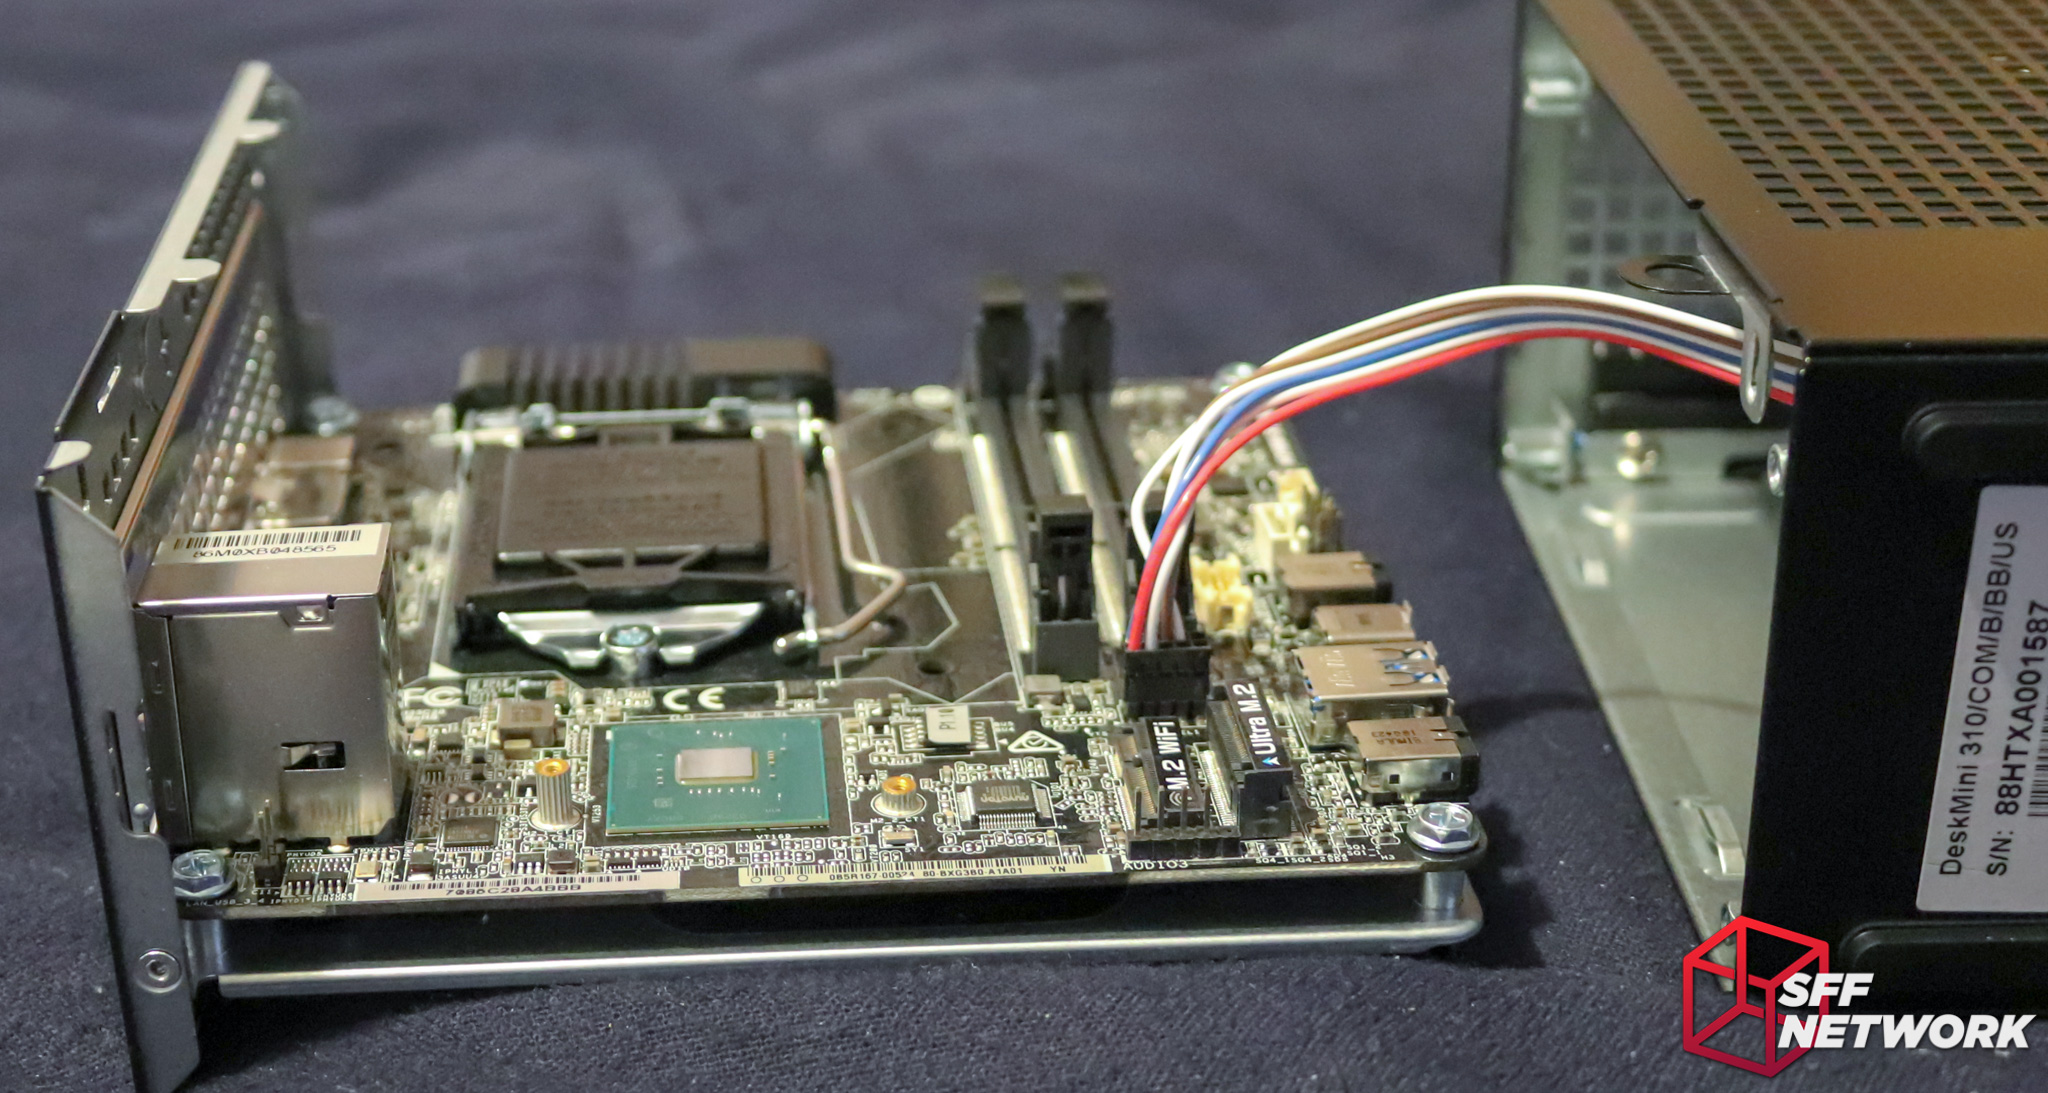
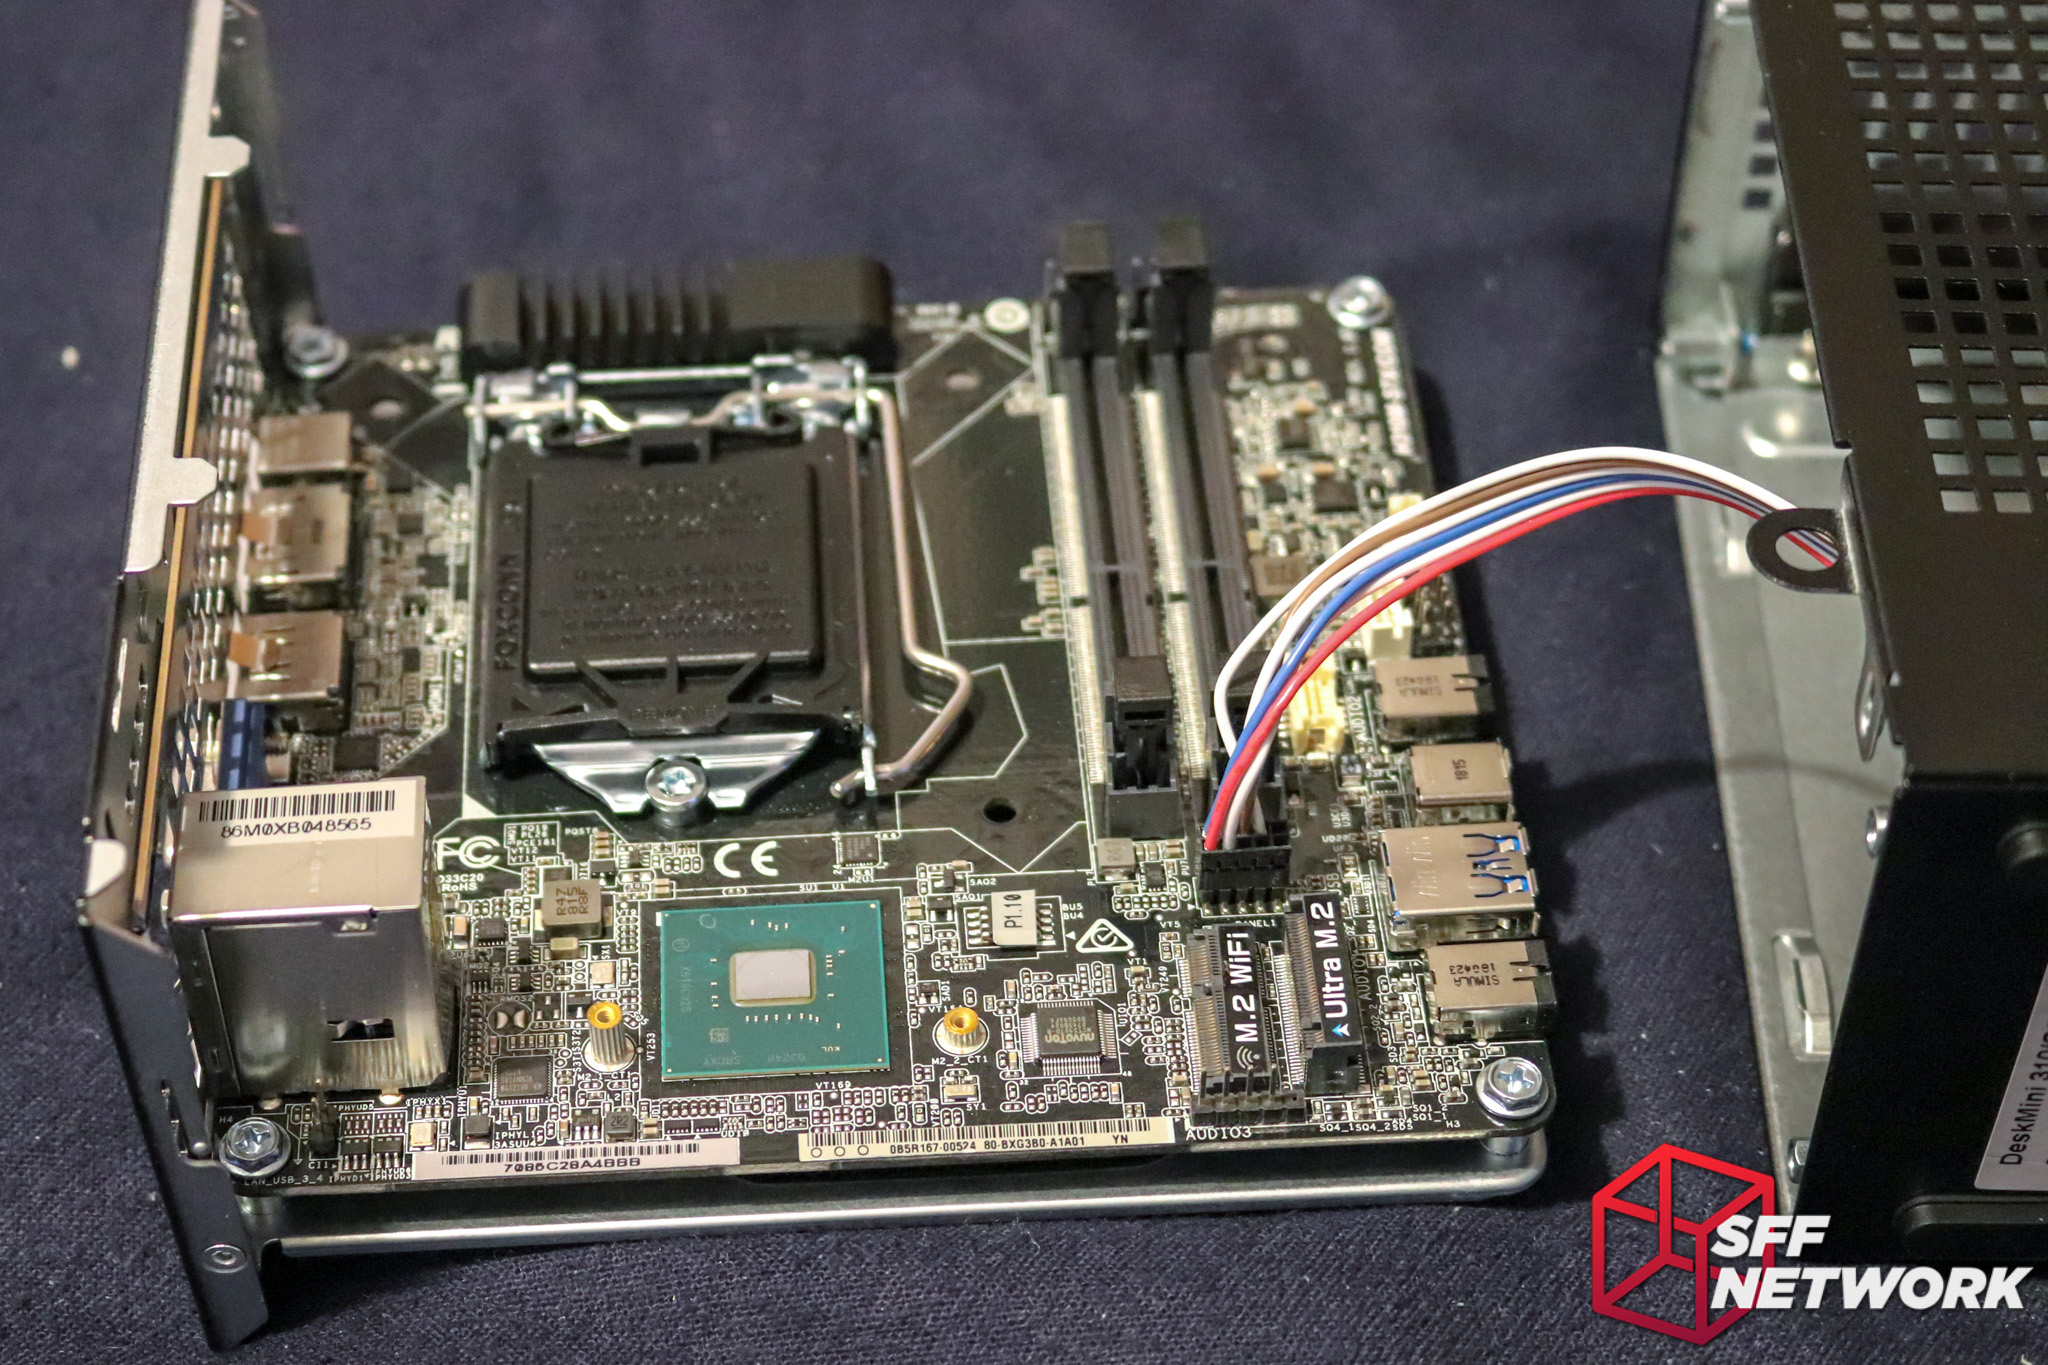
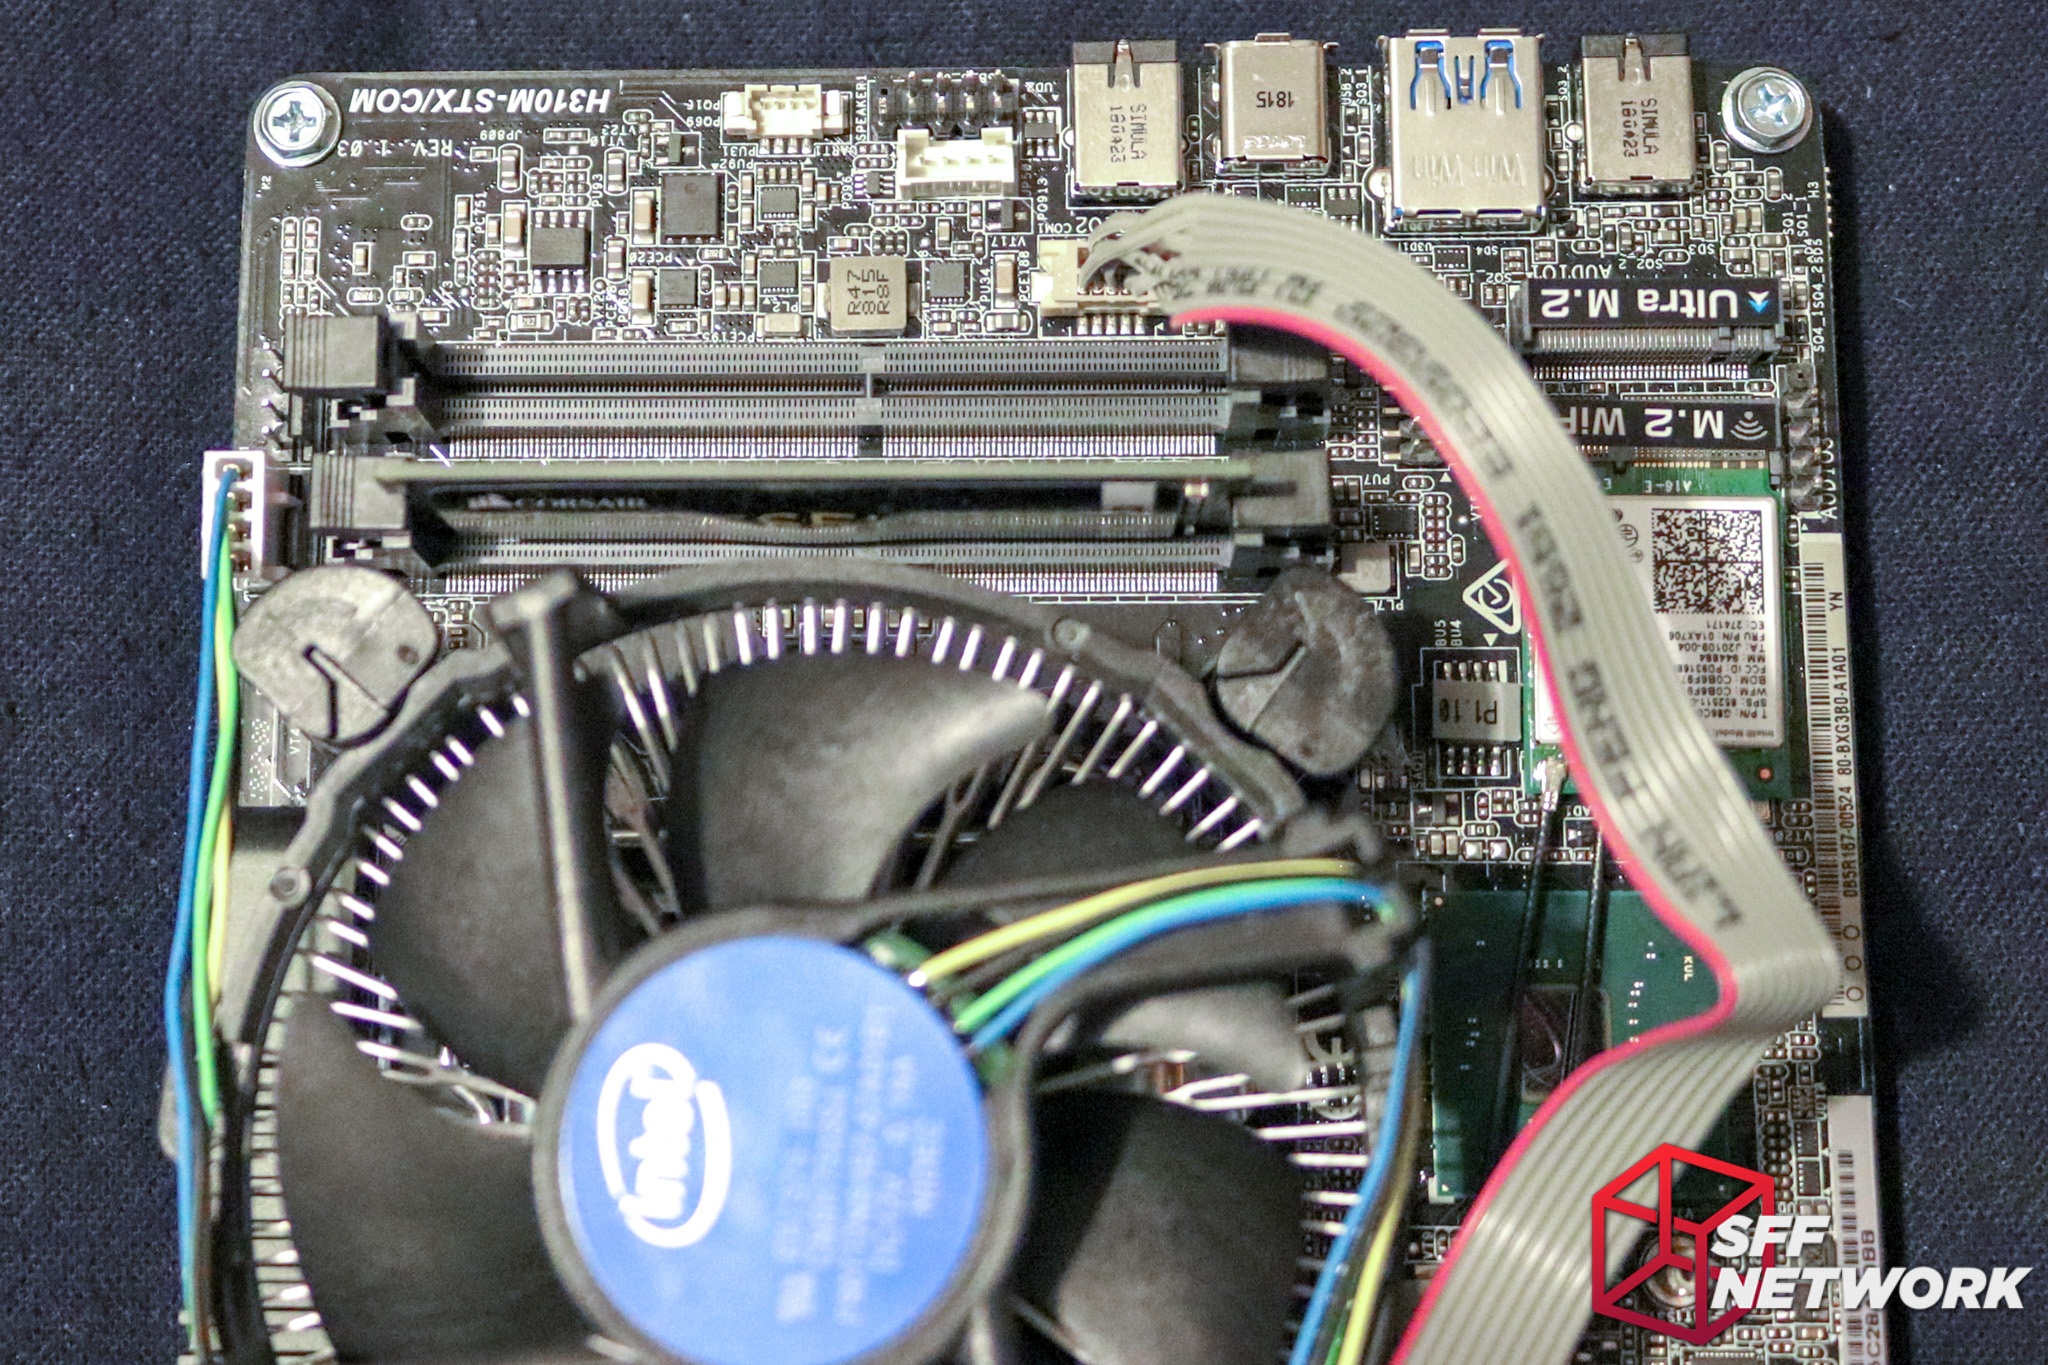
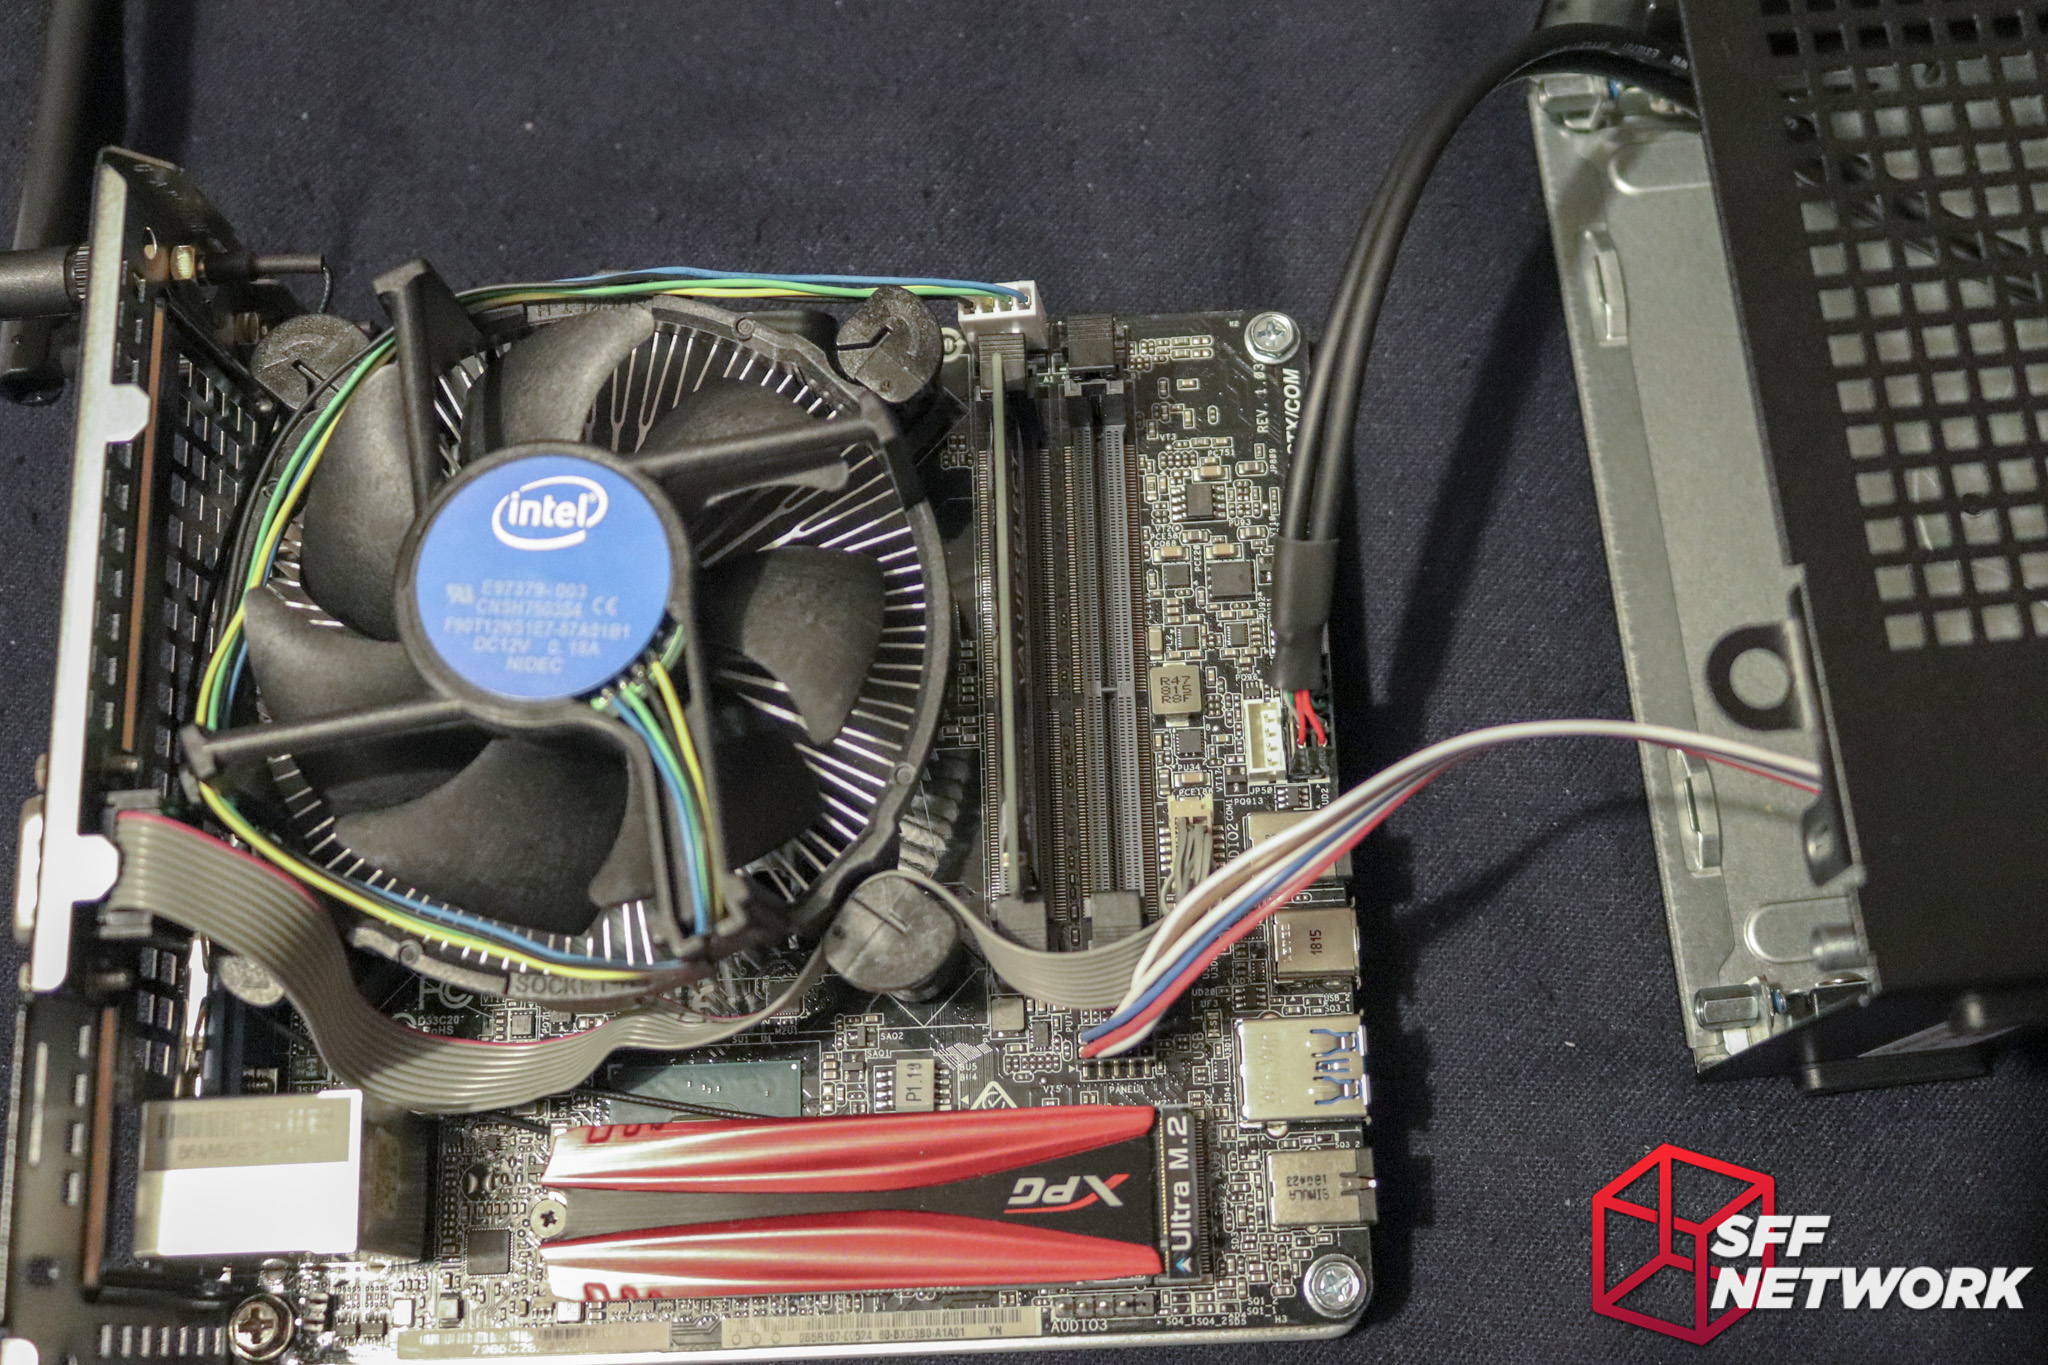
The motherboard, completely removed from the case. Let’s dive into the details.
First thing to note – no chipset heatsink! The 6 Watt H310 chipset doesn’t really need one – most motherboards include chipset heatsink these days because we expect them to! A chipset heatsink wouldn’t fit here either – the M.2 SSD sits over the H310 package.
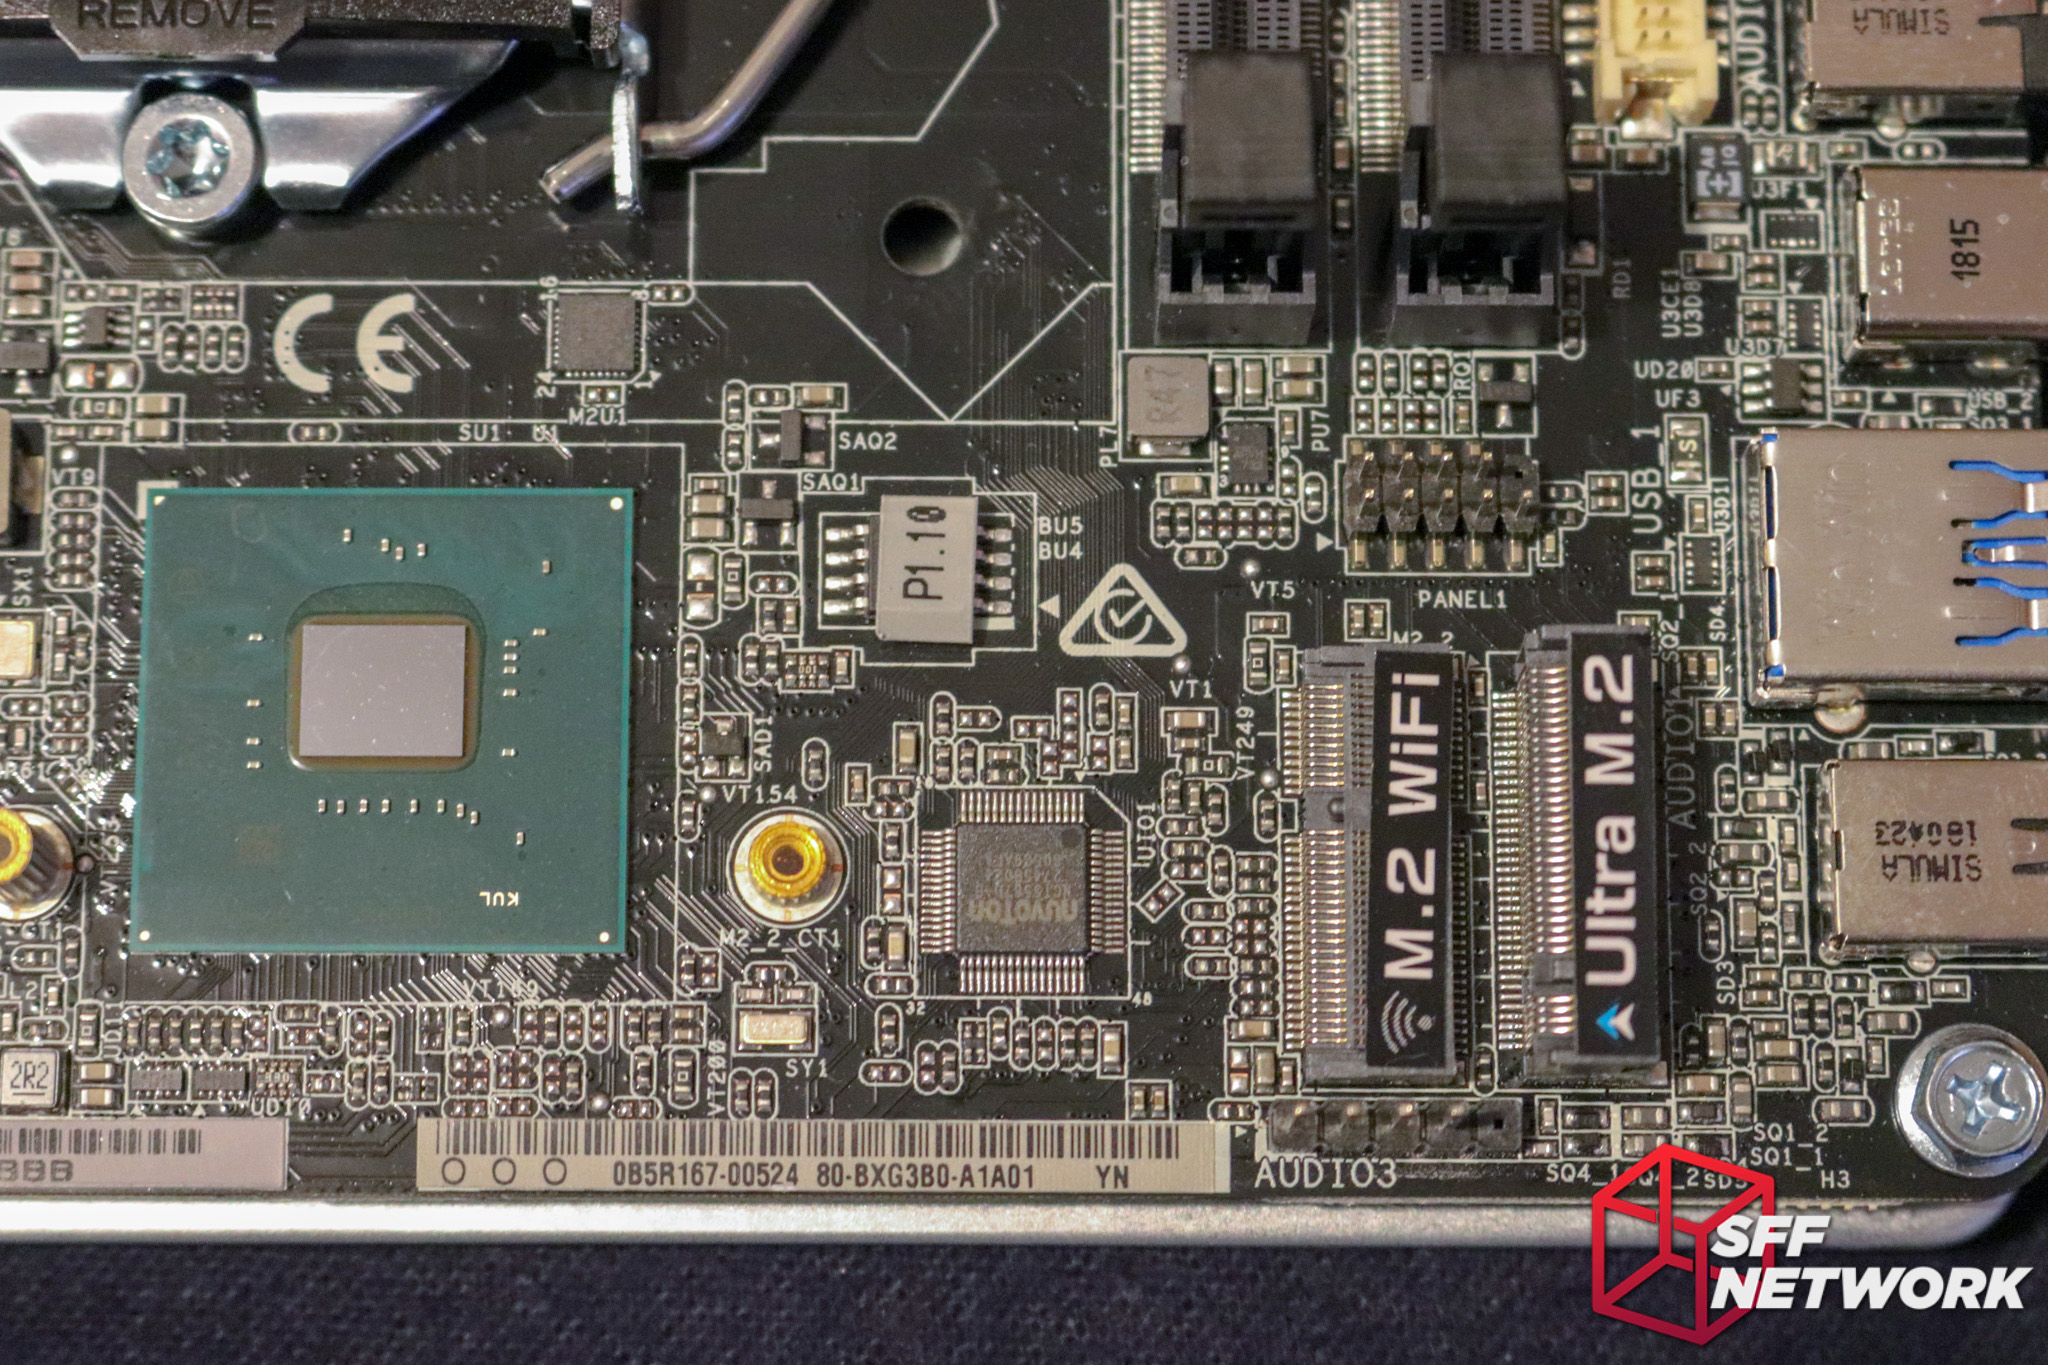
To the right – a Nuvoton NXT5567D-B Super I/O chip – here lies your sensor inputs. Above this, the BIOS chip, being P1.10 firmware in this case. At time of publishing, ASRock has moved on to P3.1 – adding support for new CPUs.
Continuing right, the M.2 (E-Key) and Ultra M.2 (M-Key) slots – WiFi and a SSD go here, respectively. Just above this, the sold USB 2.0 header.
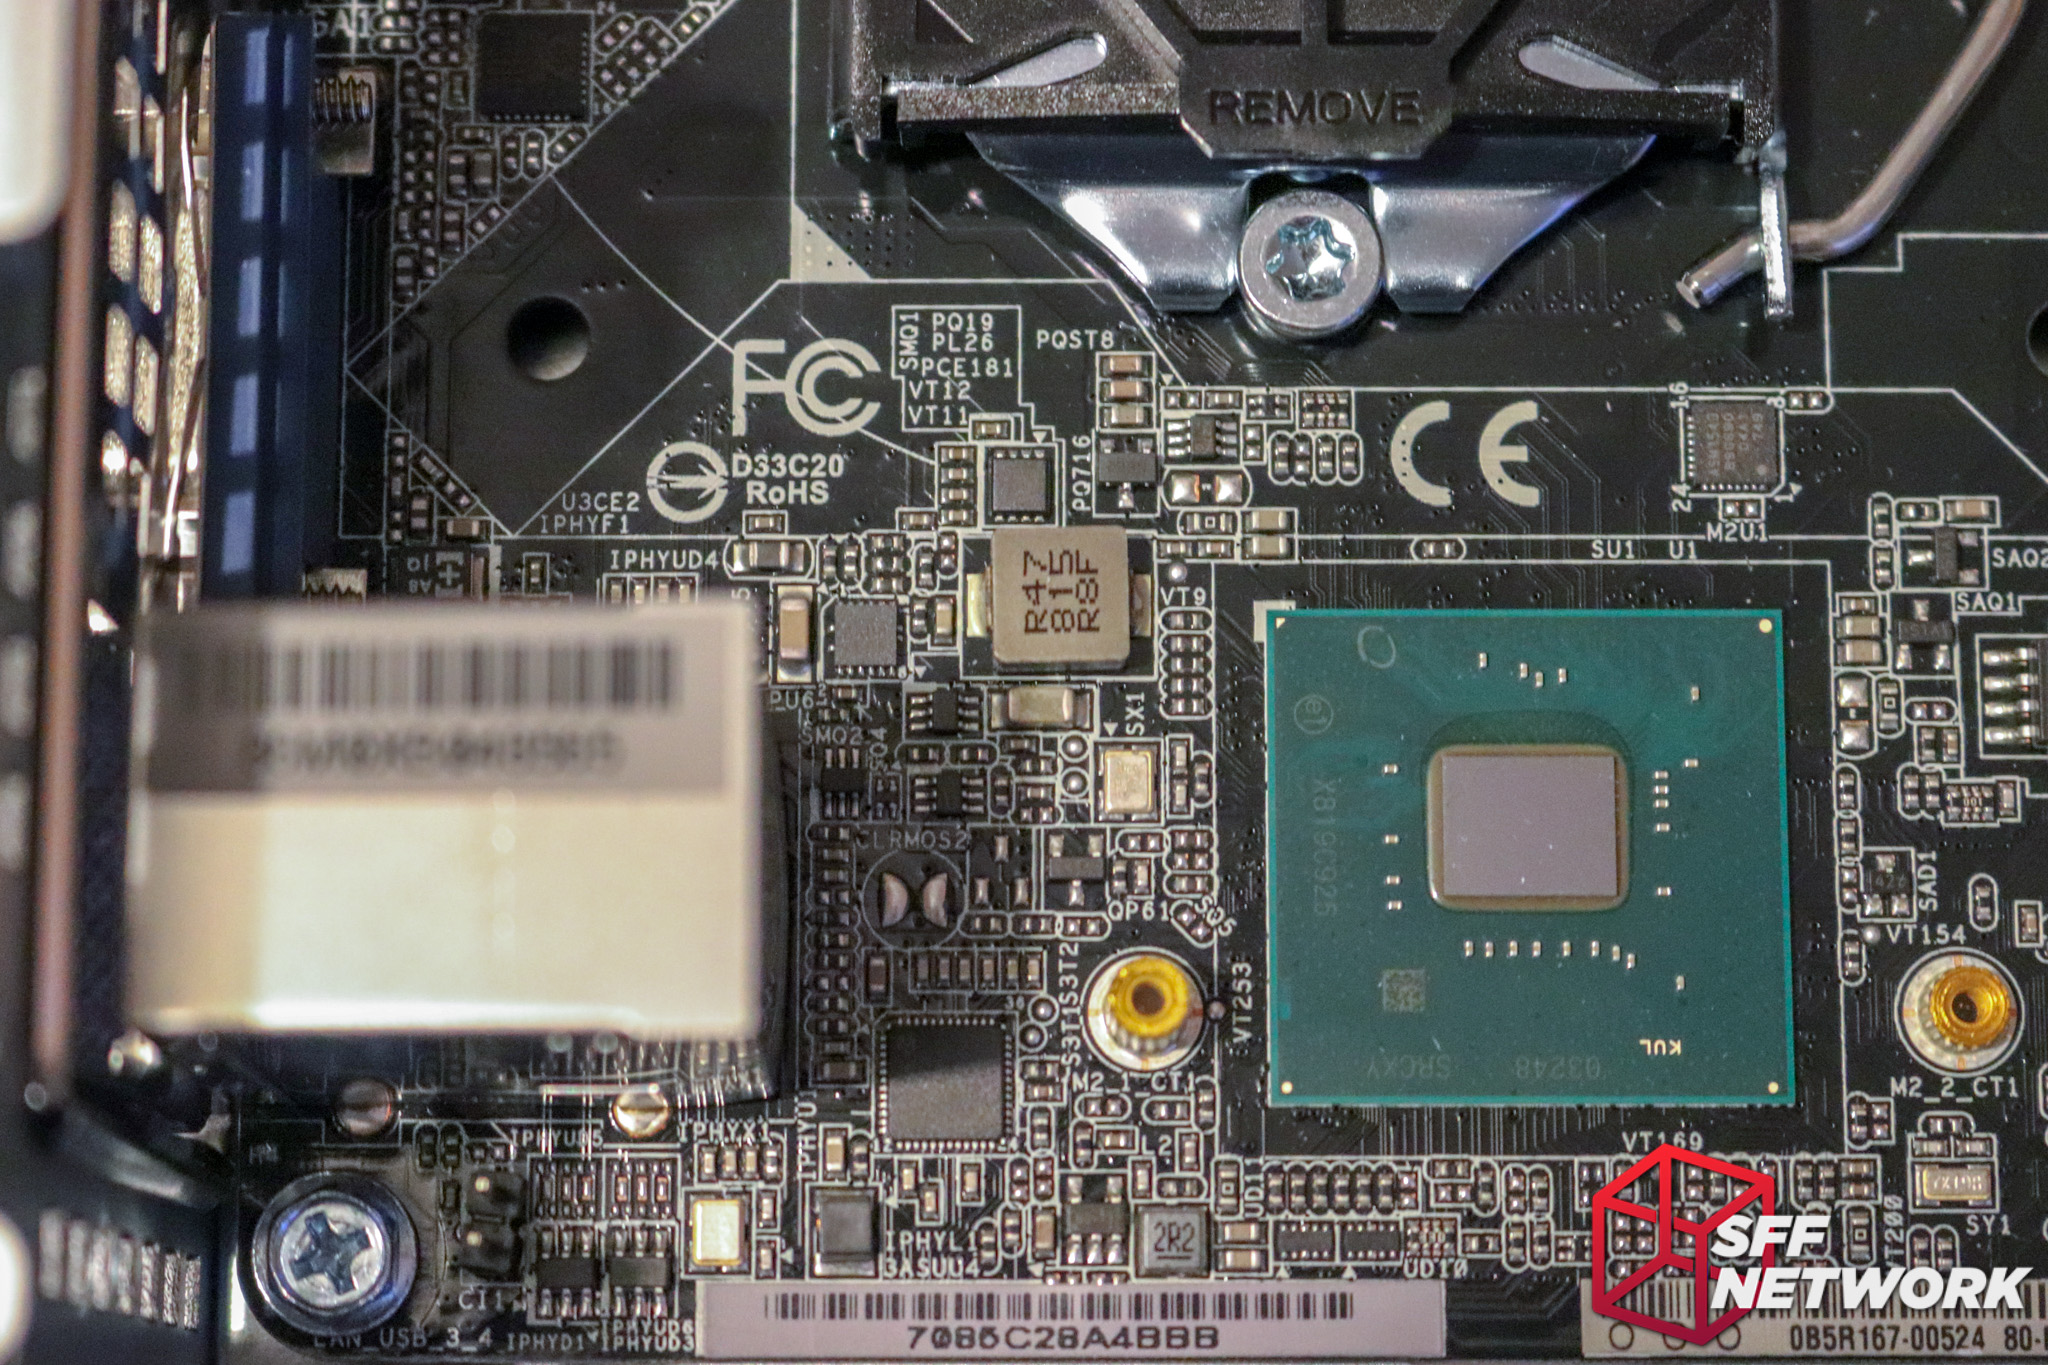
The Intel Gigabit I219V LAN chip sits to the right of the rear IO, denoted by IPHYL markings. Support circuitry aplenty! The two pin jumper to the bottom left appears to be a LAN disable jumper. Handy for physically securing a system from various attacks.
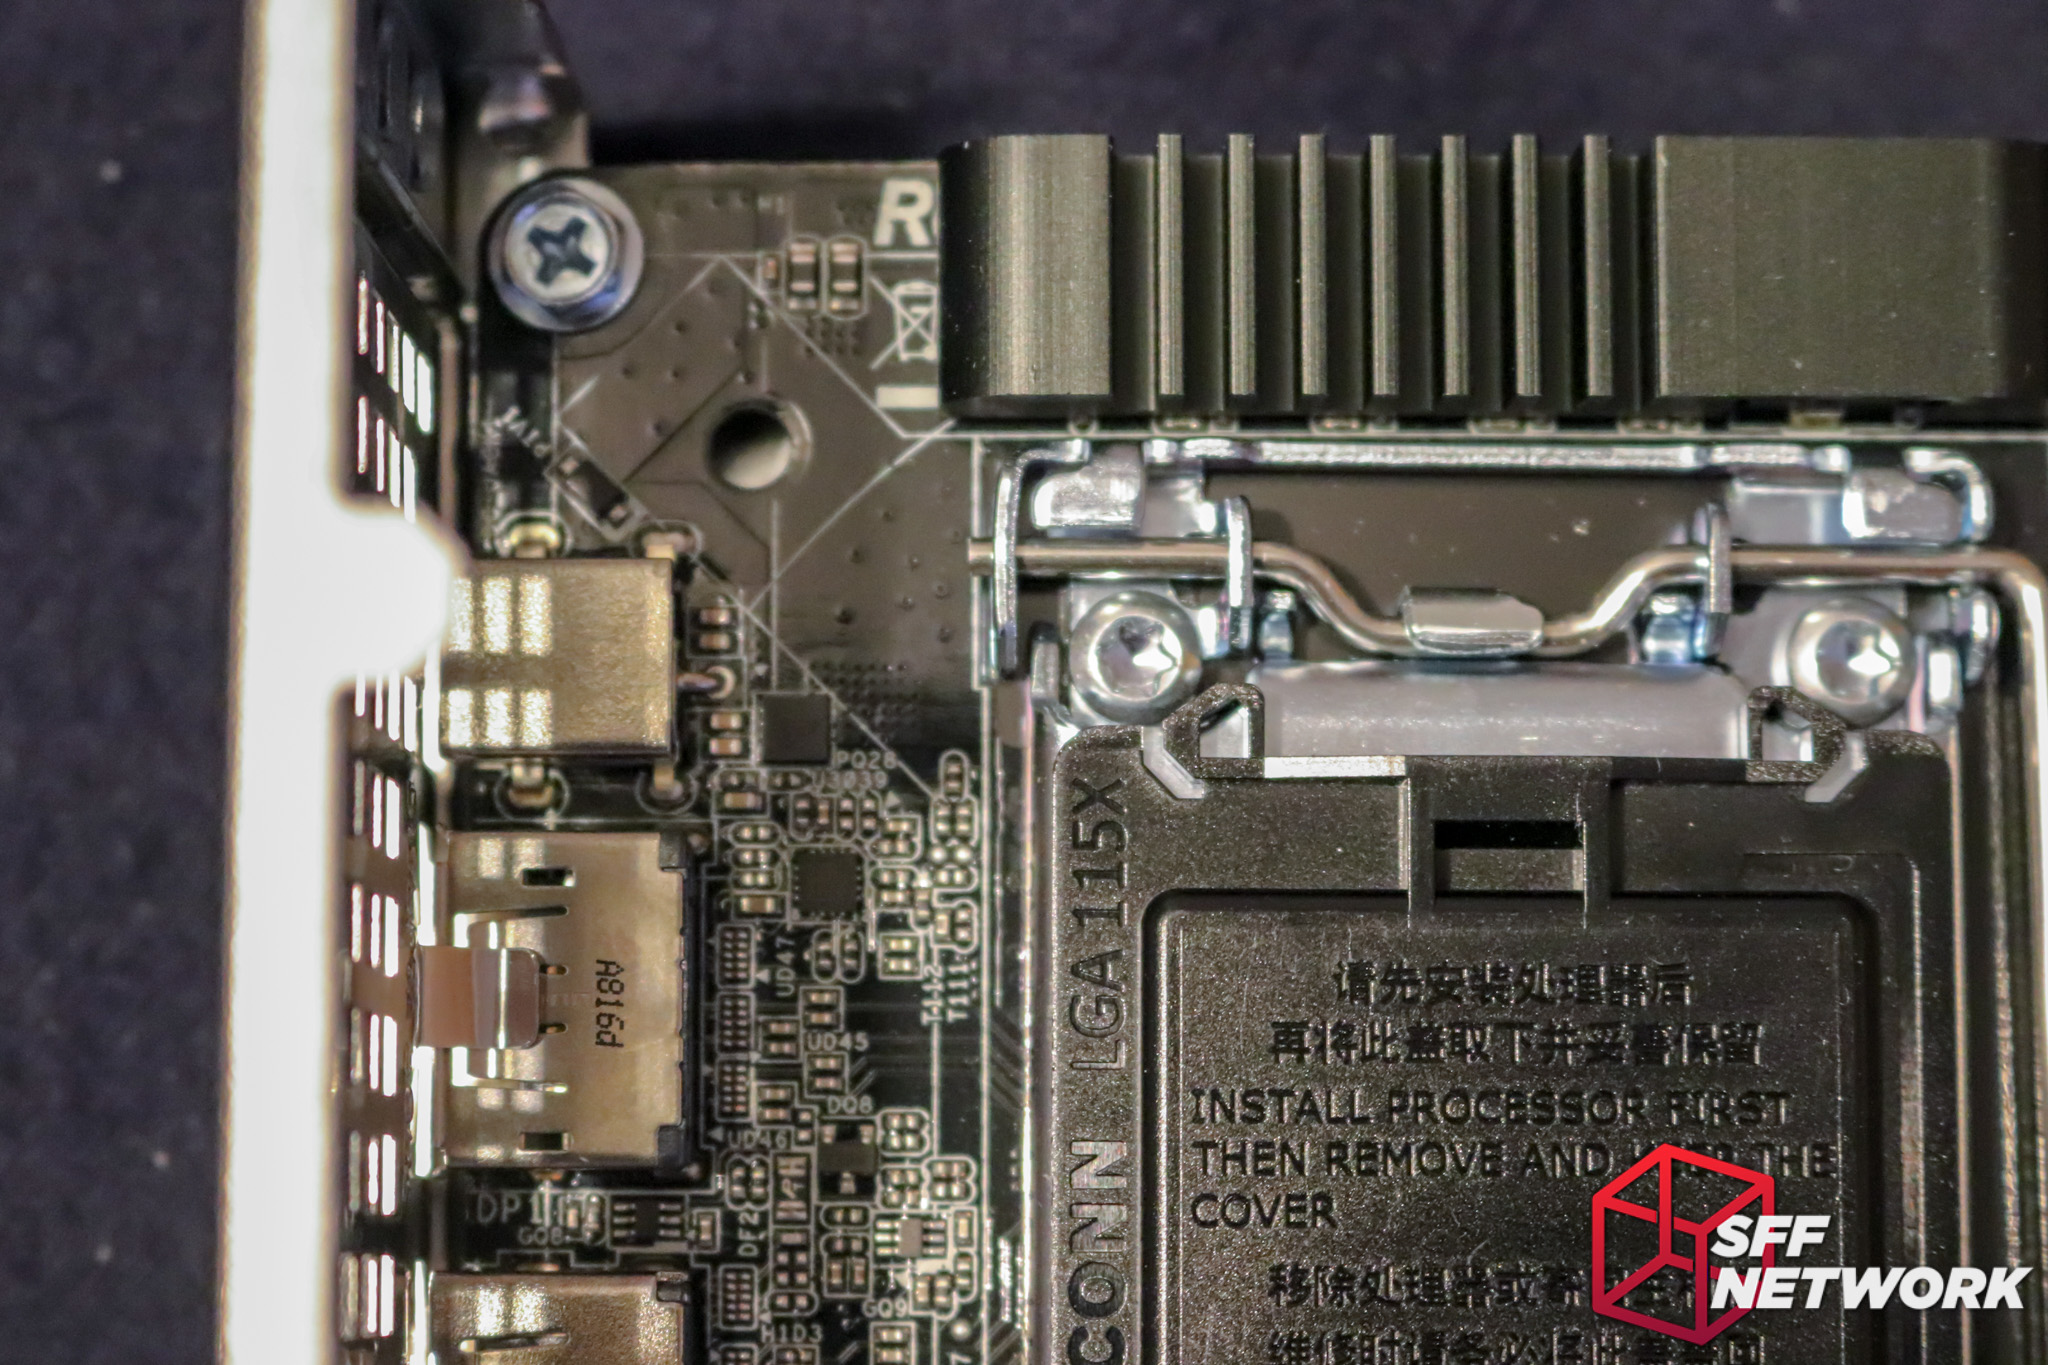
North of the CPU socket lies the bulk of the VRM section, hidden beneath a black extruded heatsink. The Intel cooler keepout zone is very much pushed here – I’ve never seen componentry border the zone outline so tightly!
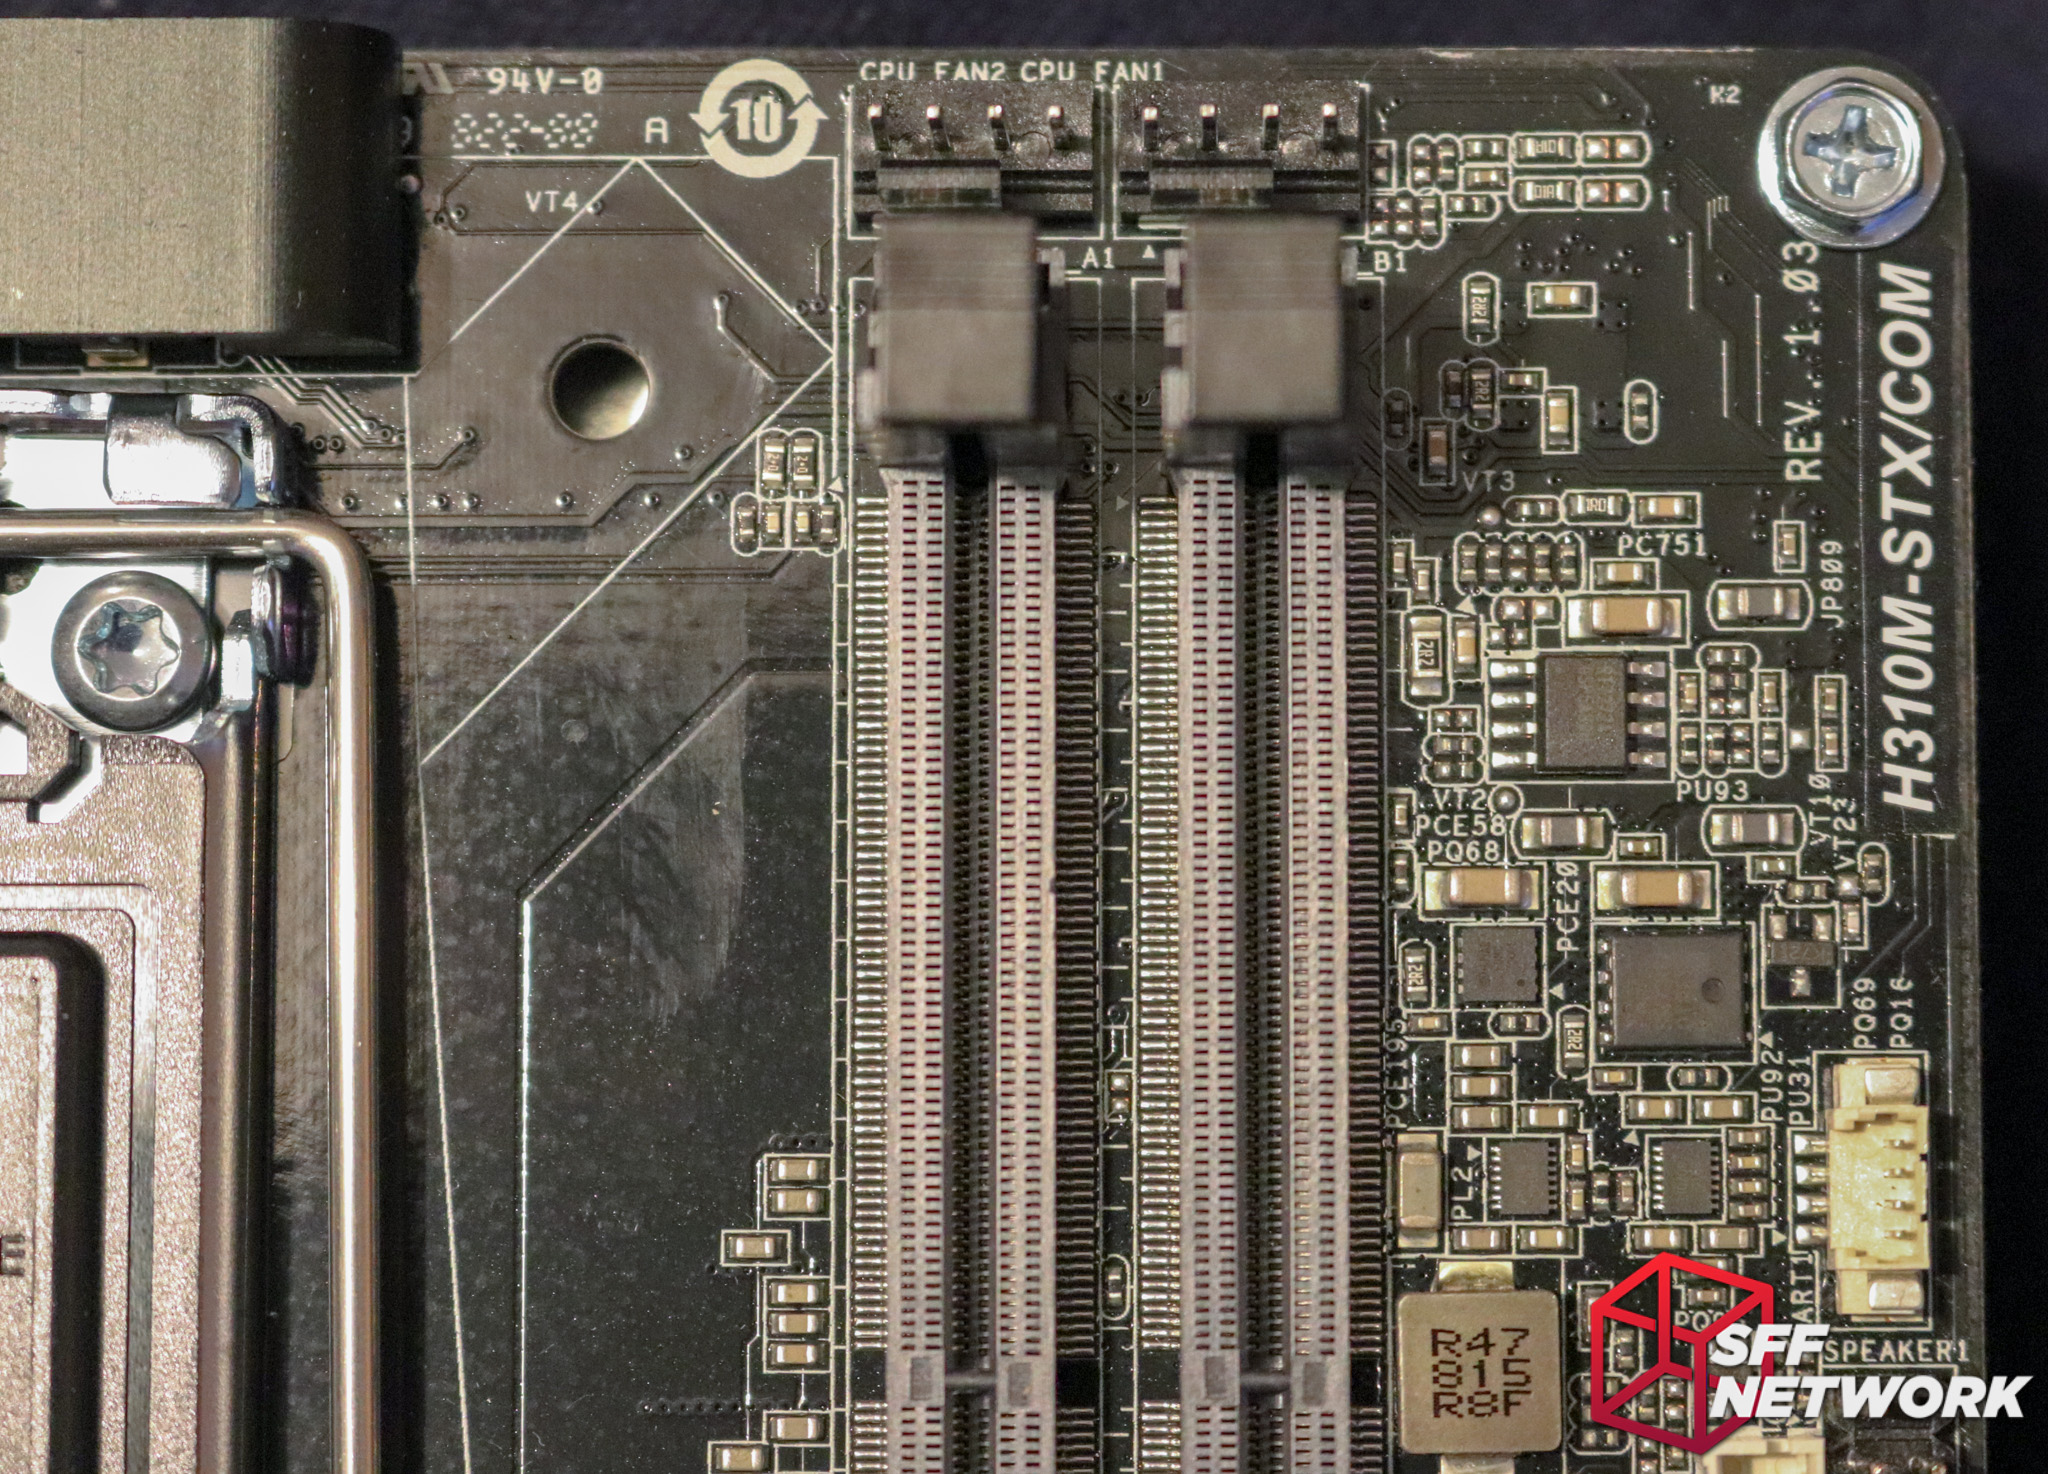
Above the twin DDR4 SODIMM slots lie two fan headers – being 4-pin, PWM capable headers. These are controlled individually. The cream header to the far right is the COM/RS232 header.
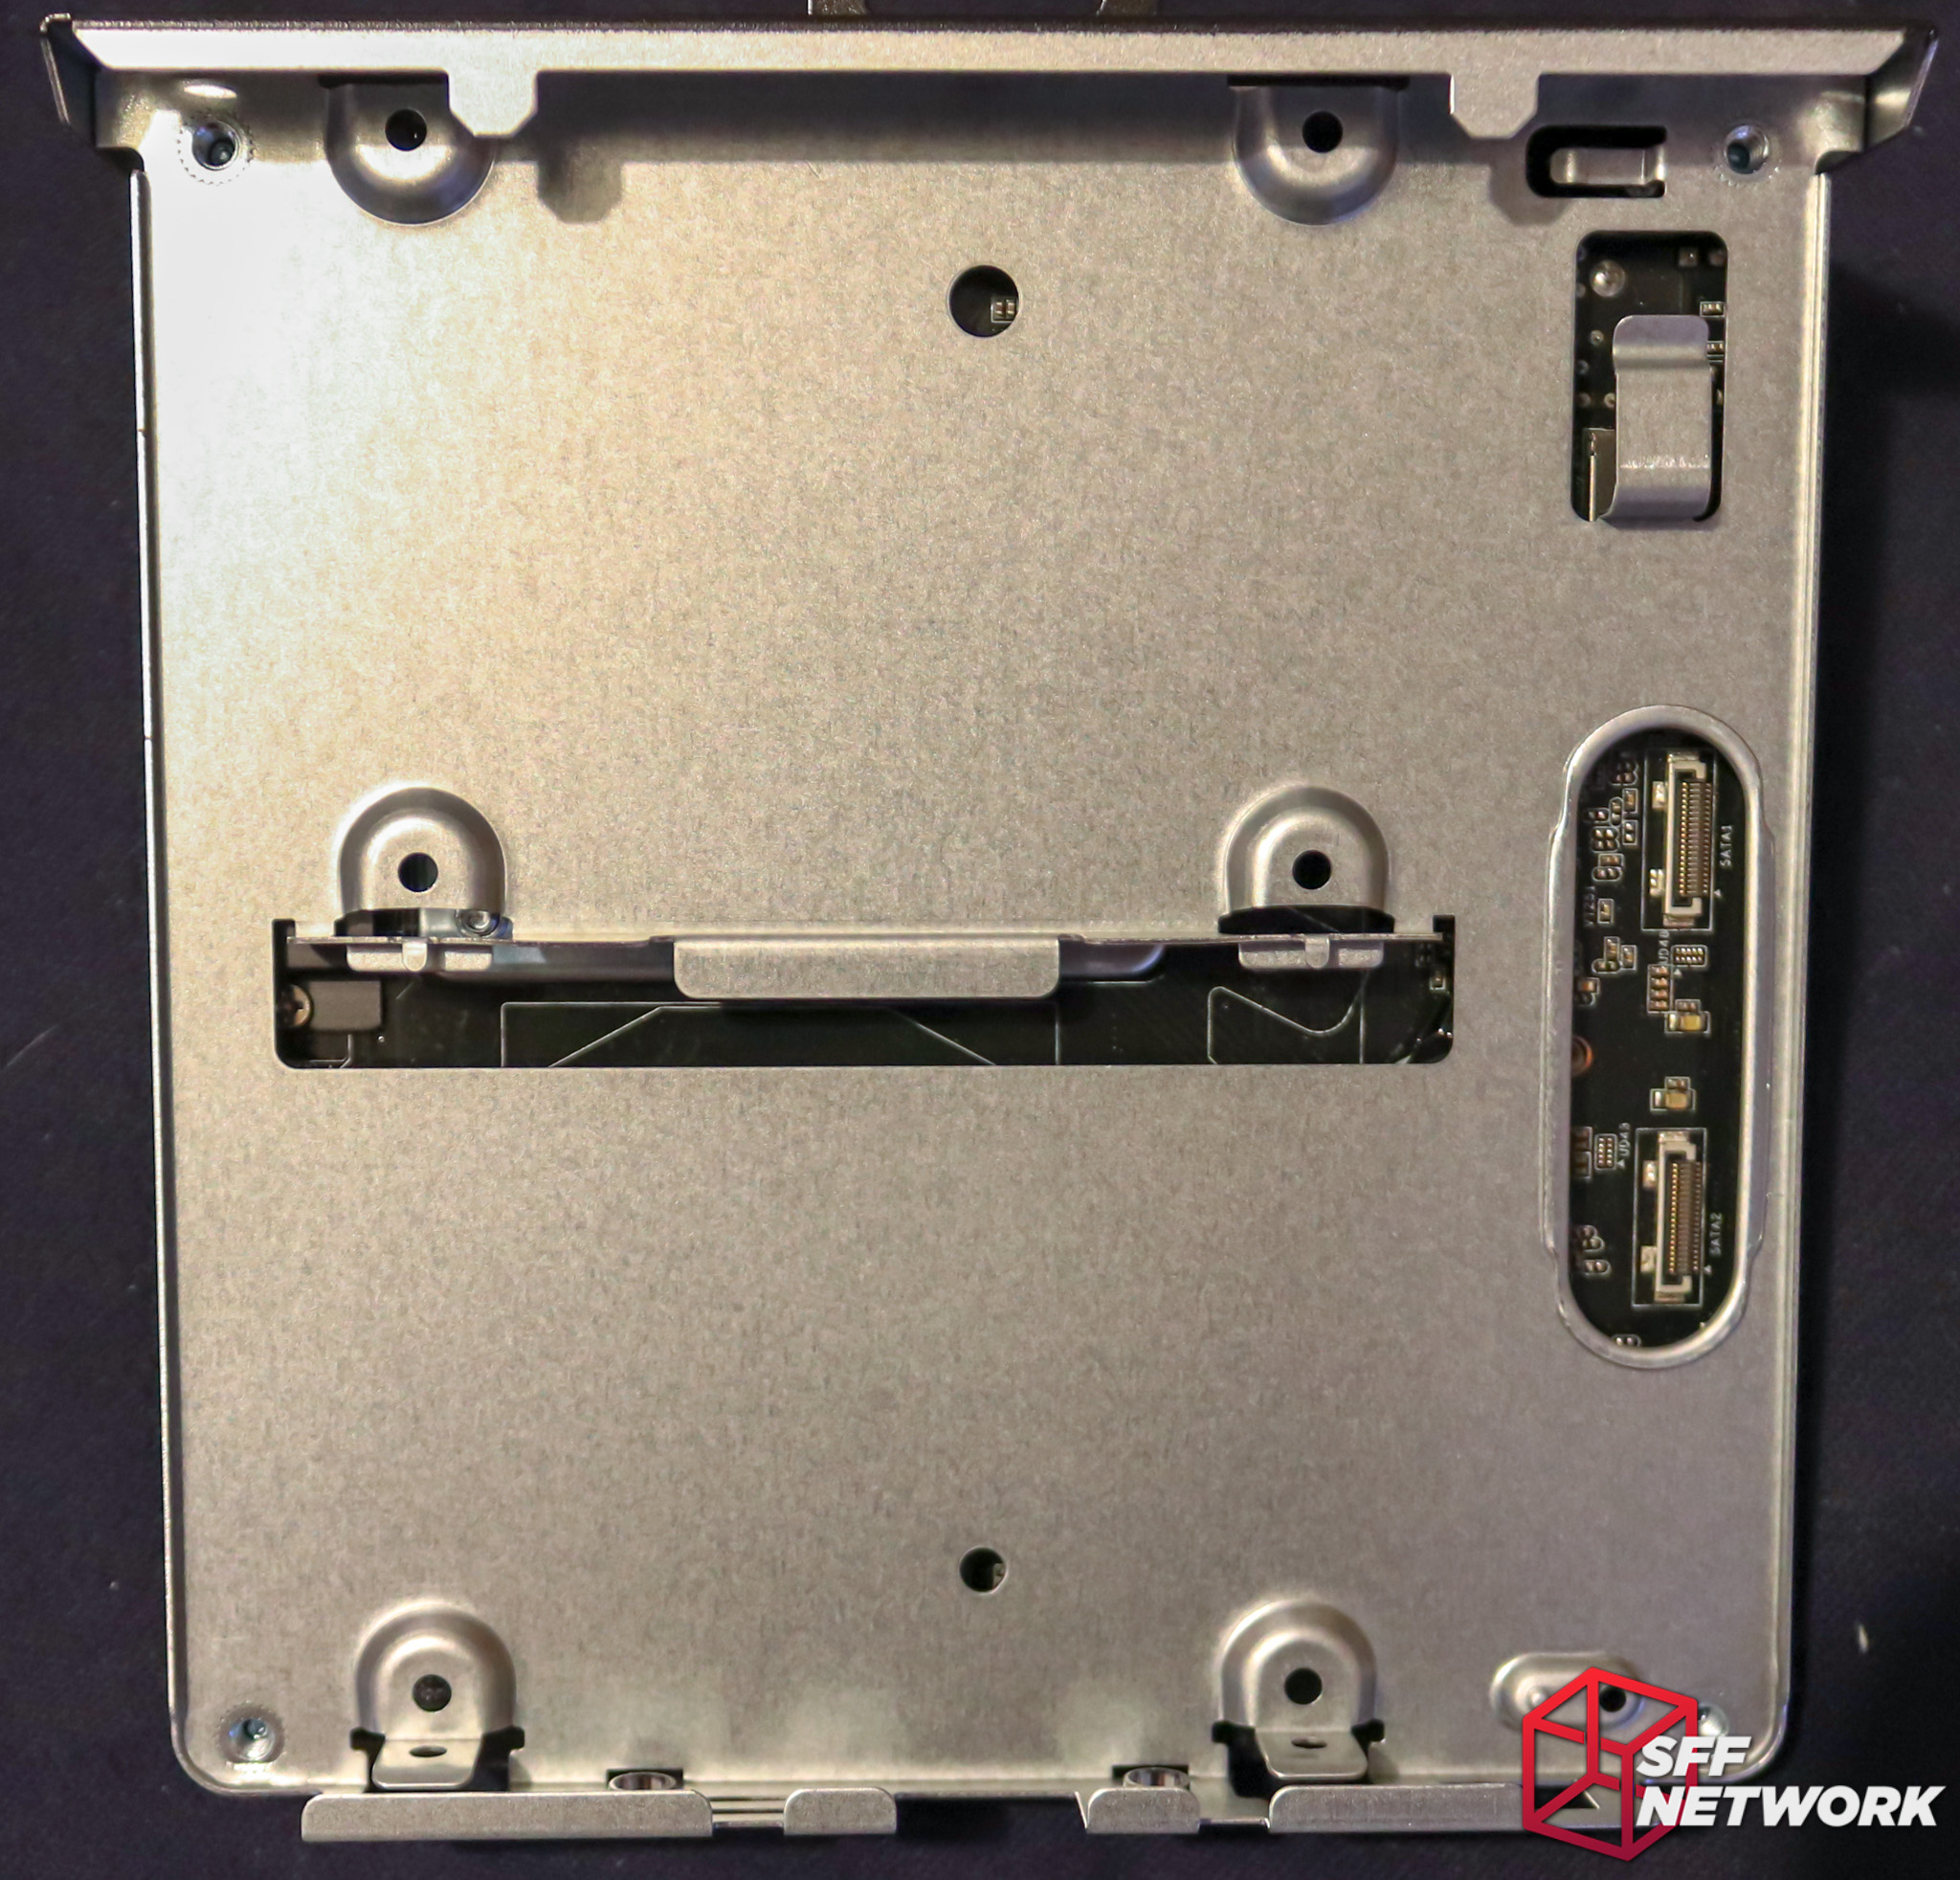
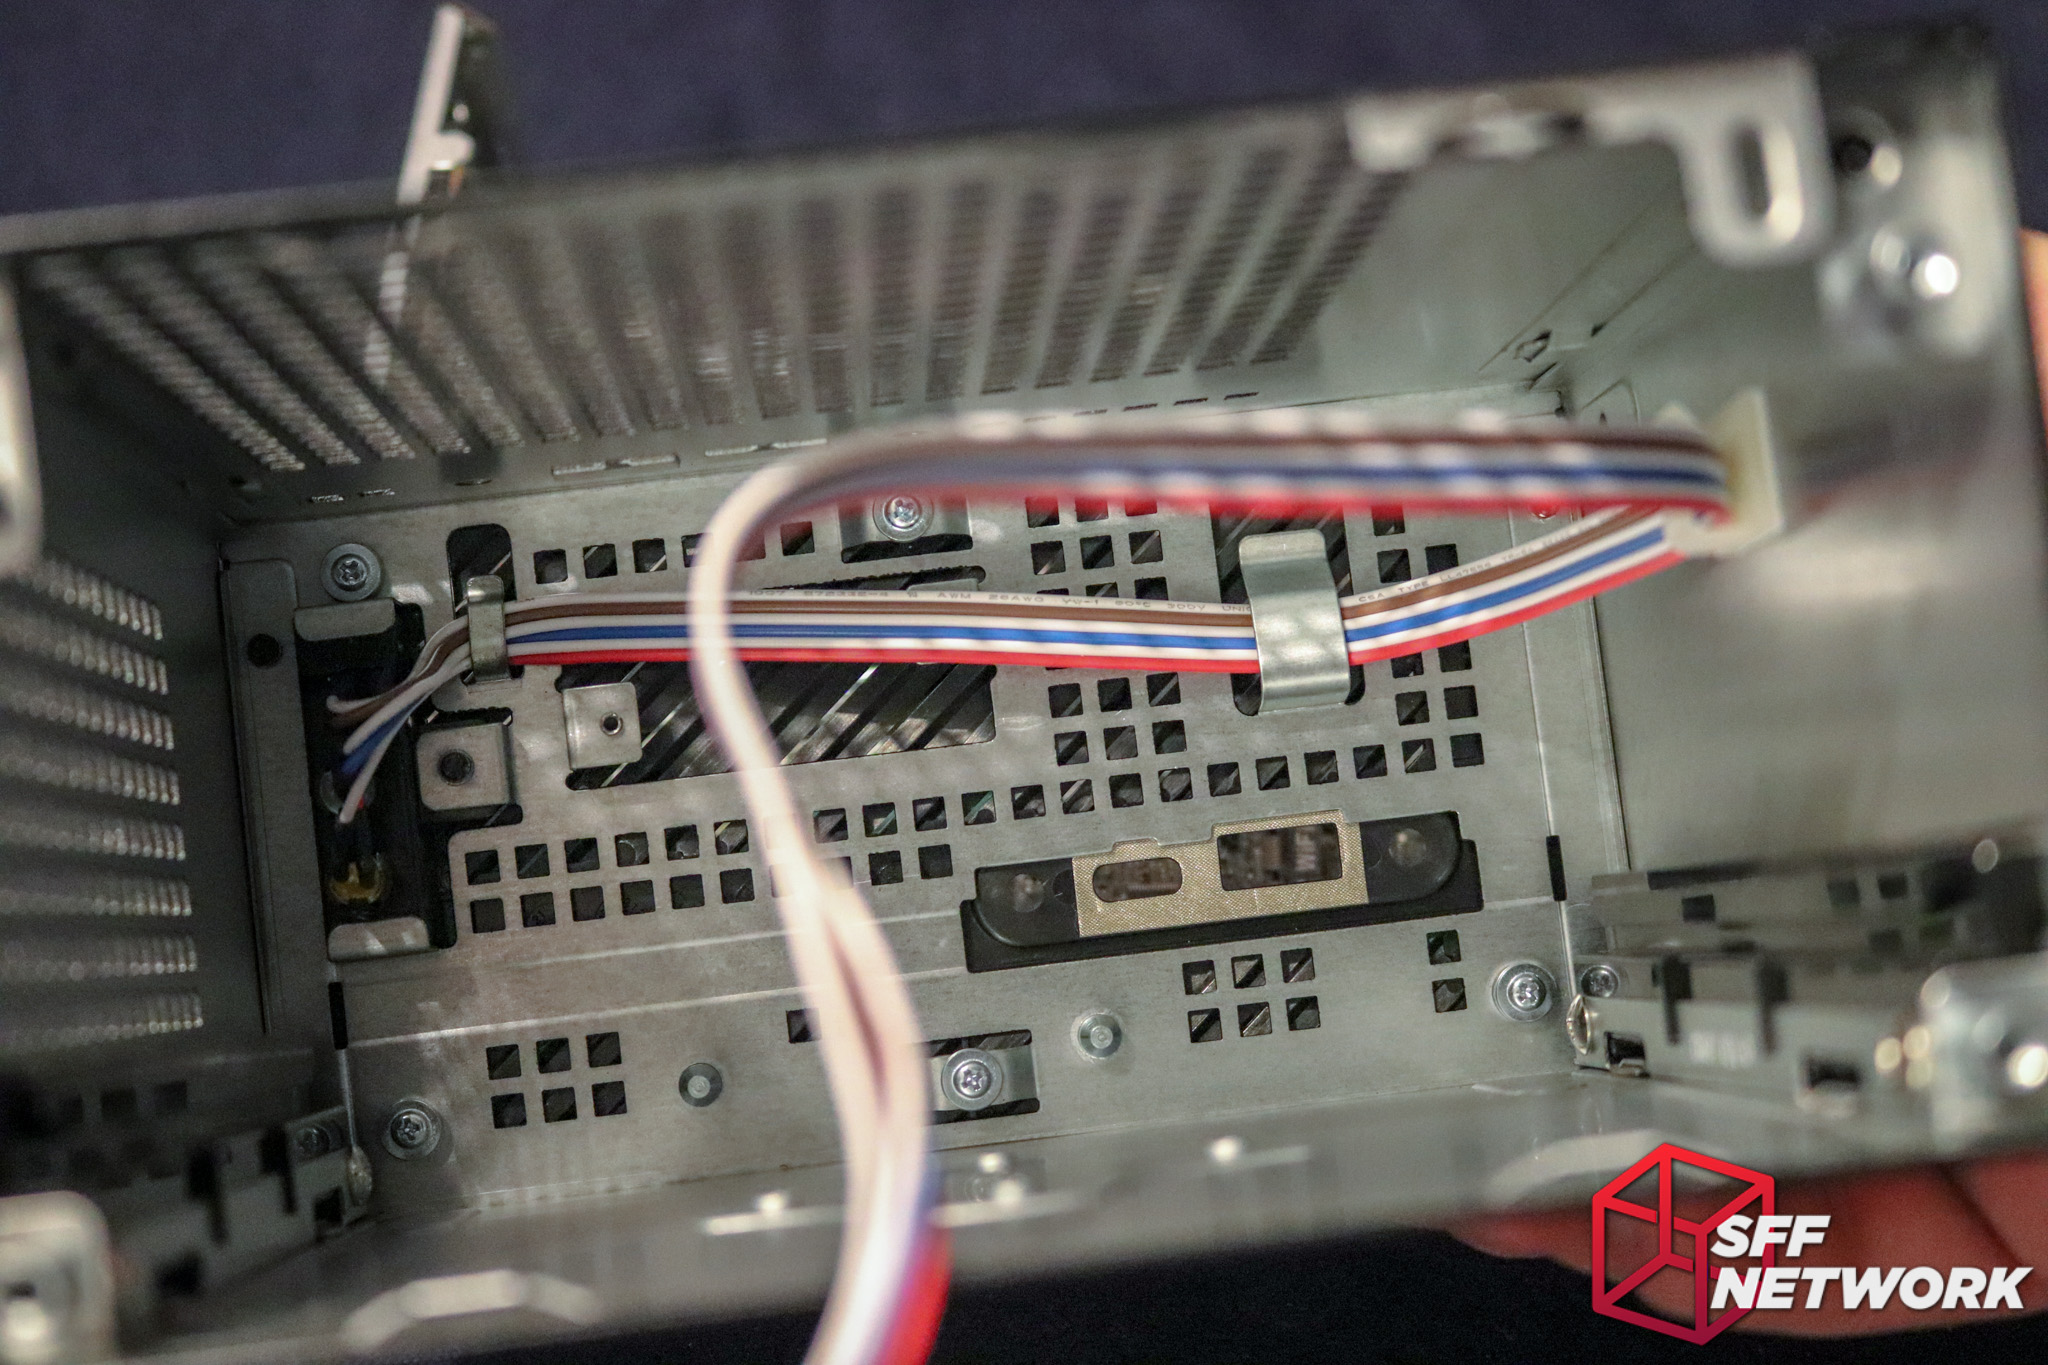
Supporting two 2.5″ drives amongst other things, the motherboard tray holds most of the system in its grasp. A cutout is present to pass through the two SATA power/data combo plugs.
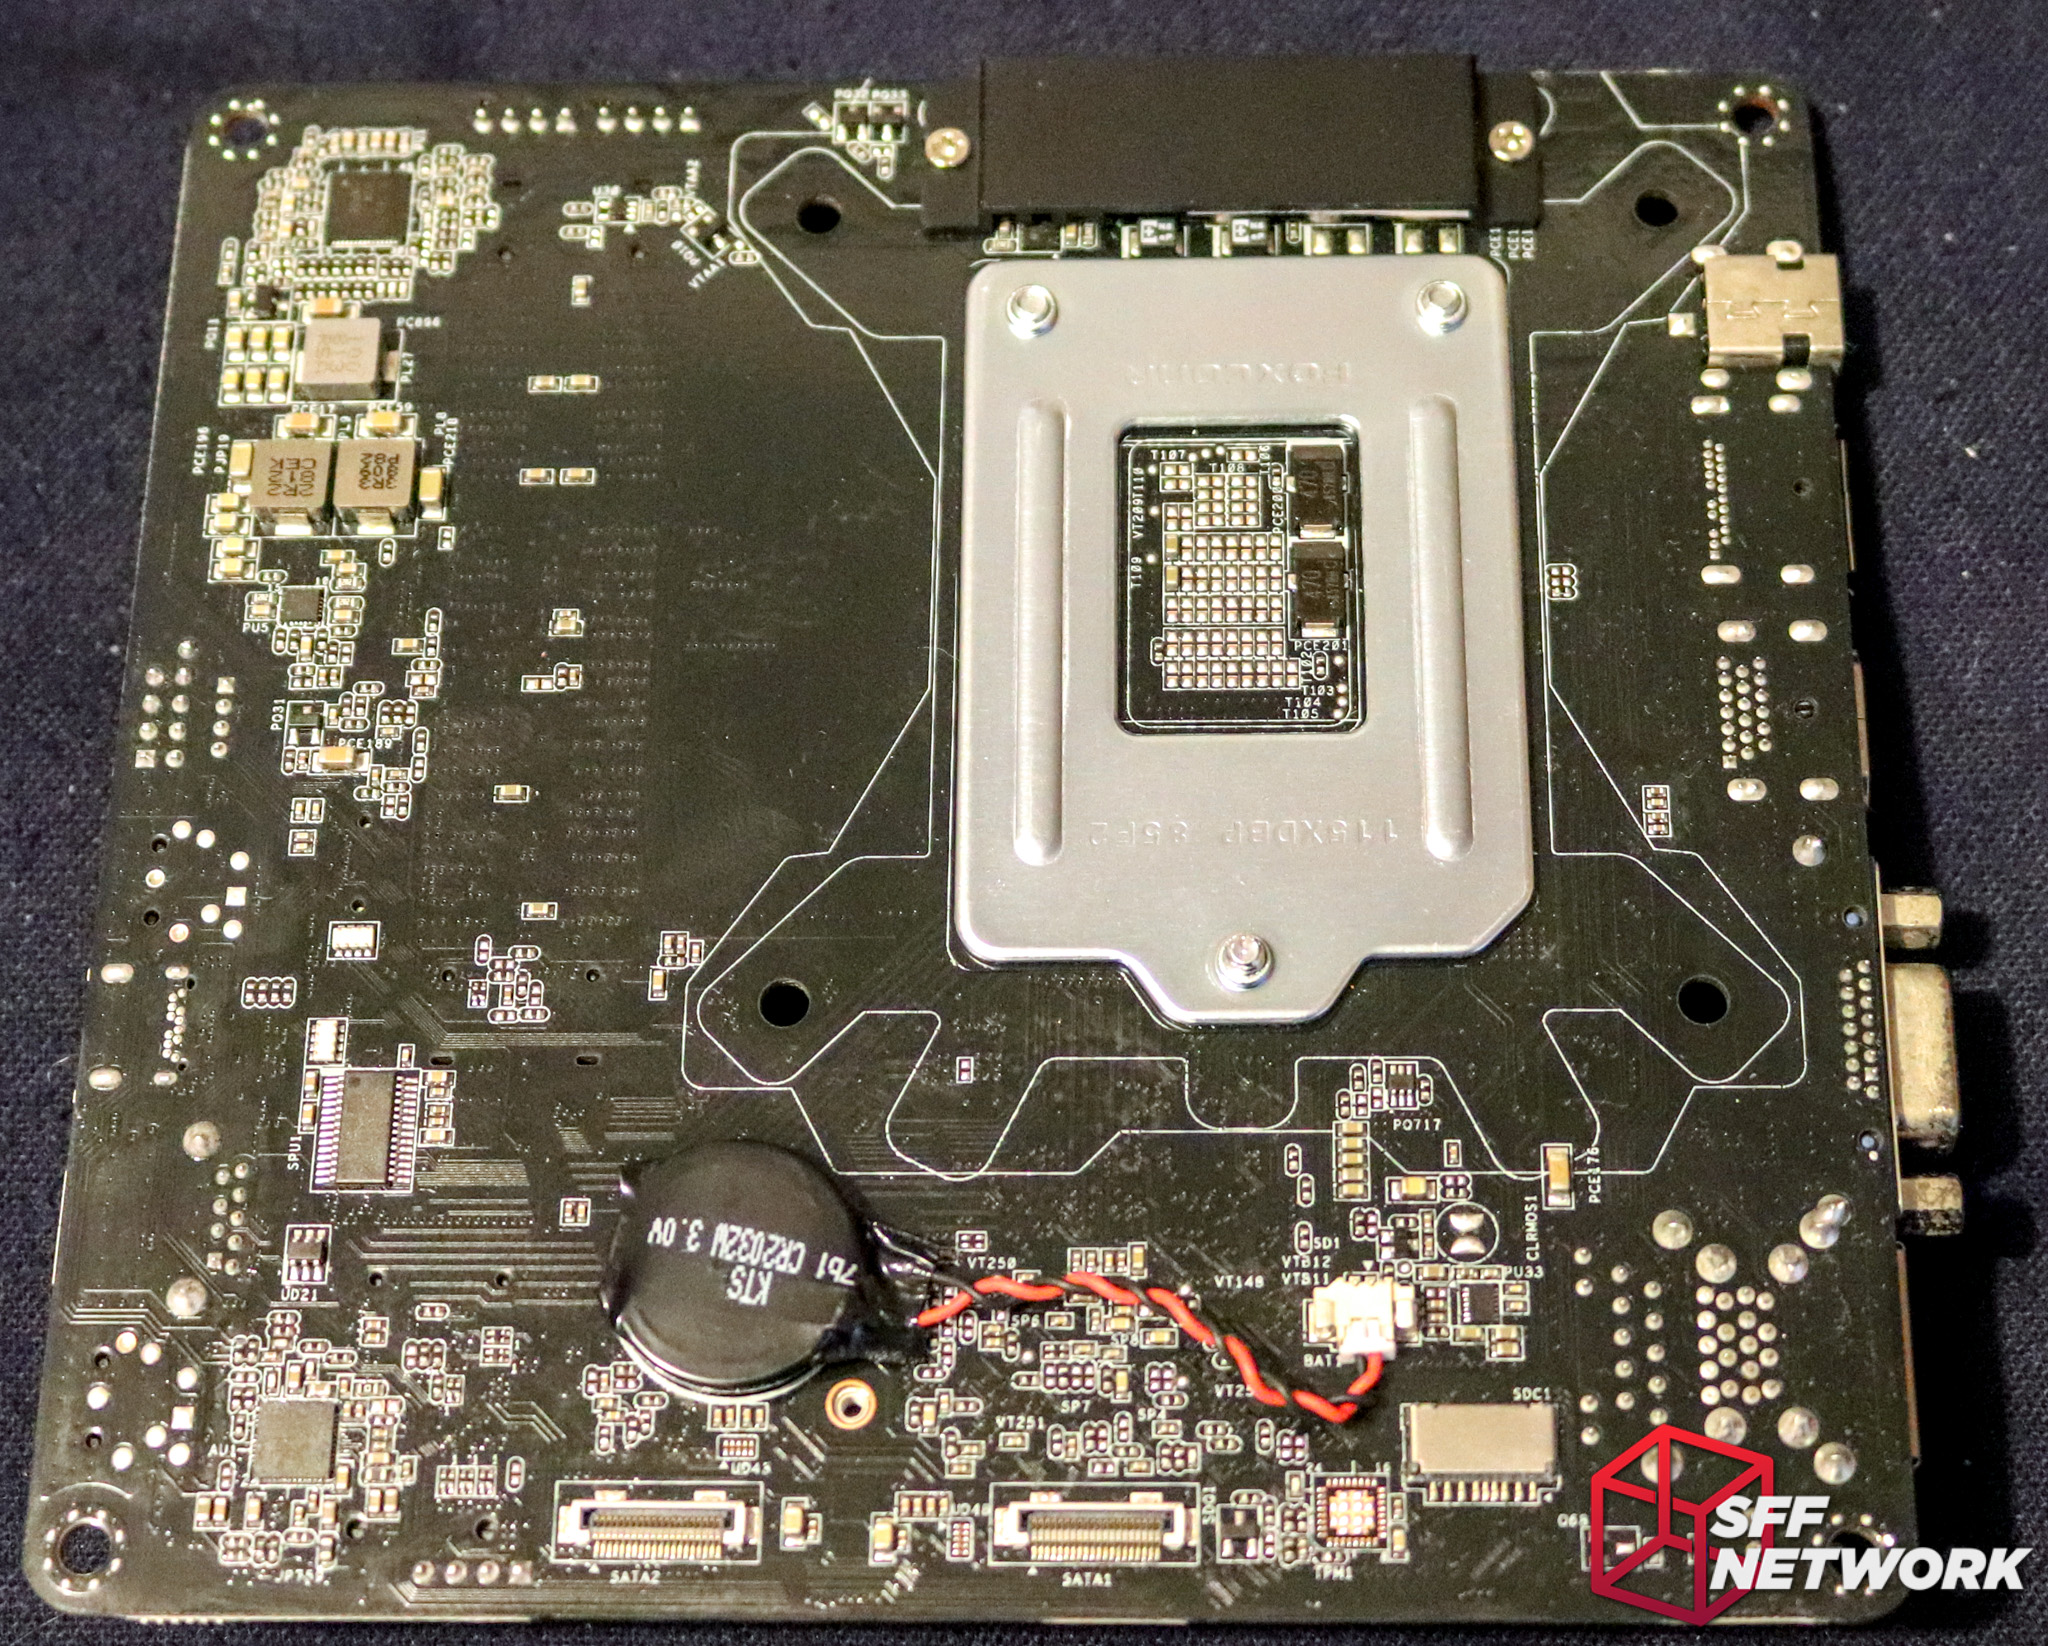
Under the motherboard – more VRM circuitry and associated heatsink to the top, the CMOS battery to the bottom and hey, what’s that? To the right of the battery plug is a micro-SD card socket – low cost embedded systems benefit a tonne from such inclusions – the SD format being cheaper to implement than a small SSD in netbooting or small operating systems.
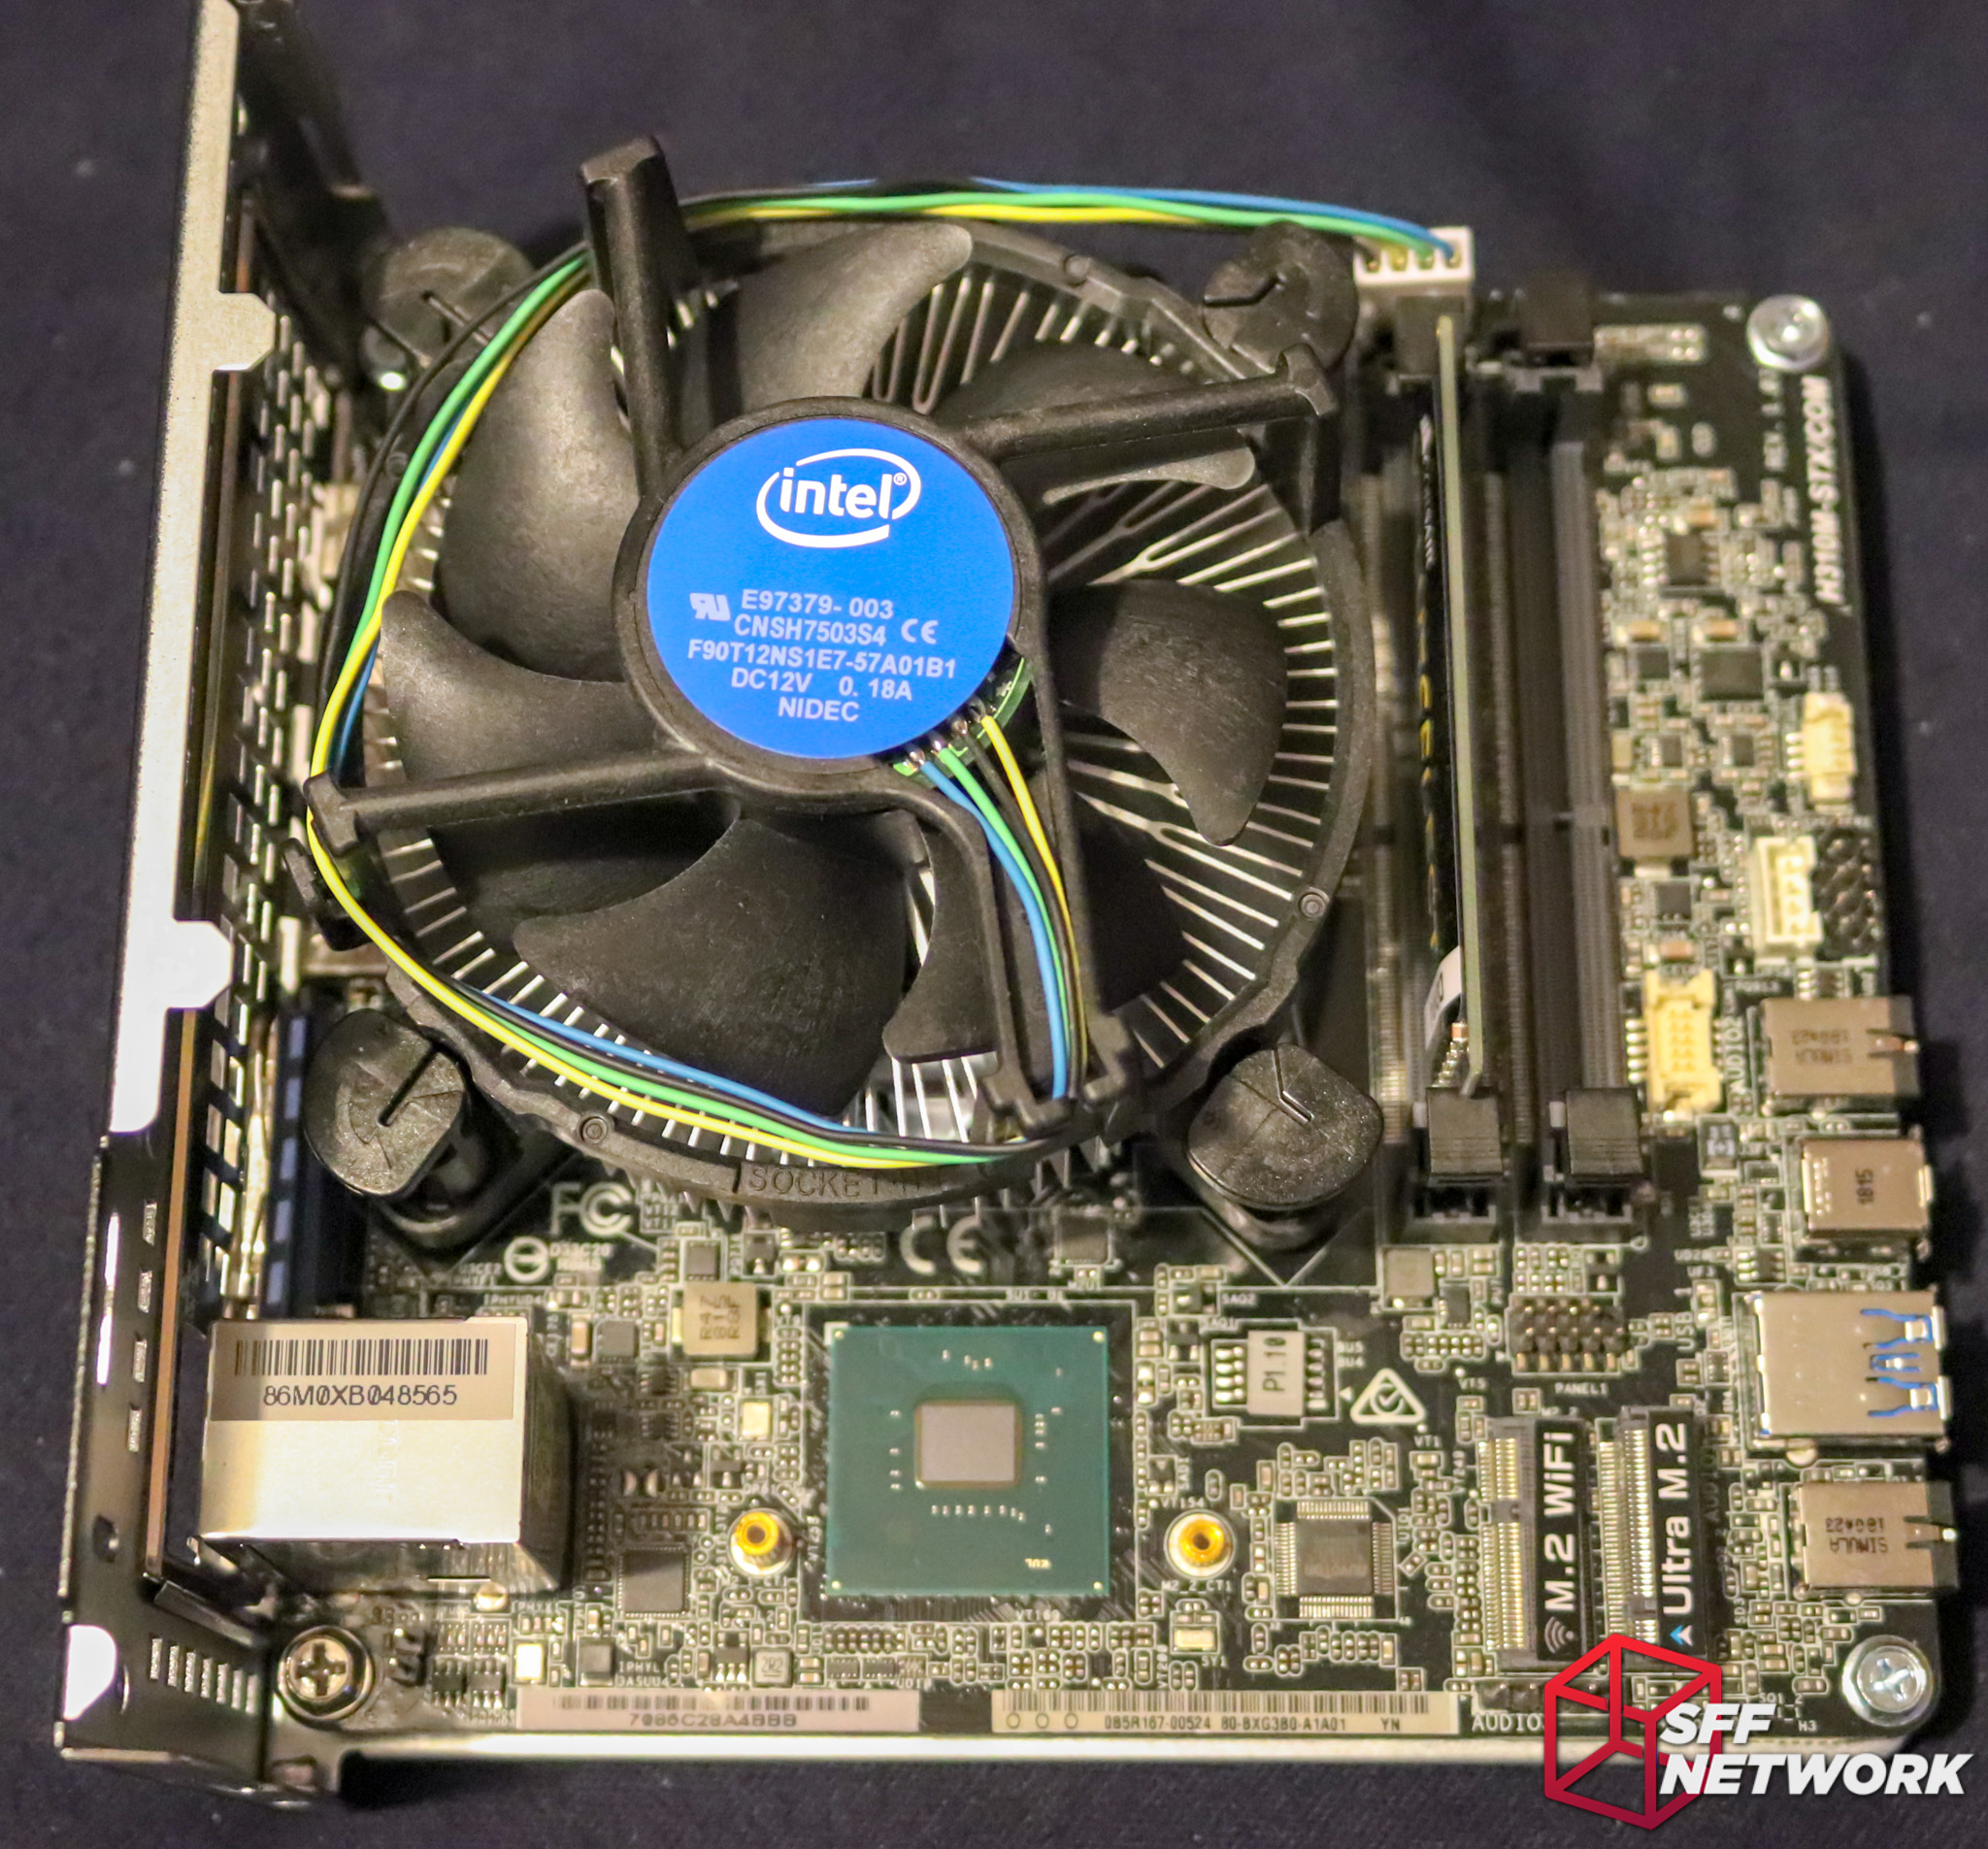
Stock cooler, fits as promised. Also installed – a DDR4 SODIMM, namely, a Corsair ValueSelect 8GB unit.
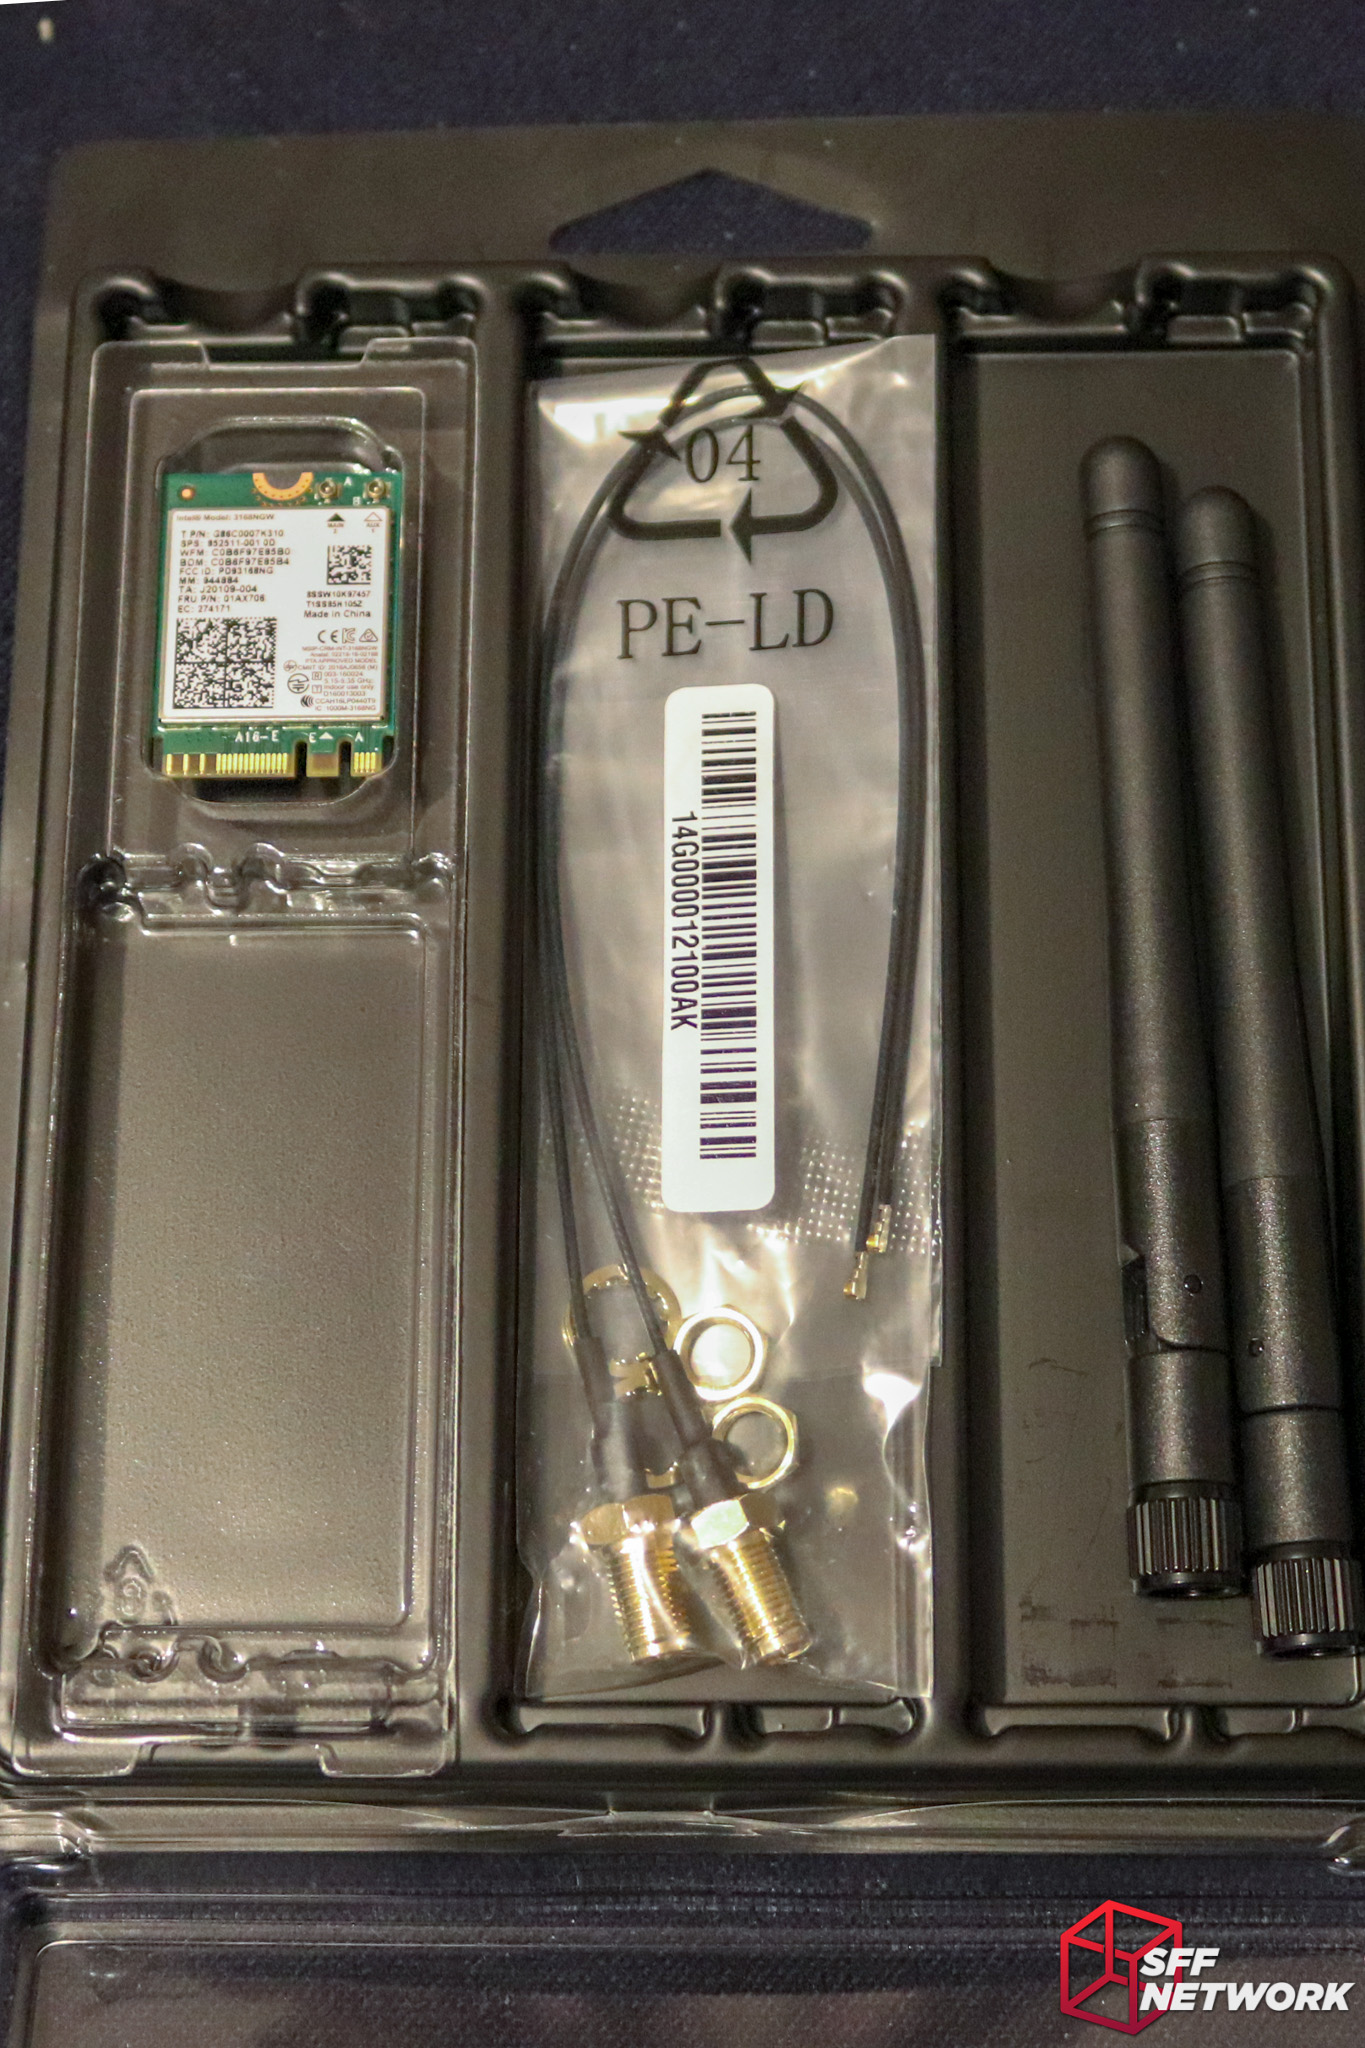
On to the WiFi accessory pack. Reusing a triple-DIMM mould from the LGA1356 days, the WiFi kit includes all you need to add Intel Wireless-N to your DeskMini 310. Injection moulds aren’t cheap, and it’s one place cost cutting isn’t a bad idea – accessories packaging.
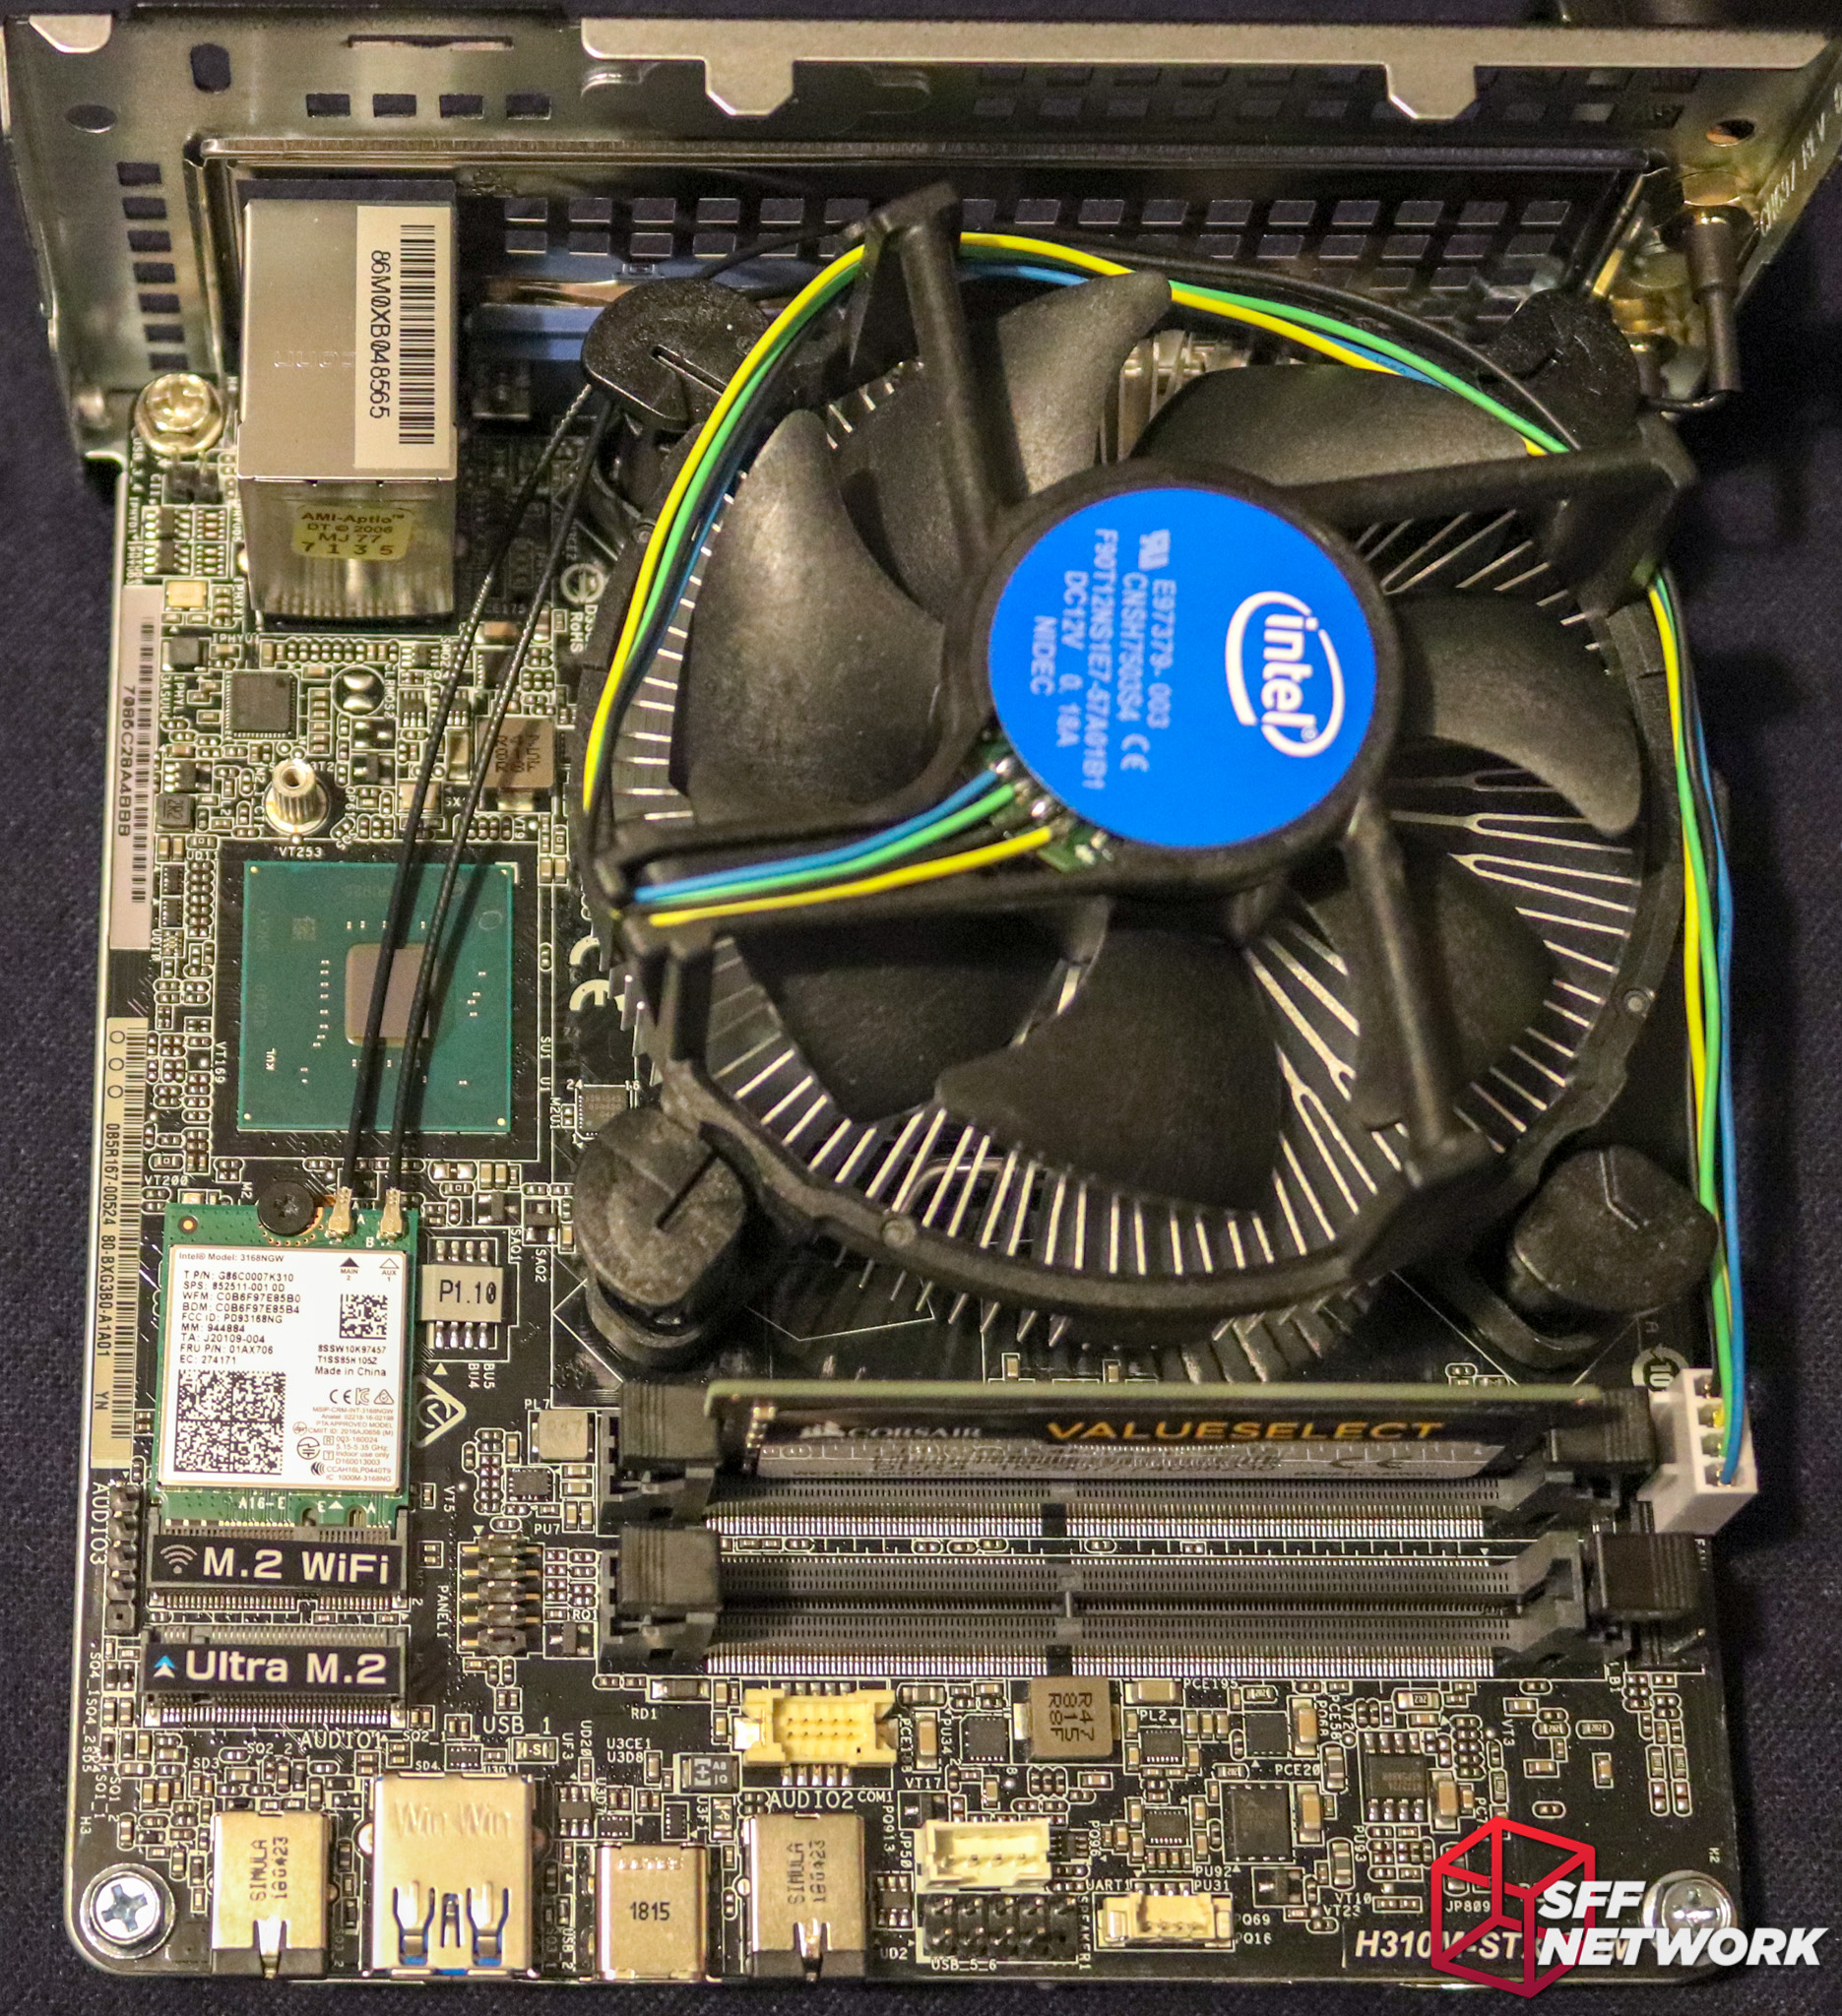
Dutifully installed. Note – install this before a M.2 SSD, as the connectors are stacked. Routing the cables is up to you – there isn’t a clear route for them. I chose to run them around the CPU cooler – leading to a sharpish bend at the external connector end.
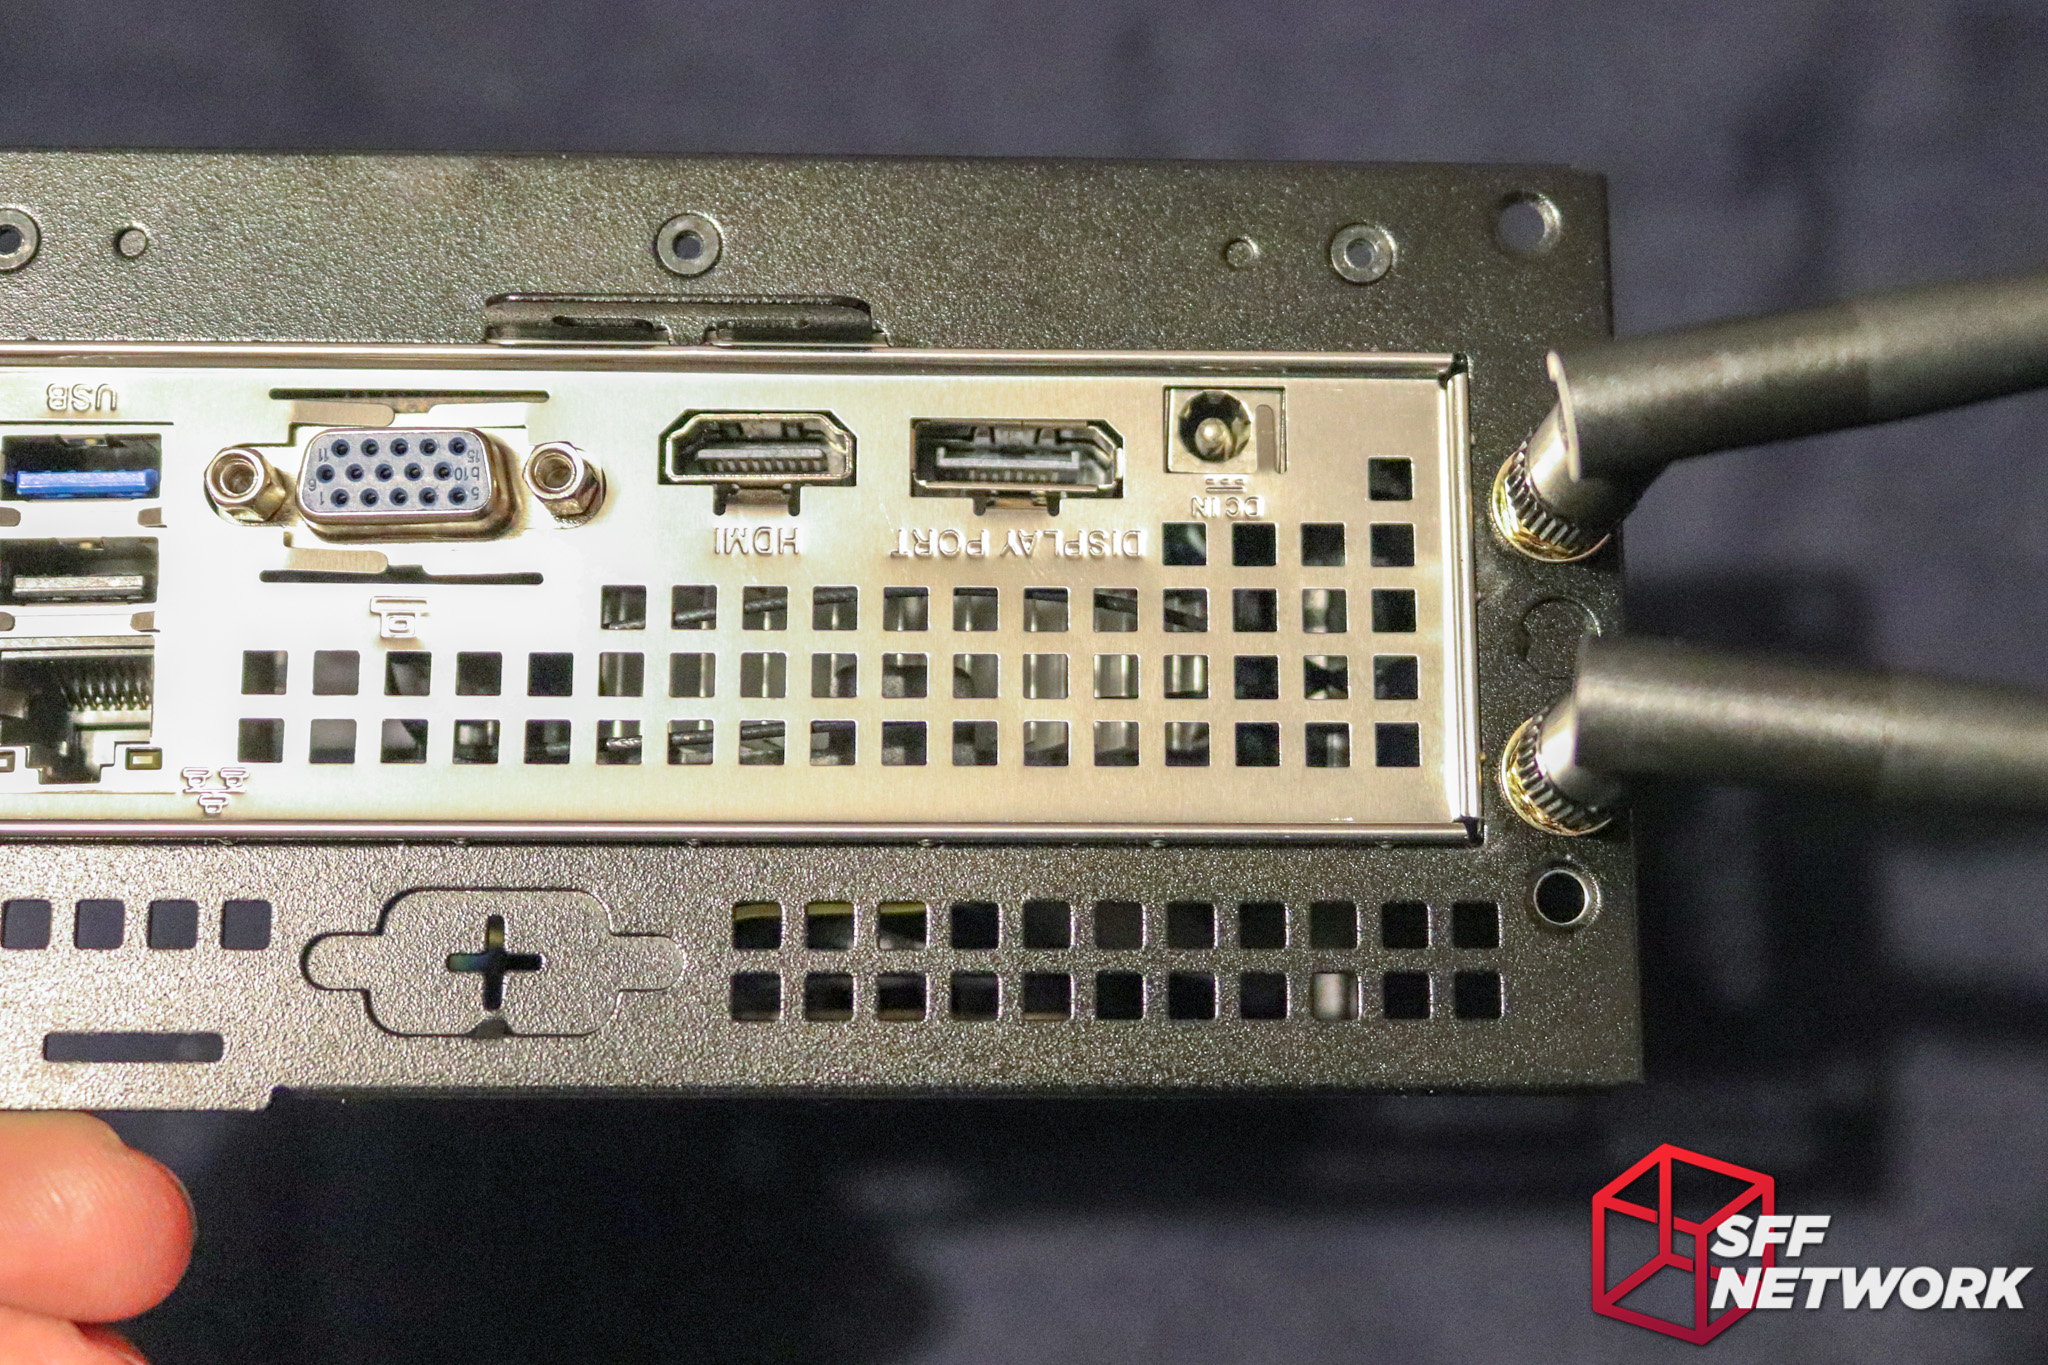
The dual antennae are installed in punchouts on the rear panel. Room for triple antennae is given – for those with overkill WiFi solutions!
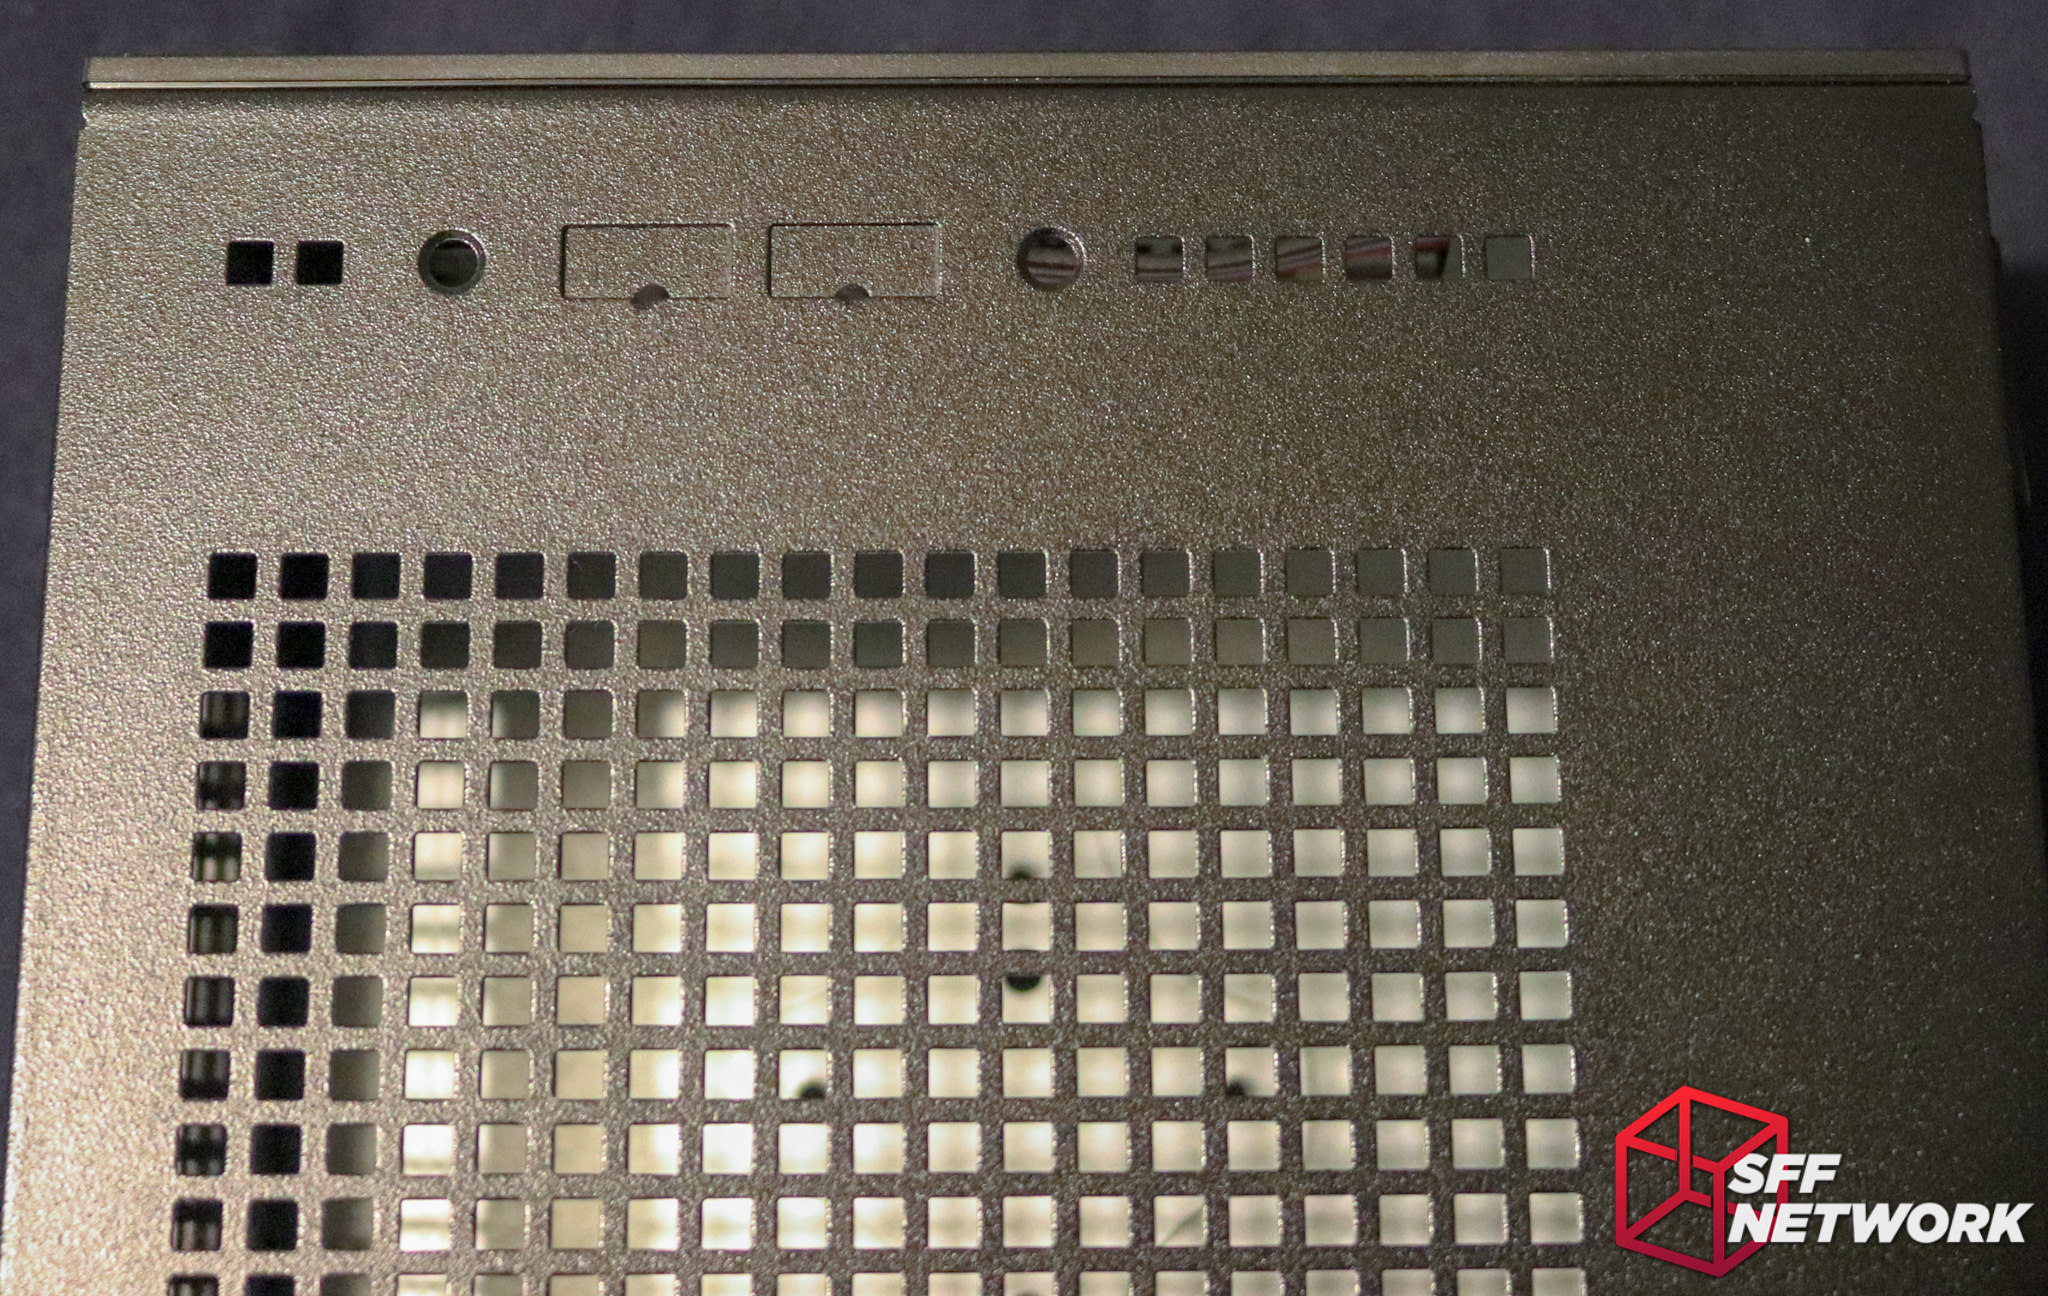
These two rectangular shapes are for the USB 2.0 sockets – let’s add those.
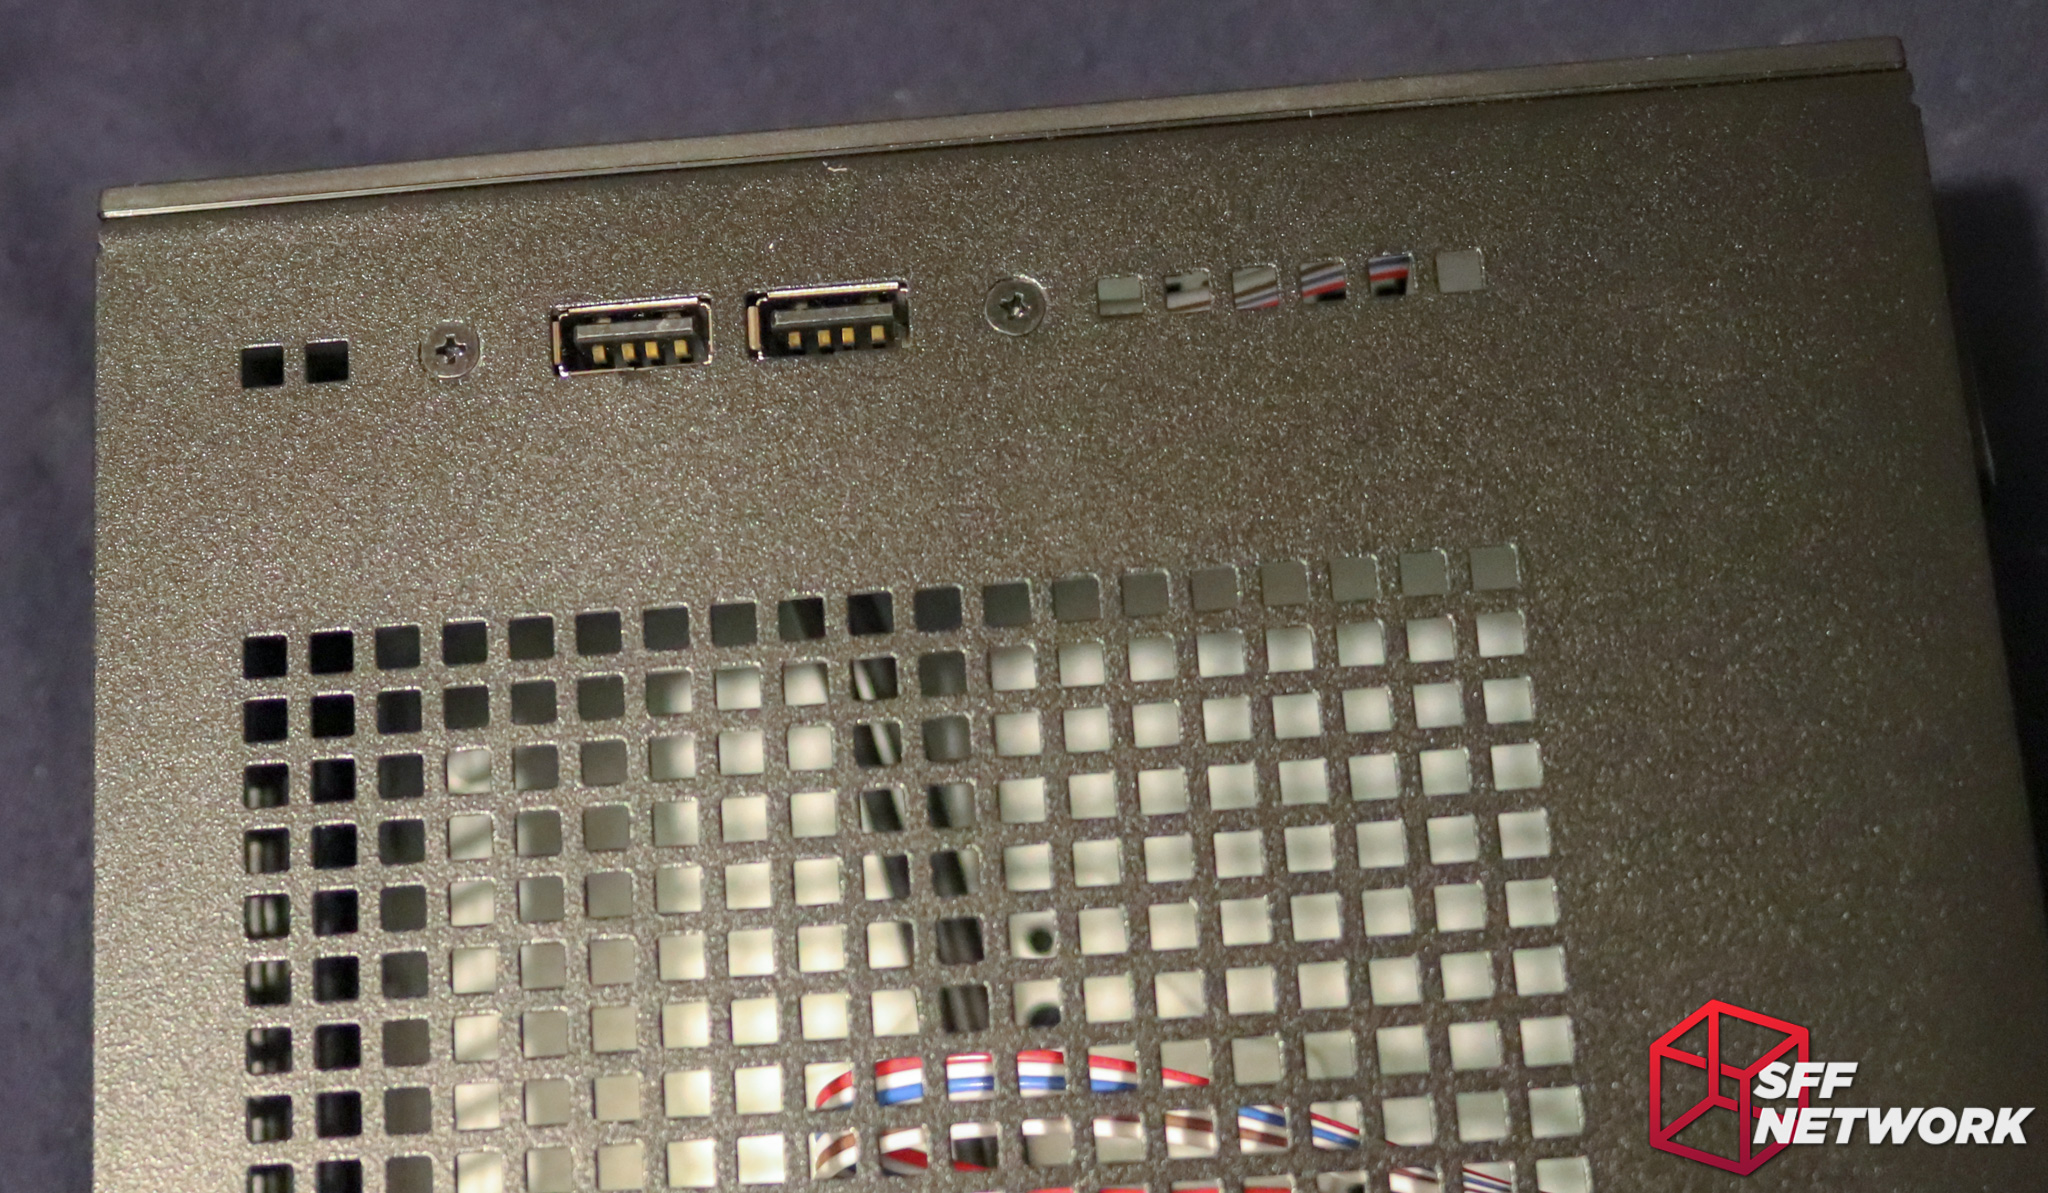
Popped out, socket assembly attached. This is a semi difficult affair, as you need smallish hands or long fingers to hold the unit in place while screws are installed.
This is the COM variant of the DeskMini, so let’s add the COM port – the DE9 RS232 connector. The punchout is pretty clear here!
Gone.

DE-9 installed.
The ribbon cable is a bit of a pain to route, but it’s workable.

Putting the cooler push pins to good use guiding the RS232 ribbon cable.
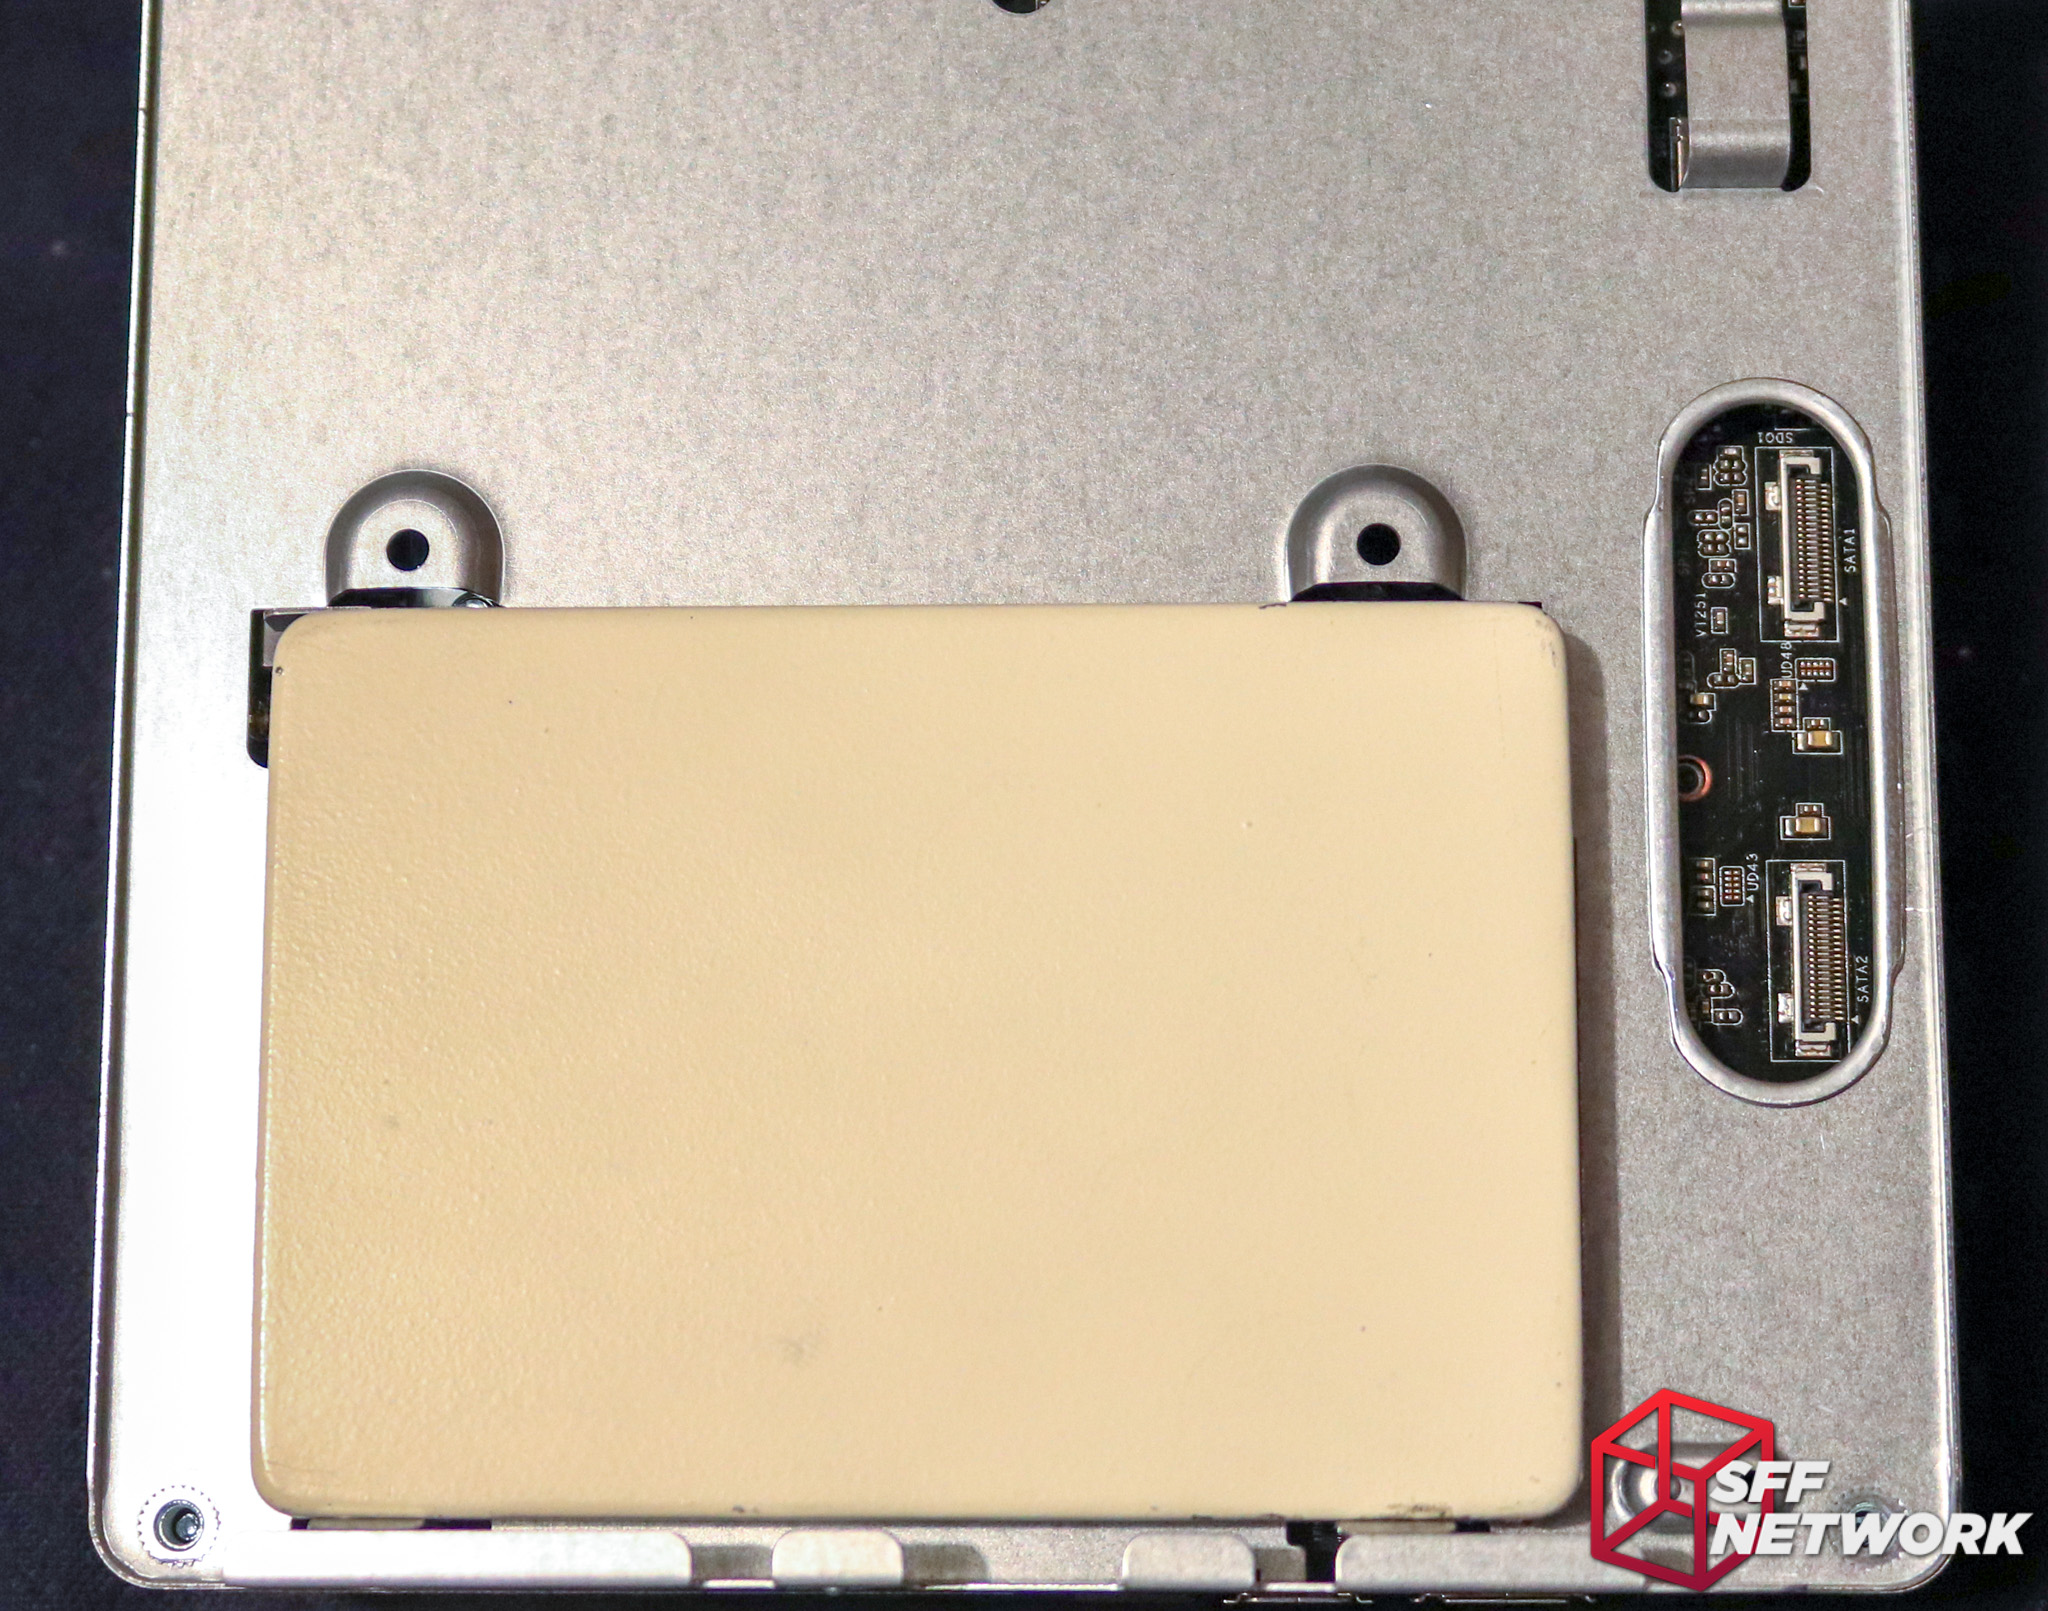
Storage time – this being a 240GB SSD painted in a fetching shade of beige. The drive sits into two protrusions on one side, and two screws secure it on the other. The DeskMini 310 supports two drives – SSD or mechanical. Mini-NAS anyone?
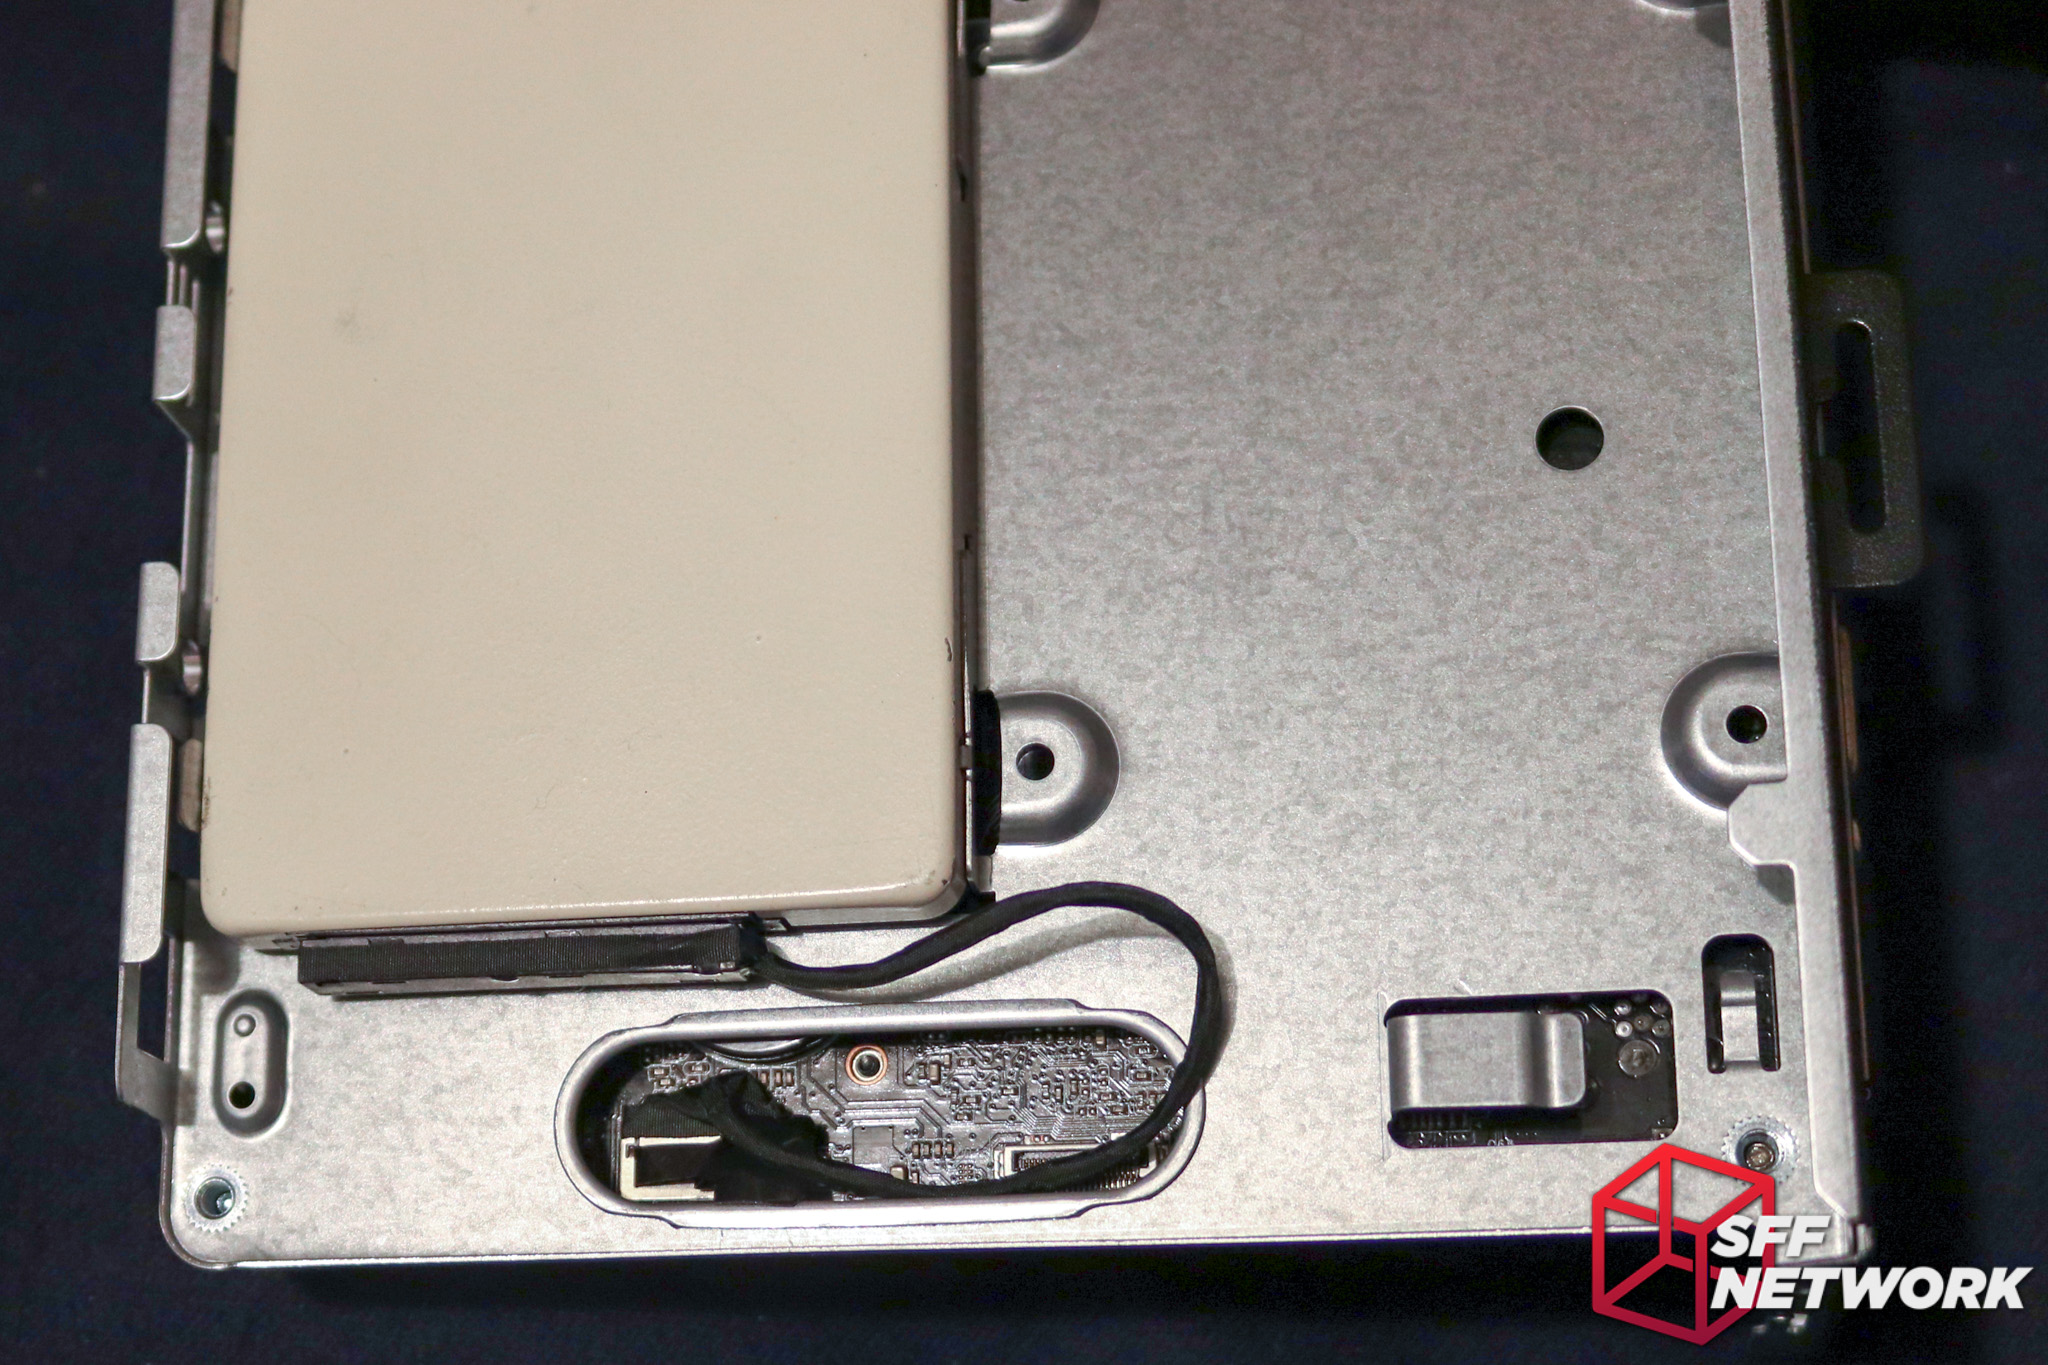
Adding the cable and we’re done. I still don’t like these micro connectors – getting a solid connection feels difficult without resorting to a plastic tool to push the plug down.
M.2 drive installed – the WiFi card is now hidden. The USB 2.0 cable is also installed, and boy is this cable a nightmare.
Ugh, I’m sure there’s a better way – the front panel and the USB cables both fought me getting this closed. The USB cable had a propensity to sit between the front panel and the motherboard tray – frustrating. Better cable management, or even better, a two part shell, would solve this.

All done.

That front panel cable, not pretty.
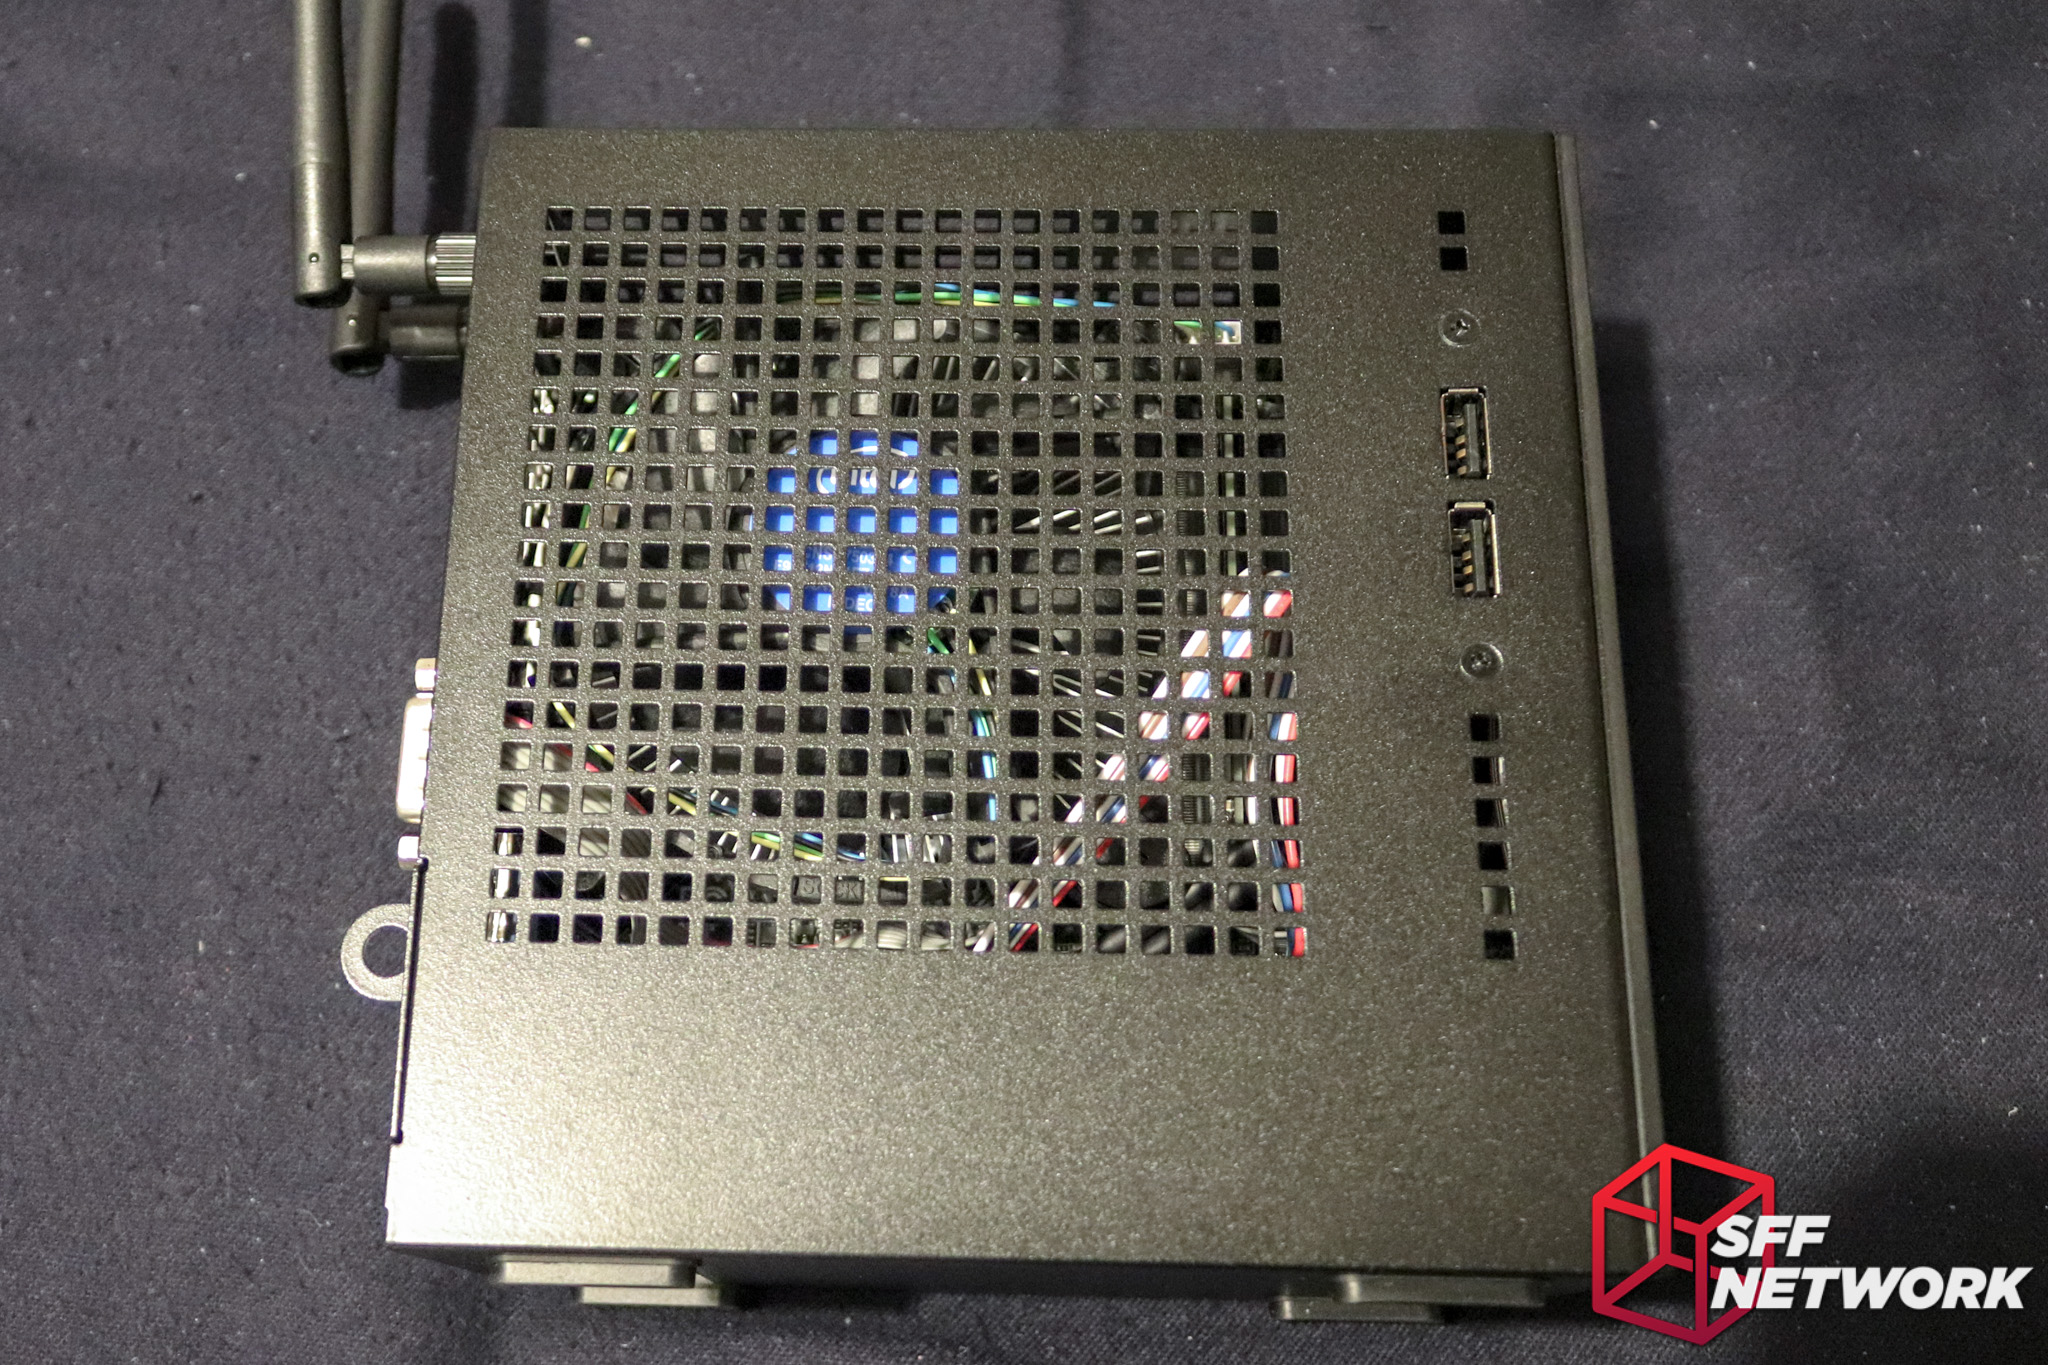
Looks professional from back here though!

VESA mount? Yup.
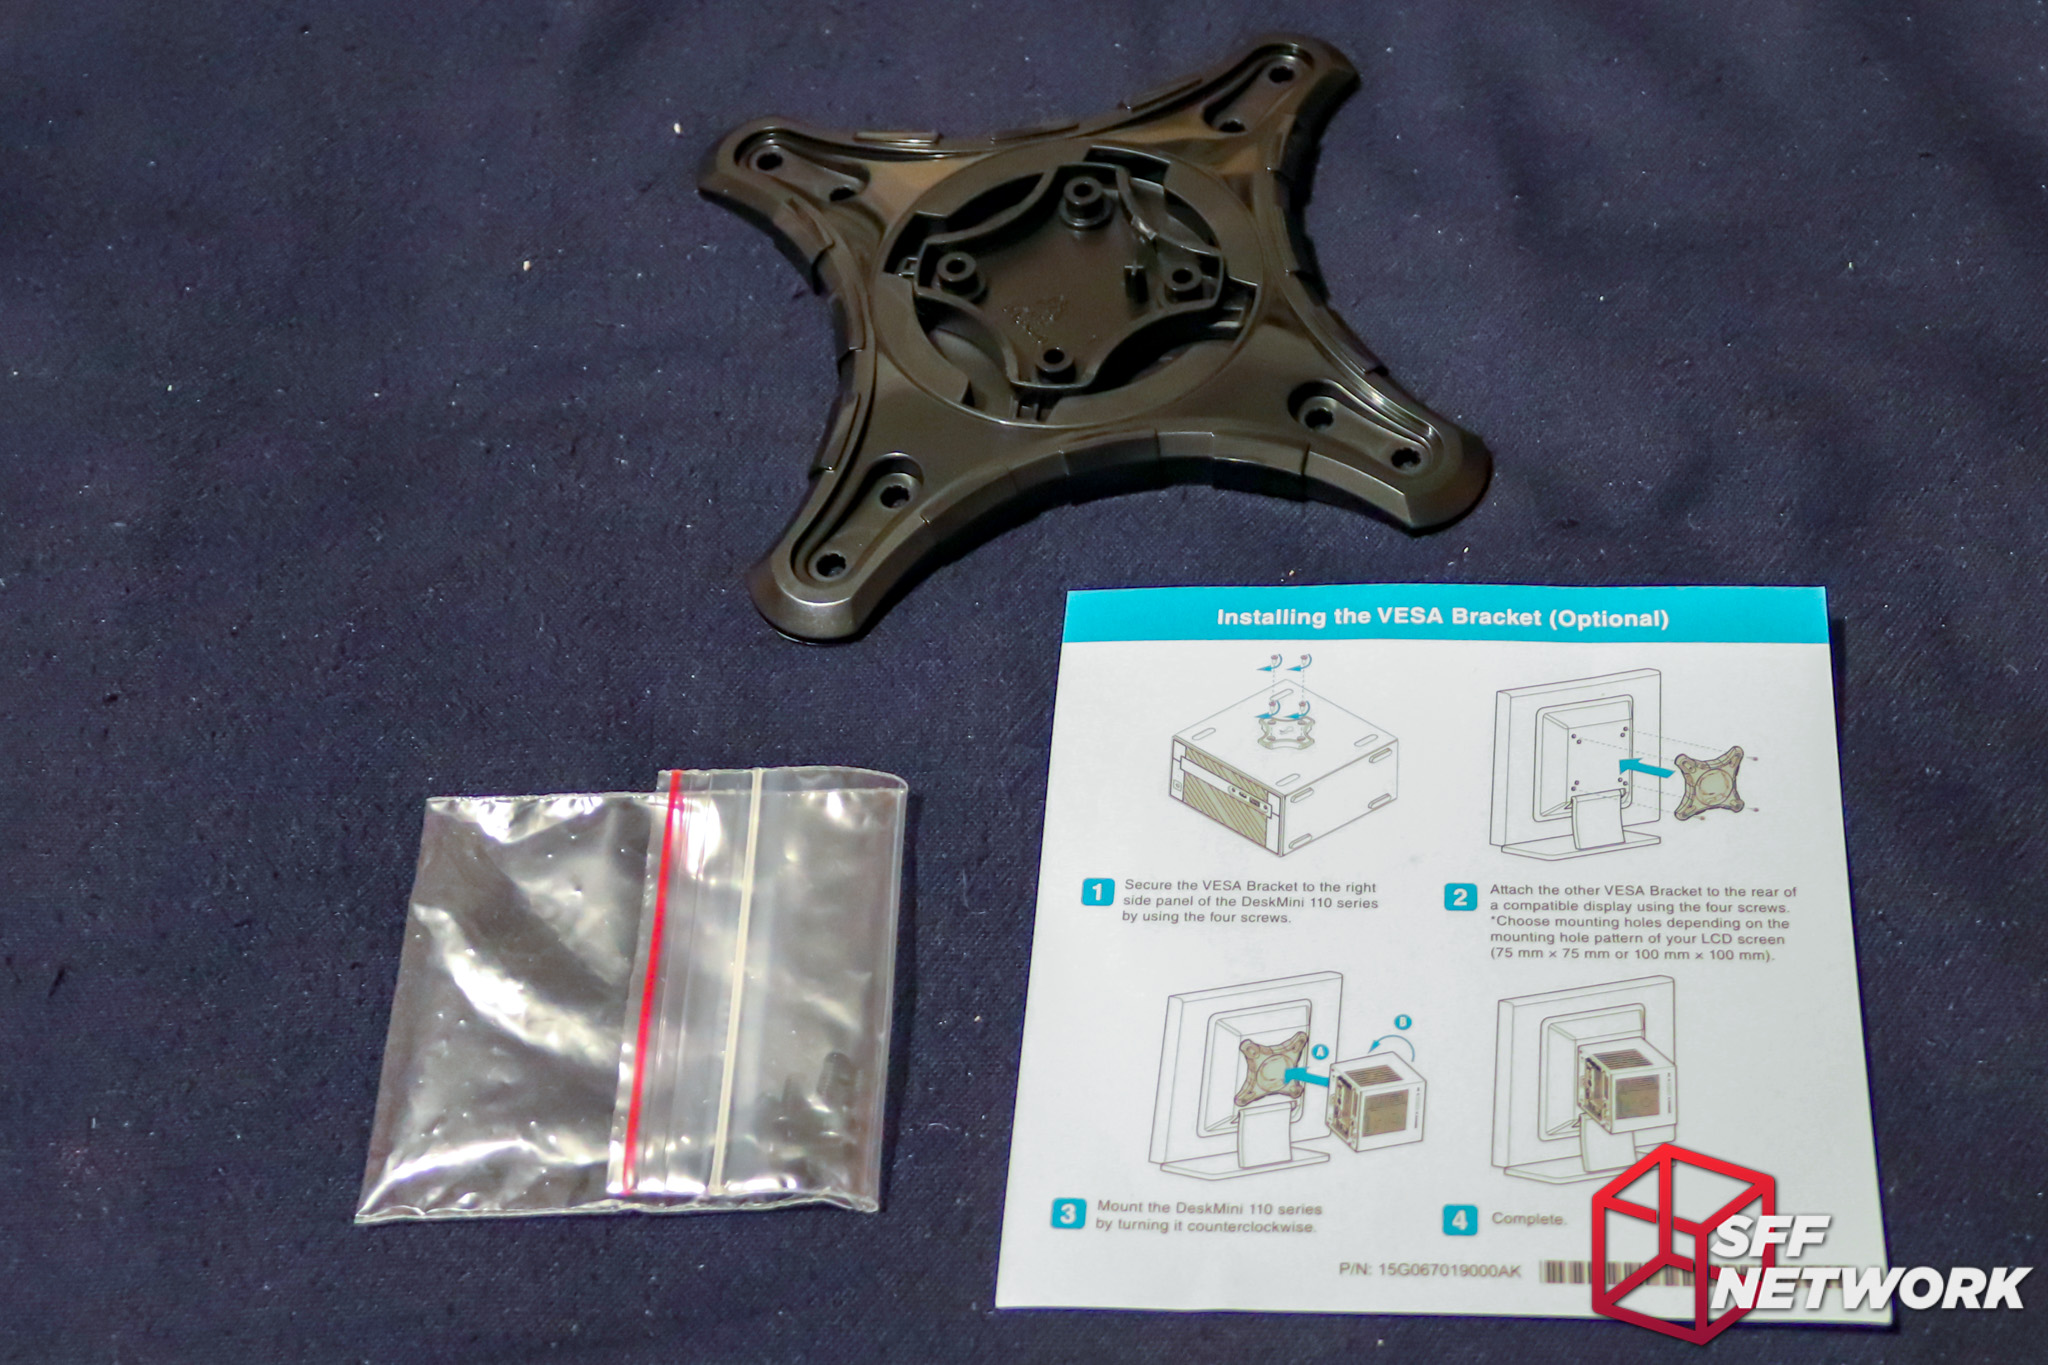
The VESA mount kit (optional extra) is a great idea to reduce the system footprint even further.
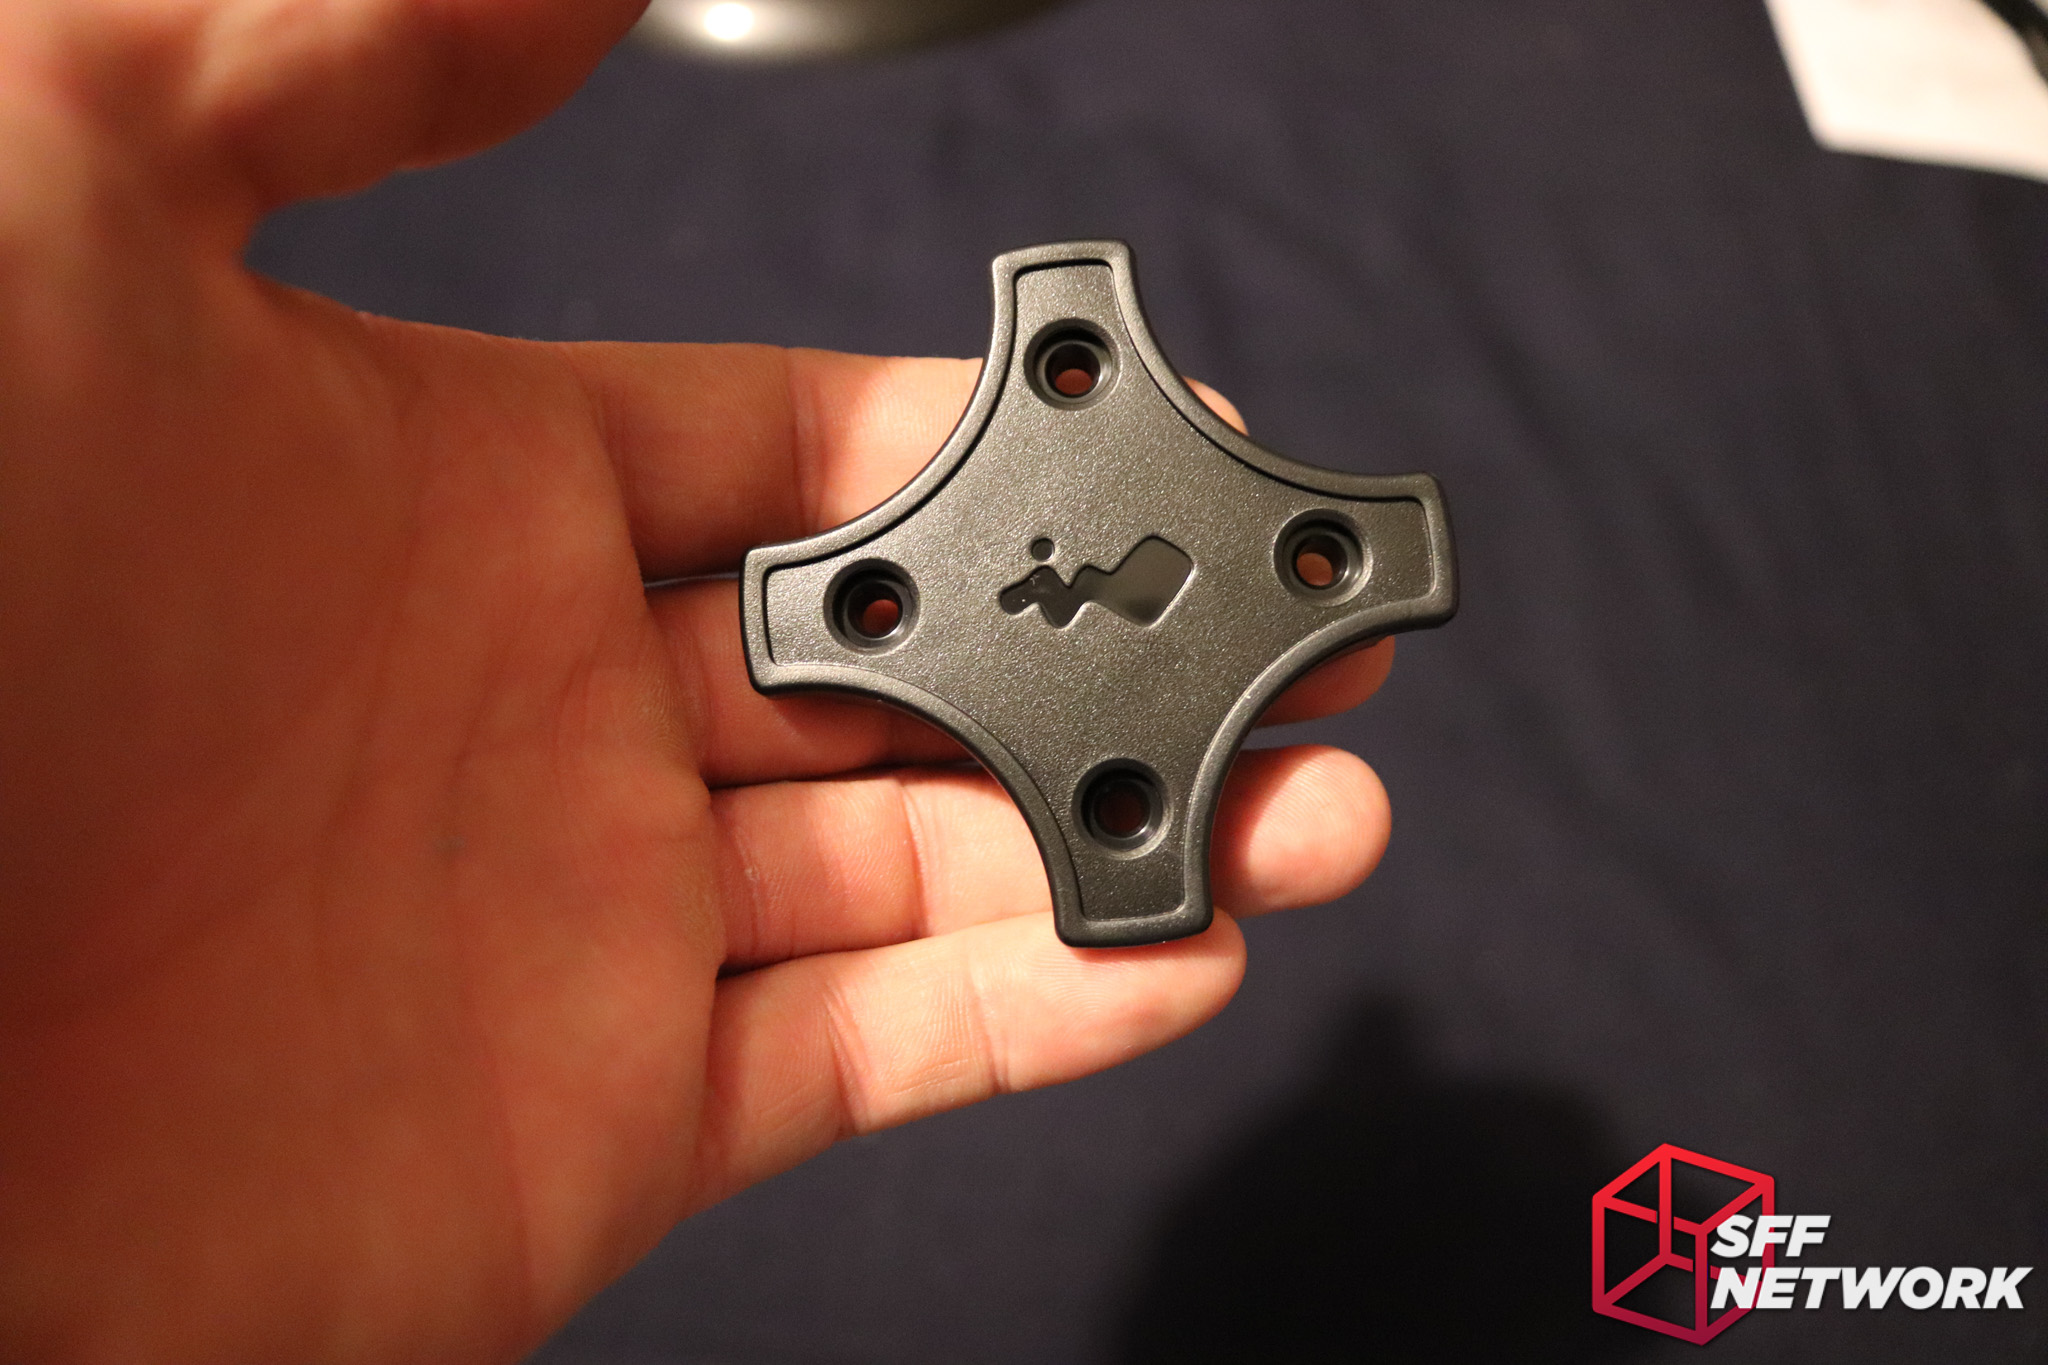
I wonder who makes this? (Hint: In-Win)
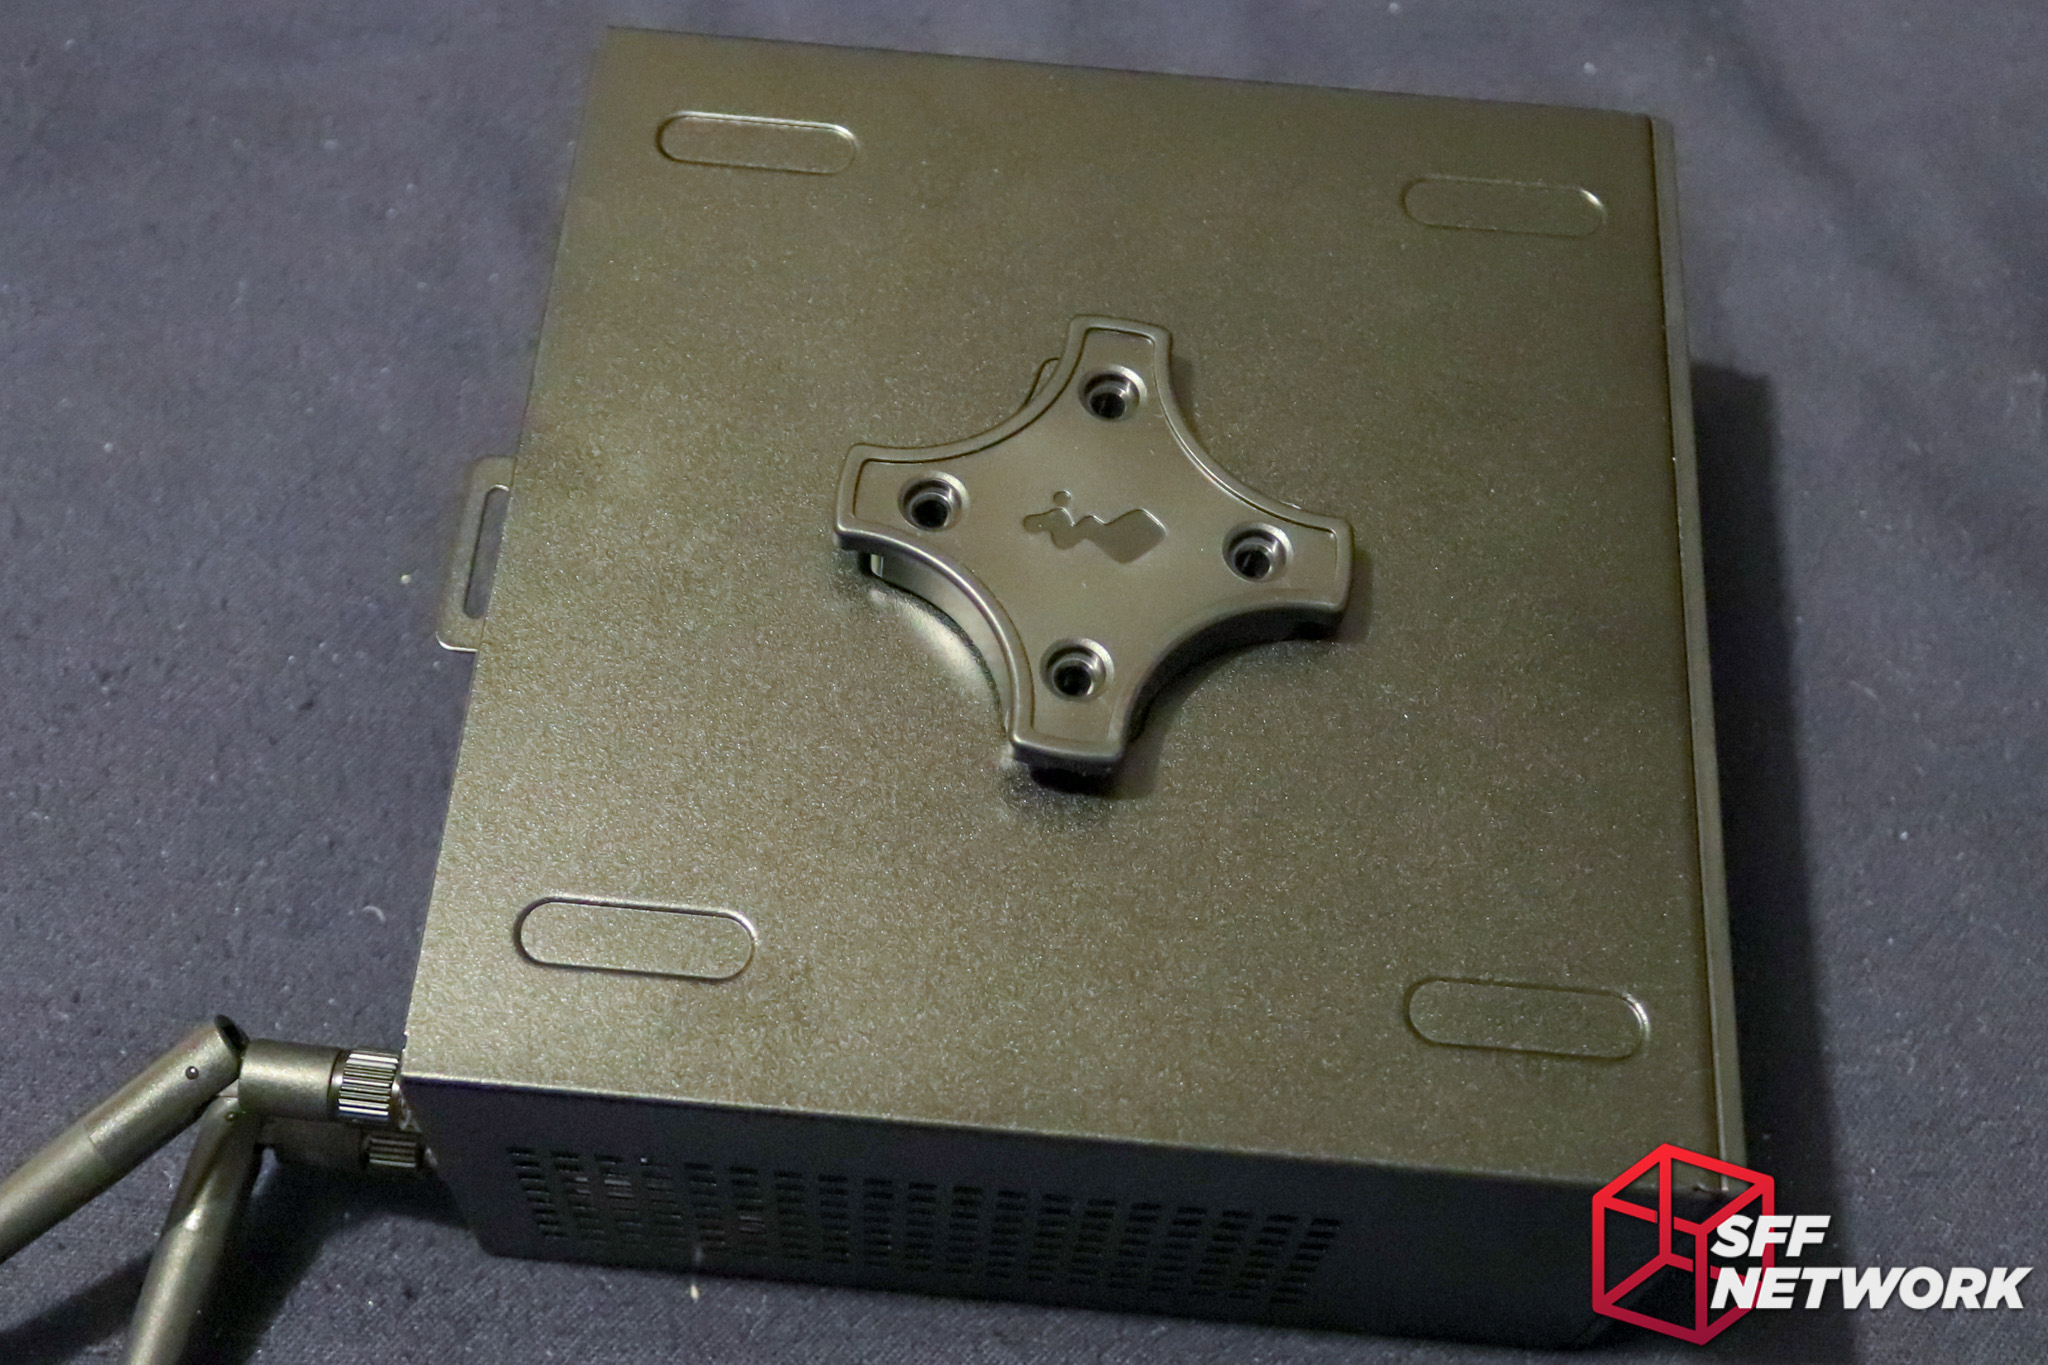
Here it goes!
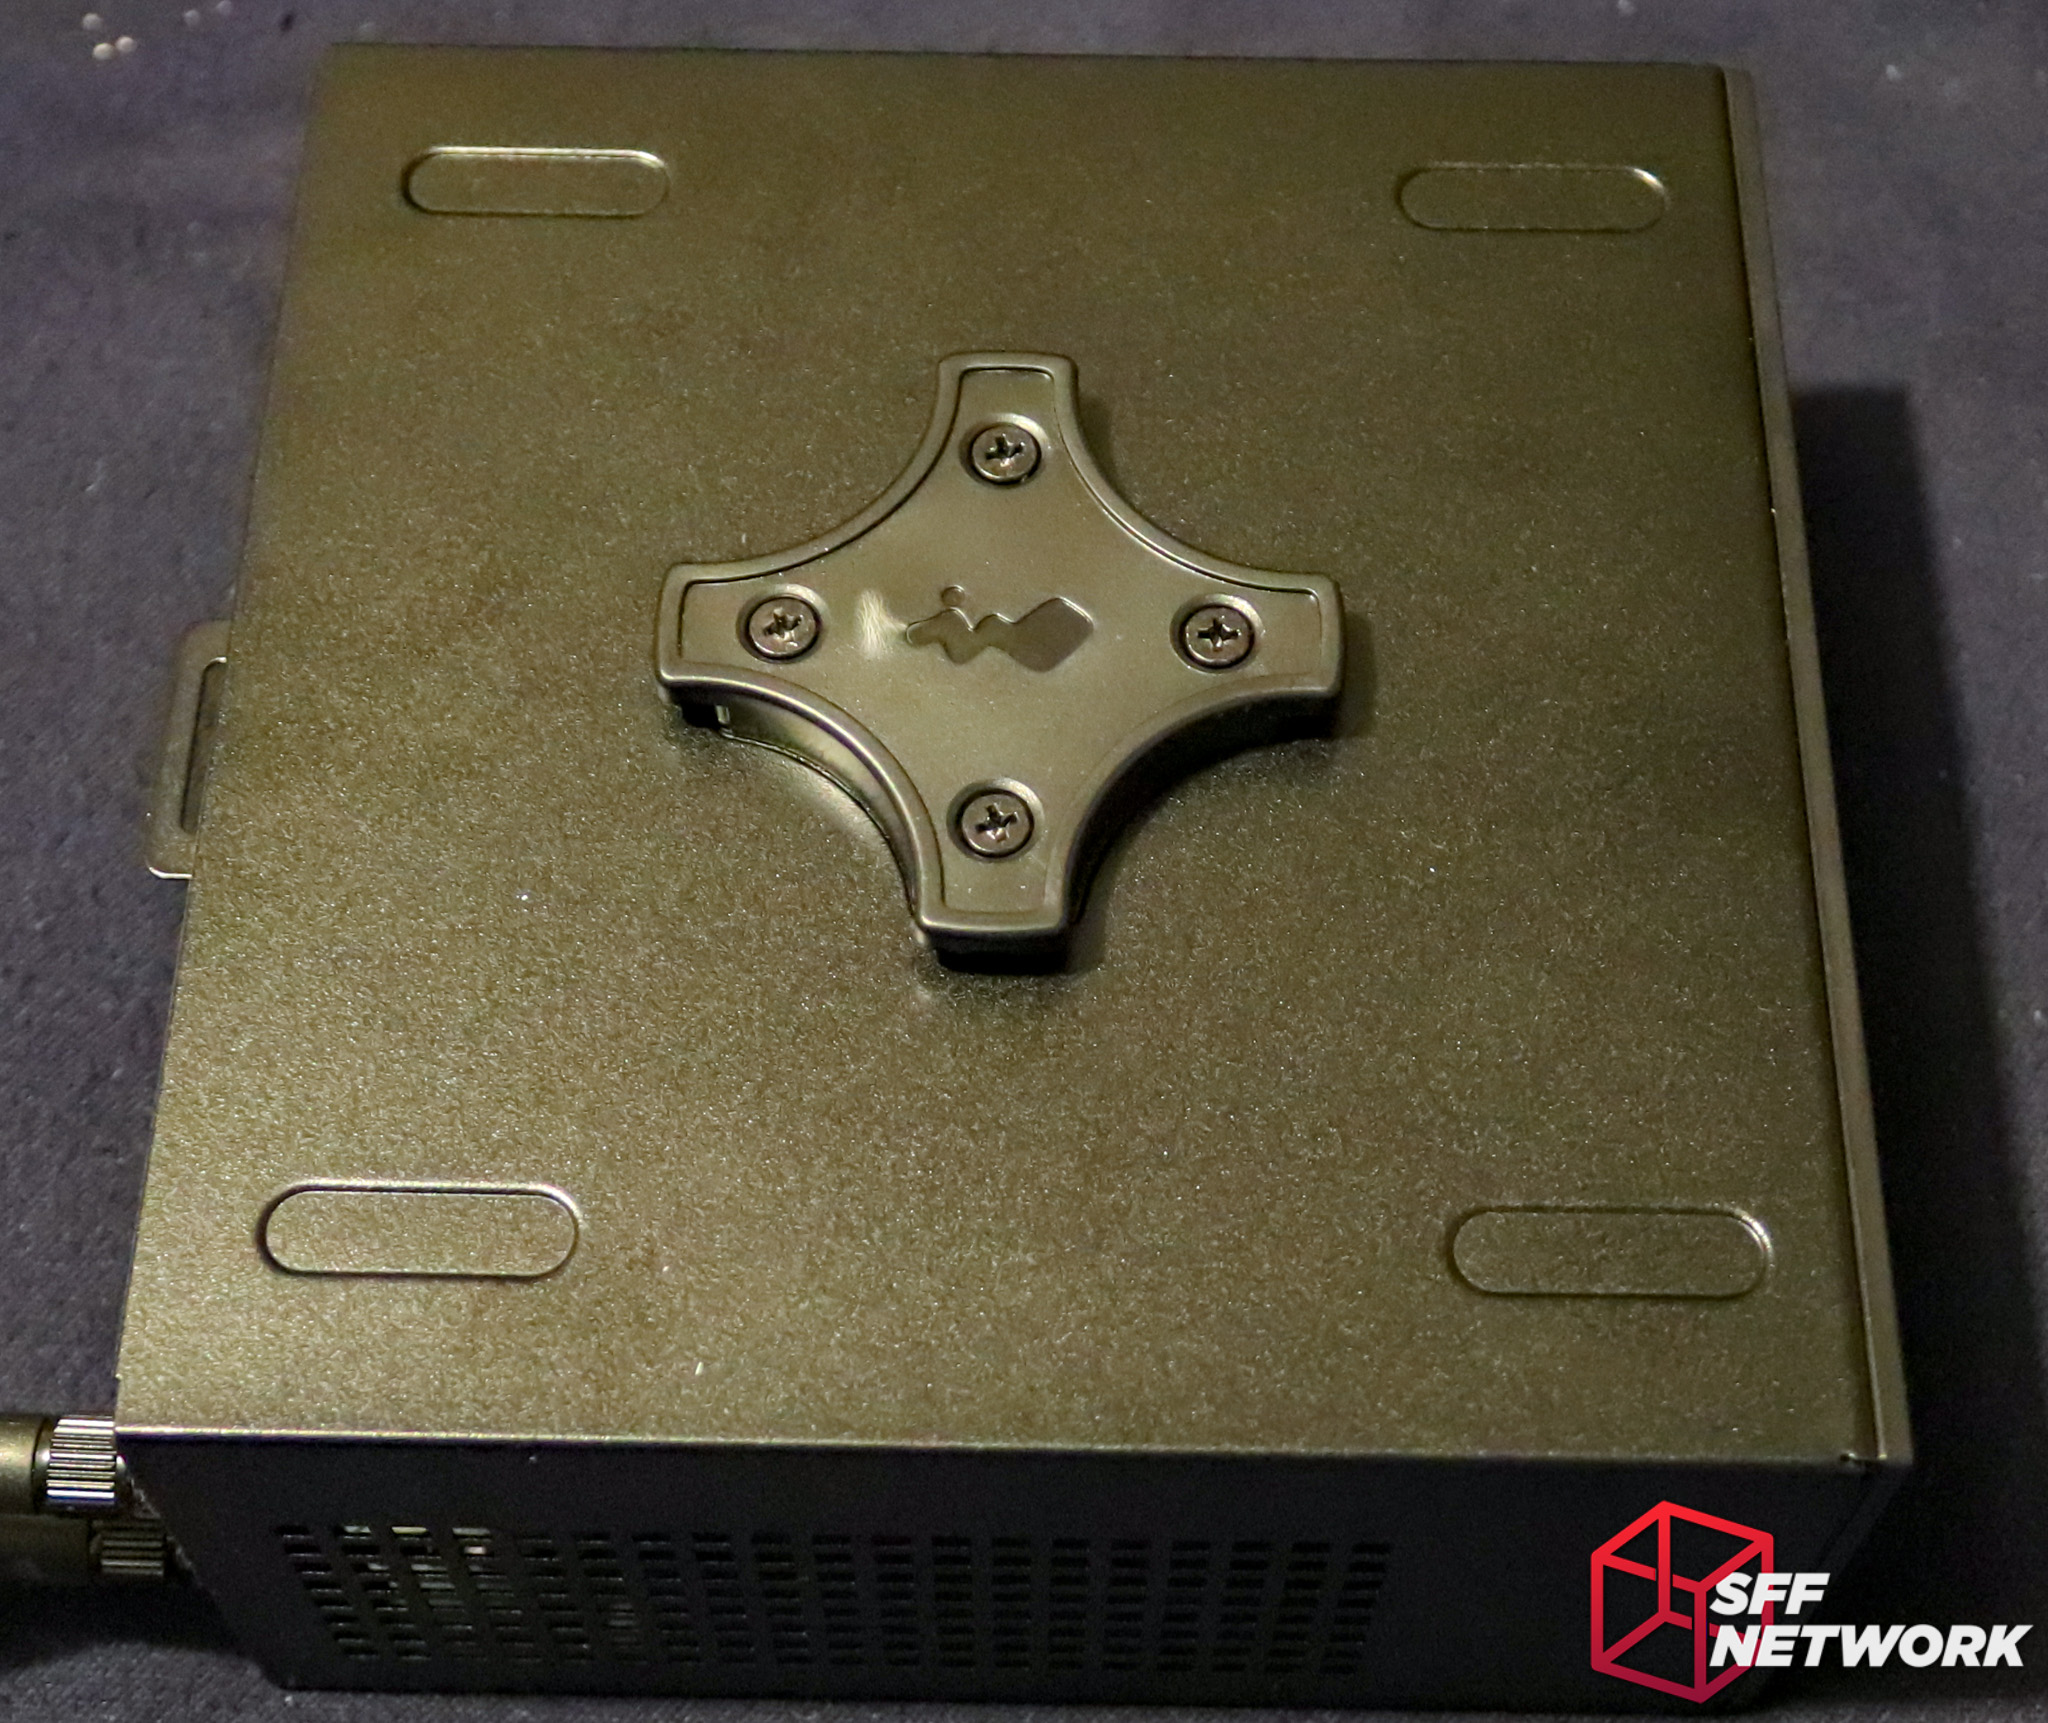
Ok, word to new users – there’s a locating peg underneath this bracket that slots into a hole in the case. Guess what I messed up?
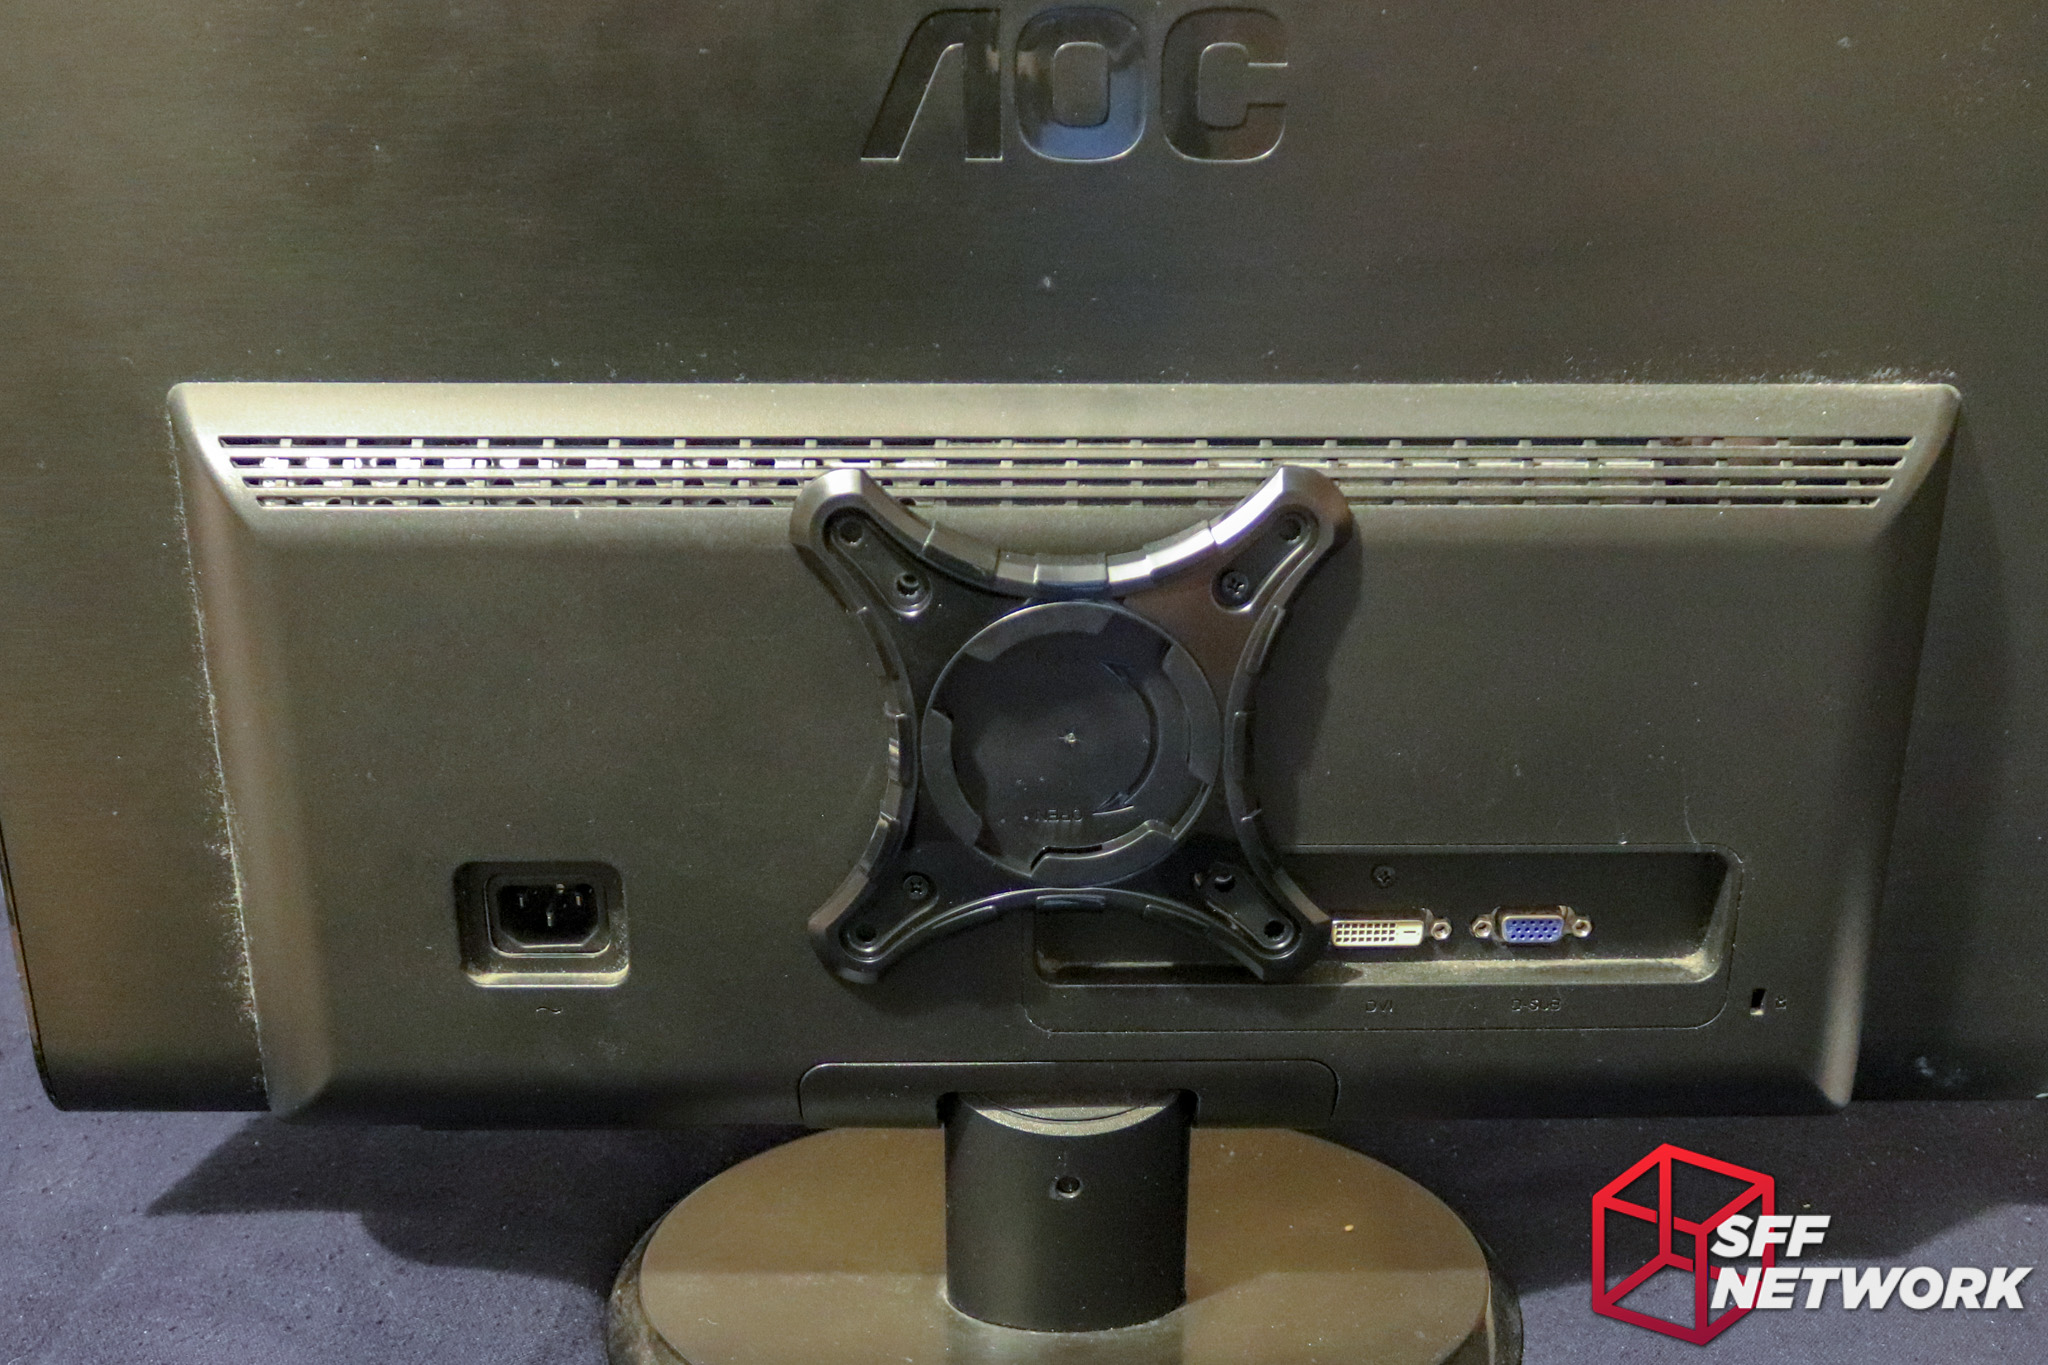
The bracket attacked to an AOC 23″ monitor. The bracket blocks the DVI port on this monitor. On smaller monitors (Eg; the LG 21″ units my children’s computers use), the bracket can block all the ports! Not the best design. All the monitors I have on site in the SFF Network NZ corporate towers (read: my home) use the closer together mounting holes – maybe a second, smaller, mounting kit would go a long way?
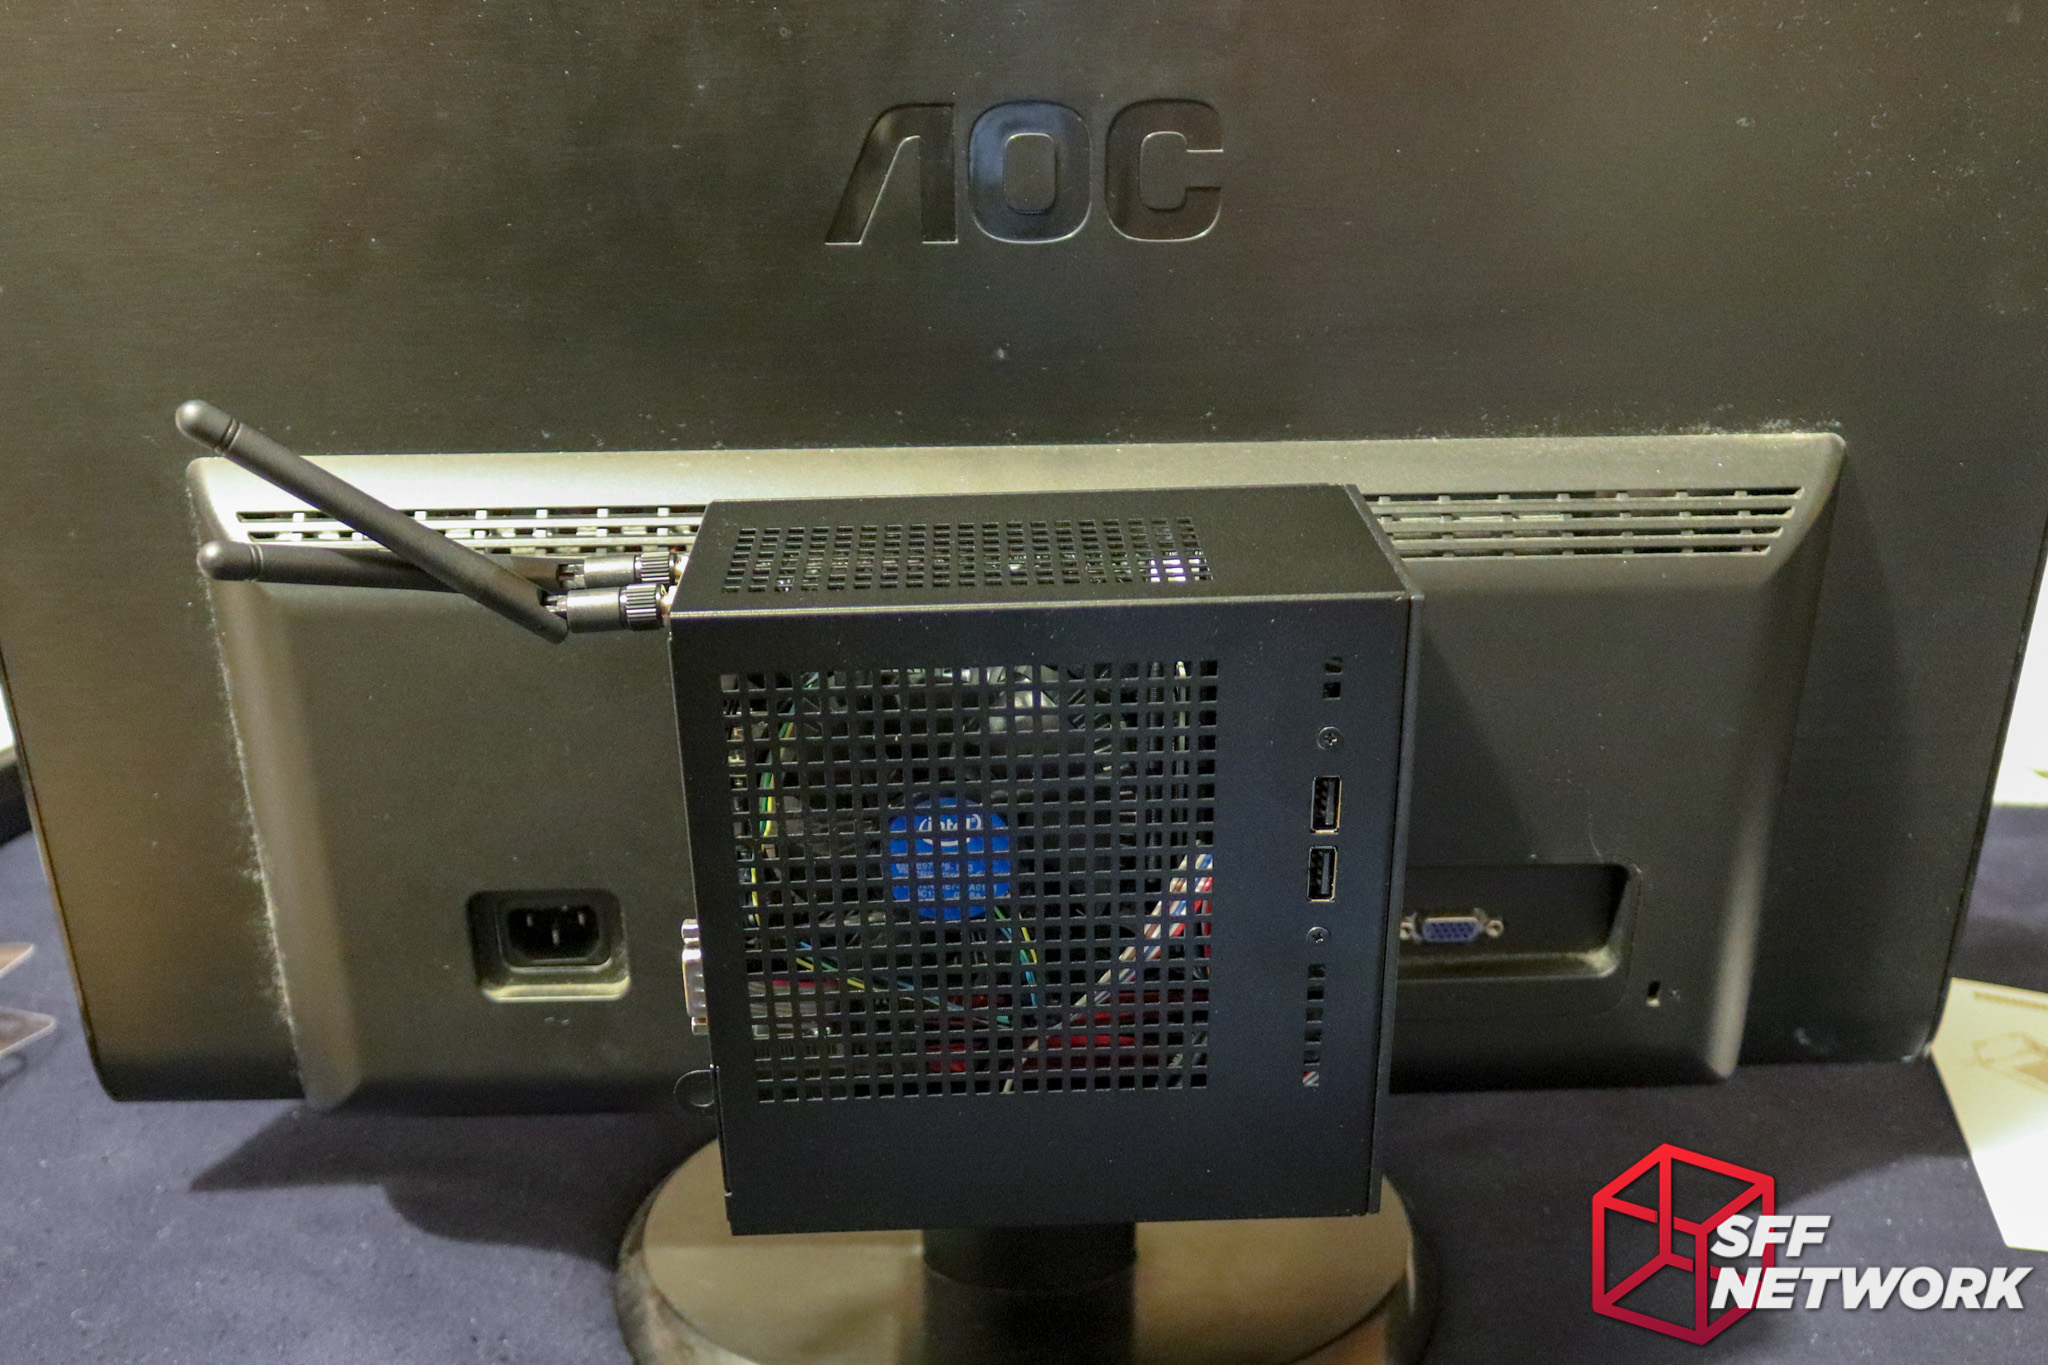
Mounted.
The Experience
Overall, after the difficulties of the build, I had no issues with the system. Windows installed quickly, and through the two weeks of the system running under various loads, the DeskMini 310 has been stable. The system has been powered on 24/7 for the whole time, barring a couple of restarts for driver installation, and I’ve had no issues with the performance in that time.
Cooling is as per expected with the Intel stock cooler on the Pentium G5400 I installed, with maximum temperatures of 65 with an ambient peaking around 20 degrees in our upstairs kids’ computer area. This may seem high, but note that I set the BIOS fan control to “quiet”!
DeskMini v NUC v M-ITX
The question on everyone’s tongues – how does the DeskMini compete versus existing options? I built up two ends of the spectrum to see how they setups fare – low and high end. Note that between the options, storage remains the same – M.2 SSDs are easy to use, good value for money and work on all platforms in this config challenge.
Prices from NewEgg.com at time of writing. Configurations were selected on generation and CPU parity, used hardware or older generation components may change results.
Low End
| DeskMini 310 | NUC | M-ITX | |
| Processor | Intel Celeron G4920 Dual Core (US$86) | Intel i3-7100U (Included) | Intel Celeron G4920 Dual Core (US$86) |
| Board | ASRock H310-STX (Included) | Included | ASRock H310M-ITX/ac (US$79) |
| RAM | Team Elite 4GB SODIMM DDR4 2400 US($35) | Team Elite 4GB SODIMM DDR4 2400 US($35) | Team Elite Plus 4GB DDR4 2133 (US$35) |
| Storage | WD Green 240GB M.2 SATA3 SSD (US$50) | WD Green 240GB M.2 SATA3 SSD (US$50) | WD Green 240GB M.2 SATA3 SSD (US$50) |
| Chassis | DeskMini 310 (US$150) | BLKNUC7i3DNH1E, (US$284) | Morex T3500 w/ 60w AC-DC (US$60) |
| Total Cost (USD) | 321 | 369 | 310 |
Wow, this was unexpected – all three options sit within a small margin in price, with the DeskMini sitting right between the other two! What we are looking at here is a great choice – multiple platforms, each with their pros and cons, able to compete with each other.
High End
| DeskMini 310 | NUC | M-ITX | |
| Processor | Core i3-8100 (US$120) | i7-8650U (Included) | Core i3-8100 (US$120) |
| Board | ASRock H310-STX (Included) | Included | ASRock H310M-ITX/ac (US$79) |
| RAM | G-Skill Ripjaws 2x8GB SODIMM DDR4 2400 (US$125) | G-Skill Ripjaws 2x8GB SODIMM DDR4 2400 (US$125) | G-Skill NT Series 2x8GB DDR4 2400 (US$129) |
| Storage | WD Green 240GB M.2 SATA3 SSD (US$50) | WD Green 240GB M.2 SATA3 SSD (US$50) | WD Green 240GB M.2 SATA3 SSD (US$50) |
| Chassis | DeskMini 310 (US$150) | BLKNUC7i7DNK1E (US$536) | Morex T3500 w/ 60w AC-DC (US$60) |
| Total Cost (USD) | 445 | 711 | 438 |
I maxed out the NUC processor, and picked the other CPU to match performance – we can’t get a full fat CPU in a NUC, alas. Interestingly, the NUC’s embedded i7-8650U is slightly slower than the desktop i3-8100, yet the total system price is significantly higher. It’s here where the DeskMini 310 continues to show it’s mettle, competing in the performance per dollar with the more flexible, but significantly larger, M-ITX platform.
Not happy with my selections here? Throw a comment in the discussion thread and show where you see the DeskMini 310 in the market – maybe it outperforms or underperforms on different metrics that more suit your use case!
The Conclusion
Overall, the ASRock DeskMini 310 offers great value for money for a small, low-mid powered system. The chassis is well provisioned (albeit challenging to work in) and relatively subtle in design.
How small do you want it? The DeskMini offers excellent performance per dollar per litre. With up to the venerable i7-8700 processor, the system can be specc’d up to perform most non graphically demanding workstation loads.
The major gripe I have with the DeskMini 310, and the STX family, is the lack of IO. In my role with SFF Network, I usually have at least 4 USB devices connected at once, with as many as 6 as each task demands. With only two available on the rear of the DeskMini 310, this would lead to a cable nightmare.
Add to this, the lack of audio jacks on the rear – meaning that those desiring to use speakers must either use the front panel jack (messy), audio over HDMI or DisplayPort (adding latency and interference opportunities), or a USB DAC (thus using another of the very limited USB ports).
If you are looking for a true “NUC Killer”, this may be a great choice – even the DeskMini 310 offers more IO than a budget NUC! If you need the IO, M-ITX is where it’s at, alas.
Overall, I give the ASRock DeskMini 310 a recommendation, if it suits your use case. It’s a great product, but has limitations.
- Upgradable
- Good value for money
- Small!
Cons
- Cable management
- Installing the USB 2 cable is a nightmare
- Plastic front panel
Niggles
- Still a limited level of IO on the STX platform
Thoughts? Discuss them in the forum.
This review sample was provided by ASRock.
Here at SmallFormFactor.net we give manufacturers the ability to be part of the community. We offer a right to reply to our hardware reviews. If a manufacturer responds with any feedback or corrections, their comments will be posted here.