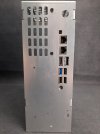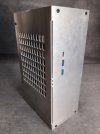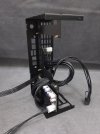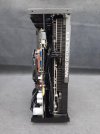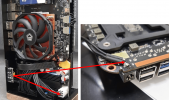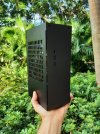
Log RCC Pocket Rocket No.2 - Ryzen 9 & RTX 4070 <4L build

REVOCCASES

Shrink Ray Wielder
Original poster
REVOCCASES
Silver Supporter
Apr 2, 2020
2,059
3,338
www.revoccases.com
20230720_174403.jpg

---------- OP ---------

this is a project I've been working on during my latest COVID infection (yeah, it's still a thing theses day...). the idea was building something small with a decent PPL score but not compromising on noise and thermals... It's still WIP but I feel confident enough that it will work out, so I'll share the progress here with you ;)

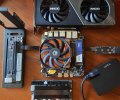
first of all, a short introduction of the parts used for this project...
Unbenannt.JPG

1) as for the GPU I chose the inno3D RTX 4070 Twin X2 which is one of the smallest I could find at 250mm length / 2-Slots and with 3080isch performance

2) the Ryzen 9 7940HS and motherboard comes from a MOREFINE/TOPTON M600 mini PC. It more or less shares the dimensions of the Deskmini STX boards but IMHO has better connectivity, e.g. including Thunderbolt.

3) unfortunately the M600 board does not run with 12VDC so I have to use a 0.25L small 19.5V 330W GaN PSU from SAVAGO. To get the GPU up and running, I ordered the new X9-ATX-320 from PICO-BOX.

4) for the PCIe riser, I was first planning to use something from ADT-LINK but then decided to use JHH-Link's Gen4 M.2 to PCIe16 "eGPU" adapter instead. It's relatively small and reliably switches the GPU and PSU on&off together with the M600 board.

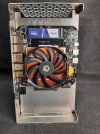
5) the M600 usually comes with a blower fan cooler, but it has also mounting holes for normal Socket 1200 coolers - perfect for an old Dynatron Vaporchamber cooler & ID-Cooling slim fan which I still had on hand from a previous build

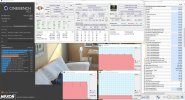
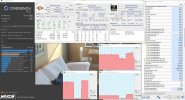
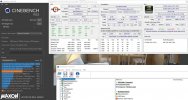
some initial benchmark results:
Anmerkung 2023-07-10 082639.jpg

Anmerkung 2023-07-10 083224.jpg

stay tuned for the build log... :)
 
Last edited:

msystems

King of Cable Management
Apr 28, 2017
786
1,373
Simply excellent... i'm not sure there is anything that could be improved. Is it able to achieve Gen 4.0 link reliably? The performance in timespy appears to be within the margin of error of Desktop performance and that is what would be expected on Gen 4.0 x4 link. Is the pico box psu performing well? It certainly appears to be higher quality than their older stuff.

On paper the m600 is the ultimate mini pc from it's feature set. I looked at putting an IS-30 onto the m600 but that would have needed custom brackets, so your solution of using the dynatron is of course so much simpler, and also I believe its even better as the Dynatron has a fairly thick shim at the base, elevating it above any little things nearby on the board. Great solution! I have to warn you to be careful in that bios though... its completely undocumented & appears a bit of non functioning developer settings were left in there. Should there be a problem the support from the company is non-existent.
 
  • Like
Reactions: BaK and REVOCCASES

REVOCCASES

Shrink Ray Wielder
Original poster
REVOCCASES
Silver Supporter
Apr 2, 2020
2,059
3,338
www.revoccases.com
Simply excellent... i'm not sure there is anything that could be improved. Is it able to achieve Gen 4.0 link reliably? The performance in timespy appears to be within the margin of error of Desktop performance and that is what would be expected on Gen 4.0 x4 link. Is the pico box psu performing well? It certainly appears to be higher quality than their older stuff.

Glad you like it... yes, the JHH-Link Adapter works reliably with Gen4 and the performance loss compared to 16x is negligible IMHO. Indeed, PICO-BOX has much improved and released some interesting new products for DIY projects. Their old X9 DC-ATX had coil whine issues and was running quite hot, but this new one is working great so far.

On paper the m600 is the ultimate mini pc from it's feature set. I looked at putting an IS-30 onto the m600 but that would have needed custom brackets, so your solution of using the dynatron is of course so much simpler, and also I believe its even better as the Dynatron has a fairly thick shim at the base, elevating it above any little things nearby on the board. Great solution! I have to warn you to be careful in that bios though... its completely undocumented & appears a bit of non functioning developer settings were left in there. Should there be a problem the support from the company is non-existent.

First I also tried fitting my IS30 but, like you said, it would collide with some components. Using the Dynatron with the IS30 fan and backplate is a perfect match, plus it's even 3mm slimmer now. Thanks for the heads-up... since it's running pretty well out-of-the-box, I probably won't change any BIOS settings apart from power level and fan speed
 

lordee

Efficiency Noob
Apr 15, 2019
7
2
This is exactly what I was planning to build (although I was considering going even smaller/quieter with a 4060). Excited to see the end result.
 
  • Like
Reactions: REVOCCASES

REVOCCASES

Shrink Ray Wielder
Original poster
REVOCCASES
Silver Supporter
Apr 2, 2020
2,059
3,338
www.revoccases.com
ok... time for the actual build log!

first step: fixing the DC-ATX PSU and the M.2 GPU riser... unfortunately this took longer then I thought because the drawings I got from PICO-BOX and JHH-LINK didn't match with the actual PCBs - but good luck I could fix this with a Dremel...

20230718_121101 (Groß).jpg

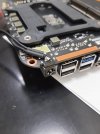
next, I soldered two wires for internal DC input to the M600 board...

20230718_112613 (Groß).jpg

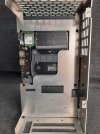
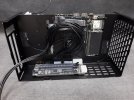
then mounted it in the case and connecting all the cables...

20230718_132429 (Groß).jpg

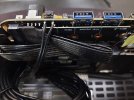
connecting the power button...

20230718_133800 (Groß).jpg

and adding two Silverstone 5010 fans to help exhausting some hot air...

20230718_150708 (Groß).jpg

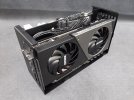
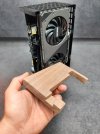
finally, time for the RTX 4070...

20230718_152809 (Groß).jpg

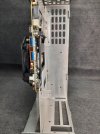
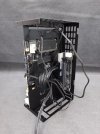
the space between GPU and motherboard is perfect to hide all the cable mess (plus, I could also fit an 2.5" drive there) and I'm really glad that I didn't design the case any smaller...

20230718_152834 (Groß).jpg

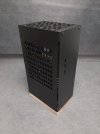
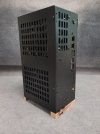
last but not least, I still made a foot/stand out of walnut wood

20230718_153838 (Groß).jpg

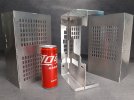
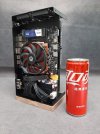
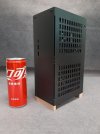
still need to take some proper pictures with "banana for scale" but the coke should do for now...

20230718_153625 (Groß).jpg

20230718_160422 (Groß).jpg
 

REVOCCASES

Shrink Ray Wielder
Original poster
REVOCCASES
Silver Supporter
Apr 2, 2020
2,059
3,338
www.revoccases.com
is this also applicable to deskmini boards? Thanks.

Yes it is. There are a couple of similar builds here on the forum, using the Deskmini A300 / X300

For example:


haribo95

Efficiency Noob
Jun 13, 2023
5
1
Would using a shorter Zotac 4070 card enable you to use bigger fans instead of the Silverstones?
Also, will this case be for sale, or will plans be available?
Tnx.
 

REVOCCASES

Shrink Ray Wielder
Original poster
REVOCCASES
Silver Supporter
Apr 2, 2020
2,059
3,338
www.revoccases.com
Would using a shorter Zotac 4070 card enable you to use bigger fans instead of the Silverstones?
Also, will this case be for sale, or will plans be available?
Tnx.

I could fit a slim 92mm fan with a shorter GPU...

No plans to sell, this was just a personal project for myself. ;-)
 

kyokyo

Minimal Tinkerer
New User
Aug 9, 2023
4
1
I have a few questions. Where is the soldered cable connected to the dc input of the motherboard? And do I need two of savago gan dc psu to run this build?
 

REVOCCASES

Shrink Ray Wielder
Original poster
REVOCCASES
Silver Supporter
Apr 2, 2020
2,059
3,338
www.revoccases.com
I have a few questions. Where is the soldered cable connected to the dc input of the motherboard? And do I need two of savago gan dc psu to run this build?

The DC input of the build is connected to the Pico-Box DC-ATX (for GPU power) and to the motherboard as shown below:

1693207588826.png

You only need one 330W Savago or SlimQ 19V adapter to run the complete setup.
 

kyokyo

Minimal Tinkerer
New User
Aug 9, 2023
4
1
The DC input of the build is connected to the Pico-Box DC-ATX (for GPU power) and to the motherboard as shown below:

View attachment 2690

You only need one 330W Savago or SlimQ 19V adapter to run the complete setup.
Thank you so much for your answer. If possible, I would like to see how the opposite side of the cable connected to the motherboard, that is, the dc input connector attached to the case, is soldered.
 

REVOCCASES

Shrink Ray Wielder
Original poster
REVOCCASES
Silver Supporter
Apr 2, 2020
2,059
3,338
www.revoccases.com
Thank you so much for your answer. If possible, I would like to see how the opposite side of the cable connected to the motherboard, that is, the dc input connector attached to the case, is soldered.

The small PCB with the DC input connector is included when you buy the Pico-Box unit. You just need to solder two additional cables that will go to the M600 motherboard DC-input.
 

kyokyo

Minimal Tinkerer
New User
Aug 9, 2023
4
1
The small PCB with the DC input connector is included when you buy the Pico-Box unit. You just need to solder two additional cables that will go to the M600 motherboard DC-input.
Oh, I see, thank you. It'll really help me with the build I'll be making soon. Seems a bit late to say but your build is awesome anyway.
 
  • Like
Reactions: REVOCCASES