Production Aquanaut Basic/Extreme - Ultra Low Profile CPU Block & Pump Mount Combo

thoughtfix

Cable-Tie Ninja
Jun 18, 2019
148
212
Yay! I got my tracking number already.

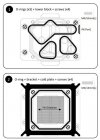
I couldn’t find a manual on the site and couldn’t make it out from the pictures. Can you clarify which ports are inlet and which are outlet?
 

Nouvolo

Creator
Original poster
Sep 8, 2018
760
1,713
www.nouvolo.com
Yay! I got my tracking number already.

I couldn’t find a manual on the site and couldn’t make it out from the pictures. Can you clarify which ports are inlet and which are outlet?
Aquanaut support section, with manual download link :

IN port has a "mark" on the block
aqx-manual.jpg
 

TMNT

What's an ITX?
New User
Oct 8, 2021
1
9
My aquanaut smiles just like the what Flar posted.


Brandon86

Trash Compacter
Feb 15, 2017
37
48
Got mine! Finished installing it into my Meshlicious PC case. I went with the Black POM and Copper Version.

Pretty easily assembled, no leaks, tooling looked fine. O-rings take a little patience, but not too bad. Been running for about 3 days. I installed it with a 45mm thick 280mm Alphacool Nexxos V.2 radiator, and lines to and from Aquanaut extreme(no reservoir) with an Alphacool Laing DDC pump. It's currently cooling an 11600K to 36C at idle. Average computer use around 44C and gaming to around 53C. Gaming was mostly Cyberpunk, CSGO, BioMutant, Rocket League, and Valorant with an AMD 6900 XT.
This setup is with pushing the air out the front of the case from inside, not fresh air in through the radiator from outside. So when gaming, my temps will be higher for the CPU, but this is to promote bringing cool air into the case for the GPU. I am using Thermaltake Tough 140mm fans, and I have them capped to not go above 50% speed until after 50deg. Then 60% until after 60deg. Nice quiet gaming experience this way. Cooler temps may be possible, but I prefer quiet.

Overall the product is much nicer than the original aquanaut which I used for a long time. However I cannot do a temp comparison, because the older one I had on a 5900X and the old version didn't come with mounting brackets for both sockets. When assembled, it actually looks like this one without accounting for fitting and DDC is 1mm shorter in height than the old version when placed flat on a table. I didn't take photos sorry, I was too excited to finally get the Noctua L9A cooler off and put this thing on. It's been awaiting this product for a while.
 

Nouvolo

Creator
Original poster
Sep 8, 2018
760
1,713
www.nouvolo.com
Got mine! Finished installing it into my Meshlicious PC case. I went with the Black POM and Copper Version.

Pretty easily assembled, no leaks, tooling looked fine. O-rings take a little patience, but not too bad. Been running for about 3 days. I installed it with a 45mm thick 280mm Alphacool Nexxos V.2 radiator, and lines to and from Aquanaut extreme(no reservoir) with an Alphacool Laing DDC pump. It's currently cooling an 11600K to 36C at idle. Average computer use around 44C and gaming to around 53C. Gaming was mostly Cyberpunk, CSGO, BioMutant, Rocket League, and Valorant with an AMD 6900 XT.
This setup is with pushing the air out the front of the case from inside, not fresh air in through the radiator from outside. So when gaming, my temps will be higher for the CPU, but this is to promote bringing cool air into the case for the GPU. I am using Thermaltake Tough 140mm fans, and I have them capped to not go above 50% speed until after 50deg. Then 60% until after 60deg. Nice quiet gaming experience this way. Cooler temps may be possible, but I prefer quiet.

Overall the product is much nicer than the original aquanaut which I used for a long time. However I cannot do a temp comparison, because the older one I had on a 5900X and the old version didn't come with mounting brackets for both sockets. When assembled, it actually looks like this one without accounting for fitting and DDC is 1mm shorter in height than the old version when placed flat on a table. I didn't take photos sorry, I was too excited to finally get the Noctua L9A cooler off and put this thing on. It's been awaiting this product for a while.
Lets have some photos! Be the first to get on to HoF build 😁
 

Nouvolo

Creator
Original poster
Sep 8, 2018
760
1,713
www.nouvolo.com
Please post some user reviews on Aquanaut product page (below), and share your thoughts

 
  • Like
Reactions: DrHudacris

Valantar

Shrink Ray Wielder
Jan 20, 2018
2,201
2,225
Got mine! Finished installing it into my Meshlicious PC case. I went with the Black POM and Copper Version.

Pretty easily assembled, no leaks, tooling looked fine. O-rings take a little patience, but not too bad. Been running for about 3 days. I installed it with a 45mm thick 280mm Alphacool Nexxos V.2 radiator, and lines to and from Aquanaut extreme(no reservoir) with an Alphacool Laing DDC pump. It's currently cooling an 11600K to 36C at idle. Average computer use around 44C and gaming to around 53C. Gaming was mostly Cyberpunk, CSGO, BioMutant, Rocket League, and Valorant with an AMD 6900 XT.
This setup is with pushing the air out the front of the case from inside, not fresh air in through the radiator from outside. So when gaming, my temps will be higher for the CPU, but this is to promote bringing cool air into the case for the GPU. I am using Thermaltake Tough 140mm fans, and I have them capped to not go above 50% speed until after 50deg. Then 60% until after 60deg. Nice quiet gaming experience this way. Cooler temps may be possible, but I prefer quiet.

Overall the product is much nicer than the original aquanaut which I used for a long time. However I cannot do a temp comparison, because the older one I had on a 5900X and the old version didn't come with mounting brackets for both sockets. When assembled, it actually looks like this one without accounting for fitting and DDC is 1mm shorter in height than the old version when placed flat on a table. I didn't take photos sorry, I was too excited to finally get the Noctua L9A cooler off and put this thing on. It's been awaiting this product for a while.
Thanks for sharing! Just to be clear, your GPU is air cooled? And how are you fitting a 45mm rad + 25mm fans in your Meshlicious? There is at best a few mm of clearance with my 28mm Arctic P14s + 30mm Corsair XR5 (both of which are actually slightly modded for fitment). Do you have the front panel off with fans on the outside or something like that?
 

Brandon86

Trash Compacter
Feb 15, 2017
37
48
Thanks for sharing! Just to be clear, your GPU is air cooled? And how are you fitting a 45mm rad + 25mm fans in your Meshlicious? There is at best a few mm of clearance with my 28mm Arctic P14s + 30mm Corsair XR5 (both of which are actually slightly modded for fitment). Do you have the front panel off with fans on the outside or something like that?

It is air-cooled. I don't want to watercool until I can get my hands on a FE edition of the 3080 or 3090 and use the limited edition EK waterblock that's really short.

It isn't plug and play, but if you use the ThermalTake Toughfan 140s, you can shave the edges off to the first notch on three sides. This allows them to fit in the recess/airgap that is usually left over between the radiator fins and the actual mounting tabs. That allows you to take 7mm off the total depth of the 70mm with the 45mm rad/25mm fans. Next you have to remove the interior motherboard 'tray/spine' place the radiator and fans mounted in, then reinstall the motherboard tray. There's not enough clearance to slide it in with the spine in place. My setup takes up exactly the 63mm clearance that is available. A little modding and you can make anything work! After all this is SmallFormFactor.net hahahaha

Most unfortunately, I'm not at home, near that computer for another day or two, but I'll take pics when I can and get them uploaded for a visual reference.

I kind of want to wait until I fully complete the build though. I notched out the top of the spine to allow a slim Noctua 120mm fan across top and I'm mounting one over the motherboard with some 3d printed brackets as well. Then plan to place 2 60mm fans in the back with a 3d printed bracket where the horizontal video card brackets would be. All 4 fans will be intake to pull in cold air for video card, and cold air across the motherboard for lower m.2/ram temps. I'm waiting on brackets and the fans still. but I'll post progress pics in the meantime if desired.
 
Last edited:

Valantar

Shrink Ray Wielder
Jan 20, 2018
2,201
2,225
It is air-cooled. I don't want to watercool until I can get my hands on a FE edition of the 3080 or 3090 and use the limited edition EK waterblock that's really short.

It isn't plug and play, but if you use the ThermalTake Toughfan 140s, you can shave the edges off to the first notch on three sides. This allows them to fit in the recess/airgap that is usually left over between the radiator fins and the actual mounting tabs. That allows you to take 7mm off the total depth of the 70mm with the 45mm rad/25mm fans. Next you have to remove the interior motherboard 'tray/spine' place the radiator and fans mounted in, then reinstall the motherboard tray. There's not enough clearance to slide it in with the spine in place. My setup takes up exactly the 63mm clearance that is available. A little modding and you can make anything work! After all this is SmallFormFactor.net hahahaha

Most unfortunately, I'm not at home, near that computer for another day or two, but I'll take pics when I can and get them uploaded for a visual reference.

I kind of want to wait until I fully complete the build though. I notched out the top of the spine to allow a slim Noctua 120mm fan across top and I'm mounting one over the motherboard with some 3d printed brackets as well. Then plan to place 2 60mm fans in the back with a 3d printed bracket where the horizontal video card brackets would be. All 4 fans will be intake to pull in cold air for video card, and cold air across the motherboard for lower m.2/ram temps. I'm waiting on brackets and the fans still. but I'll post progress pics in the meantime if desired.
Ah, I see :) Thanks for the explanation! Makes me wonder how much performance you're losing out on from placing your fans that close to the radiator core though - with no space in between them you're essentially blocking off airflow behind the motor/hub (and likely also from the corners of the fan, assuming there's a circular frame contacting or nearly contacting the radiator core), which is a pretty significant area of the radiator (especially with a large hub/motor fan like the ToughFan). Not that this gets tons of airflow in a conventional setup (there'll always be more flow directly behind the fan blades), but there will definitely be a reduction overall, alongside an increase in resistance to airflow for the fans to overcome due to there being fewer available channels through the rad for the air to pass through.

Doing some very rough back-of-the-napkin math: measuring off online pictures, the Toughfan's hub is about 55mm across (assuming the fan circle is 120mm - they're likely both slightly less, but the ratios should be reasonably accurate still) that makes the area of the hub 23.76cm² compared to the fan circle's 113.1cm² - or 21% of its area. Given that there will inevitably be more airflow closest to the fans the overall performance loss will be less than 21%, but given the complexities of fluid dynamics and airflow paths, and how pressure affects flow through the radiator, I'm not even going to make a guess. But it would be interesting to see how this compares to a normal spaced-out mount on a 30mm-ish radiator. My Corsair XR5 has its fan mounts ~5mm from the core, so the core is ~20mm thick. Going from your 7mm offset, that makes your core ~31mm thick. At 55% thicker that should be more than enough to make up for the loss of area (assuming identical liquid flow restriction and metal-air heat exchange), but the thicker rad will also restrict airflow more, further complicating things. I would really love to see this tested side by side! :p

Also, your build seems to be pretty much the antithesis of mine, stuffing it as full of fans as you are able to :p I have three - two 140s in the front, and the PSU fan. I don't think I've ever seen the PSU fan turn on (Corsiar SF750), and my top radiator fan shuts off at idle, so in most use cases it's a 1-fan system :D Love to see how flexible the Meshlicious can be though.
 
  • Like
Reactions: DrHudacris

JDuval

SFF Lingo Aficionado
Dec 8, 2020
93
166
OKAY the loop is bled, my work is done for the day, and it's time to share some pictures and data!

---

First, some unboxing and first impression photos:
The new cold plate fins are pretty.

O-rings are certainly more of a pain in the Extreme version but very doable. The video provided by Nouvolo is a good method and works well.
Assembled photos:

My build is in the FormD T1. I used the fill port on the "IN" side of the block as my primary fill point and connected it to the G 1/4" pass through at the back of the case.
I was able to do the bulk of my filling via this port but I've made it a habit to always have two fill ports and found that I was able to set the case upside down and get the small, frothier bubbles out of the loop via a ball fitting on the GPU. This fitting is also essentially the drain port and houses my water temperature sensor.

Some photos of the block installed as well as a look at the fill port connection (hard to get a good photo in there - sorry):

And finally some photos of the completed build:

---

Now for some testing data.
I haven't tested directly against the original Aquanaut since acquiring the Extreme but I do have data from an old build that was configured essentially identically to this one but with the original Aquanaut. I'll consider this good enough to draw some conclusions, though I do intend to do a more direct and managed comparison when I have more time.

EDIT: CPU/GPU Specs
Ryzen 5600x
EVGA XC3 3080

Build with ORIGINAL Aquanaut:
  • Heaven Benchmark looped for 30 minutes, all side panels closed, average readings taken from last 5 mins of the test:
  • CPU: 79.3C
  • GPU: 64C
  • Water: 47.5C
  • Fans: 1575 RPM
Build with Aquanaut EXTREME:
  • Port Royal benchmark looped for 30 minutes, all side panels closed, average readings taken from last 5 mins of the test:
  • CPU: 59.4C
  • GPU: 61.3C
  • Water: 48.8C
  • Fans: 1325 RPM
For completeness, I've also run a 30 min Cinebench R23 Multi-core test and recorded data. I don't have any old data points to compare against this though:
  • CPU: 65.6C
  • GPU: 36.5C
  • Water: 38.2C
  • Fans: 1015 RPM
It's safe to say this is a huge improvement. I'm excited to see whether others see a similar improvement to validate my results. I am VERY happy with this iteration of the product though.
Fill loop is a great addition and the performance seems to speak for itself.

If anyone's got any questions, I'm happy to answer them!
 
Last edited:

Nouvolo

Creator
Original poster
Sep 8, 2018
760
1,713
www.nouvolo.com
OKAY the loop is bled, my work is done for the day, and it's time to share some pictures and data!

---

First, some unboxing and first impression photos:
The new cold plate fins are pretty.

O-rings are certainly more of a pain in the Extreme version but very doable. The video provided by Nouvolo is a good method and works well.
Assembled photos:

My build is in the FormD T1. I used the fill port on the "IN" side of the block as my primary fill point and connected it to the G 1/4" pass through at the back of the case.
I was able to do the bulk of my filling via this port but I've made it a habit to always have two fill ports and found that I was able to set the case upside down and get the small, frothier bubbles out of the loop via a ball fitting on the GPU. This fitting is also essentially the drain port and houses my water temperature sensor.

Some photos of the block installed as well as a look at the fill port connection (hard to get a good photo in there - sorry):

And finally some photos of the completed build:

---

Now for some testing data.
I haven't tested directly against the original Aquanaut since acquiring the Extreme but I do have data from an old build that was configured essentially identically to this one but with the original Aquanaut. I'll consider this good enough to draw some conclusions, though I do intend to do a more direct and managed comparison when I have more time.

Build with ORIGINAL Aquanaut:
  • Heaven Benchmark looped for 30 minutes, all side panels closed, average readings taken from last 5 mins of the test:
  • CPU: 79.3C
  • GPU: 64C
  • Water: 47.5C
  • Fans: 1575 RPM
Build with Aquanaut EXTREME:
  • Port Royal benchmark looped for 30 minutes, all side panels closed, average readings taken from last 5 mins of the test:
  • CPU: 59.4C
  • GPU: 61.3C
  • Water: 48.8C
  • Fans: 1325 RPM
For completeness, I've also run a 30 min Cinebench R23 Multi-core test and recorded data. I don't have any old data points to compare against this though:
  • CPU: 65.6C
  • GPU: 36.5C
  • Water: 38.2C
  • Fans: 1015 RPM
It's safe to say this is a huge improvement. I'm excited to see whether others see a similar improvement to validate my results. I am VERY happy with this iteration of the product though.
Fill loop is a great addition and the performance seems to speak for itself.

If anyone's got any questions, I'm happy to answer them!
Great build! Thanks for your effort in testing out the new loop. 🙏 Added to HoF Build Gallery 🏆

Test results look awesome, guess pretty good 2nd effort by myself. 🤗
 
Last edited:

Valantar

Shrink Ray Wielder
Jan 20, 2018
2,201
2,225
OKAY the loop is bled, my work is done for the day, and it's time to share some pictures and data!

---

First, some unboxing and first impression photos:
The new cold plate fins are pretty.

O-rings are certainly more of a pain in the Extreme version but very doable. The video provided by Nouvolo is a good method and works well.
Assembled photos:

My build is in the FormD T1. I used the fill port on the "IN" side of the block as my primary fill point and connected it to the G 1/4" pass through at the back of the case.
I was able to do the bulk of my filling via this port but I've made it a habit to always have two fill ports and found that I was able to set the case upside down and get the small, frothier bubbles out of the loop via a ball fitting on the GPU. This fitting is also essentially the drain port and houses my water temperature sensor.

Some photos of the block installed as well as a look at the fill port connection (hard to get a good photo in there - sorry):

And finally some photos of the completed build:

---

Now for some testing data.
I haven't tested directly against the original Aquanaut since acquiring the Extreme but I do have data from an old build that was configured essentially identically to this one but with the original Aquanaut. I'll consider this good enough to draw some conclusions, though I do intend to do a more direct and managed comparison when I have more time.

Build with ORIGINAL Aquanaut:
  • Heaven Benchmark looped for 30 minutes, all side panels closed, average readings taken from last 5 mins of the test:
  • CPU: 79.3C
  • GPU: 64C
  • Water: 47.5C
  • Fans: 1575 RPM
Build with Aquanaut EXTREME:
  • Port Royal benchmark looped for 30 minutes, all side panels closed, average readings taken from last 5 mins of the test:
  • CPU: 59.4C
  • GPU: 61.3C
  • Water: 48.8C
  • Fans: 1325 RPM
For completeness, I've also run a 30 min Cinebench R23 Multi-core test and recorded data. I don't have any old data points to compare against this though:
  • CPU: 65.6C
  • GPU: 36.5C
  • Water: 38.2C
  • Fans: 1015 RPM
It's safe to say this is a huge improvement. I'm excited to see whether others see a similar improvement to validate my results. I am VERY happy with this iteration of the product though.
Fill loop is a great addition and the performance seems to speak for itself.

If anyone's got any questions, I'm happy to answer them!
Thanks for sharing! This looks sufficiently impressive that I'm seriously considering cancelling my beta test sign-up for that other all-metal alternative and ordering one of these. Some questions: when was the previous testing run? Summer? Winter? And does this affect your room temperature much? Also, what are your pump speeds?
 

JDuval

SFF Lingo Aficionado
Dec 8, 2020
93
166
I'm staying signed up for that beta as I want to compare and love the build process lol.

Room temp would have been very similar. 21C or so. I should record ambient for these tests in the future, that's a good point.

Pump speed on the most recent runs is 1900 RPM or so. It's about 30% pump speed controlled in Aquasuite.
I didn't record for the old test but it would have been about the same. It's the highest speed before I can start hearing the pump lol.
 

cennis

Average Stuffer
Jan 13, 2020
66
50
OKAY the loop is bled, my work is done for the day, and it's time to share some pictures and data!

---

First, some unboxing and first impression photos:
The new cold plate fins are pretty.

O-rings are certainly more of a pain in the Extreme version but very doable. The video provided by Nouvolo is a good method and works well.
Assembled photos:

My build is in the FormD T1. I used the fill port on the "IN" side of the block as my primary fill point and connected it to the G 1/4" pass through at the back of the case.
I was able to do the bulk of my filling via this port but I've made it a habit to always have two fill ports and found that I was able to set the case upside down and get the small, frothier bubbles out of the loop via a ball fitting on the GPU. This fitting is also essentially the drain port and houses my water temperature sensor.

Some photos of the block installed as well as a look at the fill port connection (hard to get a good photo in there - sorry):

And finally some photos of the completed build:

---

Now for some testing data.
I haven't tested directly against the original Aquanaut since acquiring the Extreme but I do have data from an old build that was configured essentially identically to this one but with the original Aquanaut. I'll consider this good enough to draw some conclusions, though I do intend to do a more direct and managed comparison when I have more time.

EDIT: CPU/GPU Specs
Ryzen 5600x
EVGA XC3 3080

Build with ORIGINAL Aquanaut:
  • Heaven Benchmark looped for 30 minutes, all side panels closed, average readings taken from last 5 mins of the test:
  • CPU: 79.3C
  • GPU: 64C
  • Water: 47.5C
  • Fans: 1575 RPM
Build with Aquanaut EXTREME:
  • Port Royal benchmark looped for 30 minutes, all side panels closed, average readings taken from last 5 mins of the test:
  • CPU: 59.4C
  • GPU: 61.3C
  • Water: 48.8C
  • Fans: 1325 RPM
For completeness, I've also run a 30 min Cinebench R23 Multi-core test and recorded data. I don't have any old data points to compare against this though:
  • CPU: 65.6C
  • GPU: 36.5C
  • Water: 38.2C
  • Fans: 1015 RPM
It's safe to say this is a huge improvement. I'm excited to see whether others see a similar improvement to validate my results. I am VERY happy with this iteration of the product though.
Fill loop is a great addition and the performance seems to speak for itself.

If anyone's got any questions, I'm happy to answer them!
Can you run Heaven loop with the new aquanaut? Port Royale is basically idle CPU loads where Heaven uses more CPU, so that accounts for a large part of the 20c decrease.
 
  • Like
Reactions: sos and DrHudacris

JDuval

SFF Lingo Aficionado
Dec 8, 2020
93
166
I'll give it a go later tonight, but I had 60W CPU usage in Port Royal and the max CPU load is 75W so I don't think it'll be too different. Will give it a go shortly.