
If you’re like me, you’ve probably gawked at pictures of builds with custom-sleeved cables that are perfectly cut-to-length, and meticulously organized, for that absolutely stunning look. That said, actually cutting PSU cables and individually sleeving them is a very time-consuming and tedious endeavor to say the least, so if you’re also lazy like me you’ve likely realized that ain’t nobody got time for that, and settled for whatever cables were provided with your power supply.
Fortunately, while custom sleeving used to be a mandatory weekend project of sorts, there’s been a rise in the past few years of companies like CableMod that make replacement cable sets for modular PSUs. This means that, for a price, you could buy the fancy sleeved power cables rather than go through the toil of making them yourself… but the problem then became one of living with off-the-shelf SKUs, where the cable lengths are fixed. Indeed, while you’d get the look of individually sleeved cables, the length of the cables would almost always be excessive for a SFF build, leading to bundles of wires that could clutter up a case just as bad – if not worse – than the very OEM cables they replaced.
Luckily, CableMod launched a Configuration service recently that allows customers to actually design their ideal cable set, rather than live with a pre-determined selection of kits. With this new service, builders can go to the site and select the desired cables à la carte, choose the sleeving type, specify the length for each cable, and even pick the color scheme for each pair of wires on each of the cables! The cable lengths can only be specified in 50mm increments, however (from 150mm up to 900mm), so this service isn’t suitable for those wanting a perfectly natural bend by carefully varying the length of each individual wire in the cable bundles. Consequently, for that degree of cleanliness, the best route is still to do it yourself, though for those of us with limited time or patience, CableMod’s Configurator is a great alternative to achieve a good looking build.
So what exactly does this cable configuration process look like? To start with, visit the CableMod Configuration website page here.

Step one is choosing the power supply the cables are needed for. CableMod has a fairly extensive list of PSU models they can craft cables against, but if a particular model isn’t listed, that doesn’t necessarily mean CableMod can’t make compatible cables for it. For example, almost all the SilverStone modular units use the same pinout, so even though the SX700-LPT isn’t in the list, the SX600-G would work perfectly fine as a surrogate. Additionally, at the launch of the Configurator service, only Paracord was available for the sleeving type, but CableMod has since added nylon for a more durable and vibrant option. The nylon is less flexible than the paracord, though, so you will have to consider what attributes best meet your priorities.
For the review, I choose to get cables for the Corsair SF600, which I reviewed here. The PSU itself is fantastic and I’ve been very happy with it, but every time I have to deal with the cables it comes with I curse it. I find them to be frustratingly stiff and annoying to work with, especially compared to the very flexible cables that the newer SilverStone SFX/SFX-L units ship with. It was actually through my search for replacement cables that I first discovered CableMod and their new Configurator service.
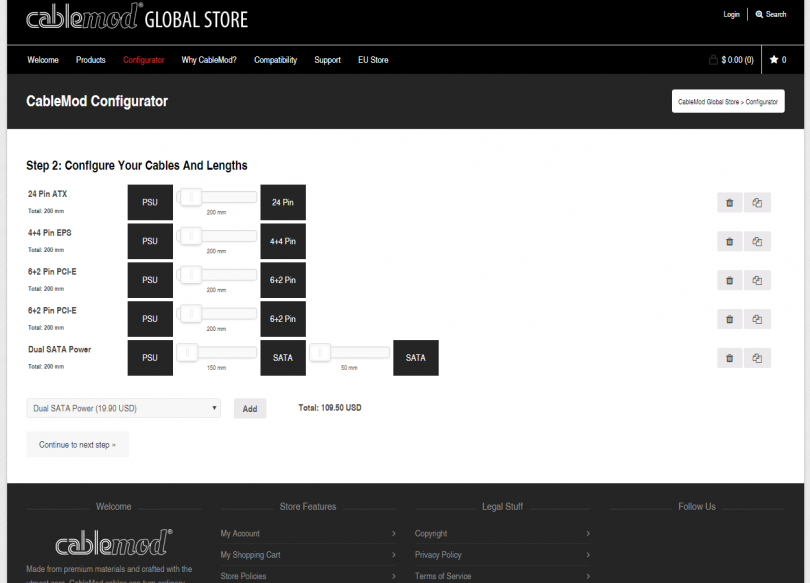
Anyways, with the PSU and sleeving type selected, the next step involves picking what cables to include in the order. This is an à la carte system, so you can do just a single cable, multiple orders of everything, or any combination in-between. This is also the screen where the cable lengths are specified.
For the review, I wanted a set for my NCASE M1. The motherboard I have in it is an ASUS Maximus VI Impact which has the 24-pin and 8-pin power connectors along the right-edge of the board, which (in the M1) places them quite close to the PSU. I estimated the lengths I’d need by taking a stock PSU cable, routing it the way I thought would be best from the component to the end of the PSU, and measuring the resulting length. The 24-pin ended up perfect, but in hindsight I should have gone with 250mm for the 8-pin since the cable is a bit tight. If in doubt, add an extra 50mm, as it’s much easier to deal with a bit of excess cable length than the far more frustrating alternative.
Alongside a short 24-pin bundle, I went with dual 6+2 PCIe cables for flexibility in card choice in the future. Since I’m going to be using a reference GTX 980, only 6-pin connectors are necessary, but while that would make for a cleaner look it would also limit what video cards I could upgrade to without replacing the cables. GTX 1080, I’m looking at you.
Finally, I added a dual SATA power cable for a 2.5″ SSD. This cable has dual connectors on a single cable, and the length from the PSU-side connector up to the first SATA plug can be specified separately from the distance between the first and second SATA plug – a really nice capability. In my build, however, I only have one drive, so I would of rather had just one SATA connector, but that wasn’t an option at the time I placed the order.
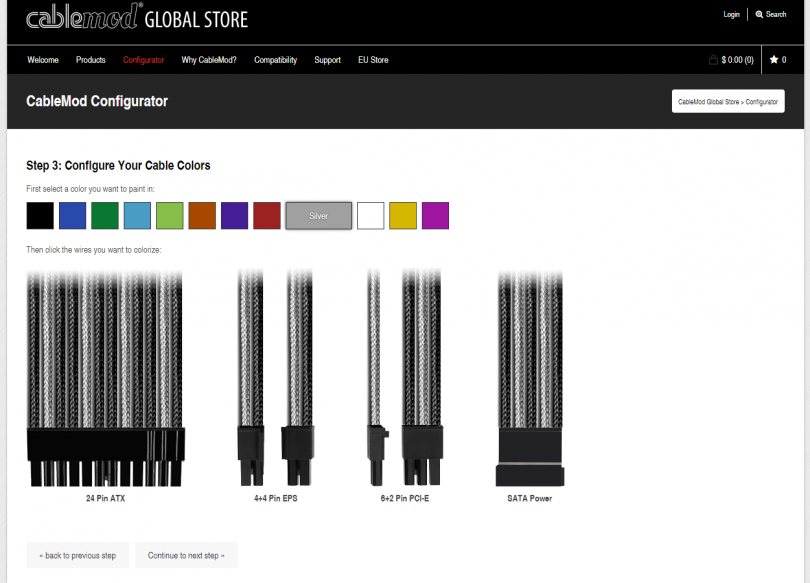
This next step can easily be the most time-consuming part of the whole process, due to the sheer number of possibilities. The cables you had picked on the previous step are laid out before you, and the color for each pair of wires for each cable can be picked from the palette at the top of the screen. I ended up going with a fairly simple monochrome design that should fit in even if I upgrade the motherboard, video card, etc. But you can be as colorful or understated as you like, within the color selection offered up by CableMod.
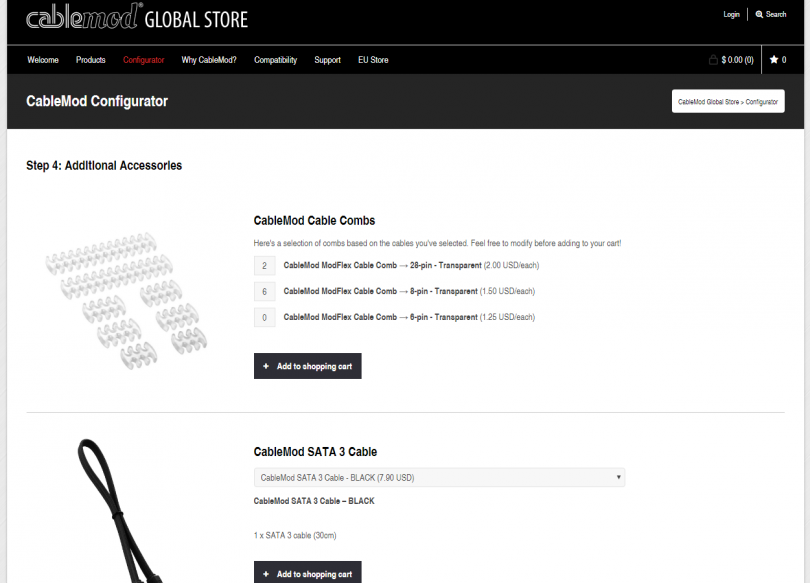
On this page, you can add CableMod accessories to your order.

Finally, we have the order review page above. The grand total for my order would have been ~$130 after shipping, though this obviously will depend on the quantity and length of the cables you order. At this point, if no changes are needed, it’s on to the checkout page, and then the inevitable drumming of fingers as you wait for your custom cables to be manufactured and shipped from Hong Kong. CableMod says to expect 1-2 weeks from order to delivery on their website, and I found that to be true.
Ok, so before I show off how the cables look, a bit of a disclosure: the first cable set that was shipped had incorrect wiring pinouts for several of the cables, as apparently a value was defined wrong in the system and that led to some error during assembly. Luckily, I didn’t have my SF600 on hand before Thomas at CableMod emailed me a warning once they caught wind of the issue, so I never tried to use them.
While unfortunate, mistakes do happen, and I’m very happy with how promptly CableMod realized the error and sent a corrected replacement set. That said, since these cables are custom-made to order and not mass-produced in a factory, there is simply always going to be the possibility for error, and it would be a good idea to inspect any custom cables before plugging them in and powering on the system. This applies to anyone making custom cables, not just CableMod.
Now with that out of the way, on to the pictures!

Here are the cables, after their journey across the Pacific, and after removing them from their individual little ziploc bags.

CableMod uses the heatshrinkless method – where the sleeving runs straight into the plastic housings – and it looks very sharp. It’s a bit hard to see, but a few of the doubled-wires on the 24-pin are visible in this picture. The extra wires are for voltage sensing, in order to improve the unit’s voltage regulation, but they make custom sleeving extra difficult.
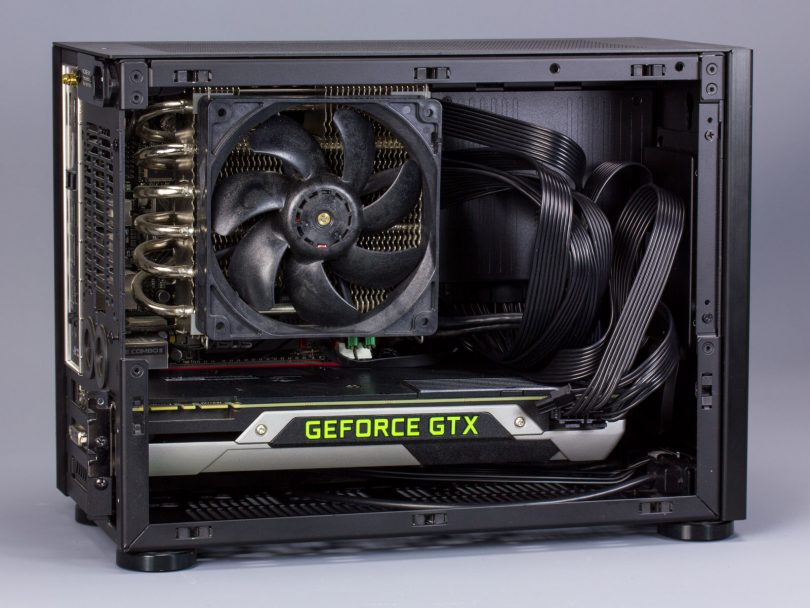
Here’s a “before” picture of the M1 with the Corsair SF600, and its stock cables. This was a quick and dirty build with no real attempt at cable management, so while it could certainly be improved, it does demonstrate the issue with typical stock PSU cables in SFF cases: they’re simply too long, and it’s almost always annoying to deal with the excess.

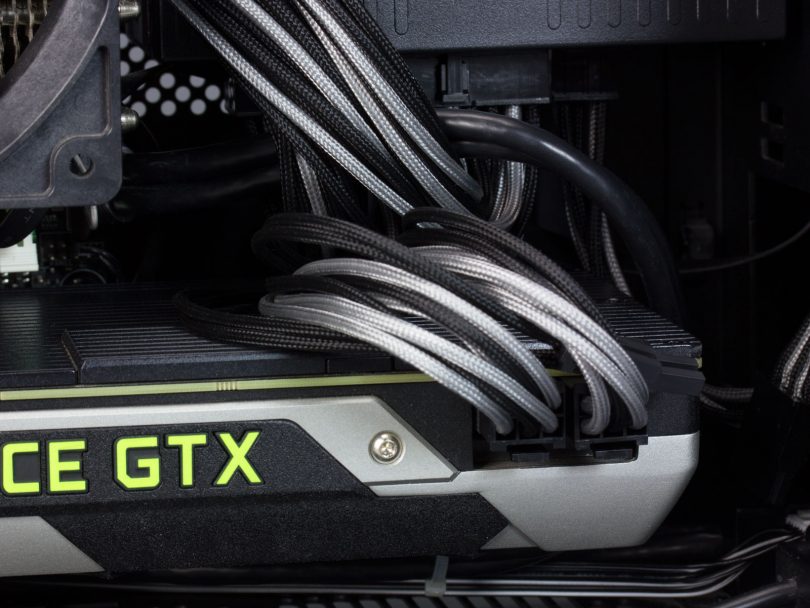
…and here’s the “after” picture! Note how the cable management issue just goes away due to the lack of excess cable length. The individual sleeving does add some volume to each wire, and makes the cables a bit bulkier overall compared to the stock ribbon cables, but they’re so much more flexible compared to the Corsair wires that it’s much easier to work with. Aesthetically, the improvement is significant.
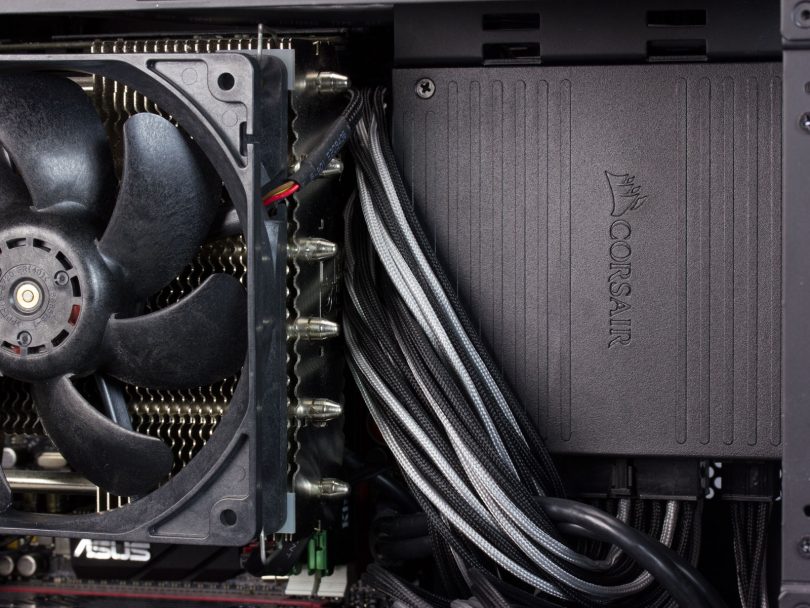
Here’s one area where the extra flexibility of the wire (and the sleeving over it) really comes in handy compared to the stock Corsair cables. With a Noctua NH-C12P heatsink on the Z87 Impact board in the NCASE M1, the edge of the heatsink hangs over the motherboard connectors, and the SFX power supply is up close against the edge of the motherboard. This leaves a fairly small gap between the fins of the heatsink and the PSU housing for the 24-pin and 8-pin cables to fit through. Since the Corsair cables are so stiff and inflexible, they have a tendency to press up into the edge of the heatsink, causing the fin to bite into the wire. Not exactly desirable, given the healthy amount of power surging through those wires!
In fact, the first time I installed the SF600 in my M1 when I was testing the PSU, I found later that the heatsink had bit into the wires deep enough that I was worried about it shorting. Yet, with the CableMod cables, all the wires are flexible enough such that they don’t press up against the heatsink with nearly as much force. Additionally, the sleeving also protects the wires themselves. This leaves me much more comfortable with this setup for long-term use.
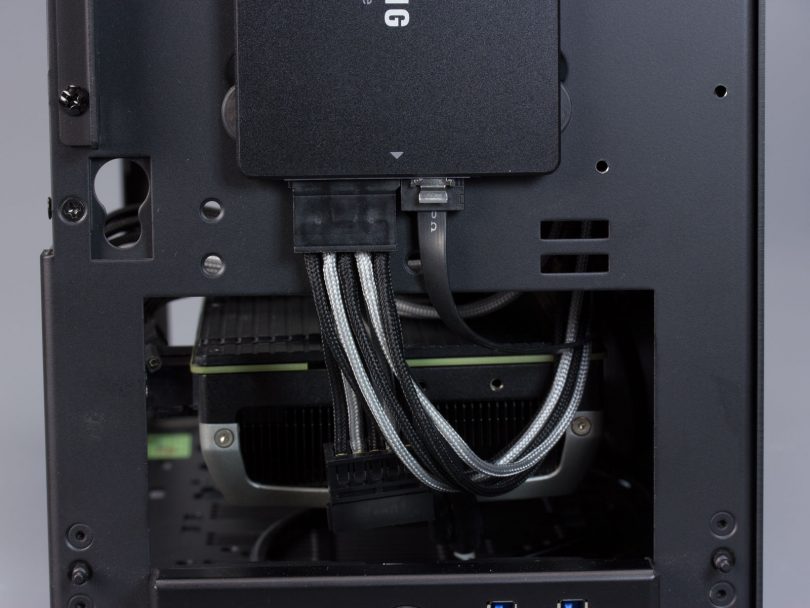
Another annoyance I have with the Corsair cables in the M1 is that the SATA strand had all right-angle connectors, and they’re facing the wrong way to connect a 2.5″ drive mounted to the front of the M1. The CableMod SATA cables are both straight-through, comparatively, so it’s perfect for this application. This is an issue specific to the NCASE M1, though, and in other cases it could very well be the opposite with the angled Corsair connectors fitting and the straight CableMod connectors sticking out too far from the drive to clear.
Overall, I’m very happy with the custom CableMod cables for my Corsair SF600. They’re much improved over the stock SF600 cables both in terms of flexibility and aesthetics, but most importantly for SFF builds, they are a huge improvement in length due to the ability to customize them as needed for the case and components. Of course, the CableMod cables don’t look quite as nice as a meticulously hand-made set where every single individual wire is carefully cut to length for that perfectly groomed wire look, but on the other hand they don’t require that huge investment in time either. So while these cables are not for everyone due to the price, they’re a great resource for busy people who want custom-length cables but would rather trade money in exchange for not having to spend hours cutting, sleeving, and crimping the wires themselves.
Thoughts? Discuss them in the forum here.
Review sample provided by CableMod.
Here at SmallFormFactor.net we give manufacturers the ability to be part of the community. We offer a right to reply to hardware reviews. If a manufacturer responds, their comments will be posted here.