Prototype REVOCCASES RCC-BIG560 | custom BTO case | maximum flexibility for high end hardware in <20L

REVOCCASES

Shrink Ray Wielder
Original poster
REVOCCASES
Silver Supporter
Apr 2, 2020
2,057
3,331
www.revoccases.com
Thermals:

Running heaven 4.0 for 20+ mins to get a normalised fluid temperature.

Pulls ~450W from the wall, fan speed is the variable. Ambient is 21c

800RPM - Fluid 34c, CPU 45c, GPU 54c

1200RPM - Fluid 31c, CPU 40c, GPU 50c

I don't have anything to compare with but I'd say that doesn't look too bad, right?

Do you think changing your solid panel on the right side to a vented one and/or increasing the height of the feet would make any significant difference?
 

eedev

Cable-Tie Ninja
Apr 23, 2020
154
288
I don't have anything to compare with but I'd say that doesn't look too bad, right?

Do you think changing your solid panel on the right side to a vented one and/or increasing the height of the feet would make any significant difference?
These are great temps IMHO!
 
  • Like
Reactions: REVOCCASES

Goatee

King of Cable Management
Jun 22, 2018
738
1,512
I don't have anything to compare with but I'd say that doesn't look too bad, right?

Do you think changing your solid panel on the right side to a vented one and/or increasing the height of the feet would make any significant difference?

Really good temperatures. Im very pleased.

Ohh... what kind of fancy display is this?

BTW, I think this perspective looks great with the slight glow in the case - reminds me somehow of my tube amp.

Its a one of these: http://www.robopeak.com/blog/?p=406

Using some windows custom drivers to work on windows with Aida64. I 3D printed a case for it.

Made me think of a bee hive :D

Now you mention it it does. I quite like the mix of yellows and oranges the LED's on the CPU block, GPU Block and motherboard had. I havent changed it and its really grown on me.
 
  • Like
Reactions: REVOCCASES

Goatee

King of Cable Management
Jun 22, 2018
738
1,512
I don't have anything to compare with but I'd say that doesn't look too bad, right?

Do you think changing your solid panel on the right side to a vented one and/or increasing the height of the feet would make any significant difference?

I will do some more testing and let you knope. I really need to rig my quadro up, so I can get some more temperature sensors (for ambient) and can control the fans in windows rather than bios.
 
  • Like
Reactions: REVOCCASES

threestripevida

Airflow Optimizer
Mar 28, 2017
277
466
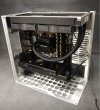
Moved my build from the Sliger S620 over into the Big-560.

Putting the case together wasn't too bad and I already shared some feedback with @REVOCCASES about sending the manual as a PDF to make the pictures easier to see when trying to figure out which screws to use. Tolerances were pretty tight on the panels, but otherwise building the case was really enjoyable.

Moving parts over was pretty straight forward. I tried managing cables and routing them early as best I could to make things easier. The CPU power connector was just long enough to go from the top left of the board behind the motherboard tray and then back under into the PSU. A shorter 24 pin cable would look a little neater, but isn't necessary imo. I do need to move the power supply up a little bit more just to make sure that the 24pin cable doesn't go into the fan on the 3090. I may use the Jhack m2426 that I have laying around to replace the 24pin also. I do have a sata drive on the back and I would definitely want to get a custom cable for this just to eliminate the excess from the daisy chained Sata power connectors. Luckily there was plenty of space on the backside to stuff the extra cable there which is really nice.

The AIO was a bit of a struggle though. I had to slide it in at an angle and the tubes were too short to have them coming out of the left side. I'm not really happy with the way the tubes are ran currently, but they aren't in the way of anything important and let's be honest most of us would probably never look at our case again anyway.

One last gripe is the GPU pcie mounting (the bracket on the back that you screw you the GPU into). This was way too hard to do by myself and I had to have my brother come help me by holding the GPU up so I could screw the thing down. Maybe I made it more difficult than it needed to be, but finding someway to make this easier in future revisions would be really nice.

Overall I am really happy with the case and it offers almost zero compromises (if you're watercooling). Next step is to build a custom loop in this thing eventually. No temp results yet, but I will play some games and come back and edit my post.

EDIT: Temps after playing RDR2 for 30 minutes. CPU: Max of 73c and GPU never went above 63c, but memory temps hit 90c. I need to replace the thermal pads, but otherwise temps were great. The loudest part of my system is the chipset fan now.

 
Last edited:

Goatee

King of Cable Management
Jun 22, 2018
738
1,512
Moved my build from the Sliger S620 over into the Big-560.

Putting the case together wasn't too bad and I already shared some feedback with @REVOCCASES about sending the manual as a PDF to make the pictures easier to see when trying to figure out which screws to use. Tolerances were pretty tight on the panels, but otherwise building the case was really enjoyable.

Moving parts over was pretty straight forward. I tried managing cables and routing them early as best I could to make things easier. The CPU power connector was just long enough to go from the top left of the board behind the motherboard tray and then back under into the PSU. A shorter 24 pin cable would look a little neater, but isn't necessary imo. I do need to move the power supply up a little bit more just to make sure that the 24pin cable doesn't go into the fan on the 3090. I may use the Jhack m2426 that I have laying around to replace the 24pin also. I do have a sata drive on the back and I would definitely want to get a custom cable for this just to eliminate the excess from the daisy chained Sata power connectors. Luckily there was plenty of space on the backside to stuff the extra cable there which is really nice.

The AIO was a bit of a struggle though. I had to slide it in at an angle and the tubes were too short to have them coming out of the left side. I'm not really happy with the way the tubes are ran currently, but they aren't in the way of anything important and let's be honest most of us would probably never look at our case again anyway.

One last gripe is the GPU pcie mounting (the bracket on the back that you screw you the GPU into). This was way too hard to do by myself and I had to have my brother come help me by holding the GPU up so I could screw the thing down. Maybe I made it more difficult than it needed to be, but finding someway to make this easier in future revisions would be really nice.

Overall I am really happy with the case and it offers almost zero compromises (if you're watercooling). Next step is to build a custom loop in this thing eventually. No temp results yet, but I will play some games and come back and edit my post.


Looks really good. I really like how easy it was to build in. I used a small spacer (small piece of wood) to keep the GPU level while I screwed the fitting bracket in, but I agree its the only fiddly bit.
 

REVOCCASES

Shrink Ray Wielder
Original poster
REVOCCASES
Silver Supporter
Apr 2, 2020
2,057
3,331
www.revoccases.com
Moved my build from the Sliger S620 over into the Big-560.

Putting the case together wasn't too bad and I already shared some feedback with @REVOCCASES about sending the manual as a PDF to make the pictures easier to see when trying to figure out which screws to use. Tolerances were pretty tight on the panels, but otherwise building the case was really enjoyable.

Moving parts over was pretty straight forward. I tried managing cables and routing them early as best I could to make things easier. The CPU power connector was just long enough to go from the top left of the board behind the motherboard tray and then back under into the PSU. A shorter 24 pin cable would look a little neater, but isn't necessary imo. I do need to move the power supply up a little bit more just to make sure that the 24pin cable doesn't go into the fan on the 3090. I may use the Jhack m2426 that I have laying around to replace the 24pin also. I do have a sata drive on the back and I would definitely want to get a custom cable for this just to eliminate the excess from the daisy chained Sata power connectors. Luckily there was plenty of space on the backside to stuff the extra cable there which is really nice.

The AIO was a bit of a struggle though. I had to slide it in at an angle and the tubes were too short to have them coming out of the left side. I'm not really happy with the way the tubes are ran currently, but they aren't in the way of anything important and let's be honest most of us would probably never look at our case again anyway.

One last gripe is the GPU pcie mounting (the bracket on the back that you screw you the GPU into). This was way too hard to do by myself and I had to have my brother come help me by holding the GPU up so I could screw the thing down. Maybe I made it more difficult than it needed to be, but finding someway to make this easier in future revisions would be really nice.

Overall I am really happy with the case and it offers almost zero compromises (if you're watercooling). Next step is to build a custom loop in this thing eventually. No temp results yet, but I will play some games and come back and edit my post.

EDIT: Temps after playing RDR2 for 30 minutes. CPU: Max of 73c and GPU never went above 63c, but memory temps hit 90c. I need to replace the thermal pads, but otherwise temps were great. The loudest part of my system is the chipset fan now.


Very nice build and good feedback for further improvements. :)

Just some tips for the cable / tubes management:

Not sure if that's possible with your board and AIO but I found it easier to mount the AIO block like this:

NOTABLE-00059.jpg

To get in the radiator you can also remove the one corner profile to make it a bit easier.

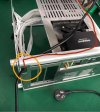
For the AC cord you could get a longer one and then use the small cutout at the bottom - this would allow you to hide that cable behind the motherboard tray - something like this:

NOTABLE-00060.jpg
 
Last edited:

threestripevida

Airflow Optimizer
Mar 28, 2017
277
466
It seems you slightly decrease your footprint!


That looks really good. Do you have an idea of what the temperatures were in open air/ SligerS620 ?

If I was playing RDR2 it would easily go to 70-75c and memory temps would hit 100c as well. There is definitely plenty of ventilation on this case to get that hot air out. I do have the 3090 undervolted as well, but I can do some more testing if people are interested and get some better temps.
 
  • Like
Reactions: Goatee

teodoro

SFF Lingo Aficionado
Oct 8, 2018
109
77
I do have the 3090 undervolted as well, but I can do some more testing if people are interested and get some better temps.
I’m curious about real-world data for a “solid” panel version (perhaps accomplished via some cardboard and tape) with bottom-to-top airflow. It’s quite understandable if you’re not interested in fashioning that, but boy do I not like the visual aspect of those side vent holes.
 

threestripevida

Airflow Optimizer
Mar 28, 2017
277
466
I’m curious about real-world data for a “solid” panel version (perhaps accomplished via some cardboard and tape) with bottom-to-top airflow. It’s quite understandable if you’re not interested in fashioning that, but boy do I not like the visual aspect of those side vent holes.

I have no problem doing that to test it out. Best case scenario I can do that Wednesday, but otherwise it might be a week or two before I can test that setup.
 
  • Like
Reactions: teodoro and eedev

Goatee

King of Cable Management
Jun 22, 2018
738
1,512
I'm a month into using my build and its still going strong running 24/7 watercooled 3090 mining away. Couple of hours gaming in the evening if I get time.

Dual 280's are awesome and means it can be providing 280W of room heating with minimal noise.
 
  • Like
Reactions: REVOCCASES