
![]()
We would like to thank Fractal Design for providing us with a review sample of their Ridge chassis. Without their generosity, this case review would not be possible.
Way back at CES 2019, representatives at Fractal were quick to quell our disappointment in their LFF case lineup by asking that we to stay tuned, and to rest assured that the ITX audience had not been forgotten. Immediately, I expected Fractal to simply take the easy route and refresh their wildly popular Node 202 chassis with some brushed aluminum variant but instead they released the wildly stylish Fractal ERA chassis that was released to a mixed reception (we reviewed it here -and liked it!).
Not content to update an old chassis by simply adding brushed aluminum to the mix, Fractal Design decided to take all the feedback from the passionate Node 202 community and build a better Node Chassis for the modern enthusiast. I love reviewing cases because the pictures can speak for themselves… mostly.
Let’s hop to it!
Specifications
| Colors |
Black or White |
| Dedicated 2.5″ drive mounts | 4x included, 4x positions total |
| 5.25” drive mounts | 0 |
| Expansion slots | 3-slot |
| Motherboard compatibility | m-ITX, Mini-DTX |
| Power supply type | SFX, SFX-L |
| Front interface | 1x USB 3.1 Gen 2 Type-C, 2x USB 3.0 1x Combo jack – Audio/Microphone, power button, power LED |
| Total fan mounts | 2x 120/140 mm and 3x 80 mm |
| Side fan | 2x 120/140 mm (2x PWM Aspect fan 140 mm included) |
| Top fan | 3x 80 mm (not included) |
| Side radiator | 120 mm when ≤175mm long GPUs are installed (280 mm without GPU) |
| PSU max length | 130mm |
| GPU max length | 325 mm with SSD installed. 335 mm without SSD installed. |
| GPU max height | 125 mm with top fan(s) installed, 137 mm without |
| GPU max thickness | 57 mm with 2x 25 mm x 140 mm fans installed 67 mm with 2x 15 mm x 120 mm or 140mm fans installed 82 mm without side fans |
| CPU cooler max height | 70 mm |
| Cable routing space | 13,8 mm (behind PSU) |
| Tool-less slide with thumbscrew lock | Side panels |
| Captive thumbscrews | Side panels |
| Left side panel | Steel |
| Right side panel | Steel |
| Front panel |
Aluminum and Cloth |
| Case dimensions (LxWxH) | Vertical: 374 x 395,4 x 110 mm Horizontal: 360 x 115 x 375 mm |
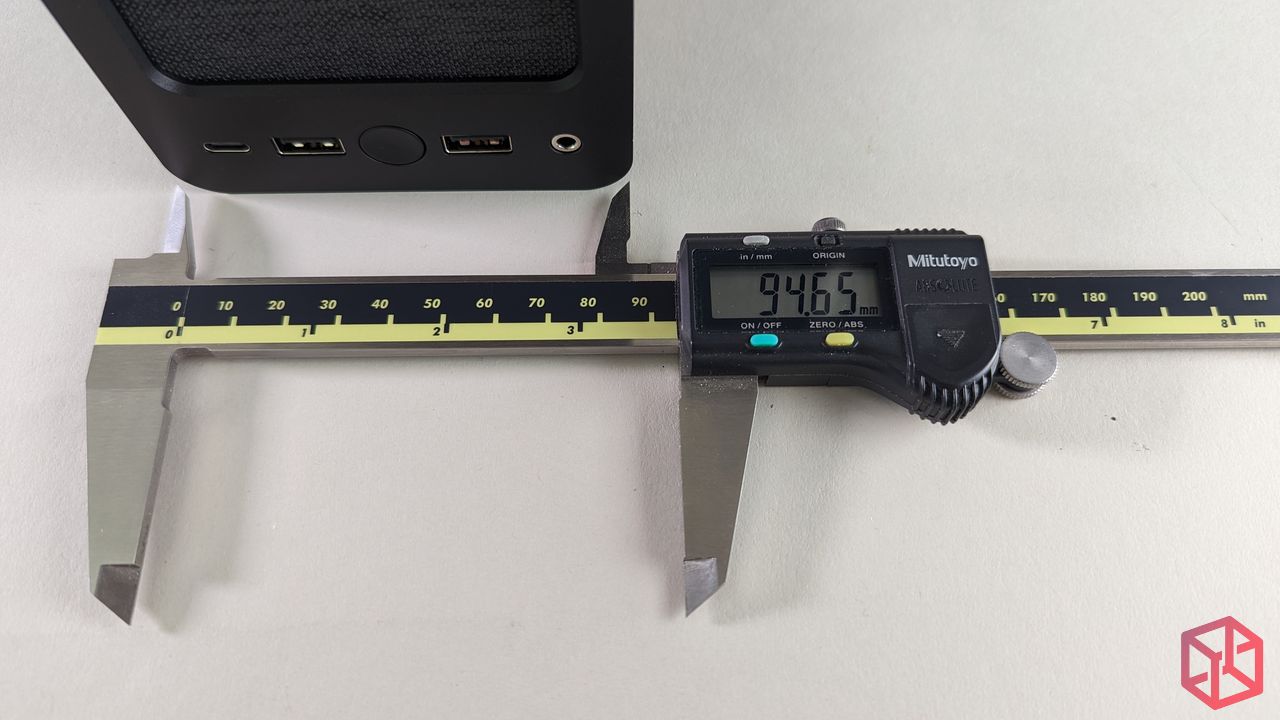
| Case dimensions w/o feet/protrusions/screws | 355 x 375 x 94.6 mm |
| Liters |
12.59 liters |
| Net weight | 4,3 kg |
| Package dimensions (LxWxH) | 26 x 167 x 431 mm |
| Gross weight | 5,5 kg |
| Price |
$129.99 |
Packaging and Contents
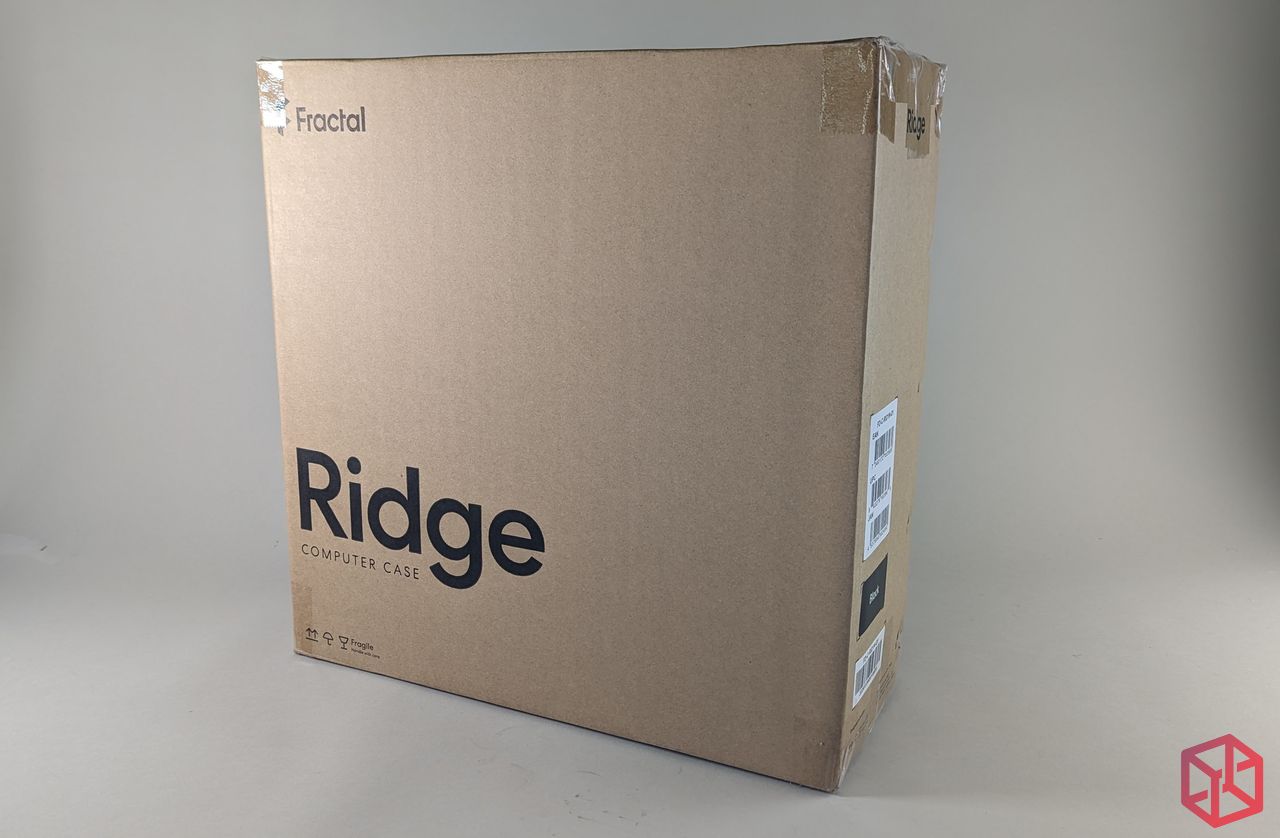
The Ridge chassis is shipped inside a brown box where its simplicity practically screams “Product of Sweden”.
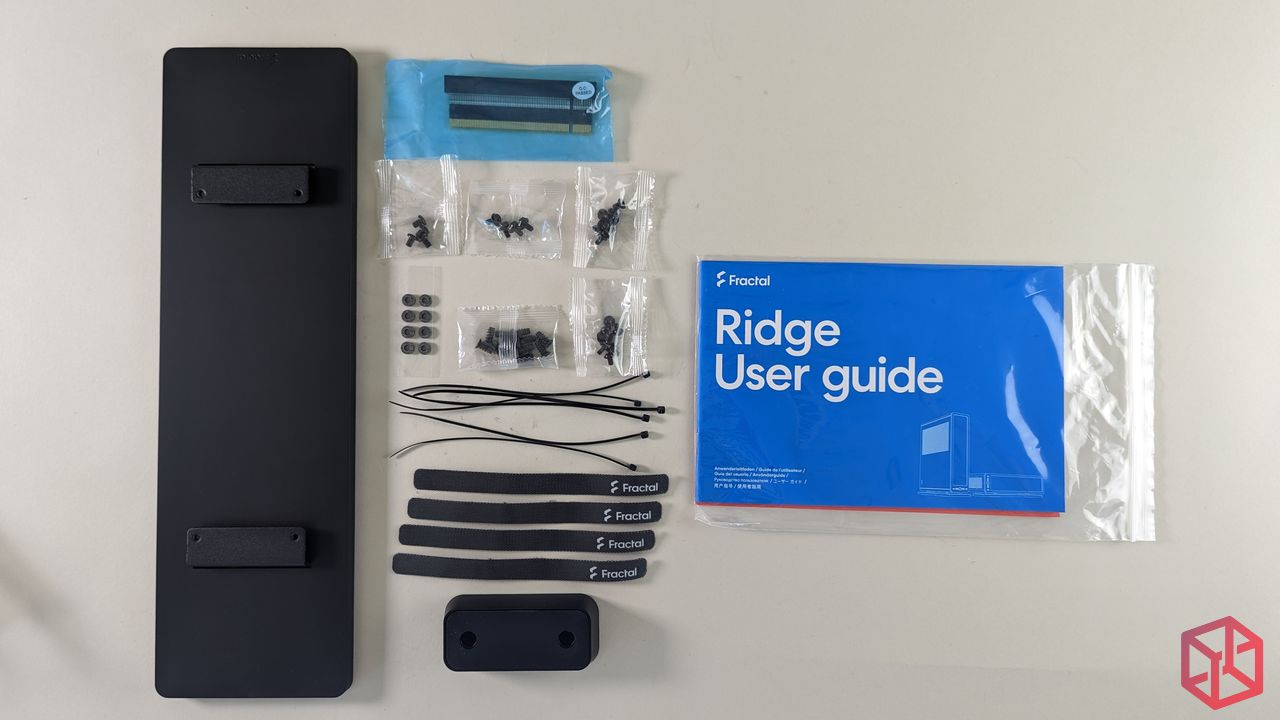
Inside the box is an additional accessories box that includes 2 stands, a PCIe riser, anti-vibration O-rings, PSU/Mobo screws, screws for the installation of the stands, zip ties, 4x Fractal branded velcro ties, and another extremely well detailed manual. Having reviewed the ERA and now the Ridge chassis, it’s clear that Fractal’s manuals put everyone else to shame (see for yourself here). The manual is highly respectful of first time builders and breaks things down really well. Even as a veteran in this industry, I can appreciate how well they illustrate everything for the next generation of SFF enthusiasts.
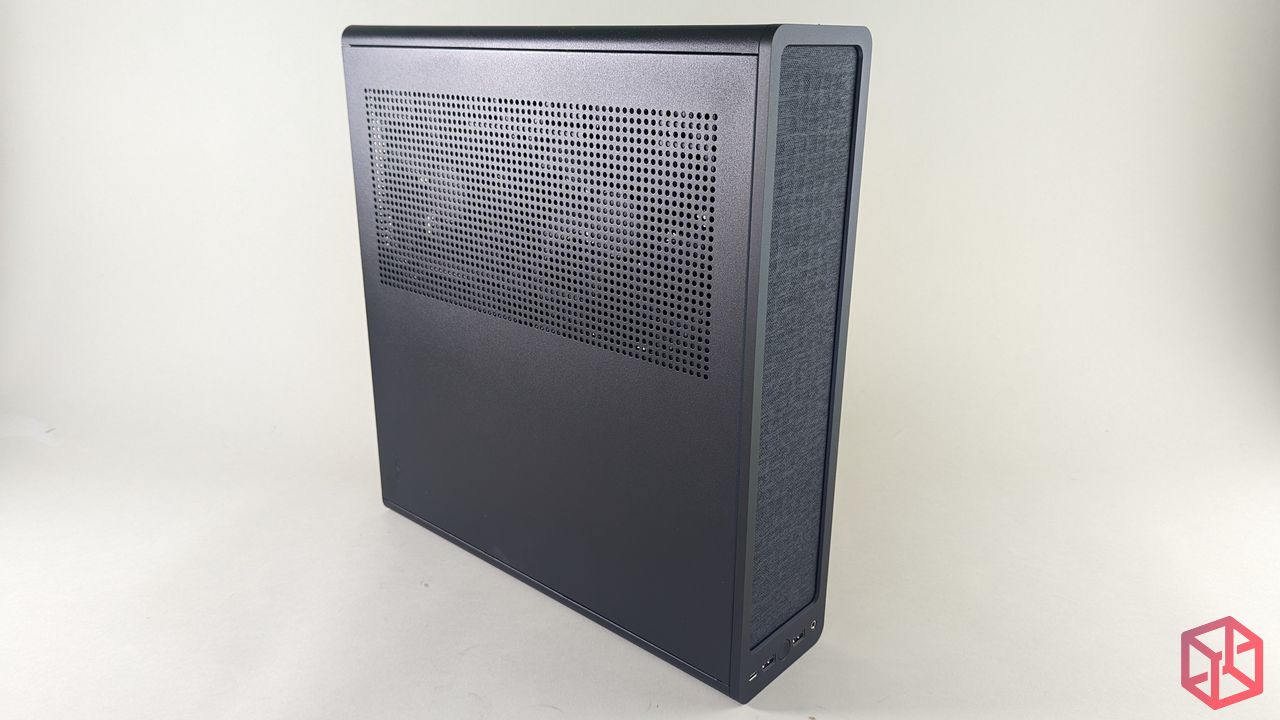
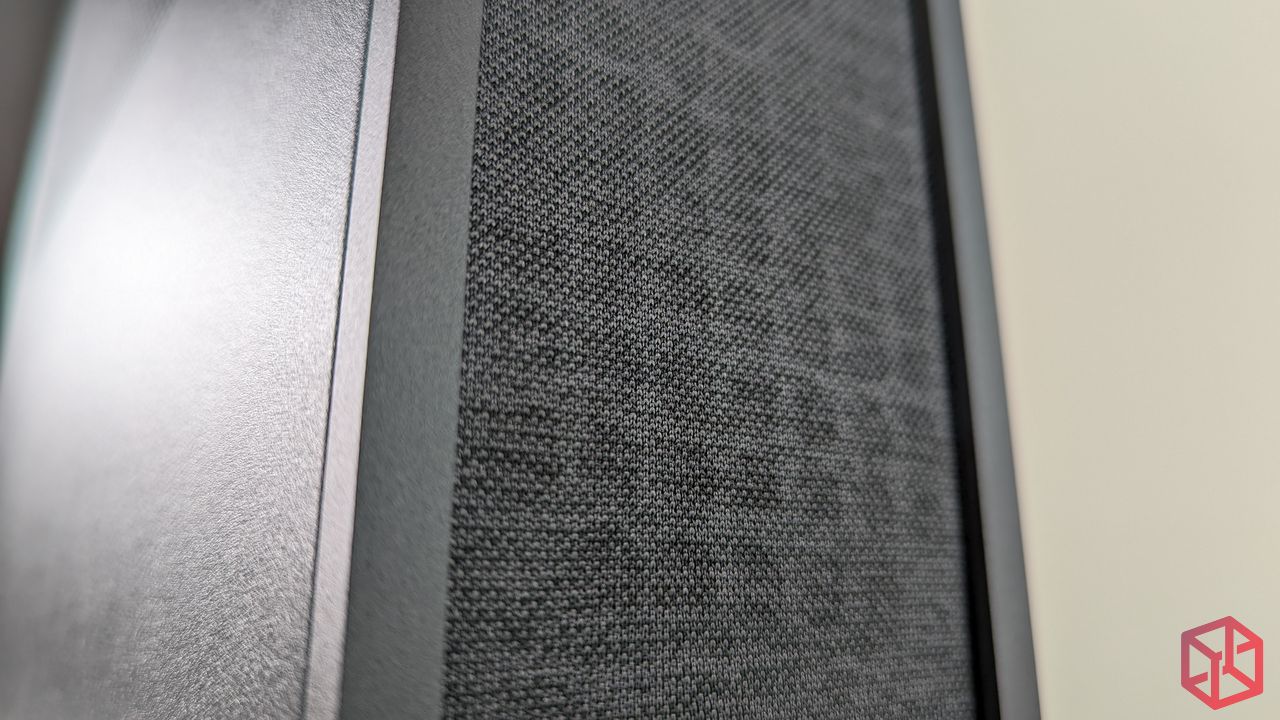
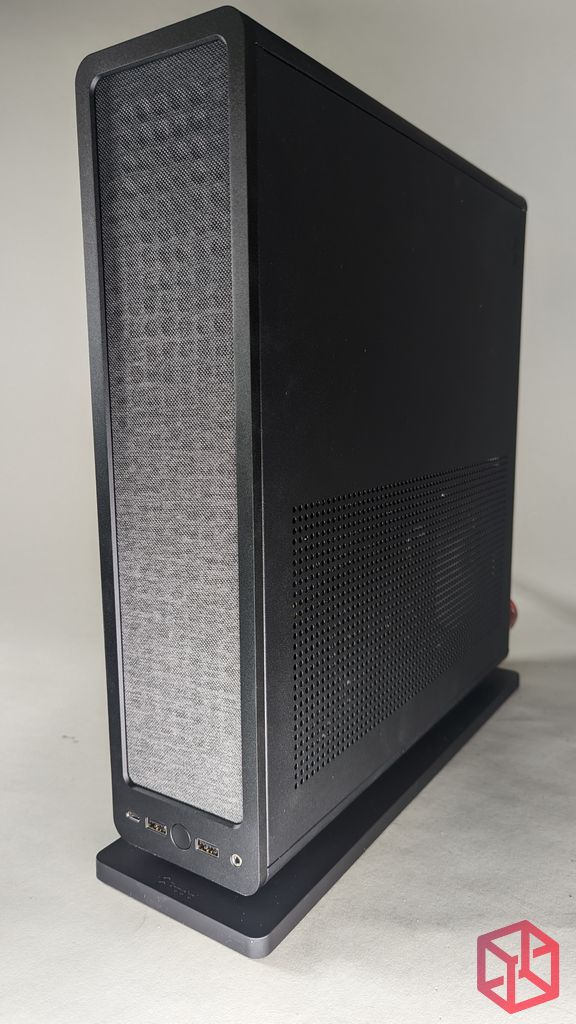
Following the retro-modern trend of mixed materials, the Ridge features a cloth mesh grill that would bring warmth to any living room or office.
The side panels are steel so attaching a magnetic wireless adapter won’t be an issue.
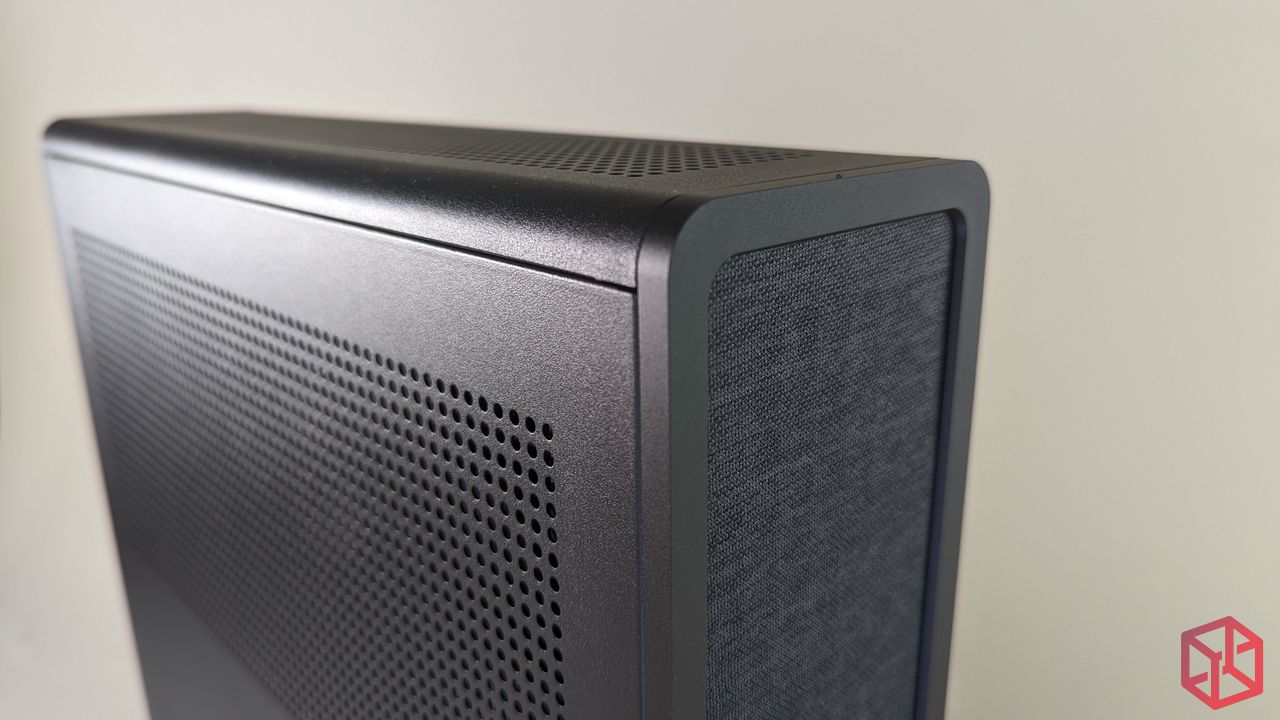
The front panel is made of aluminum with a cloth face that is securely stretched within.
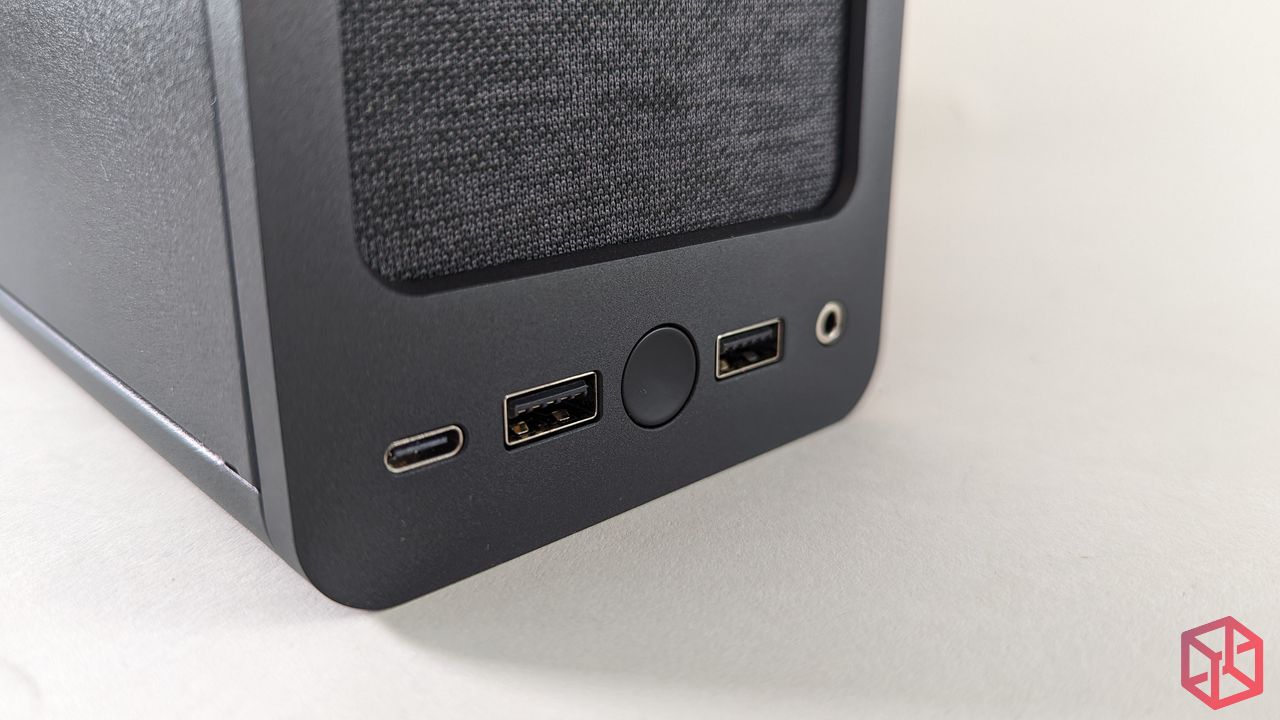
The front IO panel is equipped with 2x USB-A 3.0 ports, 1x USB-C 3.1 Gen 2, and a 3.5mm combo jack that supports headsets with a built-in mic. You can’t see it now, but behind the cloth mesh is a subtle white Power LED that is shaped like a regtangle, I’ll share that picture a little later in the article.
The power button is tactile and responsive. It doesn’t wiggle or tilt and it offers predictable results every time.
Here is a nice closeup of the mesh featured at the front. It reminded me of the subtle color patterns on Nike’s ever-so comfortable Flyknit lineup but it’s more rugged feeling like a canvas. If you have a cat that likes to sharpen it’s claws on things, you have been warned!
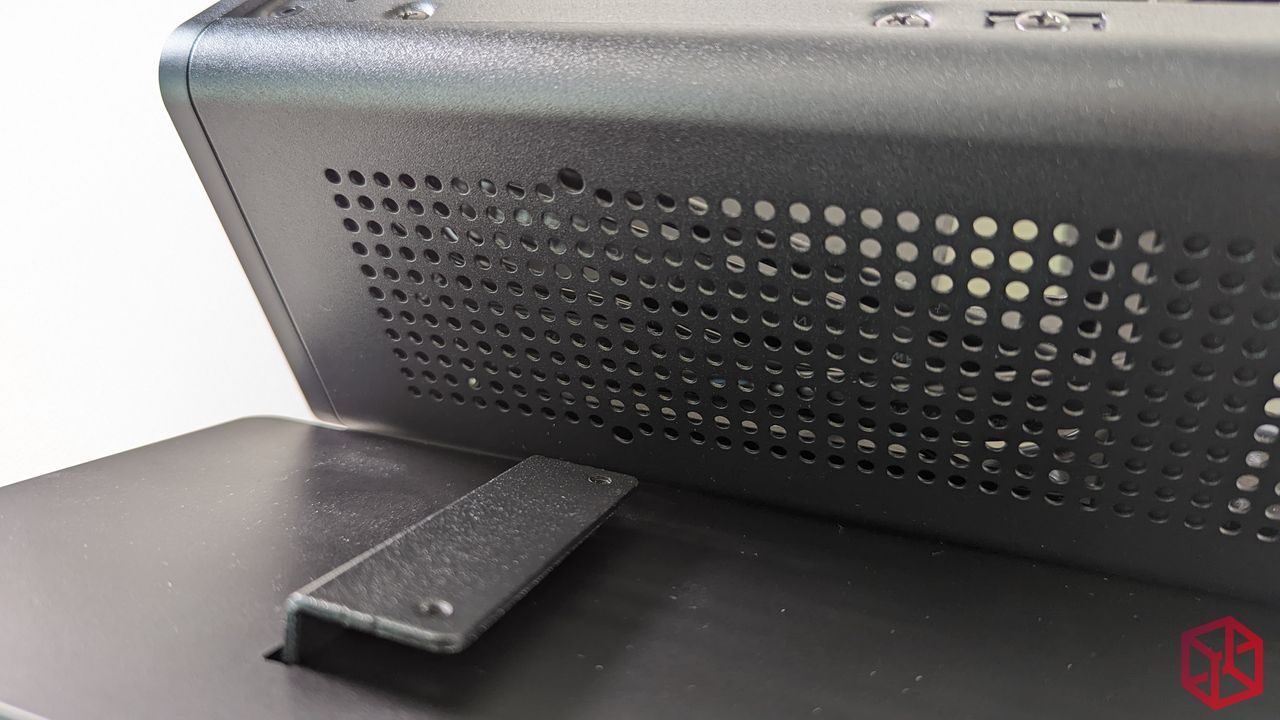
Here is how all the corners come together. It was also my intent to capture the texture of this powdercoat job. The coat is nothing spectacular, it’s black, but it won’t fingerprint easily, it’s durable, and maintenance free.
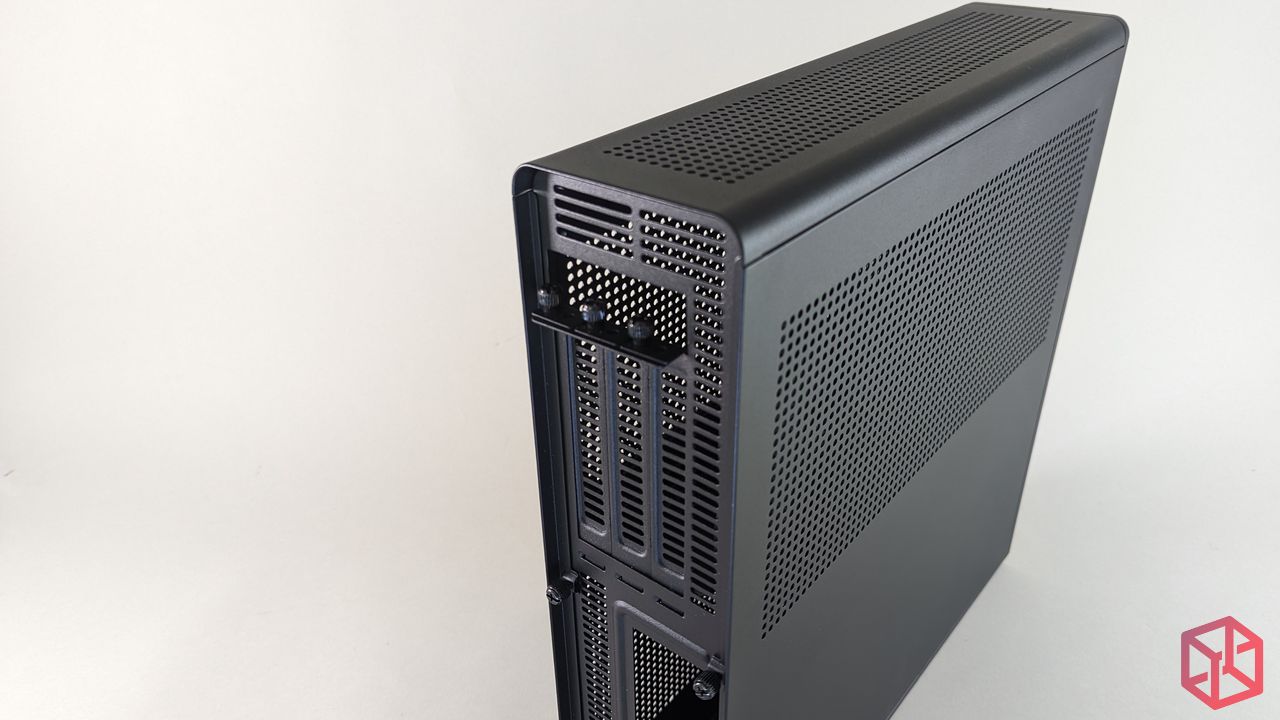
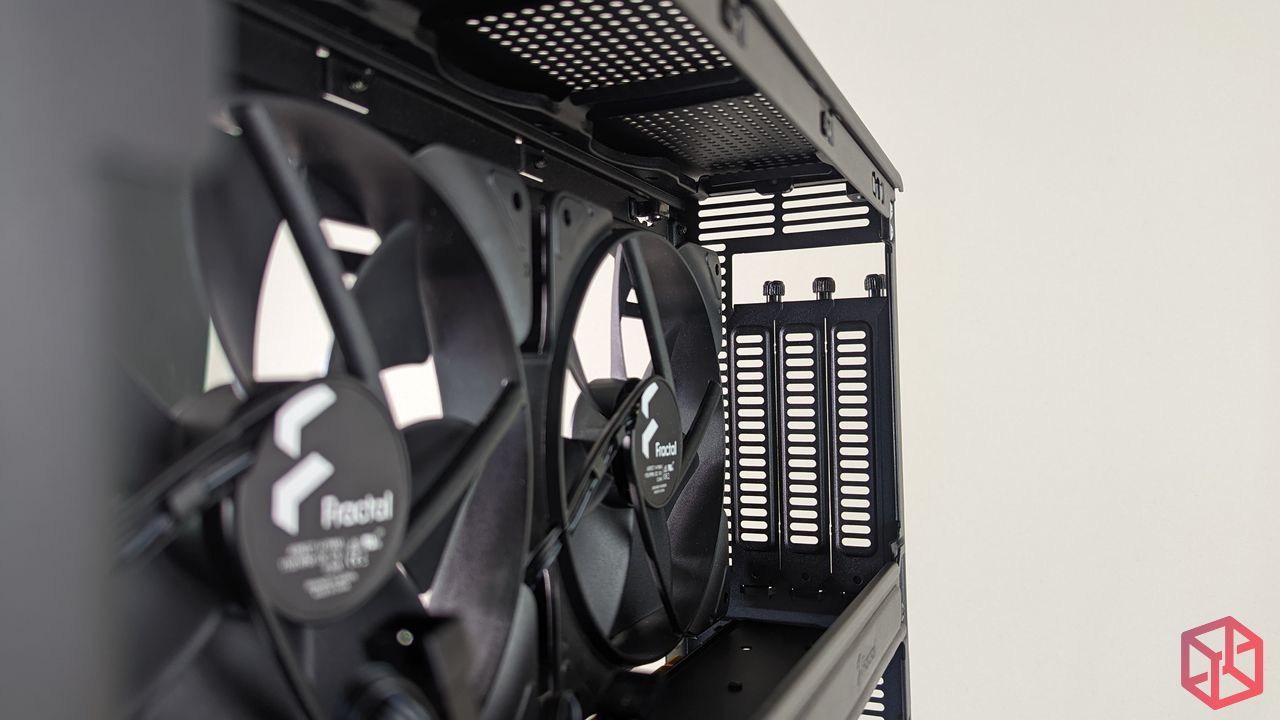
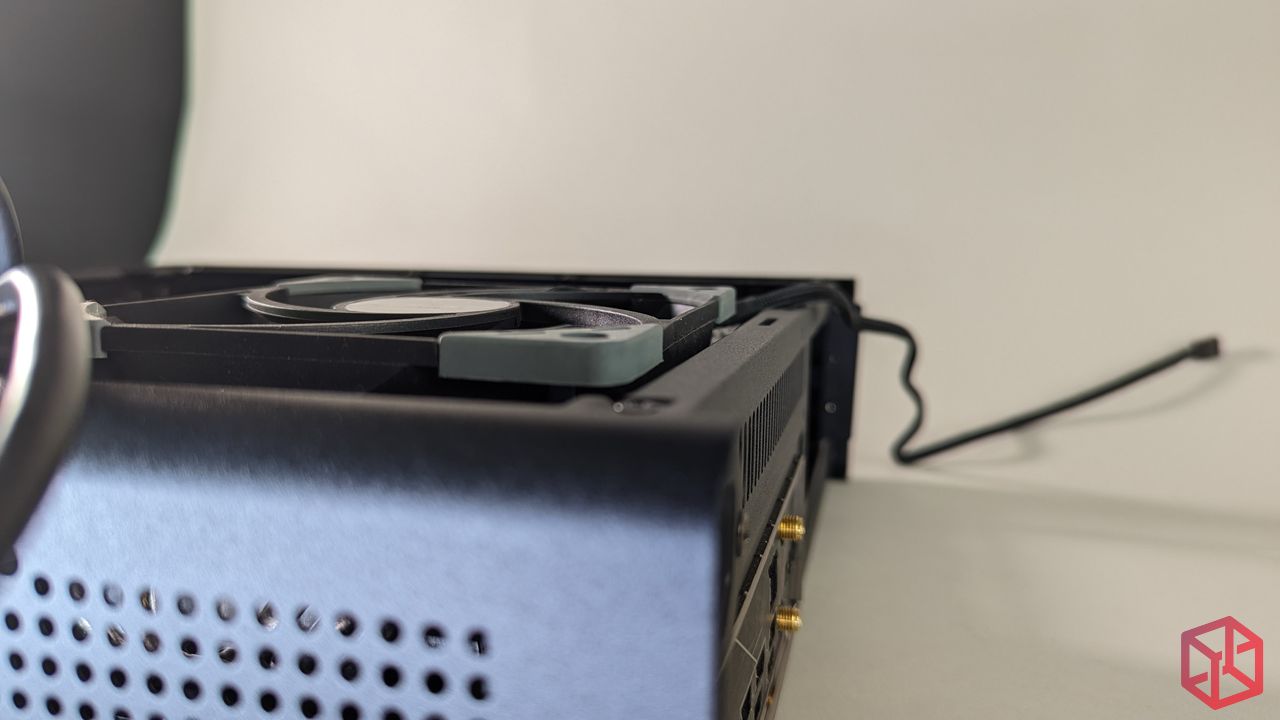
Plenty of free-flowing air can be found everywhere! As you can see, there is a lot headroom for taller cards here and it even has provisions for 3x 80mm fans at the top. While 82mm thick GPUs are supported, the two intake fans would need to be removed. It’s worth mentioning that with ventilation comes noise, so be sure to undervolt accordingly and adjust those fan curves to preserve your sanity.
The case also doesn’t include any magnetic fan filters so if you’re in the market for some, be sure to keep an eye on Demcifilter as I’m sure they will release them.
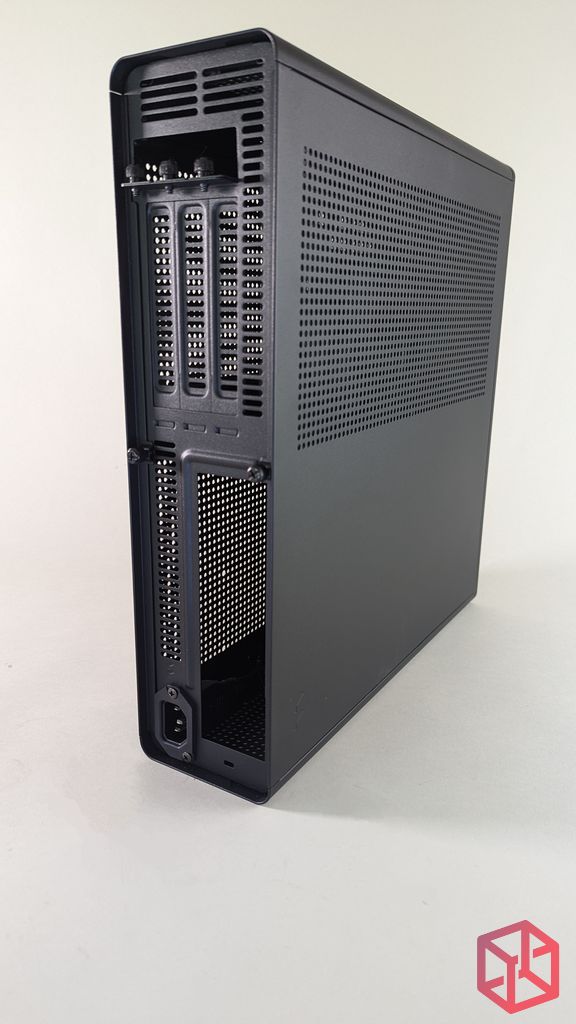
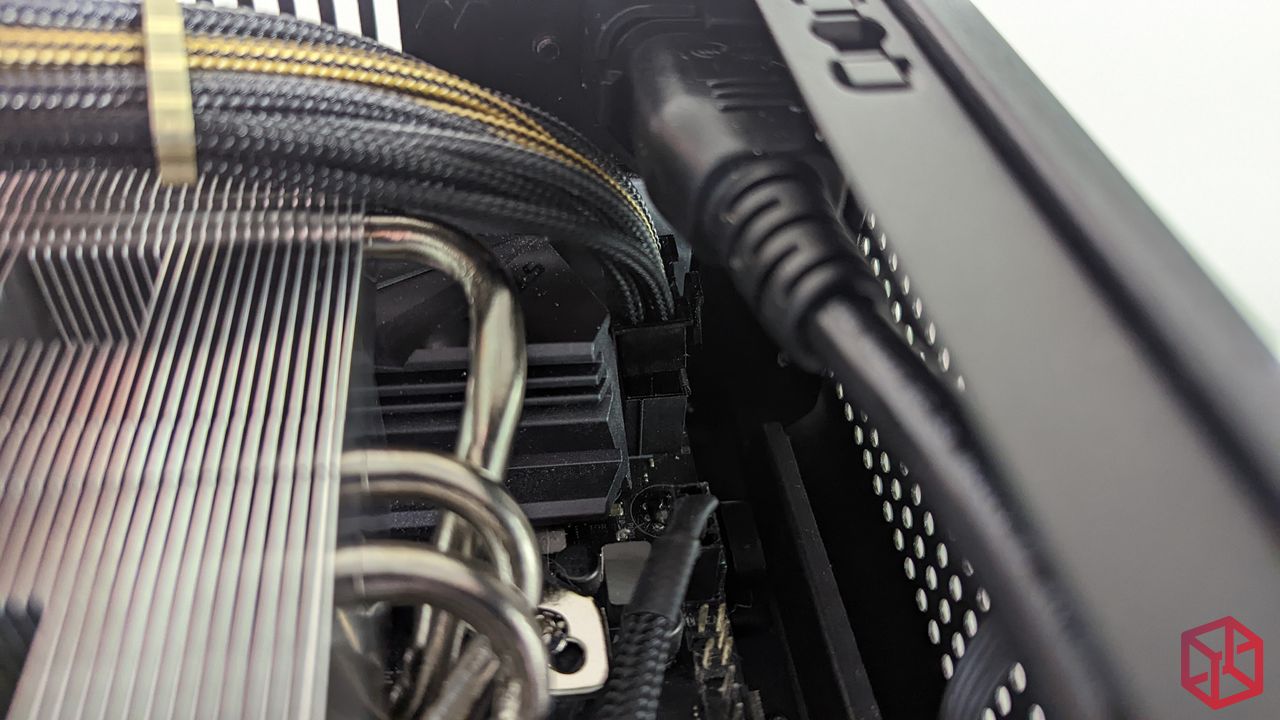
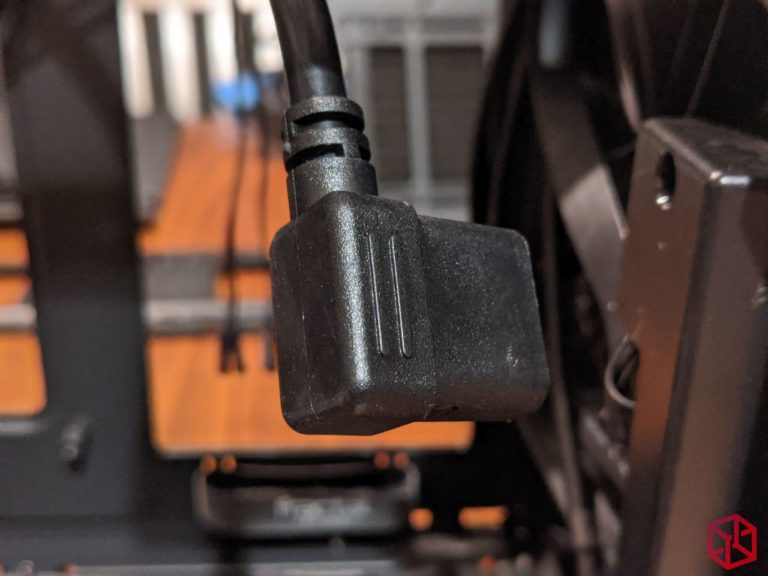
Showing off more of the chassis’ rear, you can see a C13 female for the internal power cord. Beware that it’s position might conflict with any motherboards that use an oversized heatsink over the rear IO (i.e. MSI Z390 itx) but for most boards that stay within the limits of the keep out zone, it shouldn’t be an issue. Instead of using a snap in design that can be a real bear to remove, they opted for a more premium design that is screwed into place with 2x screws that can be removed if getting to the 8-pin connector on the motherboard proves too difficult.
The case also includes a slot for a Kensington lock so you ensure that nobody walks away with your case under their arm.
Here is a closeup of the captive screws. They aren’t spring-loaded like a server chassis, which is fine, but at least they can be threaded all the way out if ever you need to replace them or prefer not to use them.
They are installed by default but they are not necessary to keep the side panels attached firmly.
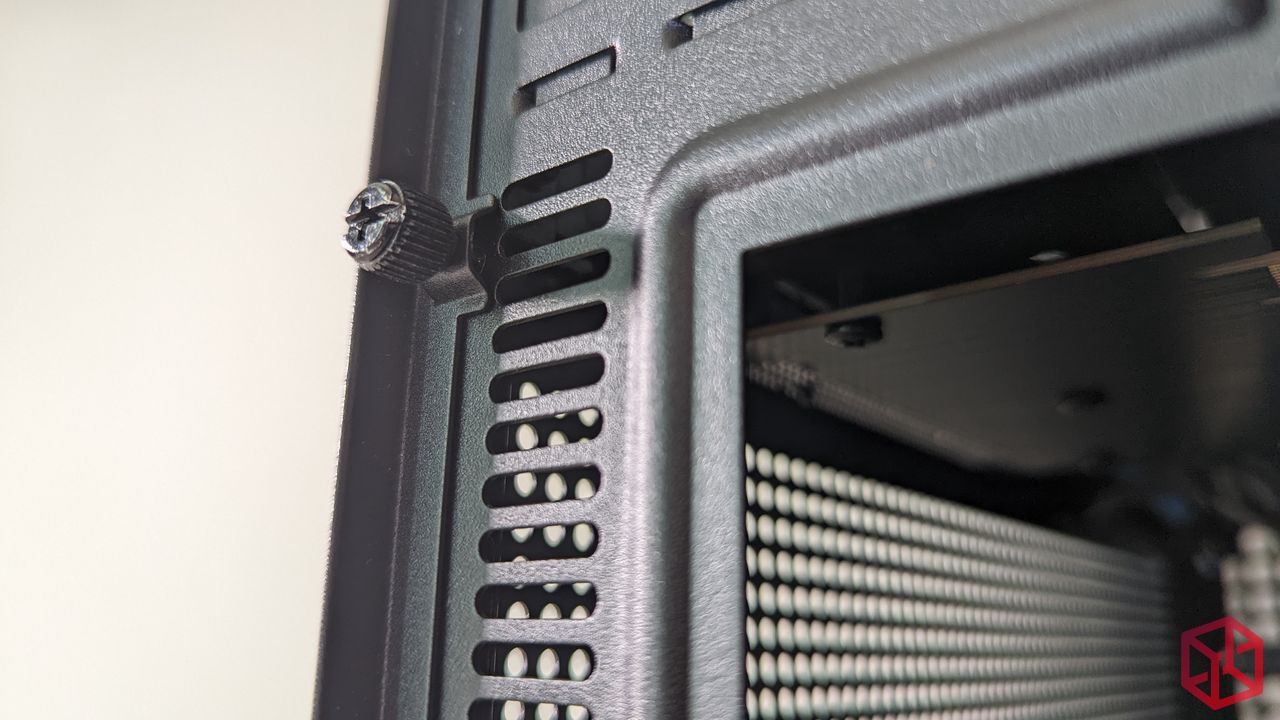
Like the legendary NCASE chassis, the side panels on the Ridge use the same lovely ball joint clips (quiet and effortless unlike Sliger) to snap the side panels into place. If you wanted to simplify access to the internal components, I would recommend removing the captive screws on the side panels as these will perform just fine.
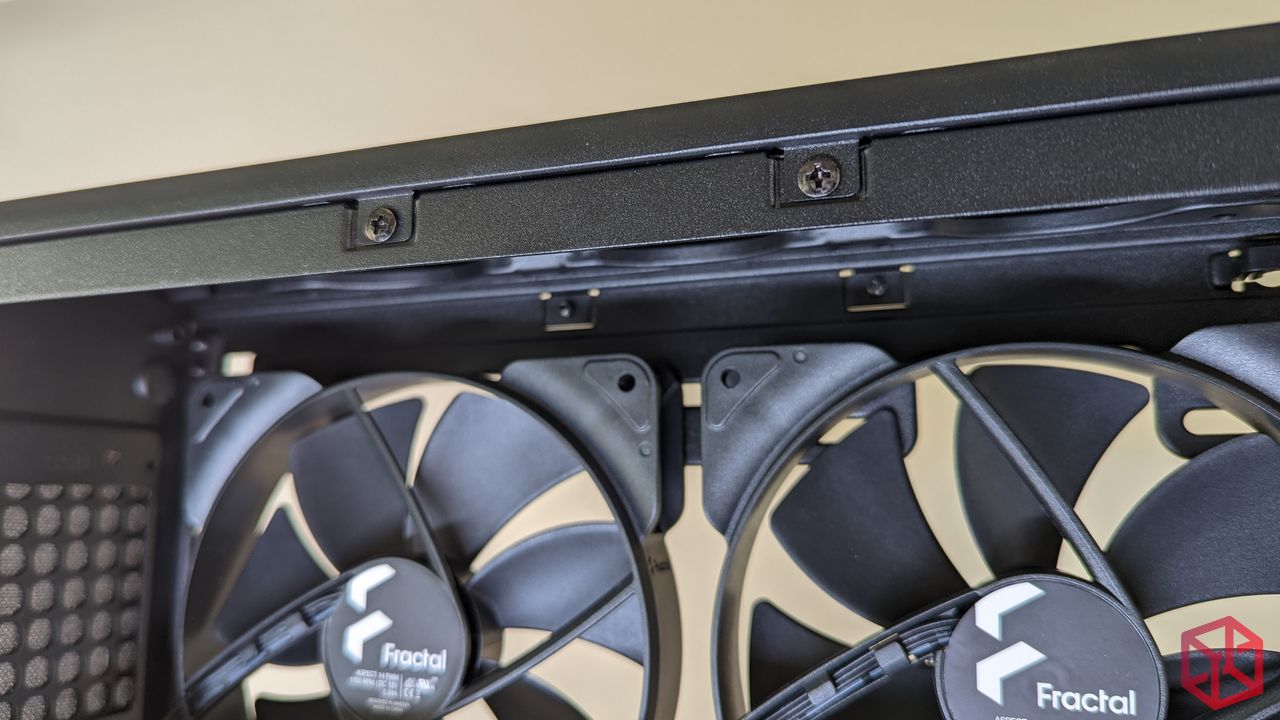
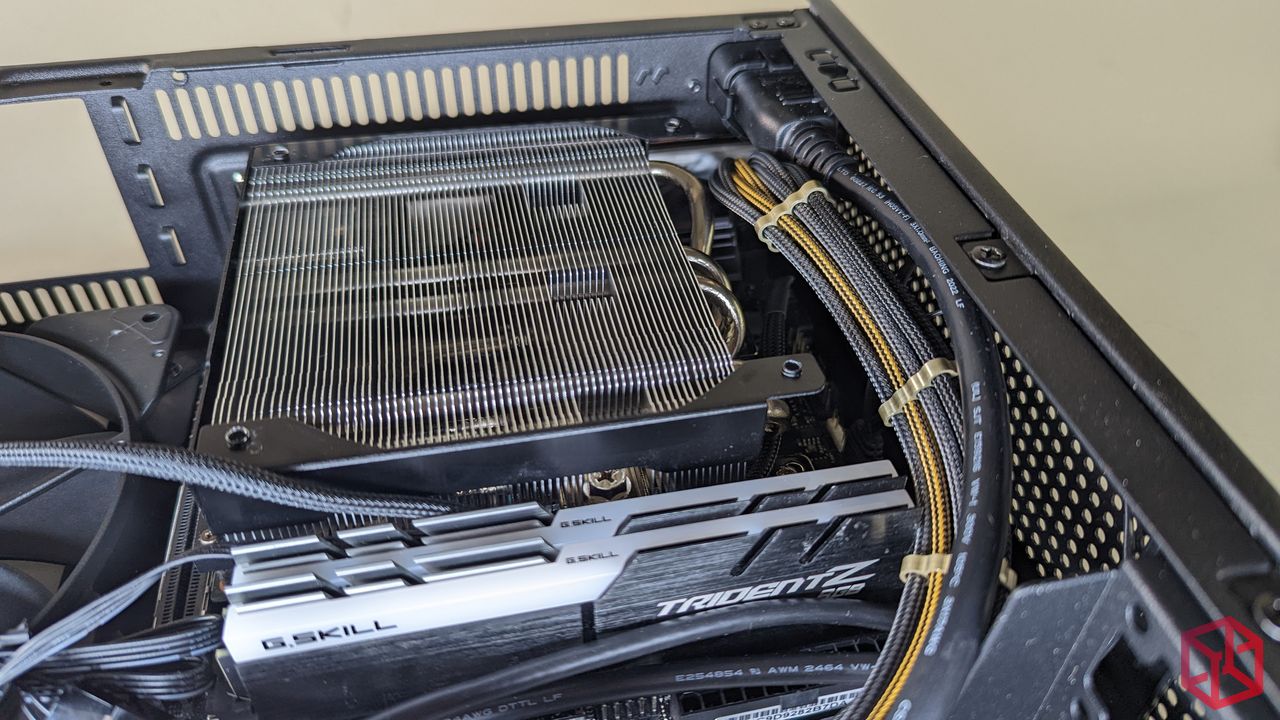
With room for 120mm or 140mm fans, the fan mounting positions are fully adjustable.
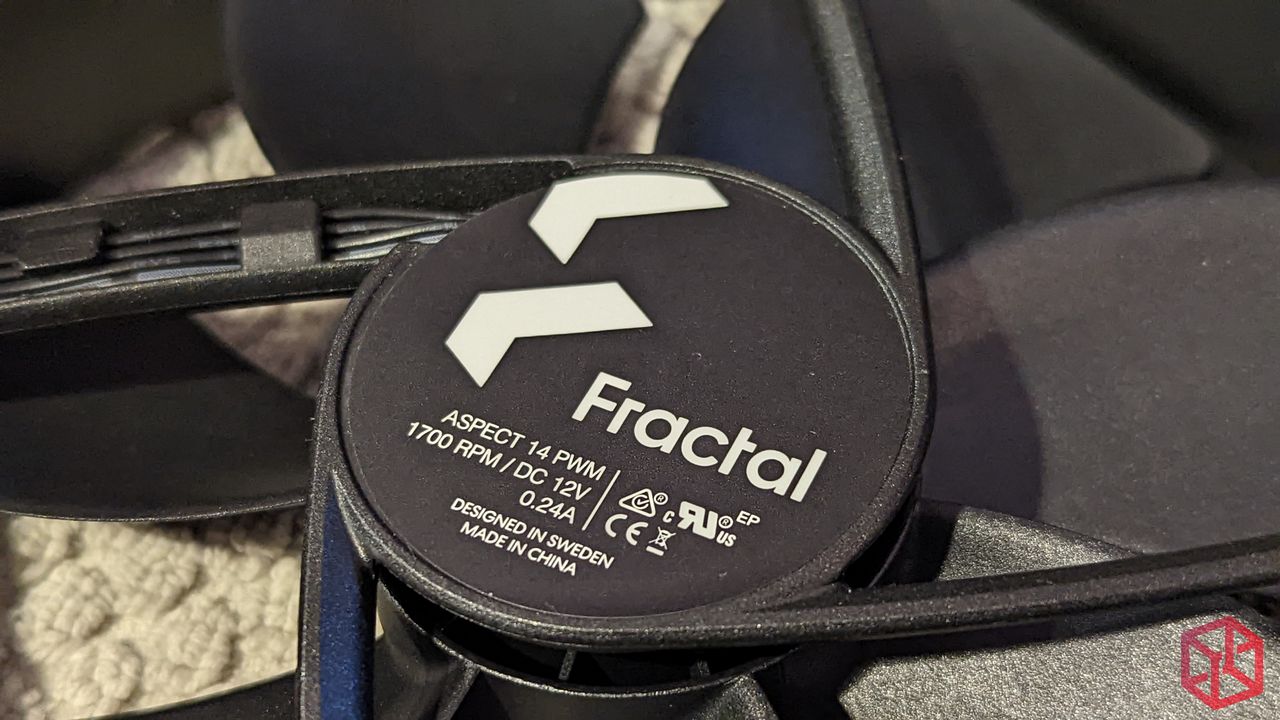
These black Fractal Aspect 14 (140 mm) fans come preinstalled and include 4-pin PWM connectors, sans RGB!
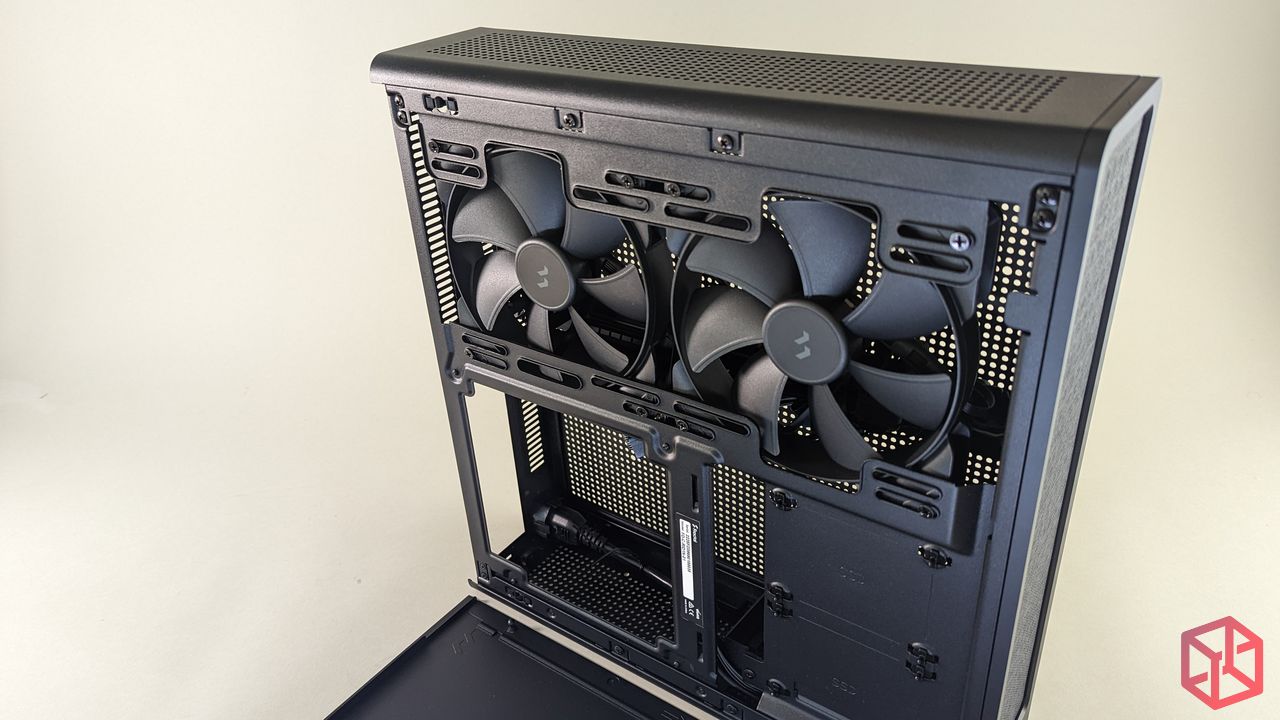
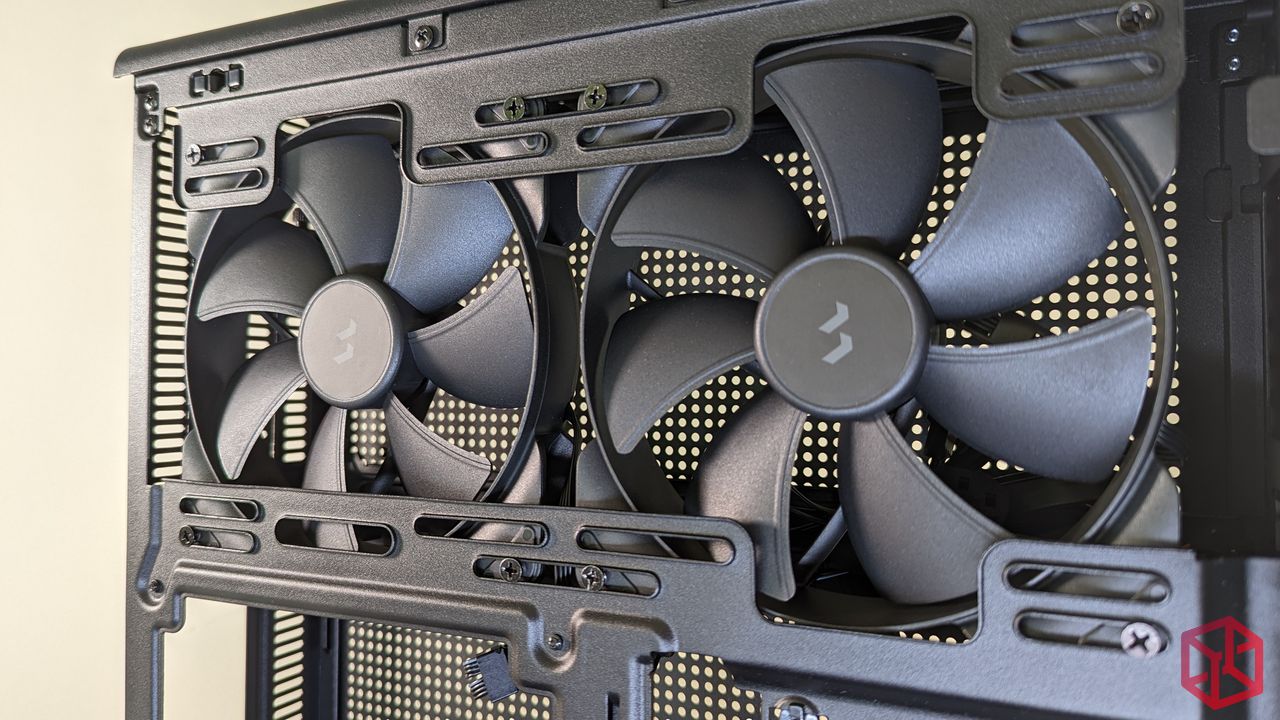
The included Aspect 14 PWM fans are the 500-1700 RPM variants. These use rifle bearings that are a big upgrade over the sleeve bearing fans that Fractal included with the ERA chassis. Each of these fans has an MSRP of $19.99 so it’s almost like getting a Fractal Design Ridge chassis for just $90 (the same MSRP as the Fractal Node 202 that didn’t include any fans). The fans also support daisy chaining to help keep cable clutter to a minimum.
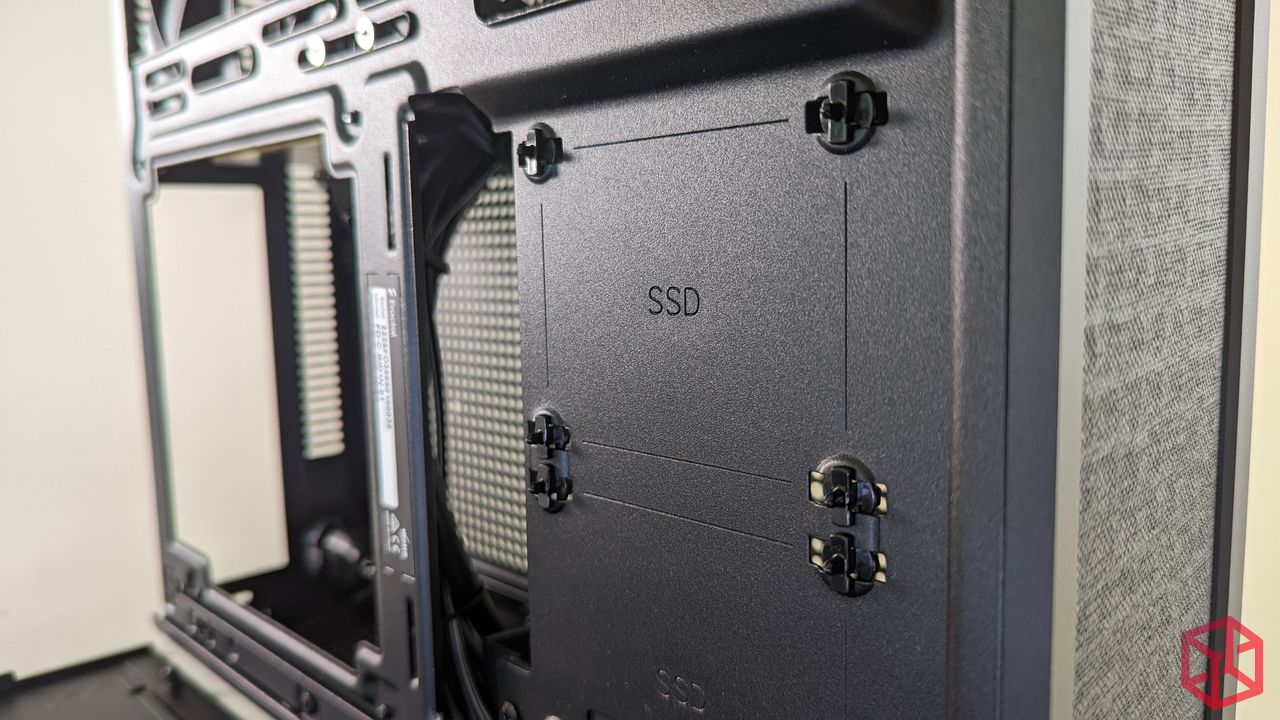
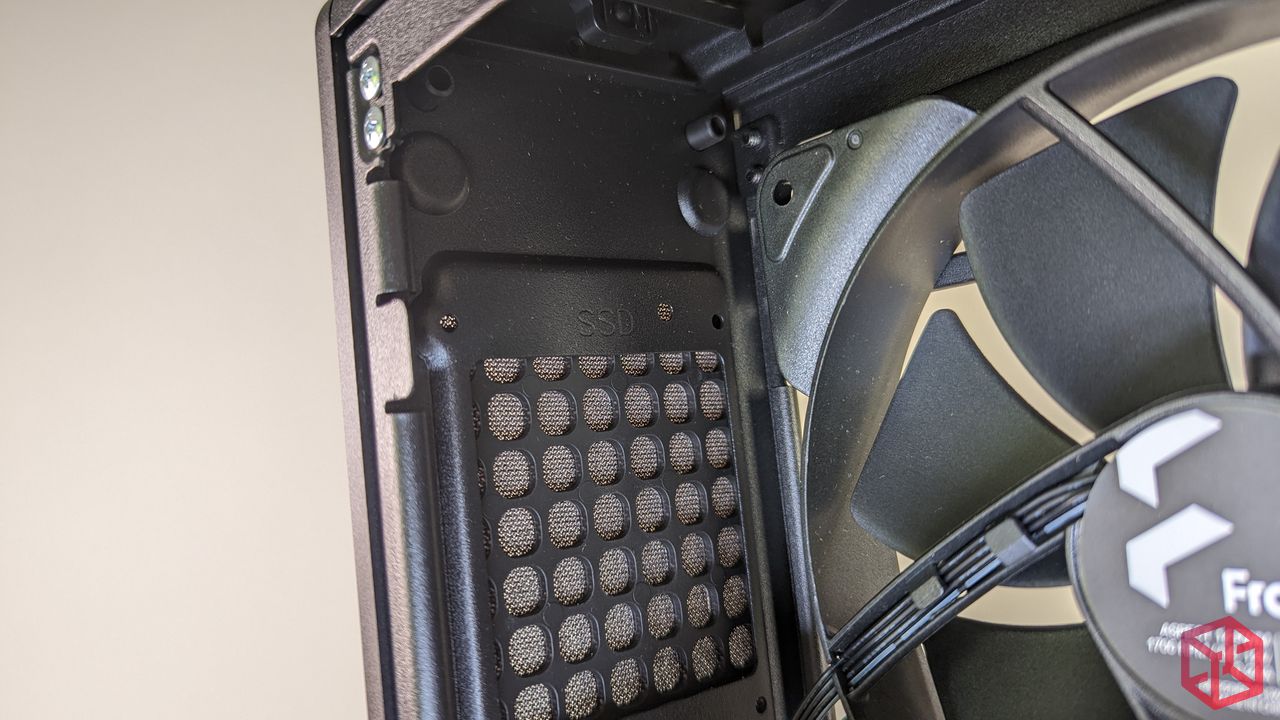
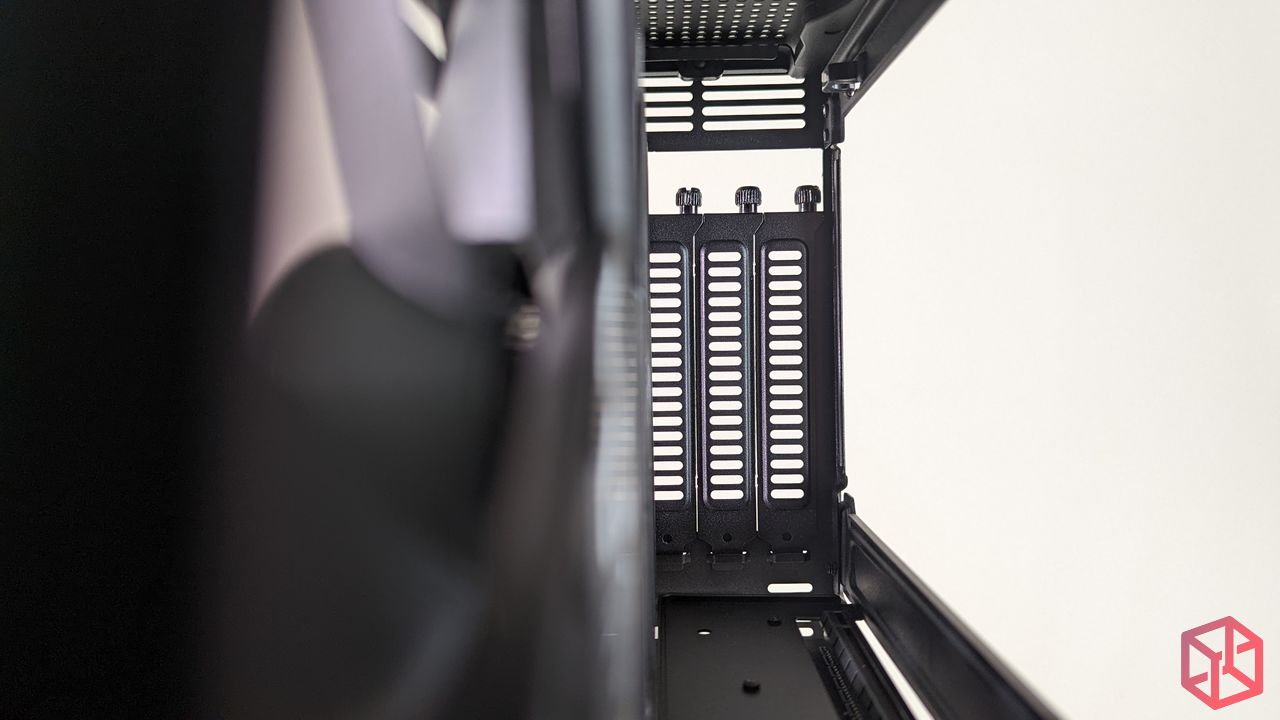
If you’re still using the added clutter caused by 2.5″ SSD drives, you’ll be pleased to see that the Ridge hasn’t forgot about you, and that it supports 4x 2.5″ SSD drives in total. The case includes a tool less design for the installation of 2x SSDs which makes installing those drives a snap, the other 2x SSD installation points will require the use of screws.
Like the Node 202, your GPU will welcome the additional airflow and you can add 3x 80mm fans to the top of the case provided your GPU height doesn’t eclipse 125mm.
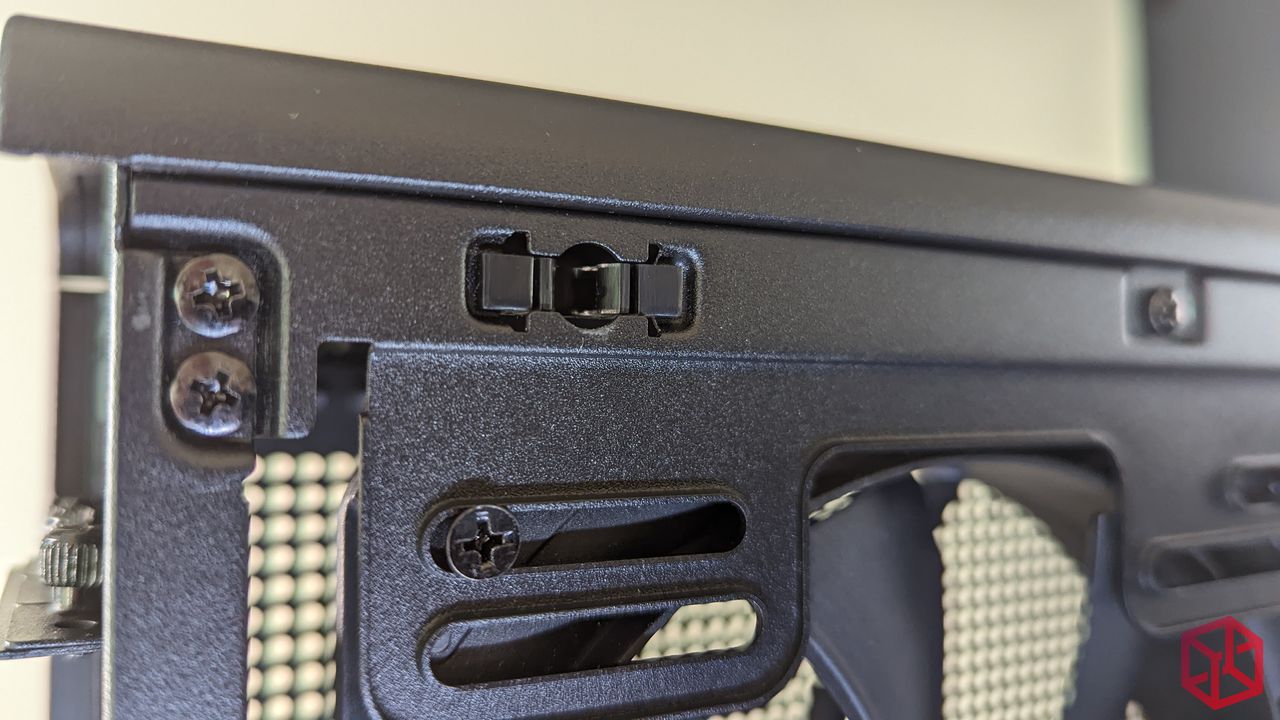
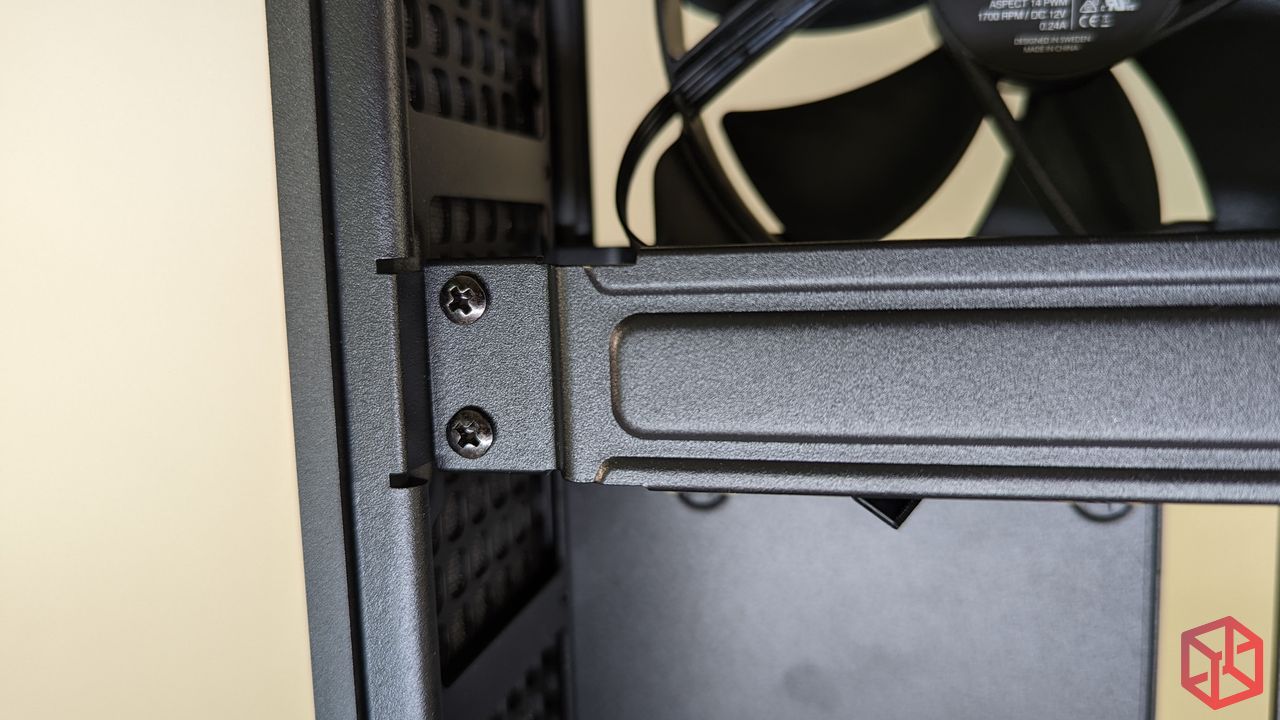
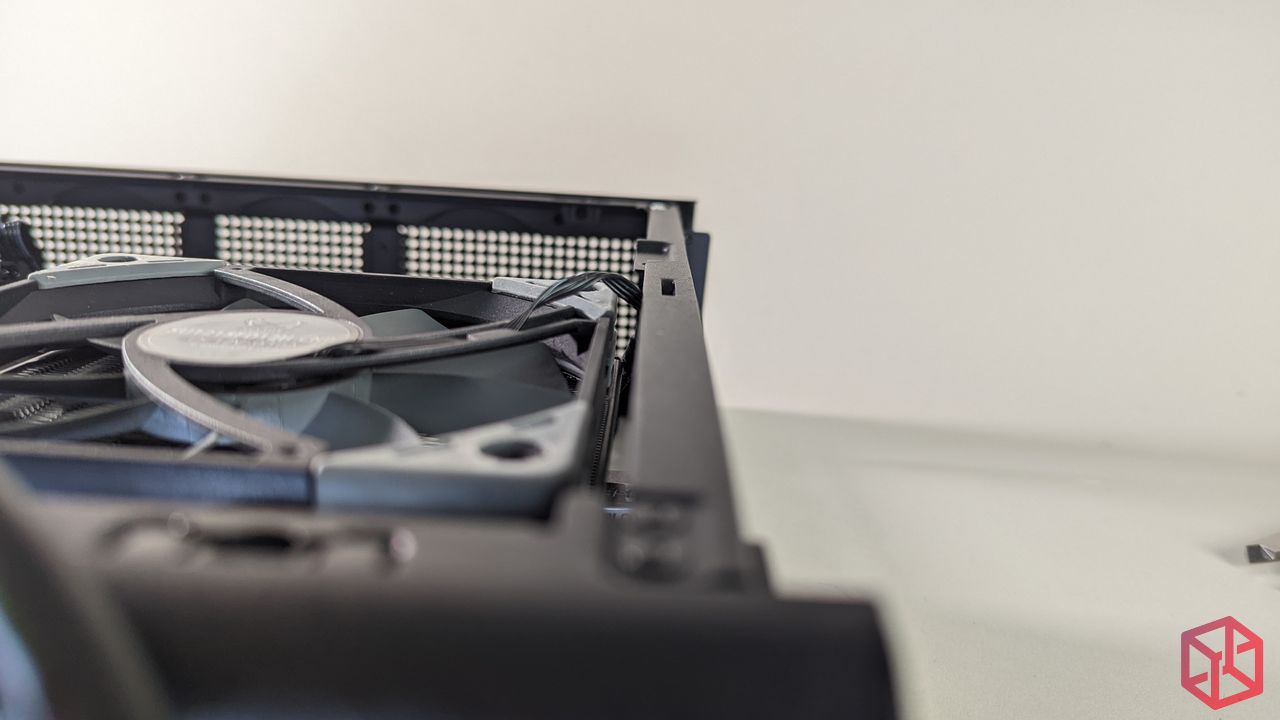
The PSU cage requires that the underside of the chassis be removed in order to install the PSU.
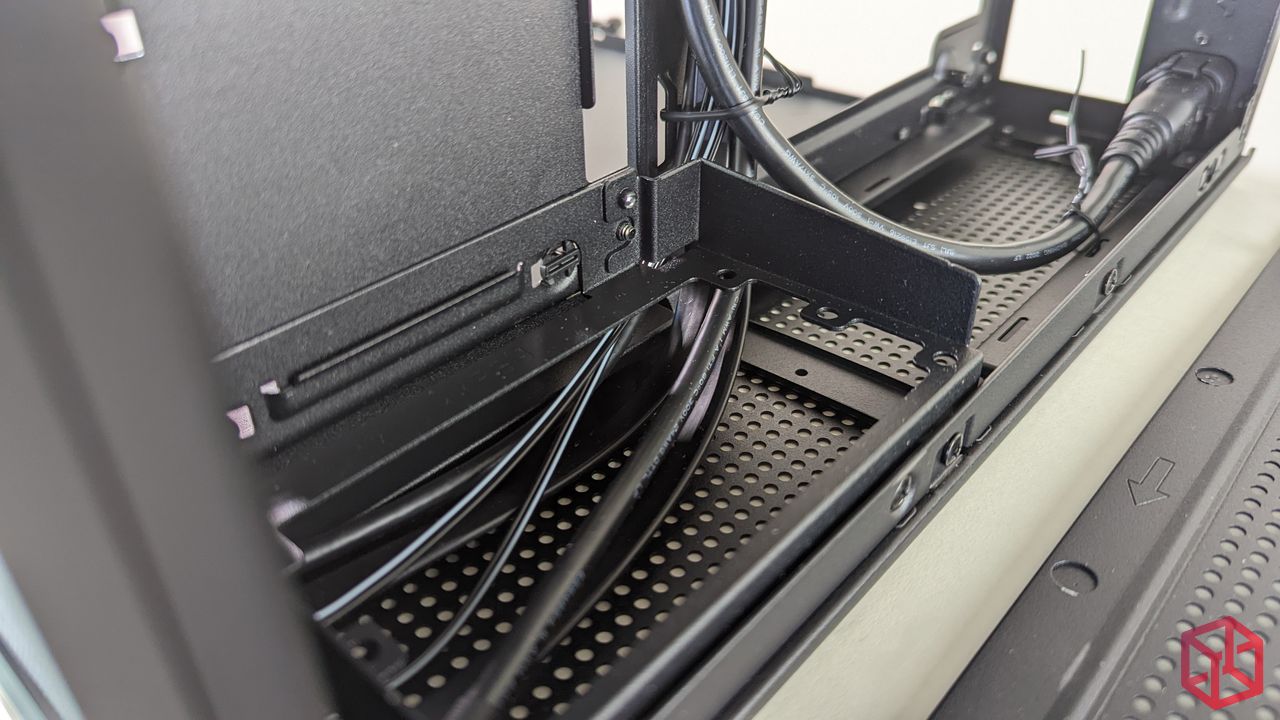
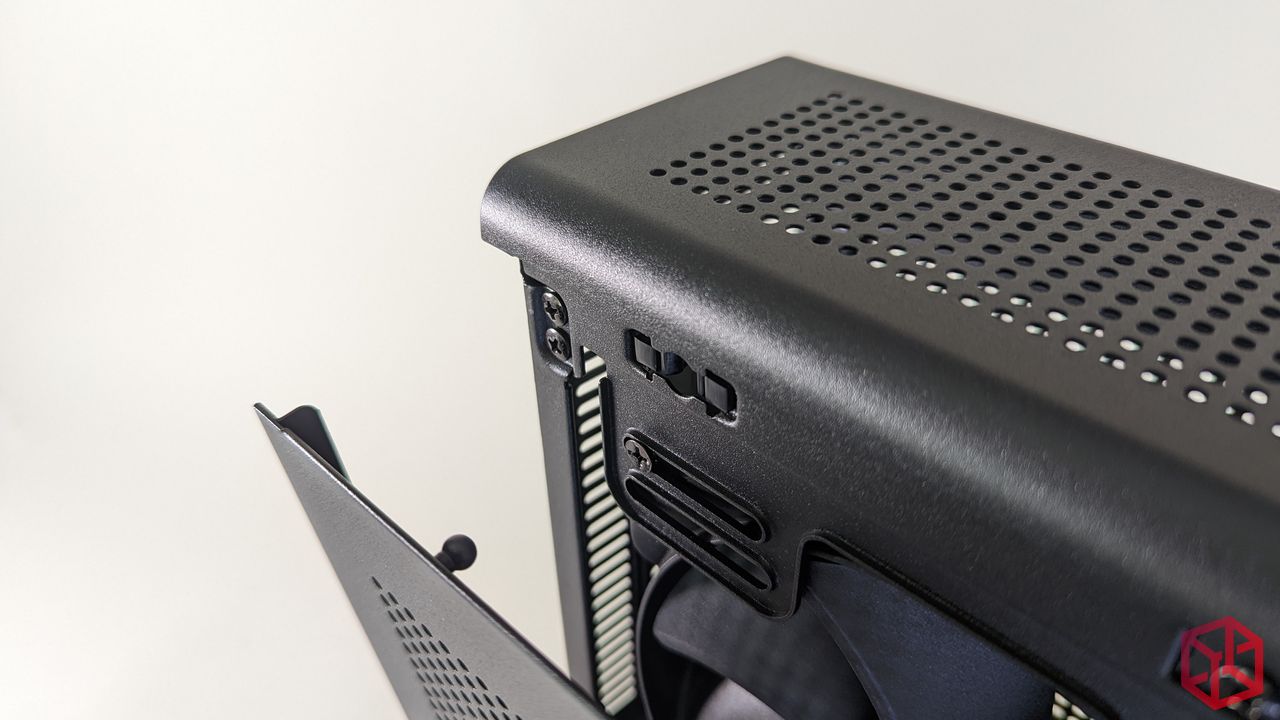
There are two screws on both sides of the chassis that will need to be removed. Rest assured, these screws are only visible when the side panels are off. On the inside of both the top and bottom panels, the case uses the same ball joint clips to snap into place just like the side panels which is a very welcome feature if you only have two hands.
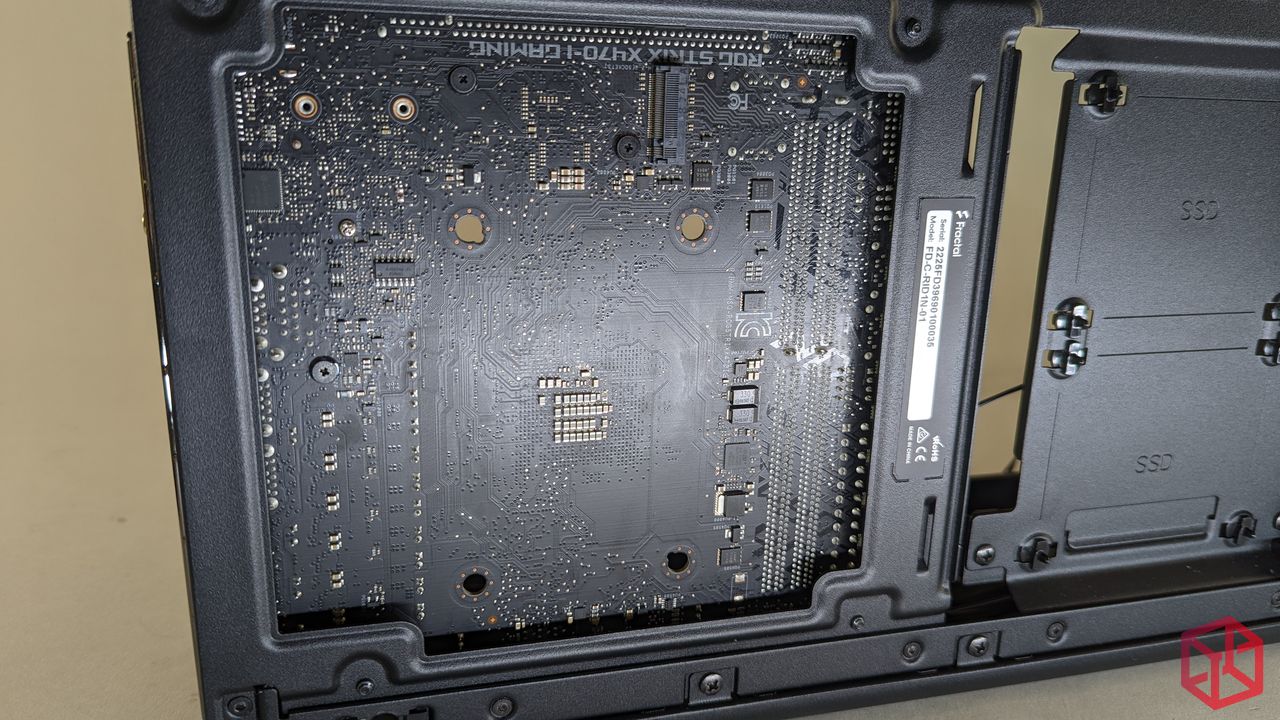
The motherboard mounts atop this gaping hole should you ever need to swap the heatsink or and another m.2 to the backside.
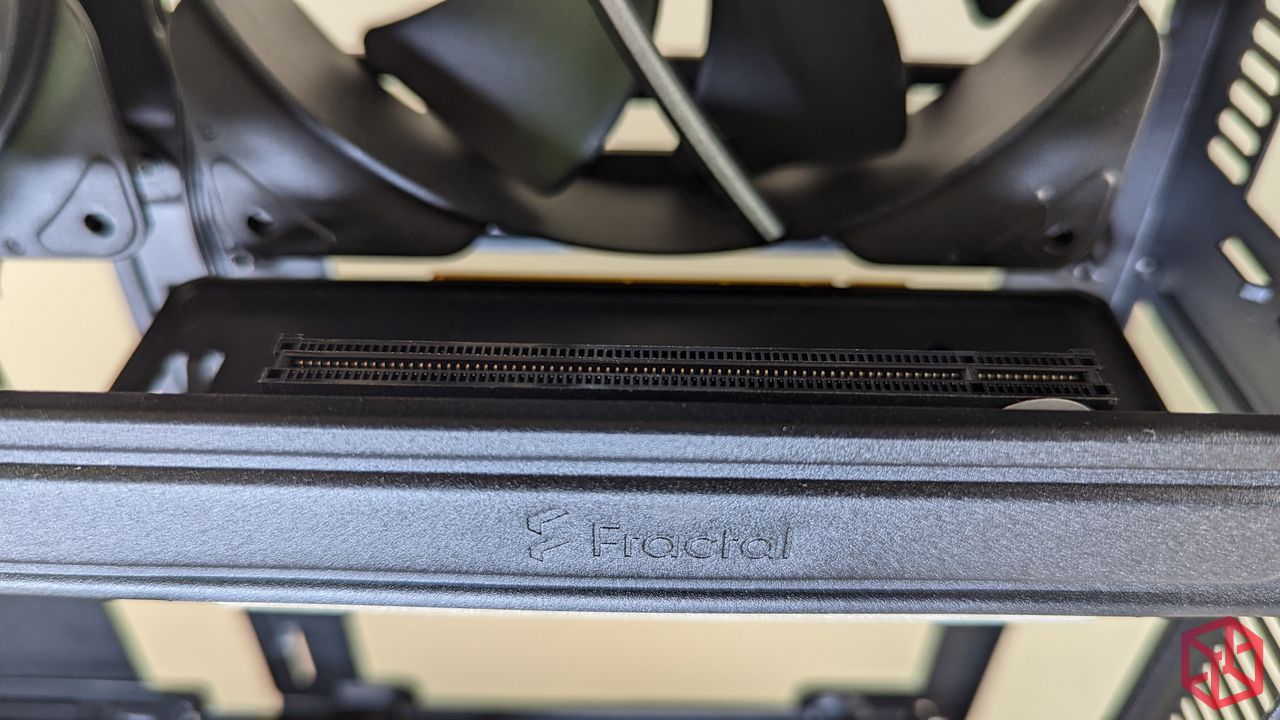
There are two nearby provisions for cable organization and at the top of this picture you can see the underside of a PCI riser card that will need to be plugged into the motherboard (similar to the Node 202).
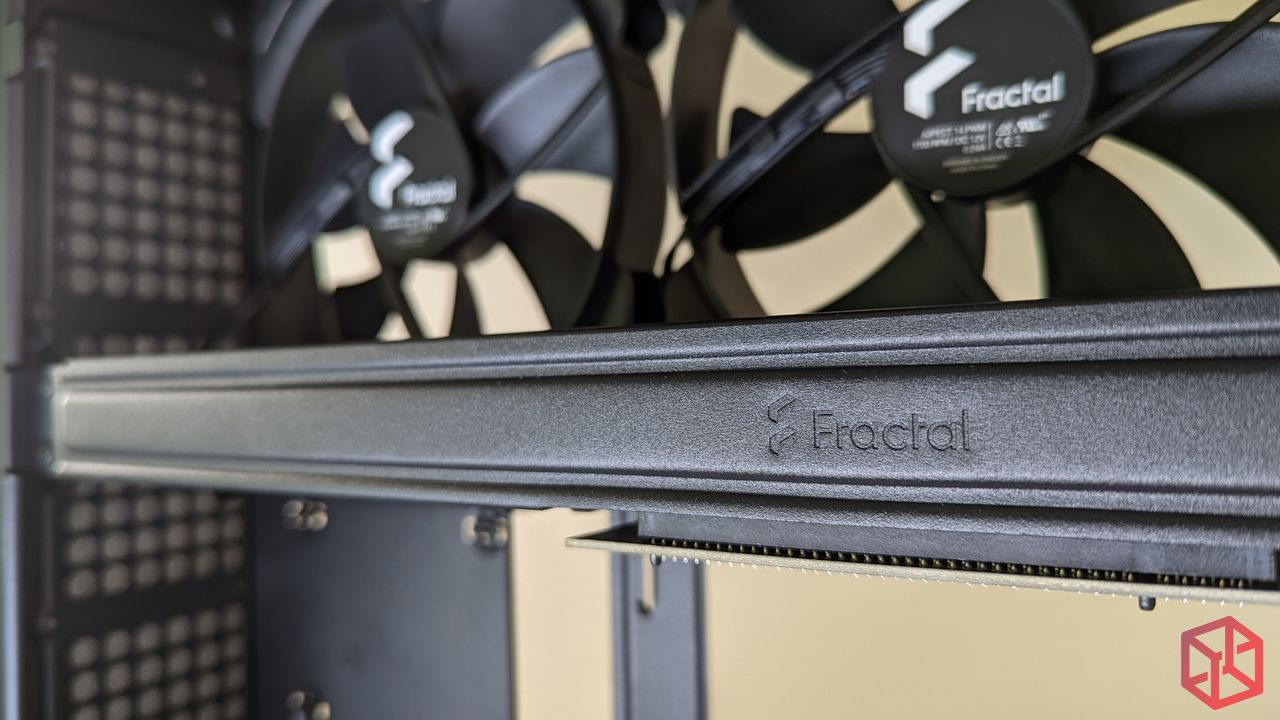
The GPU support bar that the PCI riser card is fastened to needs to be removed when installing the motherboard but the process is mindnumbingly simple.

While the case doesn’t have a window, the GPU support bar is nicely stamped with the Fractal logo.
At the back of the chassis is a single screw that will need to be removed.
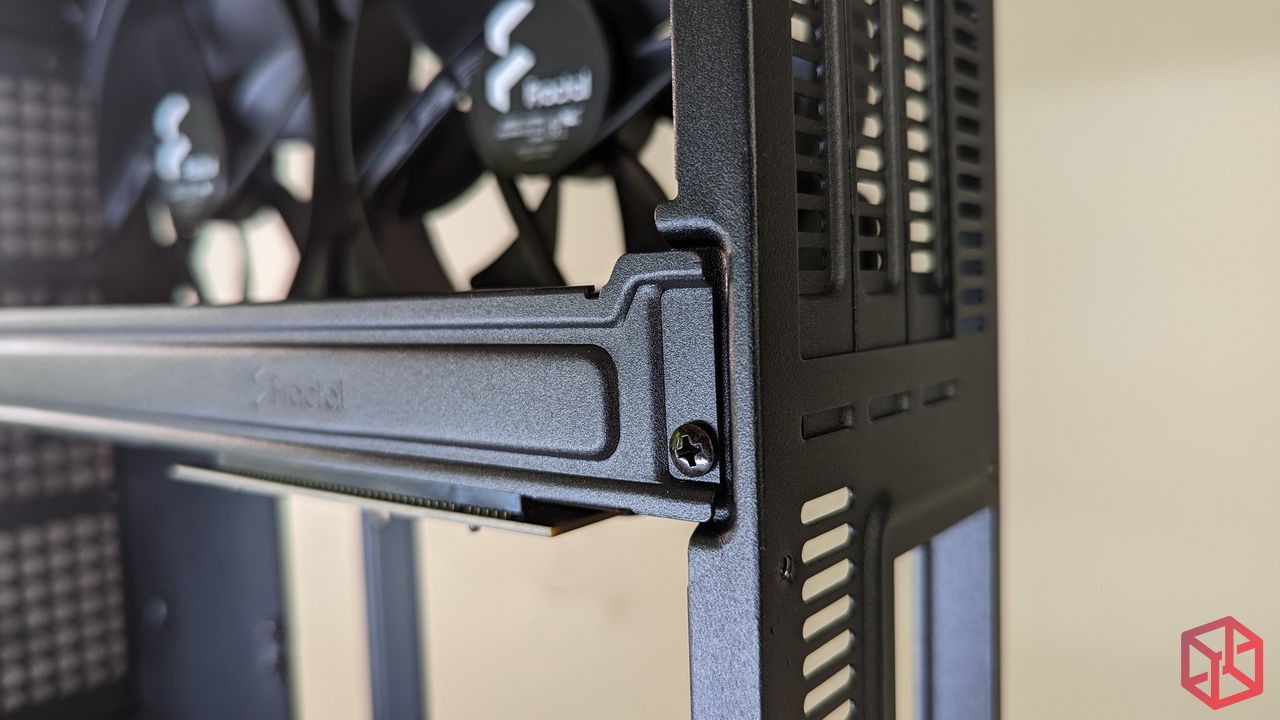
At the front of the bar, two screws will need to be removed.
With that bar removed, the whole PCI Riser assembly can be removed for the safe installation of the motherboard.
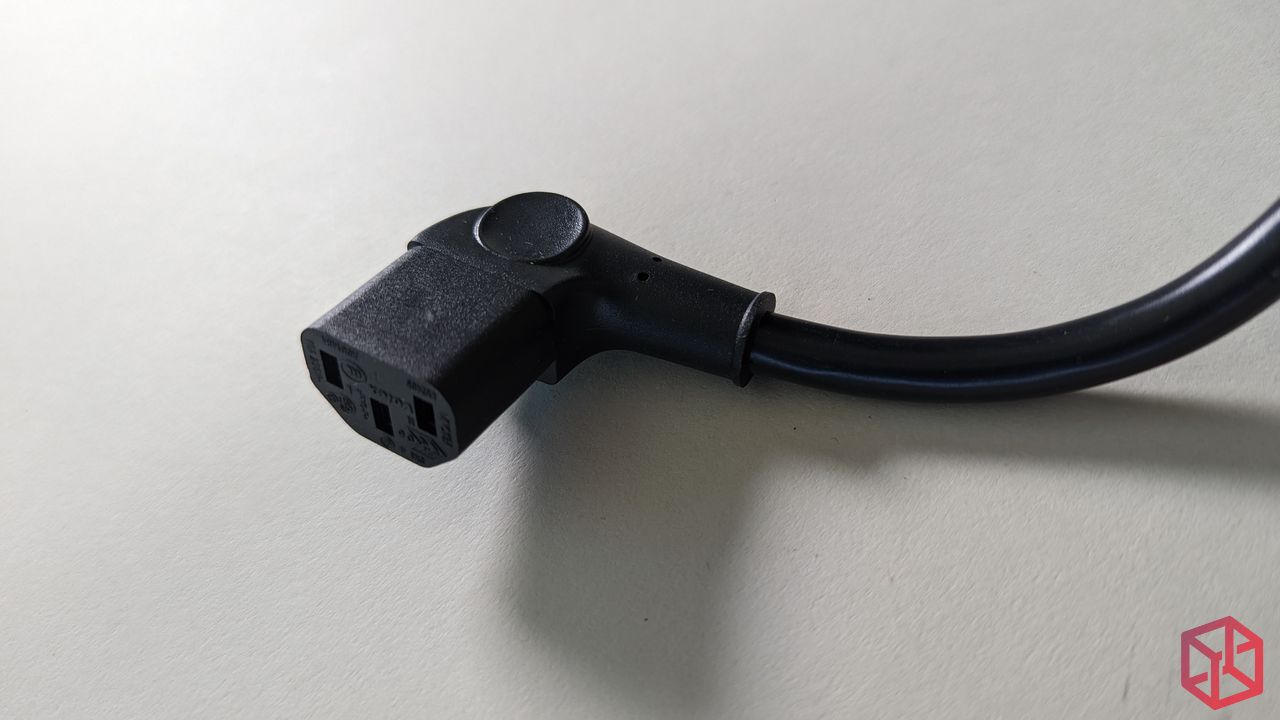
Here I will also mention that all of the included cables are black.

For the Ridge, Fractal appears to have switched to a different supplier for this 90-degree power cable. While I prefer the cable that came with the ERA, this isn’t a bad cable and it does exactly what it needs to.
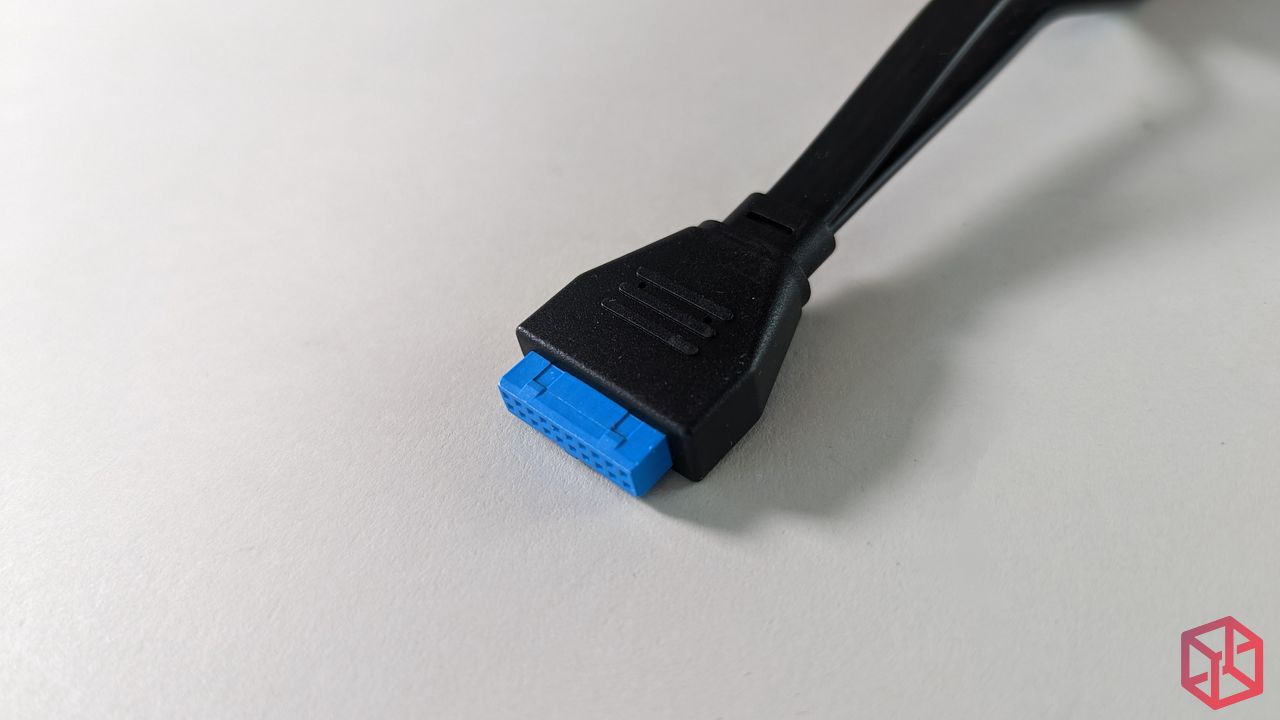
Here is the bulky USB 3.0 header cable that I cannot wait for the industry to forget. It’s such a cumbersome cable to make look nice and it’s always way too long but that’s no fault of Fractal Design.
With this cable installed, you can use the 2x USB-A 3.0 ports at the front.
Still not widely adopted on all ITX motherboards, this is the USB 3.1 Gen 2 header that enables the USB-C port at the front of the case.

Simple. The only chassis cables that really matter.
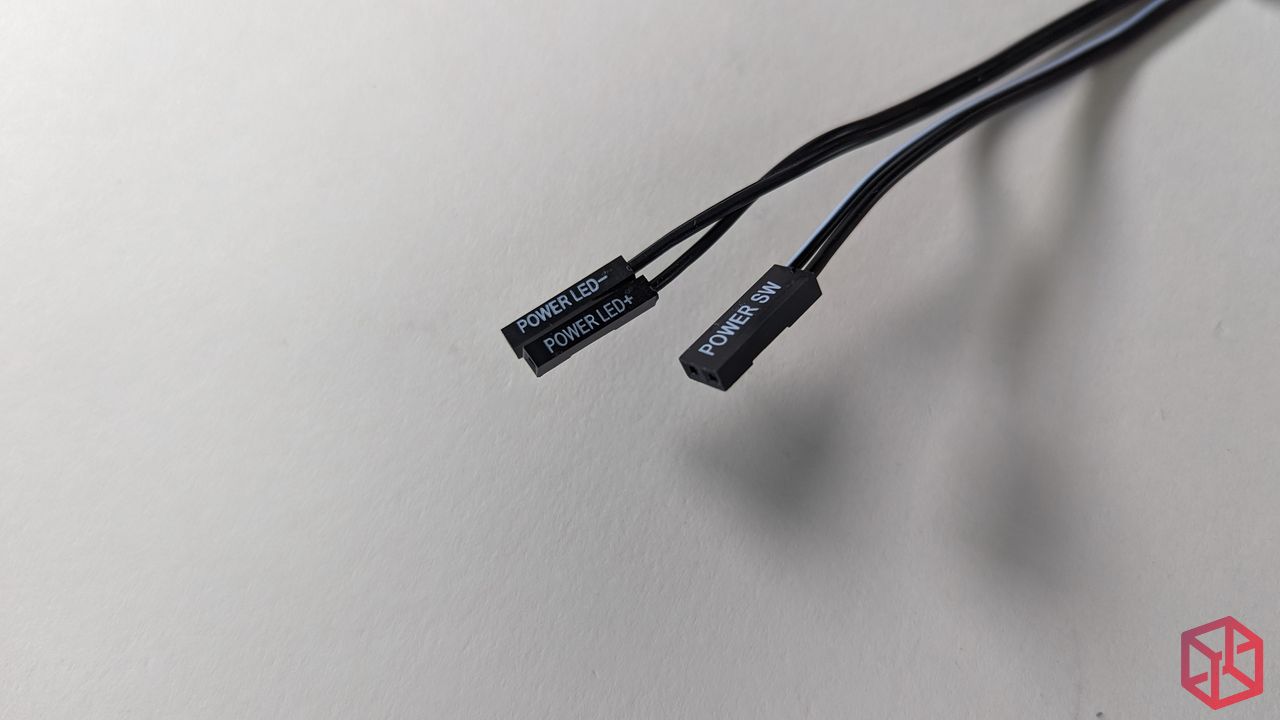
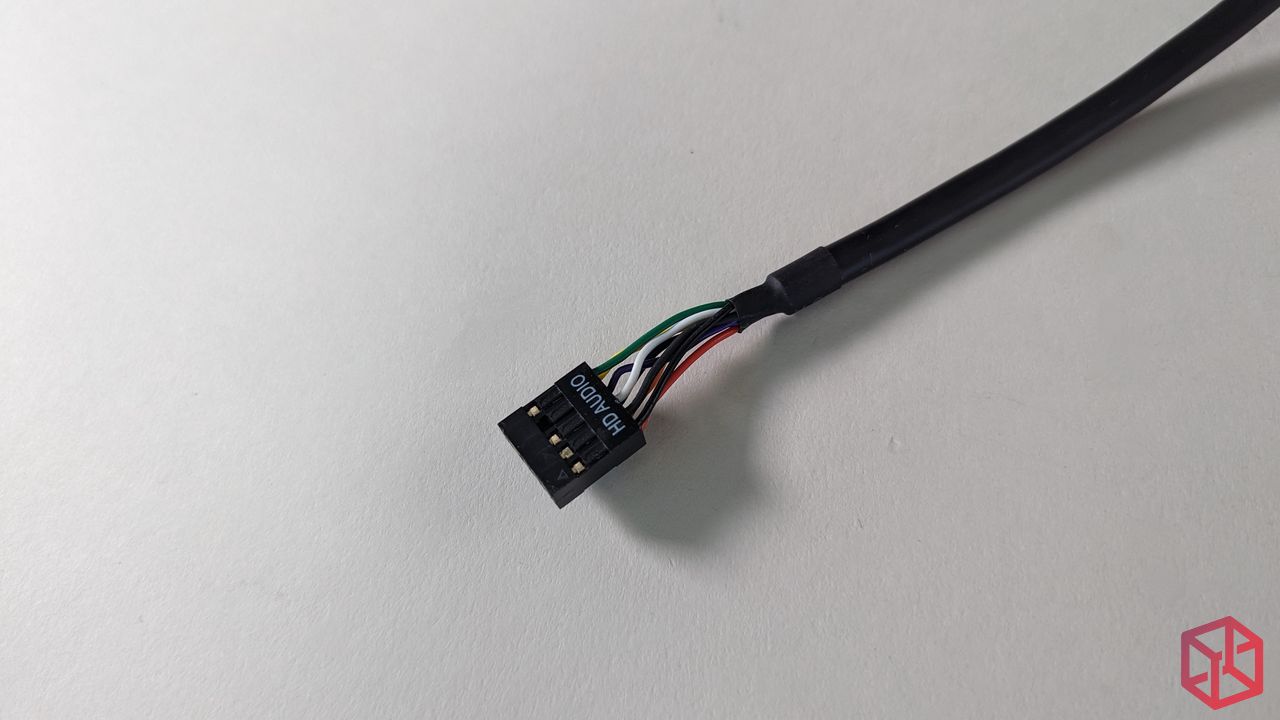
The 9-pin HD Audio connector is really flexible at the end for those hard to reach places.
You’ll need this installed in order to use the 3.5mm combo jack at the front.
Installed from the inside of the chassis, the case and the stand include provisions for the screws that are threaded into the stand.
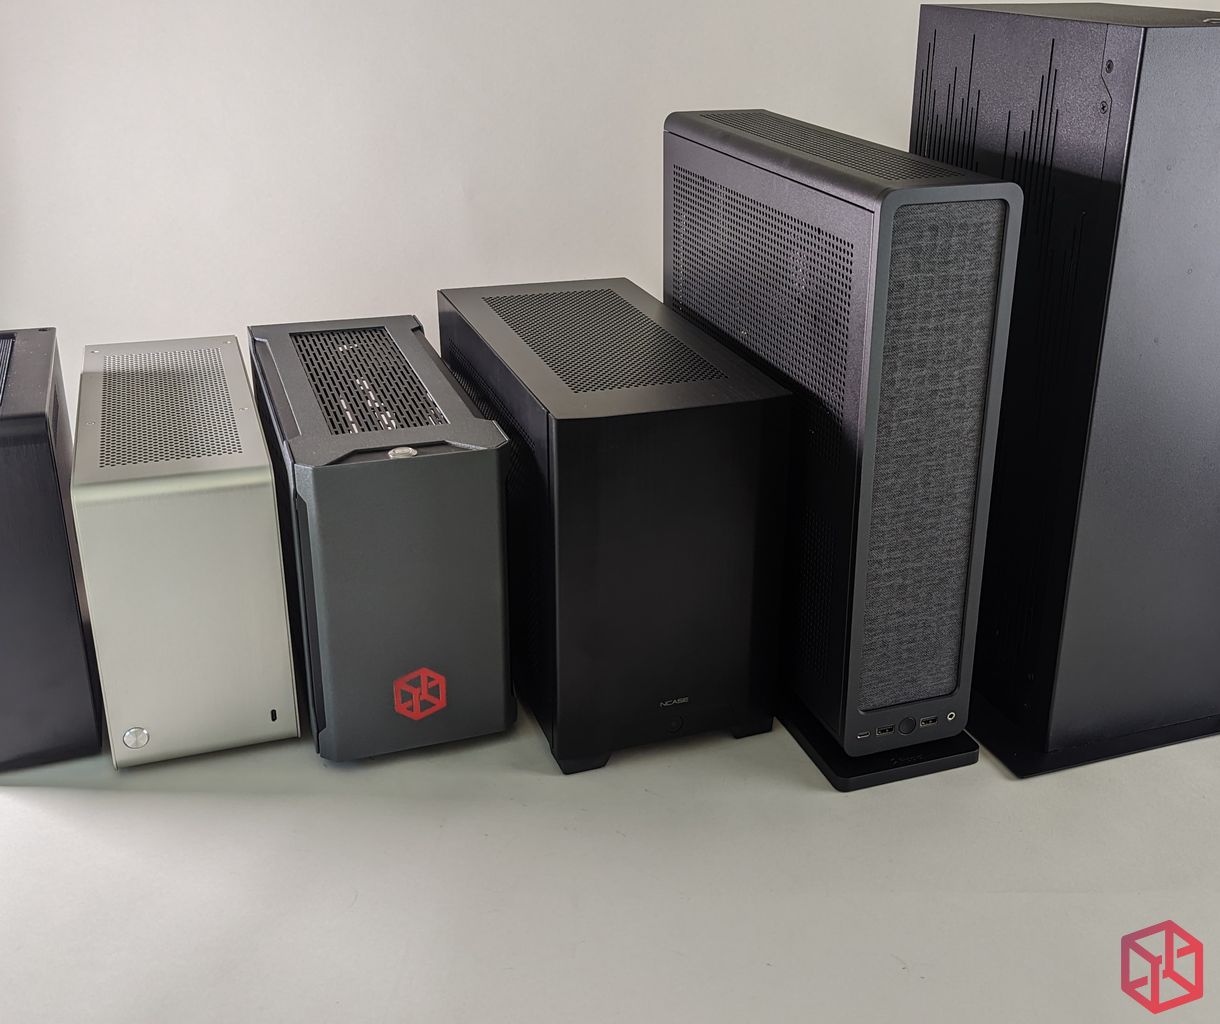
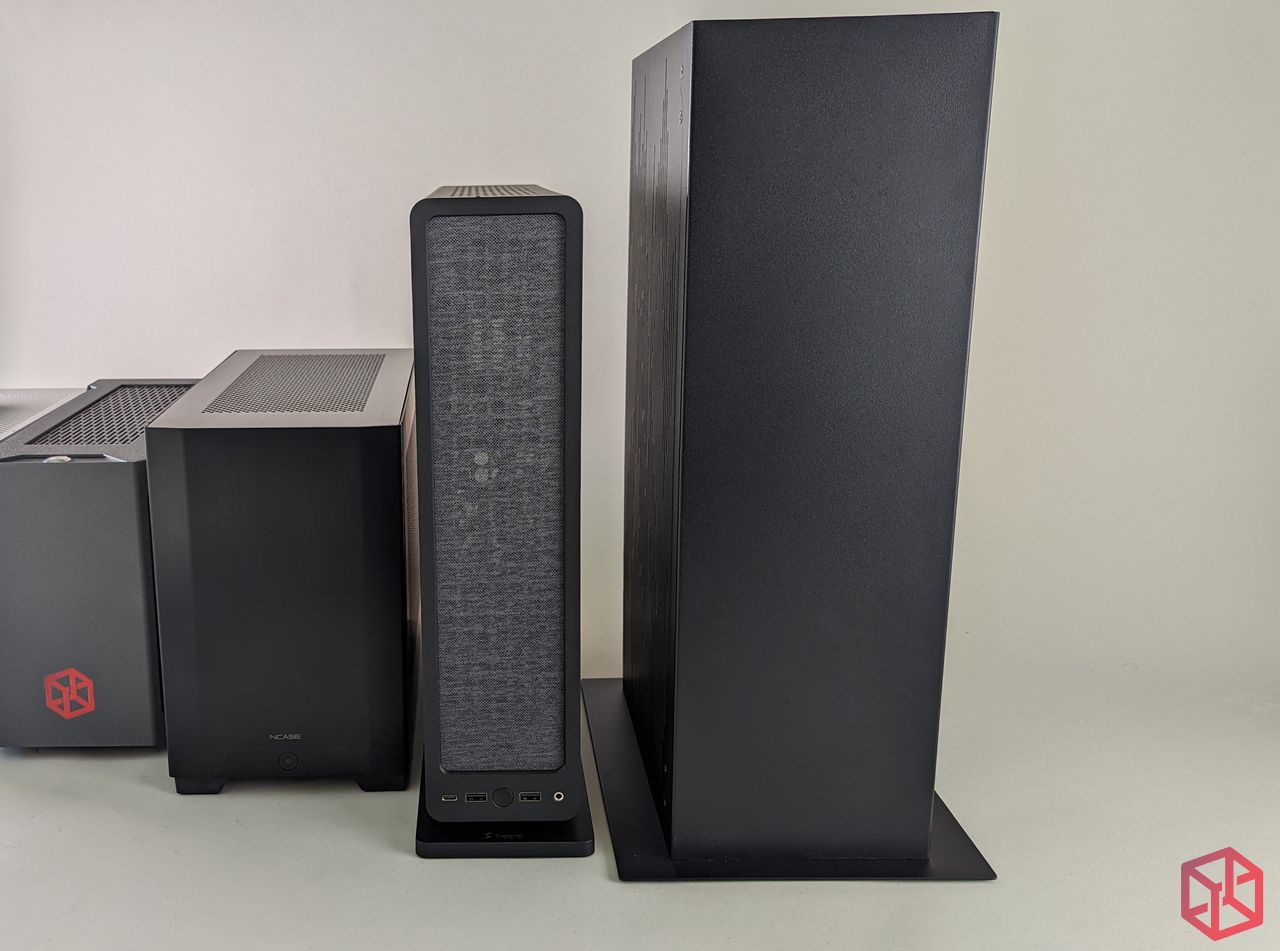
The Competition
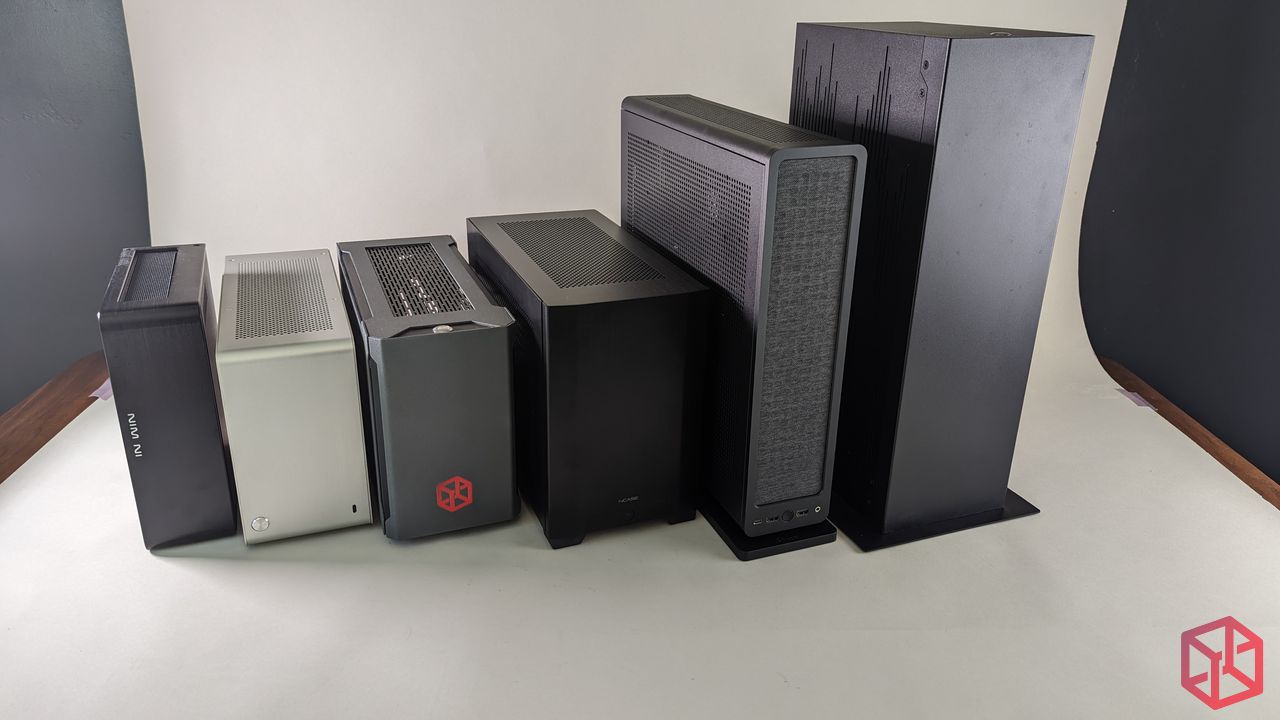
At 12.59 liters, the case is ever so slighter smaller in volume than the 12.7 liter NCASE.
From left to right: InWin Chopin – Dancase A4 – Sliger SM550 – NCASE M1 – Fractal Ridge – Sliger SV590
While I didn’t have a 10.2 liter Fractal Node 202 to compare to, I welcome the size of the Fractal Ridge as it feels like a Node 202 without any real compromises.
Measurements
It’s Mitutoyo time!
The front of the case is exactly as thick as they said it would be. There is a joke here somewhere…
I was able to read about 59.56 mm from case to fan, for the max thickness of a GPU when 25 mm thick fans are installed.
The specs call for 57 mm so it looks like their specifications offer a comfortable gap of 2 mm which is welcome.
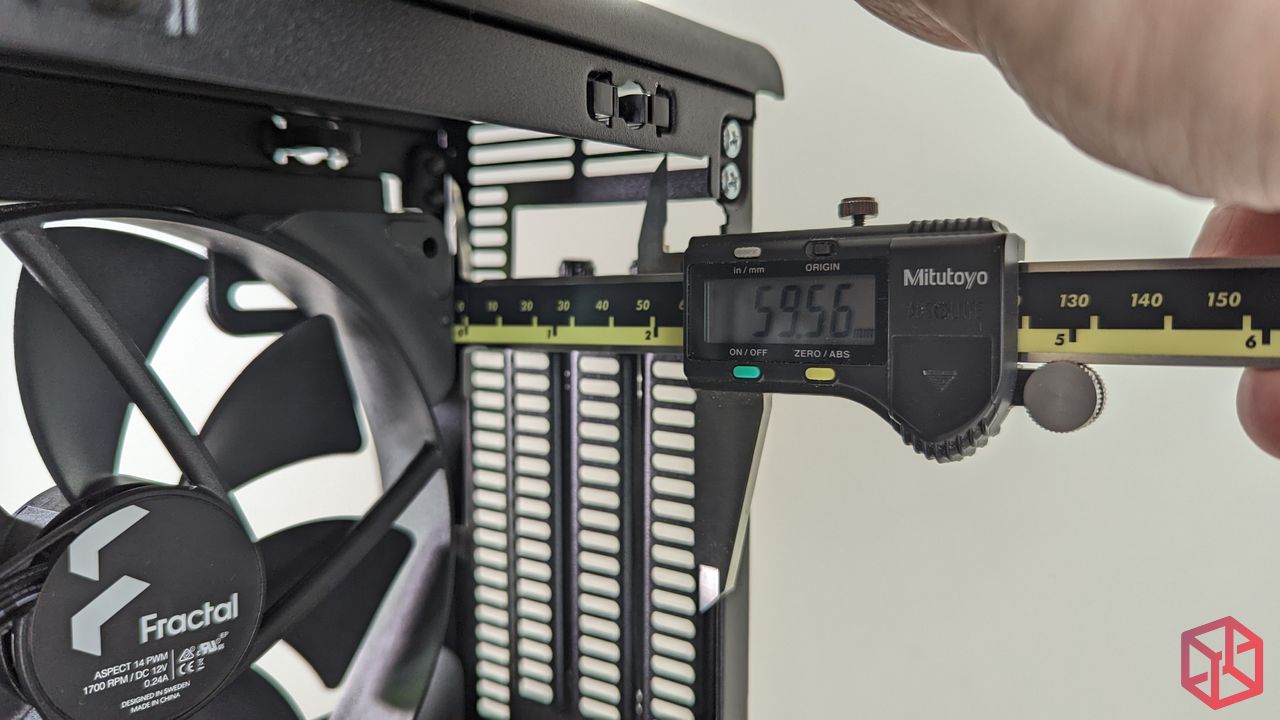
Here you can see the the 25mm fans slightly overlap the 3rd PCI slot. If you have a 3-slot card, you will want to pick up some 15mm fans. Any thicker though and the fans will need to be removed in order to support GPUs up to 82mm thick.
Installing a standard height GPU is easy and won’t require the top to the be removed in order for it to be slotted into place.
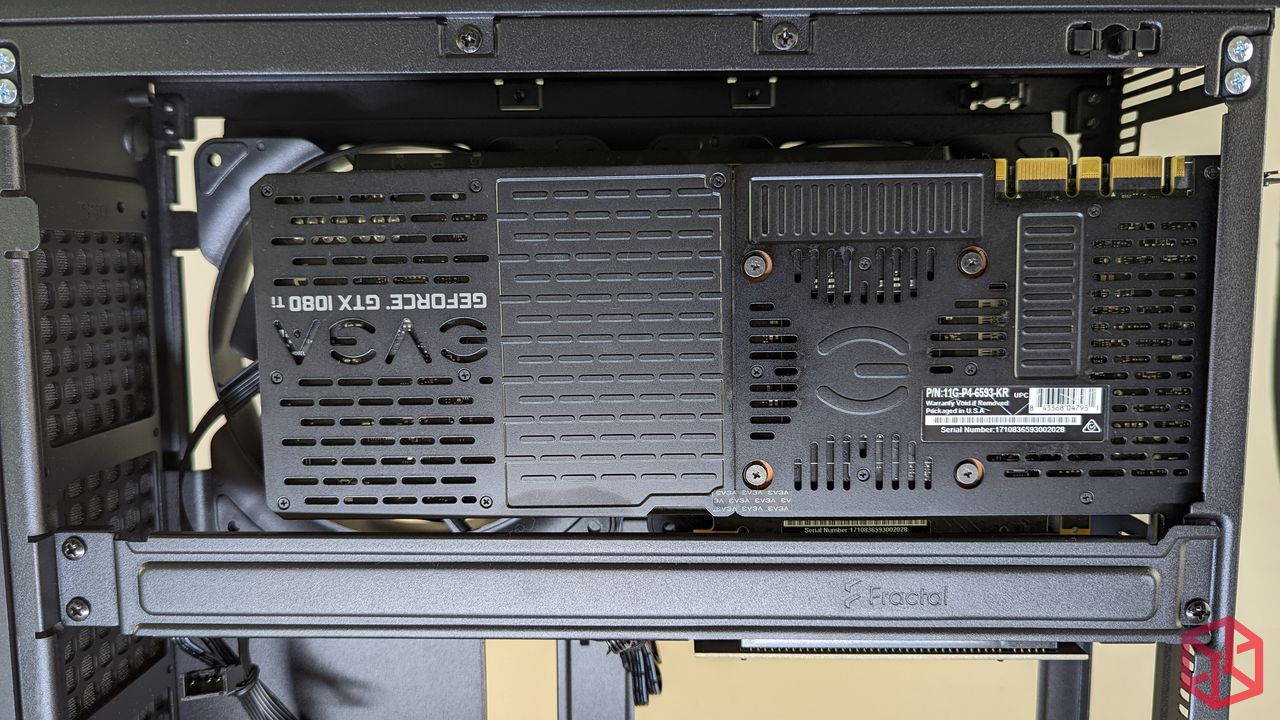
We’re going to miss you EVGA.
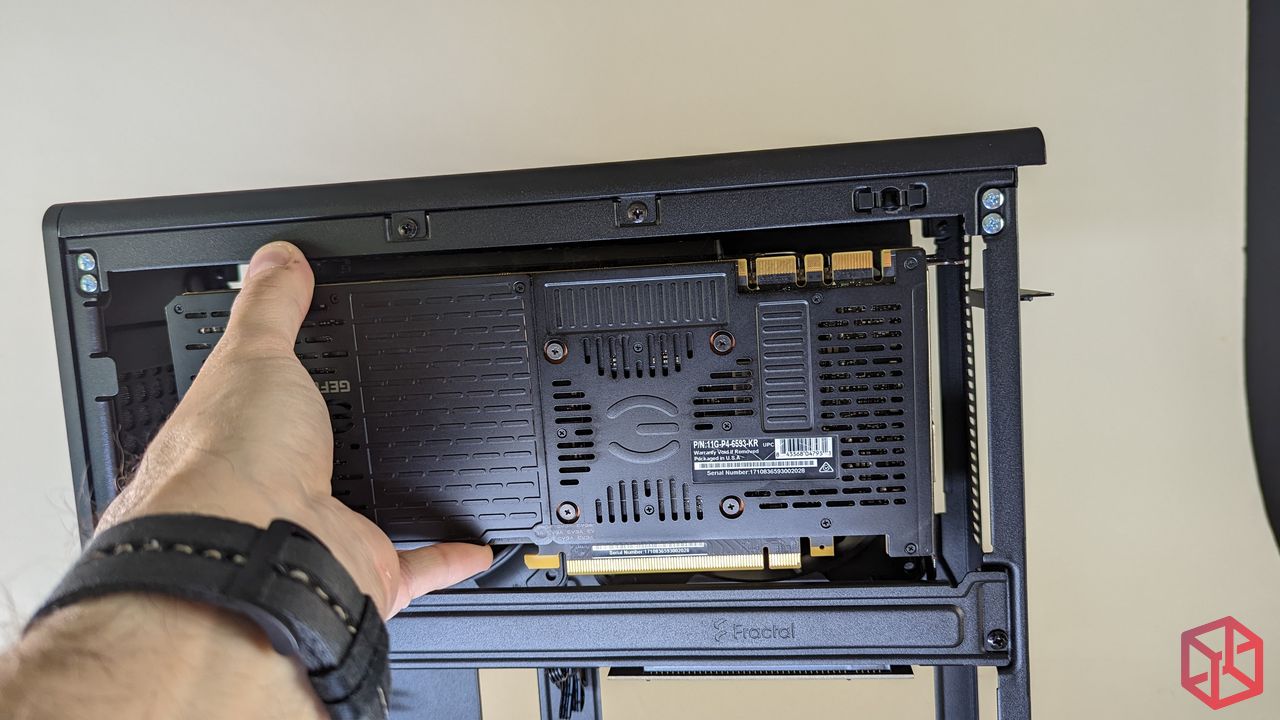
For perspective, the GPU that I am using barely protrudes beyond the height and width of the 2-slot PCI bracket itself.
Instead of using a ribbon cable, a small riser card has to be plugged in for the GPU to align with the PCI brackets at the backside of the chassis. With a Dremel and some creativity, a much taller GPU could be used without the use of this small riser card. That’s something I would love to see.
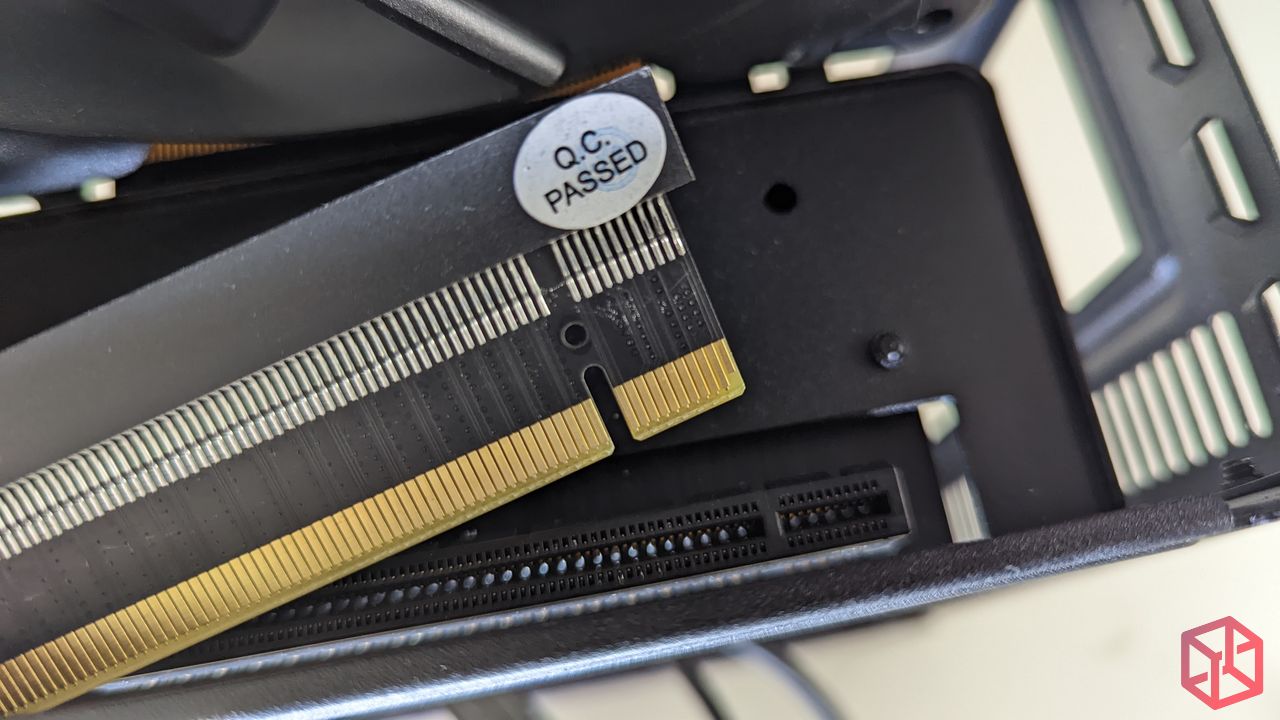
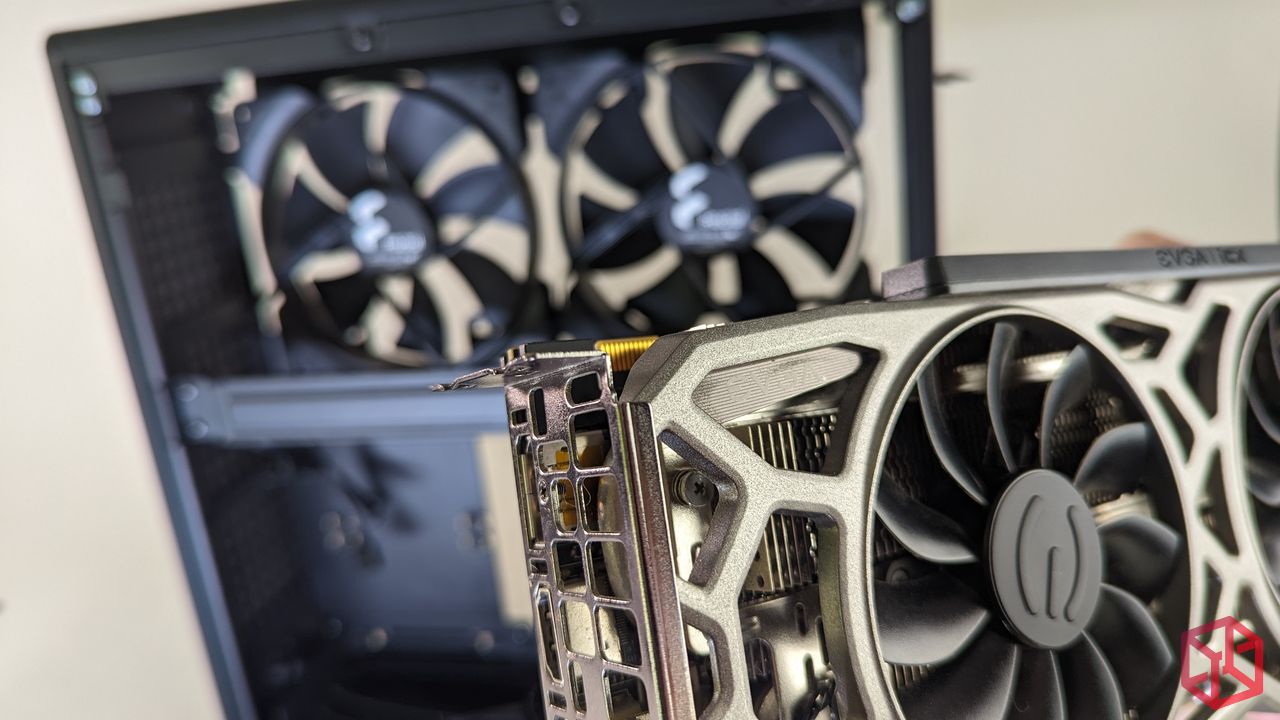
The riser card sits flush with the top of the GPU mounting bar for a clean installation but it won’t matter much since there is no window option.
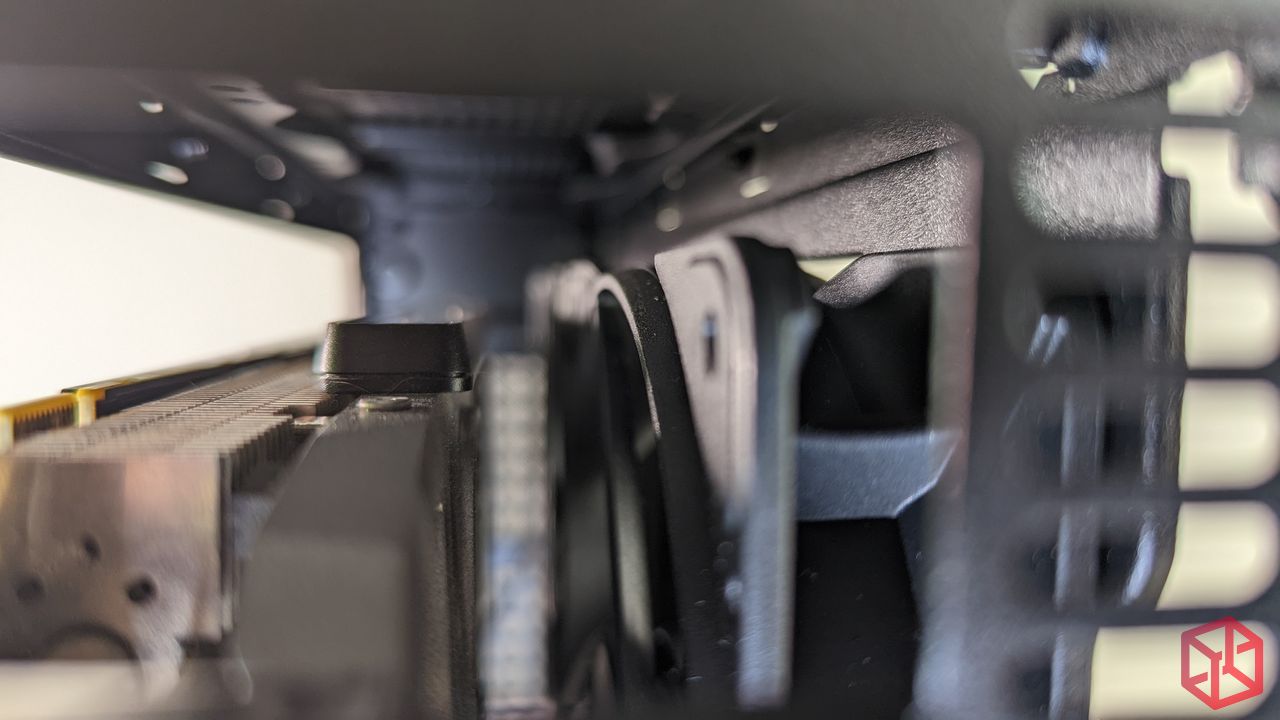
While this macro shot is heavily focused on the protruding lip of the 25mm fan, it helps to illustrate the sizeable gap between the GPU and the fans.
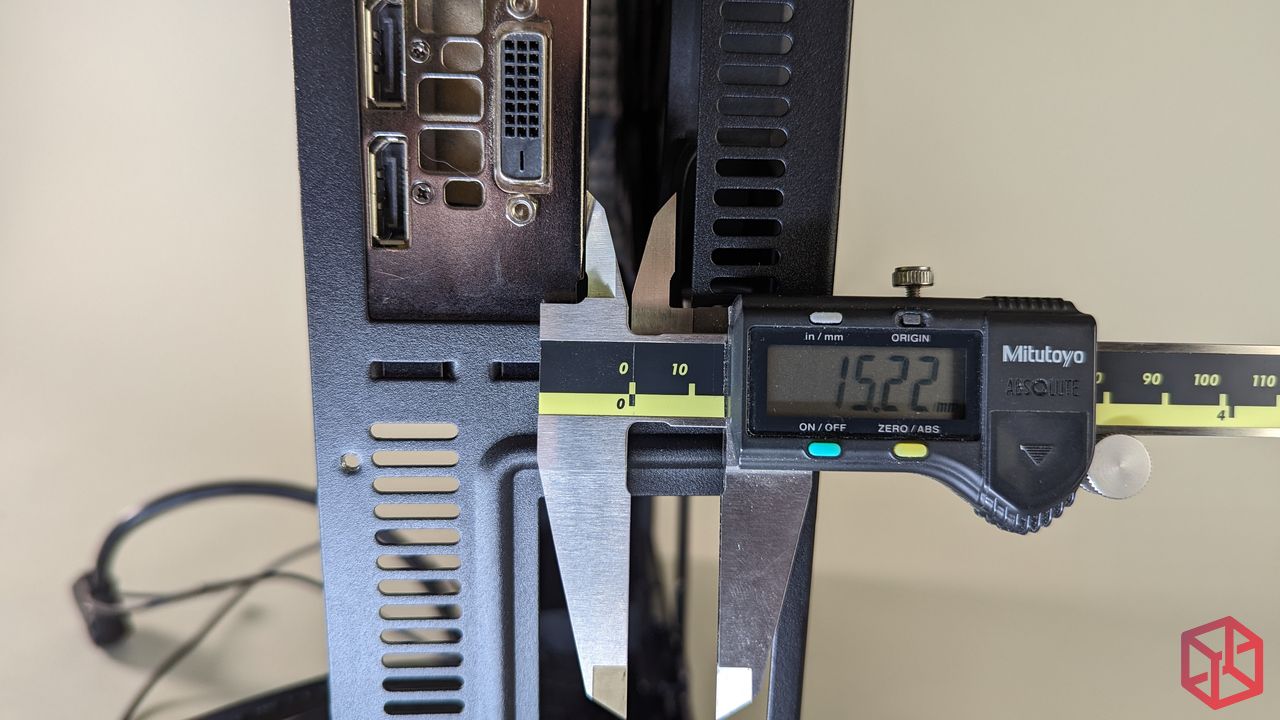
With a GPU that takes up just 2 slots, I was able to secure a nice 15.22 mm gap.
The Build
While a Noctua NH-L12S HSF would have been my personal choice of heatsink for this chassis, the Scythe Big Shuriken 3 (reviewed here) put up an equal fight in our testing. That said, depending on your processor, fan, voltage, and chiplet orientation, thermal paste, and the temperature of your room, your thermal results may vary.
With a 25mm fan installed, the HSF was too tall.
With a 15mm fan, it fit perfectly with some headroom to spare. This is an important note because when a fan brushes up too closely to the side panel it creates a lot added noise.
Servicing the motherboard or adding an m.2 is an easy task in this case.
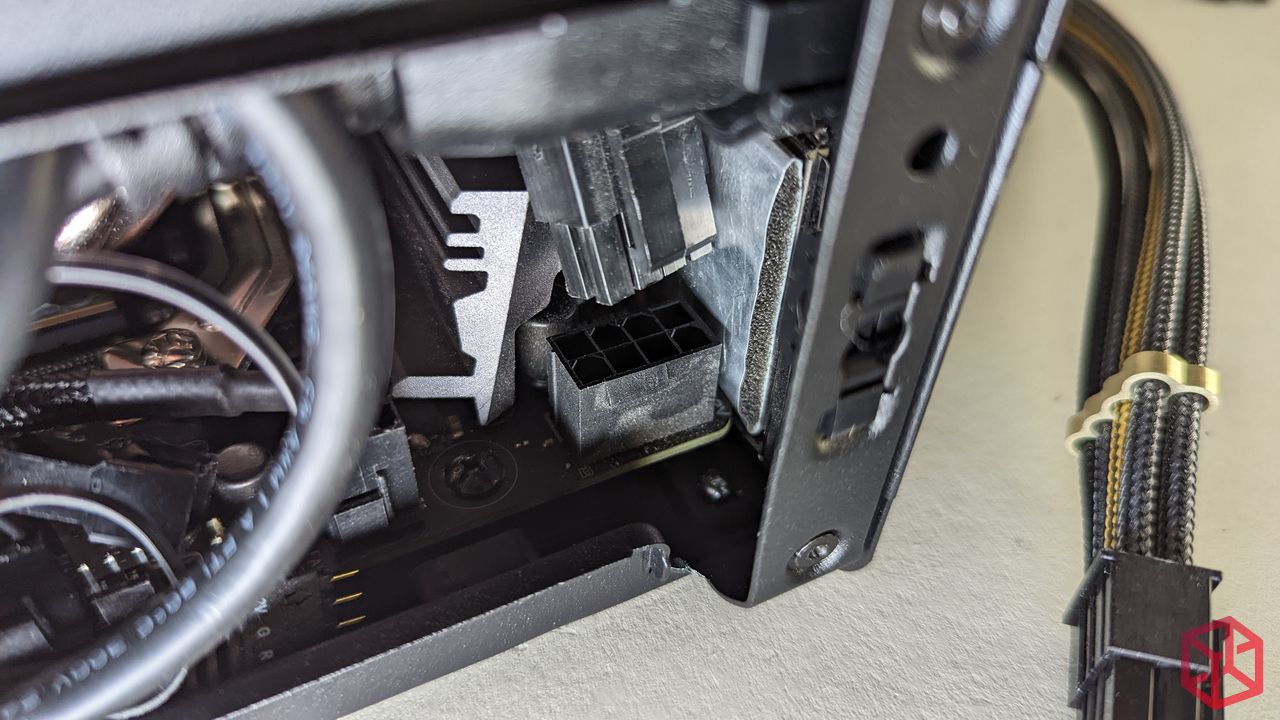
Here you can see where the motherboards 8-pin connector is buried when the motherboard is installed.
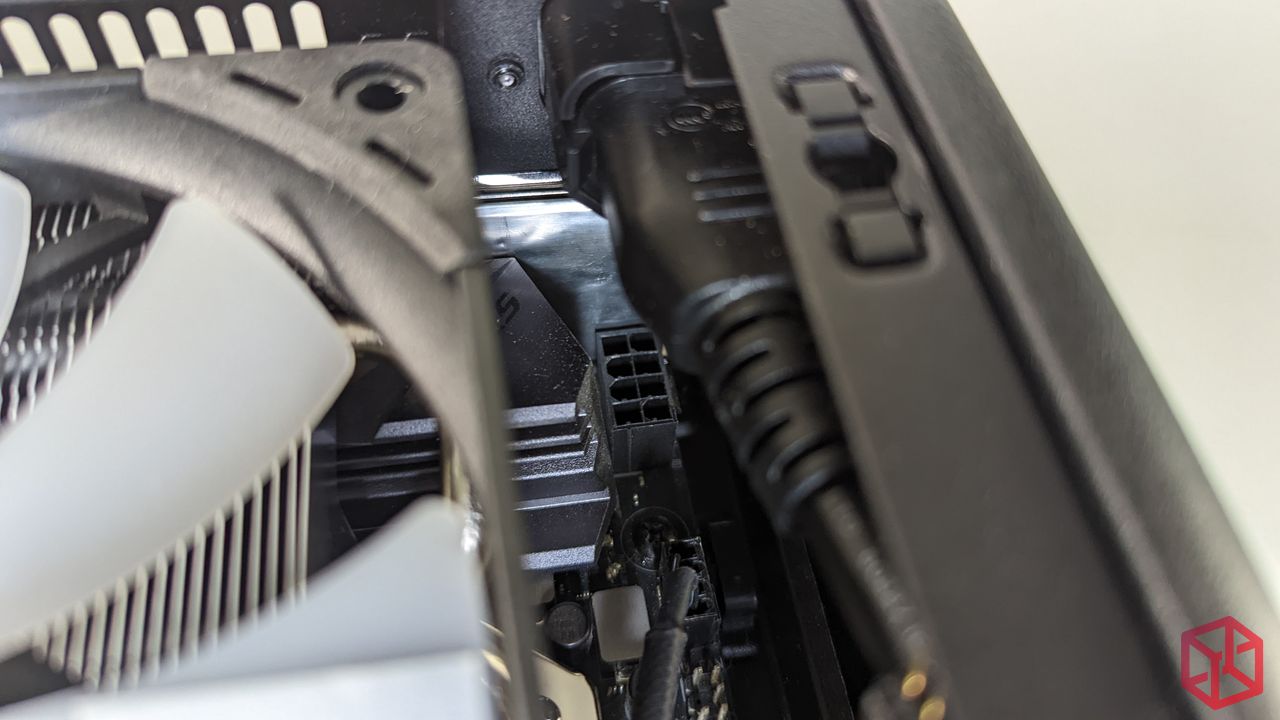
Installation wasn’t difficult and didn’t require anything to be removed. Here I wanted to illustrate that even an aftermarket cable (non-ribbon) fits comfortably.
If you have fat fingers, removing the panel at the underside of the chassis makes the installation even easier.
It was important that I didn’t use the custom length cables for the build in order to accurately demonstrate what a complete build would look like using standard off-the-shelf components and the included velcro straps.
The build itself went off without a hitch once you figure out how to properly bend the bulky USB 3.0 cable and repair any bent pins on the motherboard (oops!).
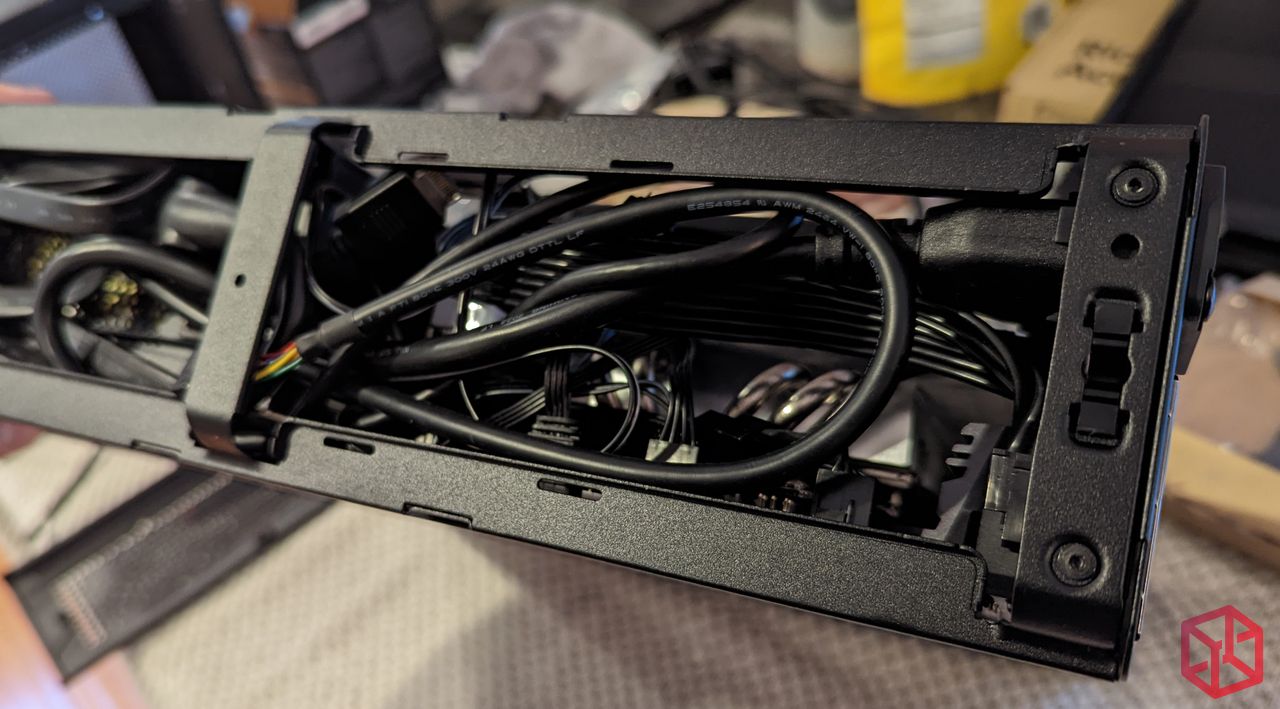
I also decided to include the larger Silverstone SFX-L sized PSU to show that even with a larger PSU installed, there is plenty of room to route the cables in the Ridge.
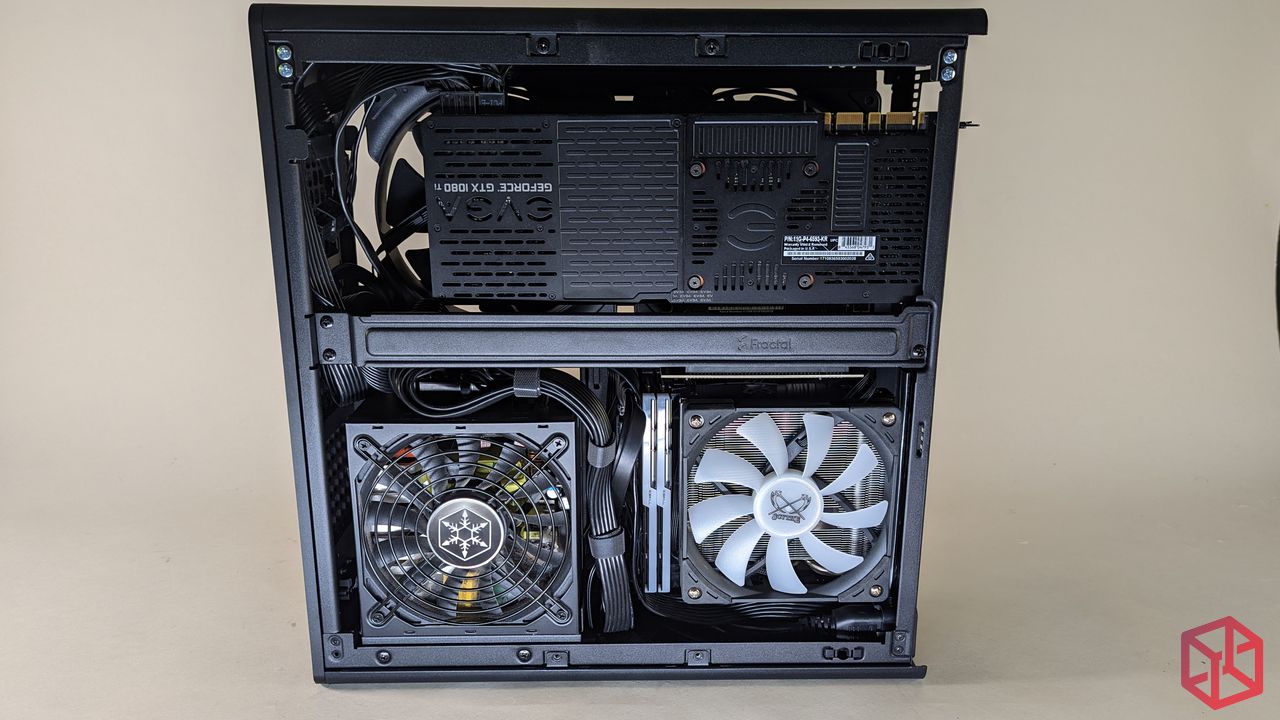
Above is the completed build.
Below is that same build with the underside of the case removed in order to show how the cables can be tucked and kept out of sight and I didn’t even have to resort to the use of zip ties.
Test Setup
Default voltages and fan speeds were used to accurately reflect the same standard out-of-the-box experience that little Timmy might have after building his first computer.
Test bench:
CPU: AMD Ryzen 2700x (8c/16t)
GPU: EVGA 1080TI SC2
Motherboard: ASUS ROG STRIX X470-I GAMING
Memory: 16GB of DDR4 @ 3200MHz (C14, 2x16GB)
Storage: 1x Samsung 960 EVO 500GB
Cooling: CORSAIR iCUE H100i RGB PRO XT
Power Supply: SilverStone SX800-LTI 800W SFX-L
Software Used:
Windows 10 install (ver. 21H2)
NVIDIA GeForce Driver v516.94
CPU-Z 1.91.0 set to stress for 15 minutes
Furmark 19.0.0 set to stress for 15 minutes
Results
Results are heavily subjective and your mileage will vary depending on how many cores you’re planning to stuff into this chassis.
As always, we highly recommend undervolting your components to maximize your cooling, save on electricity, and to configure custom fan profiles to reduce noise.
Things like the number of cores, the temperature of your room, etc etc, will all provide different results.
Your results will also be drastically different if you’re planning to build an APU home theater setup that uses a 240 mm or a 280 mm radiator.
For these results, I ask that you keep in mind that I am using an older Ryzen 2700X with a TDP of 105 watts and that it was being cooled by a 15mm thick fan (reviewed here).
To add, both components were under a 100% synthetic load, consuming more juice and generating far more heat than even the heaviest of normal loads.
IDLE: 30c GPU/ 63C CPU
LOAD: 64C GPU/ 76c CPU
All that said, those are very impressive results. With a 95w TDP processor, you would likely experience similar or better results.
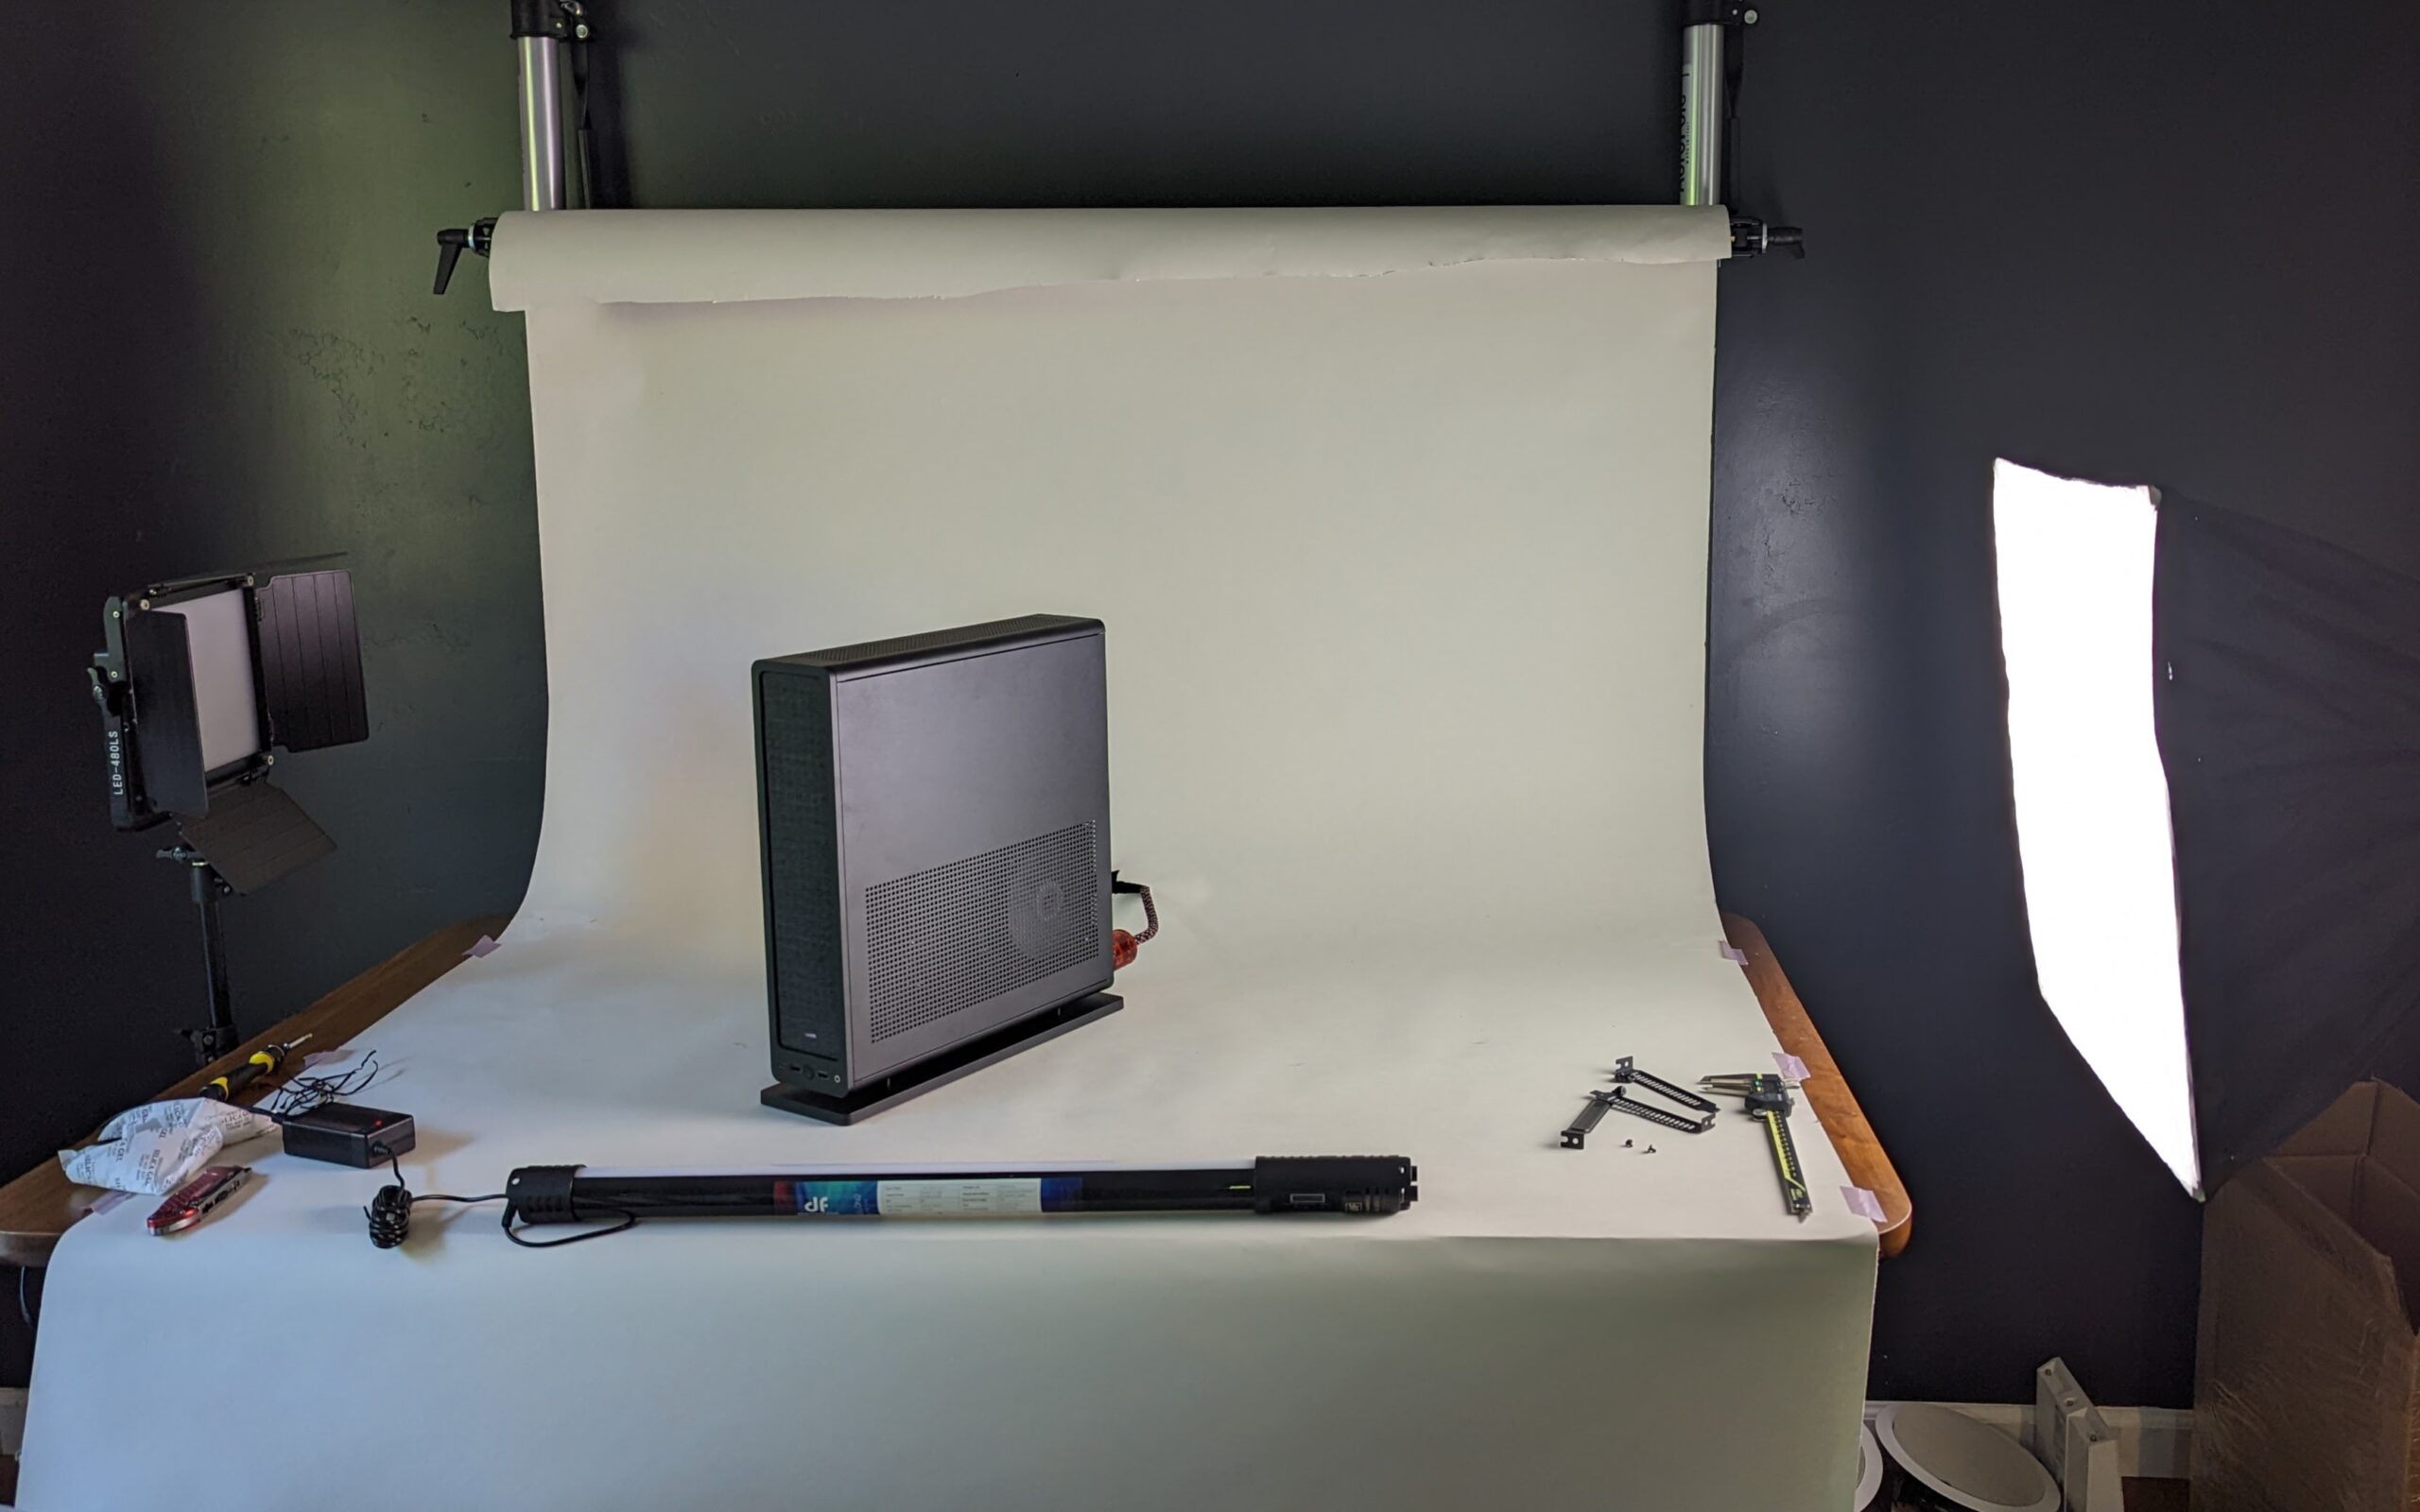
Below is a little behind the scenes shot of my dining room converted to a temporary studio.
If you look closely, you can see how the power light on the Fractal Ridge is neatly hidden and diffused behind the mesh face, just above the IO.
It’s a very soft and welcoming white that lets you know that it’s online, but it’s not capable of burning retinas or causing distraction from inside your entertainment center when the lights are out.
Conclusion
The Fractal Design Ridge is a very welcome evolution of the Fractal Design Node 202 from yesteryear. It takes all the community feedback and suggestions to heart in a well refined package that would look great on your desk, in an office, or in the living room. They made the case easier to build into by completely discarding the difficult to understand clamshell design, and removed the heavy use of plastic by switching to more premium materials like steel, aluminum, and even cloth.
Unlike the Node chassis which came with no fans, Fractal included 2x high quality 140mm rifle bearing PWM fans that retail for $19.99 each. Fractal also included two different mounts so that the chassis can be setup vertically or laid down horizontally -all of that for just $40 more than the Node 202’s original MSRP, which is especially impressive during today’s climate.
In our eyes, the Fractal Design Ridge is a welcome addition to the Small Form Factor market and we’re very pleased that Fractal Design hasn’t forgot about the little guys.
Pros
- Premium build quality
- Use of premium materials with a modern aesthetic
- Snap in panels on all sides is a welcome design choice that enables an optional tool-less chassis access.
- Case breathes really well, especially for the GPU.
- Includes 2x 140mm rifle bearing PWM fans
- Fan mounting points can be adjusted
- Available in Black and White
- Terrific thermal results
- Can be mounted vertically or horizontally
- Diffused front power light
- Would look great in any environment
- Support for 120 mm or 140 mm fans, and 240 mm or280 mm radiators
- Went the extra distance to include support for 3x 80mm fans at the top
- Easy to build into
- Great case for newcomers to the SFF market
- Exceptionally detailed and illustrated manual
- Supports SFX-L PSUs comfortably (RTX 4090 gpus are welcome!)
- Comfortably fits aftermarket PSU cables
- 70mm HSF height vs 56mm on the Node 202
- Wider HSF support opens the doors to more powerful builds
- Very attractive price when you factor in the cost of the fans and that the MSRP of the Node 202 was $90, without fans, in 2015.
- Supports up to 4x 2.5″ drives
- Supports up to 82mm thick triple-slot GPUs with the intake fans removed.
- No RGB
- Solid front IO panel offering
- The power button has a solid tactile feeling and its functionality is predictable. It not hit or miss, it doesn’t wiggle, and it’s not squishy to press on.
Cons
- The stand is made of plastic and not aluminum like the face of the chassis. Only the mounting points are metal
Nitpicks
- Requires fan curve tuning to keep noise levels in check
- Will require undervolting to keep high core count, higher TDP processor temps in check.
- No included fan filters (the Node 202 and ERA included them)
- No window option
- No RGB options available (if you like RGB)
- The 25mm fans slightly overlap the 3rd PCI slot
- If the case was just 6mm thicker, a 3-slot GPU could have been used alongside 25mm case fans and it would enable the use of a 25mm fan on my particular HSF, but then it would be 12.80 liters (vs 12.59 L)
- No color options like the Fractal Era chassis
- This Ridge could have been designed with brackets to support 4x 3.5″ mechanical HDDs for high storage capacity NAS/HTPC APU builds

