
![]()
We would like to thank Enermax for providing us with a review sample of their Enermax SteelWing chassis. Without their generosity, this case review would not be possible.
Originally announced back in May of last year, Enermax released the Enermax SteelWing chassis in October of 2016 with little-to-no fanfare. In fact, a quick search around the net reveals that this case hasn’t even received a proper review – and it probably doesn’t help that the case isn’t listed on the Enermax USA website, either. However, after meeting with Enermax at CES, we are pleased to have the opportunity to review their entire line of small form factor products… and this case is no exception.
It’s worth mentioning at this point that the Enermax SteelWing case was jointly designed with Segotep. Looking around the net, you may have come across the Segotep Desert Eagle 3 case. These two cases are exactly the same albeit with a few subtle changes exclusive to the Enermax brand.
Below you will find the Datasheet and User Manual as provided on the Enermax website.
Enermax SteelWing_Datasheet
Enermax SteelWing_User_Manual
Table of Contents
Specifications
| Case finishes: | Gunmetal – ECB2010R Aluminum – ECB2010G |
| Rear Side Panel: | Red – ECB2010R Green – ECB2010G |
| Front Side Panel: | Tempered Glass |
| Case Material: | Sandblasted Aluminum |
| Motherboard Compatibility: | Micro-ATX / Mini-ITX |
| Max Videocard length: | 290mm (11.41″) |
| PSU form factor: | SFX, SFX-L |
| PSU included: | No |
| Drive Bays: | Front: 1 × 3.5″/2.5″ (without radiator) Bottom: 1 × 3.5″ and 1 × 2.5″ Bottom: 2 × 2.5″ (without 3.5″ HDD mounting tray) |
| Radiator support: | Front: 1 × 120mm |
| Fan support: | Front: 1 × 120mm (included) Top: no Rear: no Bottom: no Side: no |
| Fan bearing type: | n/a |
| Fan Speed: | n/a |
| Dust Filters: | No |
| Front Panel I/O: | 2 x USB 3.0, 1 x Headphone, 1 x Microphone |
| Expansion Slots: | 3 |
| LED lighting: | Case: No Fan: Yes Red – ECB2010R Green- ECB2010G |
| RGB lighting: | Case: No Fan: No |
| Fan/LED Controller: | No |
| CPU Cooler Max Height: | 80mm |
| Dimensions: | W: 176mm × H: 300mm × D: 387mm W: 6.92″ × H: 11.81″ × D: 15.24″ |
| Volume: | 16.13 Liters |
| Weight: | 3.9 kg (8.6 lbs) |
| Price: | $149.99 (MSRP) |
[mks_separator style=”blank” height=”2″]
Packaging and Contents
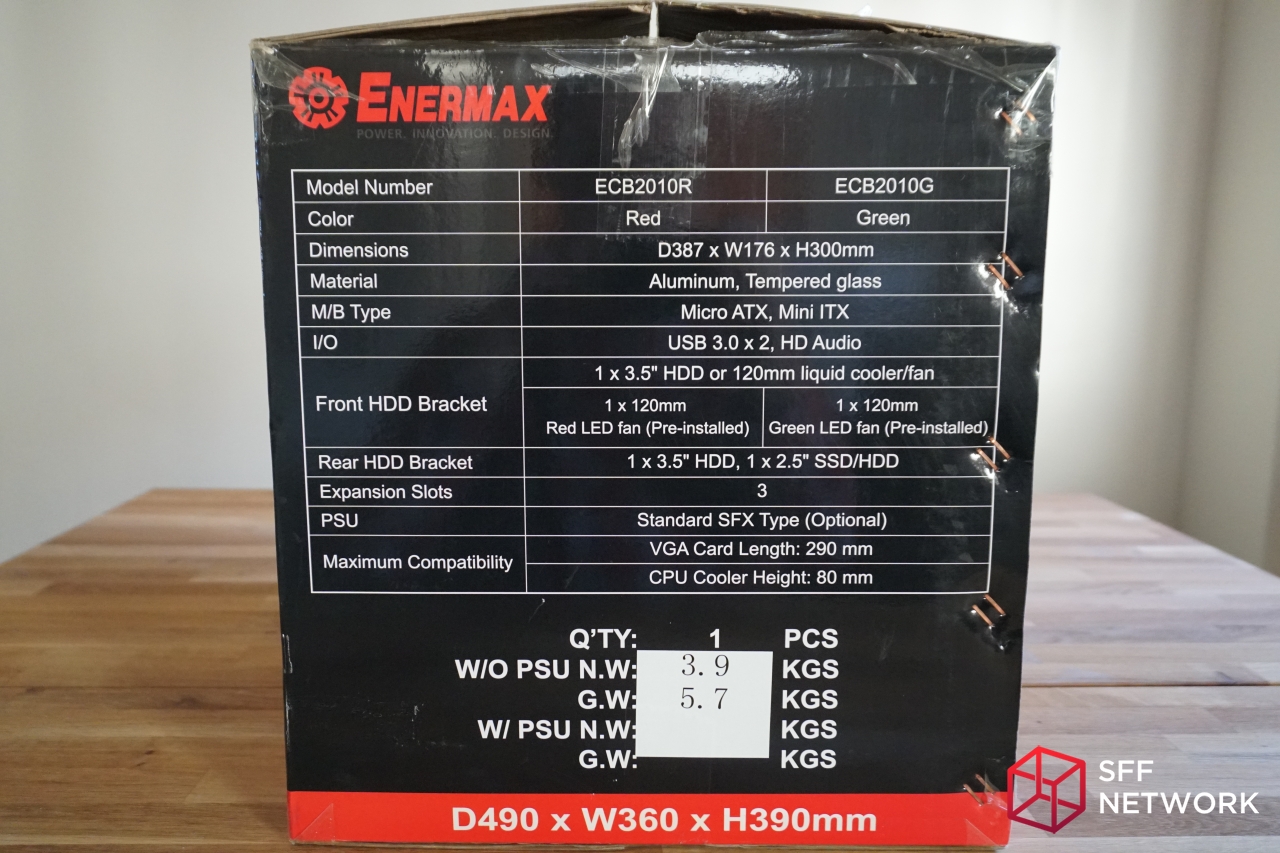
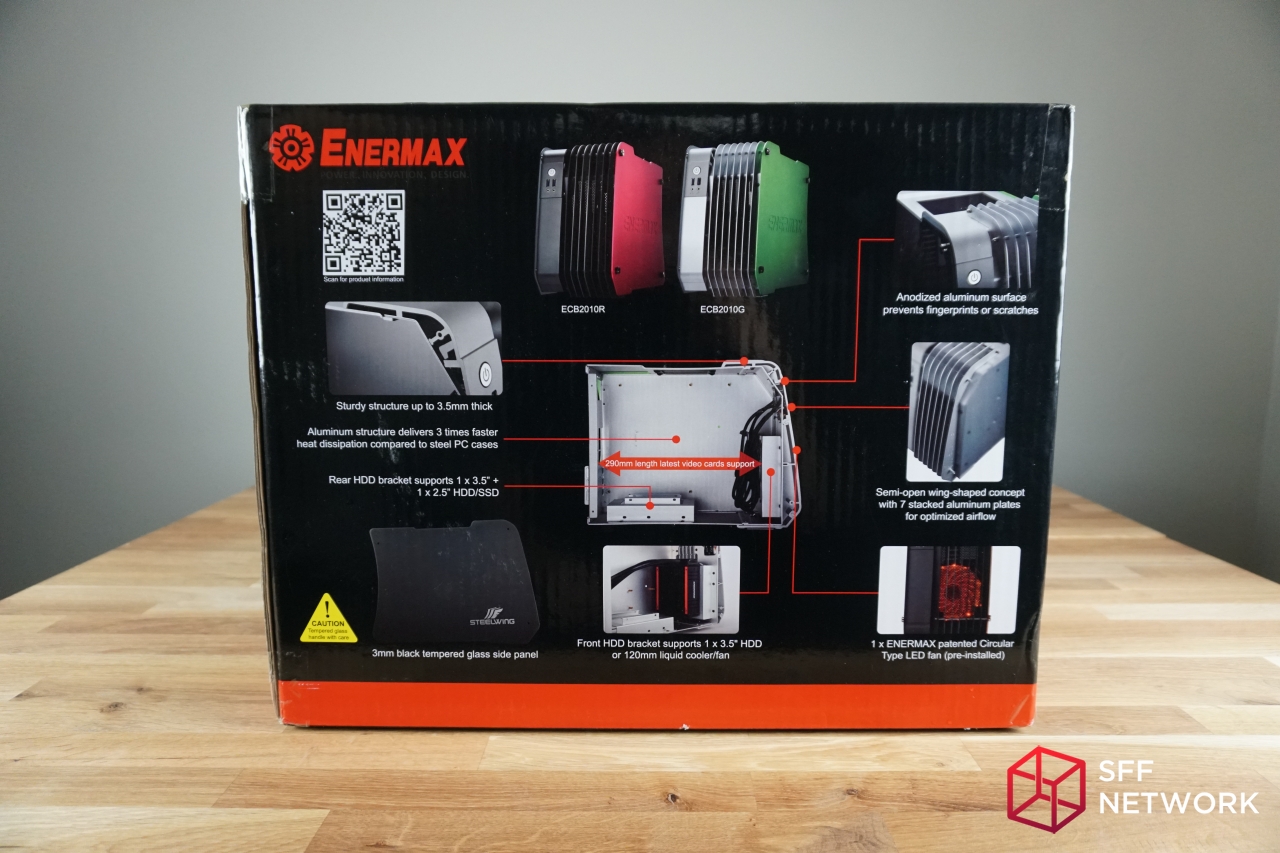
Unlike your typical plain brown box with black ink, Enermax saw fit to include a complete list of specifications and detailed pictures, in full color.
The box was not shipped inside another box, so if you order this product, everyone in your neighborhood will know exactly what’s sitting on your doorstep.
The internal packaging is strictly all business. Everything inside the box is surrounded with medium density foam, and the padding provides plenty of surrounding clearance to prevent the case from being damaged during shipping. This is especially valuable for this particular enclosure as there is a dedicated thick padded section that protects the tempered glass side panel.

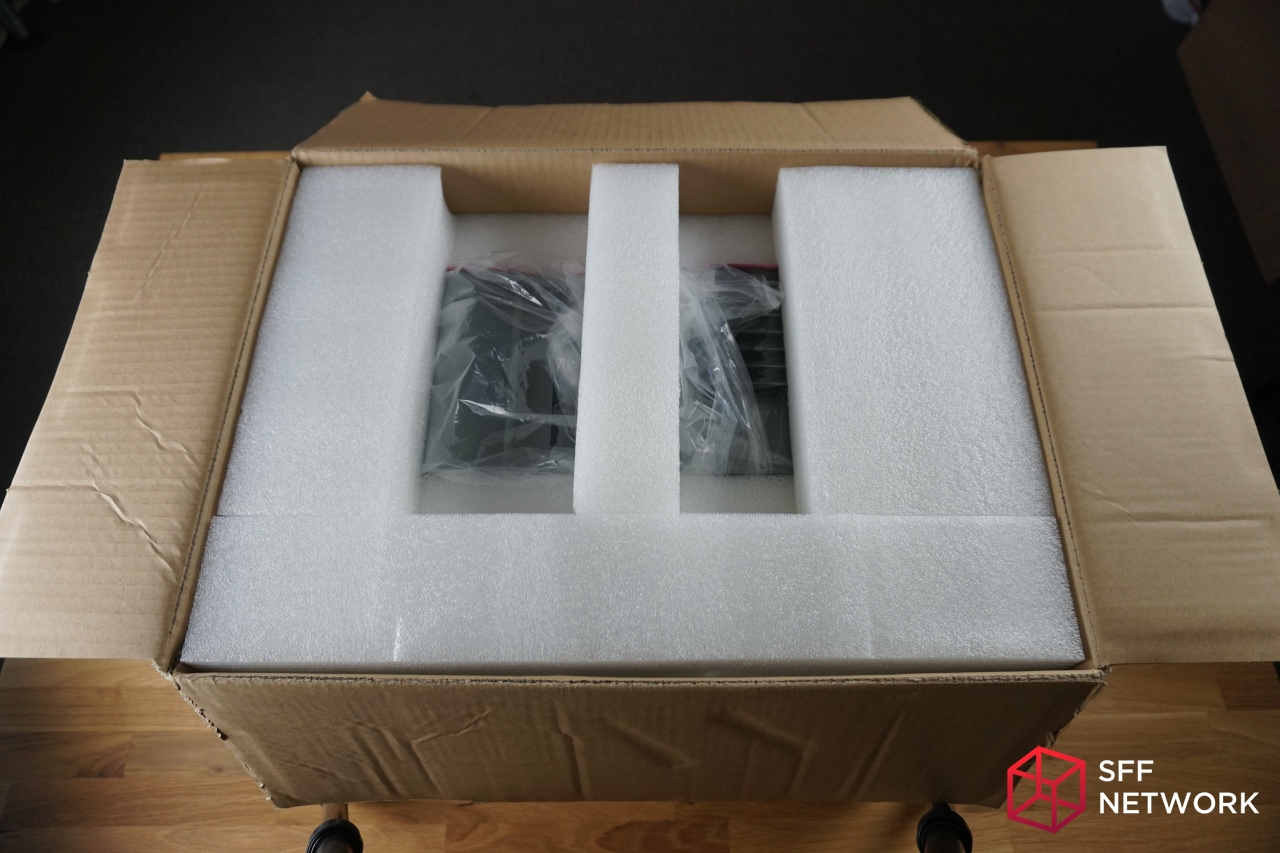
The case itself is wrapped in an oversized clear plastic bag, to prevent minor scuffs or abrasions. Our review sample arrived with the packaging, chassis, and tempered glass intact.
Mission Accomplished!


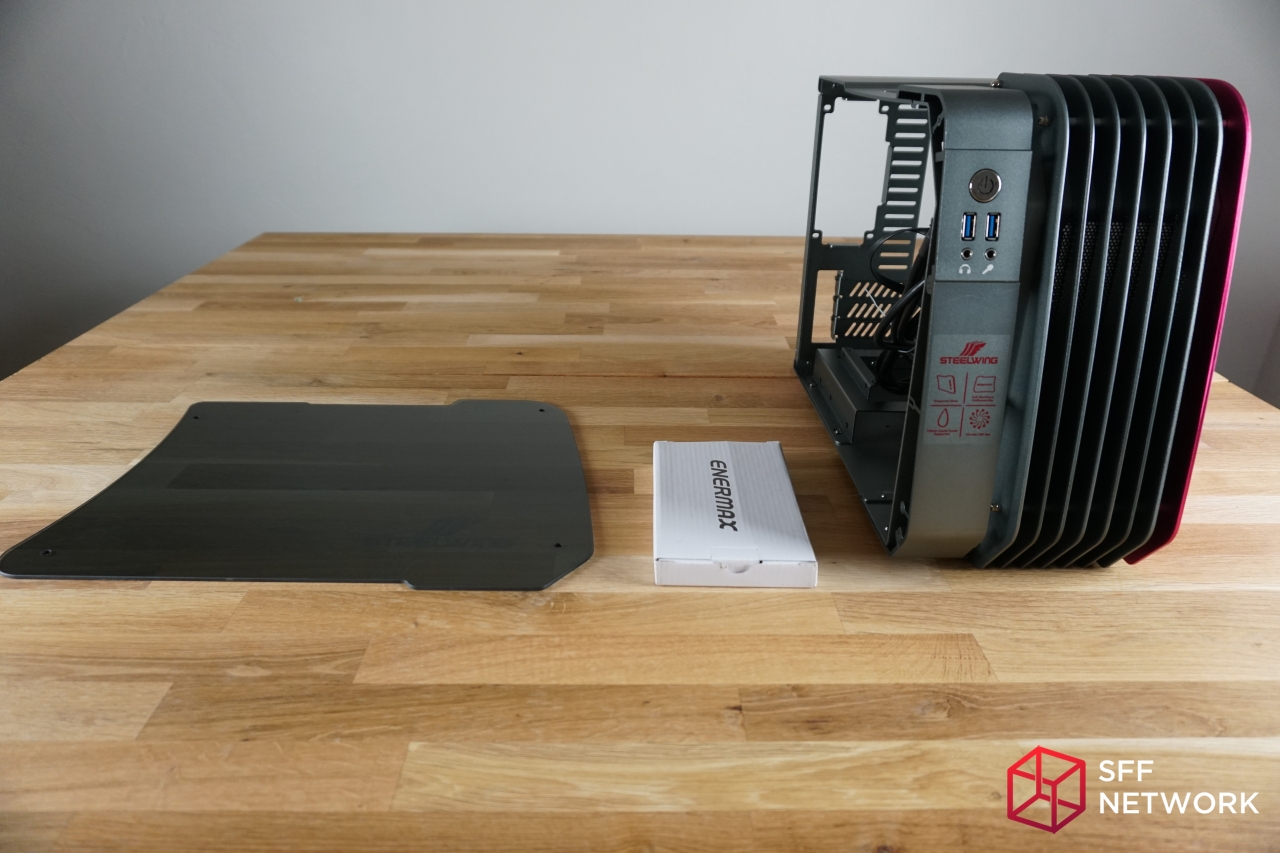
Included inside the box is the Enermax SteelWing case, a cardboard box of case accessories, one(1) 120mm Red LED Fan (pre-installed), and the tempered glass side panel.
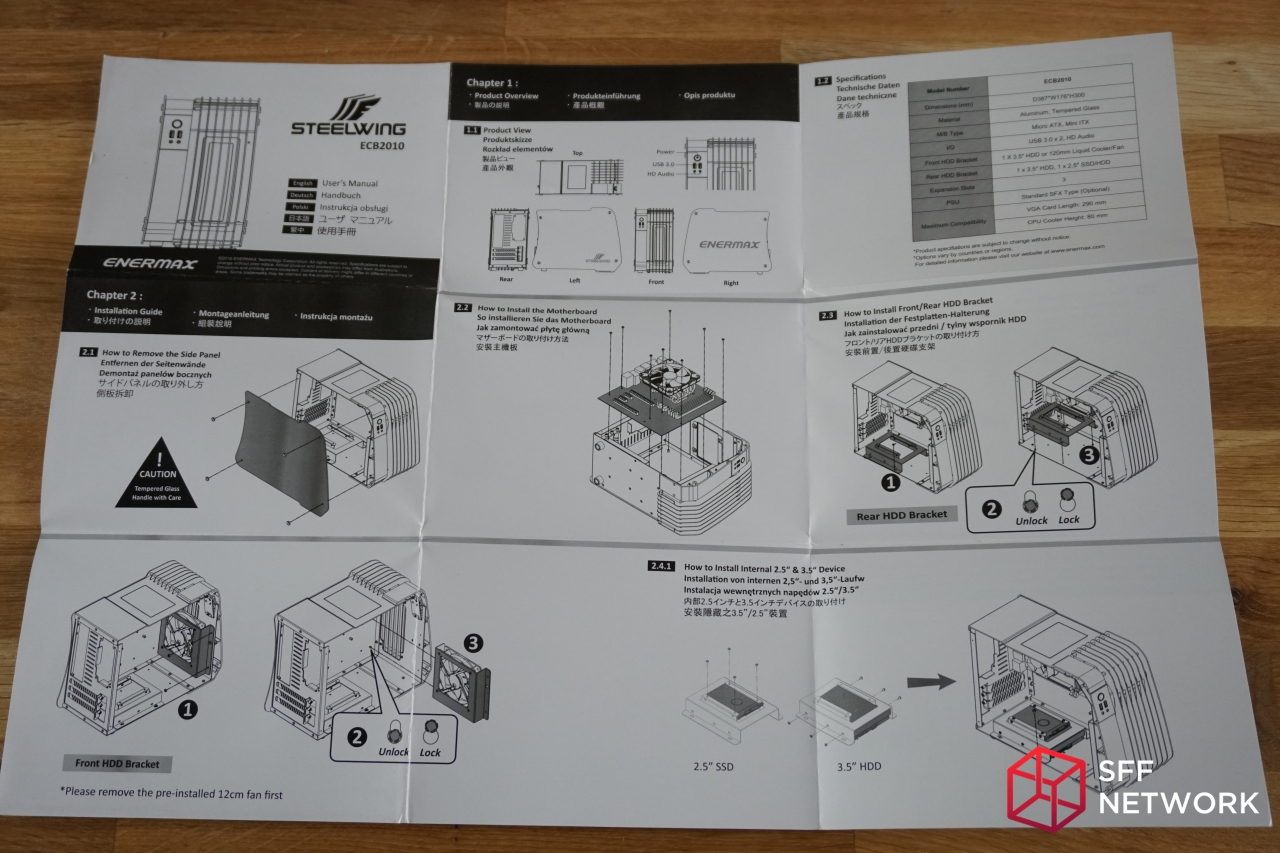
Turning to the accessory box, we find a quick installation guide which you can also find here. The guide supports English, German, Polish, Korean, and Japanese languages, and does a great job explaining case features and functionality.
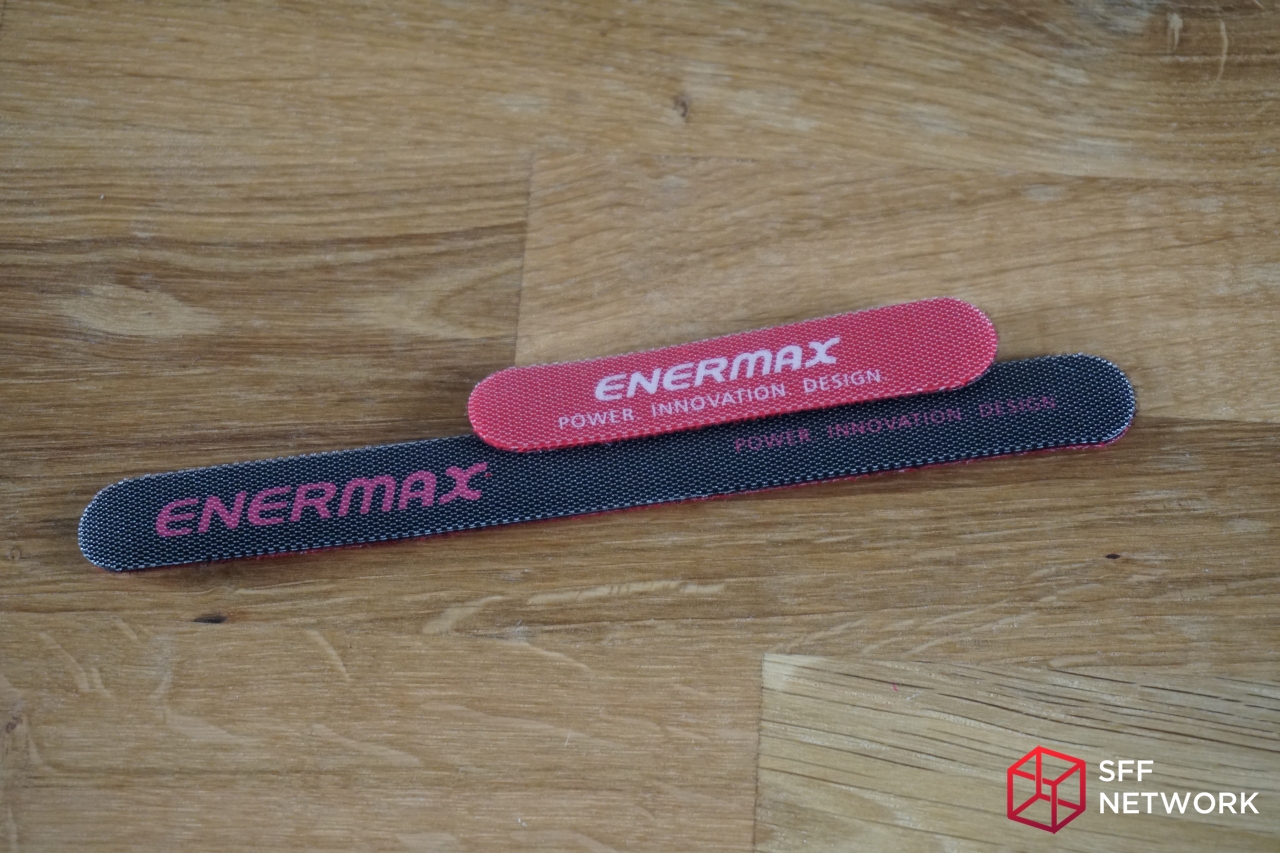
It also includes two Enermax branded velcro cable ties. Both cable ties have a premium feel to them with a soft and spongy texture but the overall thickness may prove cumbersome depending on your preference.
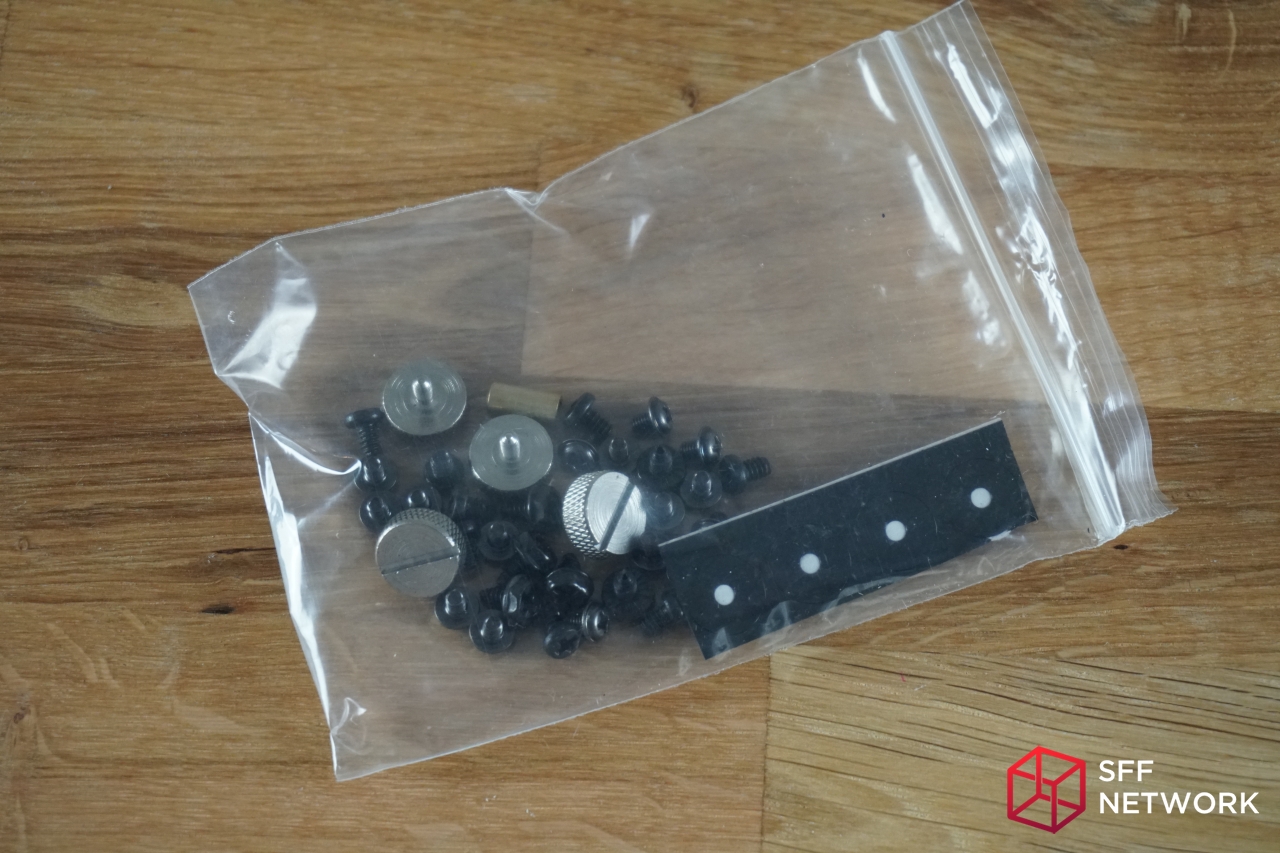
It also includes a plastic bag filled with an assortment of screws:
- Small black screws to be used for installing the 3.5″ Hard-Drive(s), 2.5″ Solid-state drive, the HDD trays, and Micro-ATX or Mini-ITX Motherboard.
- Knurled machined aluminum thumbscrews for attaching the side panel.
The bag includes a set of four high-gloss plastic washers that can be adhered to the thumbscrews to prevent surface scratches on the tempered glass side panel.
As per usual, there are more than enough spare screws to add to your preexisting collection.

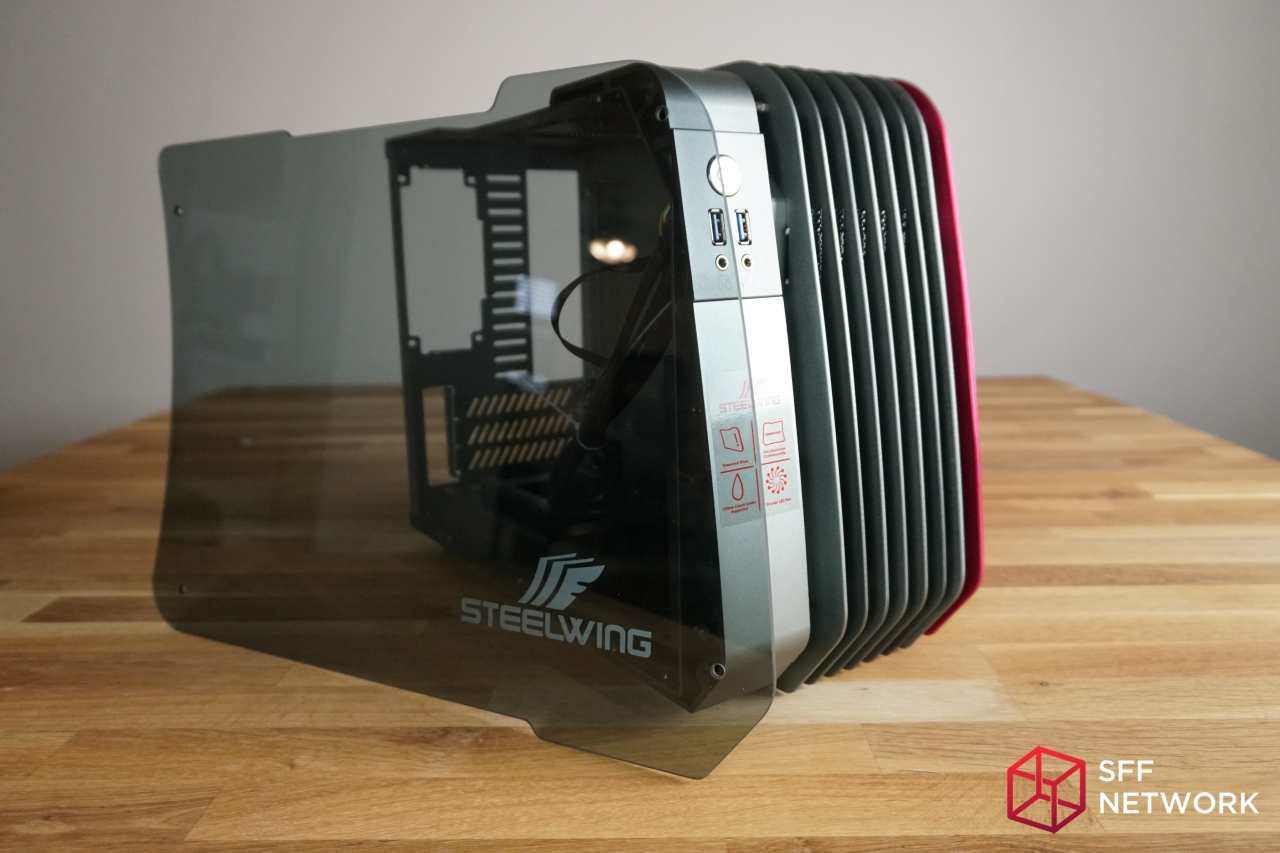
As you can see from the picture below, the side panel has a nice tint to it that is roughly equal to a 50% window tint.
[mks_separator style=”blank” height=”2″]
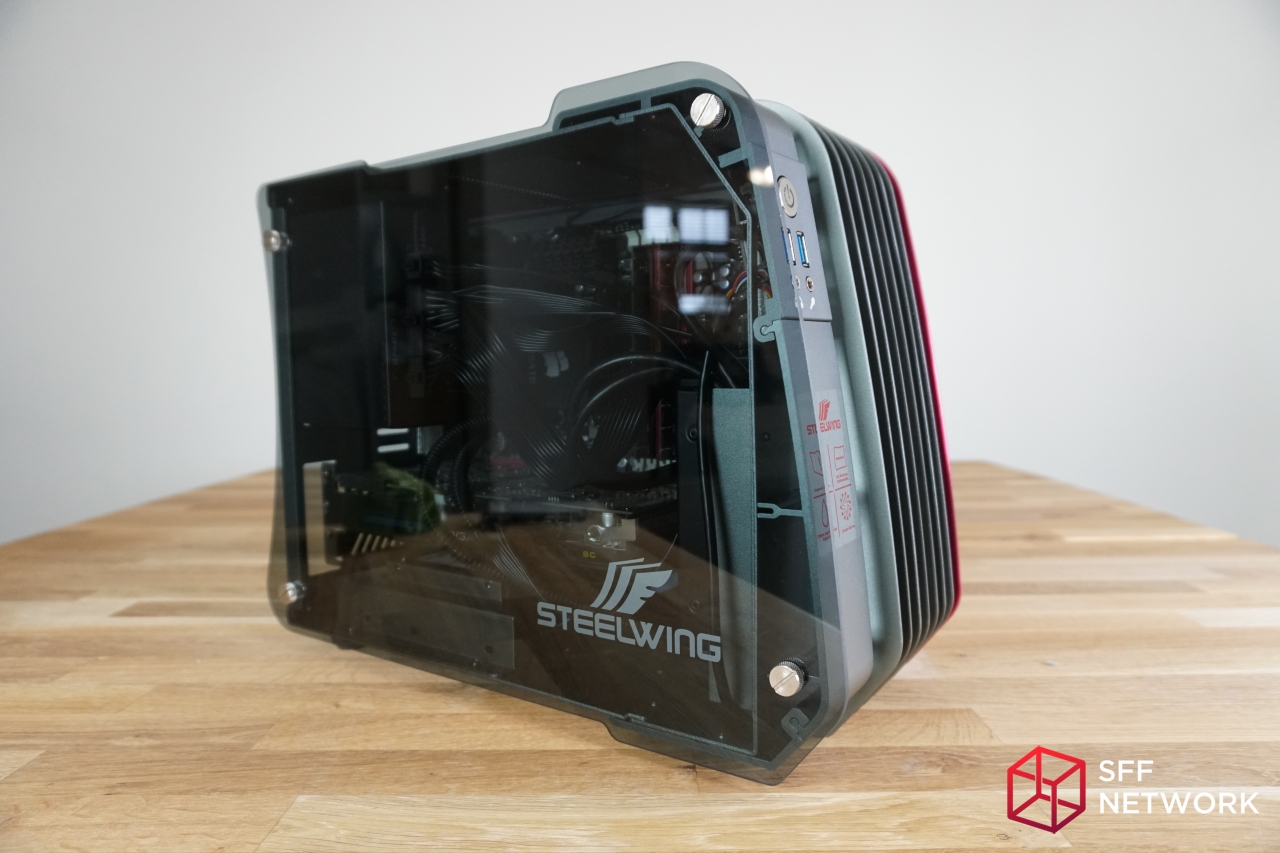
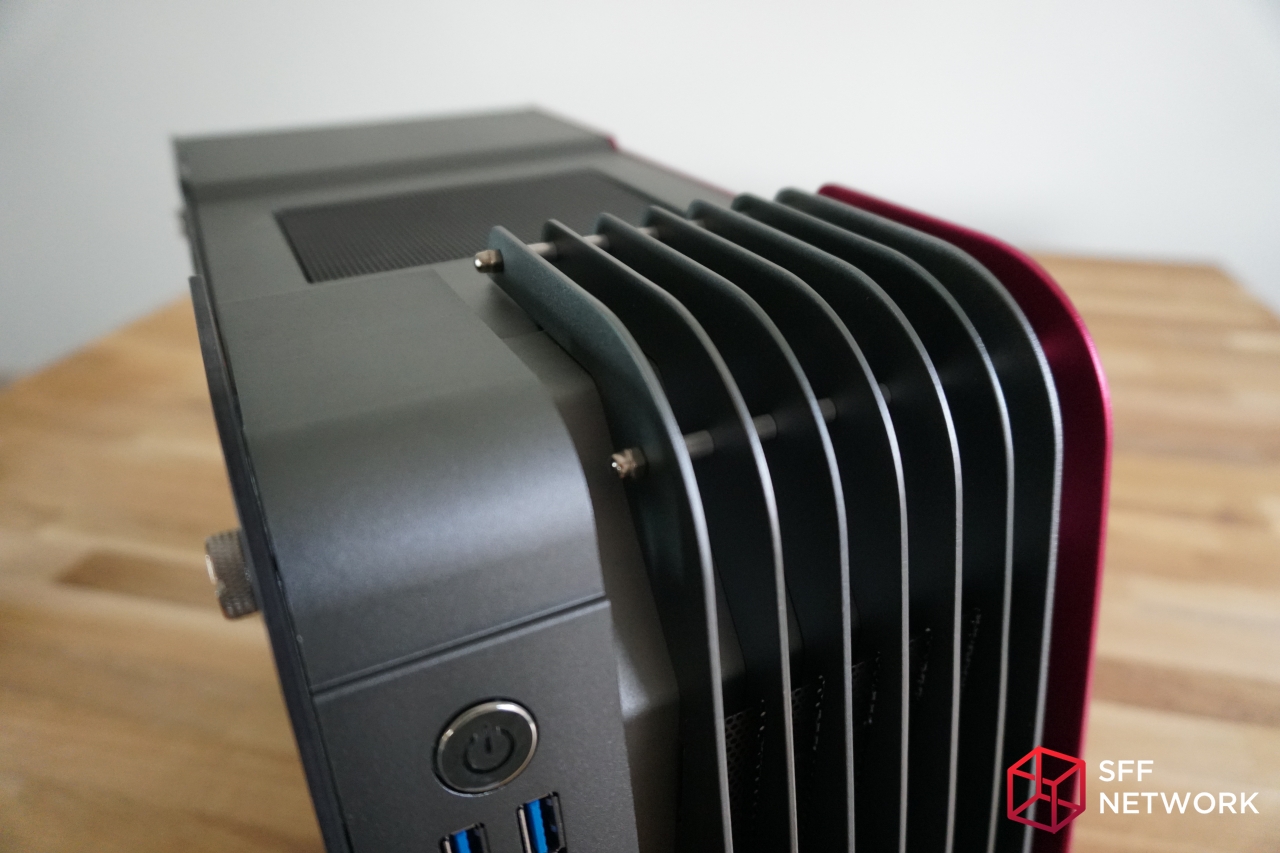
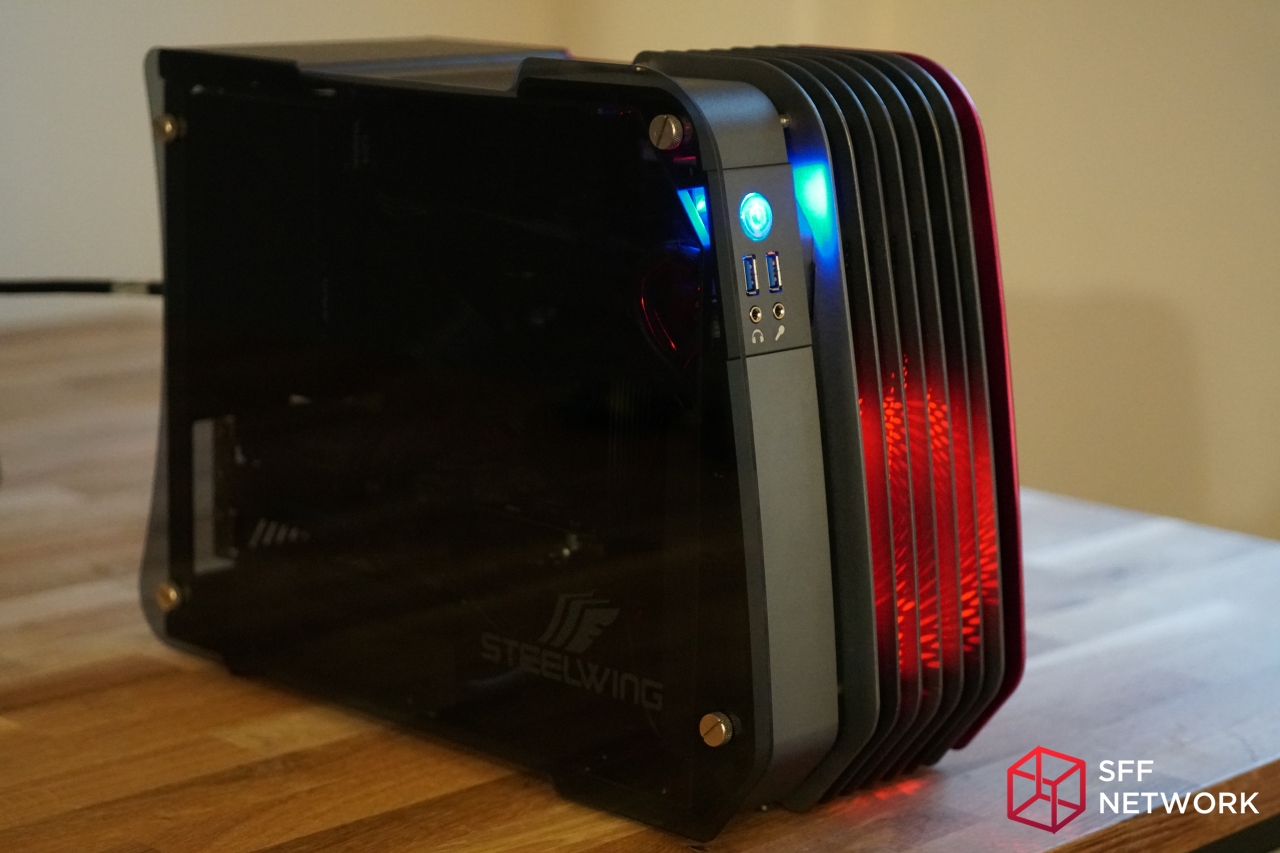
Introducing the Enermax SteelWing case
Like the case pictured in the original advertising material, the top portion of this case has a subtle bow to it. As a result, this does not appear to be a manufacturing flaw or camera lens trick but instead a product of the case’s design. If the very sight of the following image makes you frustrated, I would suggest that you look elsewhere for your next case.
The exterior color of the case continues to the inside, there is no exposed aluminum to be found in here!
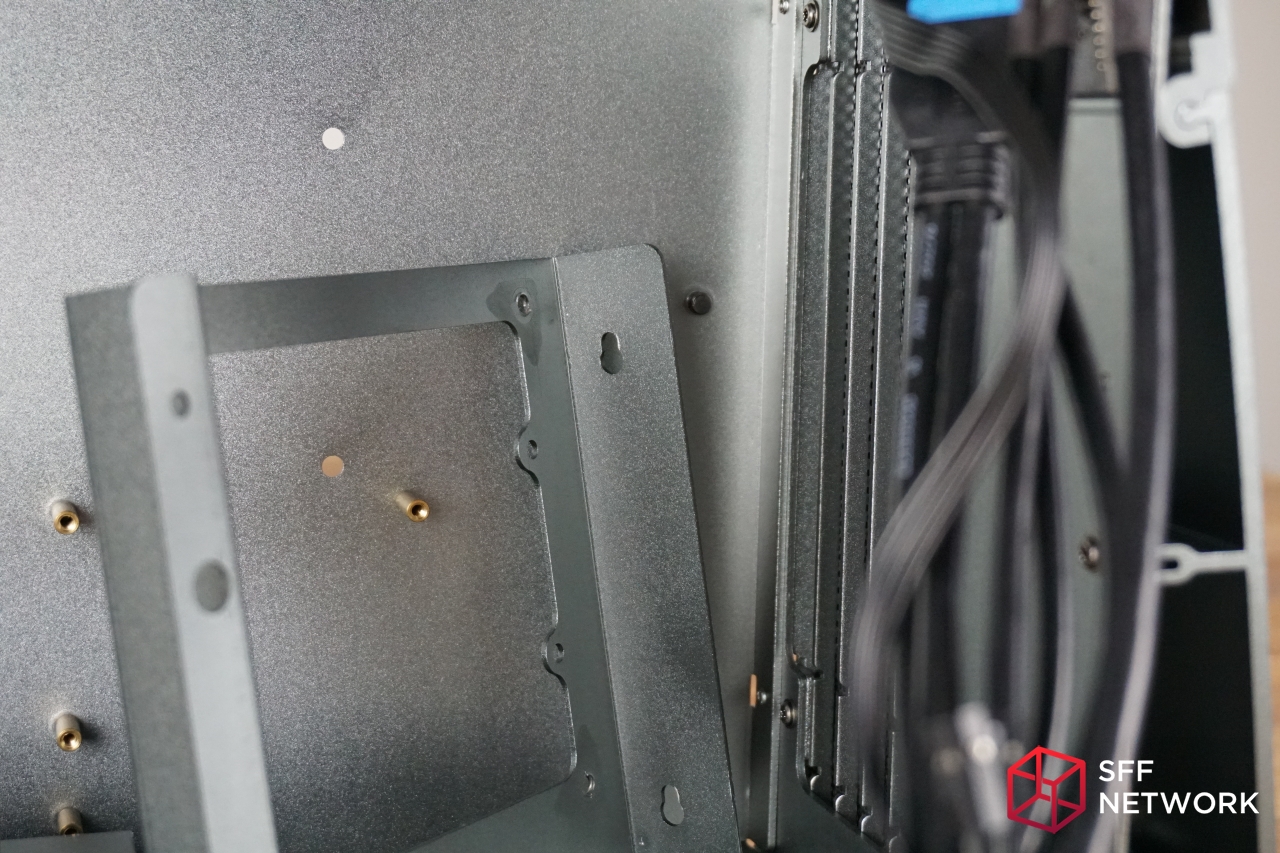
There is also no hole cutout on the motherboard mounting plate, so aftermarket coolers or M.2 SSD installs will require removal of the motherboard and all attached devices.
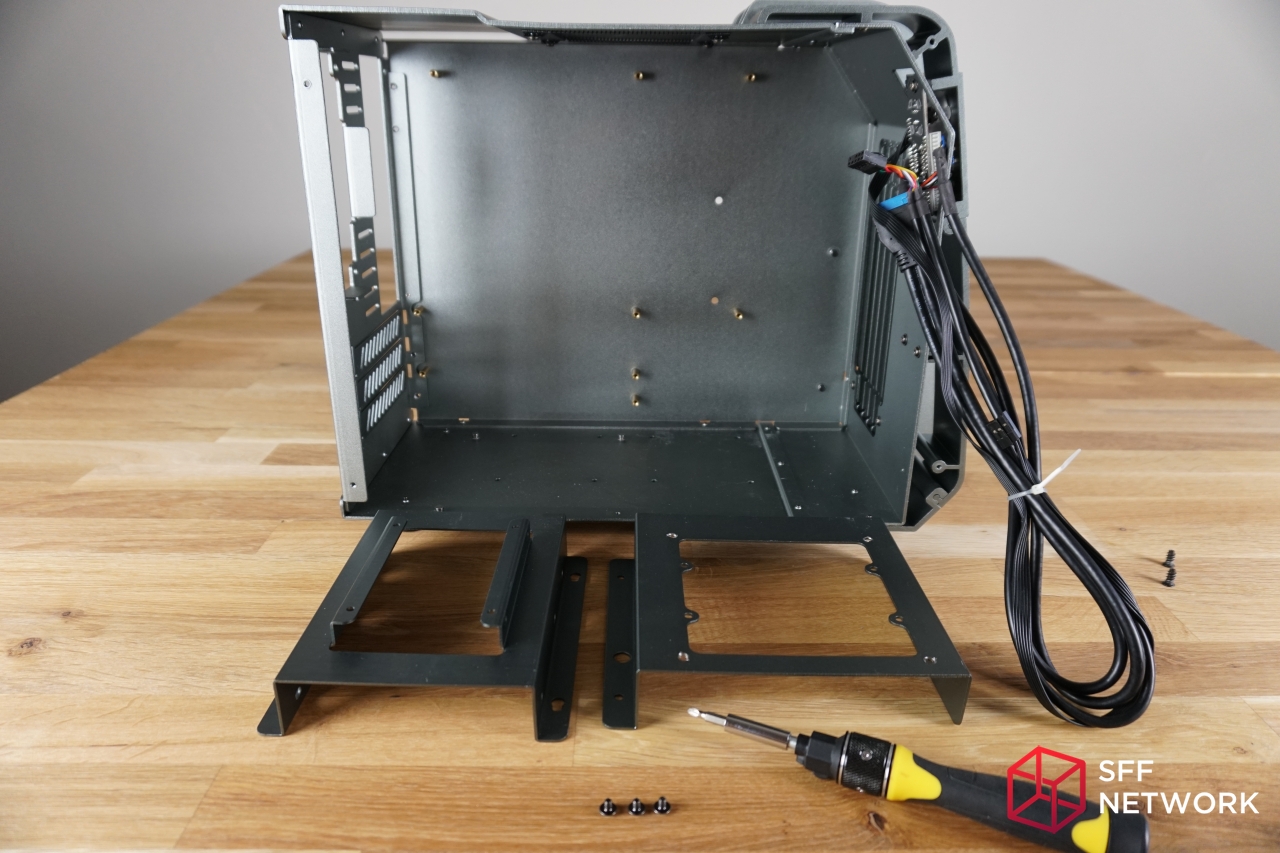
The front I/O and power button cables are conveniently zip-tied together for ease of hardware installation. The Enermax fan comes preinstalled, but I will talk more about the fan later in this review.

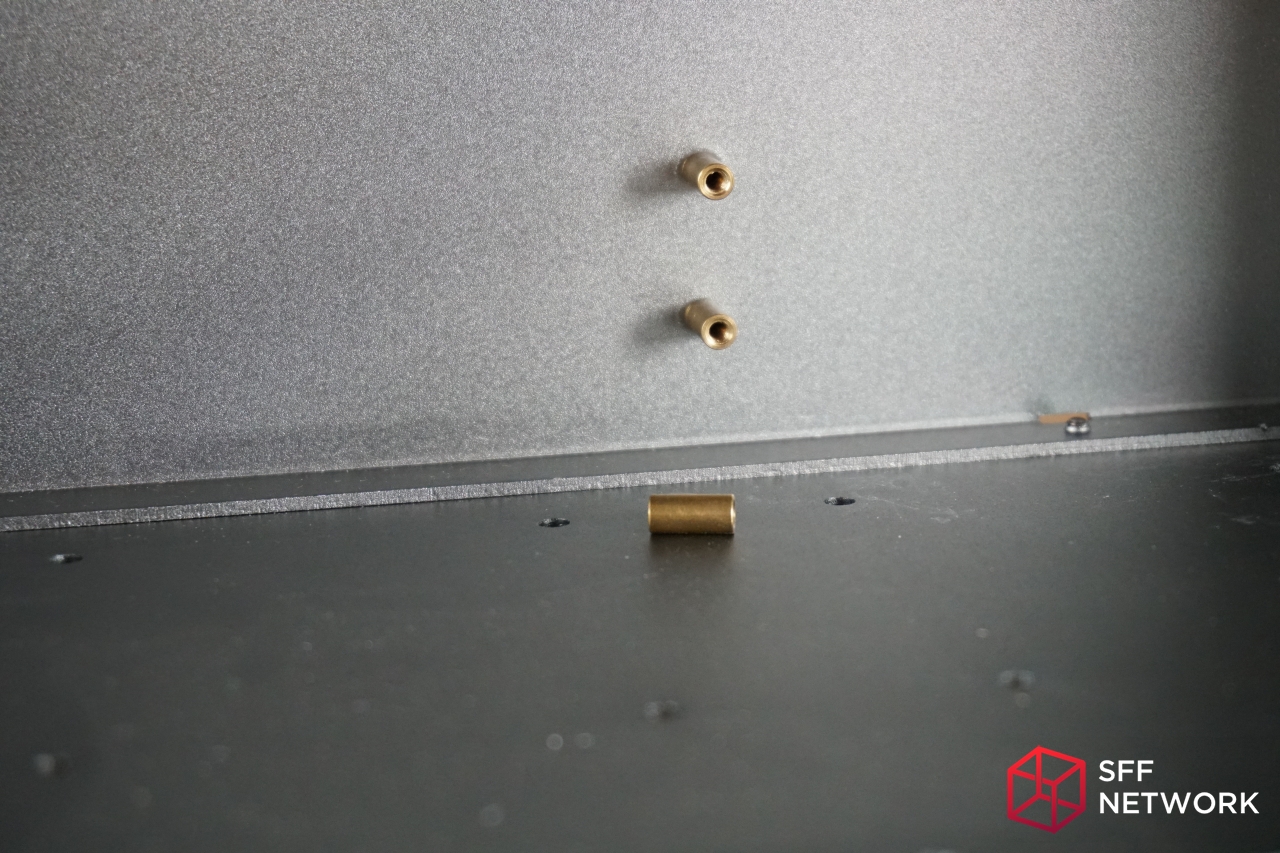
The case includes all of the brass motherboard standoffs preinstalled. The brass standoffs are cylindrical (instead of the standard hexagonal prism), but due to the threading being welded to the case, they didn’t come off when removing the motherboard screws.

Any unused HDD or fan mounts are completely optional and can be removed if desired. The mounting mechanism is a simple cap that protrudes from the aluminum case where the mounts can be seated and then slid into position. A single screw on each tray prevents the trays from moving. Once the hardware is installed, they can be a little troublesome to slide out, but the design has good intentions.
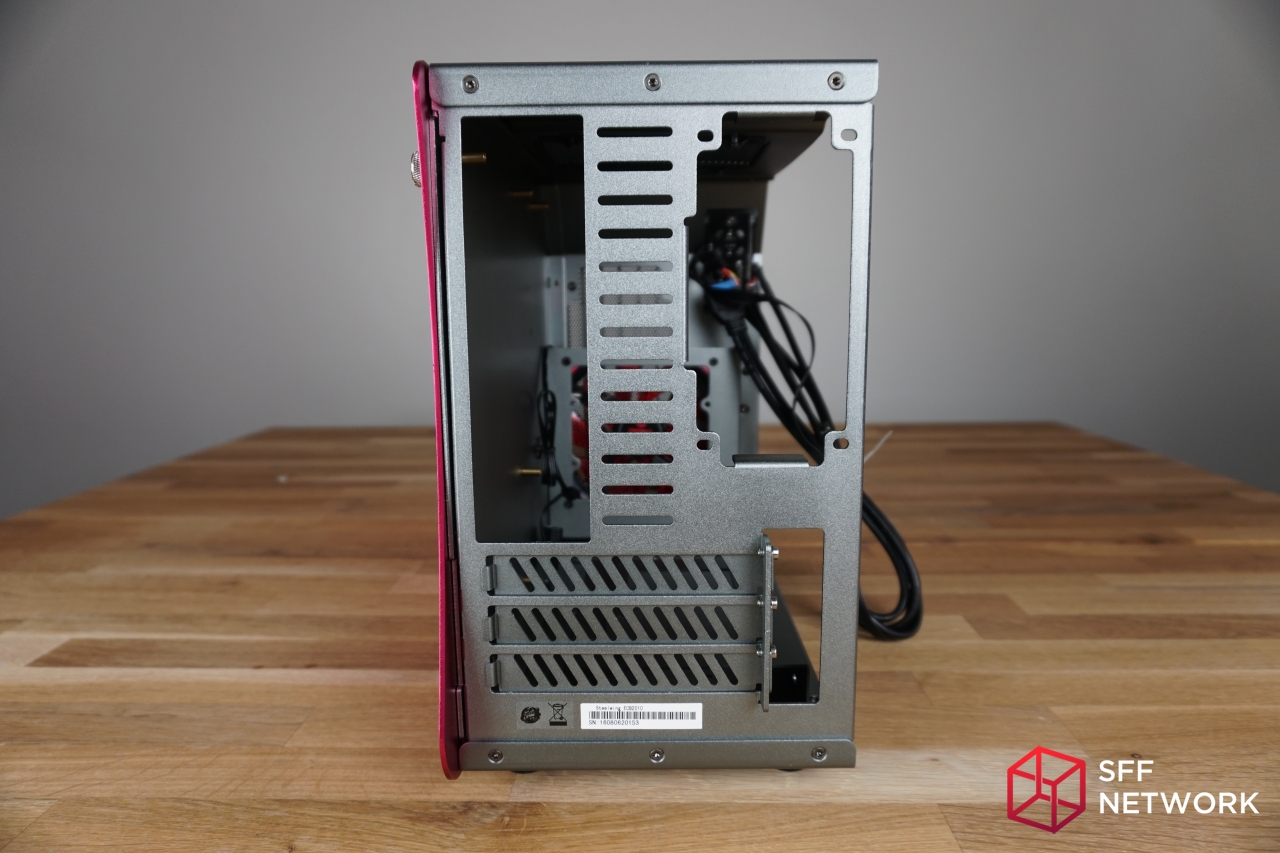
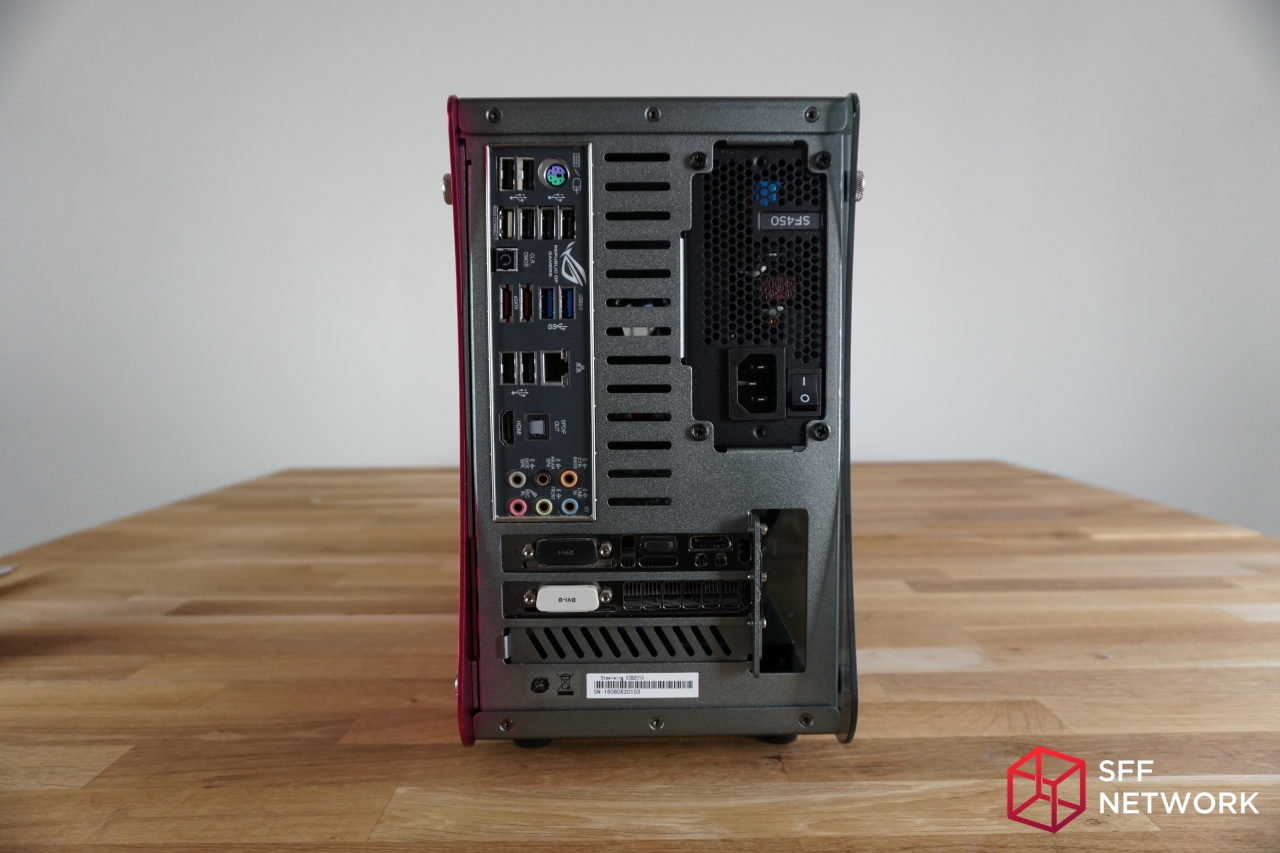
A strange omission for a Micro-ATX capable chassis is the lack of the 4th (or even 5th) expansion slot. If the thought of running Crossfire or SLI excites you, this is definitely not the case for you. However, if you desire the use of a single graphics card and the use of a dedicated sound card or capture card, you can occupy the available slots without issue.
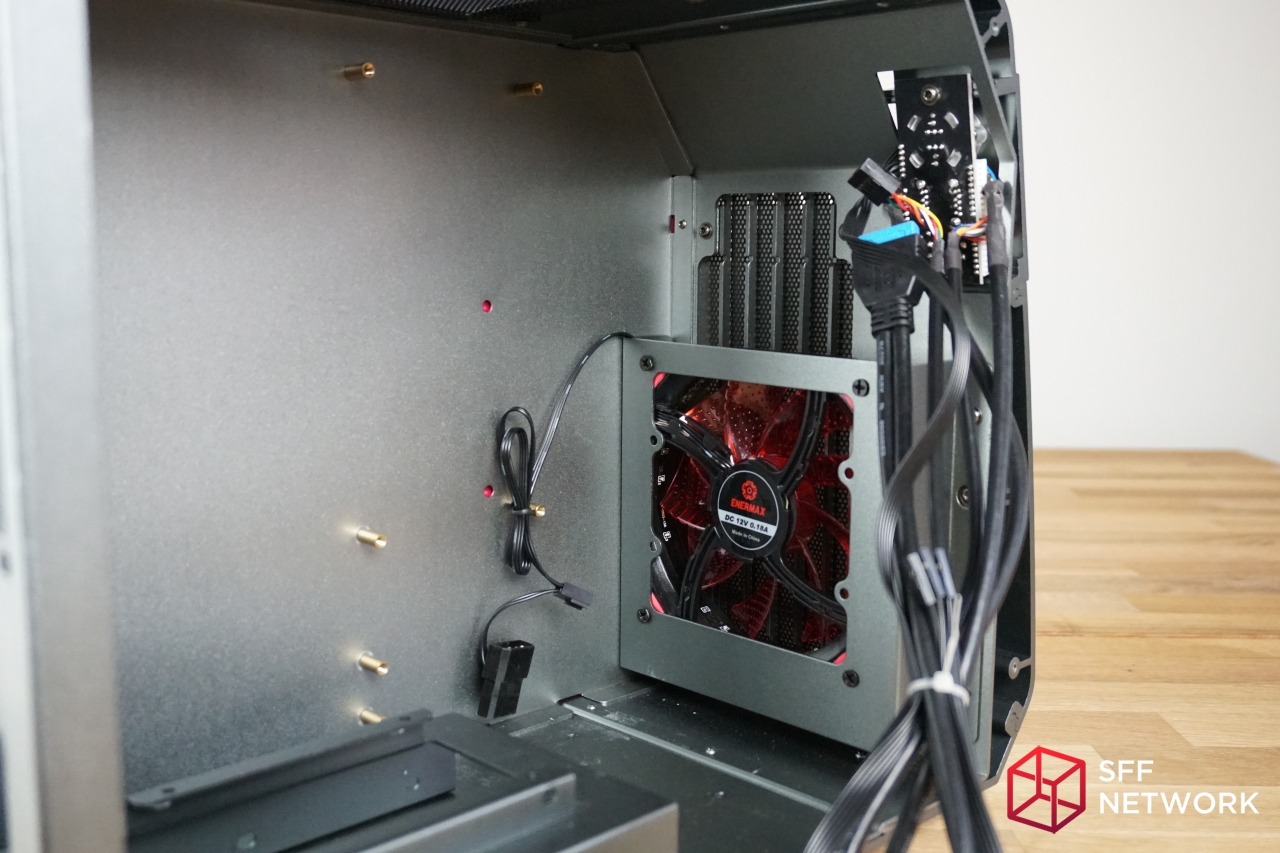
The Enermax SteelWing’s exclusive support for SFX and SFX-L PSUs is a welcome addition to keeping the case as small as possible, while still supporting a full size graphics card and a 120mm AIO liquid cooling system. The bent aluminum brackets that help to secure the SFX PSU in place make for a nice snug fit. You can easily slide the SFX PSU into place and it will secure it indefinitely while you install the 4 screws.
The entire chassis is mounted together using T10 TORX screws inserted into countersunk holes – a welcome addition over Philips head screws and the extra attention to detail doesn’t go unnoticed. Oh and when I say entire chassis, I mean it. There is not a single rivet being used on this case.
Case modders rejoice!

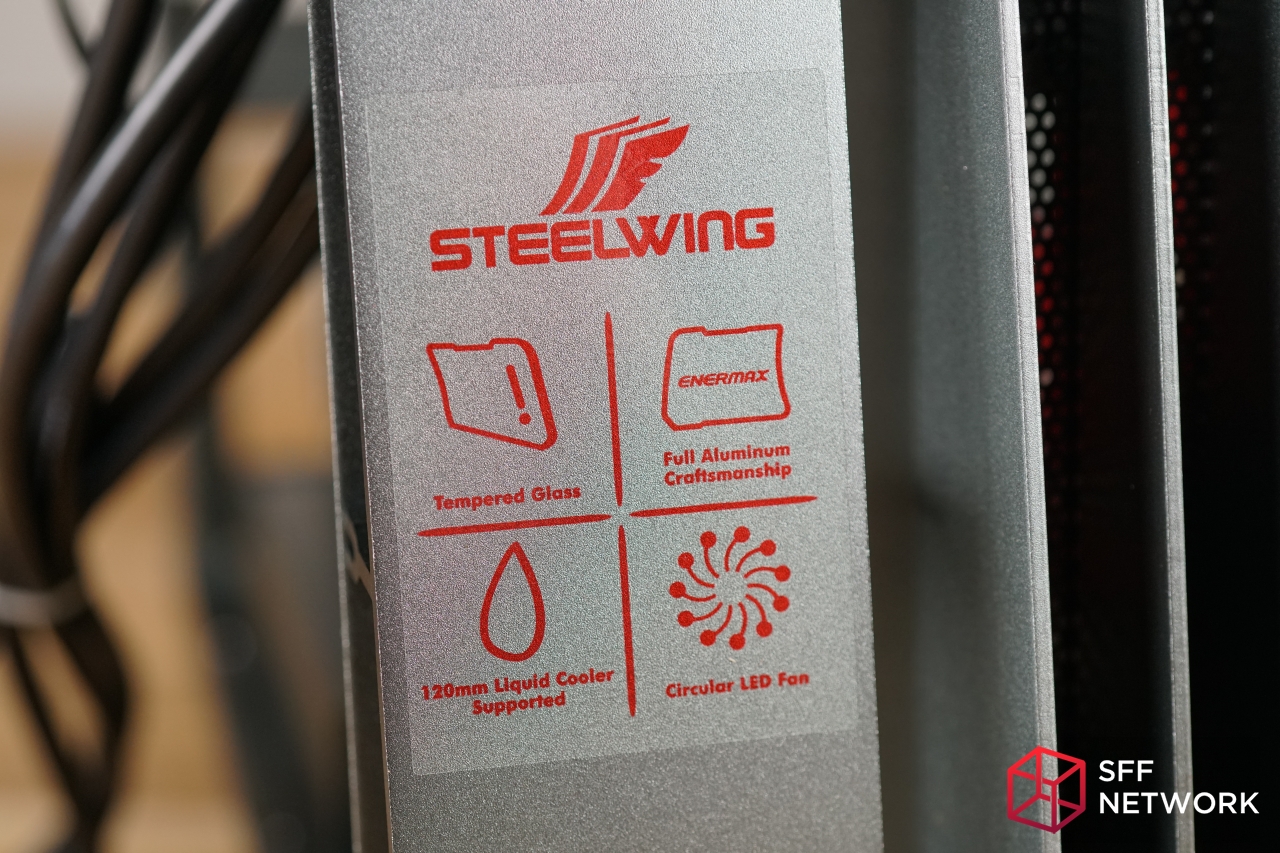
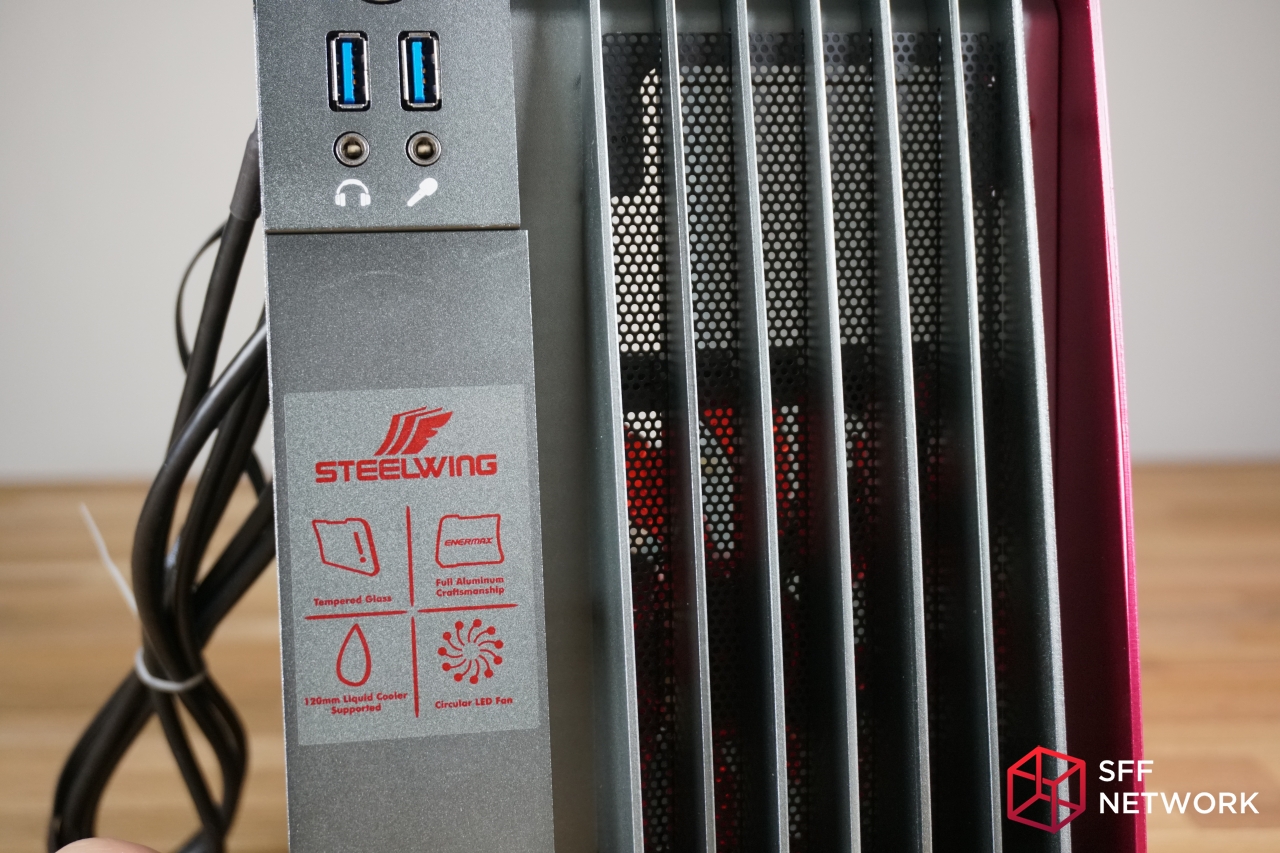
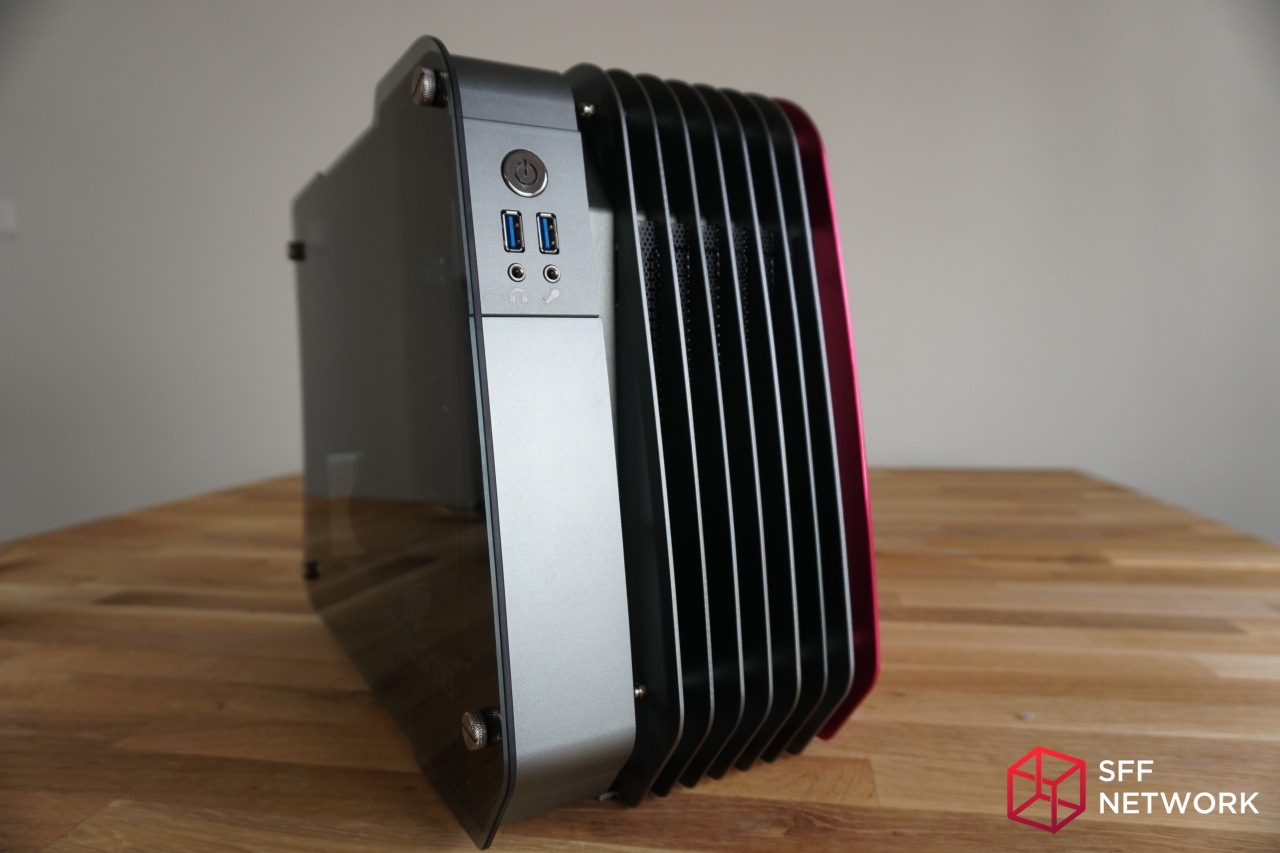
The marketing sticker that is attached to the front of the chassis is easy to remove without leaving any sticky residue on the front of the case.
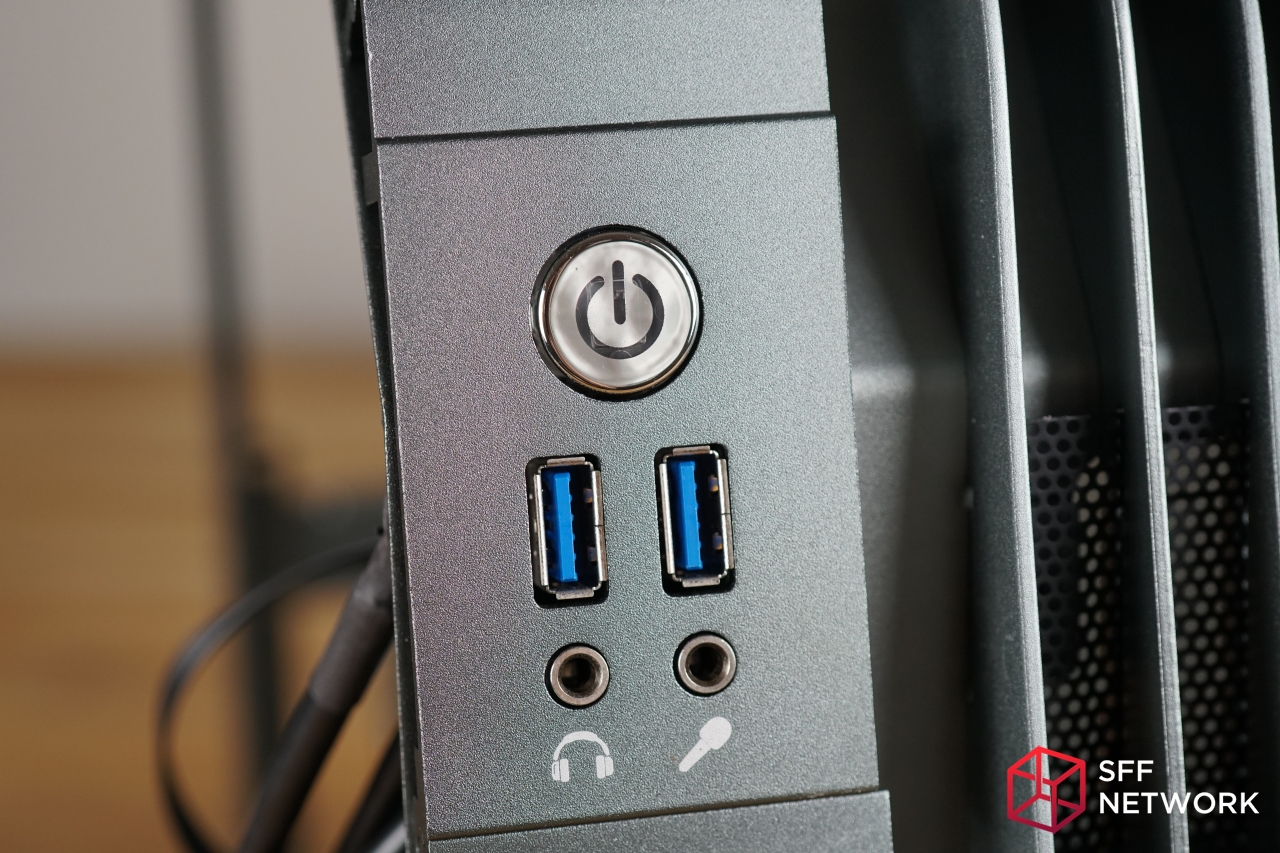
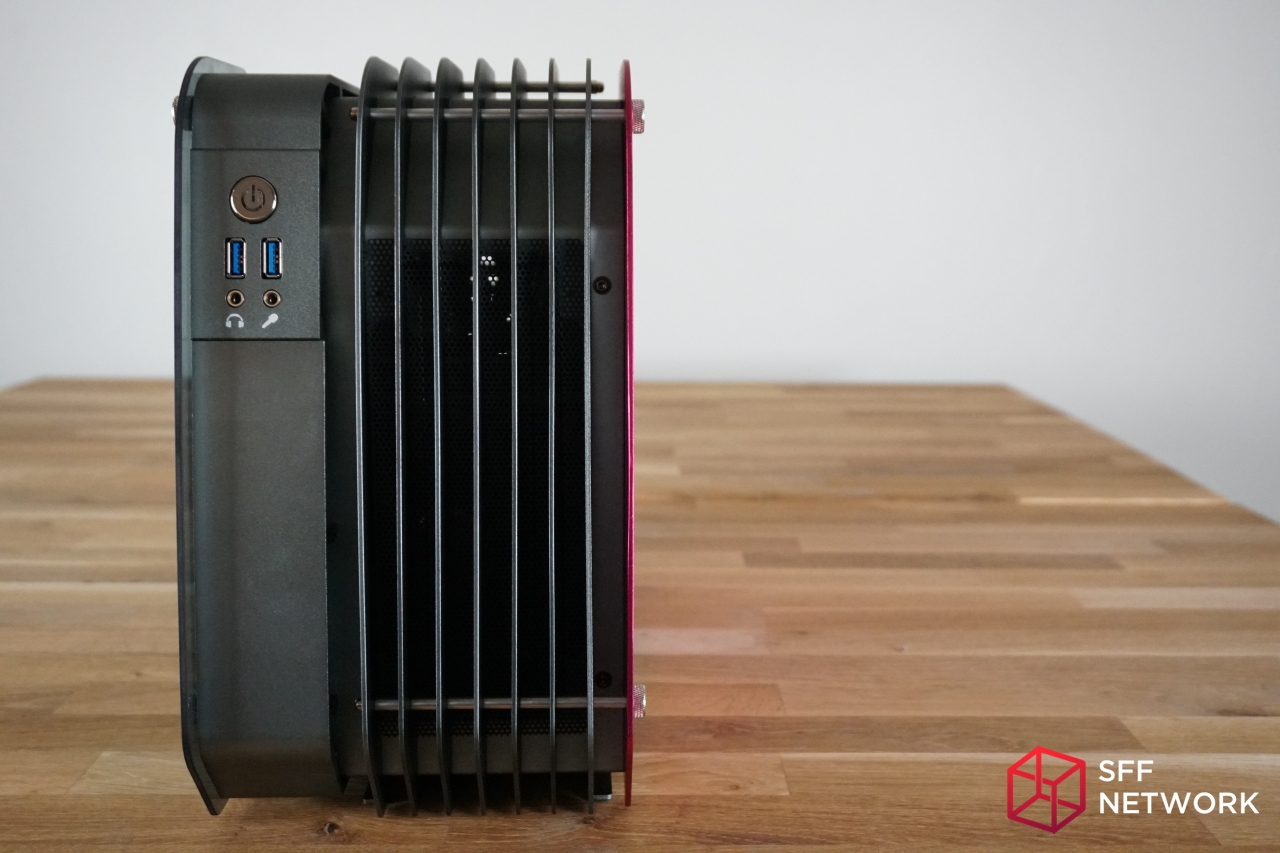
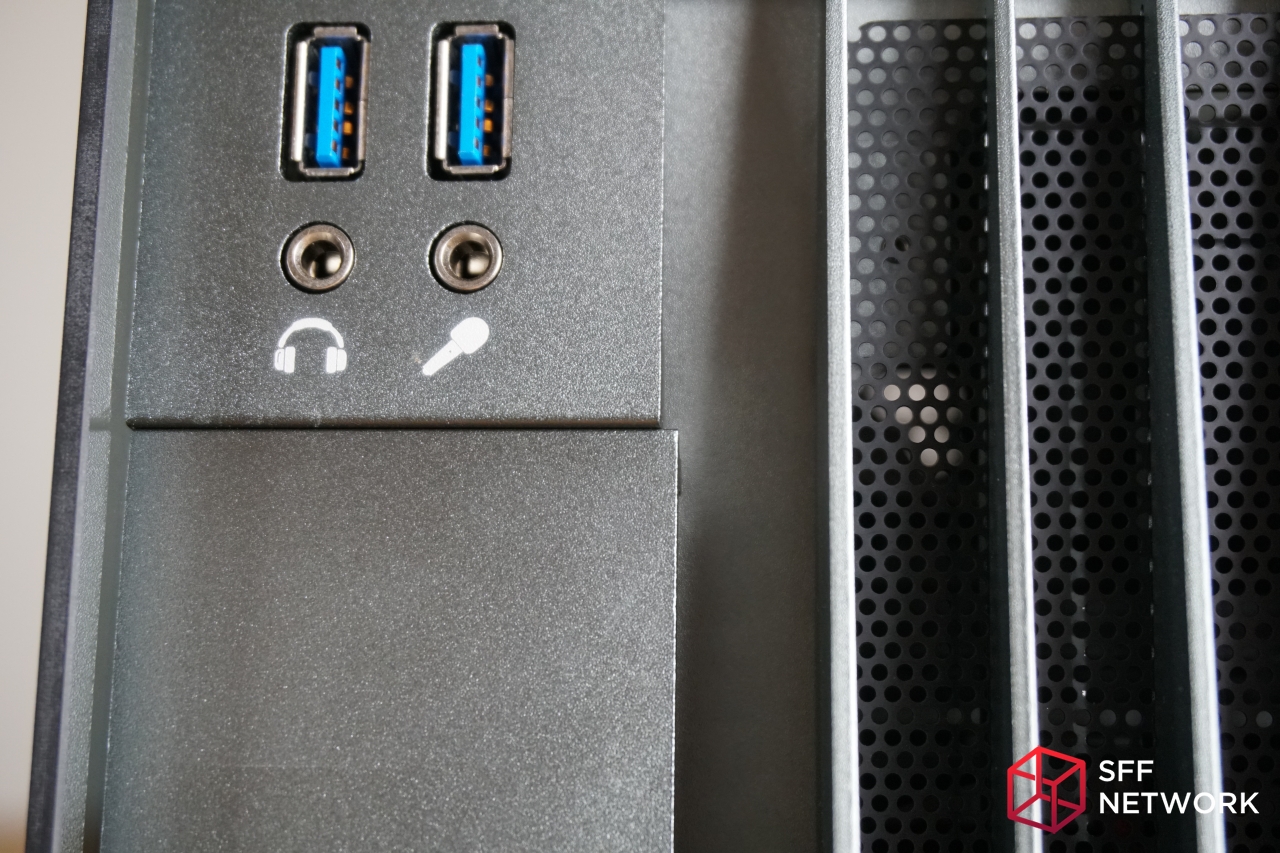
The front I/O is a pretty standard affair, with two USB 3.0 ports, a headphone jack, and a microphone jack. If you were hoping to acquire a case with front-mounted VR HDMI slots in mind, to give you that extra 12″ of cable length, you will be sorely disappointed.
The venturi slots at the front of the Enermax SteelWing also match the color of the rest of the case and the fan grill behind it is painted matte black.
No dust filters are included and due to the case’s use of aluminum, magnetic filters won’t work here so the cases will require occasional dusting.
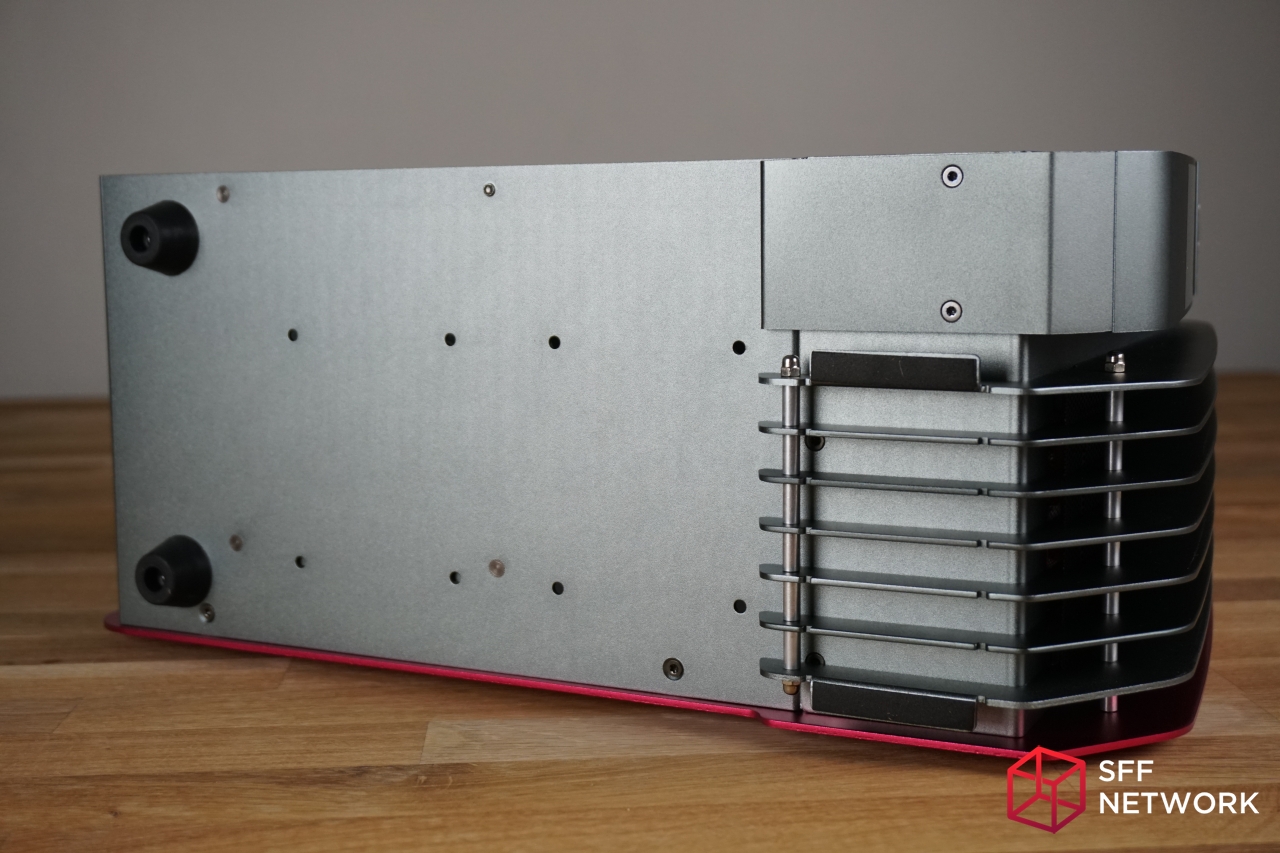
On the underside of the case, you will find holes to mount two additional 2.5″ SSDs. Strangely, this information is missing from the advertising materials – but none the less, it is a feature that is worth mentioning to anyone interested in having more than just 1 SSD installed.
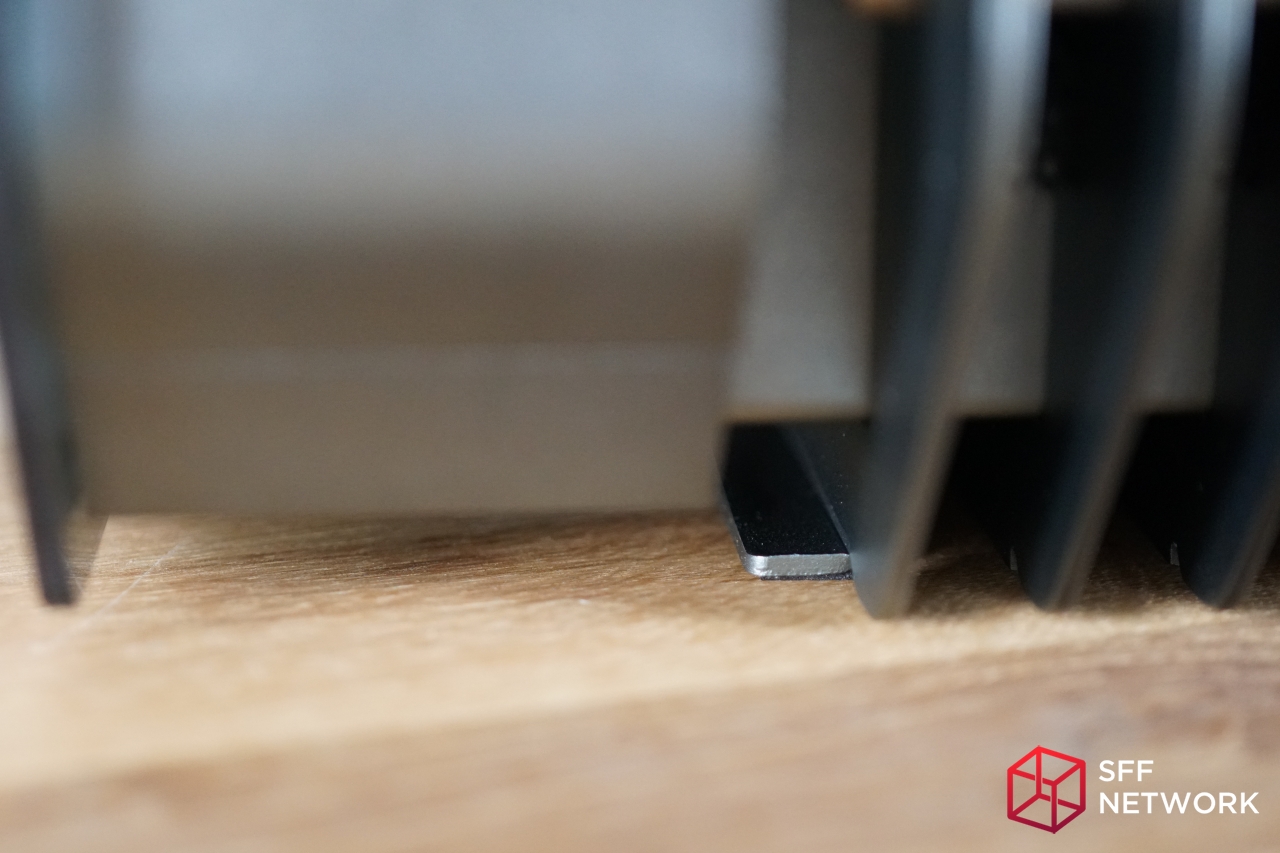
The case uses two high-density anti-vibration feet in the rear and two thin anti-vibration pads up front. The front pads offered the same result as the rear feet and vibration was dampened equally on all four corners.

While the front pads are fully compressed when the case is right-side up, no part of the metal chassis touches the surface.
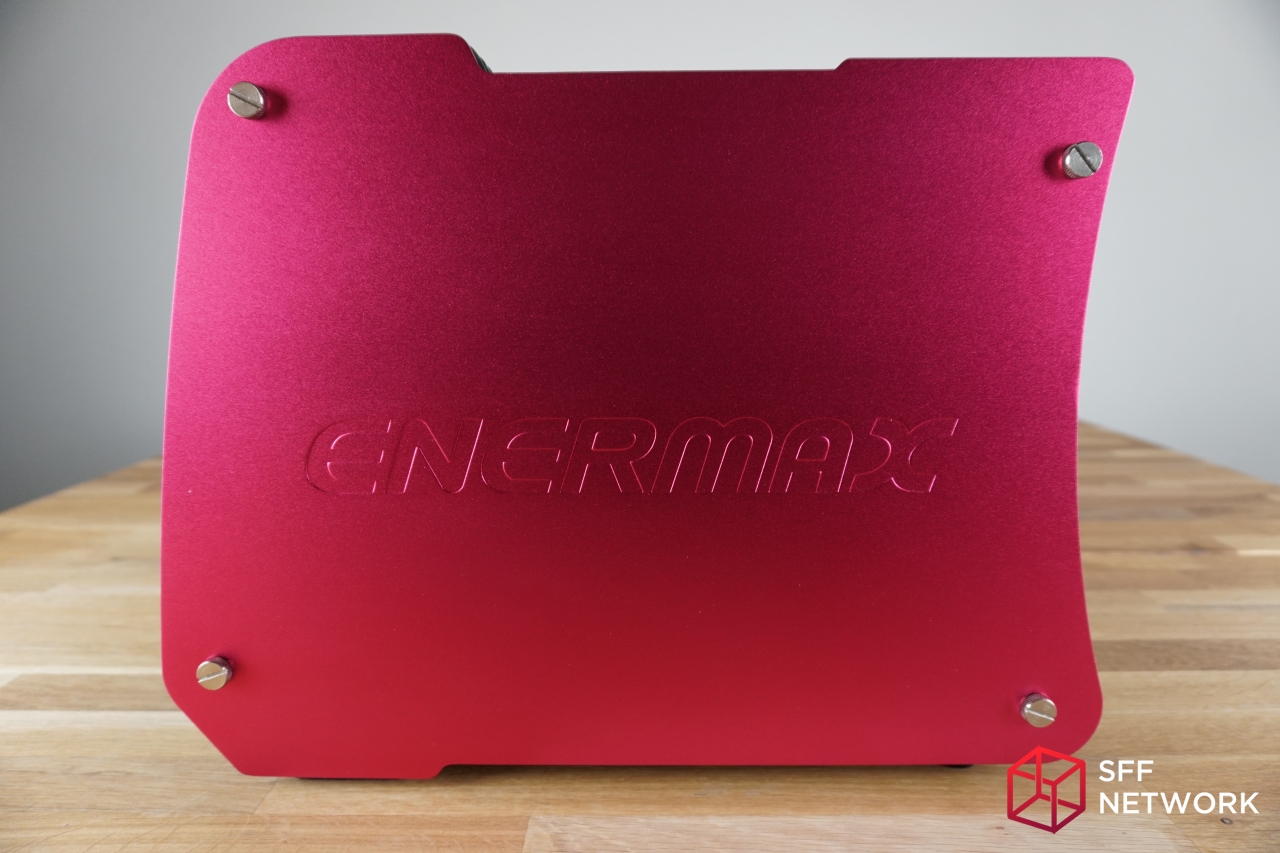
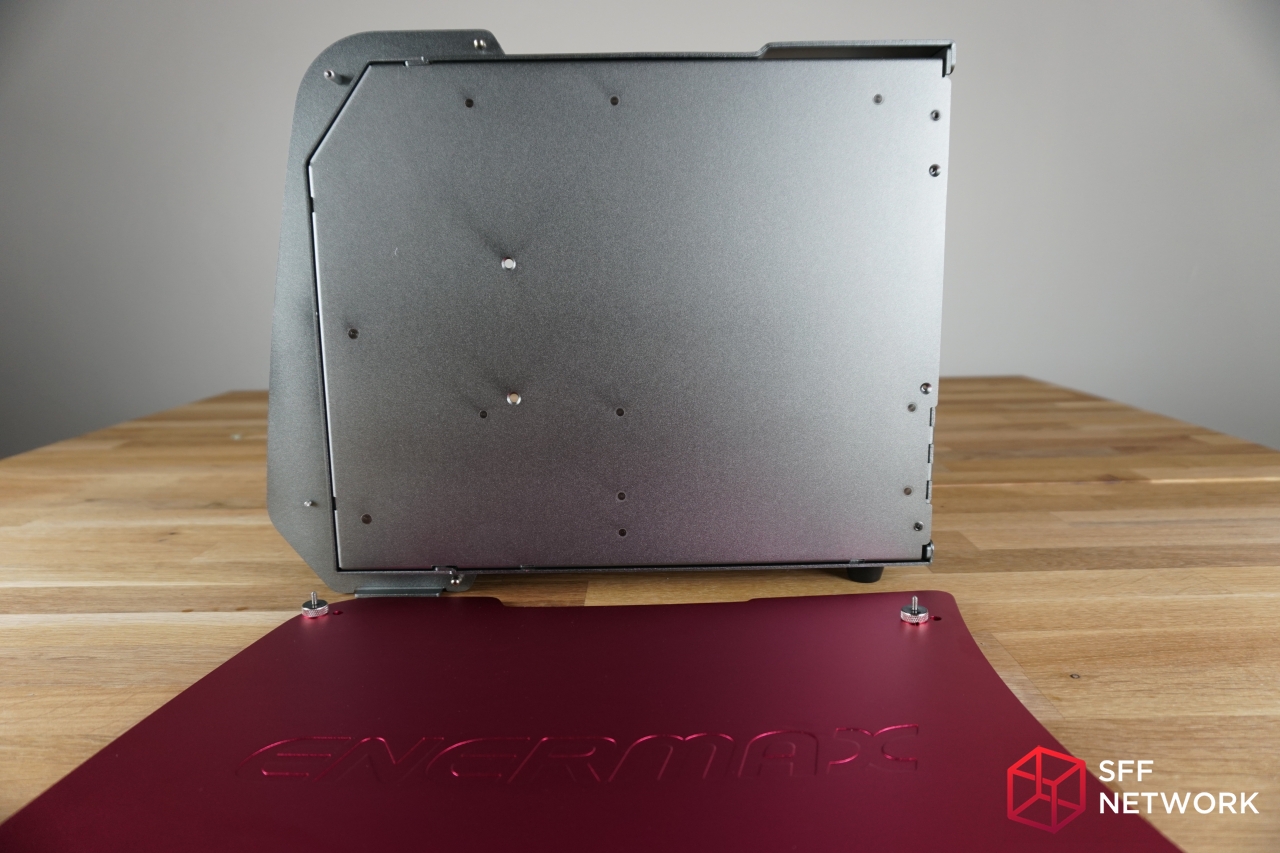
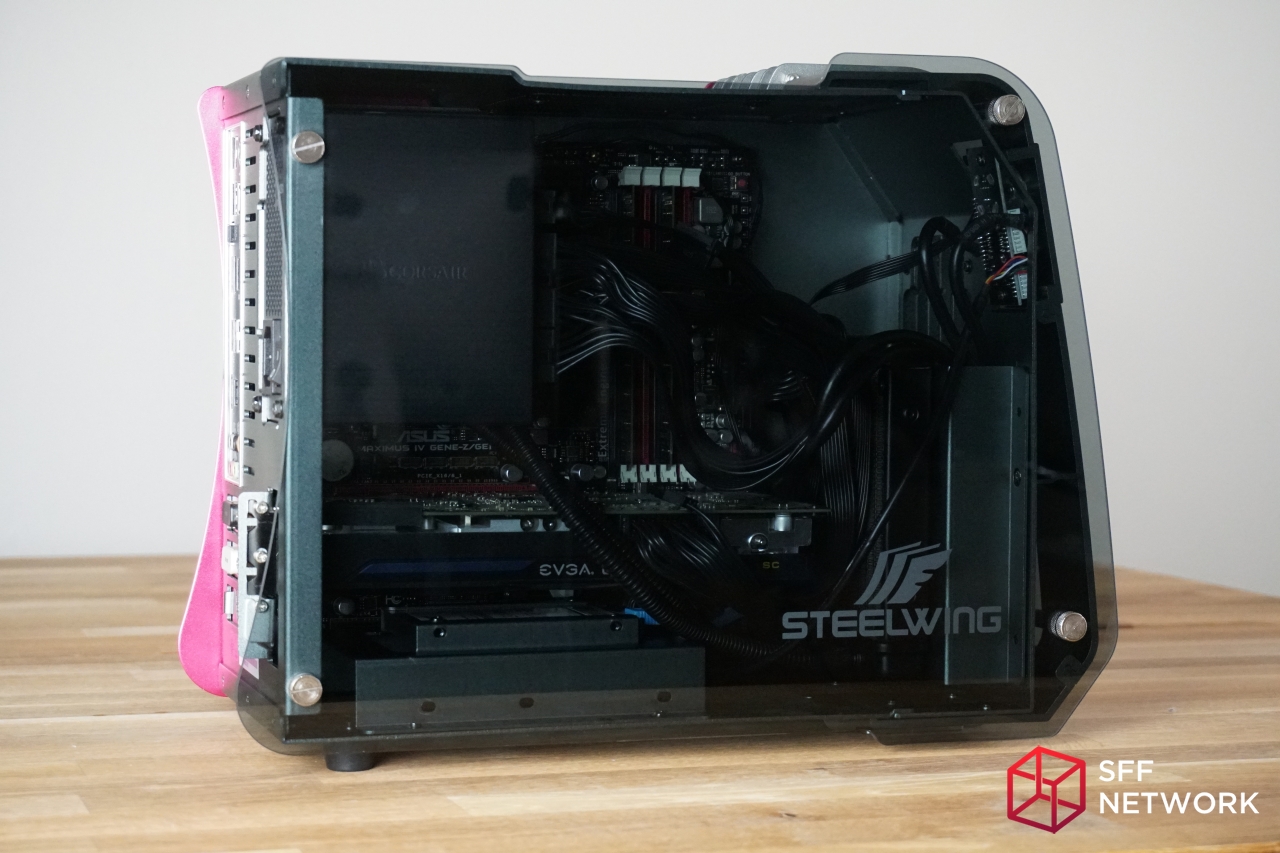
The rear side panel uses machined thumbscrews but removing them reveals that it is mounted flush to the backside of the case- there is no room to hide cables or SSDs back here.
Thankfully, the aluminum-on-aluminum panels don’t vibrate during operation so the screws are simply there for aesthetics. However, if you want to custom paint the side panel a different color, you couldn’t ask for a more welcoming design.
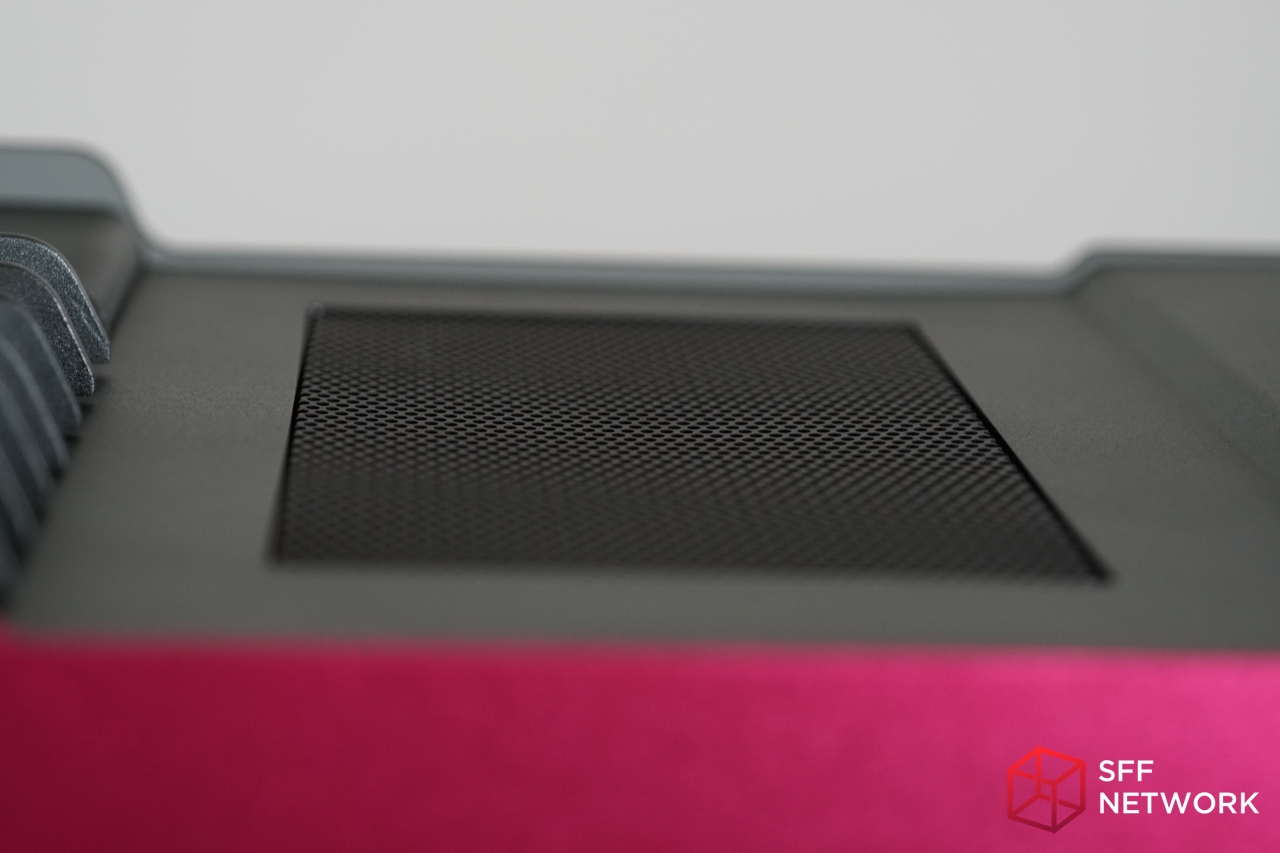
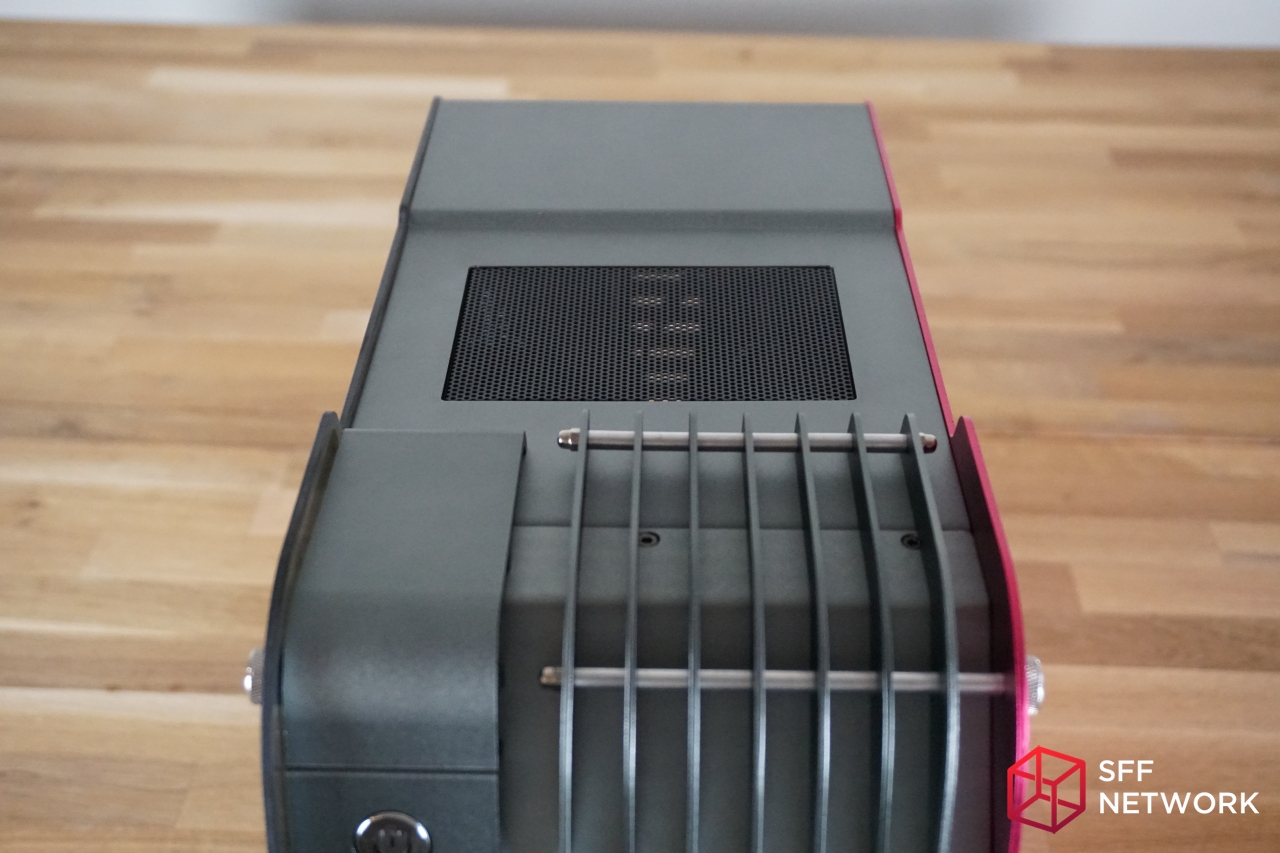
Mounted to the top of chassis is a vent which will function based on positive or negative pressure airflow from the case.
There are no holes for mounting a 120mm fan but this vented grill is machine punched to sit flush with the outside of the case.
[mks_separator style=”blank” height=”2″]

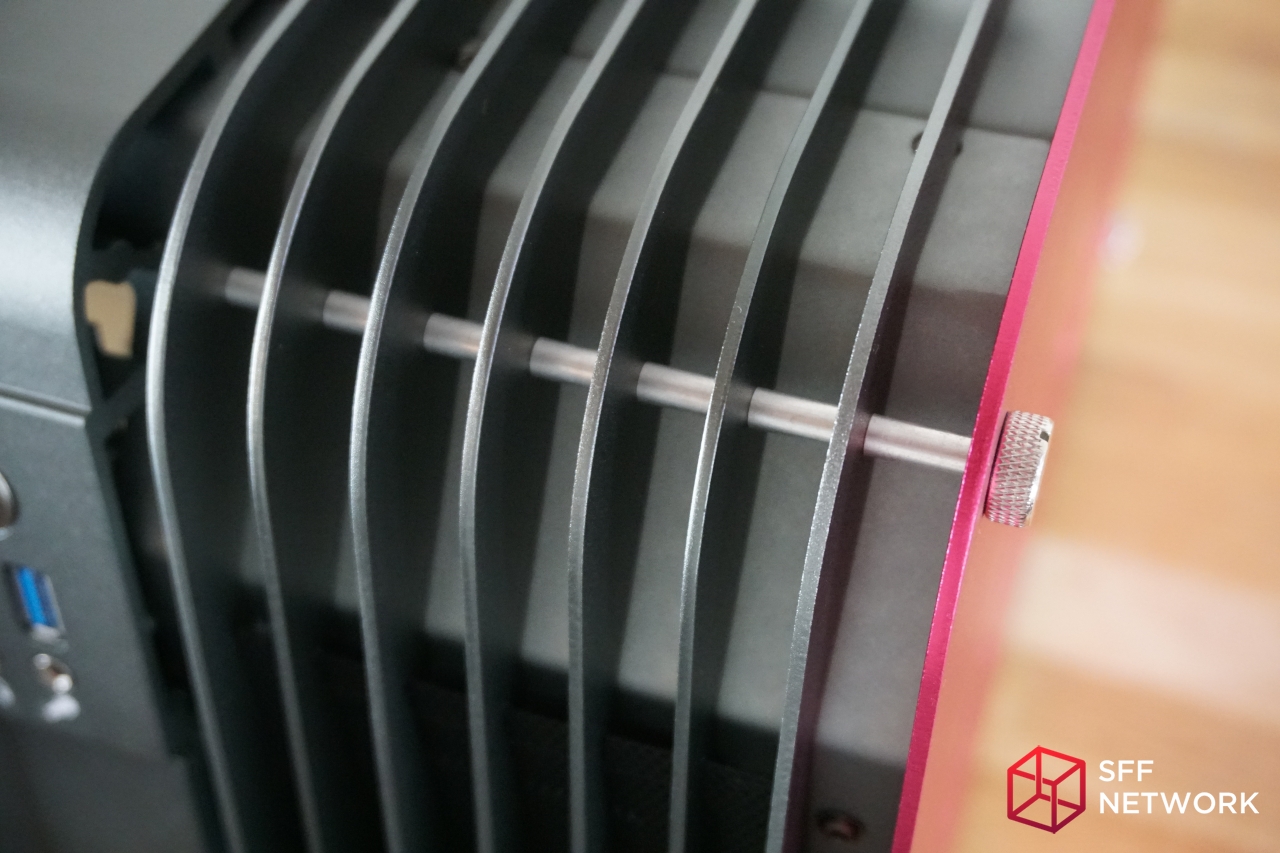
If the case ever required disassembly, the outside fin-structure would need to be completely removed first to expose the T10 TORX screws on the opposite side of the case.
[mks_separator style=”blank” height=”2″]

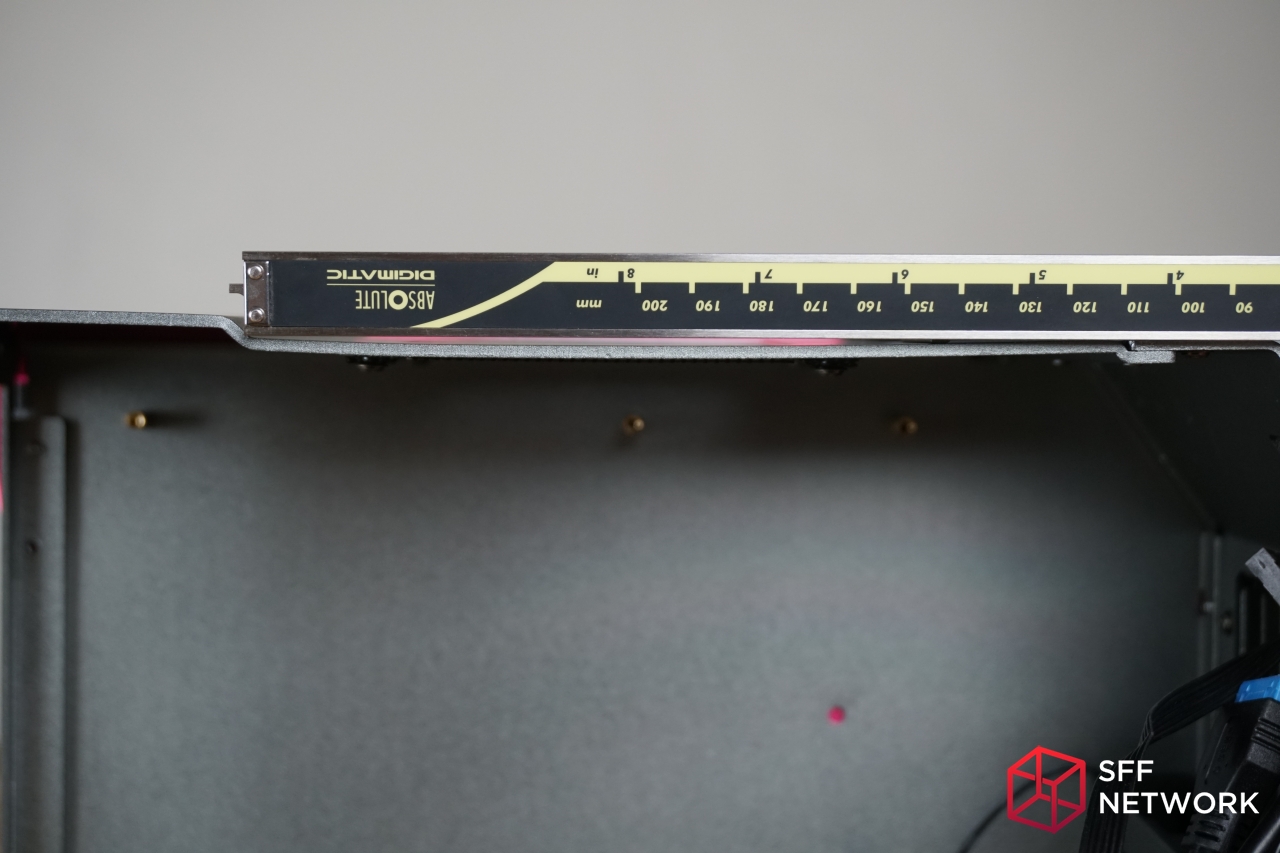
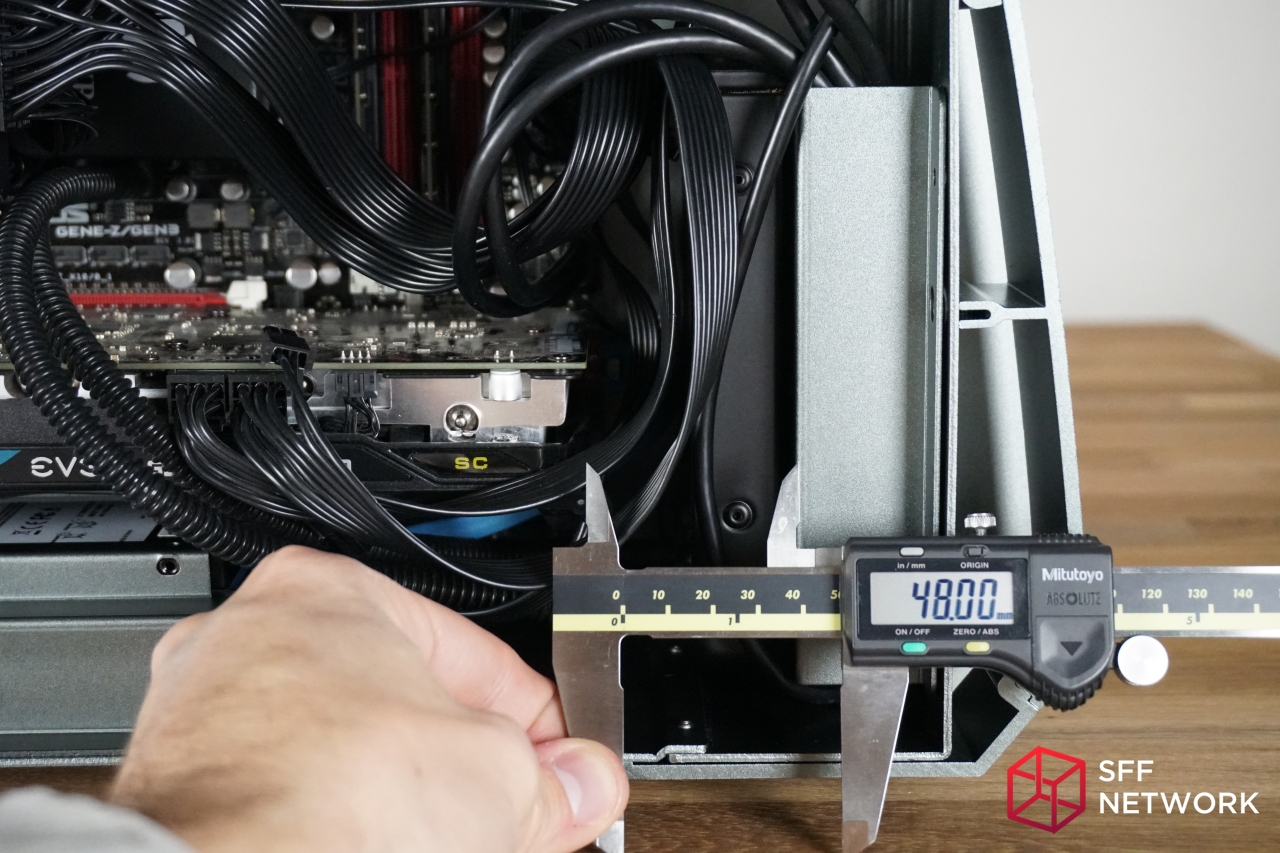
You’ve seen it before and here it is again, that digital Mitutoyo caliper! It will be used to ensure that the manufacturers listed specifications are accurate.
The following picture is provided to illustrate that the caliper is correctly calibrated to 0.00mm when closed.
[mks_separator style=”blank” height=”2″]

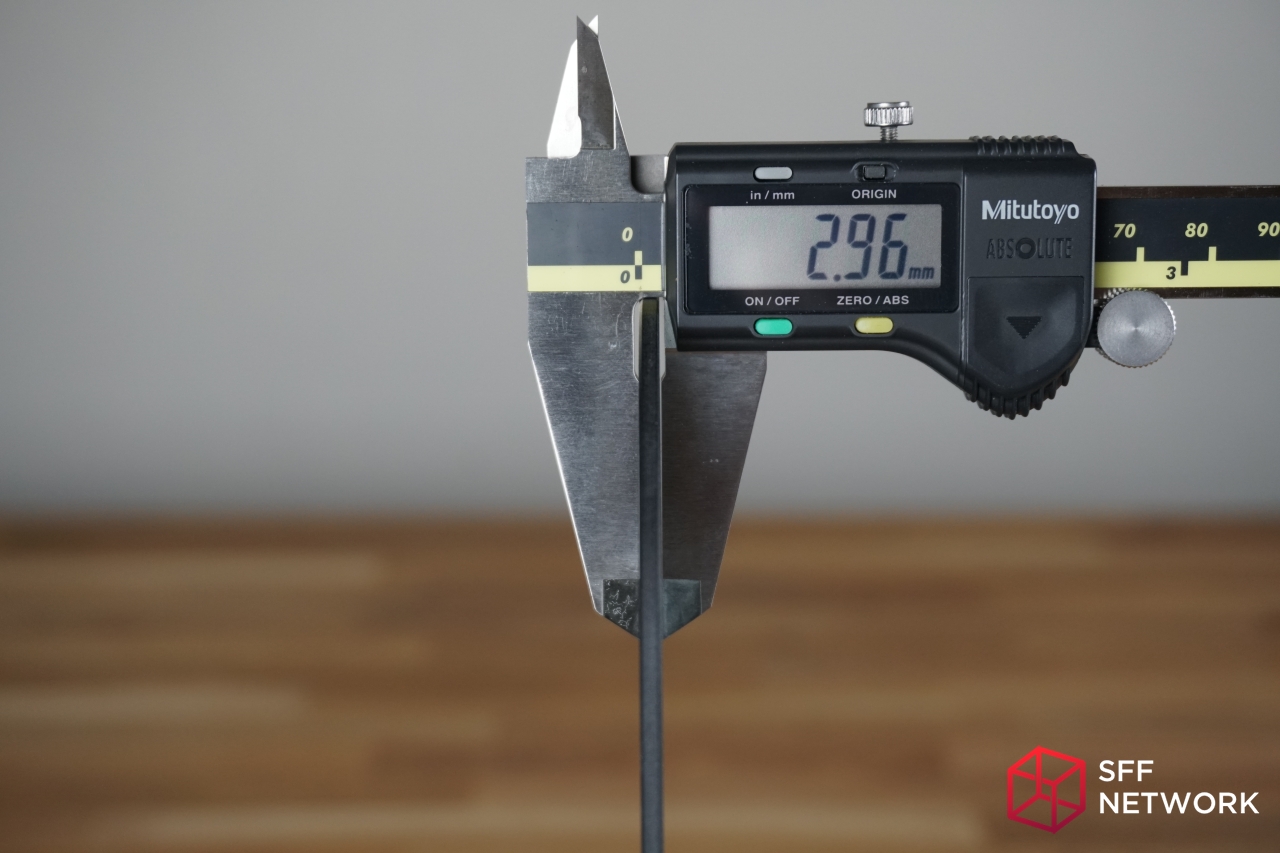
Enermax claims the the tempered glass side panel is 3mm thick and indeed it is.
[mks_separator style=”blank” height=”2″]
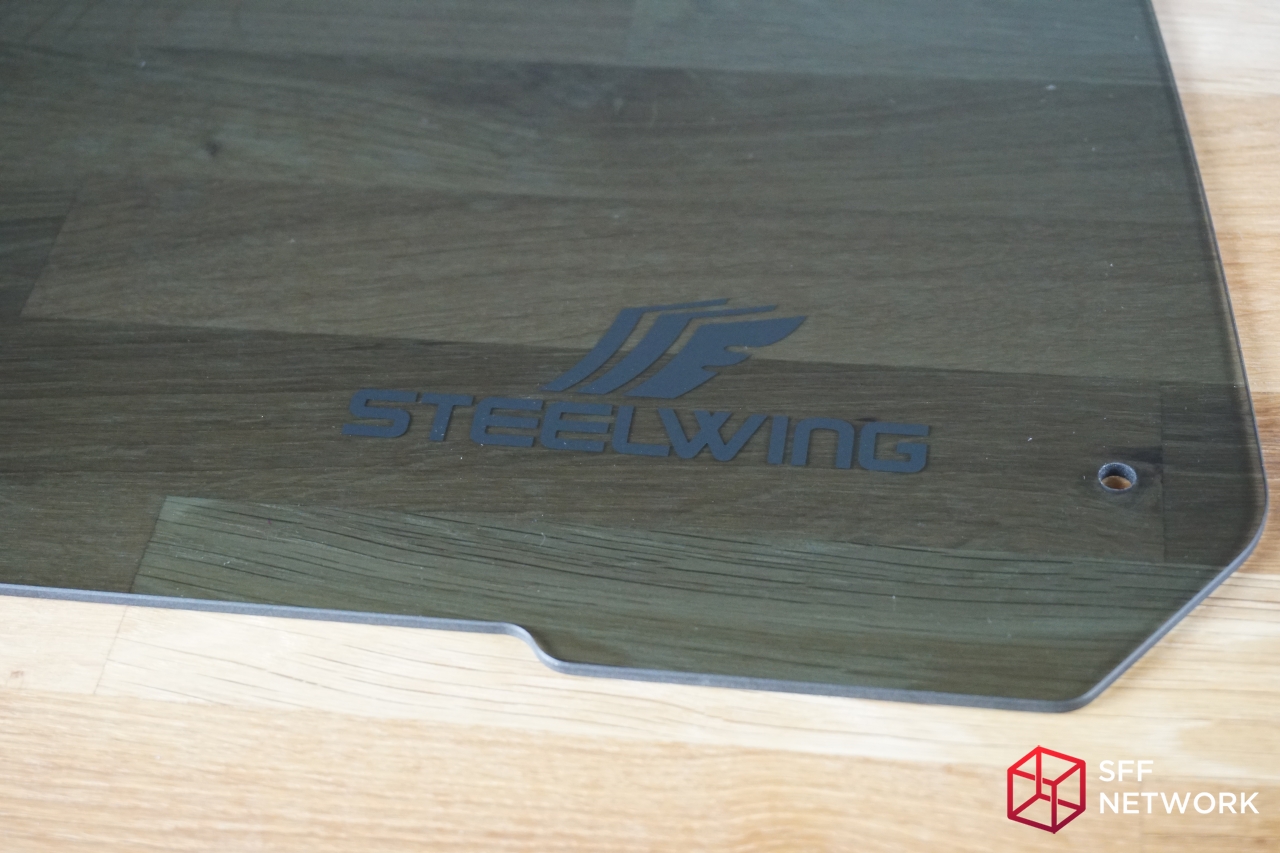
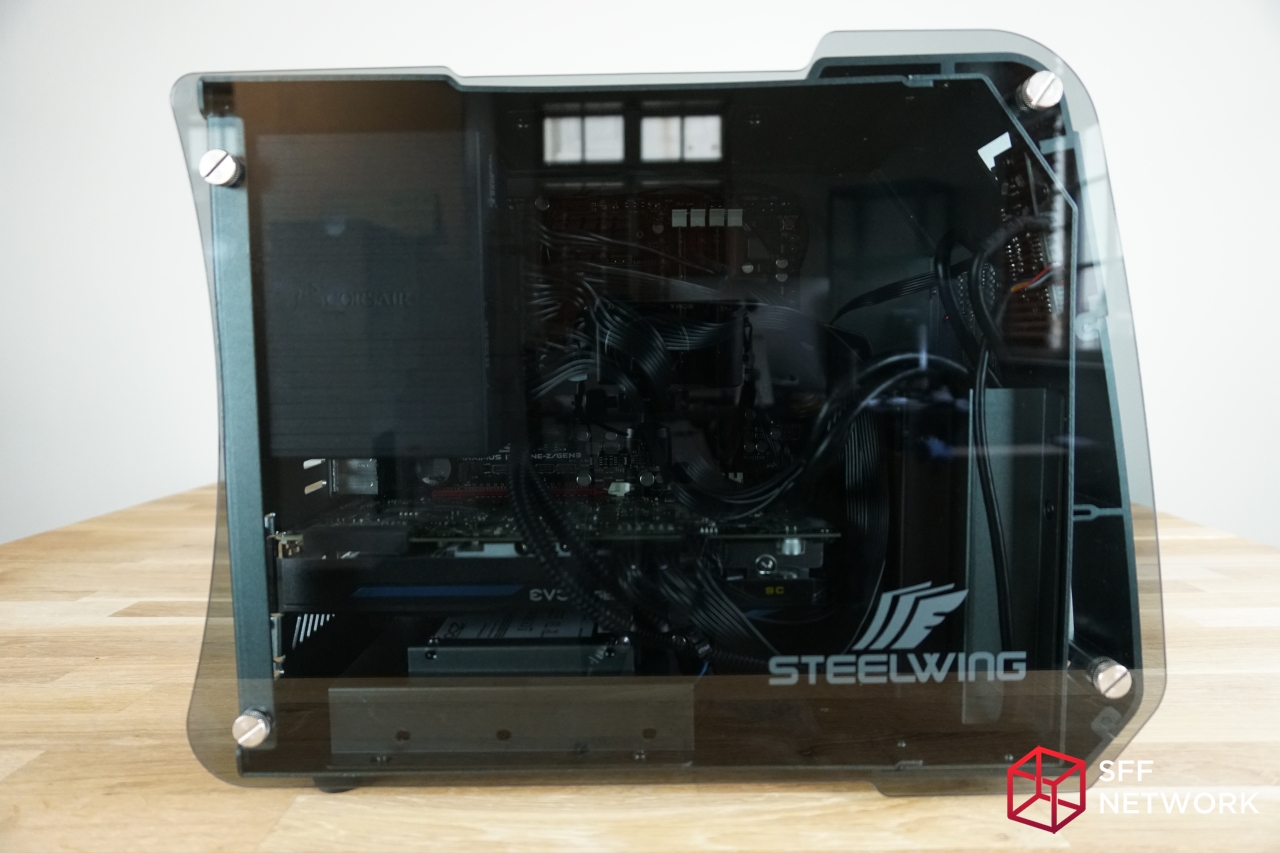
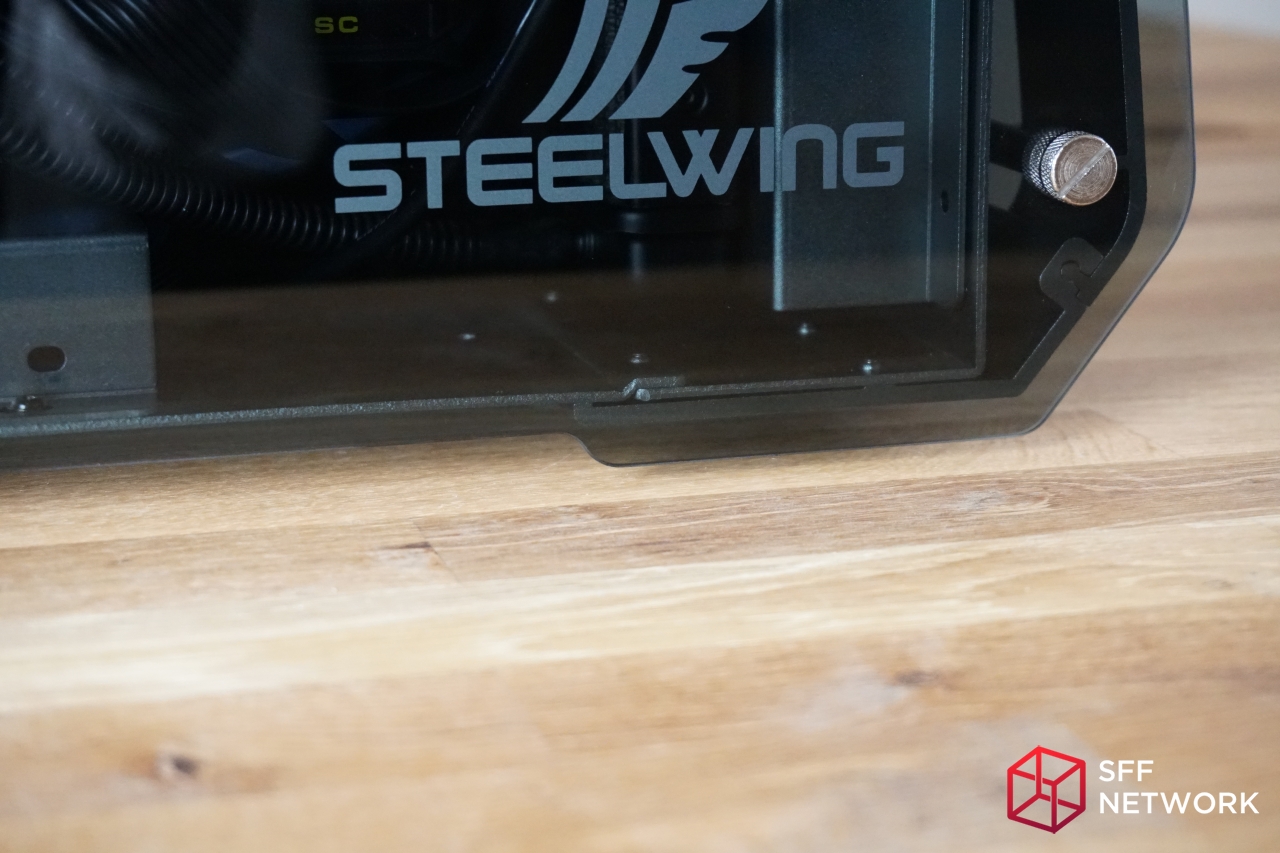
The SteelWing logo appears to be silk screened onto the backside of the tempered glass. This helps to add a nice subtle look while still advertising the case’s name without it feeling too in your face.
If you were absolutely determined to remove the logo, I don’t believe that it could be done without marring the glass.
[mks_separator style=”blank” height=”2″]

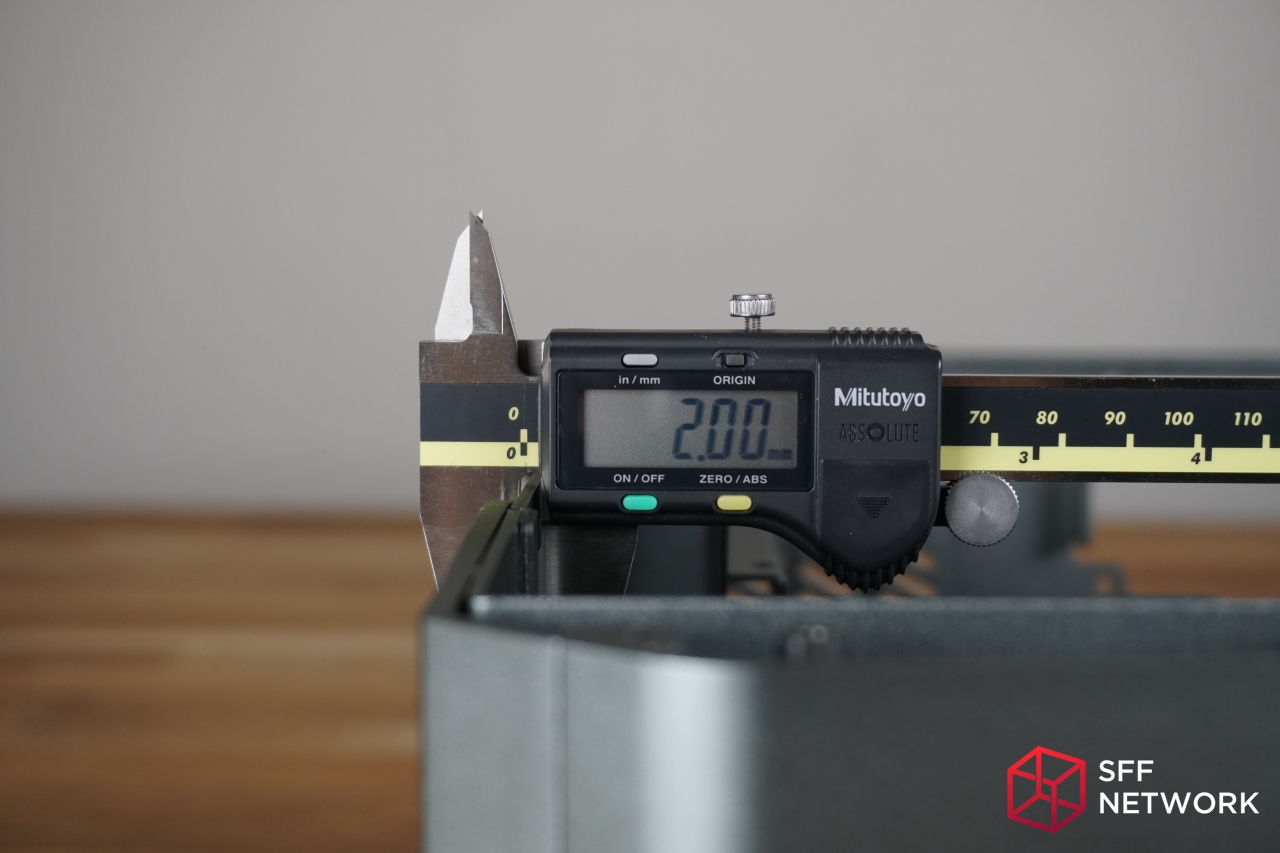
The overall thickness for the entire aluminum case is 2.00mm on the dot.
[mks_separator style=”blank” height=”2″]
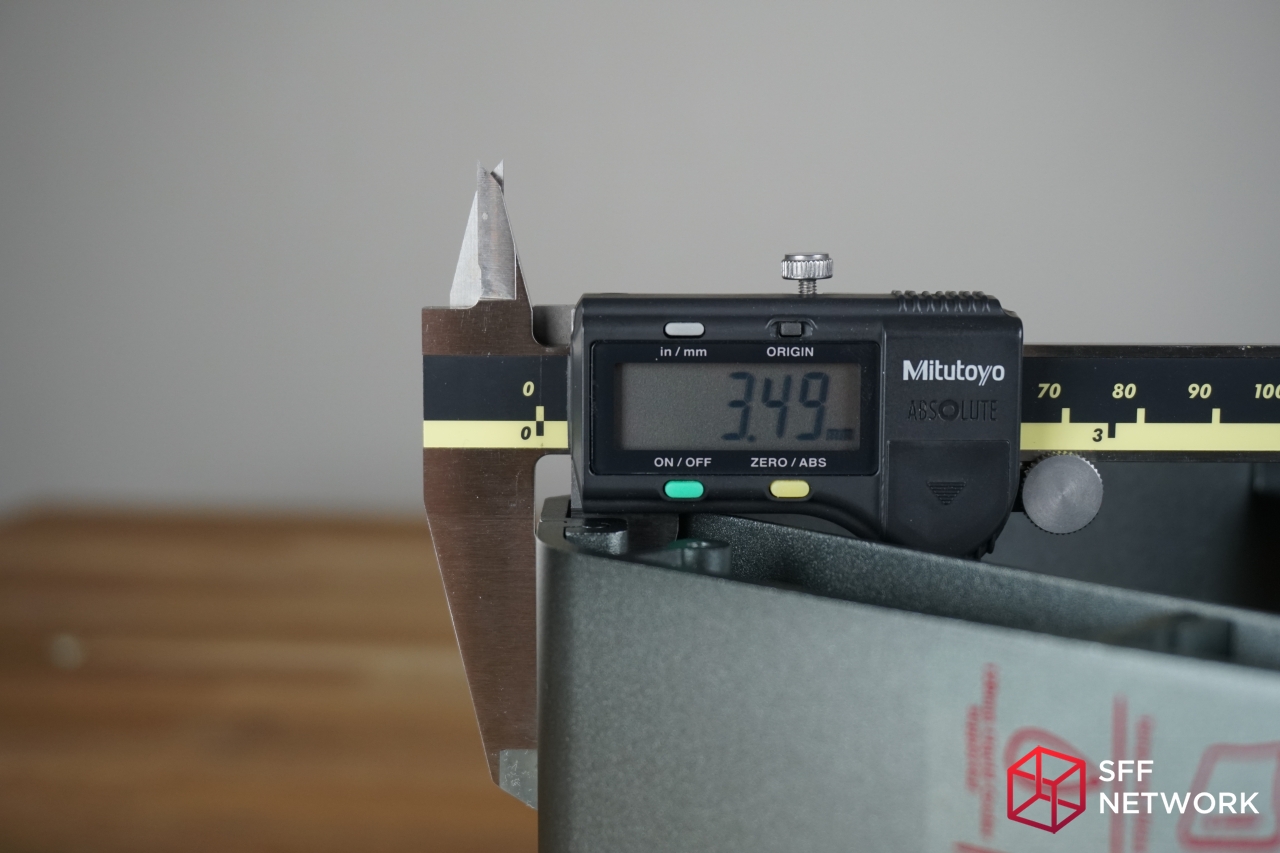
Enermax advertised that the aluminum is “up to” 3.5mm thick. Again, their advertising is 100% accurate.
[mks_separator style=”blank” height=”2″]
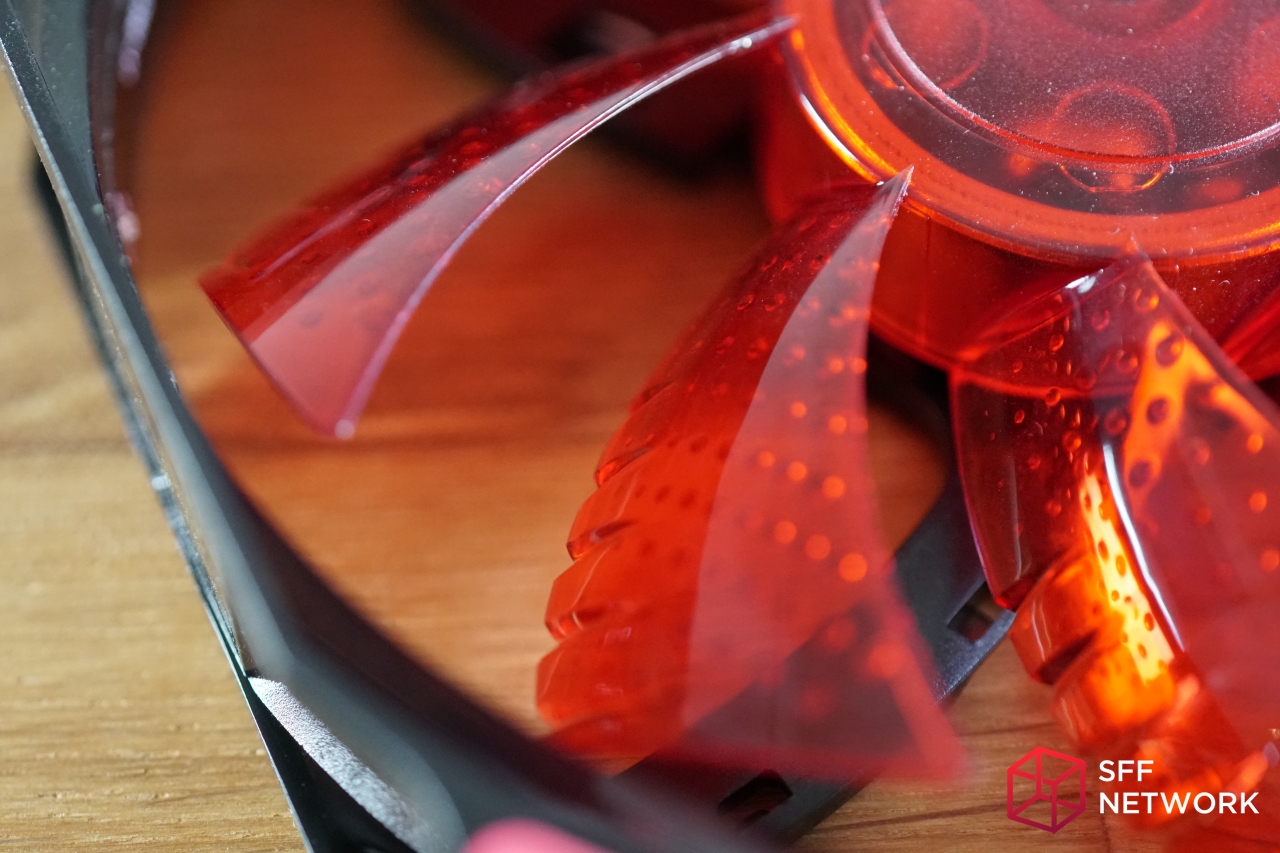
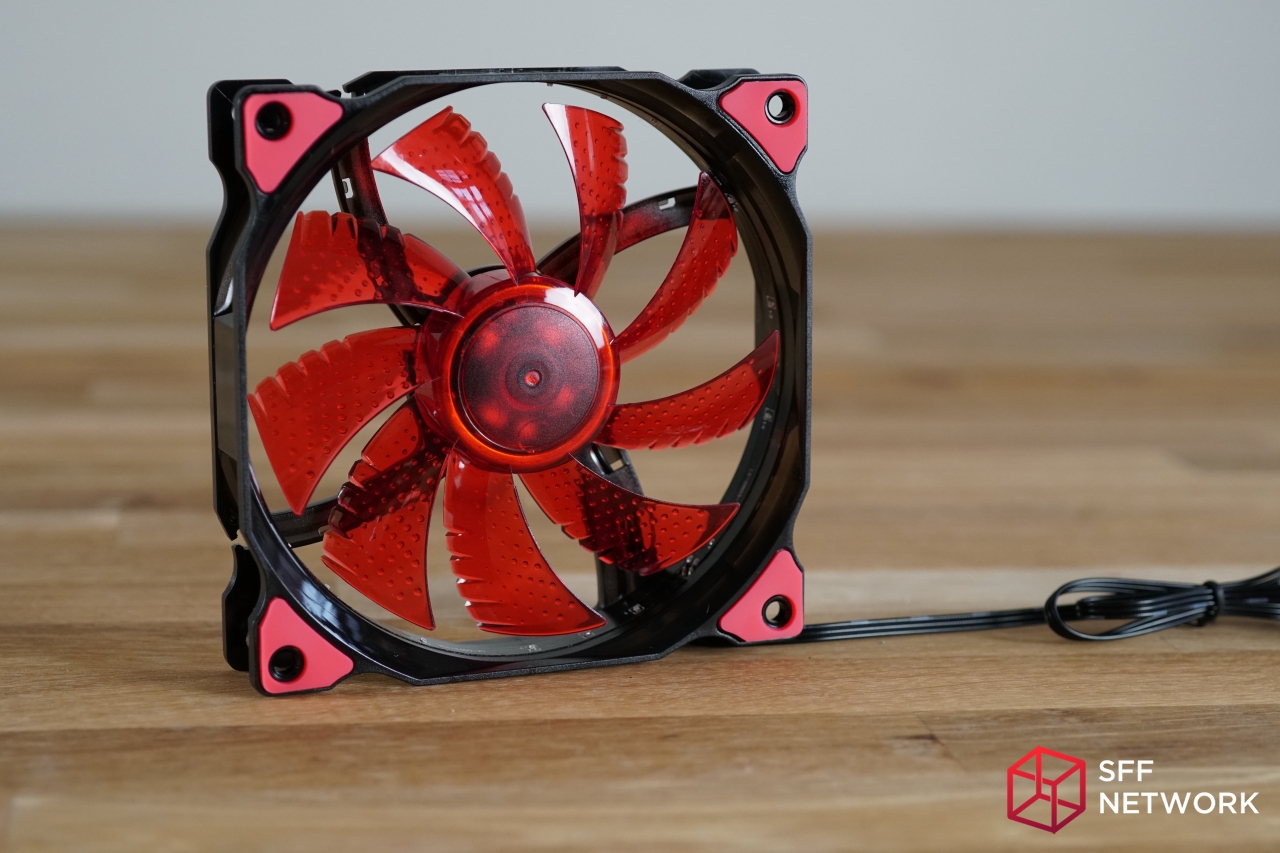
The included 120mm 9-Blade fan is designed with silence and performance in mind.
I wasn’t able to find any specifications for this exact fan on the Enermax website but it appears to be one of the better designed fans in their arsenal.
Each blade has an aerodynamic profile to help reduce wind noise.
[mks_separator style=”blank” height=”2″]
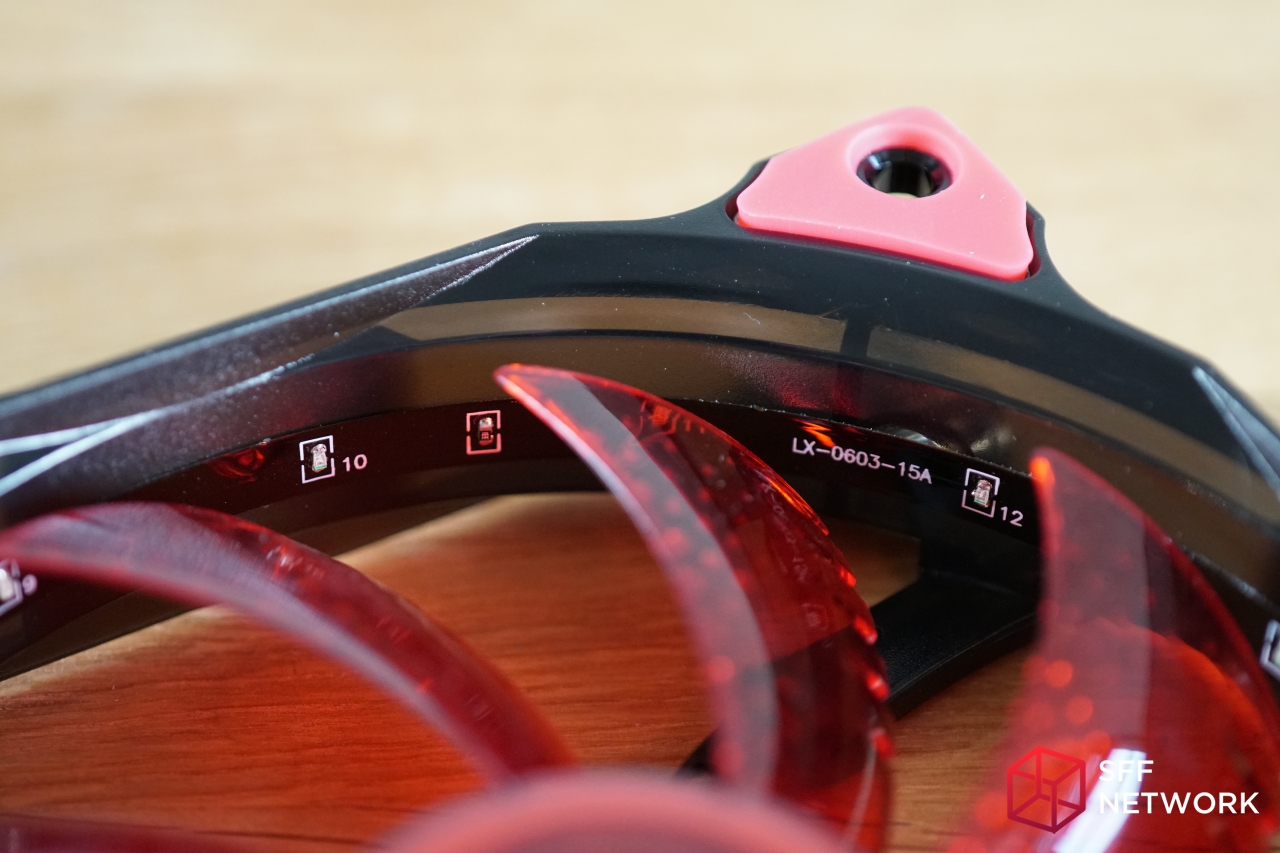
The Red LED light stripe is discrete and attached securely to the frame.
Each corner of the fan uses vibration dampers that appear to made of silicone.
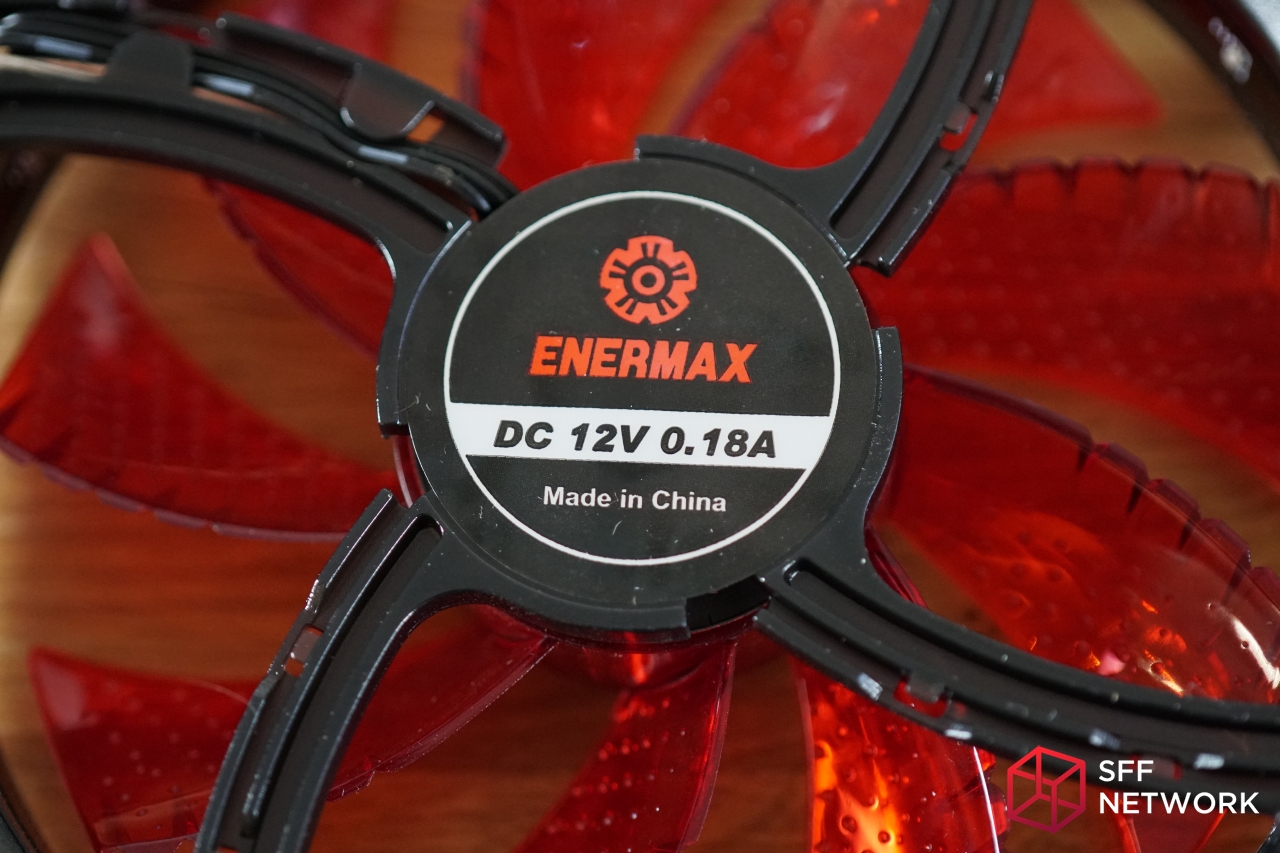
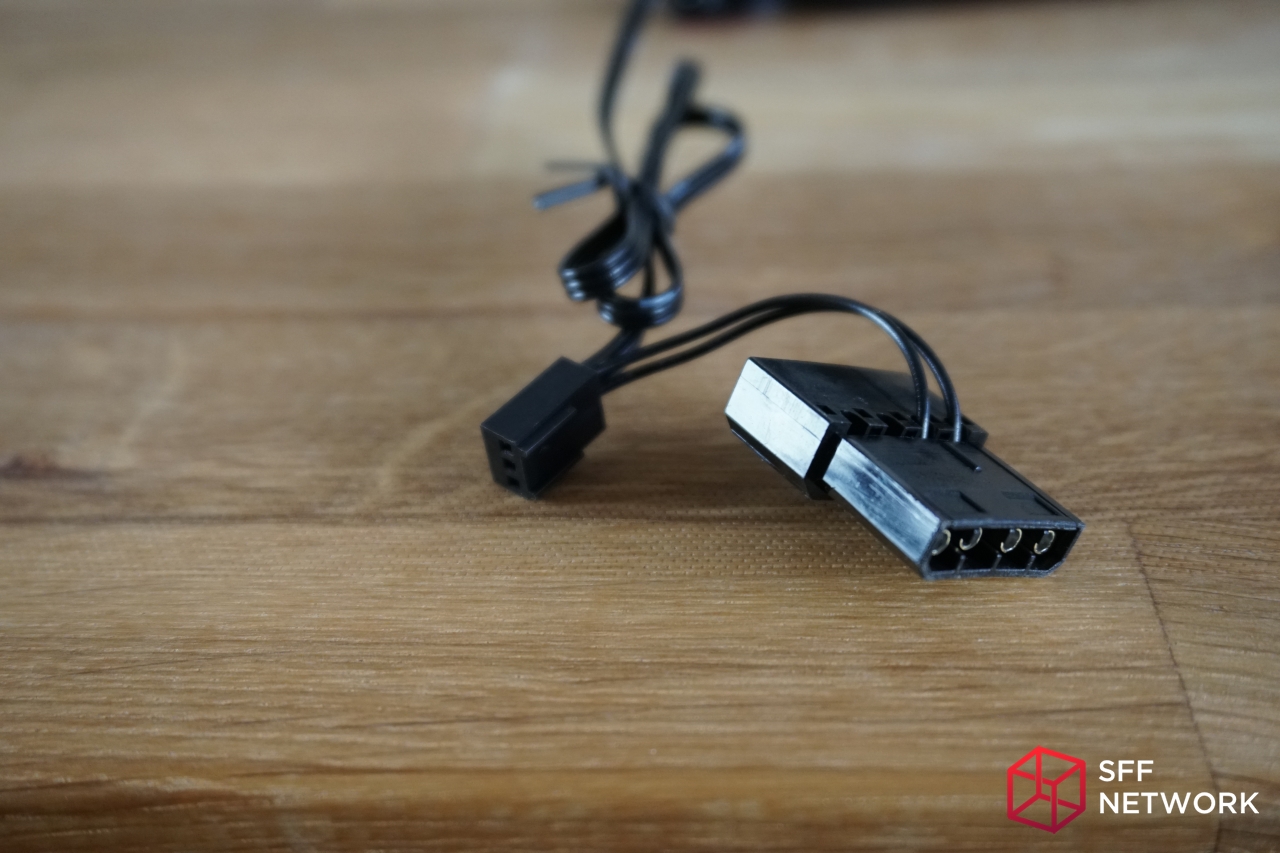
The fan uses a 3-pin fan header and can be powered by a 4-pin molex if you prefer.
The cable is not braided or sleeved but it is black, highly flexible, and easy to tuck behind the motherboard.
[mks_separator style=”blank” height=”2″]
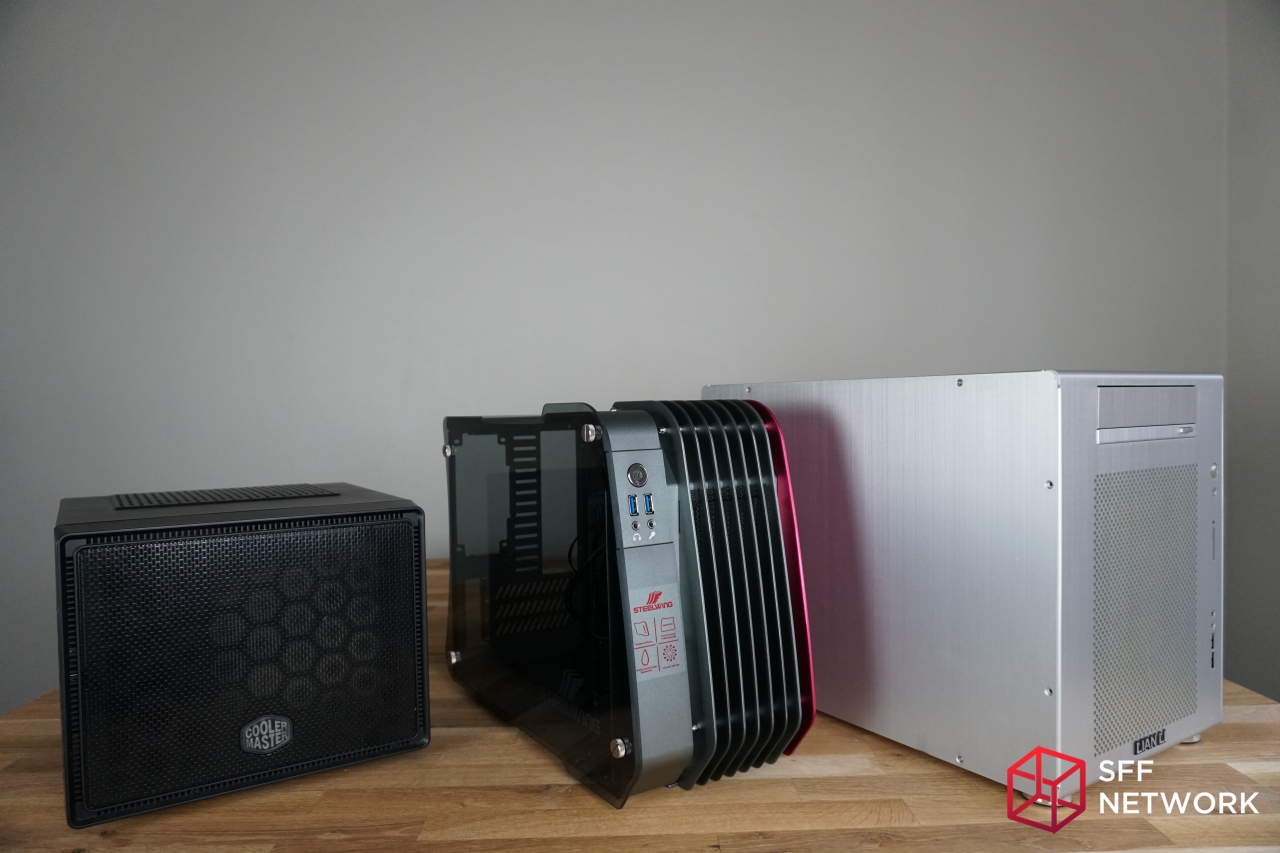
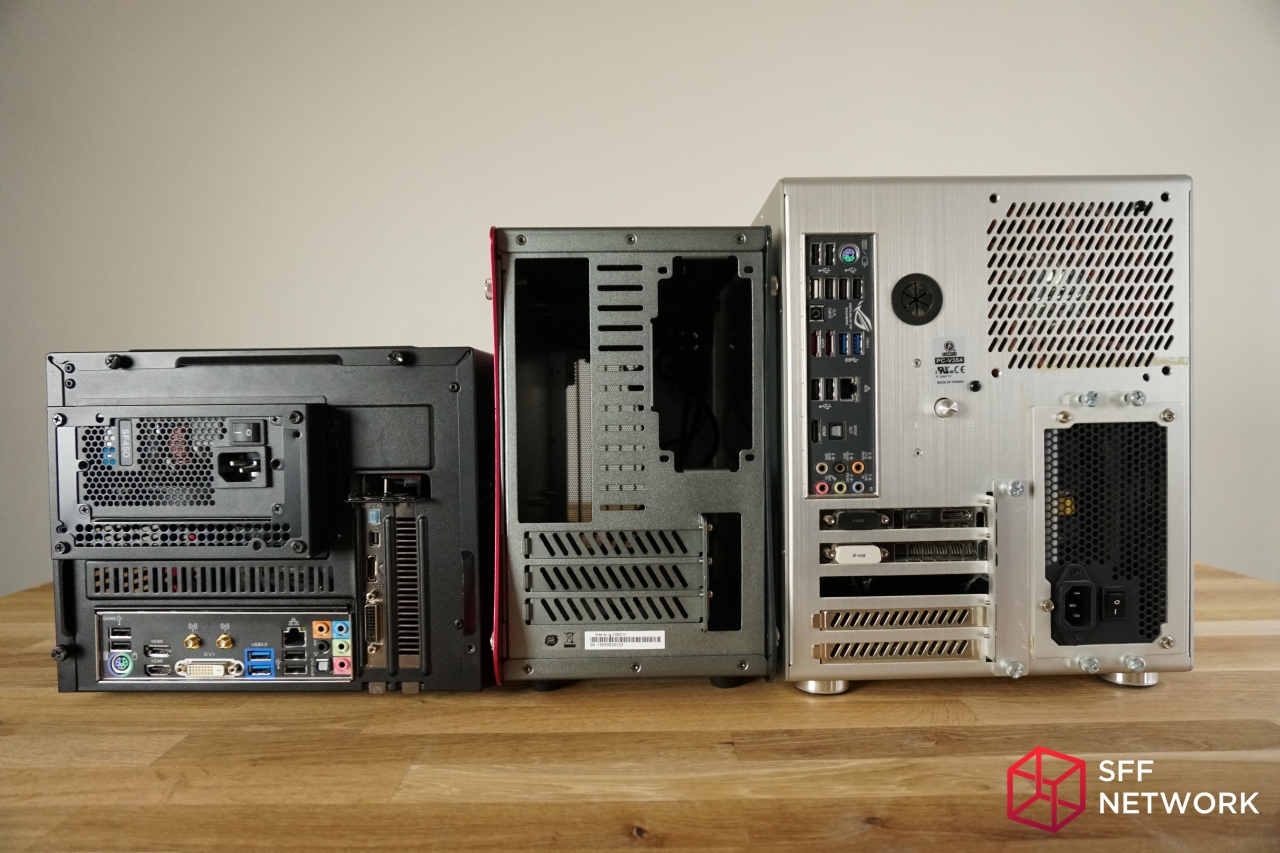
The Competition
Here is how the Enermax SteelWing stacks up to the competition.
I chose these other two cases because they offer similar functionality and similar motherboard form-factor support.
To the left, we have the Cooler Master Elite 110 at 15.36 liters.
It supports an ATX PSU but only Mini-ITX motherboards.
To the right we have the Lian-Li PC-V354 at 32.92 liters.
It supports an ATX PSU, Mini-ITX and Micro-ATX motherboards.
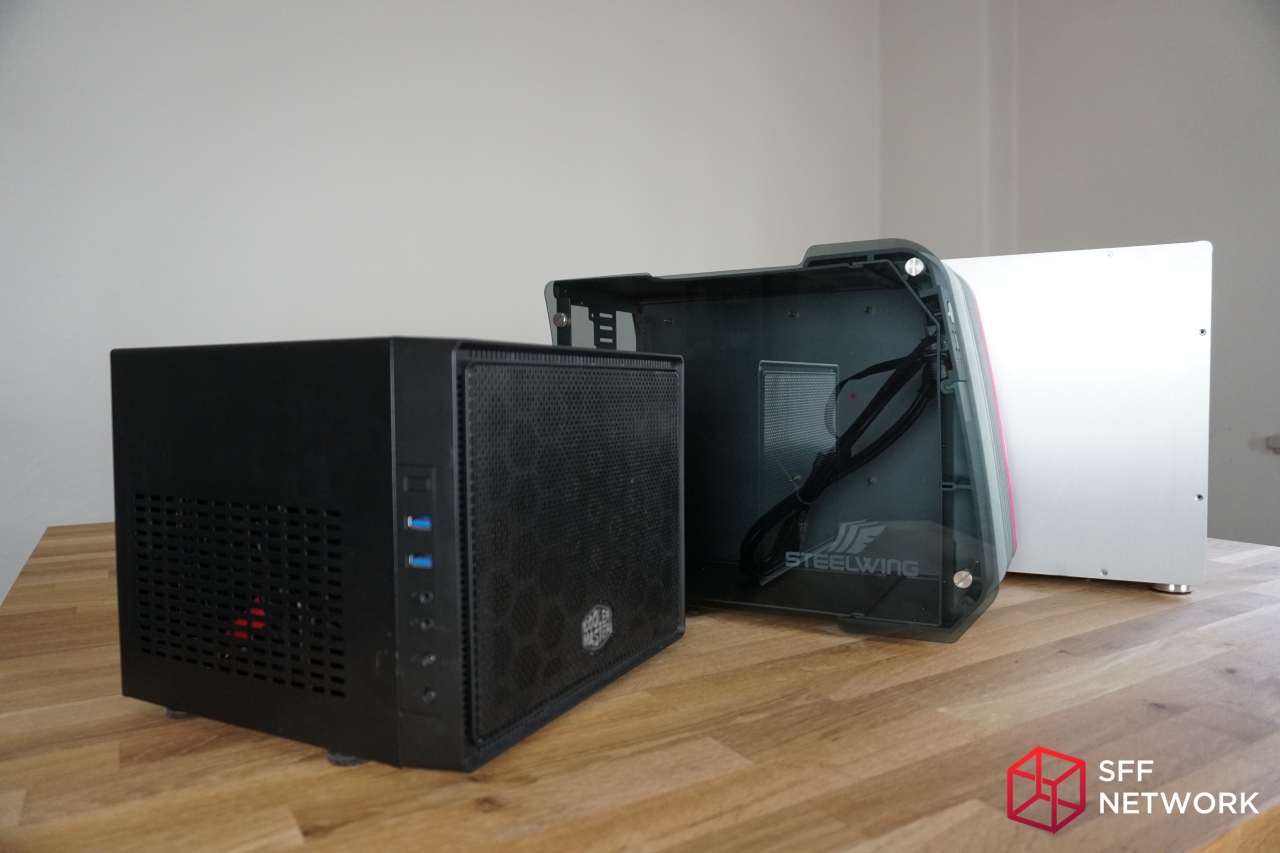
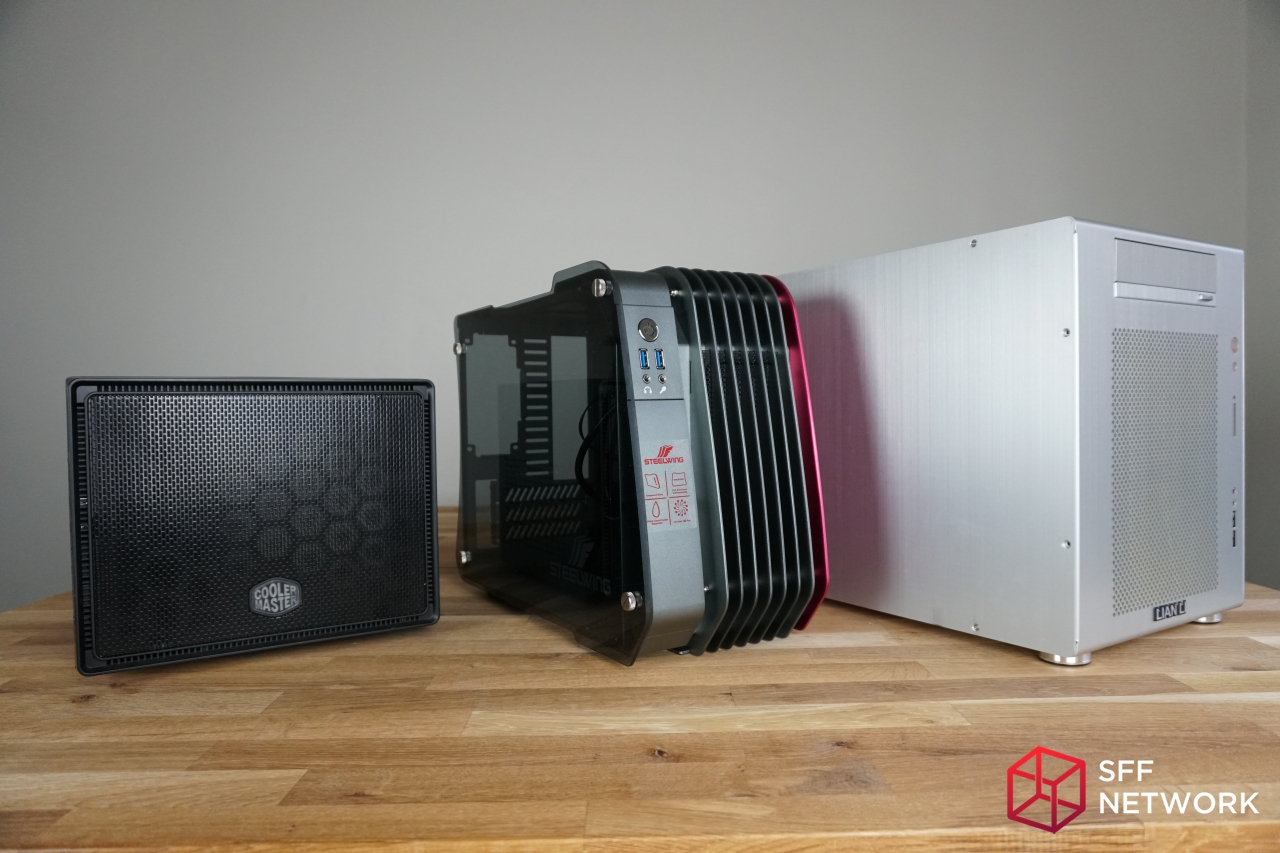
That attractive looking, non-rectangular, two-tone, Enermax SteelWing in the middle? It’s just 16.13 liters.
It supports an SFX or SFX-L PSU, Mini-ITX and even Micro-ATX motherboards.
[mks_separator style=”blank” height=”2″]

[mks_separator style=”blank” height=”2″]
The Build
For this review, I will be using parts and pieces from the two rigs pictured above.
Intel i7-2600k @ 3.8GHz
Asus Maximus IV GENE-Z/GEN3
8GB Samsung DDR3 1.35v 30nm low-profile ram
3TB HGST Deskstar 7200RPM
512GB OCZ Agility SSD
EVGA Nvidia GTX 970 Superclocked (241.3mm / 9.50″)
Corsair H60 AIO 120mm (25mm)
Corsair SF450 SFX PSU
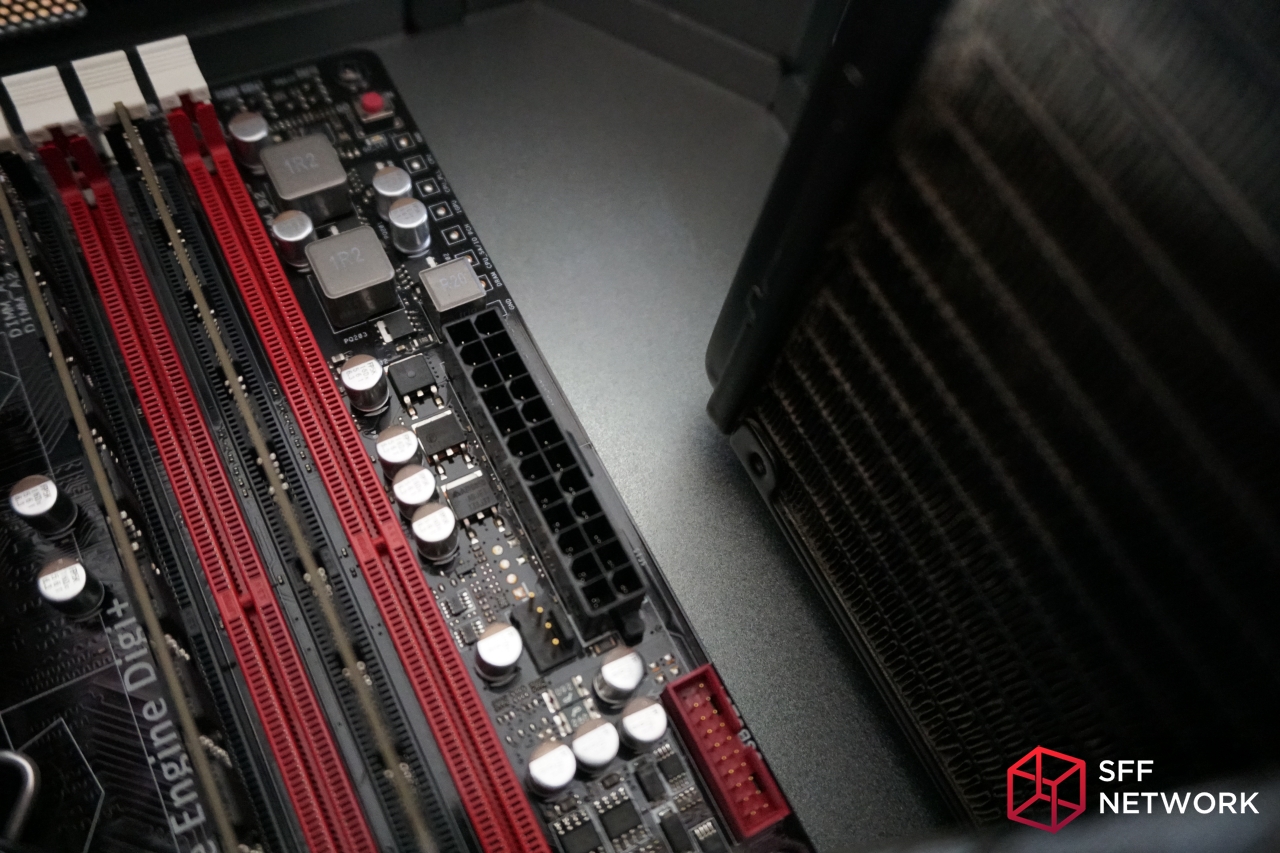
With the power supply installed, I had no issues working in the 80mm of space between the power supply and the motherboard.
Threading in the waterblock mount was a breeze as was plugging in the 8-pin CPU power.
[mks_separator style=”blank” height=”2″]

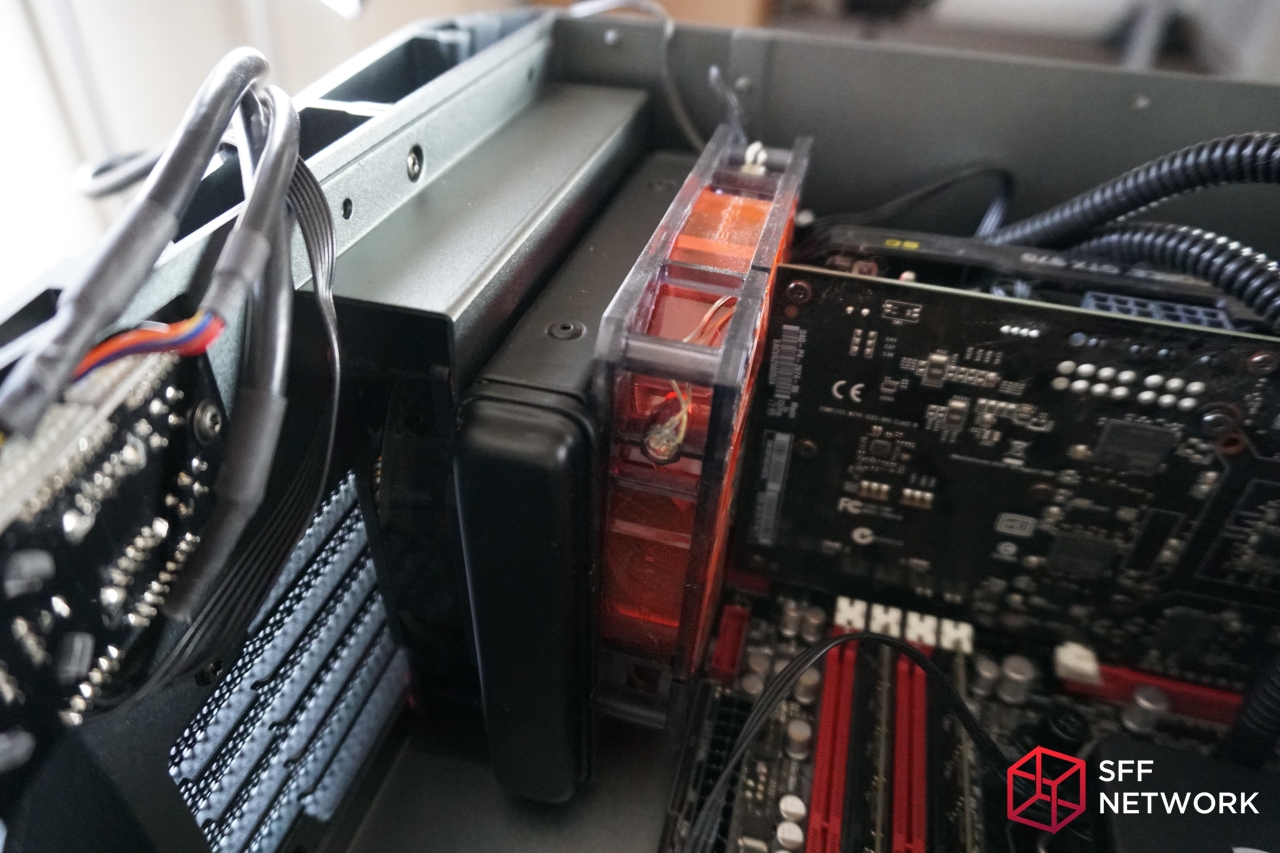
While the position of the radiator hoses appears less than ideal in this orientation, the other orientation conflicted with the location of the 24-pin on this particular motherboard.
[mks_separator style=”blank” height=”2″]

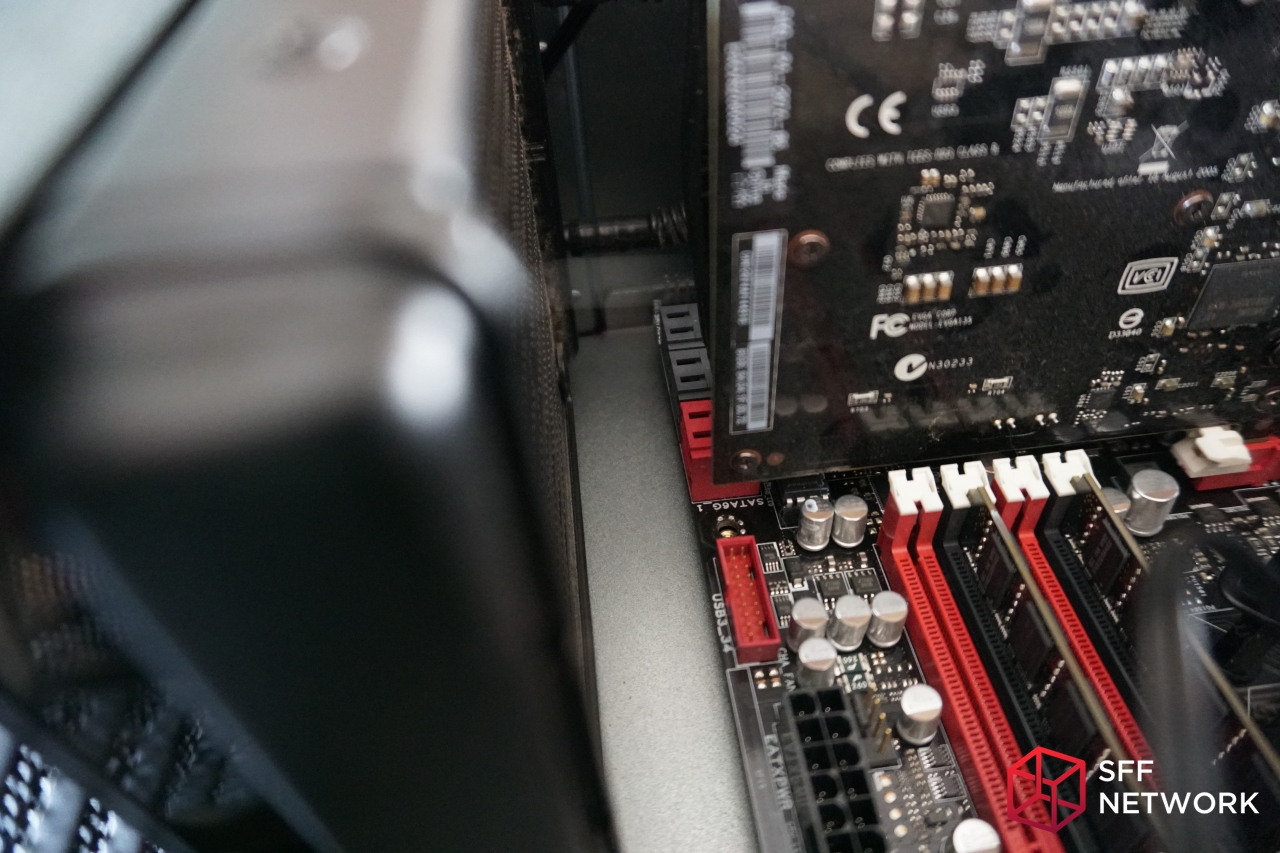
Even with a thin 25 mm radiator installed, the use of a 90-degree SATA connector is ideal on a Micro-ATX motherboard if the motherboard uses 90-degree SATA ports.
However, if you install highly flexible SATA cables before putting the motherboard into place, you can still make it work.
If no AIO system is being used, it’s non-issue.
[mks_separator style=”blank” height=”2″]
Trying to fit a 2nd fan for a push-pull configuration proved impossible with this combination of hardware.
With the use of an Mini-ITX motherboard and a shorter graphics card it wouldn’t be an issue. You could also opt to use a thicker radiator core for more effective cooling.
[mks_separator style=”blank” height=”2″]
The 3.5″ HDD and 2.5″ SSD installation was also easy to slide into place and didn’t have any conflicts with the graphics card being installed beforehand.
[mks_separator style=”blank” height=”2″]

Without the use of an AIO cooler’s radiator, you could fit up to a 290mm long graphics card.
[mks_separator style=”blank” height=”2″]
Overall, the hardware installation with a Micro-ATX motherboard is pretty straightforward and simple.
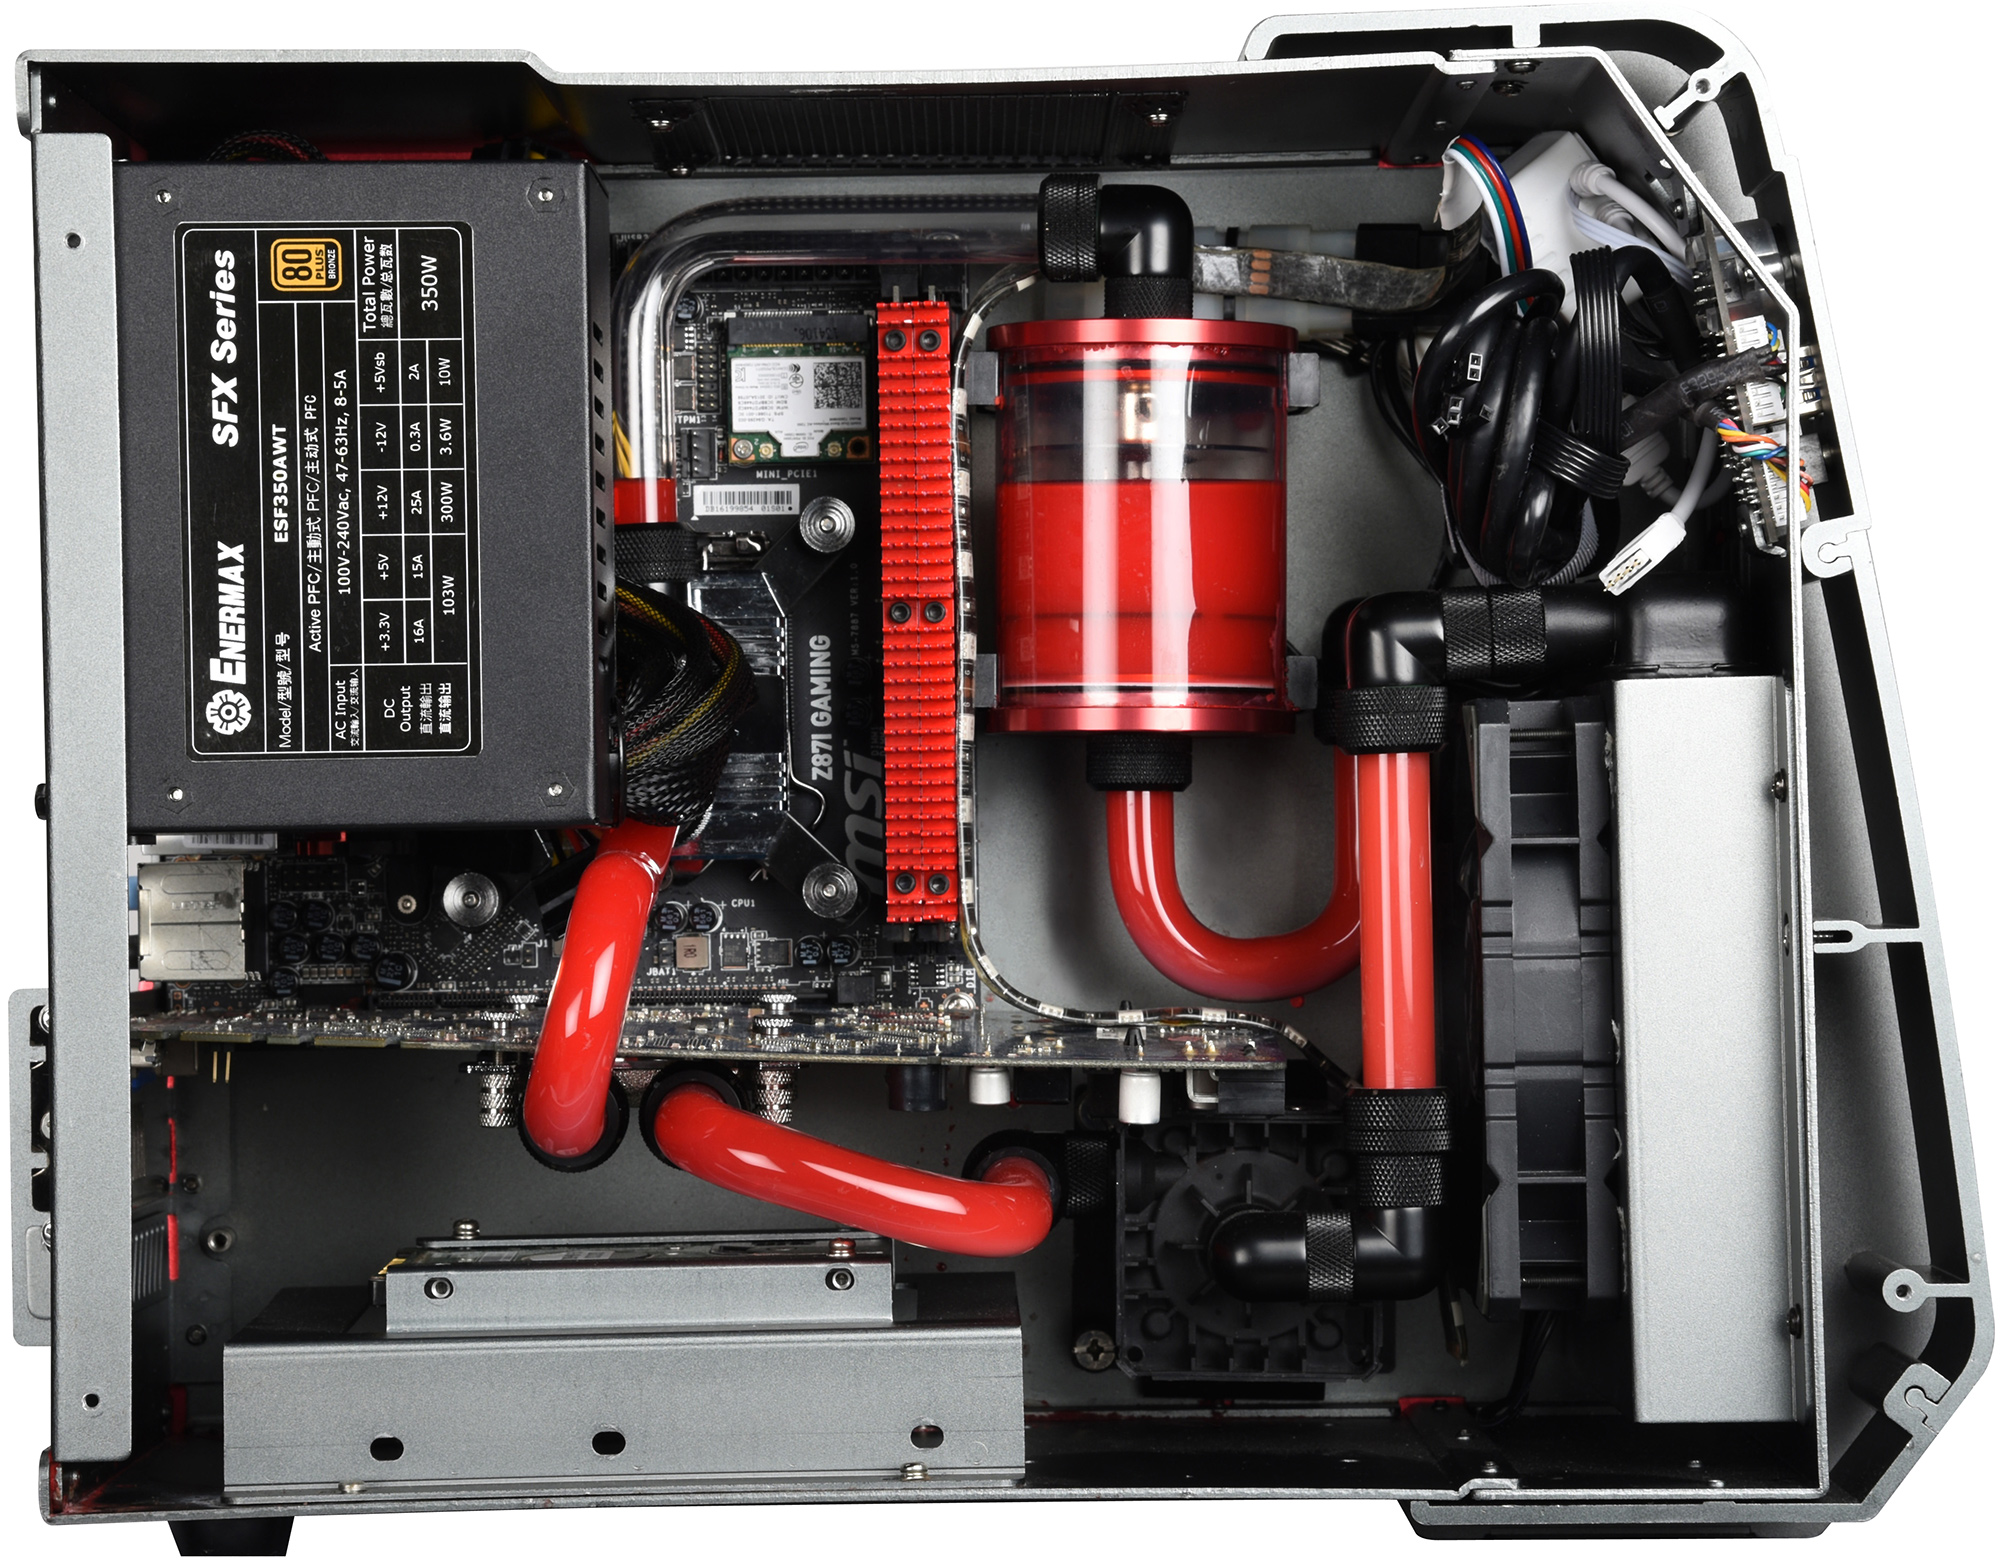
Using an ITX motherboard, you would even have enough room for a custom liquid cooling loop and even a reservoir.
[mks_separator style=”blank” height=”2″]
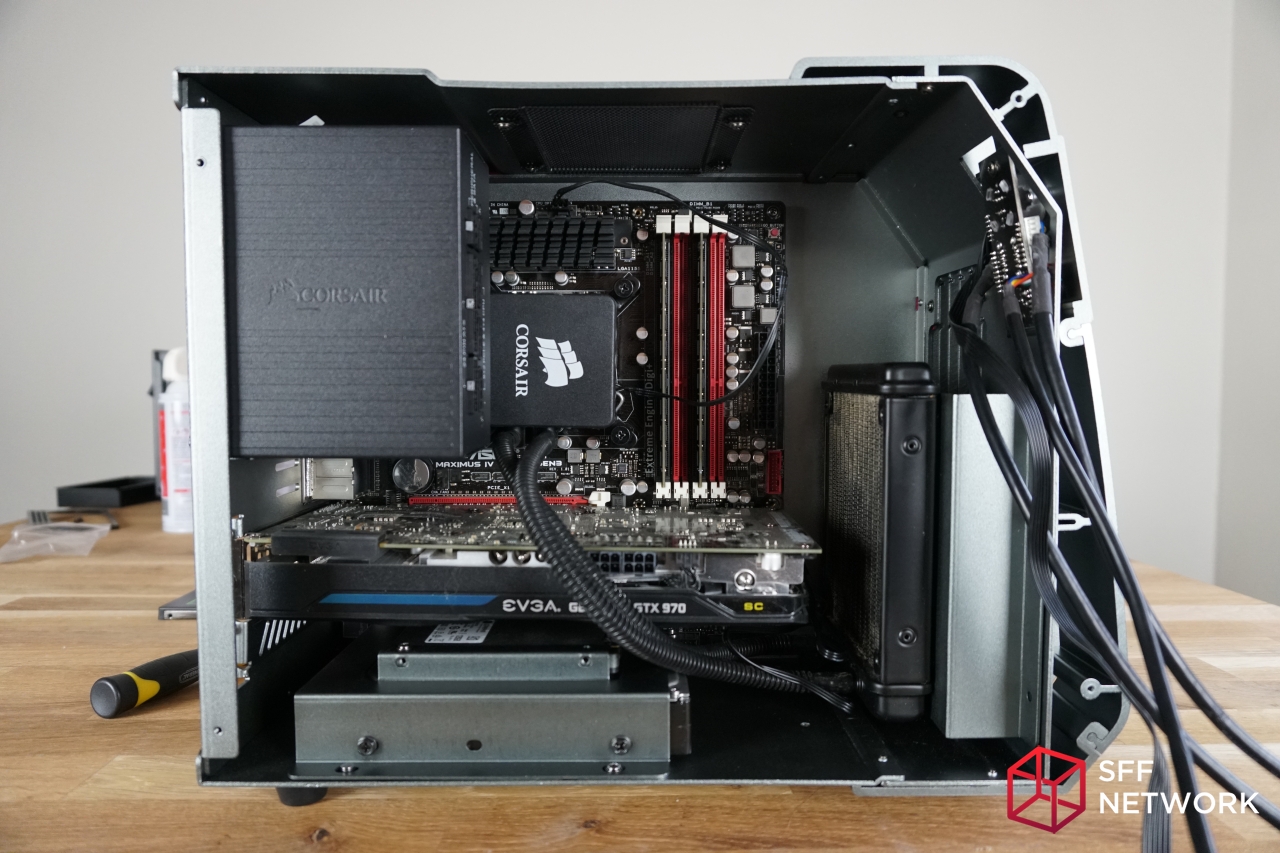
Here are the power cables and front I/O cables completely installed without any cable organization.
It’s worth noting that there is enough spare room in the front mounting bracket to tuck away or route the cables.
[mks_separator style=”blank” height=”2″]

With the tempered glass side panel installed, it does a pretty decent job hiding the messy internals of the chassis so even if you’re not a expert computer builder, you can still expect great results.
[mks_separator style=”blank” height=”2″]
Depending on the direction of the lighting, it may be more difficult to see into the side of the case.
[mks_separator style=”blank” height=”2″]

[mks_separator style=”blank” height=”2″]
Testing
Testing the quality of this case will be a three part procedure.
1. Measure noise generated by the case in idle and load states.
2. Measure CPU and GPU thermals.
3. Measure the cases ability to dissipate ambient heat using a thermal imaging camera.
Test 1: Audio Noise
Audio measurements were recorded using an Audio-Technica AT2020 mounted to a RODE PSA1 Mic Boom resting at head/monitor level, 4 feet away from the Enermax Steelwing, during operation.
The audio was record in MP3 format with the following output:
256 kbps
44100 Hz
Stereo
The audio includes ambient room noise as well as fan noise generated by the EVGA GTX970 and the Corsair SF450. This is done intentionally to help showcase audio levels that can be expected from a completed system in a typical drywall office environment.
Unlike a Fractal Design case, there are no dust filters or sound deadening material so the audio from the case is raw and unfiltered.
Noise tolerance is completely subjective so I will let your ears decide if the experience is tolerable.
IDLE:
LOAD:
Personally, I found the overall noise to be subtle and not overbearing but I will let you decide.
Test 2: Thermals
Thermals were recorded using CPUID’s HWMonitor.
The testing procedure:
With HWMonitor running, I captured the CPU and GPU temperature at IDLE and LOAD states.
IDLE is defined by the temperatures without CPU burner and GPU stress test running.
LOAD is defined by the temperatures with CPU burner and GPU stress test running for 15 minutes.
The results:
At IDLE, the CPU temperature hovered around 44°C with the GPU temperature at 55°C
At LOAD, the CPU temperature only hit 64°C and the GPU temperature managed to hit 81°C.
That’s a 20°C delta for the CPU and a 26°C delta for the GPU.
[mks_separator style=”blank” height=”2″]

With just a single 120mm fan mounted to the front of the chassis that is designated to cooling the Corsair H60’s radiator, I was a little worried that cooling in the Enermax Steelwing would be an issue. Thankfully, this didn’t appear to be the case.
For anyone curious about the use of a standard or aftermarket HSF in this chassis, I didn’t have one on hand that would fit this 1155 socket.
That being said, the heat that is being generated inside the case is being properly dispersed so I would expect similar results with plenty of headroom for overclocking.
Test 3: Ambient heat dispersion
Using a SEEK Thermal CompactPRO thermal imaging camera (provided by SEEK), I recorded video of the case during idle, stress, and load states. It became quickly apparent that while the glass did become warm to the touch, the ventilation of the case was more than adequate.
[mks_separator style=”blank” height=”2″]
During the burn-in period, only the glass near the GPU started to warm up (as did the drywall positioned in the exhaust). The ambient case temperatures didn’t appear to rise any noticeable amount.
[mks_separator style=”blank” height=”2″]
Pros
I define “Pros” as things that I really liked about the case; things that made me sit back and really appreciate the quality or how unique the product is.
First off, I am pleased to announce that the Enermax SteelWing didn’t cut off any limbs during the install, not even a scratch! The infinite array of edges all over the chassis are sandblasted to a point where you would have to try really hard to do any damage to you, or even to someone else.
[mks_separator style=”blank” height=”2″]
The case designers did a terrific job creating a unique design that is also extremely rigid. Sure, the case could have been made smaller without all this fancy decoration but for those of you that absolutely despise the look of a case the shape of a cube (or rectangle), this is a refreshing departure from the norm. Throughout my experience with this case, I found myself lifting the case by the venturi blades repeatedly without them bending or flexing.
[mks_separator style=”blank” height=”2″]
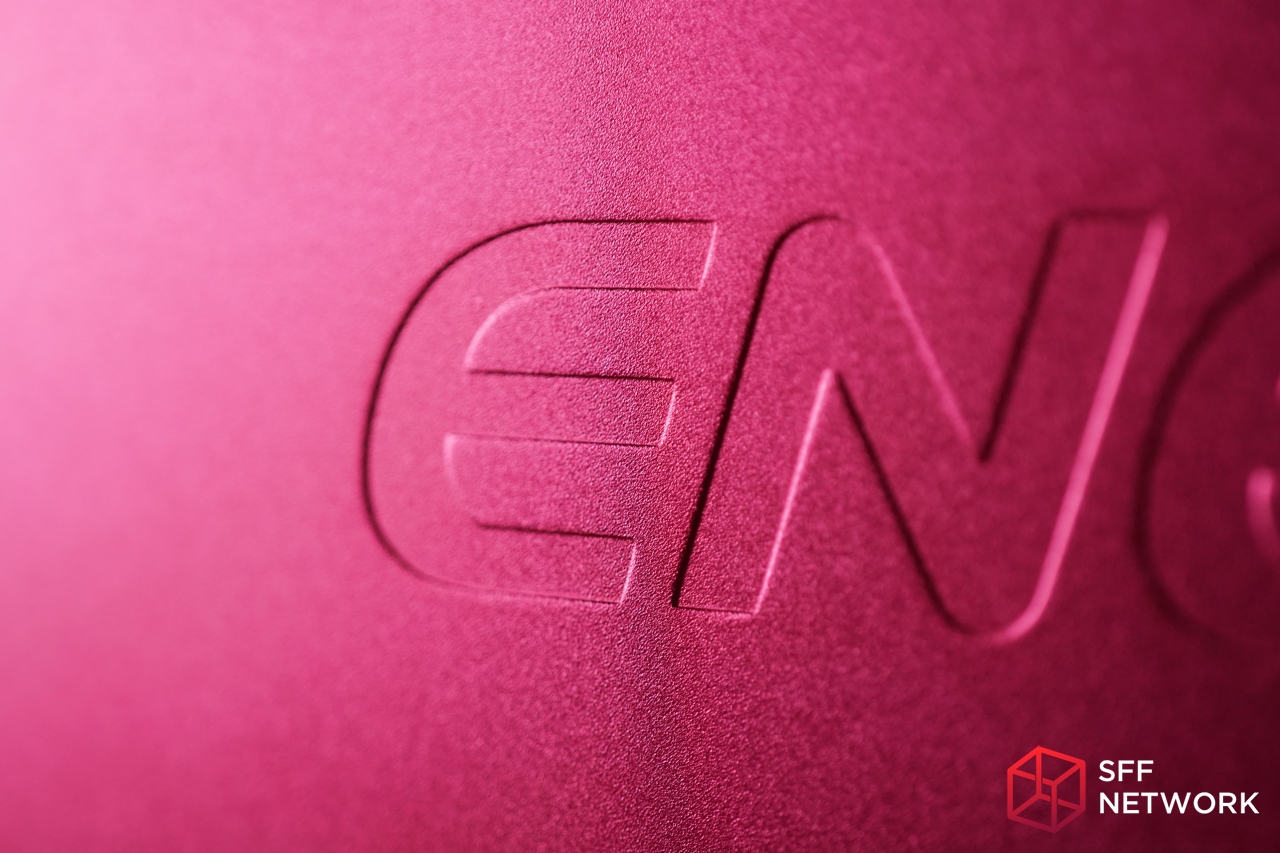
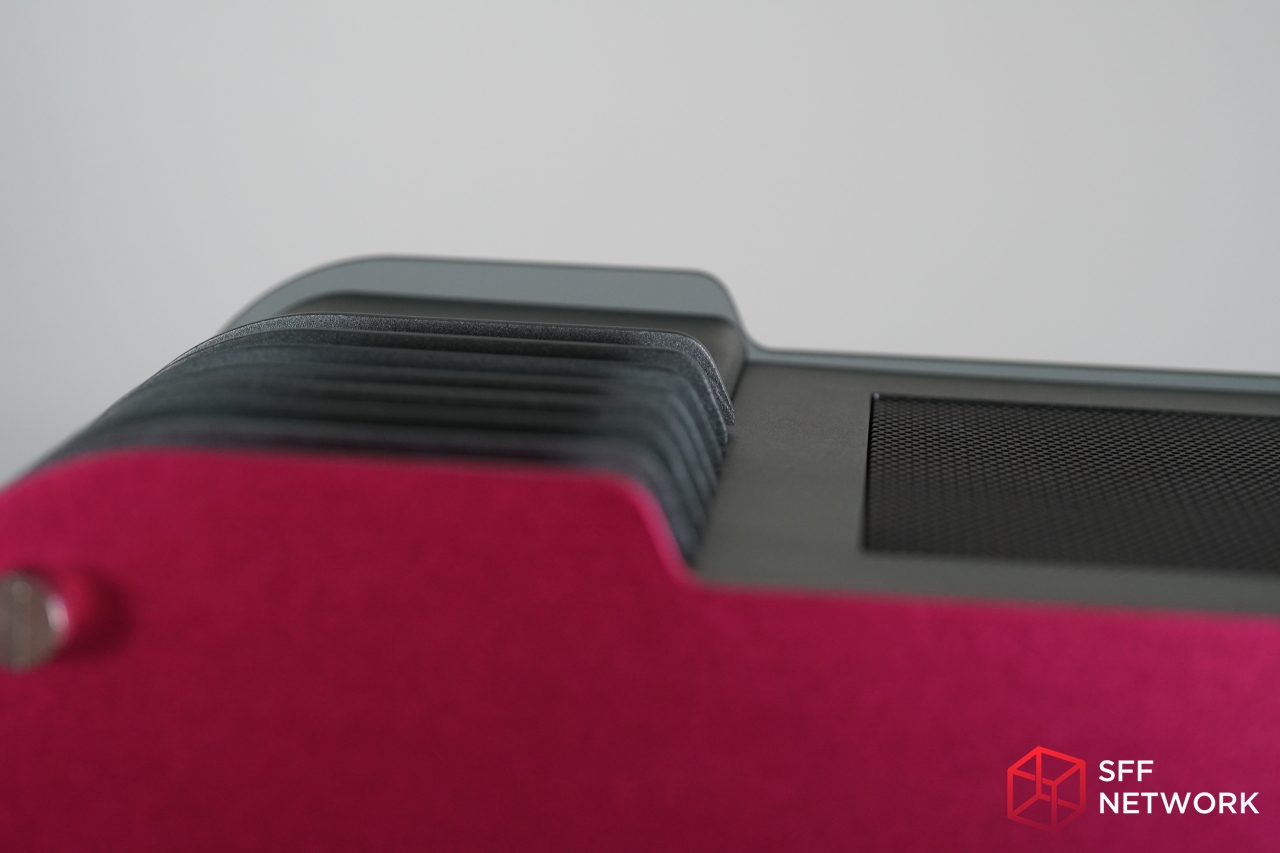
The red side panel adds an appealing amount of contrast to the gunmetal colored case. I feel that it’s a terrific shade of red and it has a subtle graininess to it.
The top portion of the matte black front grill is cut nice and smooth for a very clean look.
[mks_separator style=”blank” height=”2″]
The cutout for the motherboard shield is precise and doesn’t flex during installation. It’s just the perfect thickness for the little teeth to latch onto.
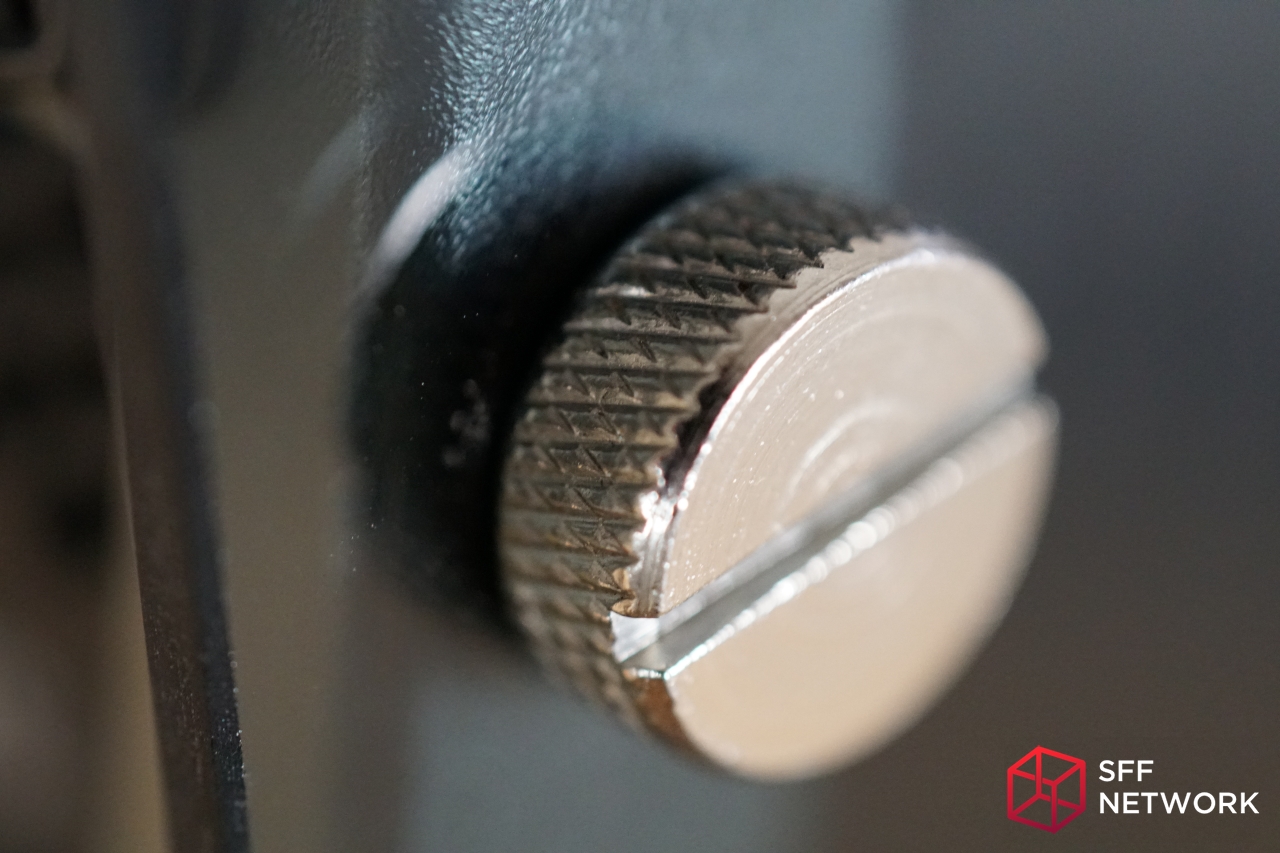
The knurling on the thumbscrews are nice and deep making it really easy to grasp and remove.
[mks_separator style=”blank” height=”2″]

The unique design of the case flows from all directions, the design is pretty well thought out.
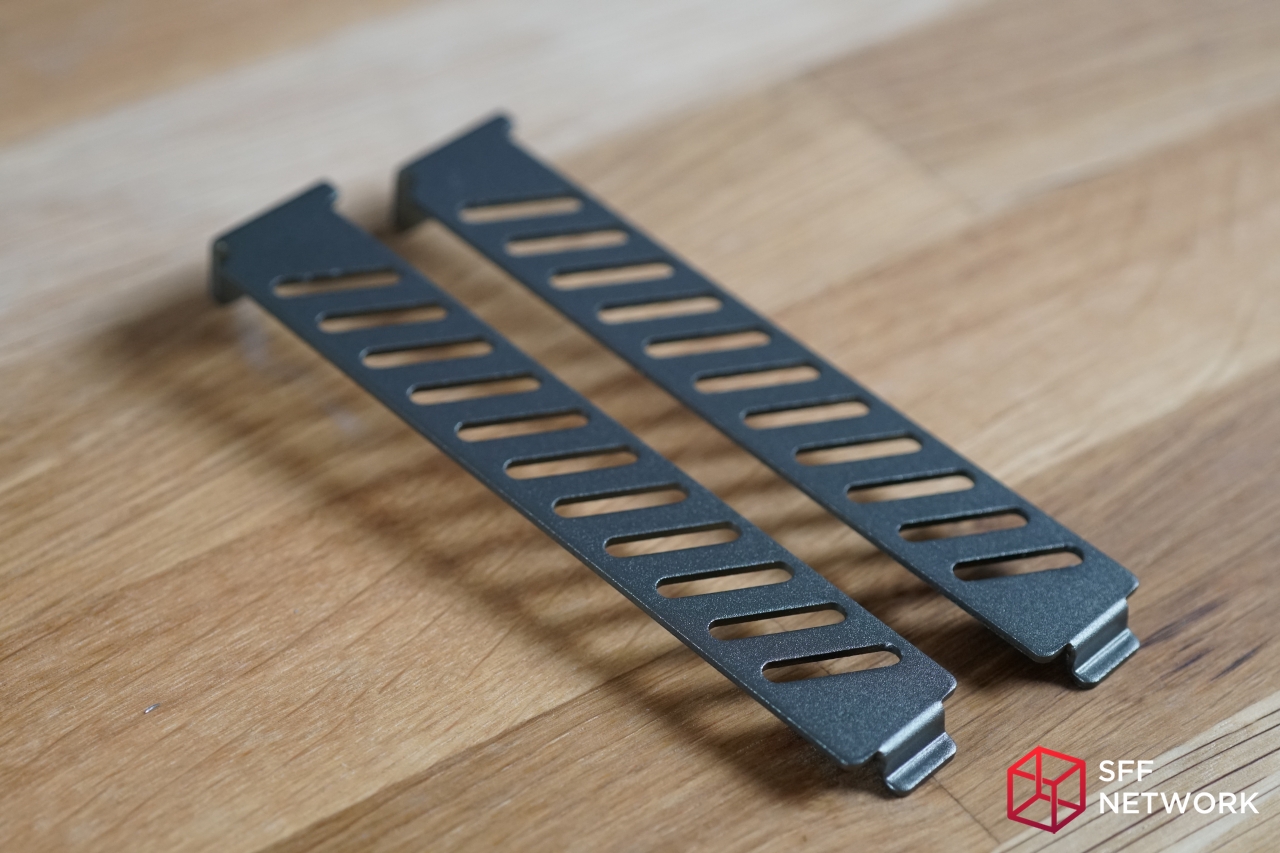
The PCI covers are 2mm thick, just like the case. They didn’t bother to cut any corners here by using some off the shelf flimsy covers.
[mks_separator style=”blank” height=”2″]
The red LEDs from the fan look terrific. It’s easily the most accurate and deep red LED I’ve seen a fan produce.
It even adds a nice subtle glow to the front portion of the case.
[mks_separator style=”blank” height=”2″]


[mks_separator style=”blank” height=”2″]
Nitpicks
No review would be complete without a little bit of nitpicking and while a few of these are just that, some of them are more obvious and could have been completely avoided by the manufacturer.
I’m not quite sure how this design flaw went unnoticed but it’s clear that these two pieces that slot together are a different width. If this was done on purpose, I don’t like it.
[mks_separator style=”blank” height=”2″]

The tempered glass is, surprise surprise, a magnet for fingerprints.
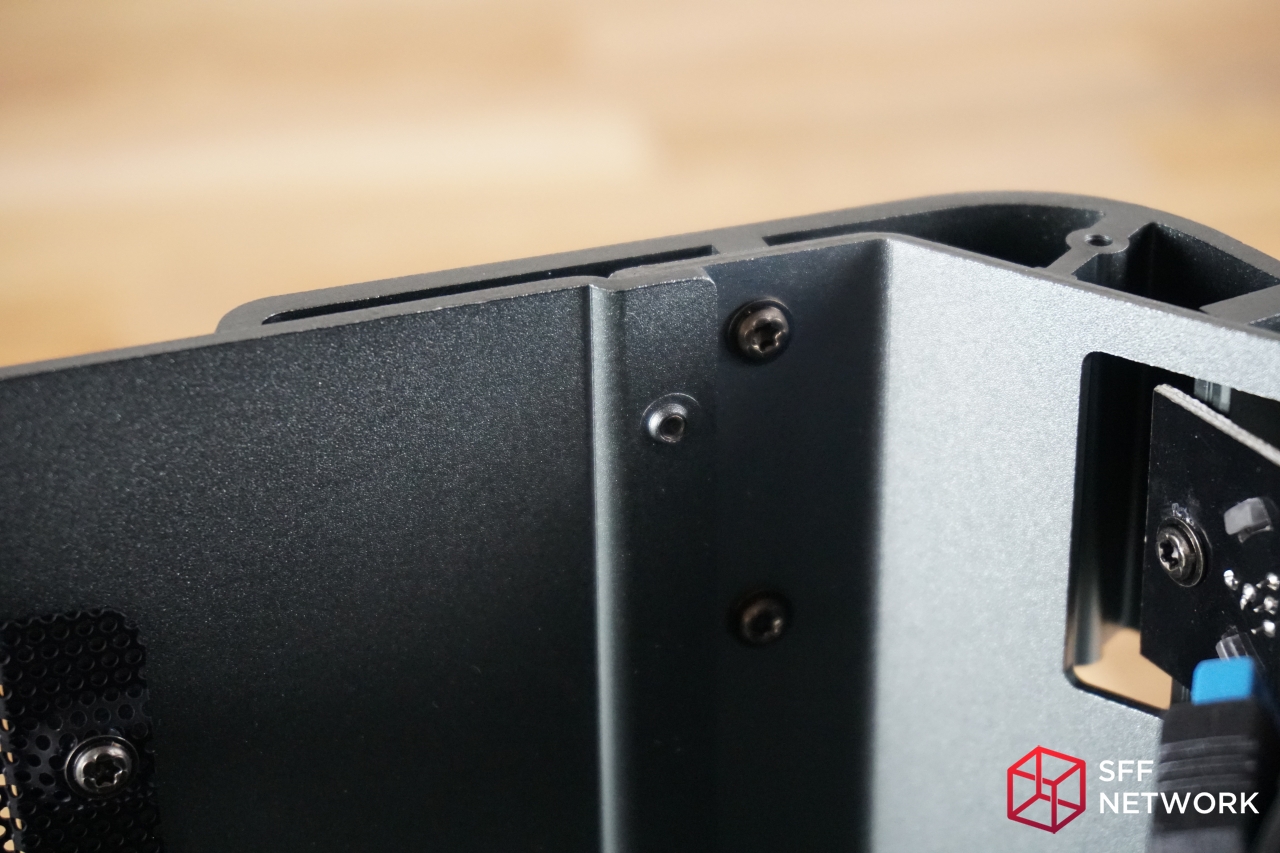
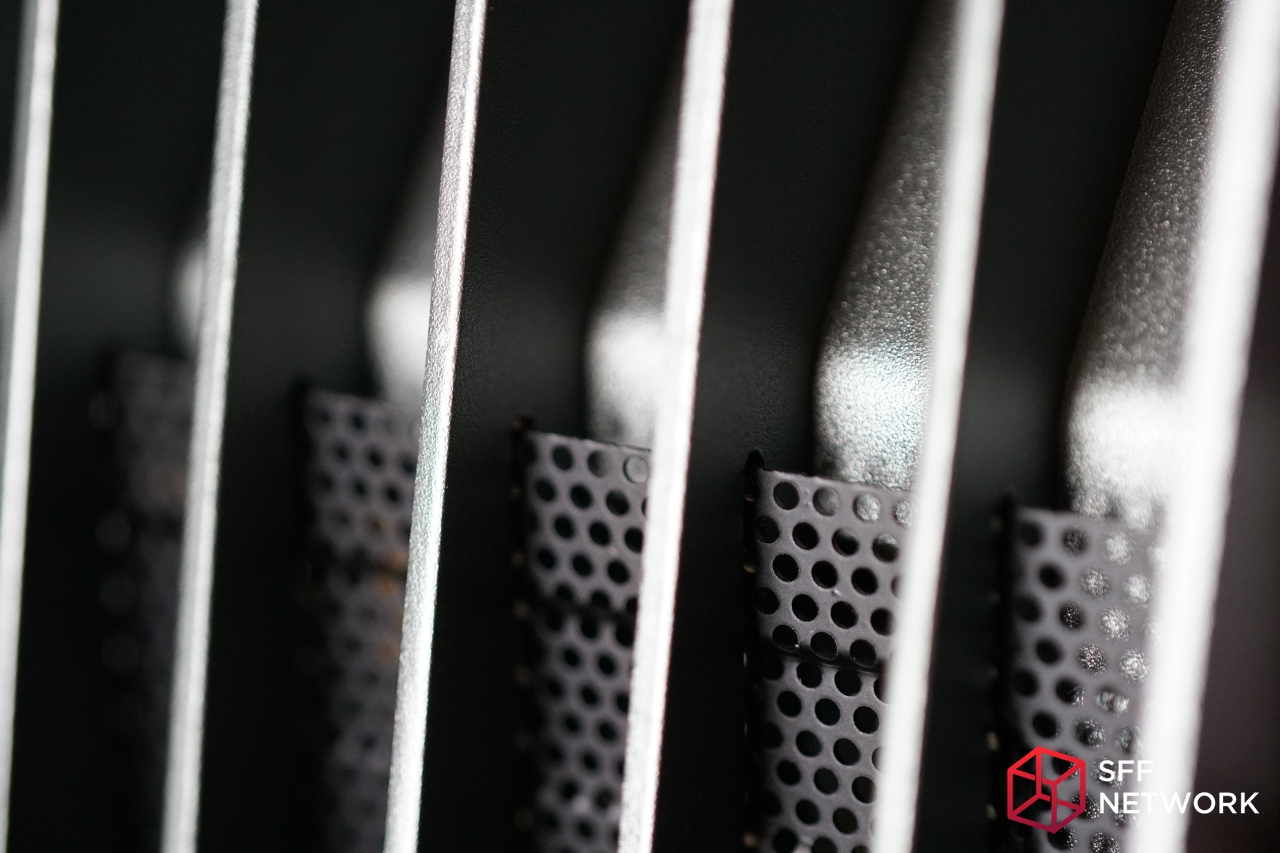
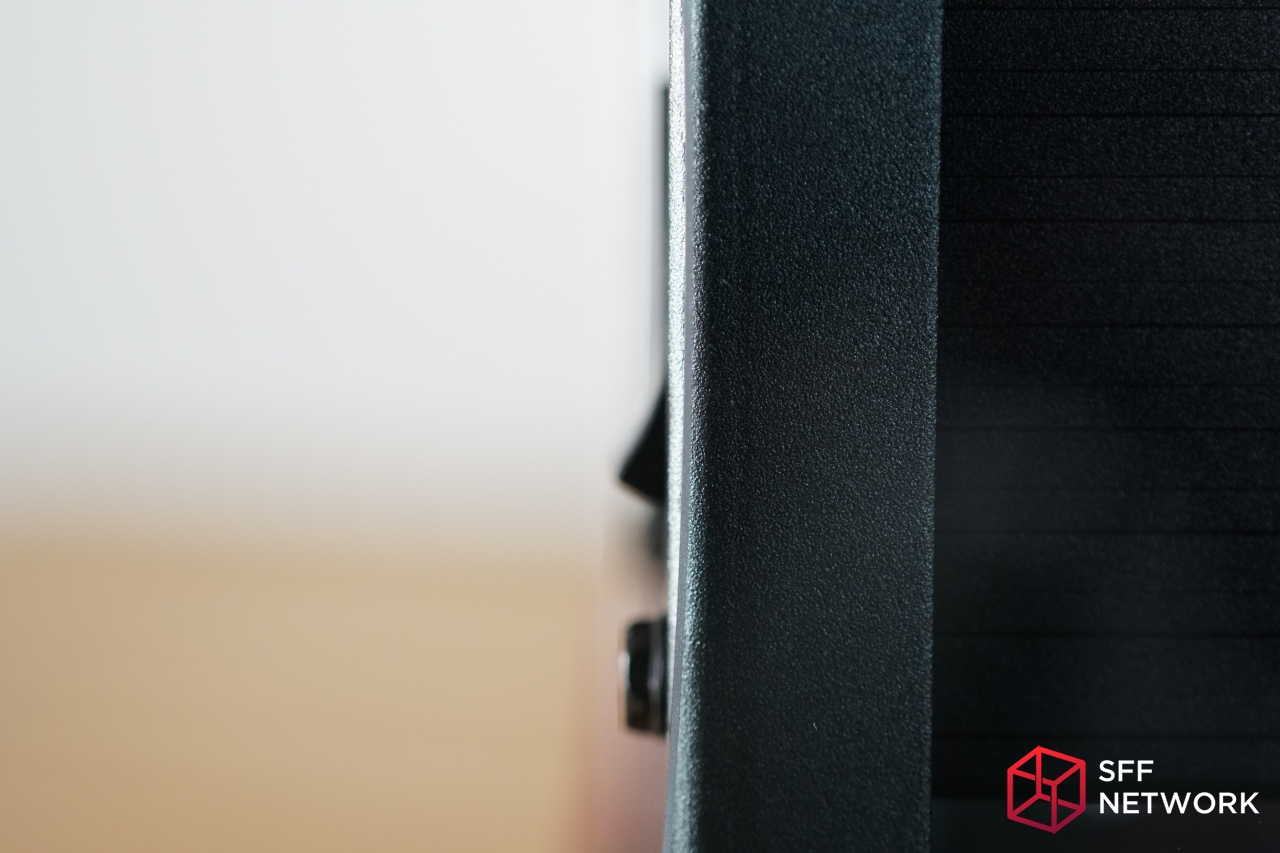
When viewing the case from the front, it becomes clear that the fin structure isn’t perfectly parallel to the rest of the case. There is a slight uplift in the fin structure as it protrudes to the left as evident by the spacing between the top mounted grill.
[mks_separator style=”blank” height=”2″]

It’s hard to see but if you look closely, you can tell that the glass isn’t the same length as the case, that sleek bend in the glass goes about 1.2mm too far.
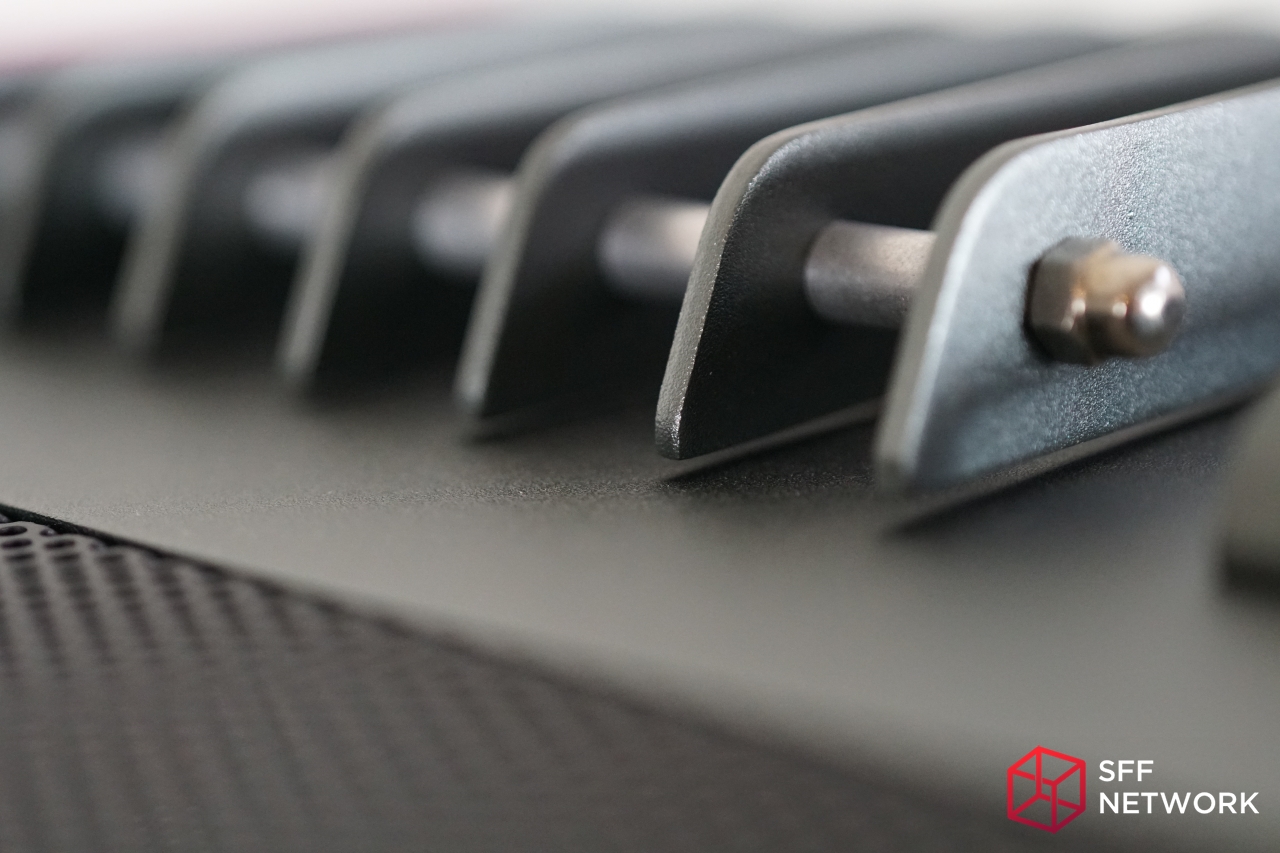
Possibly the culprit for the fin structure not being parallel to the rest of the case, the last fin appears poorly constructed compared to the rest.
[mks_separator style=”blank” height=”2″]

This is what the ideal fin should look like.
The thumbscrews exhibit heavy machining toolmarks on the surface. This could have been prevented by bead blasting, a light sanding (or brushing), and even anodizing.
[mks_separator style=”blank” height=”2″]

[mks_separator style=”blank” height=”2″]
Cons
I define “Cons” as unforgivable issues that could have a permanent impact on the usability of the product. These are issues that if removed, would make for a near perfect design.
The tempered glass side panel sticks out further than the boundaries of the aluminum frame. If by some chance the case is tilted towards your body, there is a high chance that the weight of the case will cause the glass to shatter into 1000 tiny pieces. This requires that the case is lifted vertically or titled away from the user.
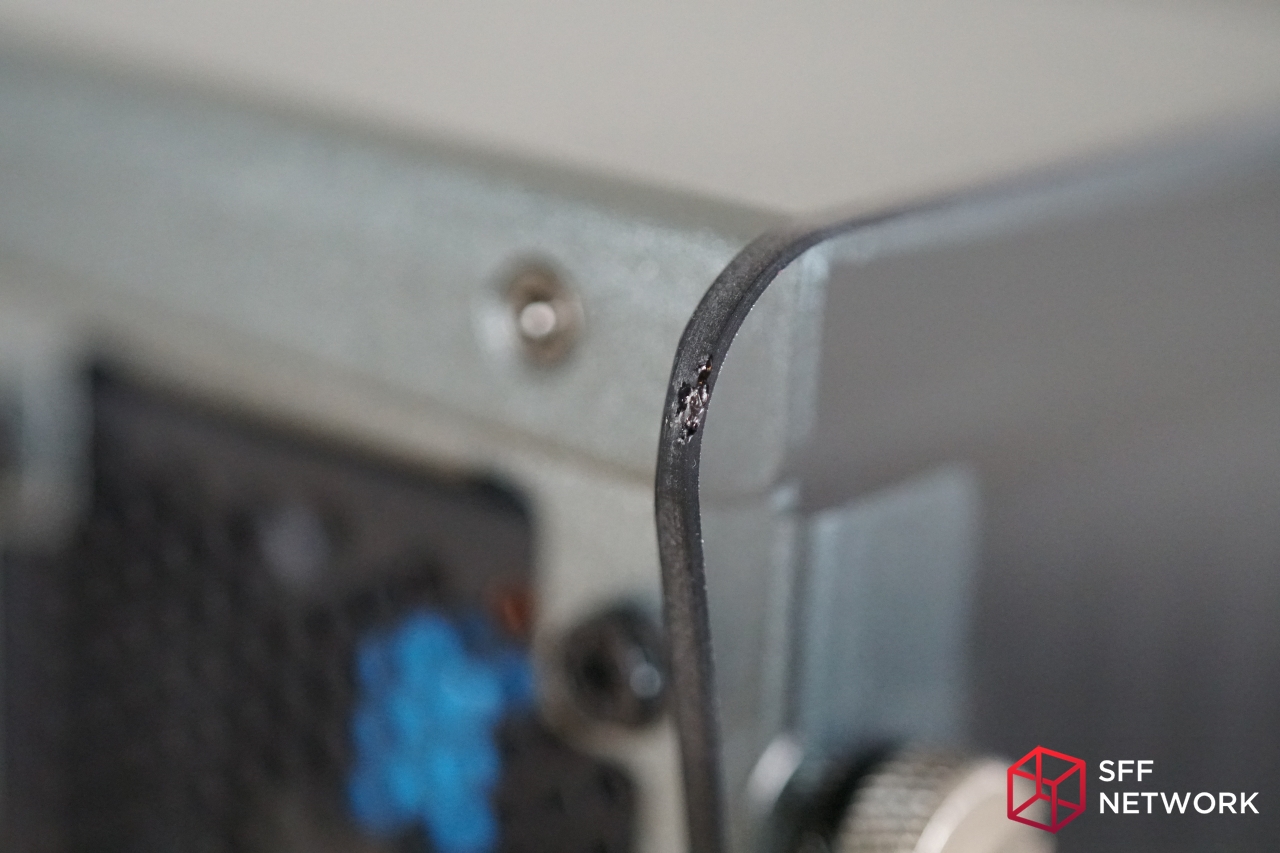
The glass itself arrived with a slight defect in the top left corner. Normally this wouldn’t be much of an issue but a small defect like this can cause a section of the glass to shear off or even worse, make it easier to shatter if that corner is accidentally pressed up against a wall.
[mks_separator style=”blank” height=”2″]
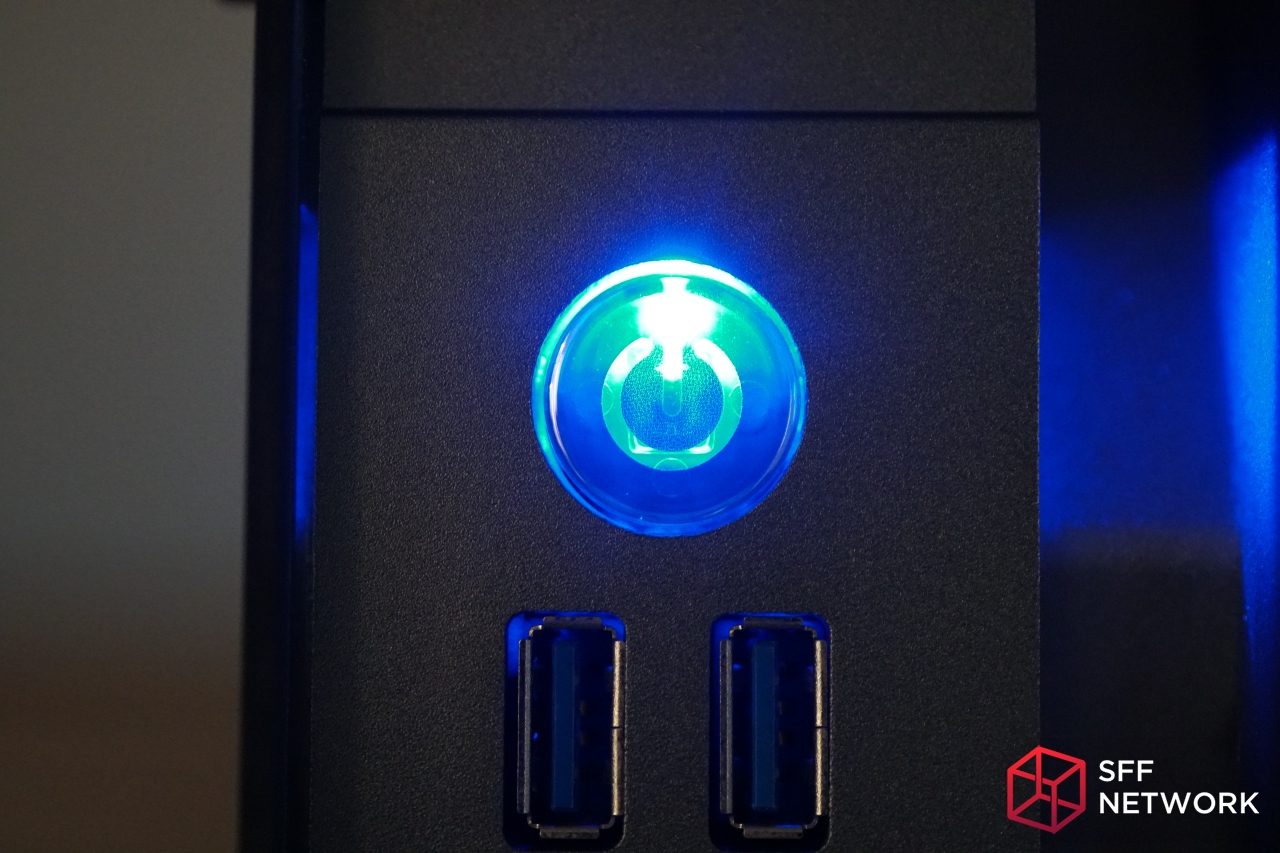
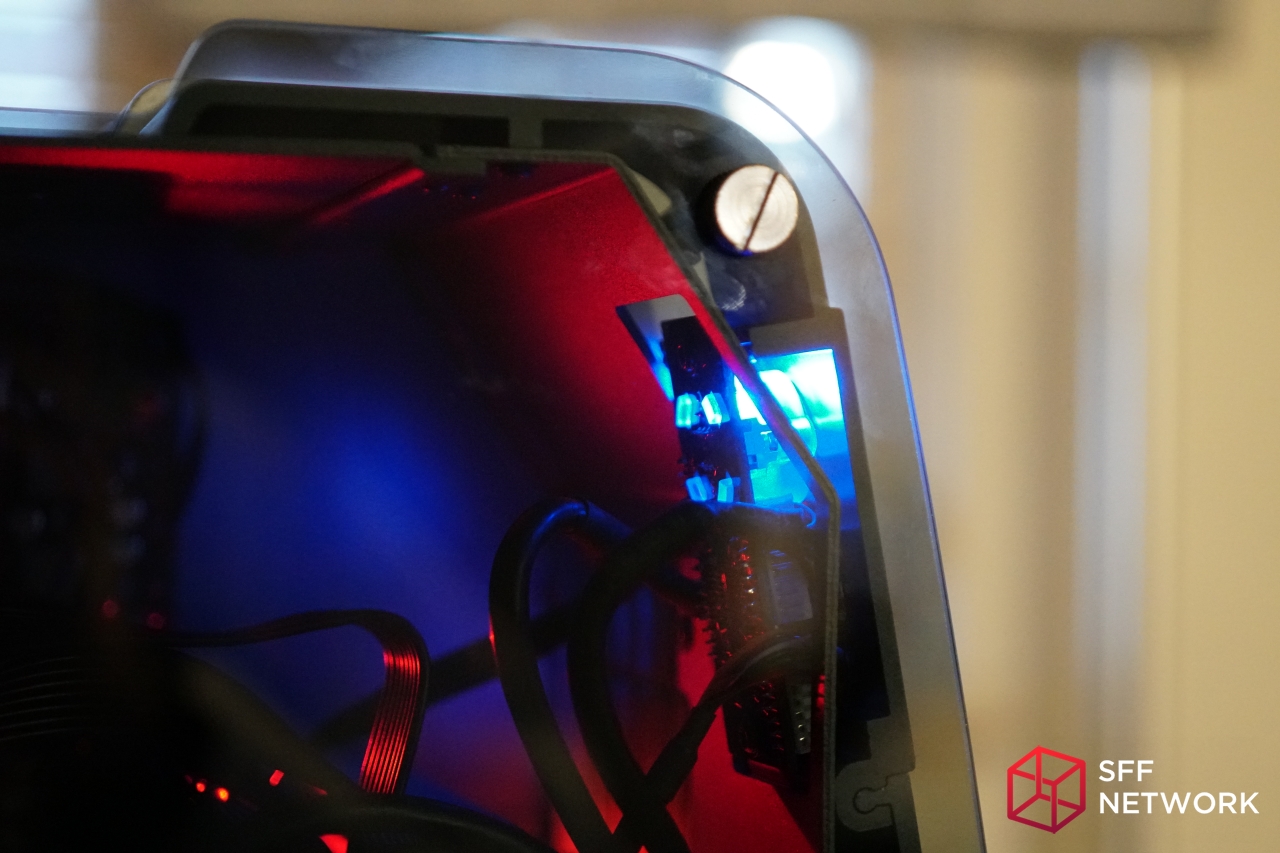
Death to high intensity blue LEDs!
I personally prefer that my vision is not constantly being bombarded with one of the least friendly LED colors ever produced. Thankfully, unplugging the PLED header from the motherboard can quickly solve this problem.
[mks_separator style=”blank” height=”2″]
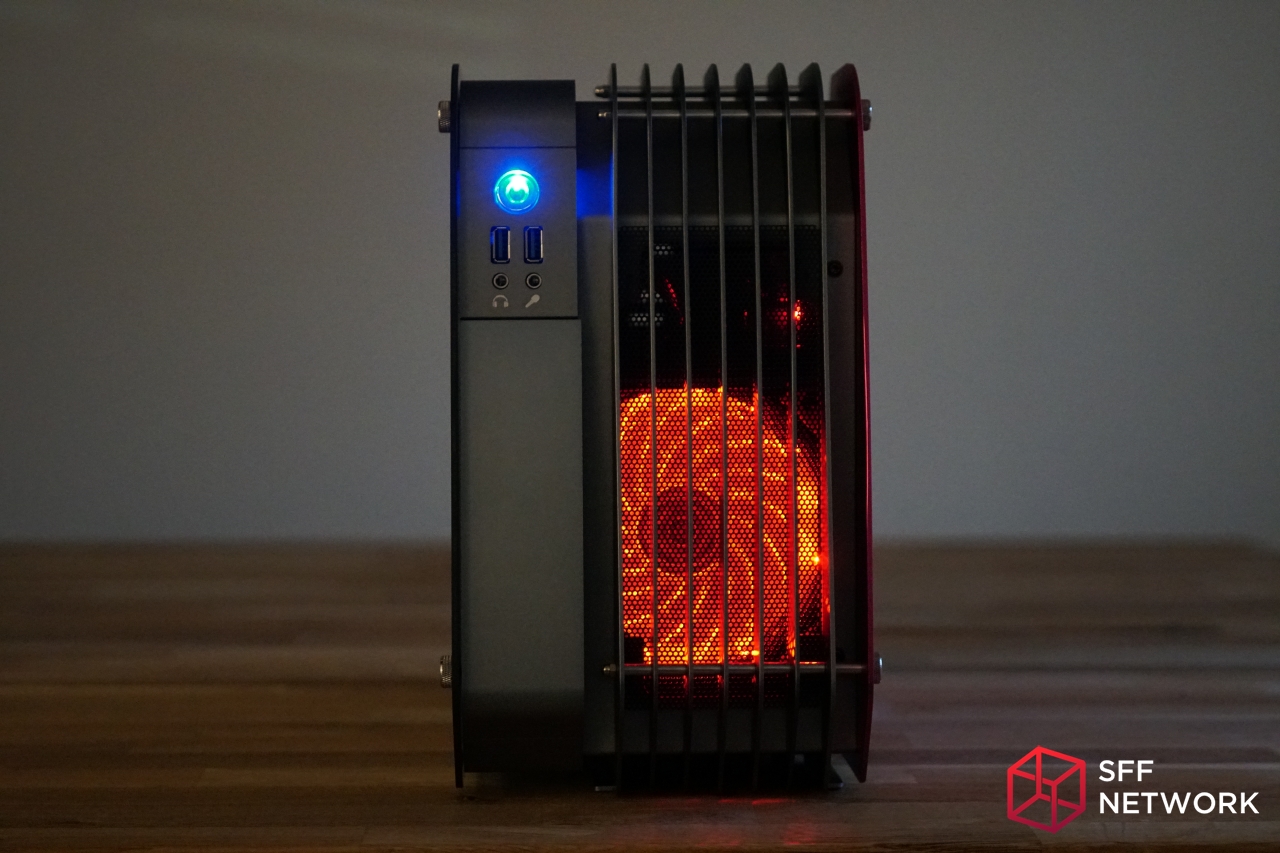
Worse yet, because the blue LED is so incredibly overpowering, it bleeds into and out of the case.
[mks_separator style=”blank” height=”2″]
[mks_separator style=”blank” height=”2″]
Conclusion
The conclusion: I really enjoyed working with this case.
The Enermax SteelWing is pleasing to look at and the designers weren’t afraid to break conventions here. Sure, the case could have been made more compact or they could have designed it to accommodate a 240mm radiator in one way or another but the truth is, they designed a truly unique case in a sea of the same and for that I thank them. If you despise cube-shaped cases and are looking for a case that can accommodate full-size components, this could be the case of your dreams so long as you don’t require the use of 4 expansion slots.
For this review Enermax has kindly requested that we provide a link to their Facebook Page, so if you like what you have seen here, please be sure to give them a “Like”.
www.facebook.com/enermaxusa
Also, I would like to give a special shout out to SEEK Thermal for providing a their CompactPRO thermal imaging camera for use in this review. We hope to work with them again for future reviews.
[mks_separator style=”blank” height=”2″]
Please let us know what you think about the Enermax SteelWing on the forums.