Note, this is just a quick article so that we can link back to it in the future when testing those more extreme CPU coolers!
Recently, a couple of manufacturers have been so kind as to supply us with some large CPU coolers to review. But this has left the team with a bit of a conundrum: do we test these coolers on our usual thermal test system, keeping the units nowhere near their true cooling capacity, or use a secondary test system meant to push temperatures upward and really see how they perform?
Somewhat ironically, during the discussions around this with the staff, the current standard testing system died of a fatal motherboard failure (woops!), so the decision was quickly made for us – throw all of the heat at these larger coolers, and see how they cope. For science!
Thus, while this system is significantly different from the regular SFFn Thermal Test Rig, the aim is the same: to accurately and repeatably test CPU cooling. And while all of the original articles testing some of these larger coolers will be left as they are, moving forward we will rely on this new system exclusively for testing high end CPU coolers. Due to this, however, results will not be comparable to the usual SFFn Test Rig numbers, so just bear that in mind.
[mks_separator style=”blank” height=”2″]
The Design
When designing our thermal test rig, it was important to be able to accurately test coolers in a repeatable and consistent fashion. We also wanted a configuration that was at least somewhat rooted in the characteristics of many enthusiasts’ performance-tuned builds, at least with respect to thermals.
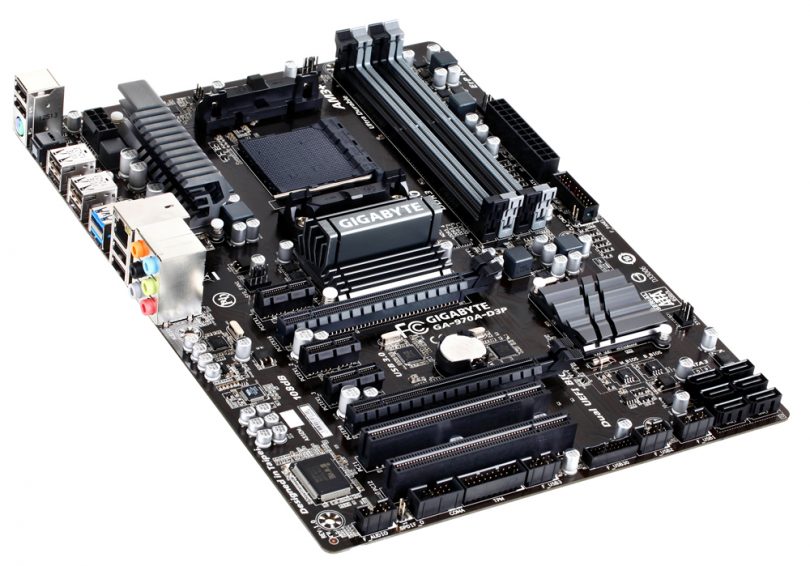
With the various platforms available, as well as the limitations of certain chipsets and sockets, we ultimately decided to go with an AM3+ based board, as it enabled us to purchase an inexpensive mid-range processor that’s representative of most systems… but can be overclocked to provide even more versatility (and thermal load). Indeed, we’ve actually overclocked this system to truly put the larger CPU coolers to the test.
We’ve also decided to continue using an open bench design, as many SFF cases have varying dimensions, and (simply) because trying to test within a representative sample of enclosures would limit the amount of coolers we could review fairly and accurately. The figures we produce will certainly paint an idealized picture of actual performance compared to closed builds, but more important is that the results across coolers and tests are directly comparable. With this setup, we can ensure that they are.
Specifications
| Motherboard | Gigabyte 970A-D3P |
| Processor | AMD Phenom II 555BE, Socket AM3+. Overclocked to 1.45v, 3.8ghz to enable a 140w TDP. |
| Memory | 2x G. SKILL NS 2GB DDR3-1333 (F3-10600CL9S-2GBNS) |
| Storage | 60GB 2.5″ HDD |
| Case | Bench |
| Power Supply | FSP 300W SFX non-modular (FSP300-60GLS) |
| Thermal Paste | Noctua NT-H1 |
Methodology
To test the coolers, we will follow the following procedure:
- Clean the cooler base and CPU heatspreader thoroughly with acetone or alcohol
- Squeeze a rice grain sized application of Noctua NT-H1 paste on to the CPU heatspreader
- Install the cooler as per manufacturer’s instructions, but connect the fan(s) to 4 pin fan adapters
- Boot into Windows, open SpeedFan, and then let the system idle for ten minutes
- Record the current temperature of the CPU
- Change the fan voltage, let idle for five minutes, then record the temperature of the CPU
- Repeat desired fan voltage reductions and configurations until the full fan speed range is tested
- Spin fan back up to 100%
- Load CPU with Prime95 Small FFTs on all cores
- Record the temperature of the CPU after 10 minutes
- Change the fan voltage, continue load for five minutes, and then record the temperature of the CPU
- Repeat the fan voltage reductions and configurations until the full fan speed range is tested.
- Shutdown the system and remove the cooler
- Repeat the entire above process to ensure that the seating of the CPU cooler is good and proper
- Average the results between the two installations
We will not be using this thermal test rig for chassis testing, as it does not fit with the usual SFF products we see.
Finally, for our synthetic CPU loading, Prime 95’s ‘Small FFT’ mode was chosen as the best compromise between ‘blend’ mode (which made timely temperature monitoring impossible – SpeedFan stalls when using ‘blend’ mode), and simply producing as much heat as possible.
Conclusion
While this is a solid and reliable testing system, it will of course be tweaked over time, with changes being made as suggestions from the community are taken into account, or changes are needed to correct anomalies.
[mks_separator style=”blank” height=”2″]
Thermal paste provided by Noctua. The remainder of the hardware is supplied by SmallFormFactor.net.

