
Introduction
Earlier this year InWin announced their latest HTPC case, the B1. More stylish than the popular Chopin with a tempered glass cover, and following a different cooling principle than the open air H Frame mini of yesteryear, the B1 is an affordable and stylish case for those seeking a compact home server or mini PC.
At the time of writing, the B1 is $85.00 on Amazon, coming in under the InWin Chopin ($99.00). It offers a 200w 80 plus gold power supply as well as an 80mm internal fan, but trades the durable aluminum aesthetic of the Chopin for a more sleek (and dust attracting) plastic and glass design. It also offers extra height for CPU coolers, though in reality this isn’t totally accurate as the mesh cover of the Chopin allows for coolers near it’s maximum limit, while a cooler in the B1 will need some breathing room as air won’t be flowing through that glass. The B1 also allows for the install of two 2.5 hard drives on the backside of the motherboard tray. Externally it gives up a USB 3.0 port and reduces the microphone and headphone jack down to a single combo jack on the front. Otherwise, there is nothing exceptional to write about regarding the specs, it is designed for APU systems or other integrated graphics, as there is no PCI slot on the case.
Basic Specs:
- Dimensions: 302 x 108 x 238 = 7.76L
- CPU Heatsink clearance: 60mm (max)
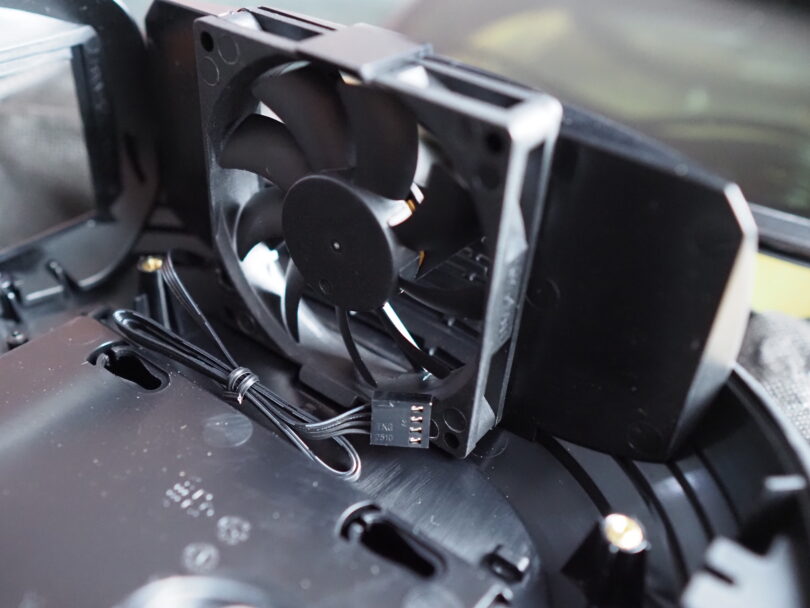
- Fans: 1x 80x15mm InWin fan (2700rpm max)
- Power Supply: InWin 200W FlexATX 80 Plus Gold
Unboxing
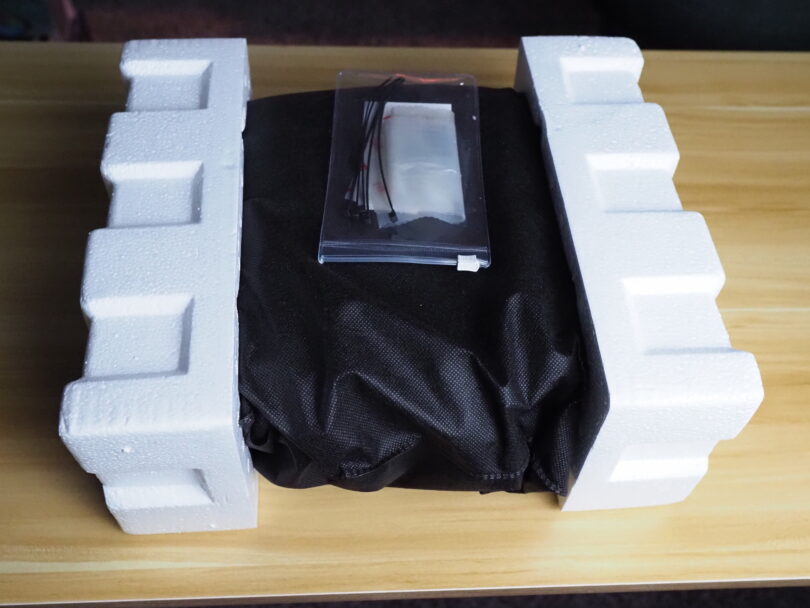
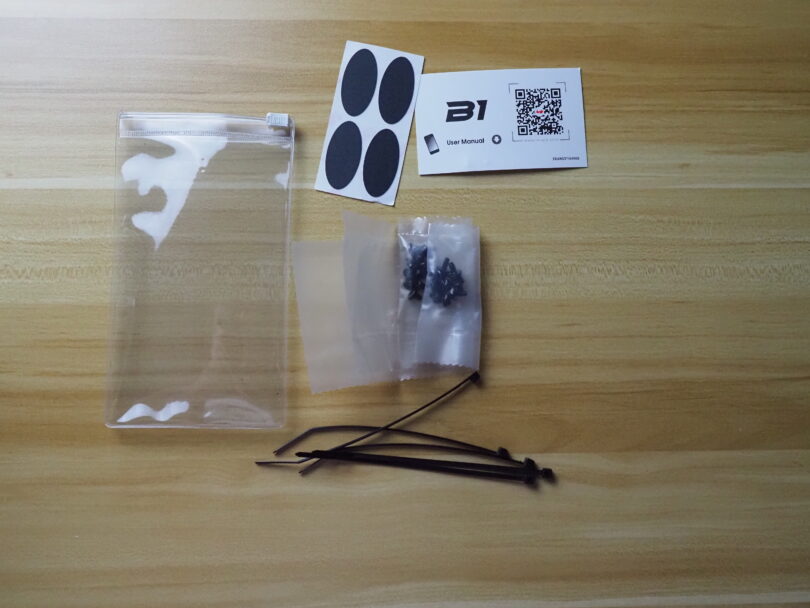
While my box arrived from Amazon damaged, the packaging was sufficient to protect the case and I encountered no defects in the product. Thick styrofoam covered either end of the case and the case itself was enclosed in a cloth bag, which additionally came in use later to avoid prints and other buildup gathering on the tinted glass cover. Additionally, a bag was included in the box with stickers to cover the mounting points for the console feet (in case you want to have a vertical orientation), as well as the needed screws and some zip ties, and a card with a QR code for accessing the manual.
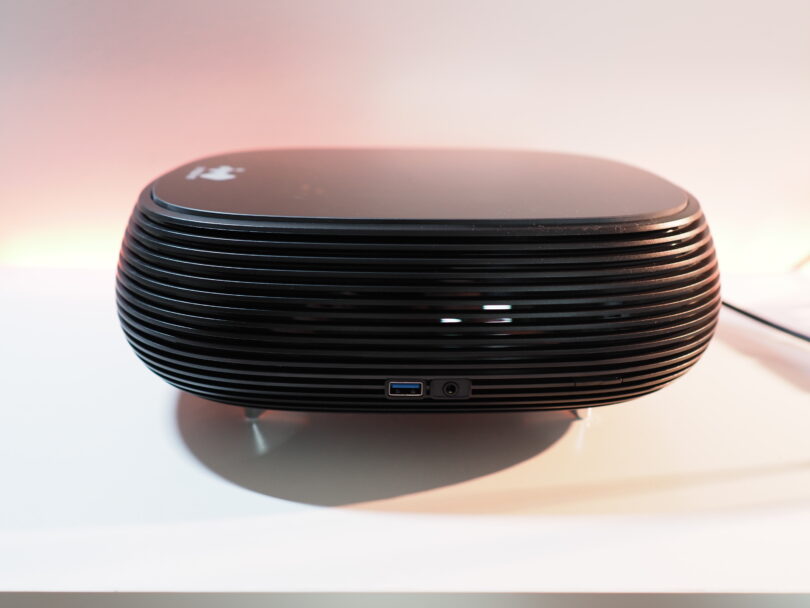
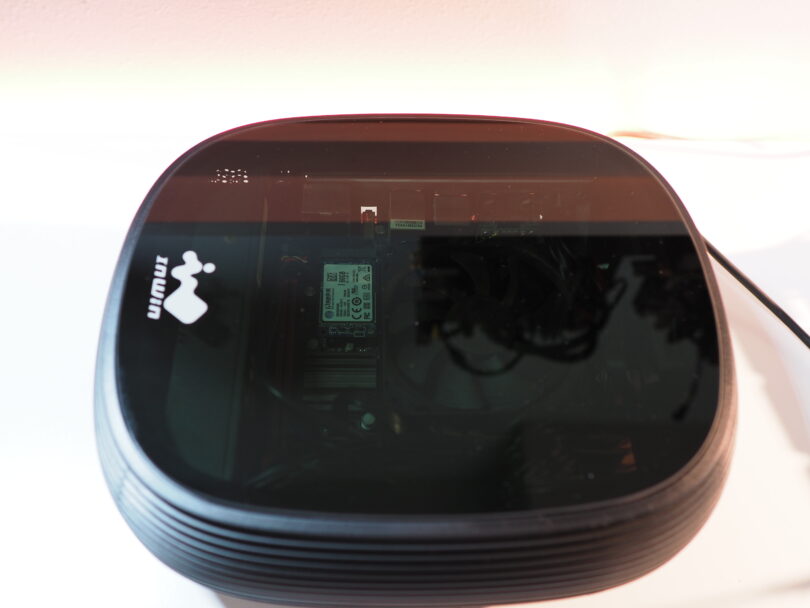
The exterior is primarily made from a durable matte black plastic, except for the tempered glass side panel. It does not have an exceptional amount of ventilation, which we will see later does hurt performance.
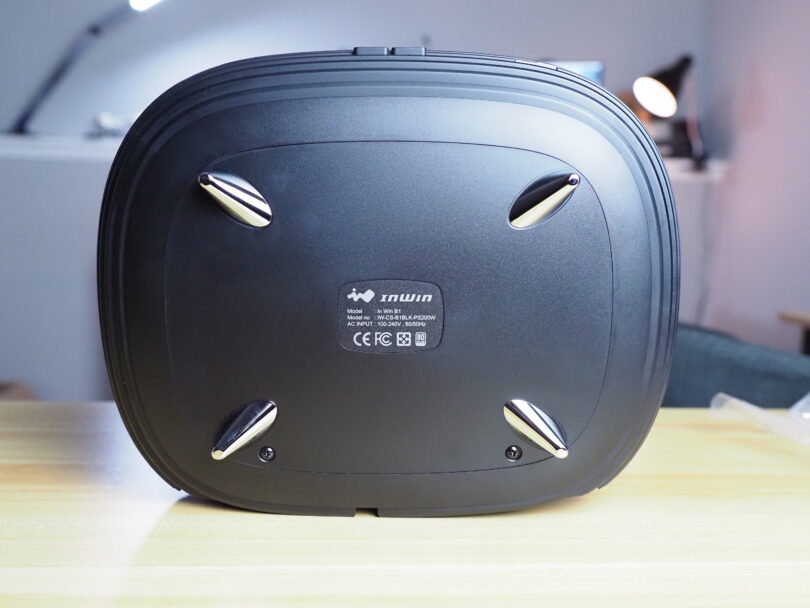
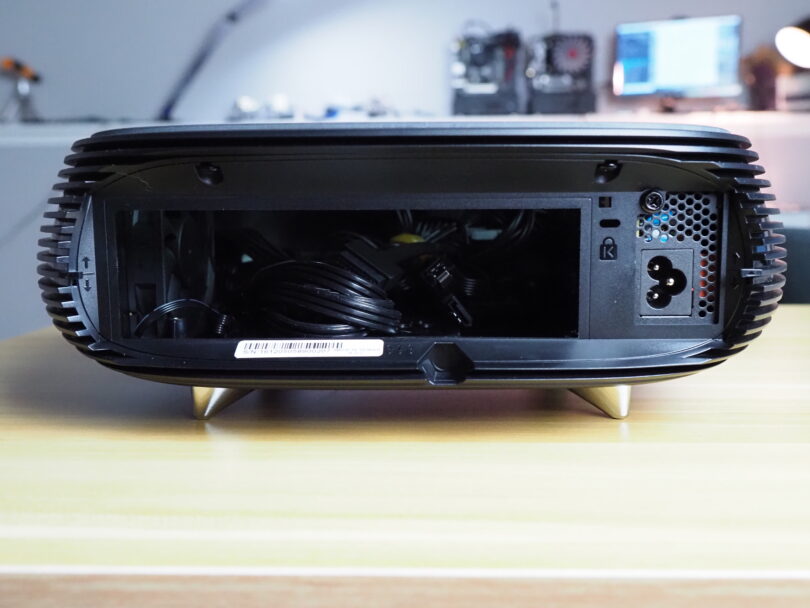
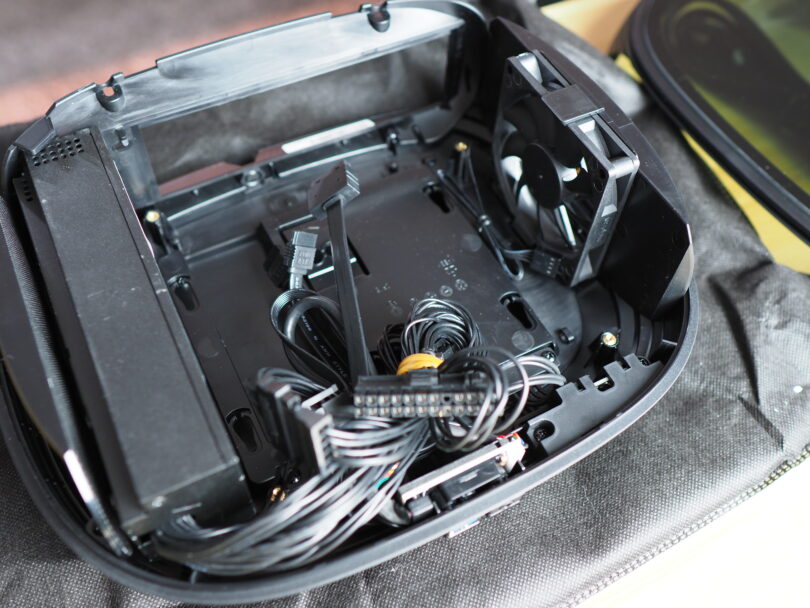
Accessing the interior requires removal of a total of 4 screws. Two on the back side just above the I/O to remove the top cover and glass panel (it required a bit of force to remove the first time, which I was worried would break the plastic case). An additional two on the bottom of the case (near the feet) can be extracted to remove the bottom cover over the 2.5 drive bay. After opening the case you will find the included plastic stand for vertical mounting, as well as all the cables you will need.
- 24 pin Motherboard cable
- 4+4 pin CPU cable
- SATA power connector (pre installed cables run to the 2.5 drives, allowing for easy installation)
- USB 3.0 Internal Connector
- LED and Power Switch connector (bundled as an all in one connector)
- Front HD Audio internal connector
- 80mm Fan PWM 4 pin cable
Build
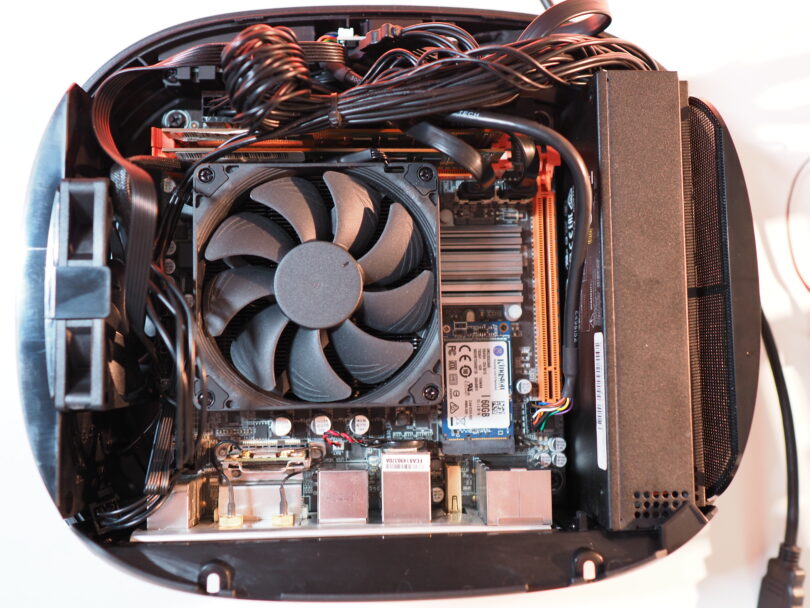
Simply put, the InWin B1 is quite easy to build in. There are two screws needed to access nearly everything in the motherboard area, and two screws to access the hard drive bay. Aside from this, you will only need 4 screws to attach the motherboard and 8 screws to attach 2x 2.5 hard drives. Once those panels are removed you can access everything in the case and can begin building. Keep in mind, you may want to install the CPU cooler prior to installation of the motherboard, as there is not a cut out on the back plate to attach the retention nuts for most coolers. Additionally, if you are using a larger cooler it can be difficult to route the cables with the board installed.
For my testing build I am using a Gigabyte B85N motherboard with 2 DDR3 DIMM’s and i5 4690k set to stock settings. Cooling is provided by a Noctua NH-L9i Chromax CPU cooler. I am not utilizing the 2.5 drives as the board has an mSATA slot populated with a simple 60gb drive for testing.
Side Note:
After testing I changed the system for personal use to an EVGA Z97 Stinger system with 5775C, and used a Alpenfoehn Black Ridge cooler. With the Black Ridge cooler it required a bit of planning to get all of the cables to fit, and I found that the USB 3.0 internal connector could not reach the motherboard input (I chalk that up to poor design of the Z97 board). In addition I was able to put a PCIe to M.2 adapter in the PCIe x16 slot of the motherboard without any issue, and the heat sink which extended several milometers past the edge of the board did not encounter clearance issues with the power supply. Both 2.5 drives were used in this later build, and I appreciated the simplicity of installation provided with the pre-routed cables. The drives snapped into place securely and easily.
With everything installed there is a bit of cable clutter, but fortunately it is not easily visible as all of the cables are black and the tinted glass hides them well. Keep in mind that the included InWin fan is setup as an exhaust fan, so you will need to be careful that your cables are kept clear of the fan intake.
Performance Results
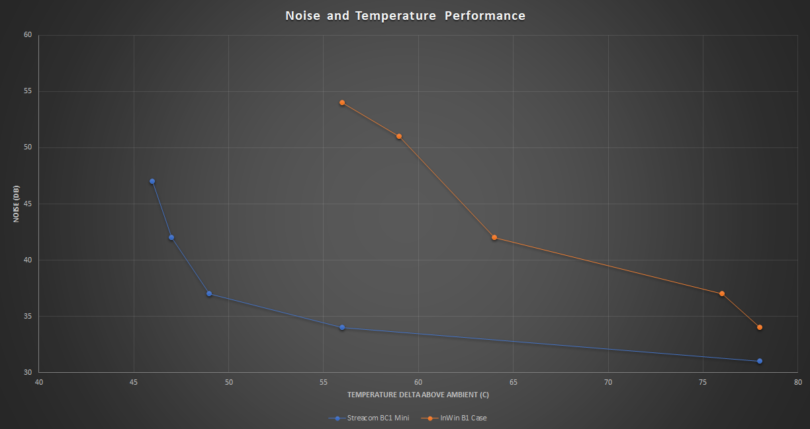
Cutting straight to the biscuits, the InWin B1 sacrifices function for form. To compare the thermal performance of the case, I have tested the same system on a Streacom BC1 Mini open bench case, then repeated the same tests after building in the InWin B1. The open air bench allows me to see what the system is capable of doing without any restrictions, and thus we can see how much air flow is limited inside the case. Of course using an improper cooler could also affect these numbers, for example utilizing the maximum height clearance would almost certainly have a detrimental effect on cooling in this case, so testing was done with a Noctua NH-L9i so as to keep ample clearance above the fan for air flow. Testing inside the case resulted in increased temperatures of around 10 C at all fan speeds tested. It was also louder than the open bench, owing to the case fan being a bit noisy. Even more detrimental is that it is an 80mm fan and not 92mm fan, so it’s difficult to find a replacement much less one that would offer superior performance. I ran a short test with the fan disabled, which resulted in a huge reduction in noise, but also a massive increase in temperature making this setup impractical.
In the chart below I have shown the results of the tests. Rather than provide fan speed, I have given the decibel reading for the different fan speeds. I find this more relevant especially for this test, as many people looking to such a case would be using it in an environment where reducing noise is a priority. The noise floor for this test was 31db in the room. As the fan speed increases, noise rises (vertical Y Axis), and as a result temperature generally decreases as we follow the line to the left. The Streacom’s line is lower across the board in noise and further to the left in temperature. The InWin B1 offers inferior noise performance and thermal performance to an open bench in a big way. You will notice that even with the fans turned off (the furthest right dots), the Streacom test still had lower numbers, this is owing to the PSU fan on the InWin B1 which could not be disabled in the fan profiles.
Analysis
On one hand the B1 is a great looking case. With low power systems it runs fine and temperatures are not an issue. It seems obvious InWin put some thought into the case and produced a good design that is easy to build in and gave thought to placement. Unfortunately it came up short in a few areas, especially cooling. It would appear the PSU fan can be replaced, but I did not remove the fan so I cannot confirm the size. It appears to be a 40x10mm fan however. The case exhaust fan could also be replaced, but with what? The case has room that a 92mm fan mount could have been afforded and would allow for quieter Noctua or Scythe fans to replace the existing one. In addition, the case appears to be vented all around but actually is blocked except for where the exhaust fan is mounted and next to the PSU. Having vents in the front would have also helped with air flow and cooling. With more options for APU’s on the horizon and likely increased power consumption, the InWin B1 in some ways is positioned to accommodate them with it’s 200w power supply and increased CPU cooler clearance. Unfortunately it also comes up short in cooling, making it a difficult proposition. It is unlikely we will see a revision of the B1, but I hope that InWin can follow this up with something that makes less sacrifice in performance while keeping the excellent design aesthetic.