
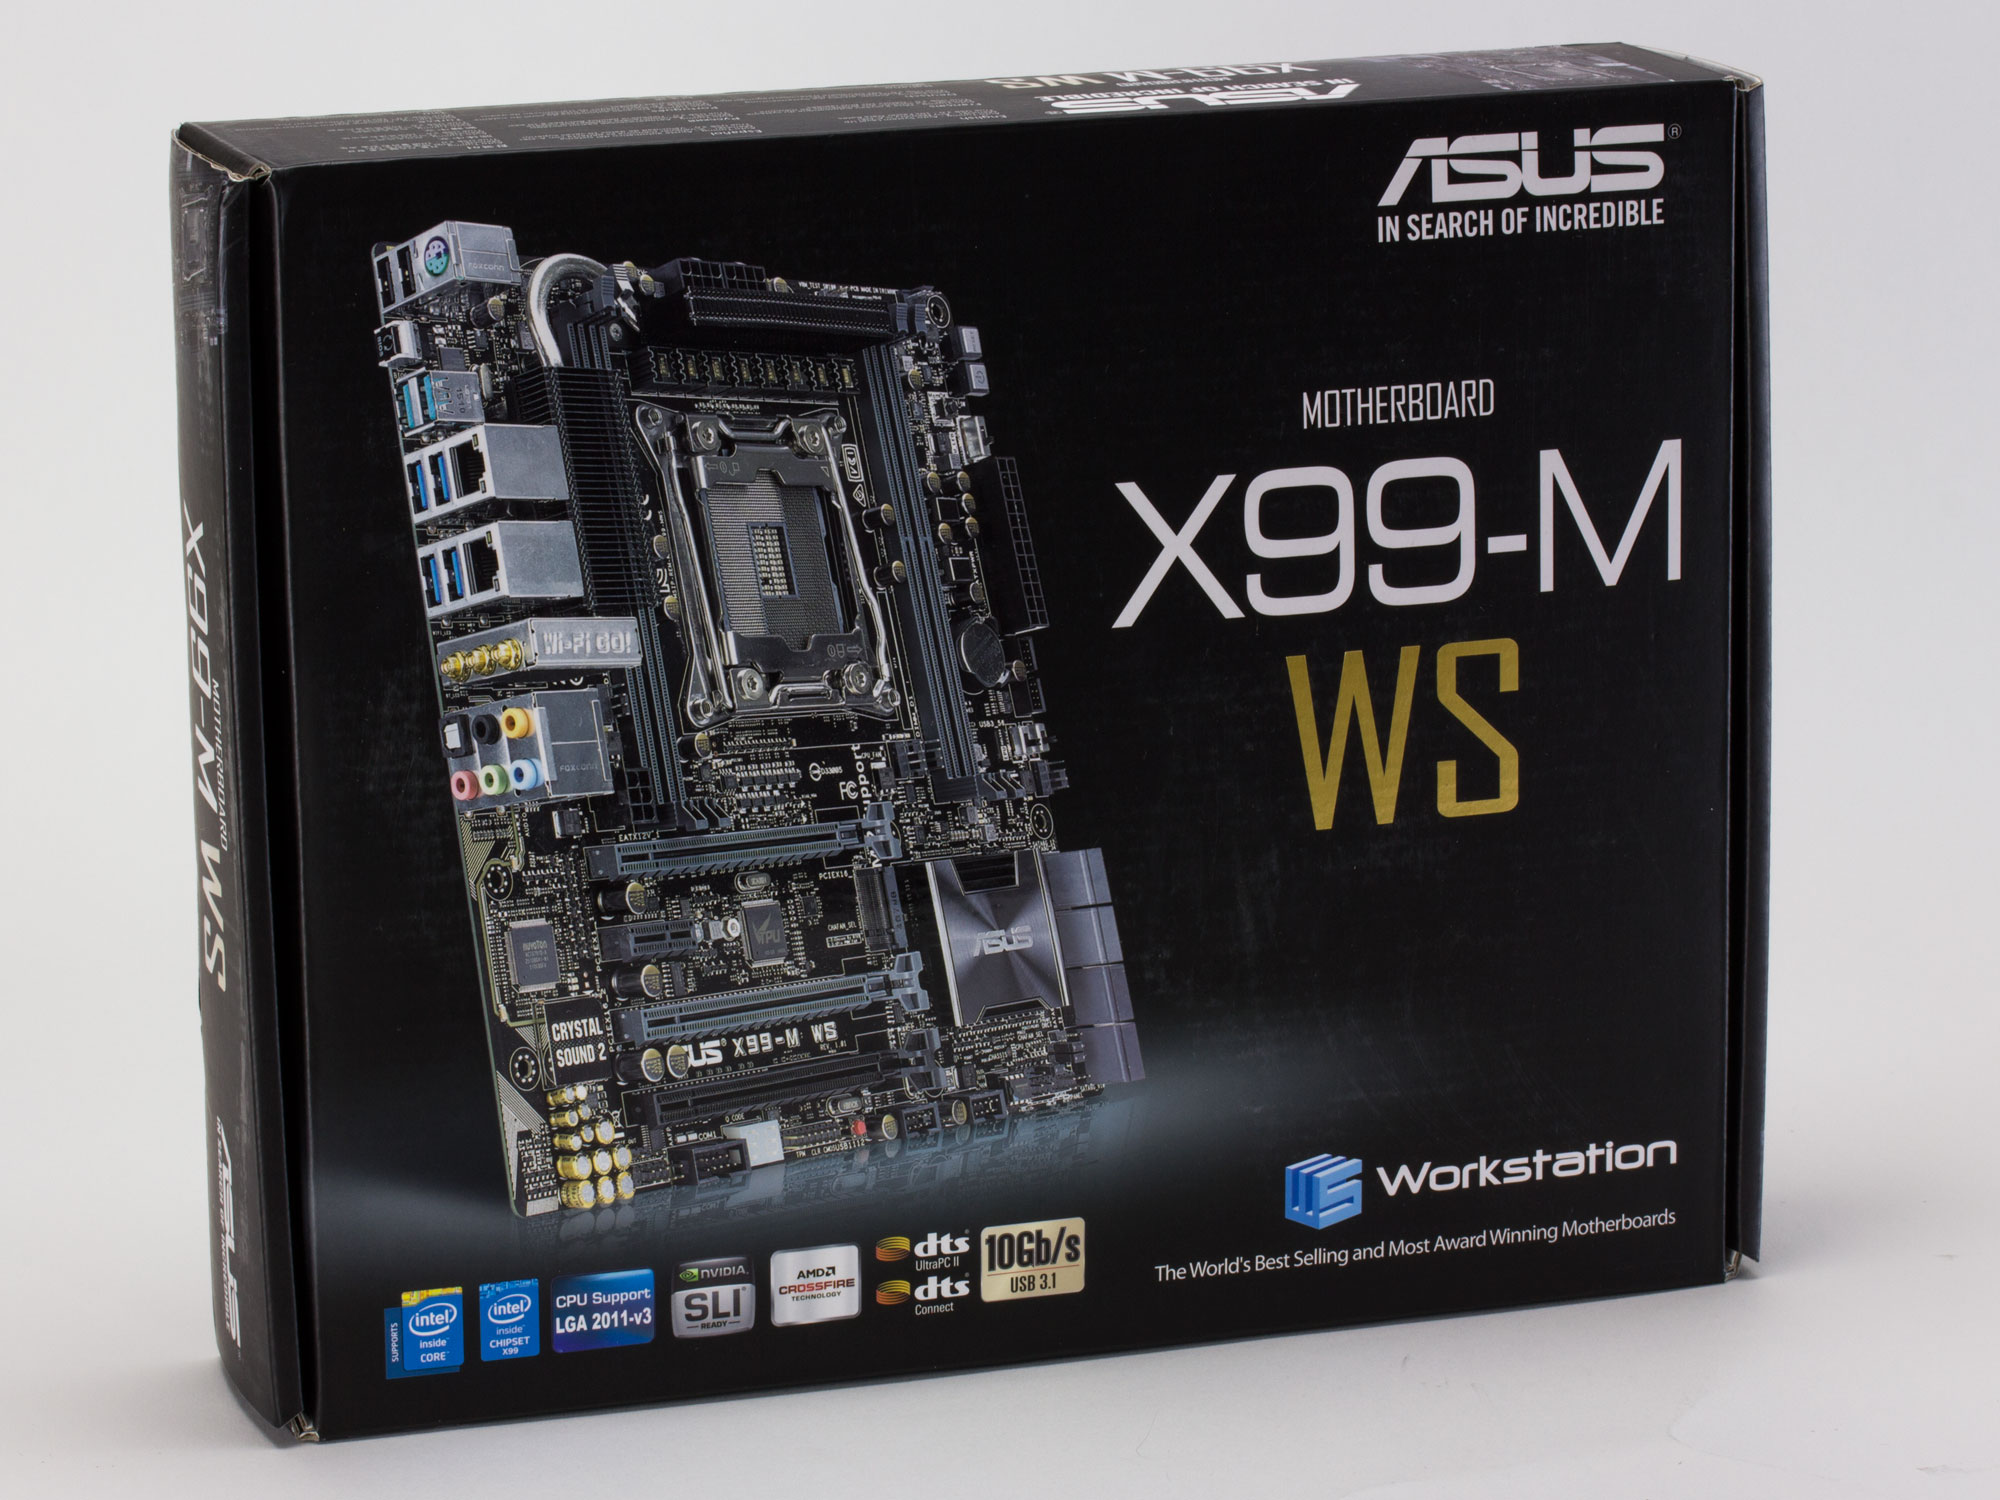
On the bench today is the X99-M WS motherboard, Asus’s much anticipated foray into the world of microATX X99. But has it been worth the wait?
This product is one I’ve been anxiously awaiting for quite some time now, since April of last year actually. Except back then I was expecting a Rampage V Gene (a hypothetical update to the X79-based Rampage IV Gene) but the launch of Intel’s X99 platform came and went with no sign of the Gene and then a few weeks later Raja from Asus confirmed that a Gene wasn’t in the plans at all. That was a huge disappointment for me because my last three builds had used ROG boards and I was planning my next one around a black and red scheme. So I made a petition to show Asus that there’s demand for powerhouse SFF rigs and now here we are. I have no idea how much influence that petition actually had on the decision to bring this to market but I’d like to think it was at least a small factor. Of course this is a X99-M WS and not a Rampage V Gene but I rather like the black and grey color scheme and have changed my planned build accordingly. I’d still love to see a mATX X99 ROG board though.
Ok, that’s enough babbling, what’s this product all about? For starters it is a microATX motherboard for the Intel X99 platform and is part of Asus’s WS line of workstation boards. The WS line features extra validation to ensure maximum reliability and compatibility with things like capture cards, RAID controllers, etc. It’s by no means a boring server board though and comes with the Asus OC socket, advanced power deliver, stylish looks, and other features to appeal to enthusiasts.
The CPU socket is LGA2011-v3 and supports Haswell-E i7’s but also the Xeon E5-1600 v3 and E5-2600 v3 series CPUs. Being mATX there are only four DDR4 slots and they support up to 64GB RAM total by way of 16GB modules, including ECC RAM (both unbuffered and registered) when used with a Xeon processor.
For expansion there are three full-size PCIe slots and one x1 slot. Networking is pretty comprehensive with dual Intel gigabit NICs, 3×3 802.11ac wireless, and Bluetooth v4.0. There’s your typical mix of USB 2.0 and 3.0 but on the rear panel are also two USB 3.1 10Gb/s Type-A ports. Storage consists of eight SATA 3.0 ports and a M.2 slot. Rest of the specs below:
Asus X99-M WS specifications |
|
| Form Factor | microATX |
| CPU socket | LGA2011-v3 Haswell-E i7, E5-1600 v3, and E5-2600 v3 CPUs supported |
| Chipset | Intel X99 |
| Memory | 4 x DDR4 DIMM slots, up to 64 GB Quad channel architecture Supports non-ECC, unbuffered; ECC, unbuffered; and ECC, registered |
| Networking | Intel I218-LM gigabit NIC Intel I210-AT gigabit NIC 3×3 802.11ac WiFi Bluetooth v4.0 |
| Audio | Realtek ALC1150 Crystal Sound 2 |
| Expansion Slots | 3 x PCIe 3.0 x16 40-lane CPU: x16 / x16 / x8 28-lane CPU: x16 / x8 / x4 1 x PCIe 2.0 x1 |
| Storage | 4 x SATA 3.0, RAID 0/1/5/10 4 x SATA 3.0, no RAID 1 x PCIe 2.0 x2 M.2 (2260 or 2280) |
| USB 3.0 | 6 x USB 3.0 (4x rear IO, 2x header, X99 chipset) 6 x USB 2.0 (2x rear IO, 4x headers, X99 chipset) 2 x USB 3.1 Type-A (rear IO, ASMedia controller) |
| Onboard | 1 x USB 3.0 connector(s) support(s) additional 2 USB 3.0 port(s) (19-pin) 2 x USB 2.0 connector(s) support(s) additional 4 USB 2.0 port(s) 1 x M.2 Socket 3 for M Key, type 2260/2280 devices 1 x TPM connector(s) 8 x SATA 6Gb/s connector(s) 1 x CPU Fan connector(s) (1 x 4 -pin) 1 x CPU OPT Fan connector(s) (1 x 4 -pin) 3 x Chassis Fan connector(s) (4 x 4 -pin) 1 x S/PDIF out header(s) 2 x 8-pin EATX 12 V Power connector 1 x 6-pin EATX 12 V_1 Power connector(s) 1 x 24-pin EATX Power connector(s) 1 x 8-pin ATX 12V Power connector(s) 1 x EZ XMP switch 1 x Front panel connector(s) 1 x System panel(s) (Q-Connector) 1 x DRCT header(s) 1 x Thermal sensor connector(s) 1 x TPU switch(es) 1 x EPU switch(es) 1 x Power-on button(s) 1 x Reset button(s) 1 x Clear CMOS button(s) |
| Rear IO | 2 x LAN (RJ45) port(s) 2 x USB 3.1 (teal blue) 4 x USB 3.0 (blue) 2 x USB 2.0 1 x Optical S/PDIF out 1 x USB BIOS Flashback Button(s) 1 x ASUS Wi-Fi GO! module (Wi-Fi 802.11 a/b/g/n/ac and Bluetooth v4.0 1 x 8-channel Audio I/O |
| Warranty Period | 3 Years |
| Product Page | Link |
Accessories
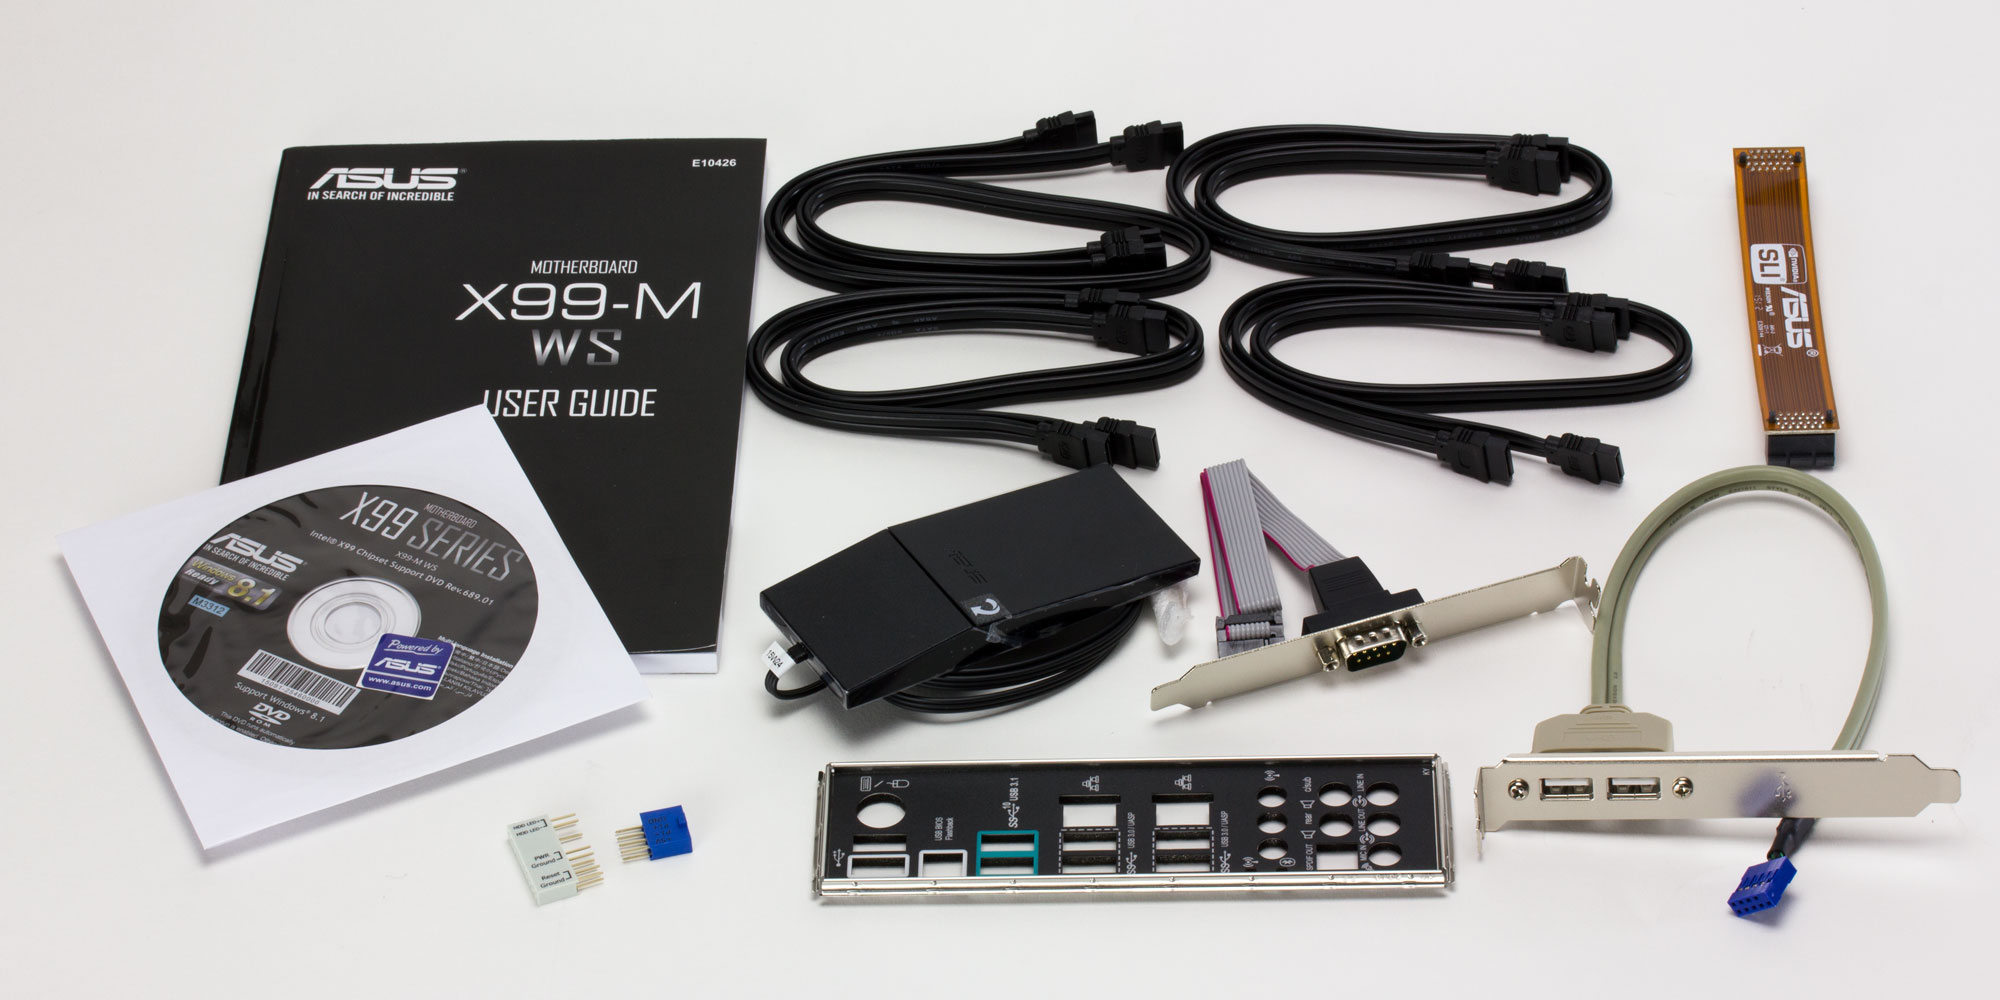
The X99-M WS comes with quite the stash of goodies. In the box we have the manual, case badge, driver DVD, 8x SATA cables, flexible SLI bridge, WiFi antenna, serial port bracket, 2x USB 2.0 bracket, front panel adapters, and a padded IO shield.
The manual, in typical Asus fasion, clocks in at 176 pages single-language (in this case English) and is very in-depth, going over every little jumper on the board, setting in the BIOS, etc.
A serial port may seem like an anachronism to enthusiasts but in professional environments it’s still common to run into equipment that use serial and since this is a workstation board it makes sense to include it.
The included set of accessories is very comprehensive, the only other thing I would have liked to see included is a thermistor cable for the T_Sensor header since that’s not something the typical user will have laying around.
The Board
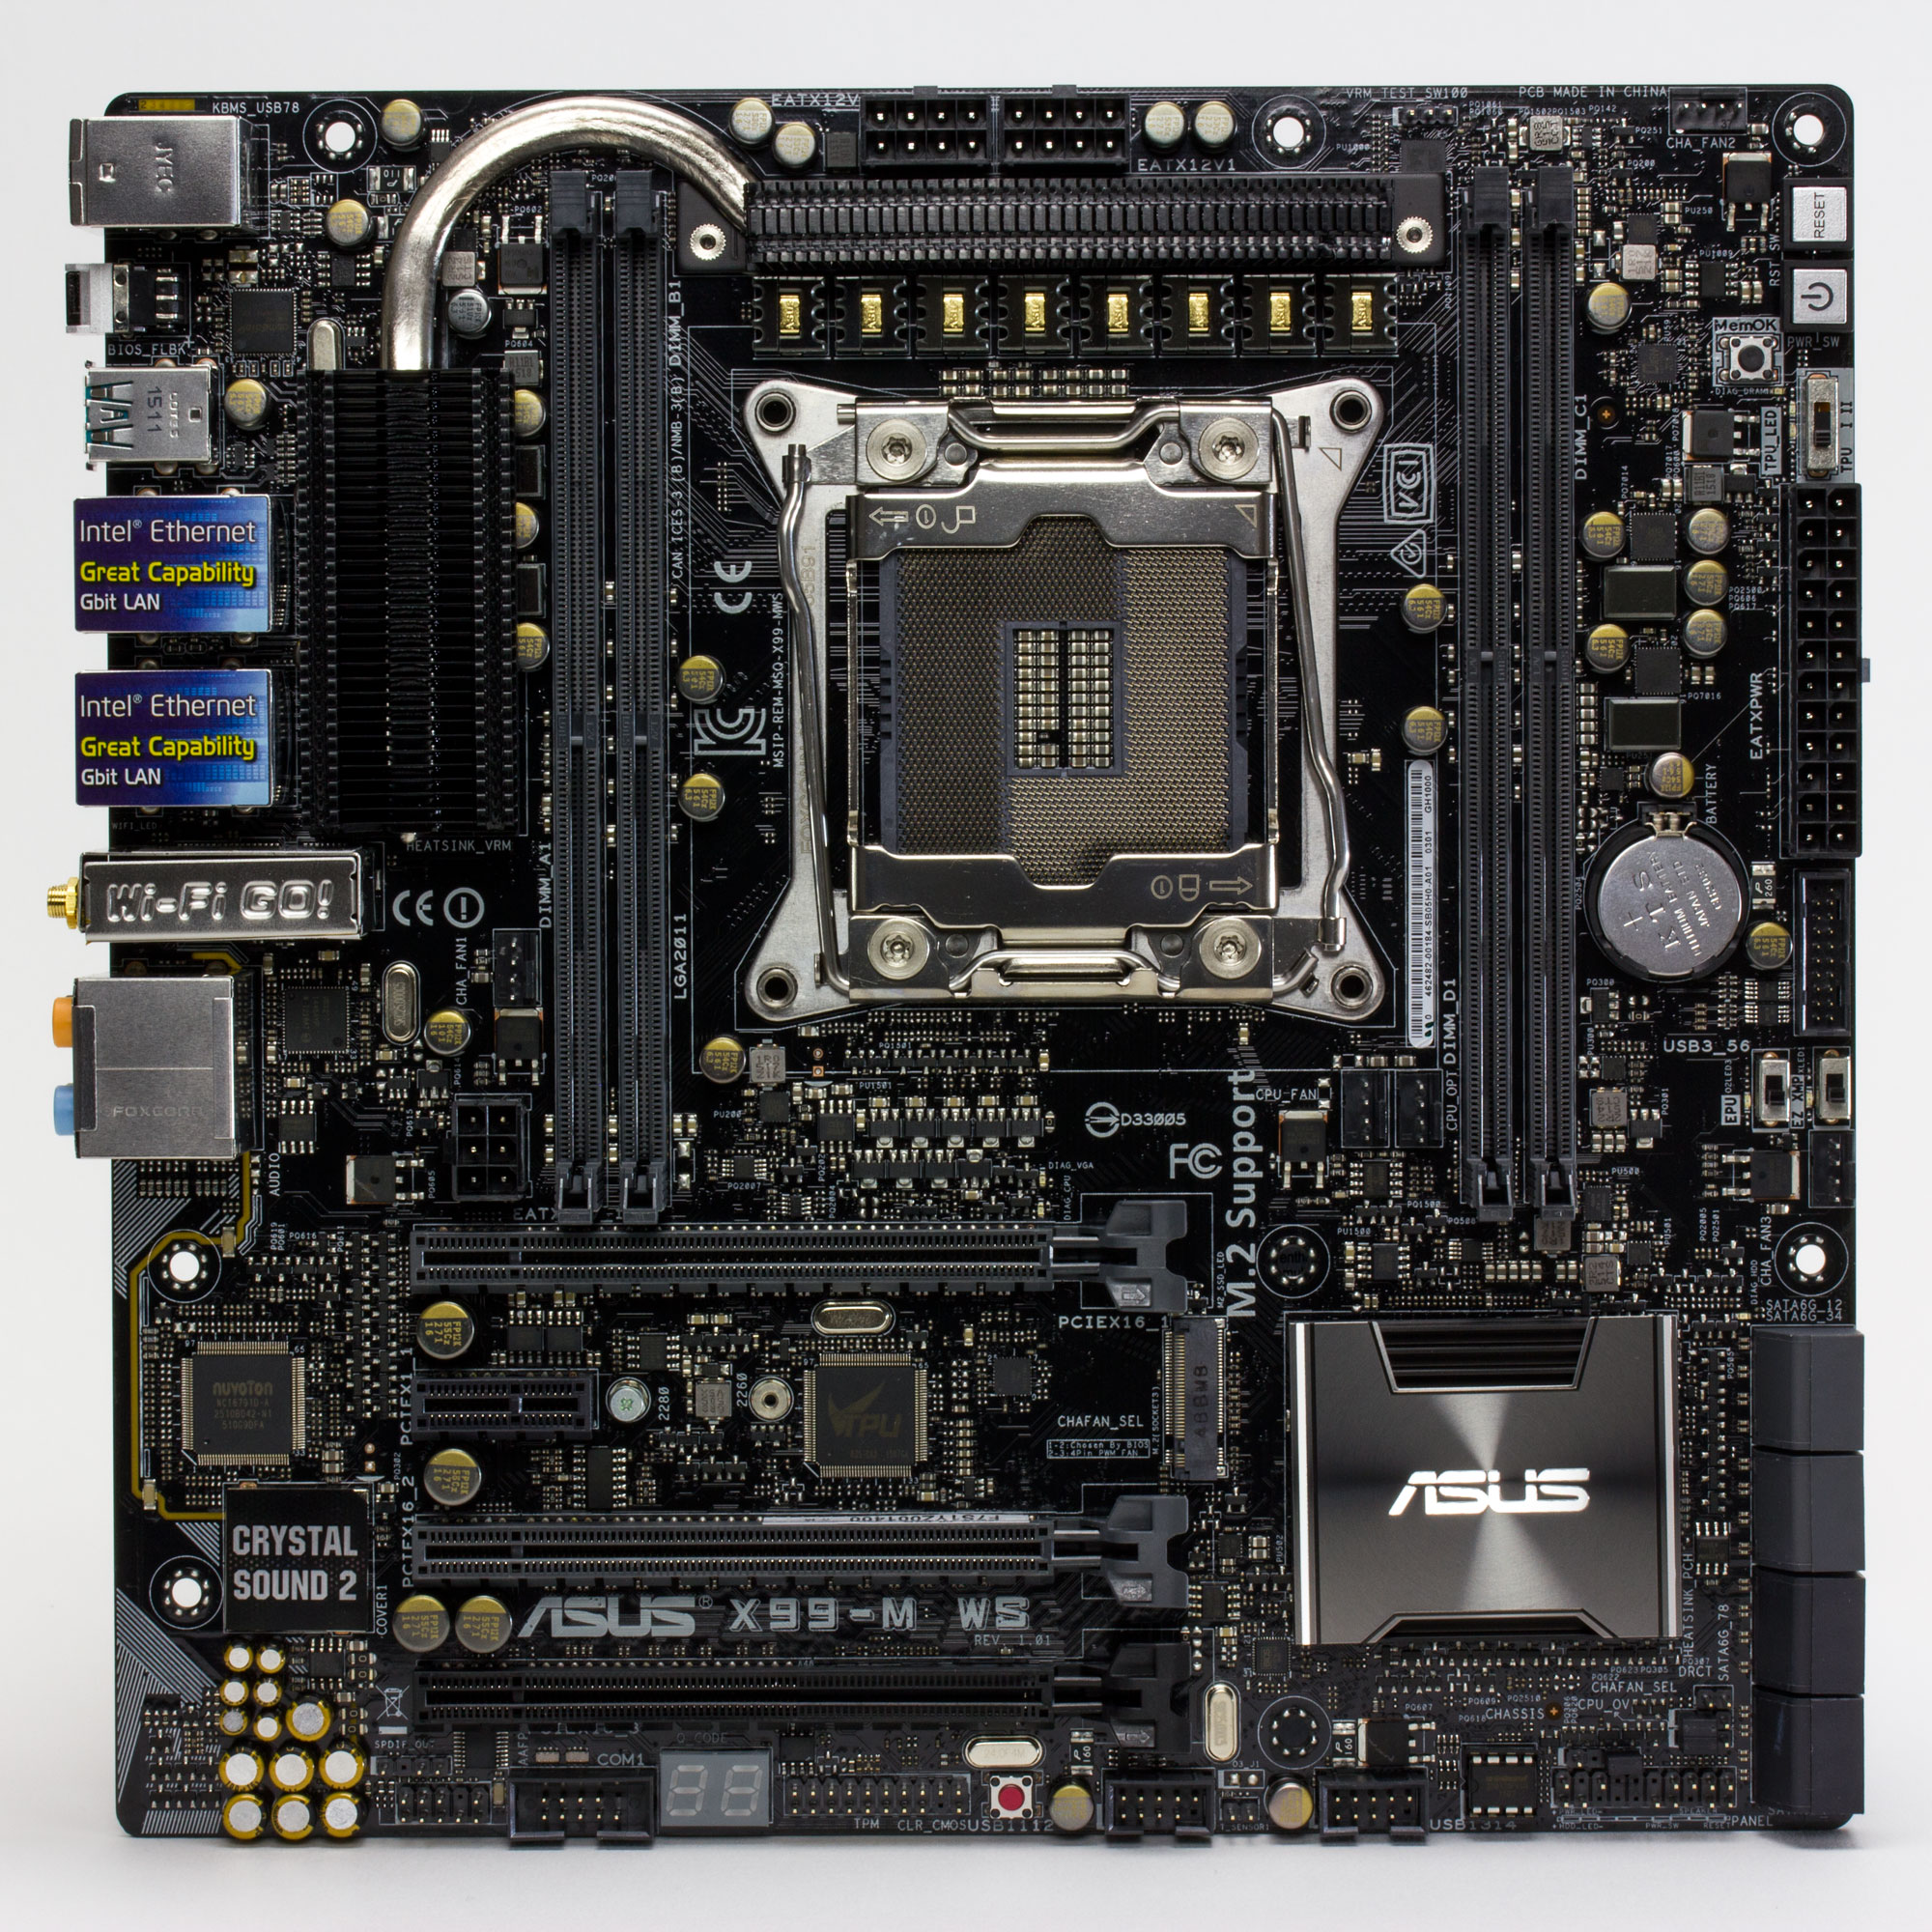
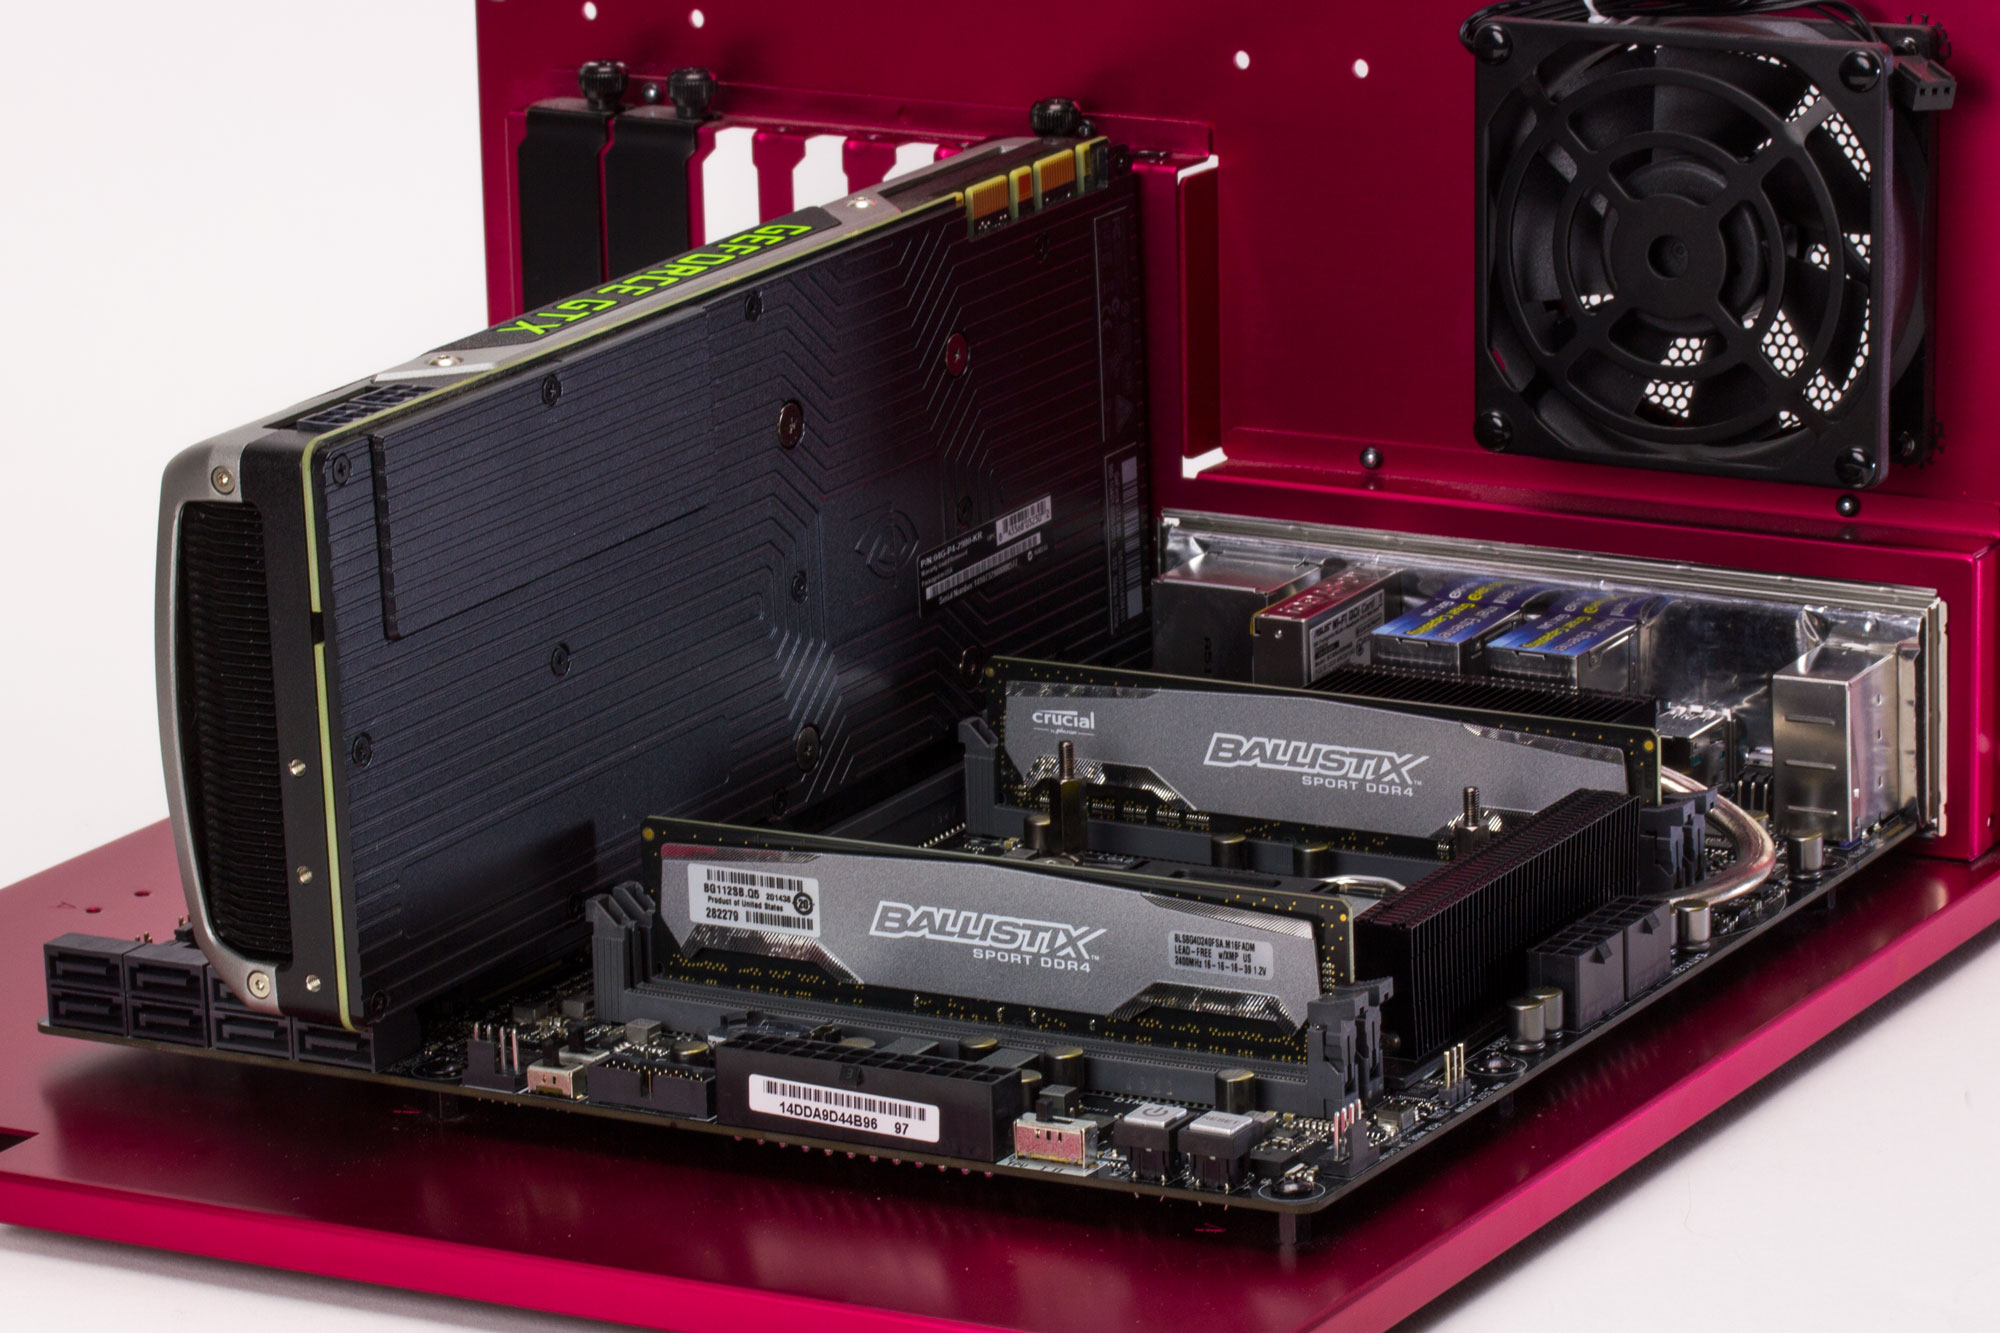
The X99-M WS takes styling cues from the X99E-WS and I think it looks fantastic. The black and grey with subtle gold accents looks very classy, though I wish the CPU socket was the black nickel version to match the rest of the board. The layout of the board is good: CPU and ATX power connectors are on the edges, CMOS battery is easily accessible, USB 3.0 header is where it belongs so it doesn’t interfere with dual video cards, SATA ports are angled, bottom of RAM slots are tab-less, etc.
A note about heatsink clearance, some very large air coolers may overhang the top PCIe slot. This is a problem with all microATX X99 boards though due to the large size of the LGA2011-v3 CPU socket.
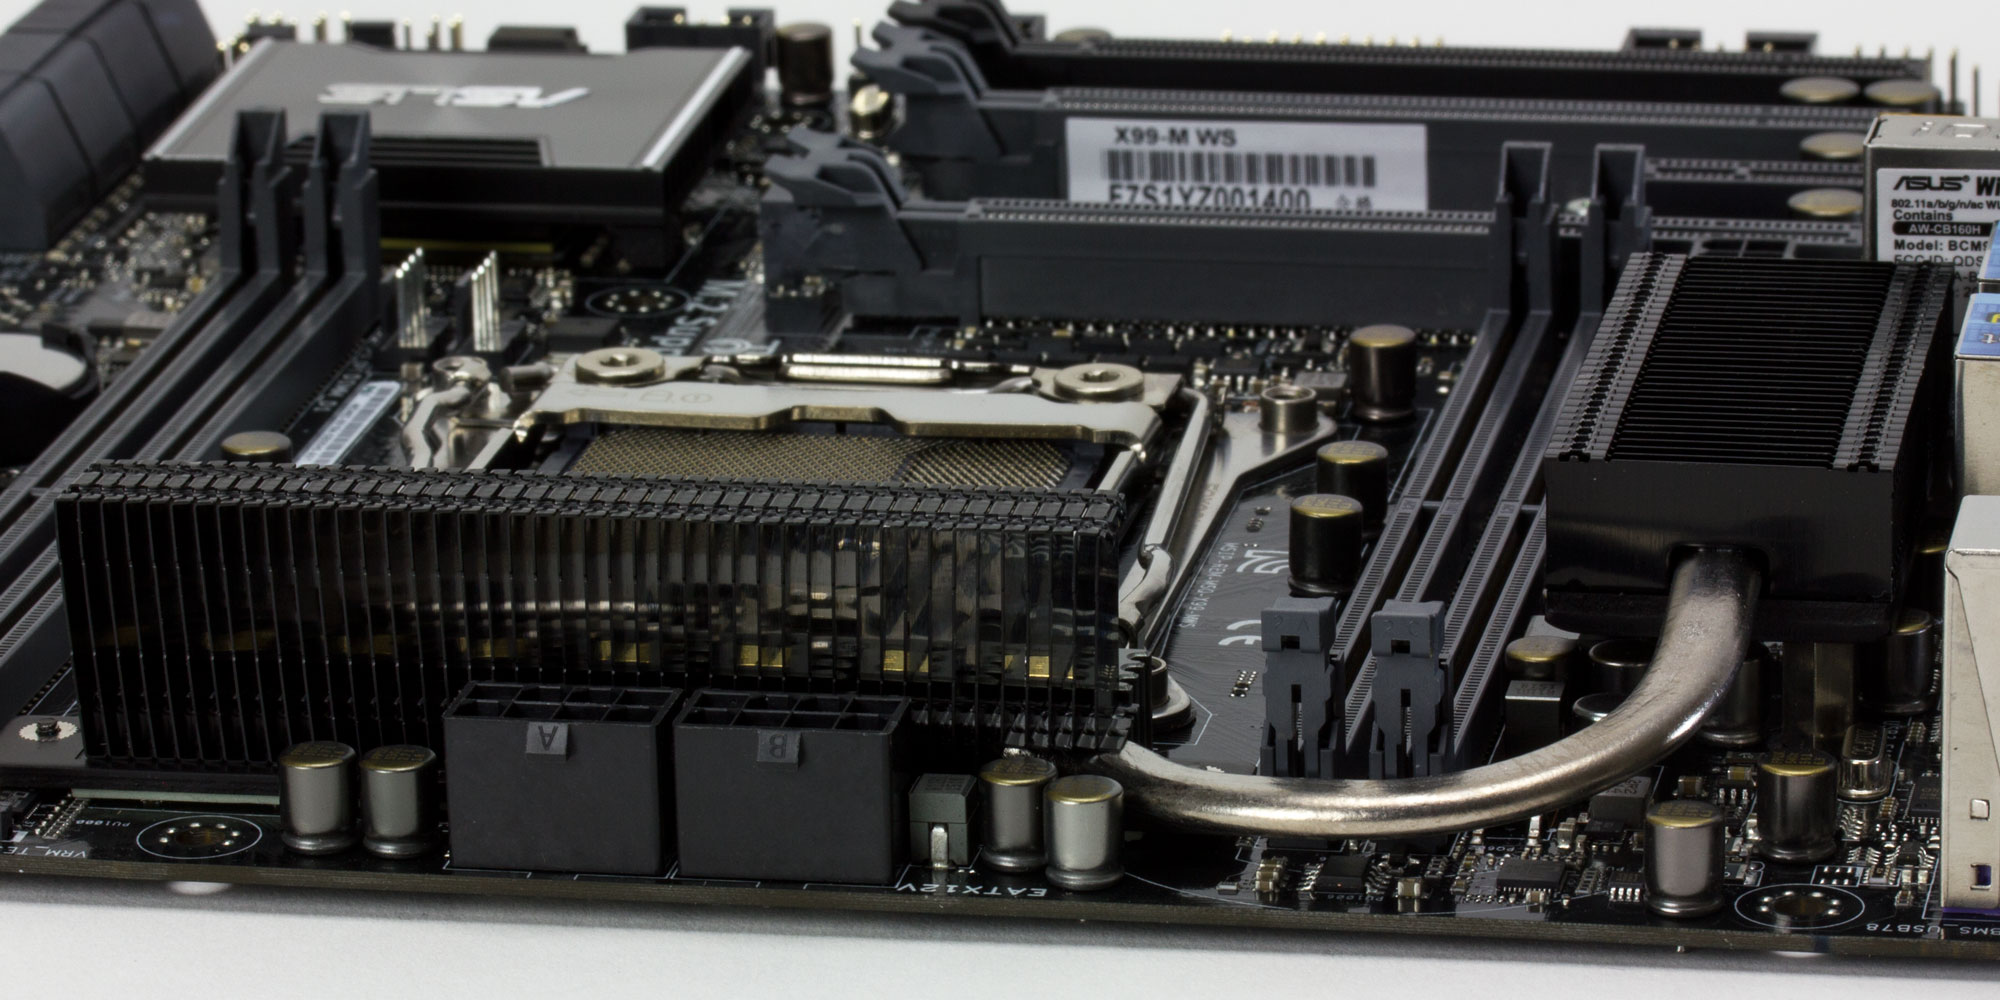
One interesting feature is the VRM cooling is a proper heatsink with two groups of fins connected by a heatpipe. This used to be common but has all but disappeared in favor of stylized blocks of aluminum. Also visible here are the dual 8-pin CPU power connectors. Only one is necessary under most circumstances though, the second one is used to provide extra power for extreme overclocking.
For expansion there are three PCIe 3.0 slots, all x16 physically, and a 2.0 x1 slot between the first and second PCIe 3.0 slots. Lane configuration is as follows:
| Lane Configuration | PCIe 3.0 x16_1 | PCIe 3.0 x16_2 | PCIe 3.0 x16_3 |
| 40-lane CPU | x16 | x16 | x8 |
| 28-lane CPU | x16 | x8 | x4 |
The 2.0 x1 slot could be useful for something like a PCIe sound card since they are sometimes tricky to get working in 3.0 slots. It would require either a single-slot video card in the top slot or moving the video card to one of the lower slots though. With 40-lane CPUs the bottom slot runs at x8 and I can confirm that spaced SLI does work on this motherboard.
Also, there is an auxiliary power plug for the PCIe slots in the form of a 6-pin PCIe connector just above the top slot. In theory it can be used to provide supplemental power to the slots for extra stability.
I do have a few nitpicks with the board layout though, one is the debug LED is on the bottom edge of the board where it would be obscured by a second video card. Also, the two CPU fan headers are right below the socket, which is great for air coolers but it makes for slightly messier cable management when using water cooling because the cables for the radiator fans will have to be run across the motherboard. Not a deal-breaker but I would rather have the CPU fan headers along the top edge of the board for tidier wiring. I don’t think it’s possible to move it due to space constraints but having the M.2 slot sitting underneath the video card could possibly lead to thermal throttling.
Rear IO
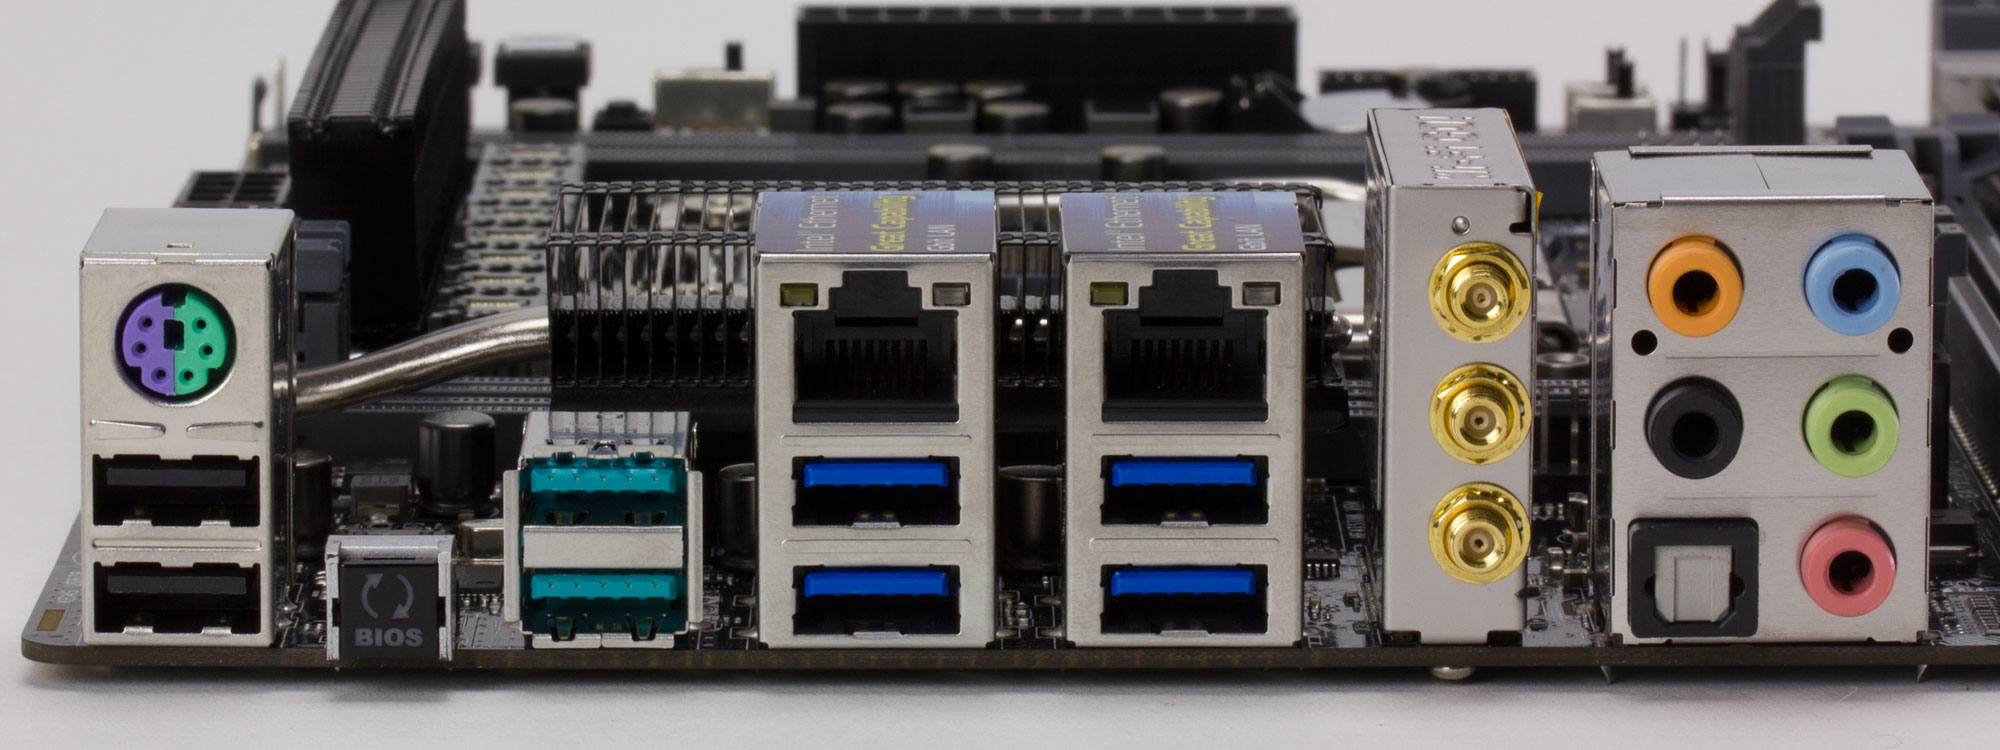
For the rear IO connectors we have a single PS/2 port, 2x USB 2.0, BIOS Flashback button, 2x USB 3.1 (10Gb/s), 4x USB 3.0, dual Intel gigabit NICs, WiFi antenna connectors, and the audio jacks. I’m glad there’s a PS/2 connector because I’ve seen Windows glitch and drop all USB connections. No Type-C connectors but that’s acceptable on a desktop.
For those not familiar with it, the BIOS Flashback feature allows the BIOS to be updated even with no RAM or CPU installed. By plugging in a formatted USB drive with the BIOS file extracted to it into the USB 2.0 port to the left of the button and then pressing the BIOS Flashback button for three seconds, the BIOS will update. Please refer to the manual for more details.
WiFi and Bluetooth
The manual and spec page are very clear on what the NICs are, an Intel I218-LM (from the X99 chipset) and an Intel I210-AT. The WiFi+Bluetooth combo card is a complete mystery though, all Asus says is 3×3 802.11ac WiFi and Bluetooth v4.0. That’s it. Usually when a manufacturer is cagey about details like this it means it’s not something worth bragging about, so let’s find out exactly what card is hiding away on this board.
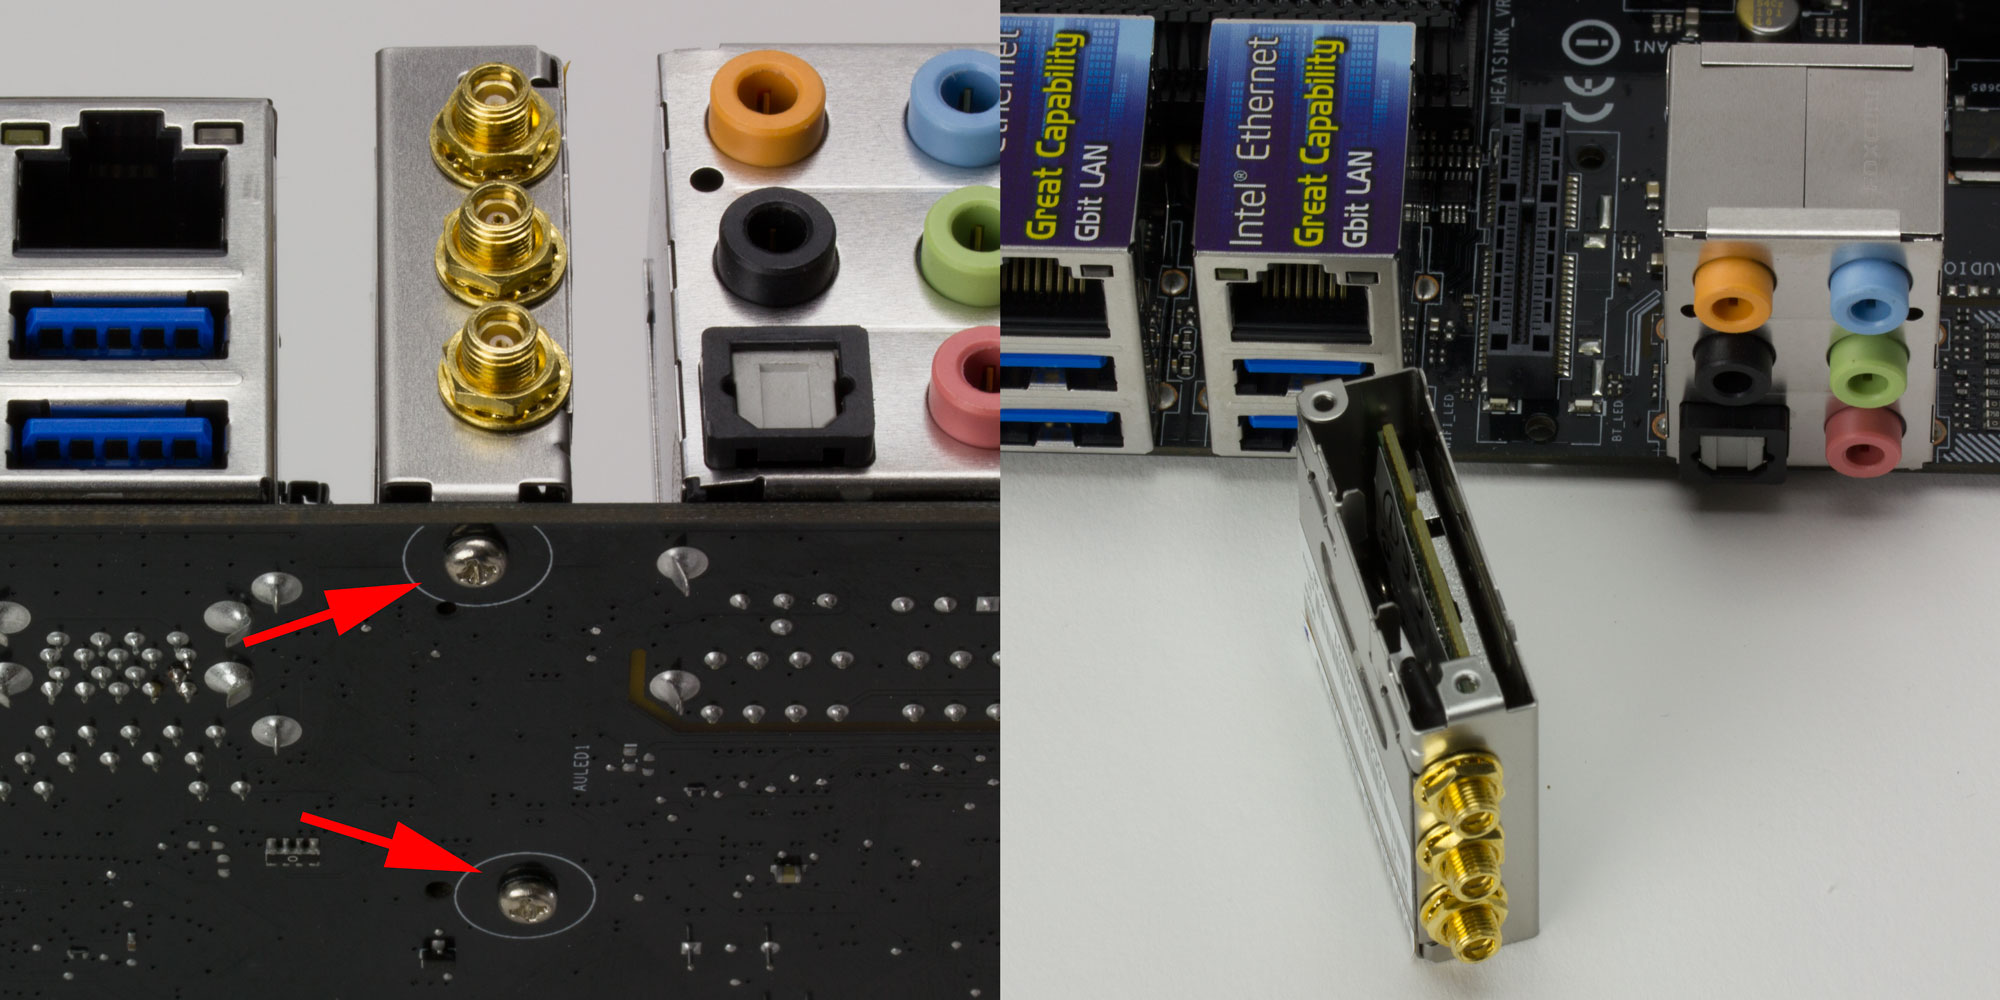
First step is to undo the two screws securing the wireless module to the board. Then it pops right off the slot.
The cover is just held on with two small detents and slides apart easily. The top antenna has to be detached to make room for the screwdriver, then it’s just a matter of removing the two screws holding the card to the cage and unclipping the antennas from the back of the card.
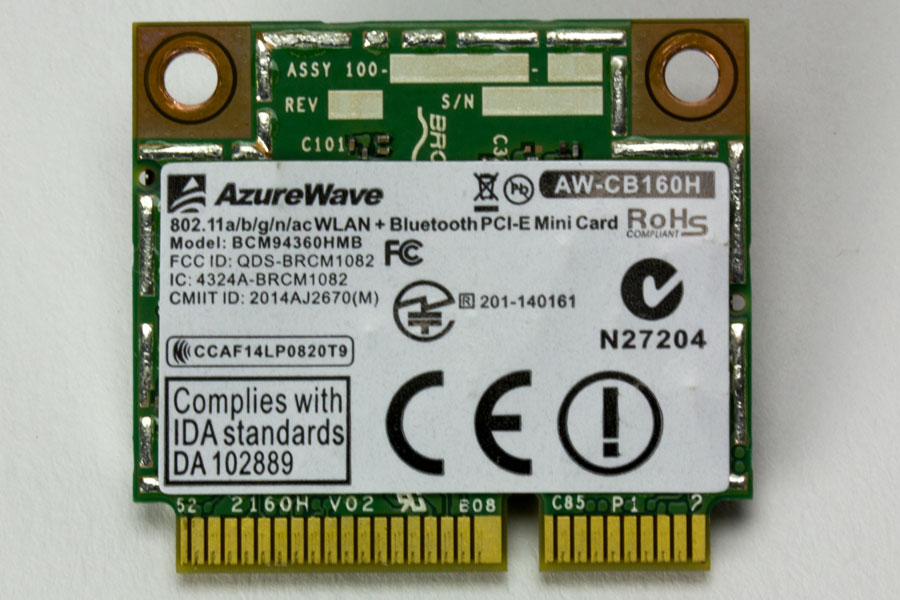
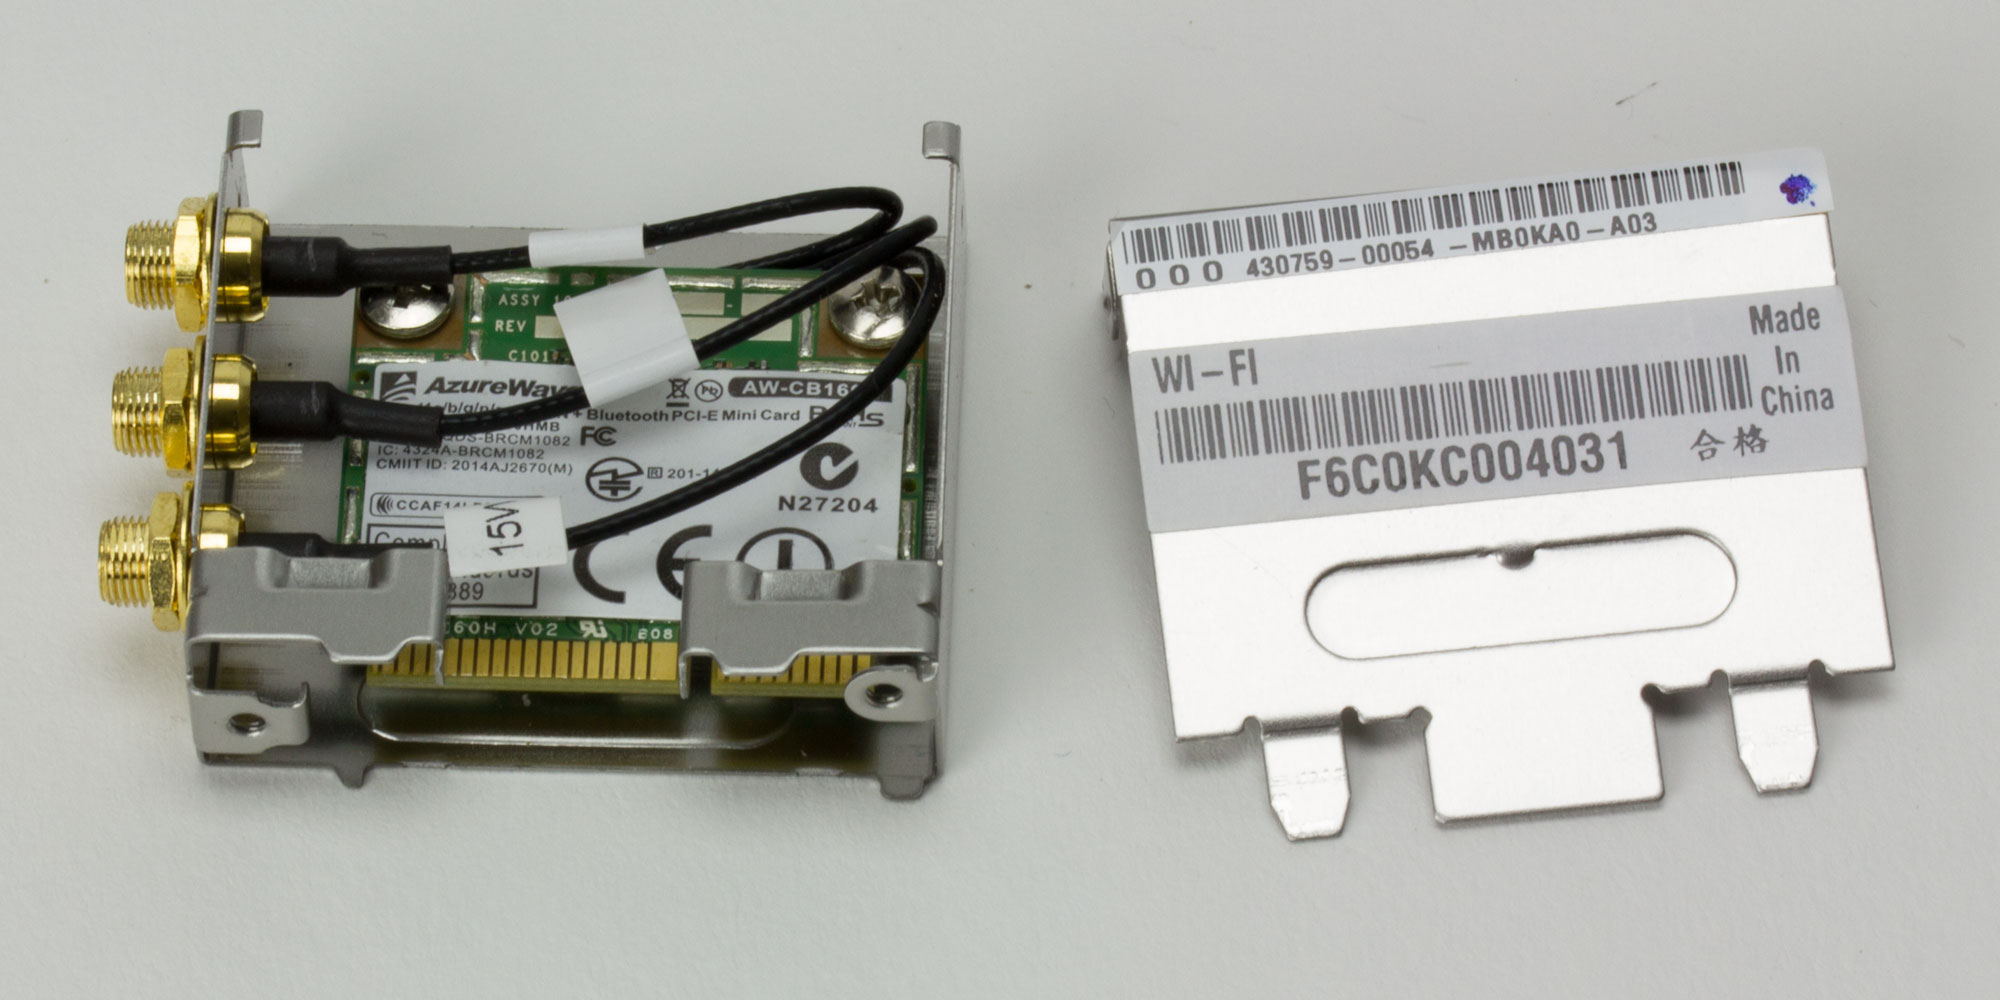
And voila, there it is! Turns out it is an AzureWave AW-CB160H Mini PCIe combo WiFi + Bluetooth card. I couldn’t find official product specs for this but it appears to use Broadcom chips. It should be possible to replace it with an Intel card but I don’t have one on hand to check if the motherboard would recognize it correctly.
Storage
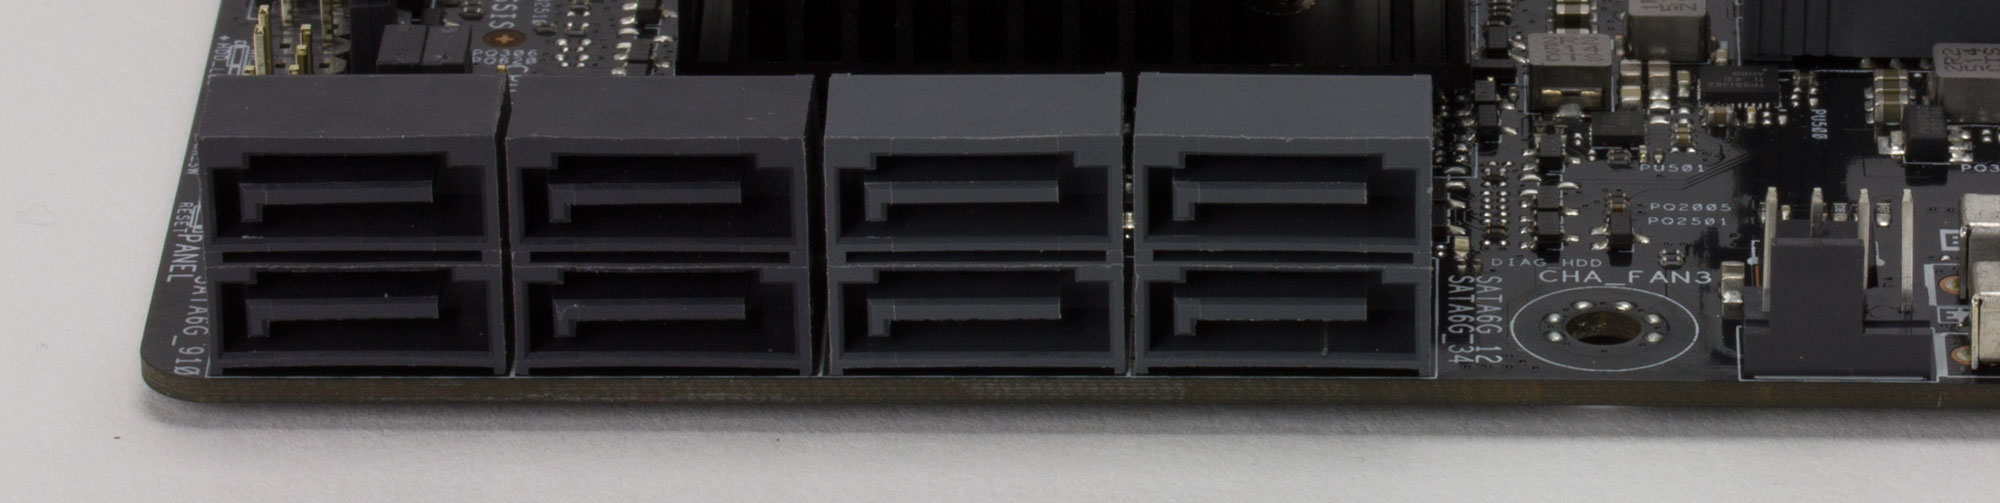
For storage we’re looking at 8 x SATA 3.0 ports and the M.2 slot. Eight SATA is just right in my mind for a microATX board. That’s enough for a RAID 5 array, OS drive, scratch drive or two, and an ODD. Any more than that and you’d need an ATX case to house all those drives anyway. Only four of the SATA ports support Intel RST and RAID though (the grey ones).
There’s no SATA Express on the board but I don’t think anyone will miss it, so far it looks like the SSD manufacturers are going to skip it in favor of M.2.
Which makes the M.2 port on the X99-M WS all the more disappointing. The M.2 spec is a boon for SFF builds because the drives take up no additional space in the case, there are no cables, and yet it’s capable of speeds that completely blow SATA SSDs out of the water. The key word is “capable” however since the M.2 spec allows the motherboard makers wide leeway in how they wire it up, namely for SSDs they can use SATA 3.0 or PCI Express.
M.2 ports using PCIe then vary widely in possible bandwidth depending on what gen PCIe is used (2.0 or 3.0) and the number of lanes allocated (1-4). So a PCIe M.2 port could have anywhere from 4Gb/s of bandwidth (PCIe 2.0 x1) like on the Asus Maximus VI Impact up to 32Gb/s (PCIe 3.0 x4) like on the EVGA X99 Micro2.

Unfortunately Asus decided to go with just PCIe 2.0 x2 for the M.2 socket on this motherboard, for 8Gb/s (1000MB/s) theoretical bandwidth but due to overhead that translates to about 800MB/s real-world throughput. That is still 45% better than the max real-world throughput of ~550MB/s for SATA 3.0 but it pales in comparison to what high-performance M.2 SSDs are capable of.
Edit: After some discussion, the 10Gb/s advertised is technically correct since that’s the raw bandwidth of 2.0 x2. Just be aware that you’re not going to get anywhere near 1250MB/s out of a 2.0 x2 slot, it’s more like 800MB/s after encoding and overhead.

To demonstrate, here’s the ATTO results for a Samsung SM951 (Lenovo version). This particular drive has a Lenovo part number and runs at 2.0 x4 in AHCI. On the left is the drive installed in the M.2 slot on the Asus X99-M WS and on the right is the drive installed in a PCIe card adapter on a Gigabyte X99M-Gaming 5. The 2.0 x2 of the Asus is clearly bottlenecking the drive’s performance.
Of course for the random performance that benefits everyday usage there wouldn’t be such a disparity as there is with sequential transfers but this is a workstation board and people editing 4K video or the like would regularly be moving around large files and as such could use that extra sequential read/write speed. So while a PCIe 2.0 x2 M.2 slot is a bit faster than Sata 3.0, considering this is a workstation motherboard I would much rather have seen Asus use PCIe 3.0 x4 instead, or at the very least PCIe 2.0 x4.
Anyway, the M.2 socket is M-key, supports SATA and PCIe drives, ACHI and NVMe (probably still want to check the compatibility list to be safe), and drives in either 60mm or 80mm length.
This board does support the Asus Hyper Kit, which converts the M.2 slot to a HD Mini-SAS connector for use with drives like the 2.5″ Intel 750 SSD. But due to the bandwidth bottleneck I’d recommend using the add-in card version of the drive if possible.
Fan Headers
There are five fan headers. CPU_FAN and CPU_OPT just below-right of the CPU socket, CHA_FAN1 between the RAM slots and WiFi module, CHA_FAN2 at the top-right corner, and CHA_FAN3 between the USB 3.0 header and SATA ports.
Some motherboard manufacturers use ambiguous wording in the manual and spec sheets to cover up that the 4-pin chassis headers are compatible with PWM fans, but only have DC control. Fan control is a pet peeve of mine so I use a simple oscilloscope (a DSO Nano v1) to check if the 4th pin is outputting a PWM control signal.
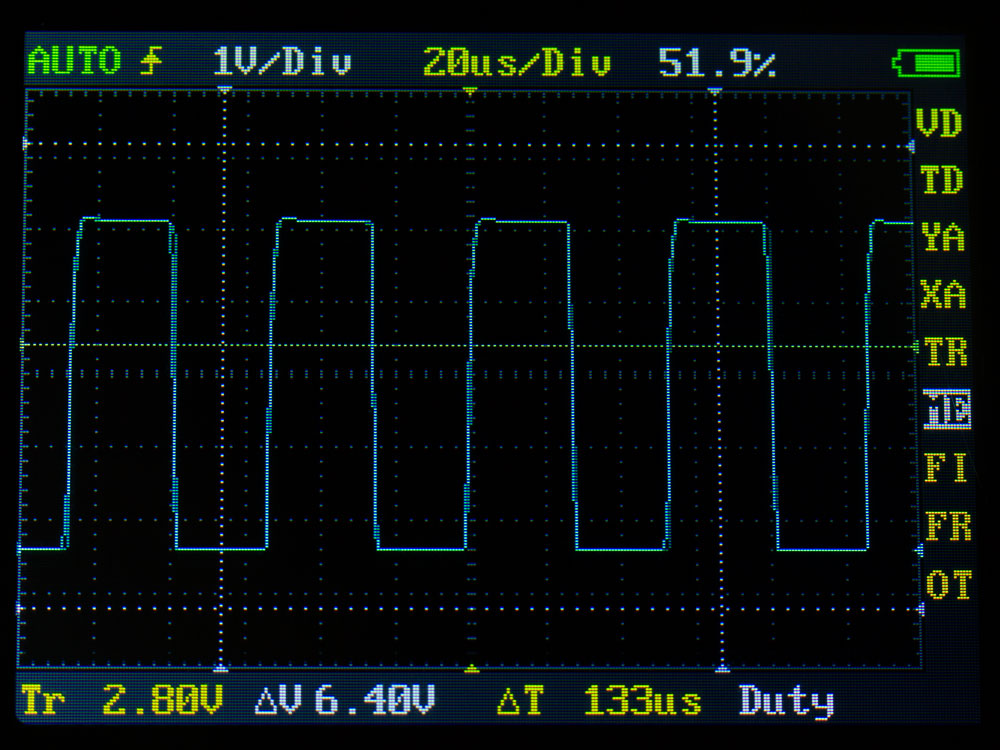
For the Asus X99-M WS I can confirm that all five fan headers output a PWM signal when in PWM mode. Unfortunately though, CPU_OPT is just slaved to CPU_FAN and is not independently controllable.
In the BIOS there is the option to change mode for each header between PWM and DC mode. Strangely, there is also a jumper on the motherboard just above the front panel header to force PWM mode for all headers though default is BIOS select.
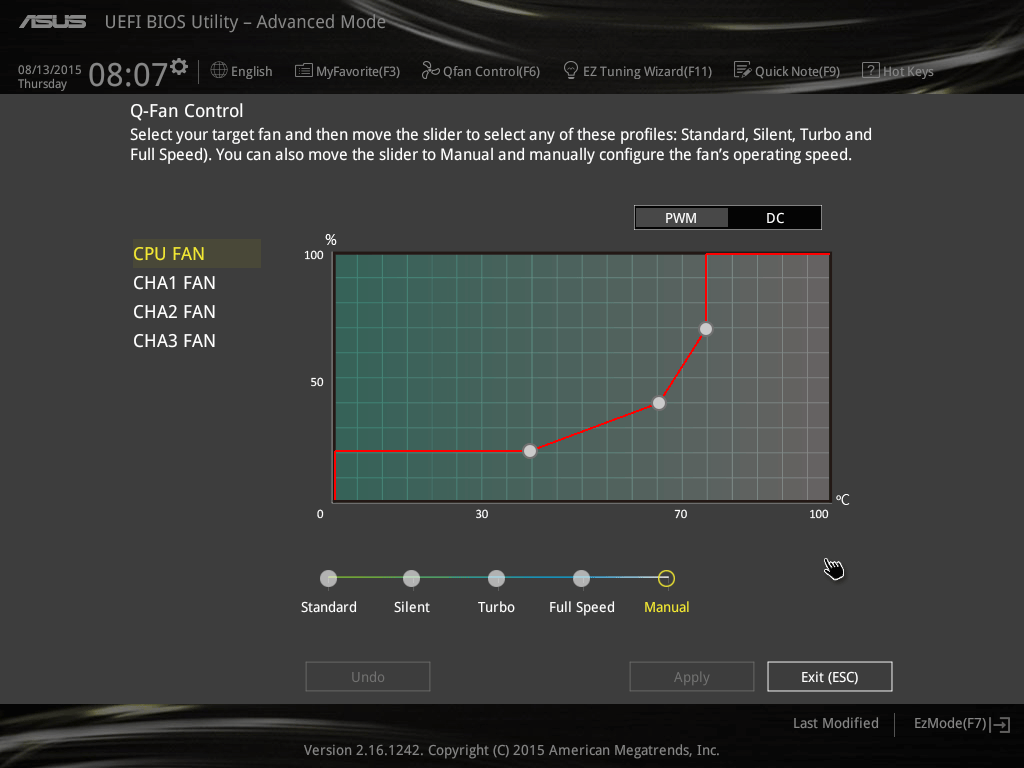
For the fan profile there is the choice between three preset options (Standard, Silent, and Turbo) or Manual. In Manual mode, three temp/duty cycle points can be set. The temp can be pinned to either CPU, Motherboard, VRM, PCH, or T_Sensor1. T_Sensor1 is a header that can be connected to a thermistor cable allowing the temperature of anything it’s stuck to to serve as an input for fan speed, pretty neat.
The chassis fan headers also each have an option to allow the fan to be turned off when the source temp is below the lower temp point for a fanless idle state.
BIOS
The BIOS is accessed by pressing F2 or Delete right after POST. Alternatively there is a header on the motherboard labeled DRCT. The reset switch can be plugged into it instead so when it’s pressed the computer will boot to straight to the BIOS. Either way, once you get there you’re greeted with this:
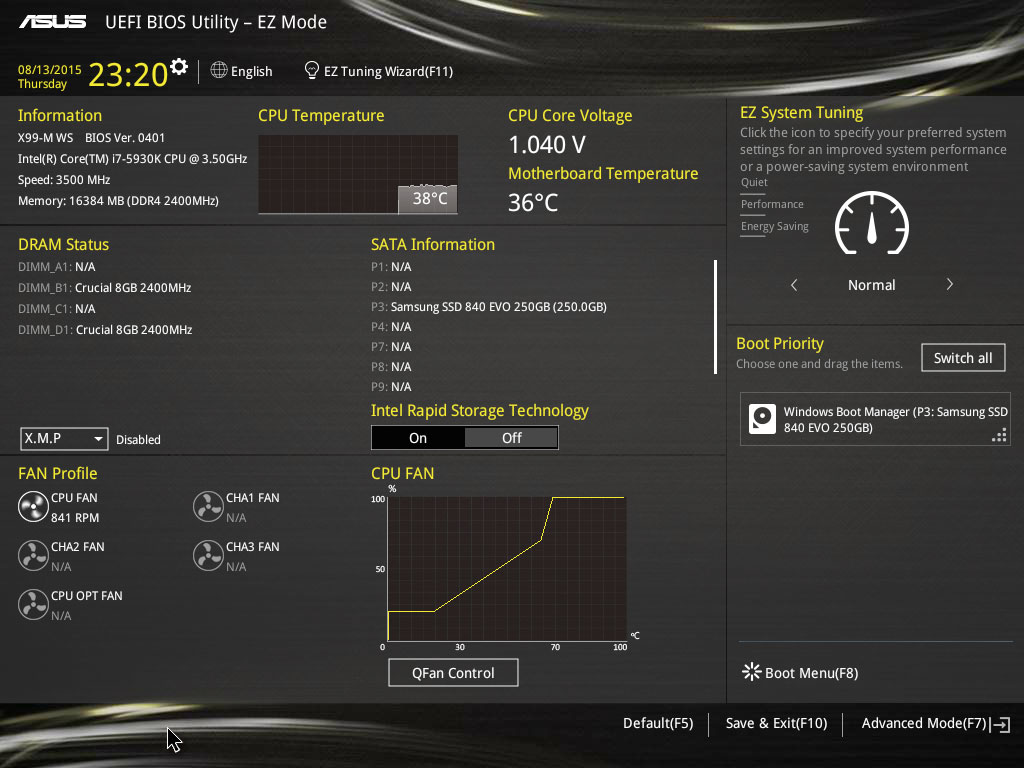
This is EZ Mode and has some basic options like boot priority and status info like CPU temp. Pressing F7 or clicking where it says Advanced Mode switches to the full set of options. I won’t go over every screen since it’s all covered in the manual and there’s a ton of options in here to configure.
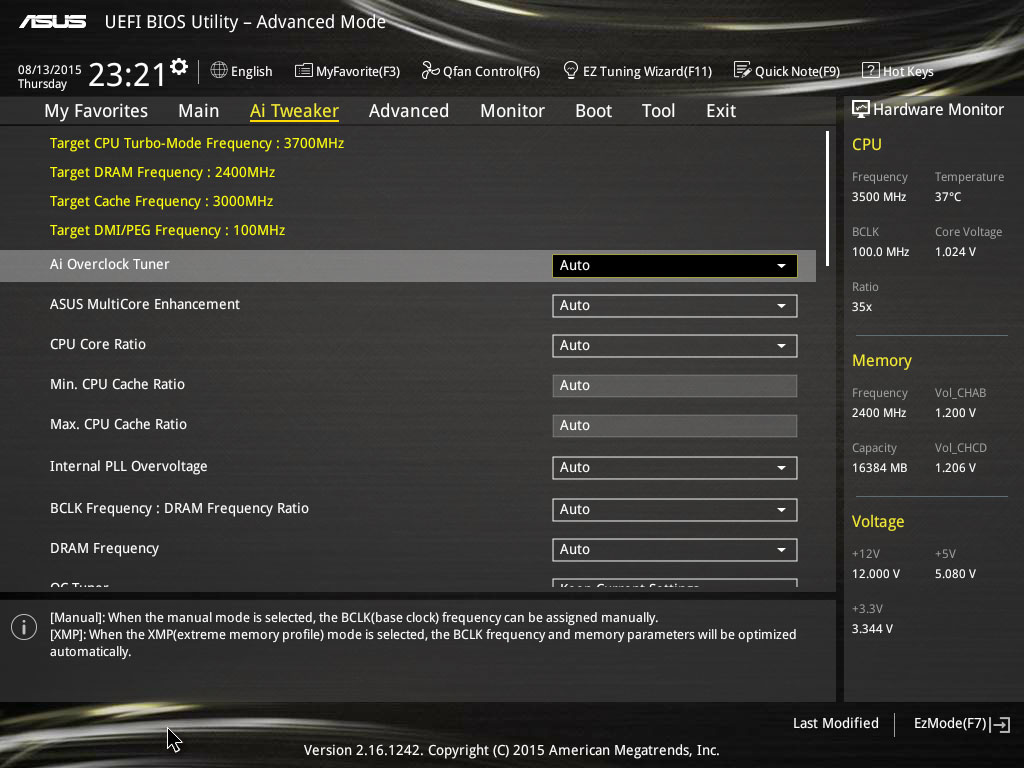
As an example, here’s the Ai Tweaker page where overclockers will spend most of their time.
Software
The main piece of software that comes with this board is AI Suite 3. Though I’m not sure if it actually comes with it yet. The manual suggests it’s on the driver disc but I don’t have a optical drive to verify that and it’s not listed under the Drivers page for the X99-M WS on the Asus website. I downloaded the one listed under the X99-E WS/USB 3.1 and it seems to work just fine.

Here’s the main screen that shows when the program is opened.
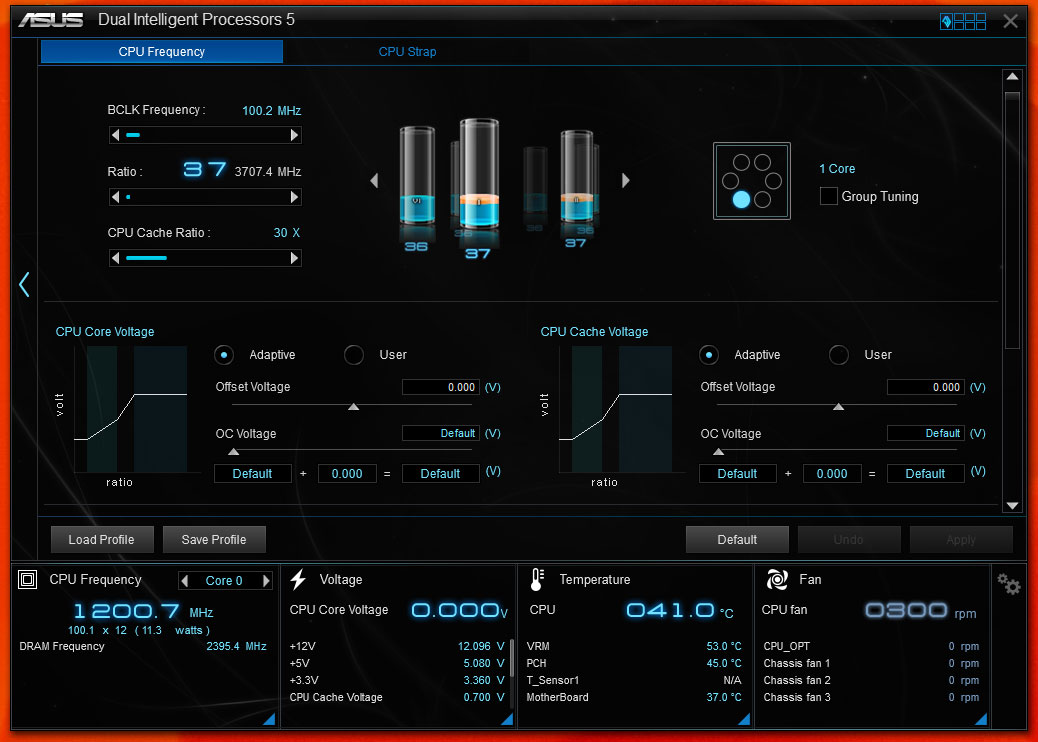
This is the TPU menu which allows overclocking from within Windows. One cool thing is any changes made here are saved directly to the BIOS so the software doesn’t have to be running, or even installed, to keep the settings.

Fan Xpert 3 gives a few more options over what’s in the BIOS to tweak fan settings, including fixed RPM mode which is strangely absent in the BIOS controls (though it can be accomplished by setting a manual “curve” where all the RPM levels are the same).
One thing to note, Windows 10 is not officially supported by Asus for this board yet so there are no Windows 10 drivers on their website. Most of the drivers are probably available direct from the manufacturer, like the Intel NICs, but it’s something to be aware of.
Test Setup
| CPU | Intel Core i7-5930K |
| Motherboard | Asus X99-M WS (naturally) |
| Cooling | NZXT X41 with Noctua 140mm iPPC-2000 PWM |
| PSU | SilverStone Strider Gold Evolution 1000W |
| RAM | Crucial Ballistix Sport 16GB (2x8GB) DDR4 2400 |
| Video Card | EVGA GTX 980 reference |
| Storage | Samsung 840 EVO 250GB |
| Case | Lian Li PC-6X tray |
| OS | Windows 8.1 64-bit |
Power
Measurements are taken at the wall for the whole system using a Brand 4-1850 power meter.
After 15 minutes idling: 57W
After 15 minutes Prime: 146W
Cinebench R15
With the 5930K at stock clocks it scored 1072 points for the CPU test.
Overclocking
I didn’t have much time for overclocking so don’t take this as the last word on this board’s overclocking ability. To start with I just let the Asus AI Suite 3’s automatic OC tool have at it. It came up with 4.3GHz (100×43) at 1.25V. It ran Prime95 Blend test 12 threads for a little over an hour before crashing. I tried tweaking the settings a bit but couldn’t get it stable running Prime above 4.3GHz. The newer versions of Prime95 are overly stressful on Haswell so I then tried Aida64 as an alternative.
I ran the Aida64 system stability test for an hour and a half at 4.55GHz (101.1 x 45) 1.30V with no issues but then it locked up when I tried to run Cinebench. Unfortunately I ran out of time to mess with it further so I can’t really comment either way on the overclocking capability of this board.
Conclusion
Overall the Asus X99-M WS is very impressive. It looks fantastic, the BIOS is feature-rich and easy to navigate, all the fan headers are really PWM capable and easy to control, power delivery seems robust, the USB 3.0 header is well-positioned for dual-GPU, network connectivity is best in class, etc. To me it’s almost the perfect microATX X99 board but is marred by a lackluster M.2 port that’s limited to PCIe 2.0 x2.
It is listed for $276 on Newegg, making it the most expensive mATX X99 board currently on the market, though not by that much. In the end though, whether the X99-M WS is worth the premium comes down to your particular needs because no single mATX X99 board currently available delivers everything for everybody. For example, if you’re like me and aren’t planning on using a high-performance M.2 drive (I have an Intel 750 AIC) but need an Intel NIC, PCIe 3.0 x8 on the bottom slot, good fan controls, and want to use a large air cooler, then the X99-M WS is the best option so far.
Edit: Forum member veryrarium alerted me to a variant of this board, the ASUS X99-M WS/SE. As far as I can tell the only difference is the SE lacks the WiFi/Bluetooth module.
Thoughts? Discuss them here