
ASRock’s DeskMini series has been a stalwart in the SFF world for some time now, even with the canning of the GTX/RX series (Rest in Peace, MXM graphics cards). Eschewing standard form factors to enable denser computers, the DeskMini has been the basis of many builds and mods in our community forum. But the challenge with the DeskMini has always been hardware compatibility – only really supporting CPU, RAM and storage upgrades. What if we wanted more graphics power and more RAM? Enter the DeskMeet.
As a larger brethren to the DeskMini, the new DeskMeet series significantly increases component compatibility at the expense of size.
Is the size sacrifice worth it? Let’s find out.
Table of Contents
Specifications
| Model | ASRock DeskMeet B660 |
| Product webpage | https://www.asrock.com/nettop/Intel/DeskMeet%20B660%20Series/index.asp?cat=#Overview |
| CPU Support | 12th Gen Intel® Core™ Processors (LGA1700) |
| Memory | 4 slots of Dual Channel DDR4 Non-ECC, Unbuffered, up to 3200*. Max 128GB |
| Chipset | Intel B660 |
| Audio | Realtek ALC897 |
| Storage |
-3 x SATA3 6.0GB/s ports -1 x Hyper M.2 Socket (M2_1), supports type 2280 SATA3 6.0Gb/s & PCIe Gen4x4 (64 Gb/s) modes -1 x Hyper M.2 Socket (M2_2), supports type 2280 PCIe Gen4x4 (64 Gb/s) mode Supports Intel Optane |
| Networking | Giga PHY Intel I219V |
| Expansion Slots |
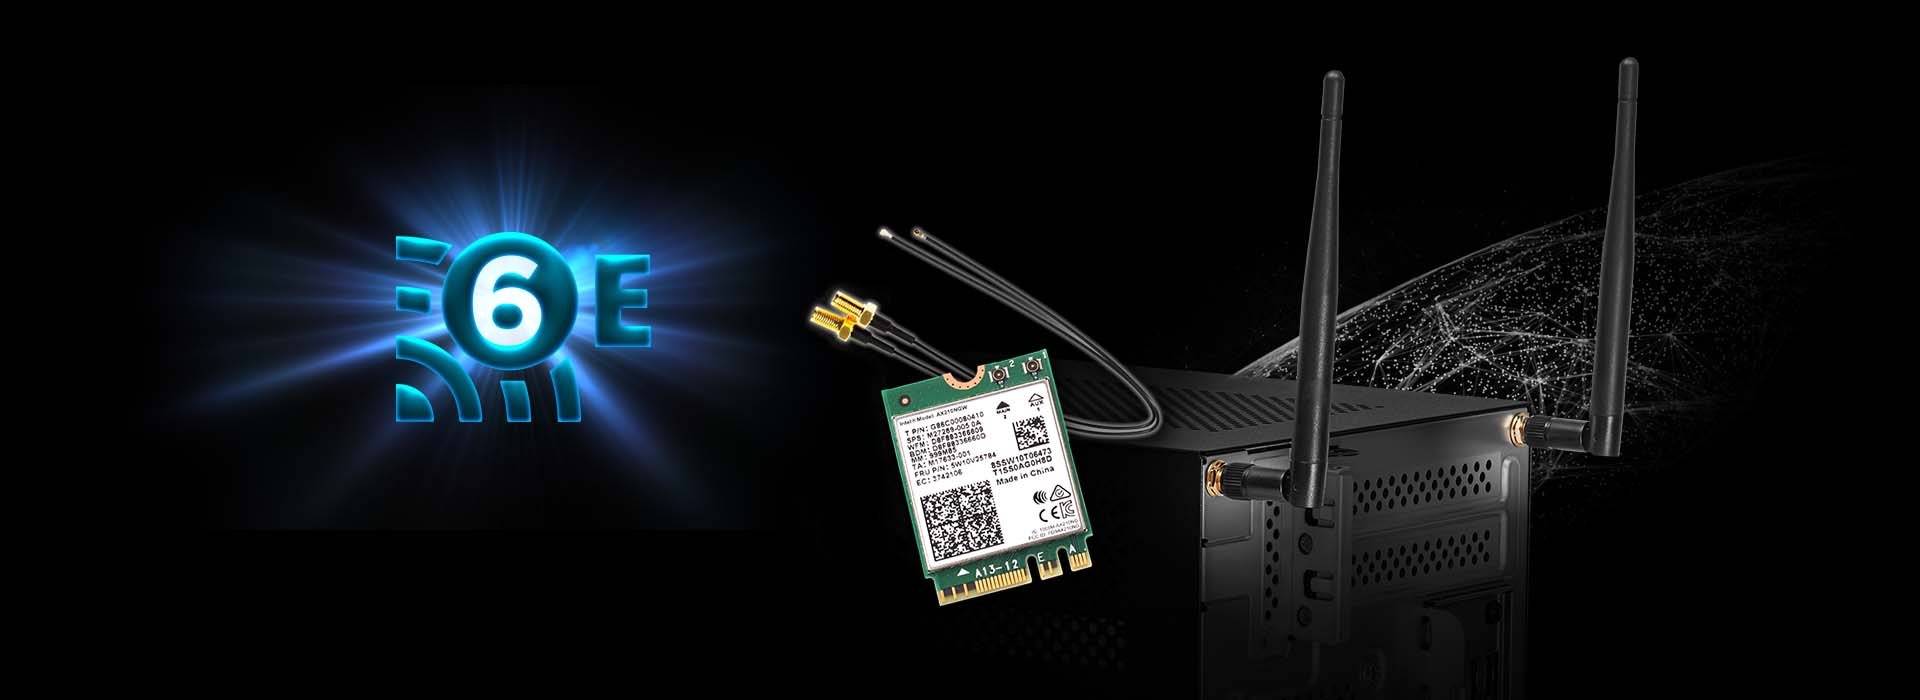
-1x PCIe 4.0 x 16 -1 x M.2 Socket (Key E), supports type 2230 Wi-Fi/BT module and Intel® CNVi (Integrated Wi-Fi/BT) (Not included) |
| Integrated Front I/O | – 1 x Headphone/Headset Jack – 1 x USB 3.2 Gen1 Type-C – 2 x USB 3.2 Gen1 Type-A – 2 x USB 2.0 Type-A |
| Rear I/O | – 1 x DisplayPort 1.4 – 1 x HDMI – 1 x D-Sub – 2 x USB 2.0 – 2 x USB 3.2 Gen1 Type-A – 1 x RJ-45 LAN Port – HD Audio Jacks: Line in / Front Speaker / Microphone |
| Internal Connectors | – 1 x Chassis Intrusion Header – 1 x CPU Fan Connector (4-pin) – 1 x Chassis/Water Pump Fan Connectors (4-pin) – 1 x 24 pin ATX Power Connector – 1 x 8 pin 12V Power Connector – 1 x Front Panel Header – 1 x USB 2.0 Headers (Support 2 USB 2.0 ports) (Supports ESD Protection) |
| Power Supply | Channel Well 500W ATX Power Supply (80+ Bronze, 550W peak) |
*I tested at DDR4-3600 with no issues
Physical Specifications
| Dimensions (ASRock Supplied, Our calculations in Bold) | – 168 (W) x 219.3 (D) x 218.3(H) mm (excl. Protrusions) = 8.04L – 168 (W) x 236.1 (D) x 221.6(H) mm (incl. Protrusions) = 8.79L |
| Volume (ASRock Supplied) | 8L |
| CPU Cooler Height with included PSU | ≦ 54mm |
| PSU Support | ATX, SFX, SFX-L |
| GPU Support | ≦ 200mm* |
*No mention of maximum card thickness, however I’ve measured in at no more than a true dual slot card)
Overview
The ASRock DeskMeet family, on the surface, appears to be a larger brother to the DeskMini series, but that similarity is only name deep. Using a “standard” form factor motherboard, a ‘standard” power supply (I’ll get back to this), and support for a standard SFF graphics card, this is a more mainstream cousin in effect. But, before I dig any deeper, let’s dig into the packaging!
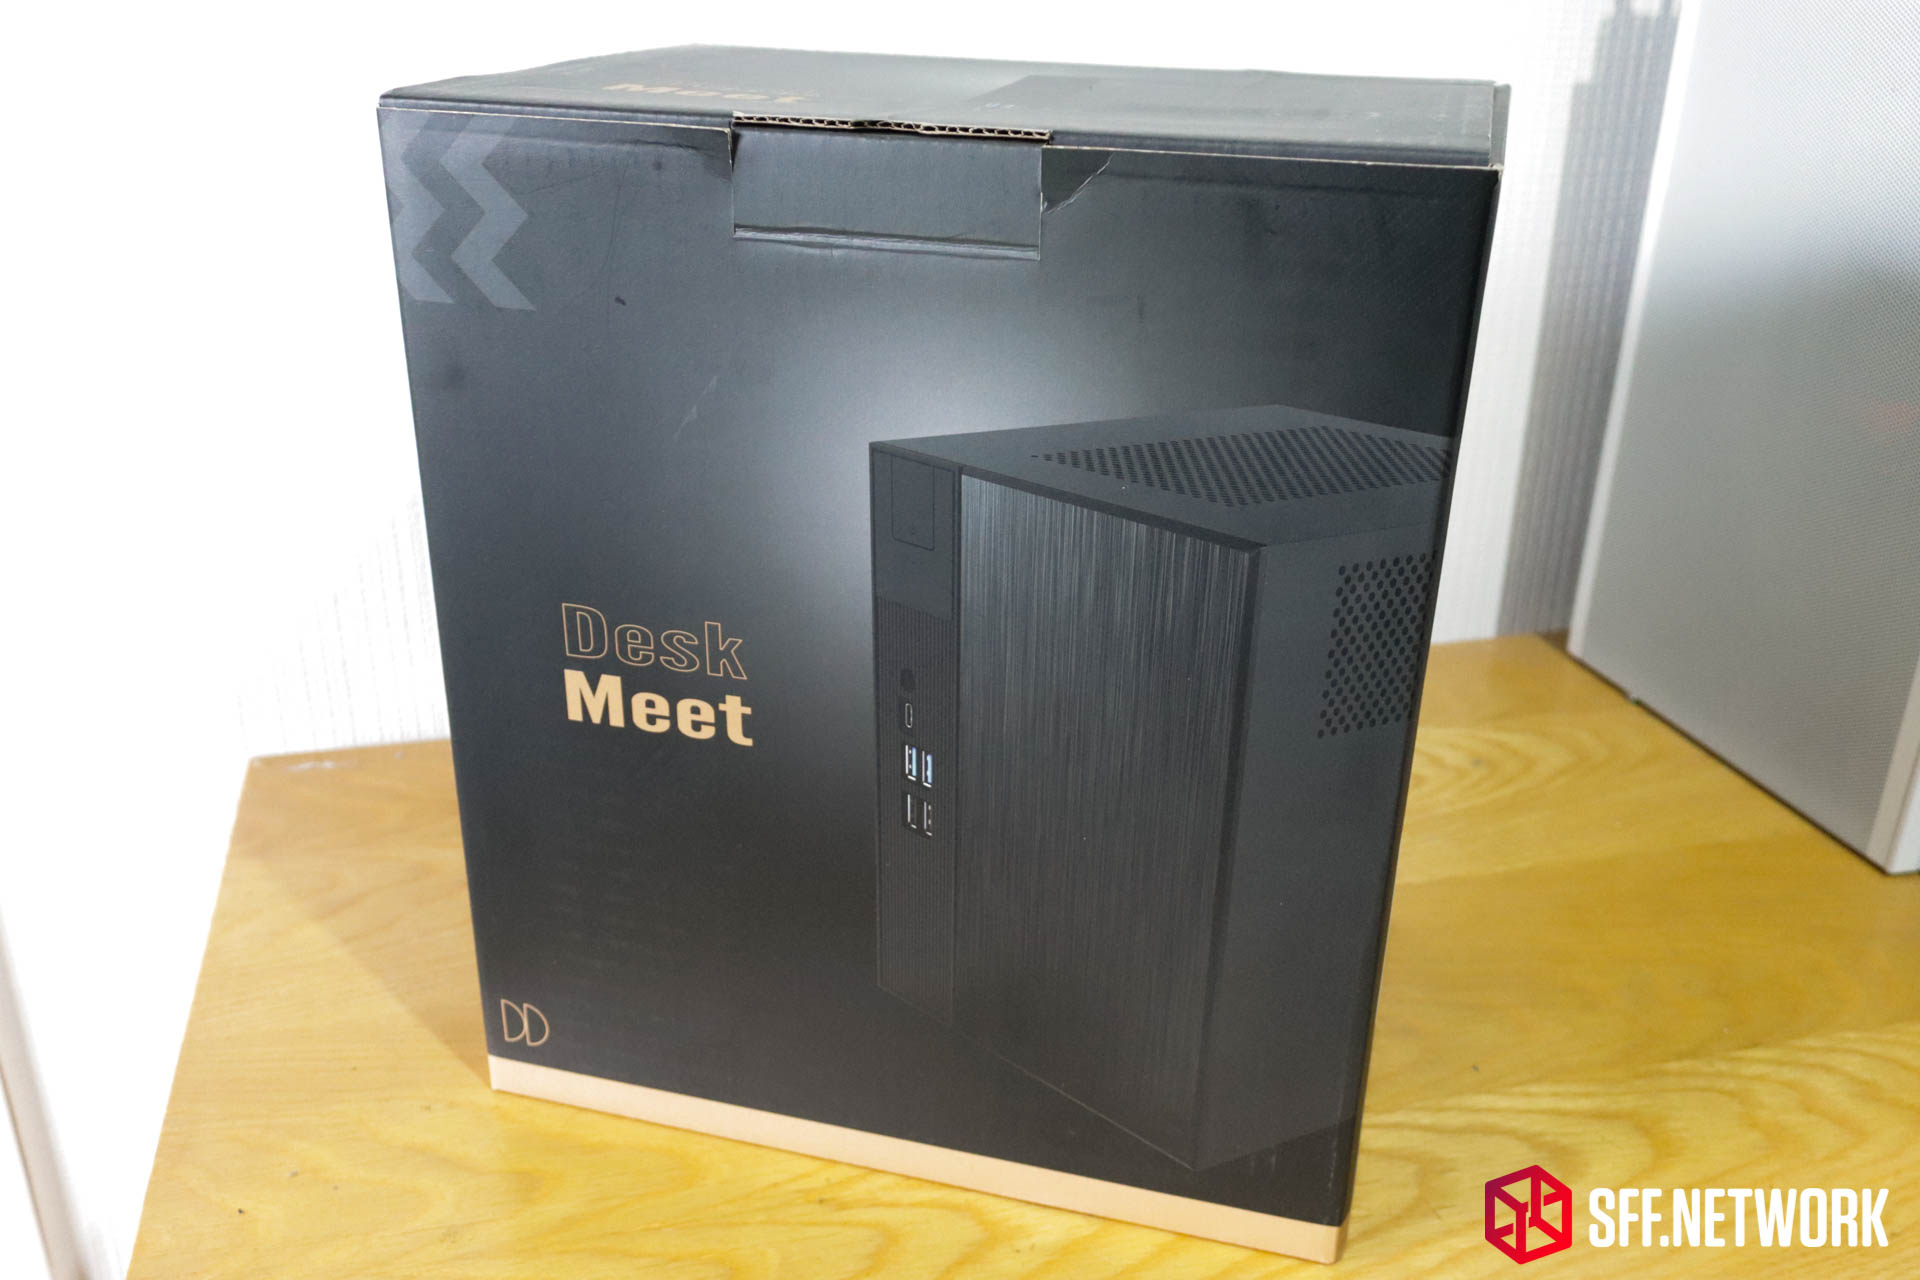
A simple printed box encloses the DeskMeet – in full colour, even though that’s mostly shades of black. Gold accents punctuate the logo – is this a premium product?
The box is a greasy fingerprint magnet – sorry! I guess I was super excited to unbox this new concept in SFF.
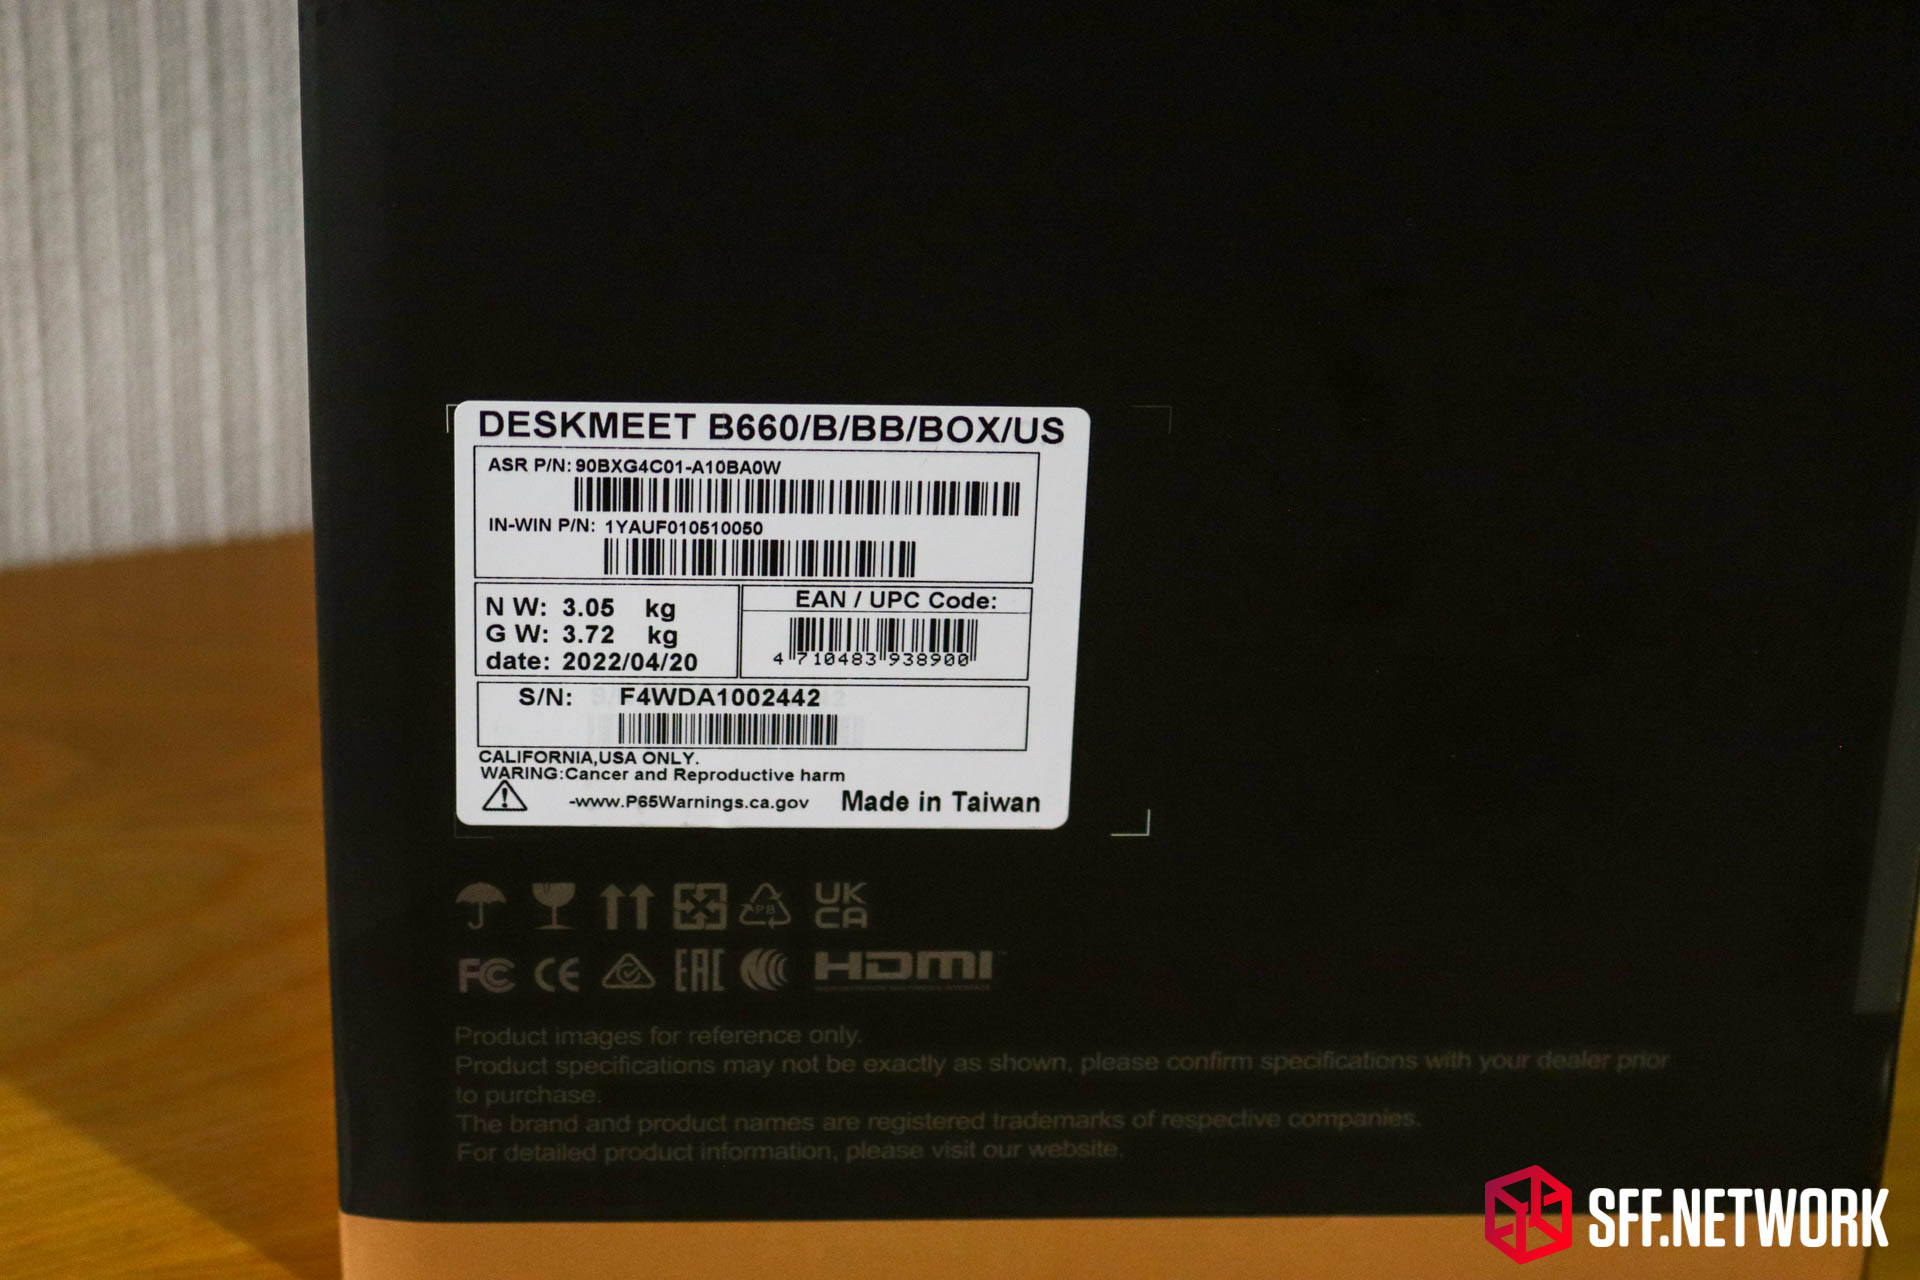
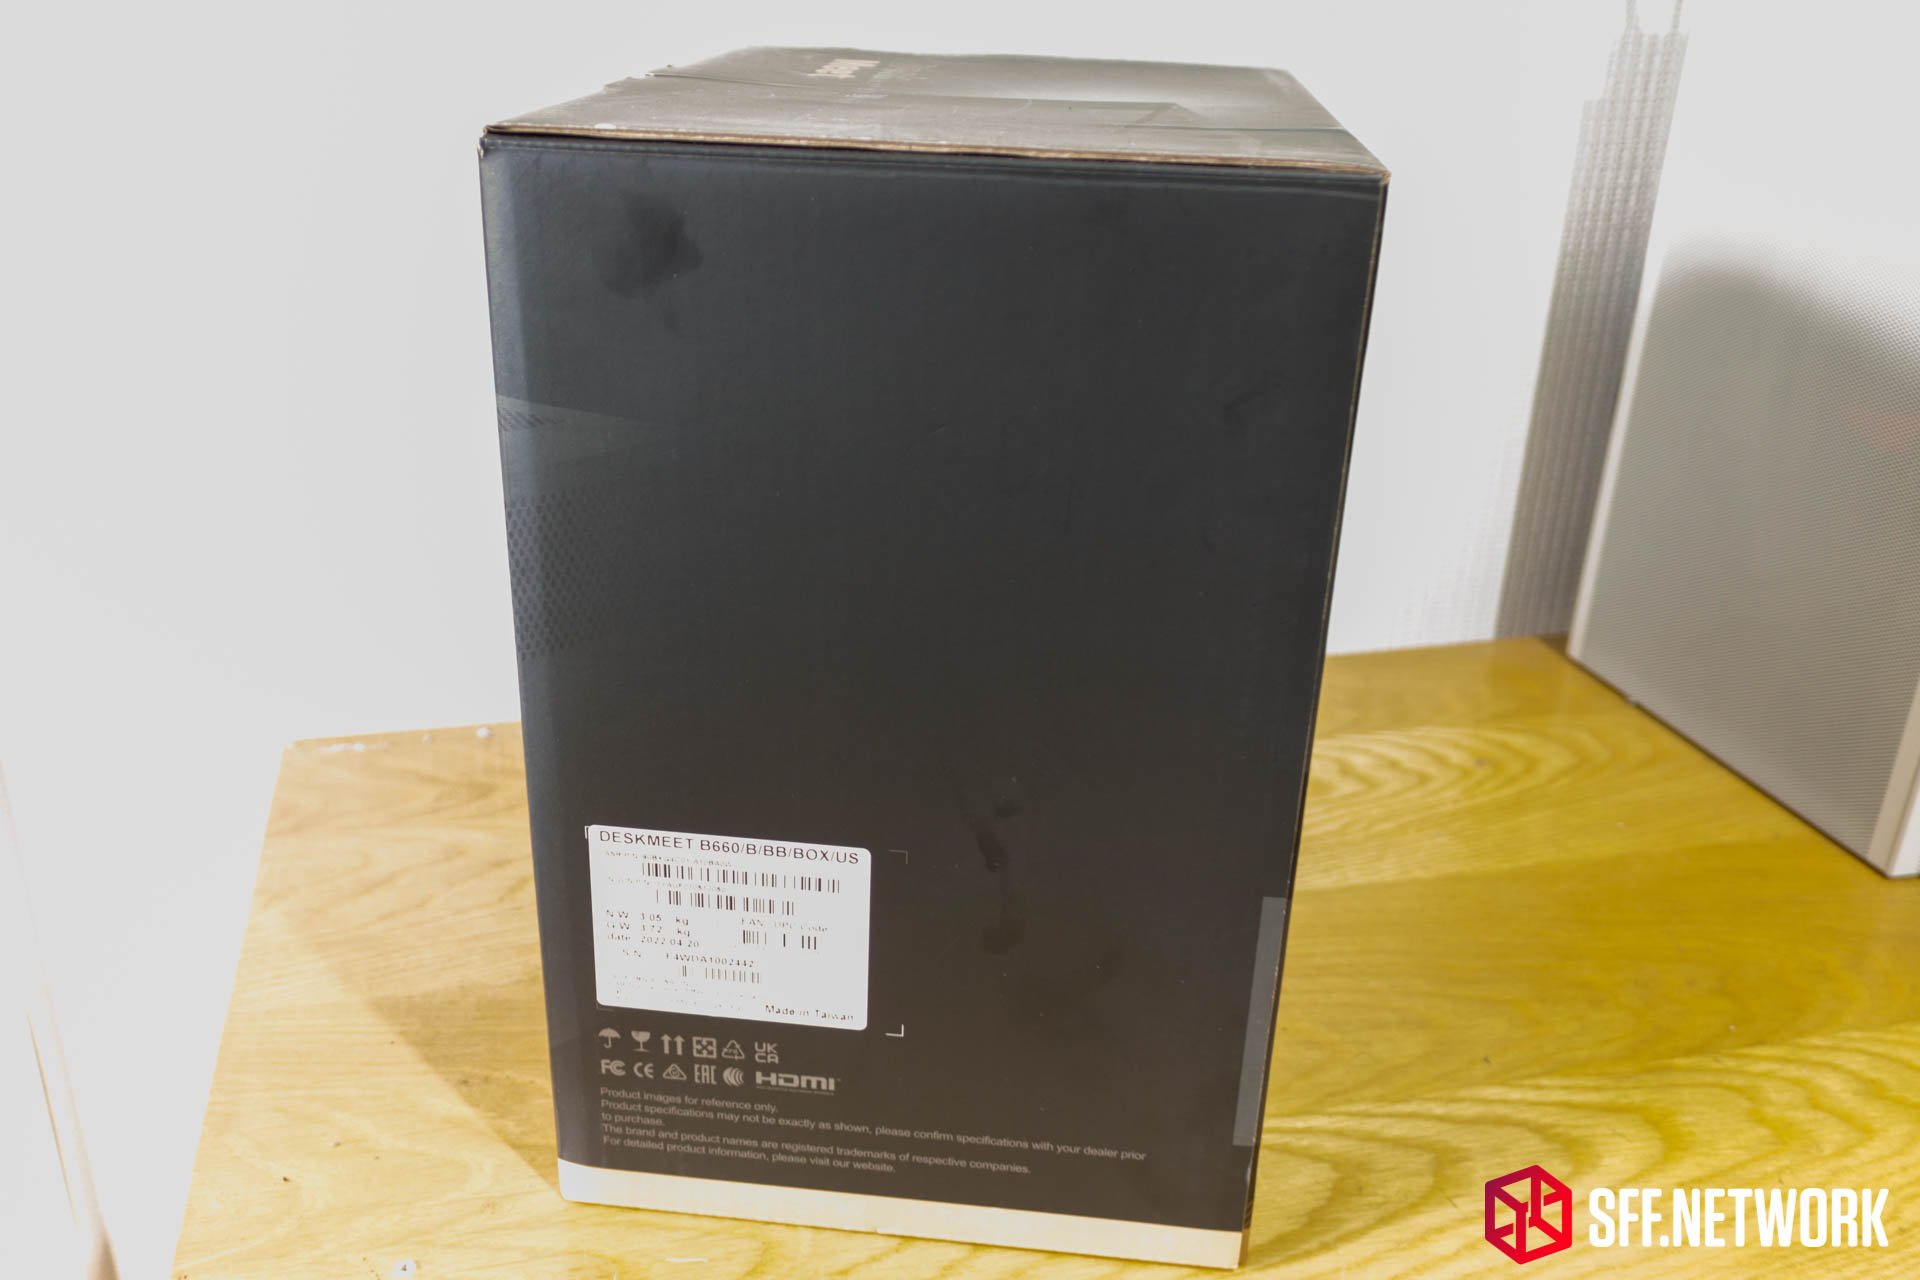
So, this is a DeskMeet B660, in black, BB(?) in a box (woo!) for the US market. Guess I’ll have to find my own power cable. Interesting to note the ASRock part number – expected – and an In-Win part number. I guess we know who made the chassis! As always, there’s the Californian Cancer waring (typo as per label) and date of production. Hopefully this system was produced pre-partaking of the greenery.
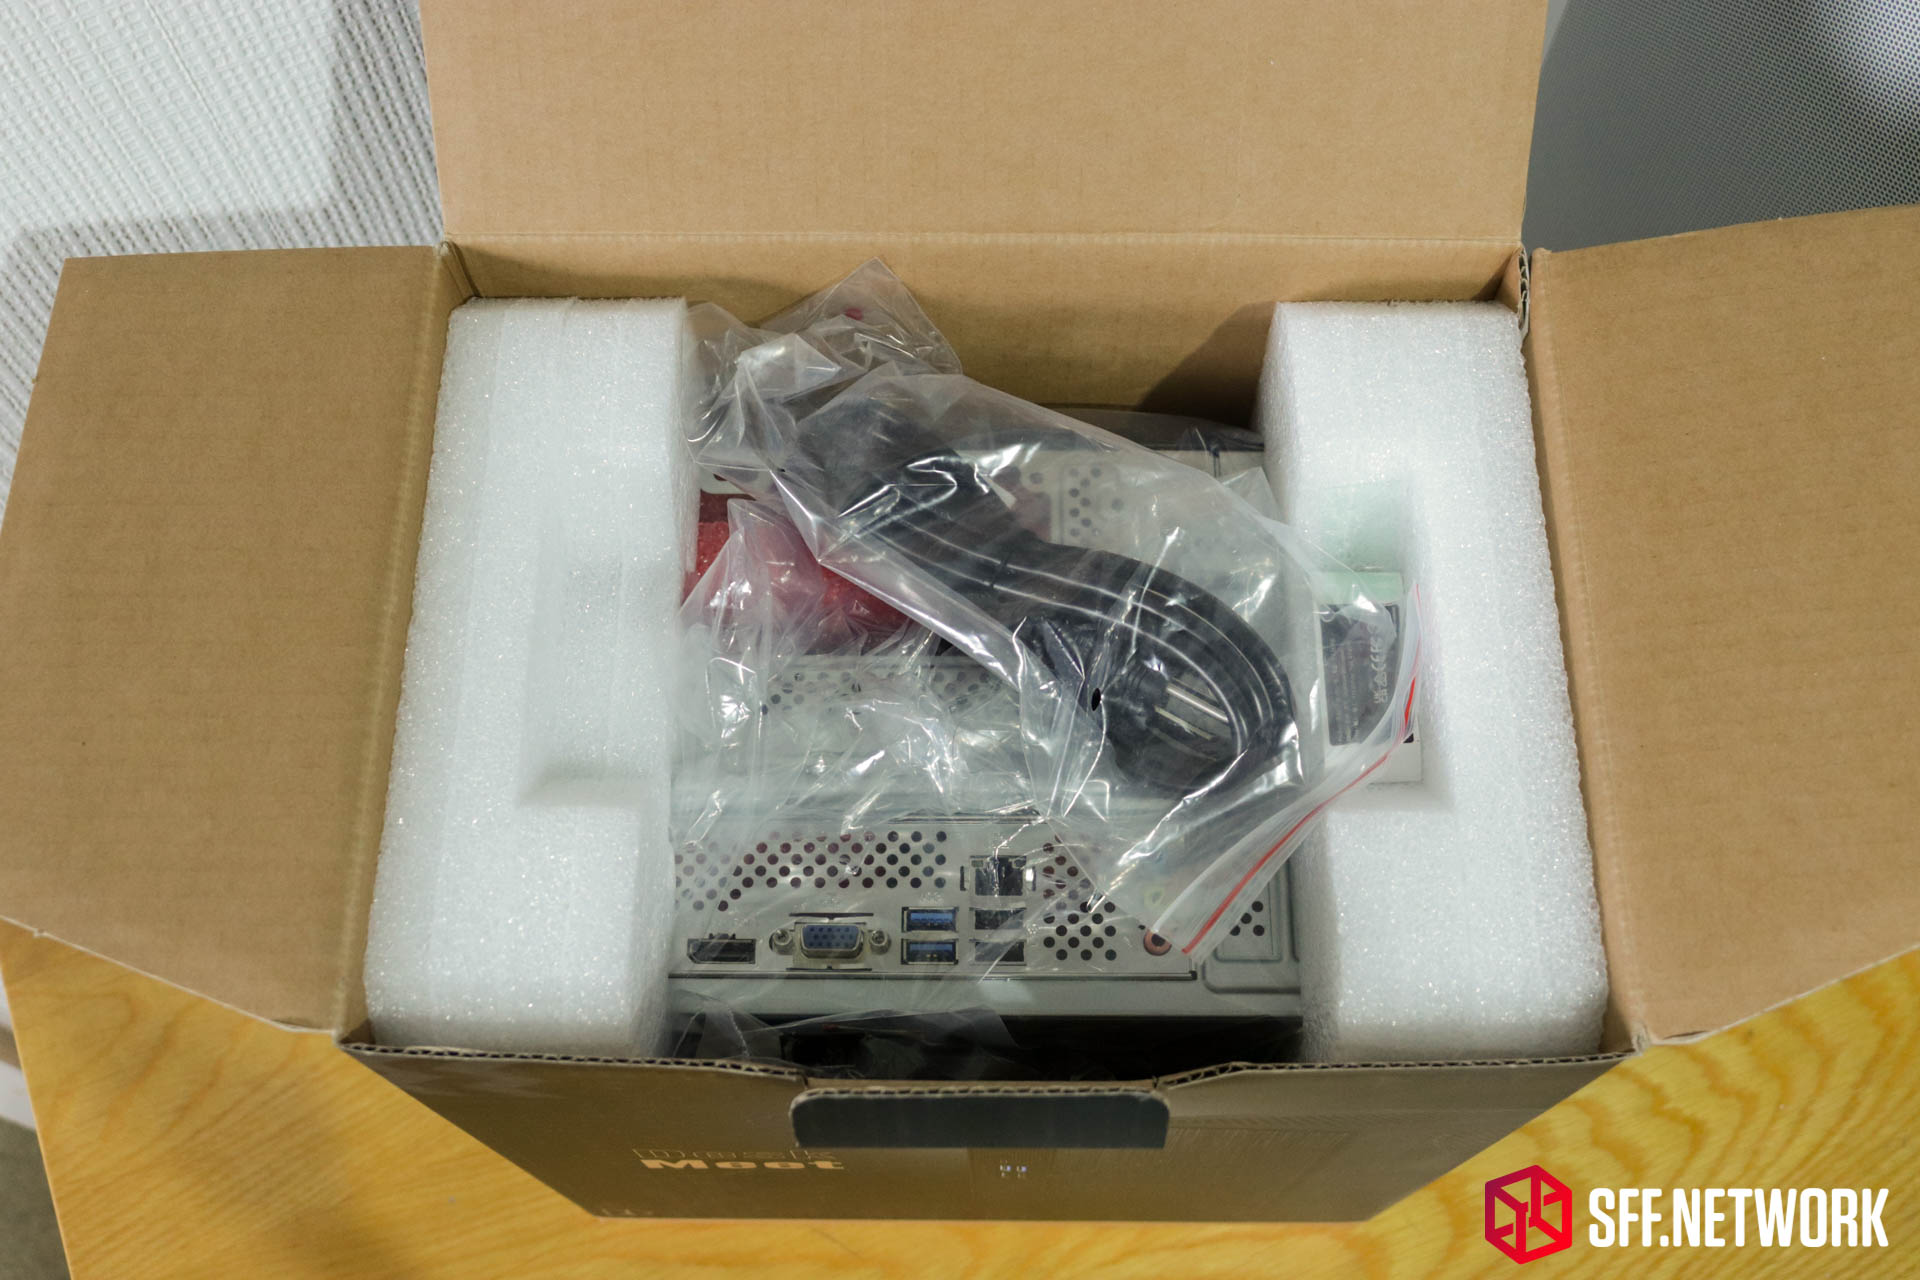
Opening the box, we are greeted with the accessories bundle on the top and down one side – a power cable that I will have no use for, a serial sticker and…
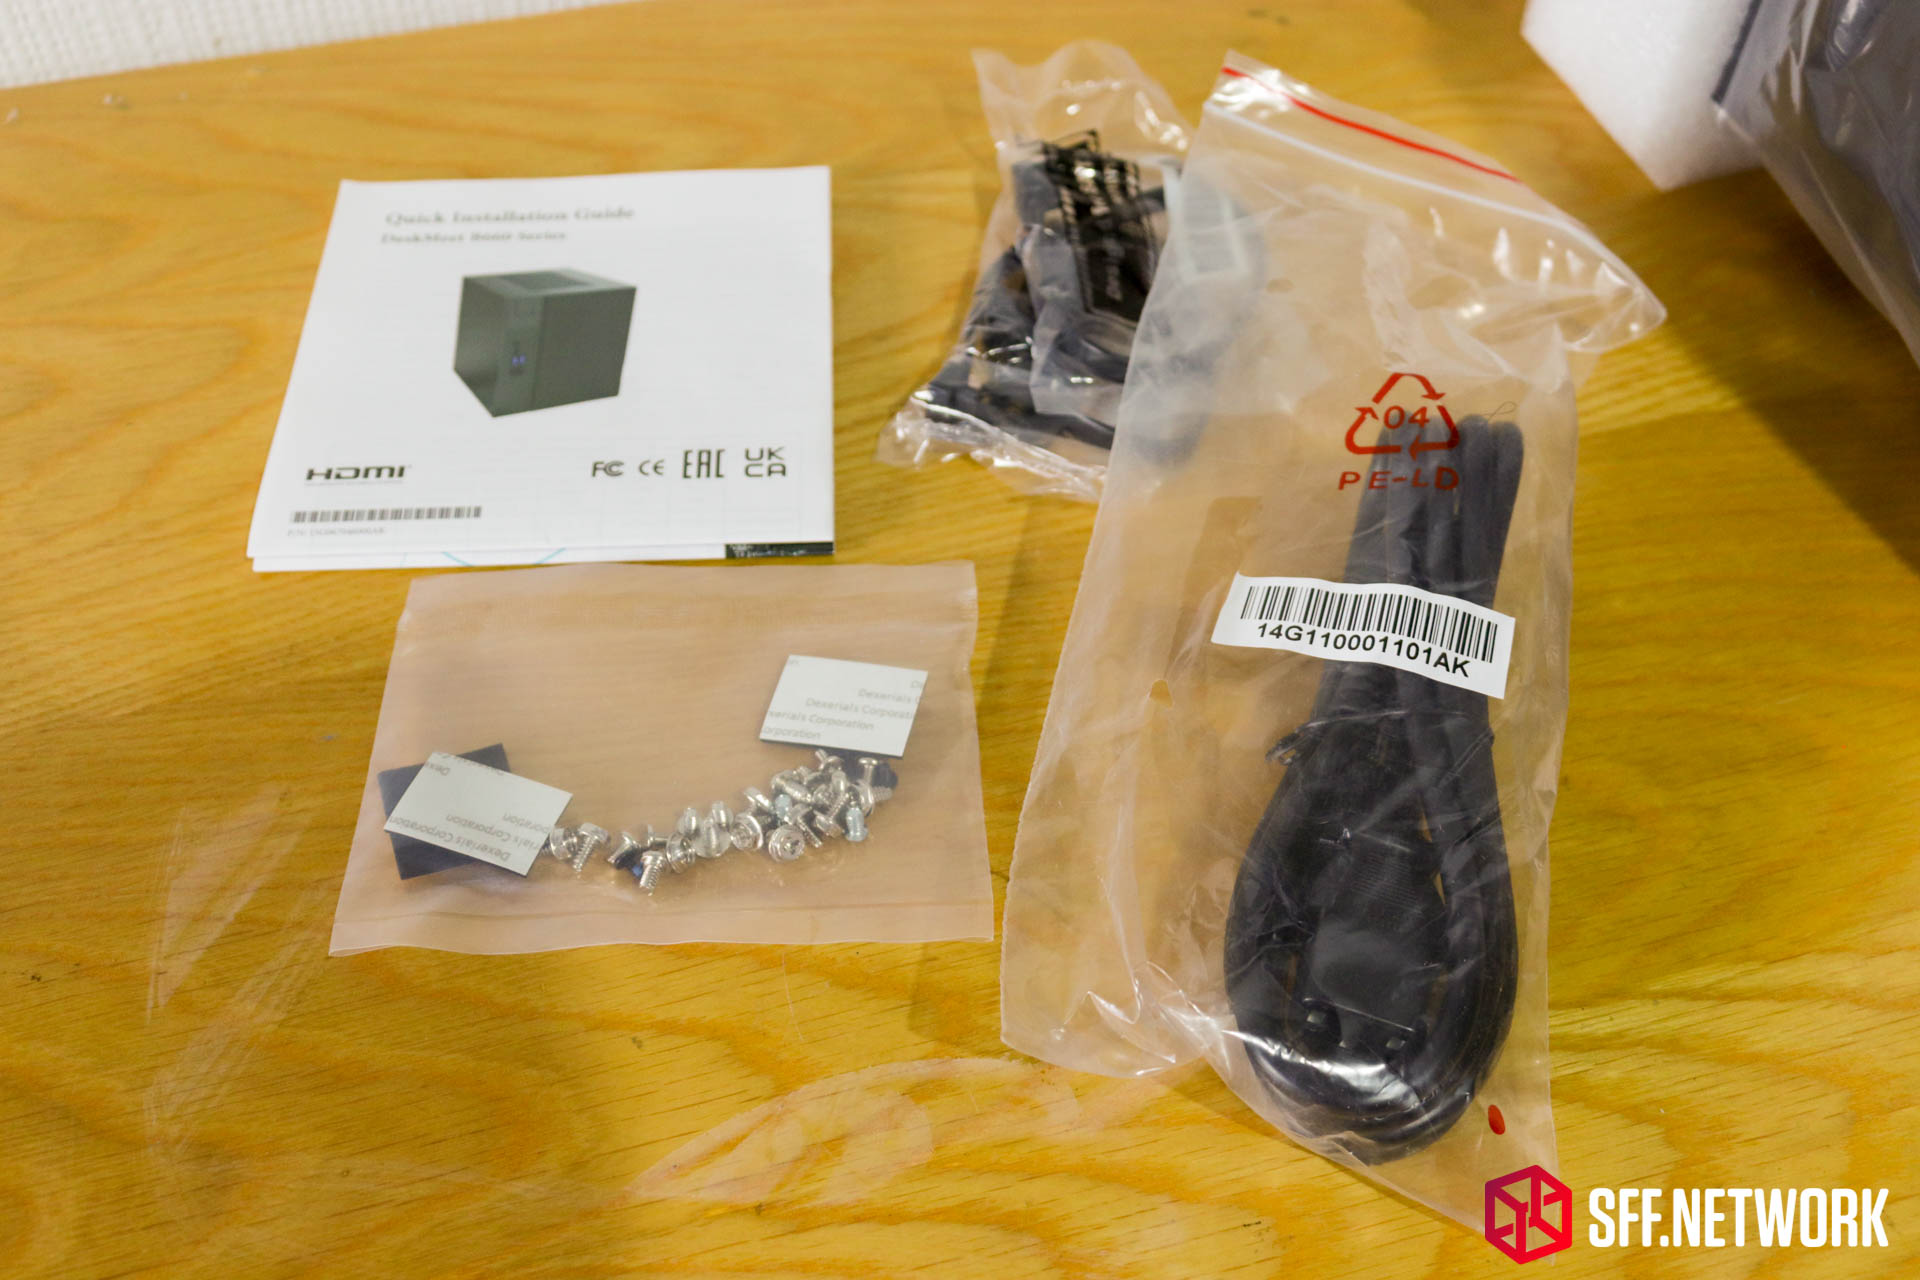
A manual, bag of screws and rubber feets, and a pair of black SATA cables. The manual is a fold out quick start guide, a copy of which can be found here. The quick start guide is high quality, and very much appreciated in it’s inclusion. Because this boxed unit was destined for the USA market, the power cable isn’t suitable for my location, however the quality seems good.
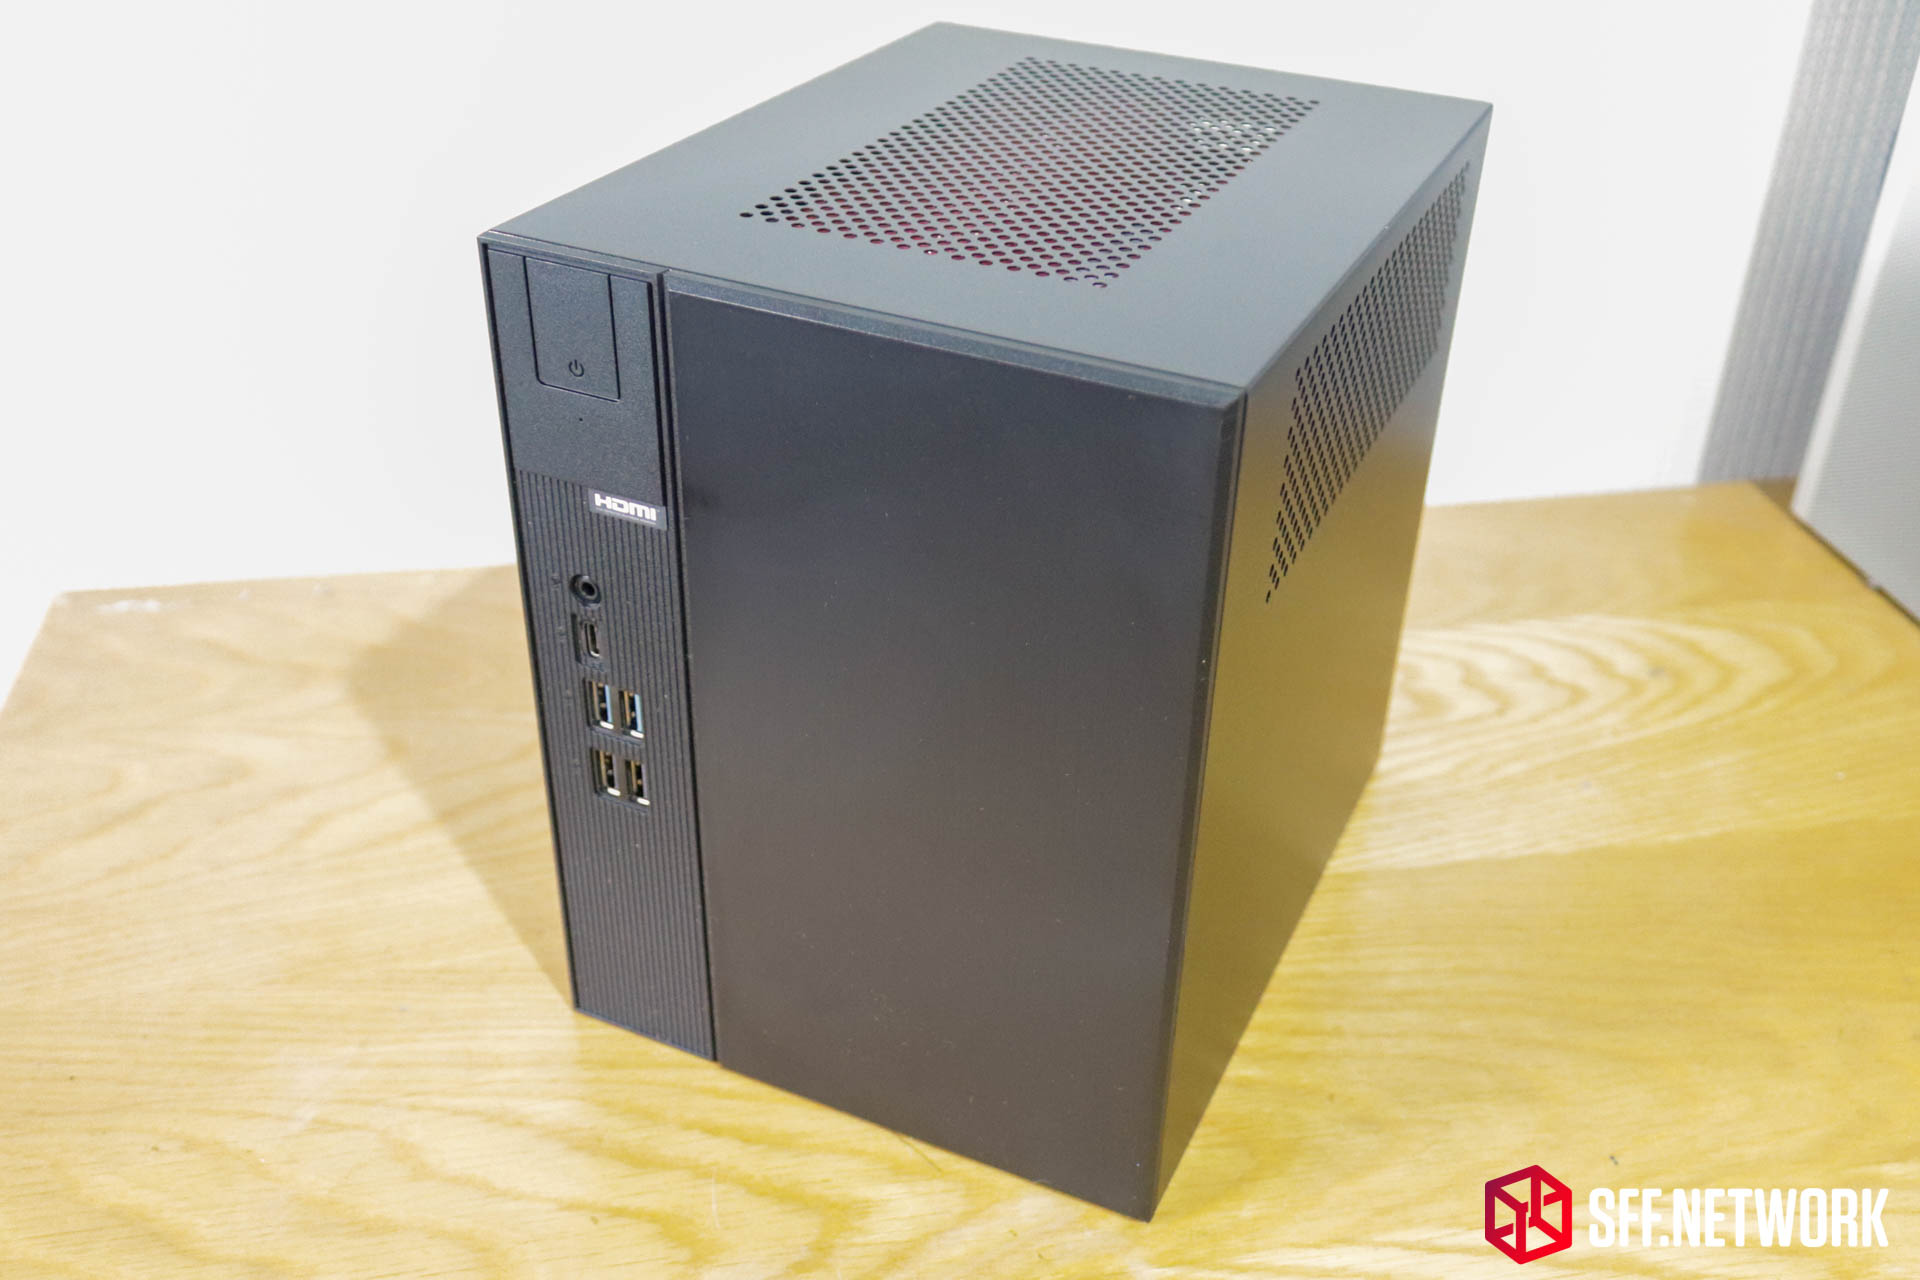
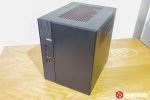
So, let’s meet the ASRock DeskMeet B660. A nondescript black chassis, likely designed for use in an office or HTPC location. A lack of cooling intakes at the front is noticeable, but I’ll have to see if that has any effect on performance later in this article. All the front IO is to the left, which is a side effect of the motherboard’s layout.

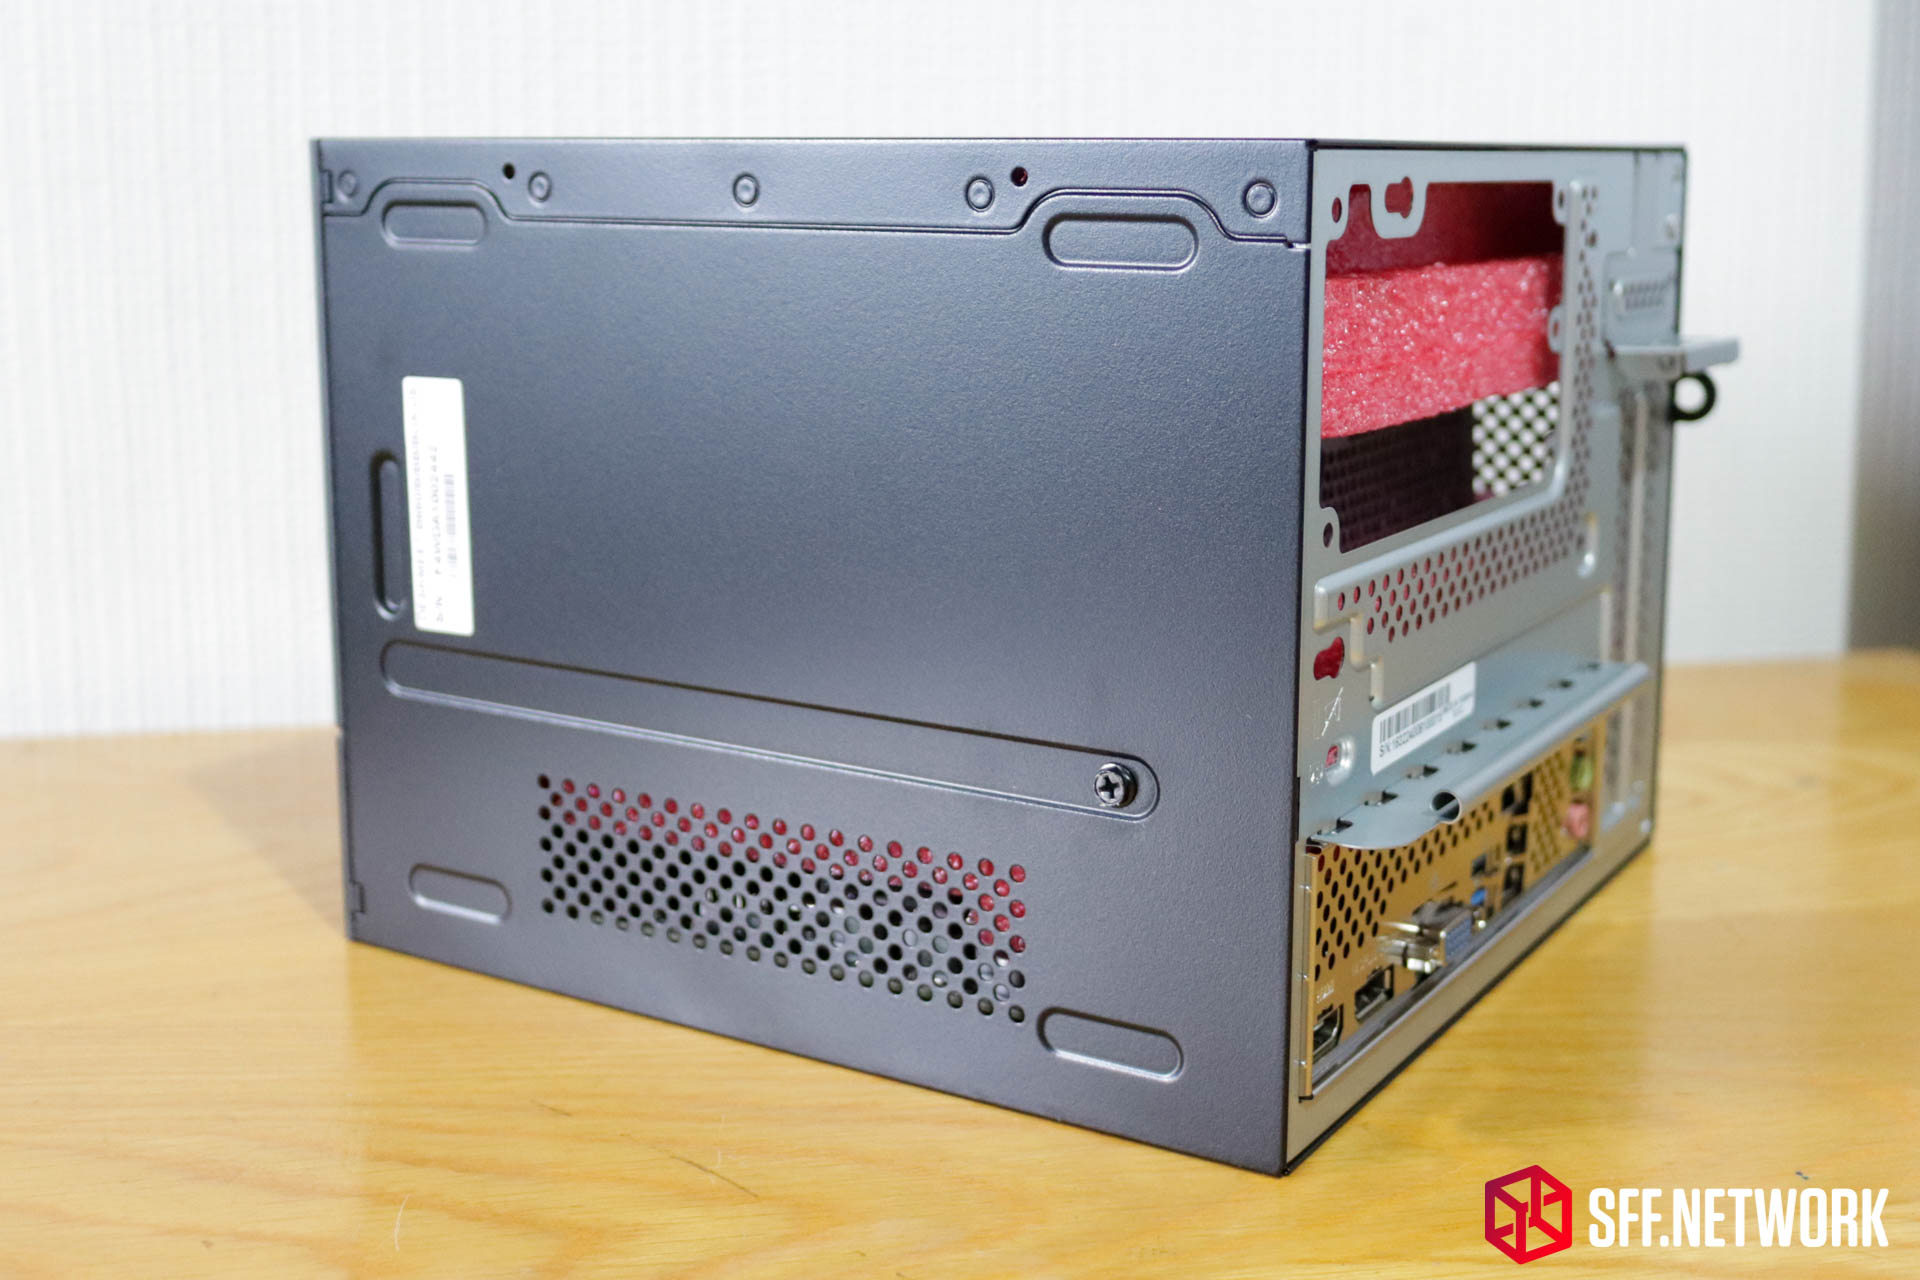
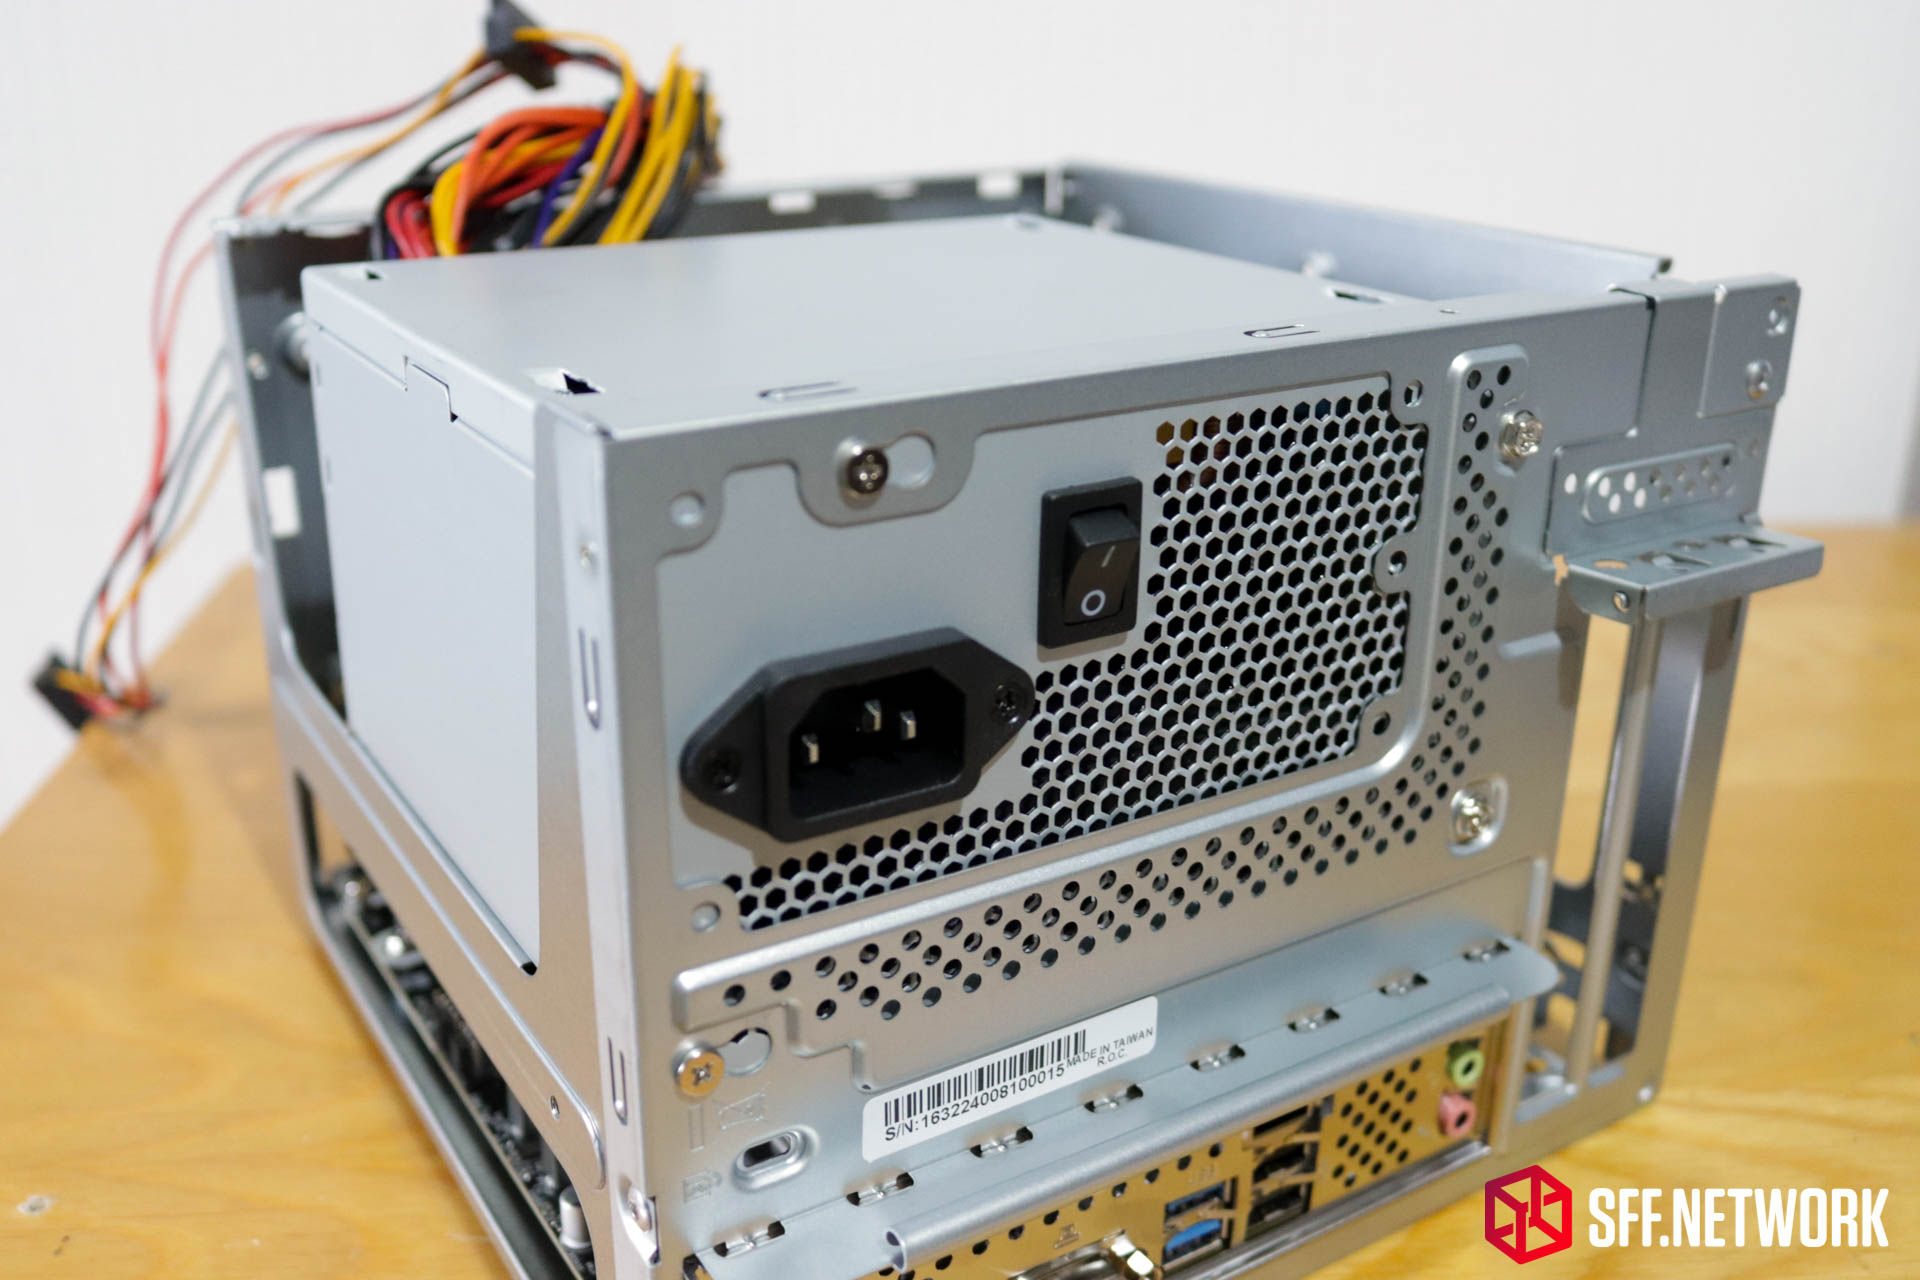
To the rear, we see mounting for a SFX power supply… oh wait… it has ATX mounts too! A standard IO shield is in place, with a relatively sparse IO. Two physical slots exist for the expansion card. A rolled steel handle aids removal of the inner chassis – a welcome addition as quite a few chassis in this configuration neglect to include this feature. The grey SECC steel interior chassis construction is clear to see here – I do wish ASRock had this part of the chassis, at least, painted black.
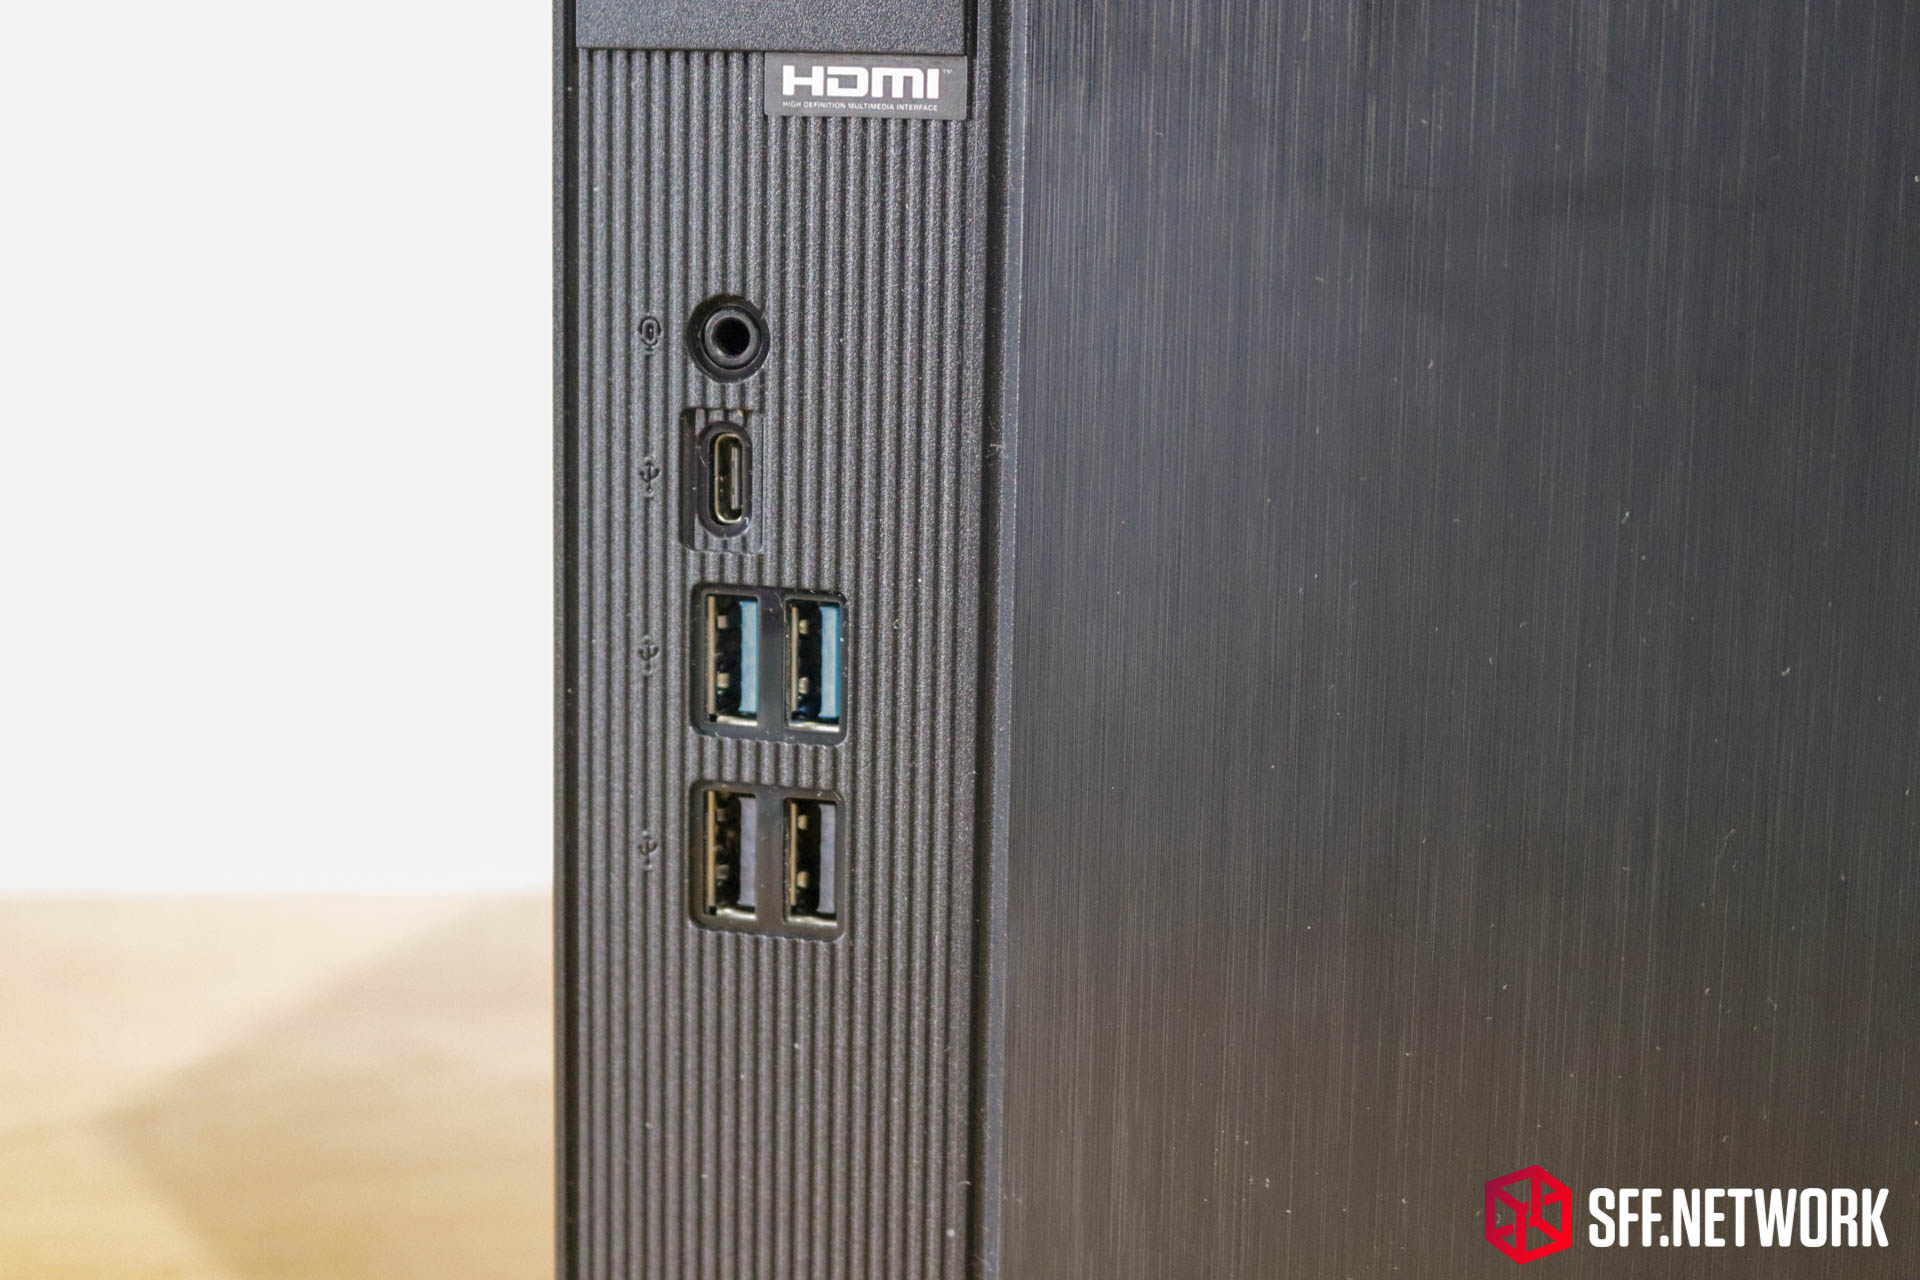
The front IO is quite well equipped compared to modern SFF systems – with a pair of USB2.0 Type-A ports, a pair of USB3.2 Gen1 Type-A ports and a singular USB3.2 Gen 1 Type-C port. (I hate USB nomenclature). Also included is a combo headphone/microphone jack to support your favourite headset in an office, or headphones at home. A little HDMI sticker is present.
Having such a well-equipped front IO is fantastic for creative users, enabling quick addition of card readers, USB drives, cameras, amongst many other peripherals.
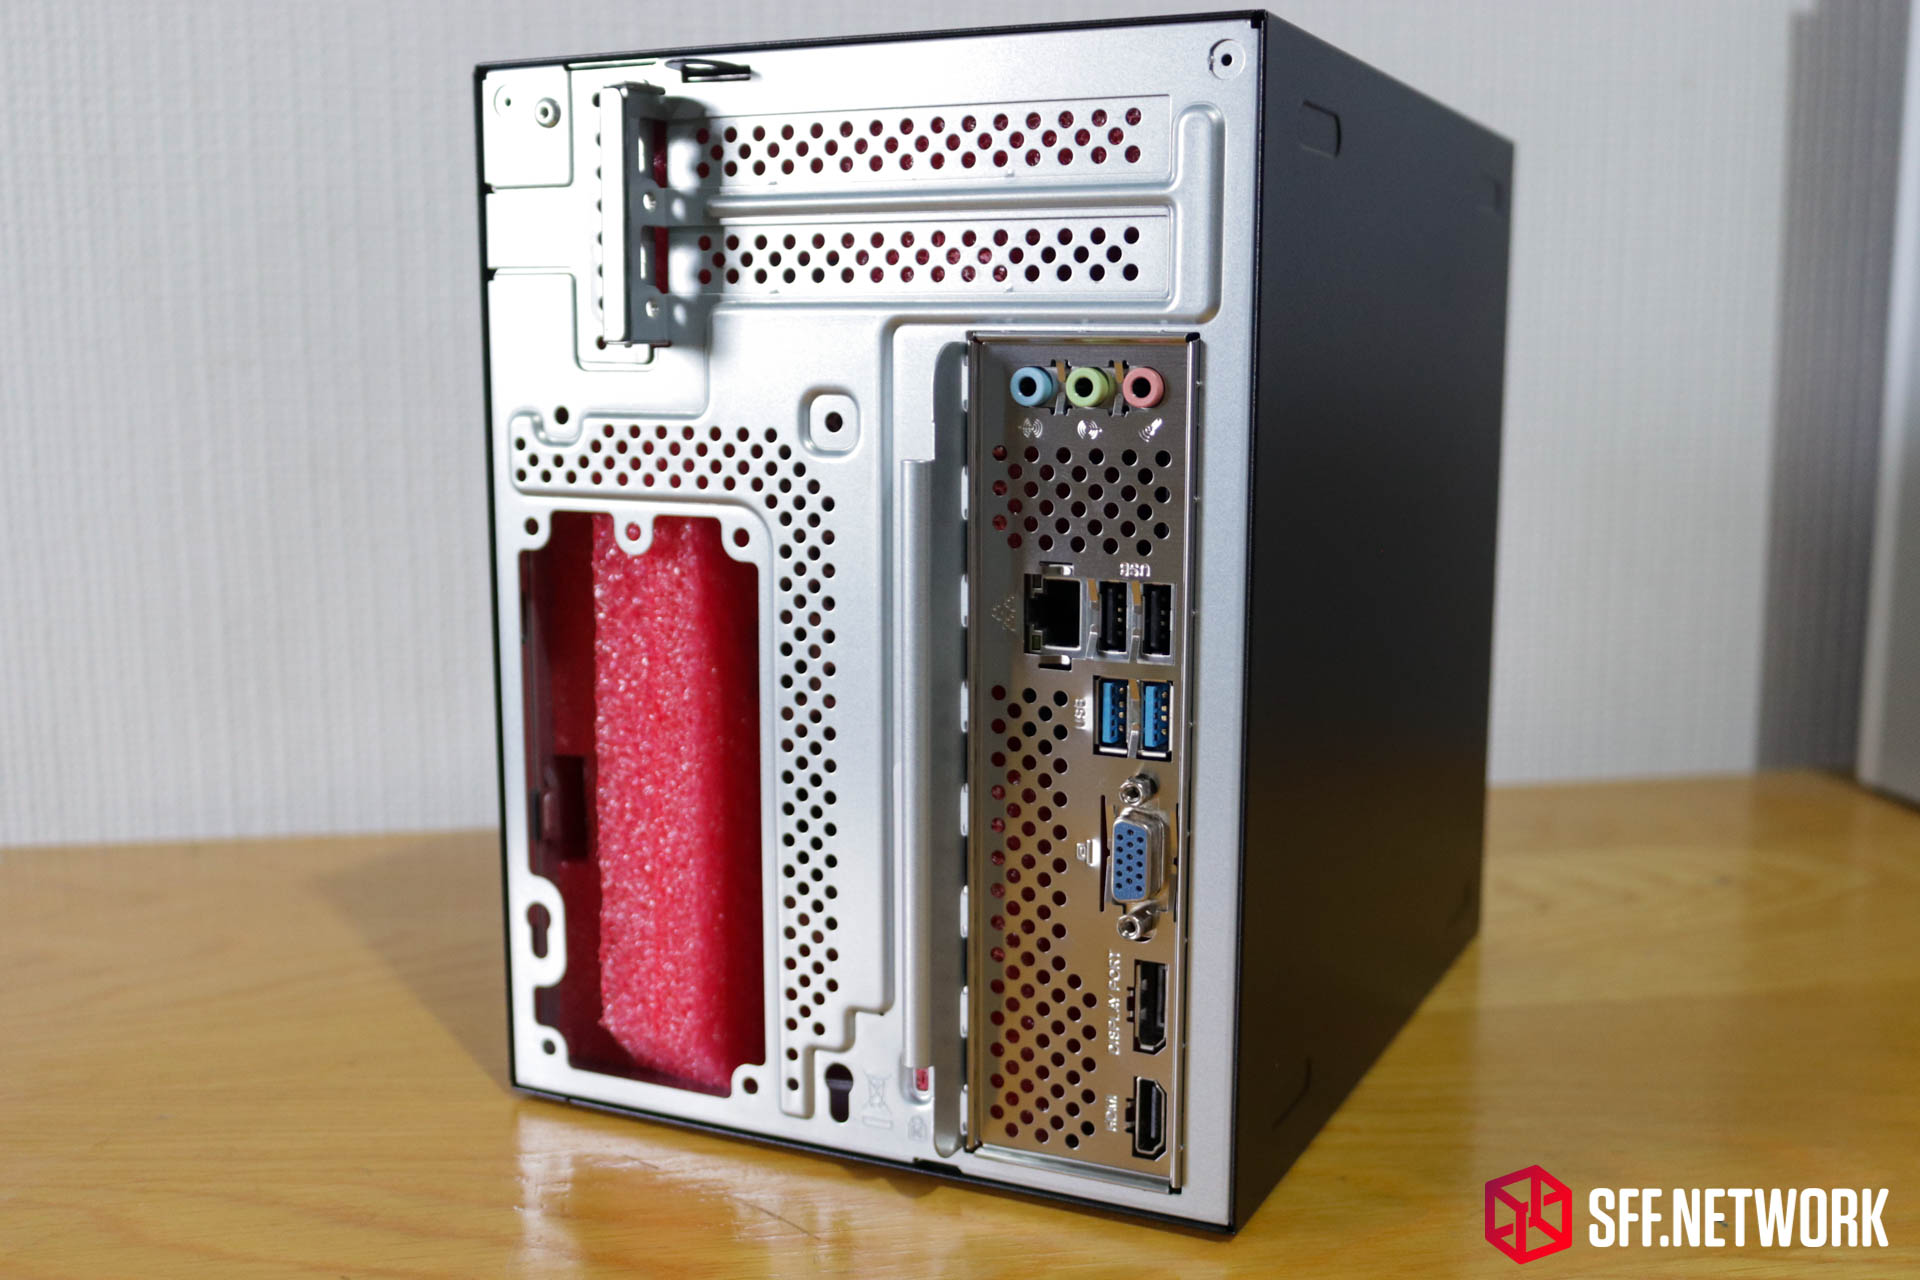
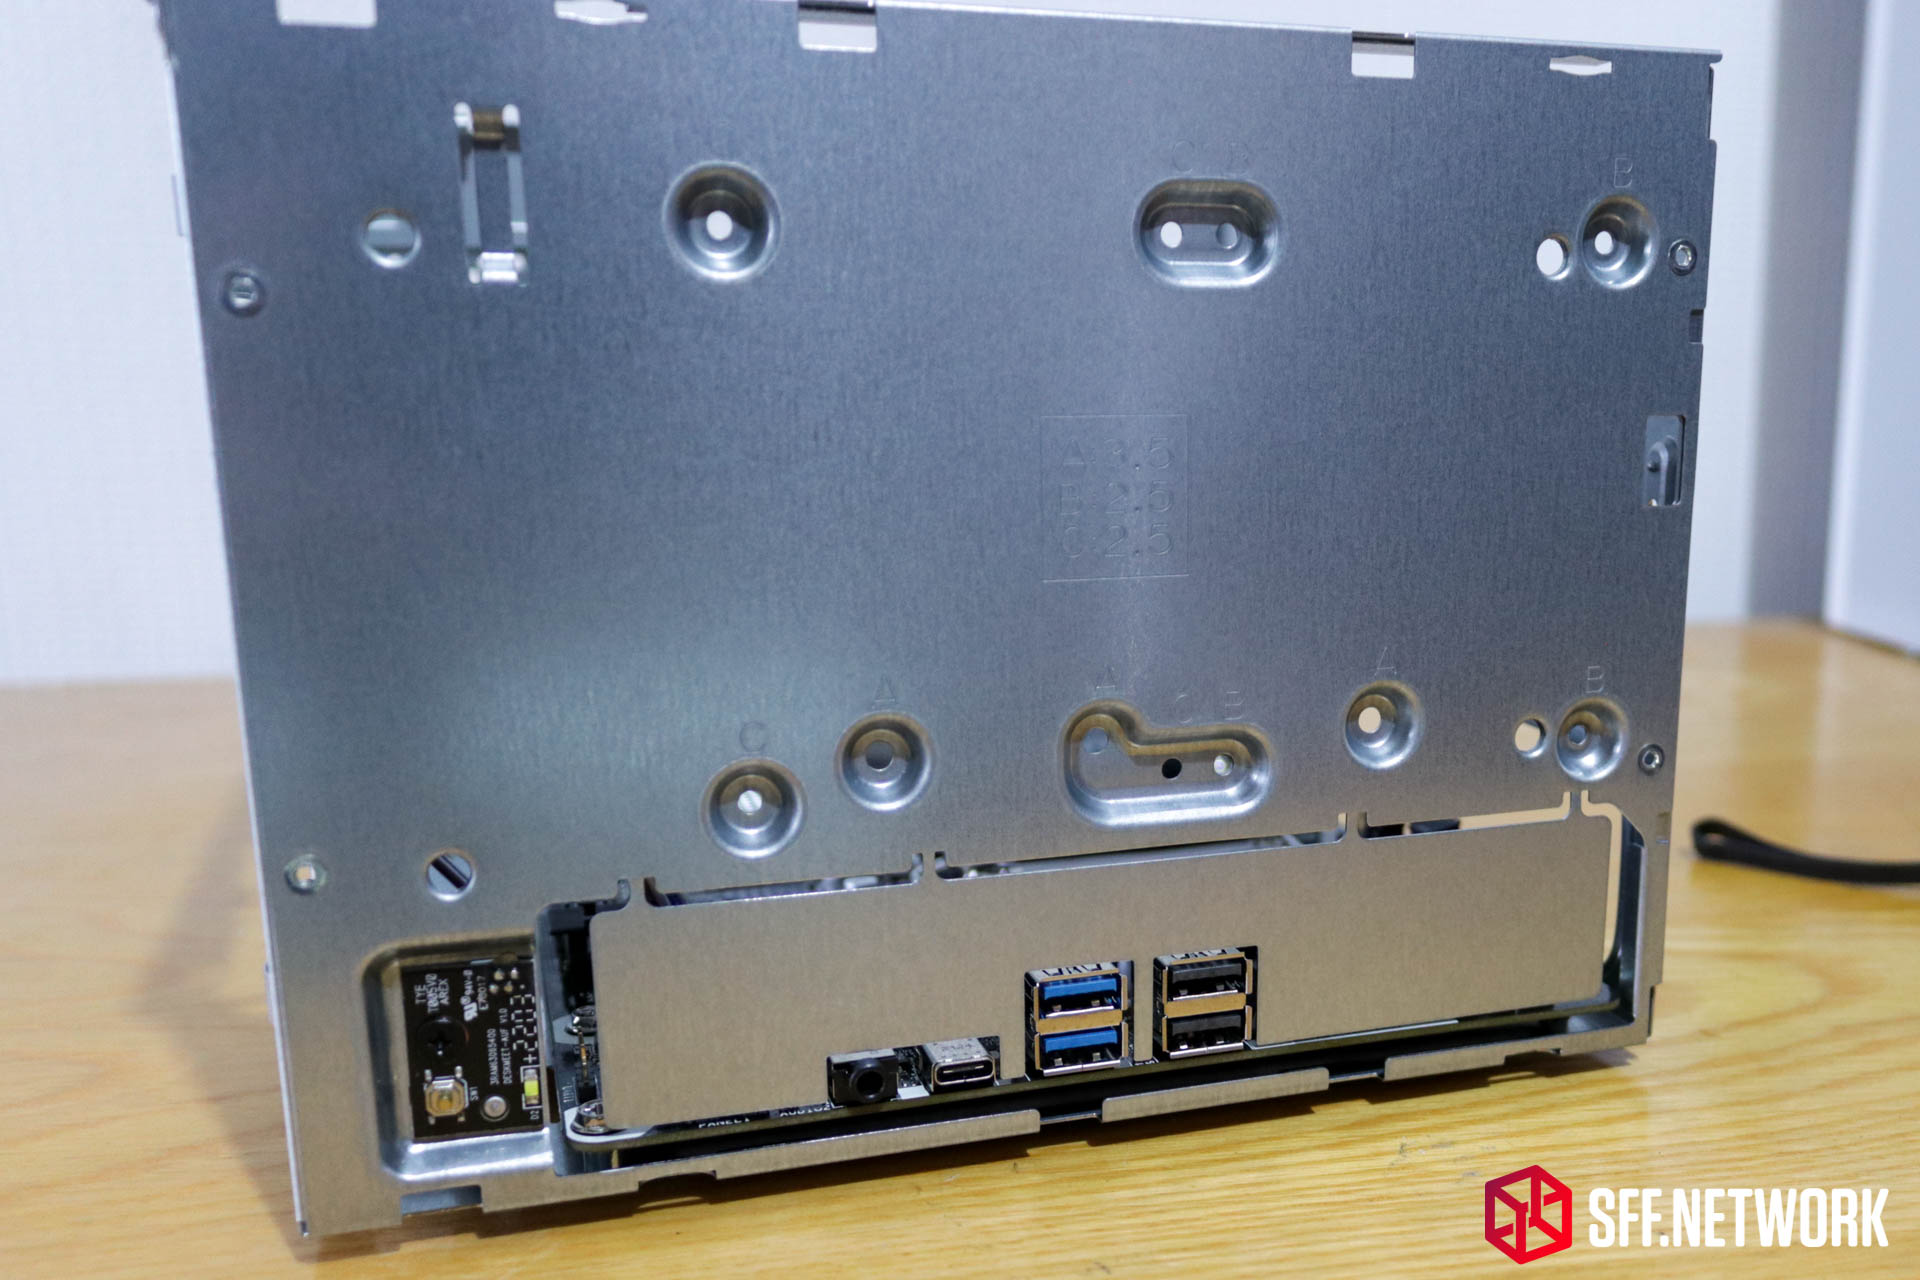
Back to the rear for a look at the IO. Rather minimal for a modern system, unfortunately. Only a pair of USB3.2 Gen 2 Type-A ports, a pair of USB2.0 Type-
A ports, RJ45 for gigabit ethernet and basic HD audio jacks. Also included are a DisplayPort 1.4, VGA and HDMI ports if you wish to use the integrated graphics from a supported processor. Nothing else is included. Slightly disappointing, but I can’t make any further judgement without knowing what price the ASRock DeskMeet B660 will retail for. However, If one takes into account the “relocation” of 3 USB ports (given most systems have a pair of USB ports on the front of the chassis), the rear configuration isn’t as poor as I at first thought.
One thing that I barely noticed – the two antenna mounting holes. To the top left and right of the case are two punch out holes for WiFi antenna. Nicely done, ASRock.
To the bottom of the case – a single 6/32 screw that holds the internal chassis in place, four locations for the included rubber stick on case feet, and a small vent for the CPU cooler. Make sure you install the case feet – the screw protrudes out and will scratch your desk otherwise!
Inside
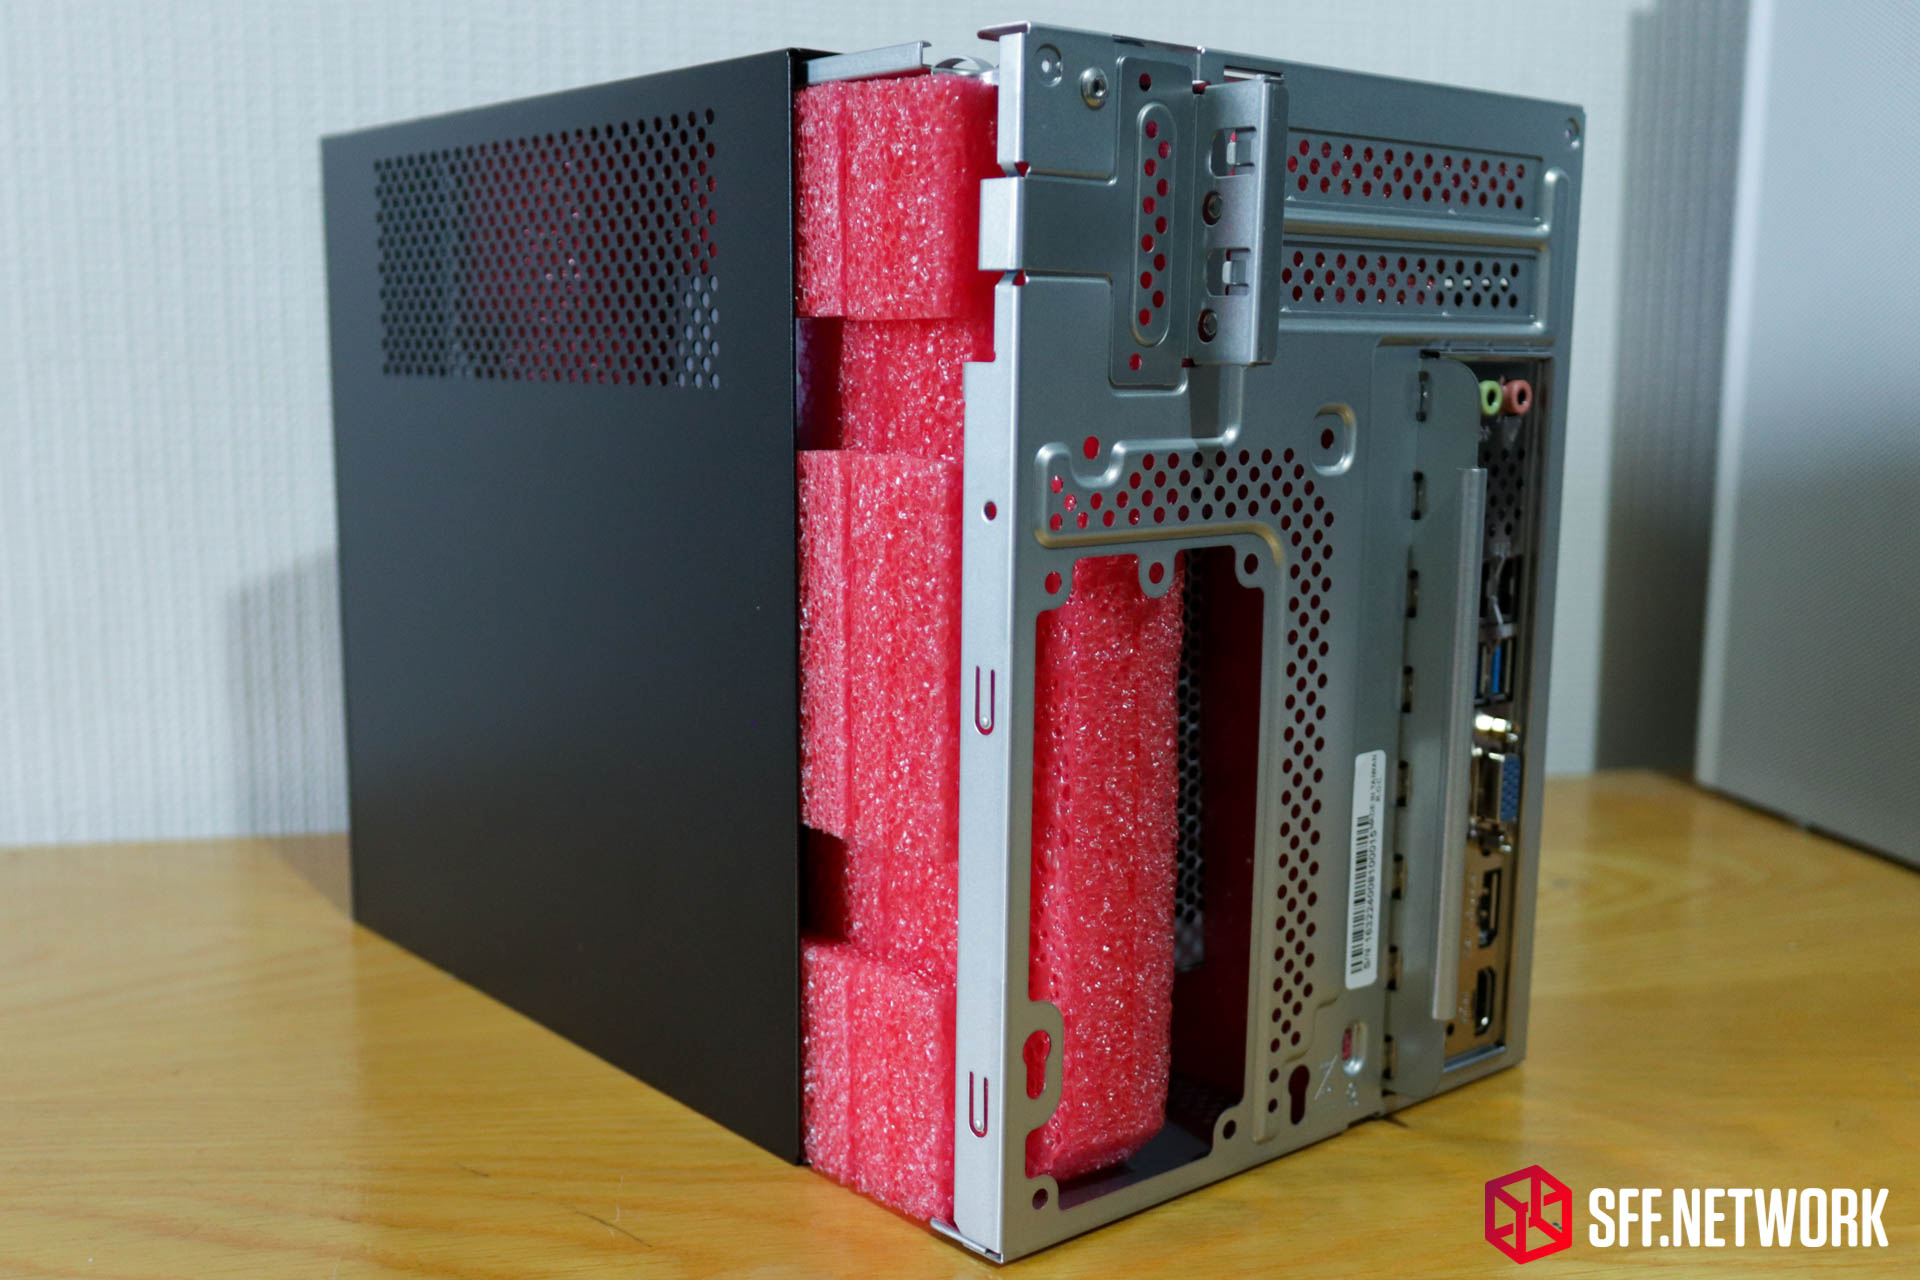
I’ve removed the singular retention screw, grabbed the integrated SECC steel handle and out slides the internal chassis. Pink foam! Whatever could this hold?
Hmm.
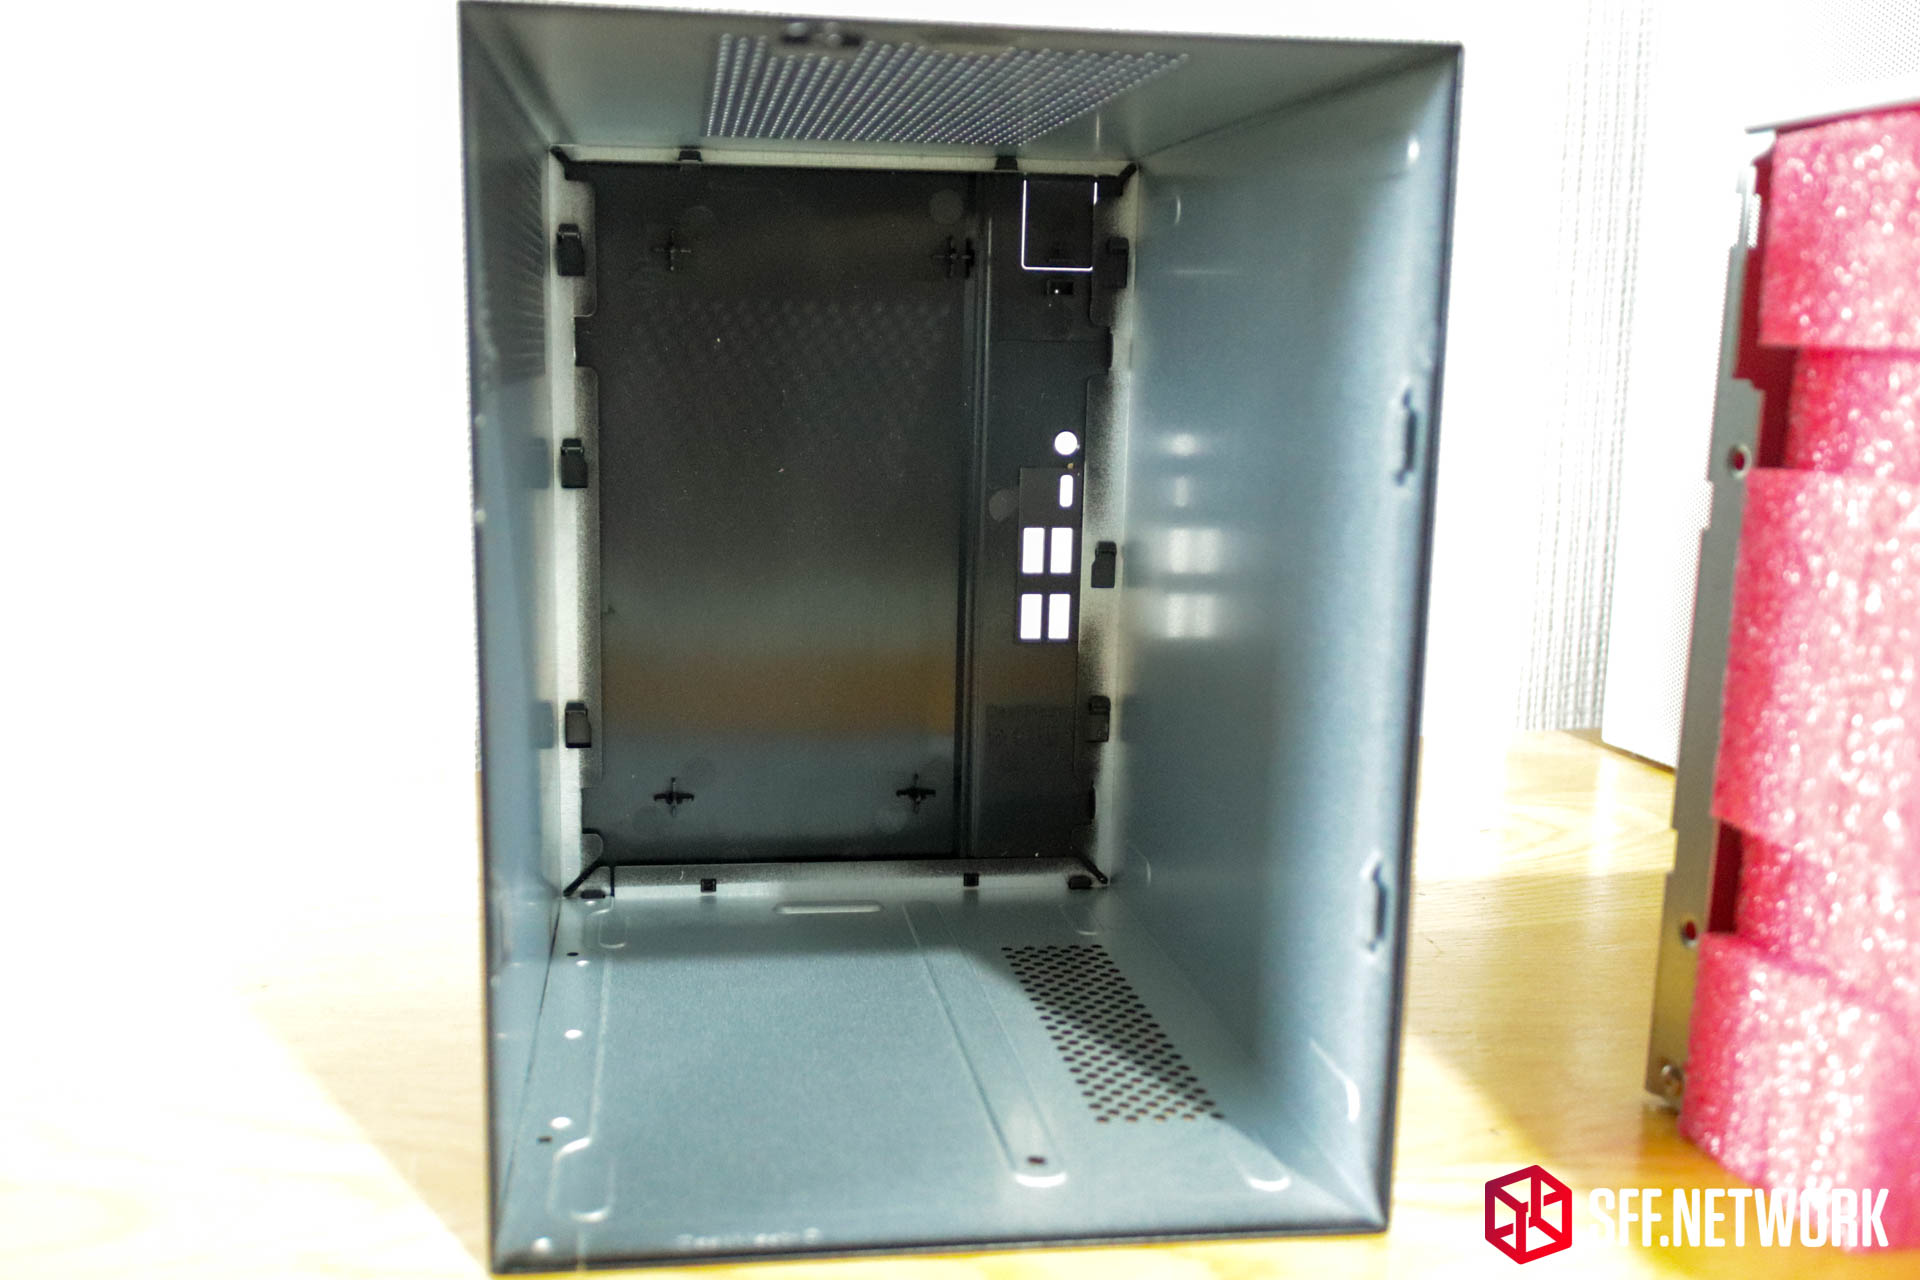
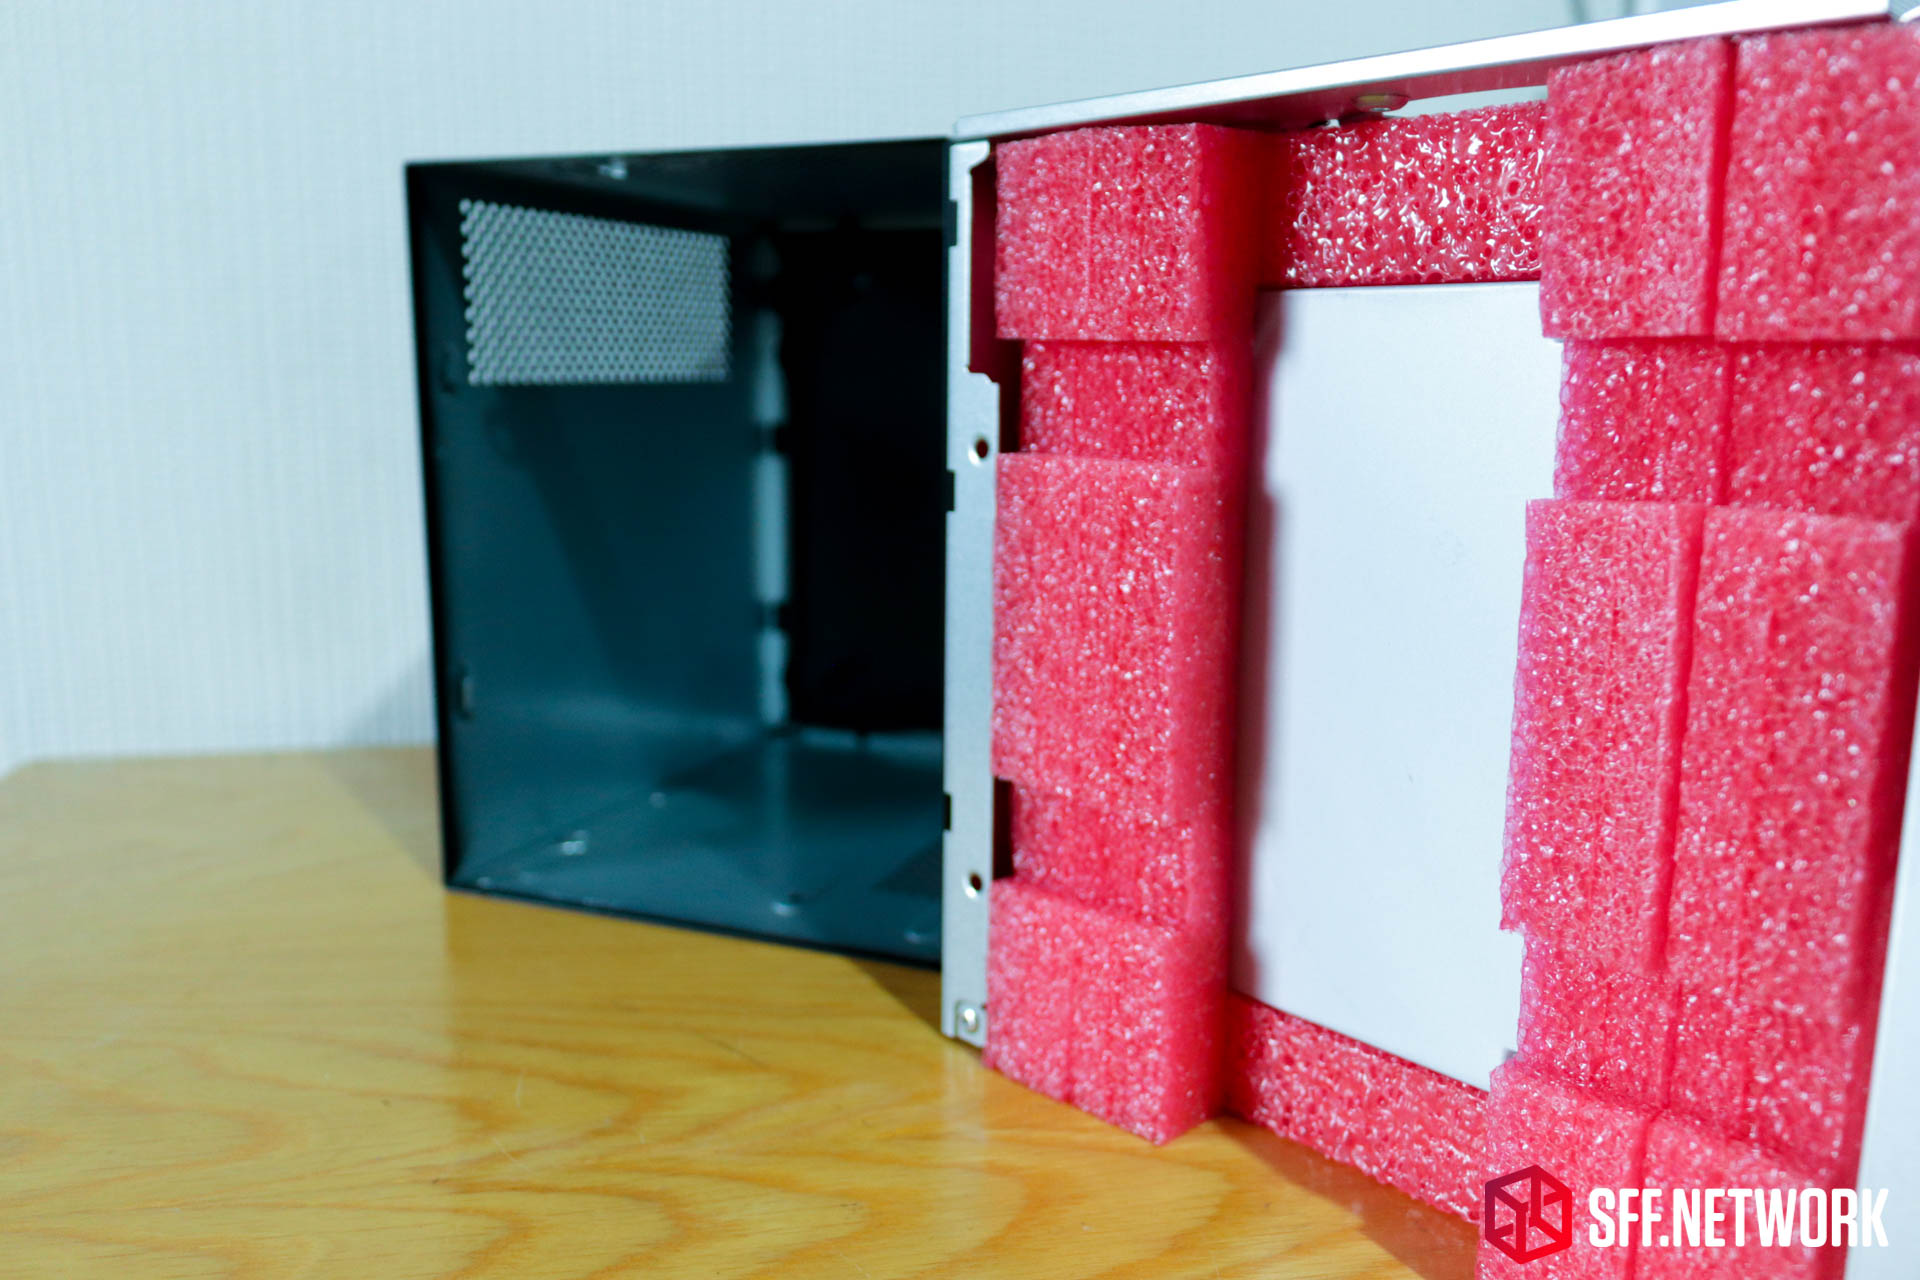
The shell of the DeskMeet’s case includes no electronics. Just a SECC steel box with a plastic front panel. Modding potential? Well..
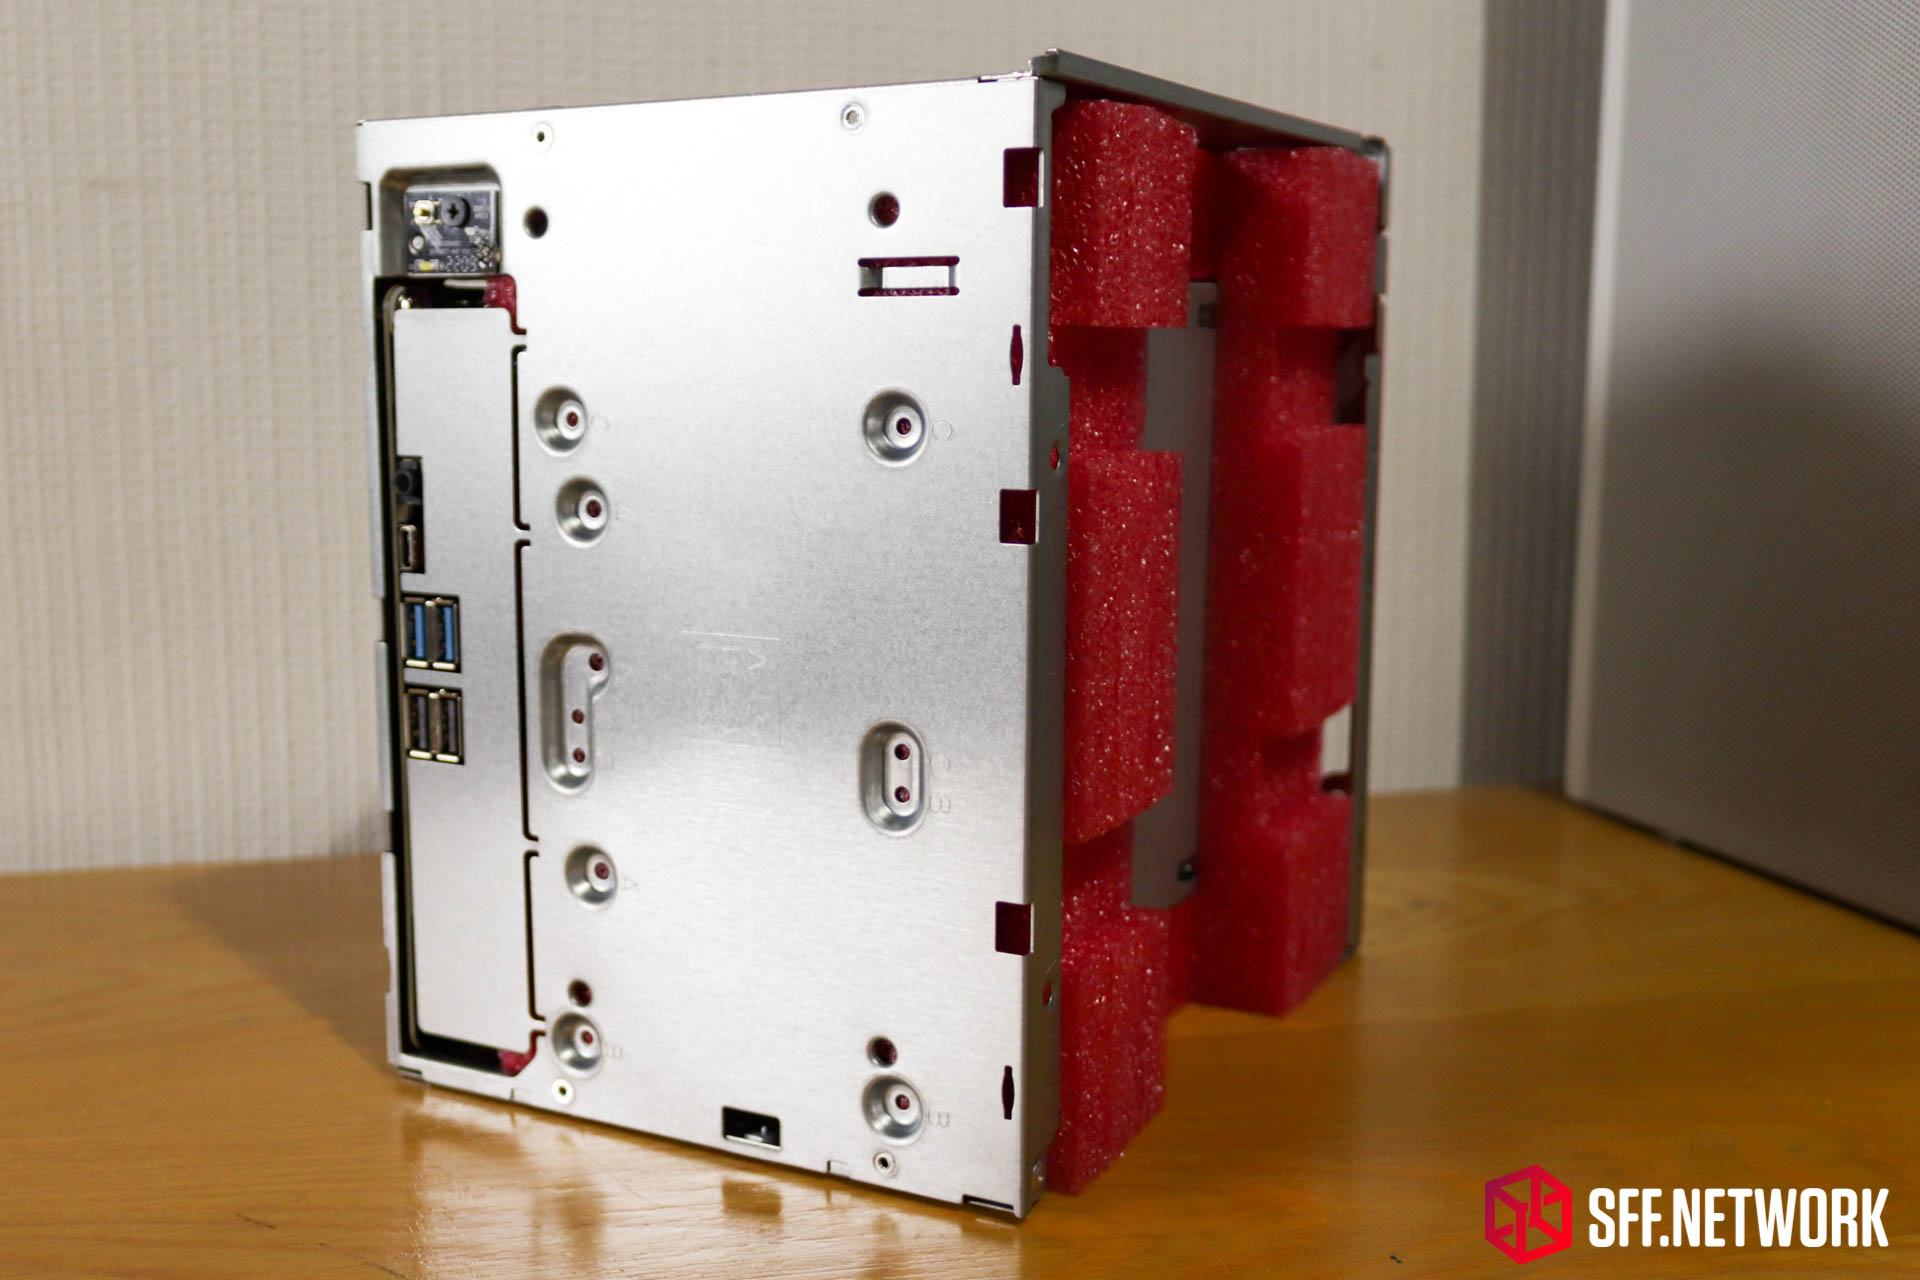
Easy modding? Not so much. The front panel of the case is an almost solid steel panel, negating any forward intake fans without getting the Dremel out. You can, however, mount a few different drive configurations to the front of the chassis. Interestingly, the front IO is behind a semi-cutout panel – providing flexibility for installation and removal of the motherboard. For what it’s worth, I measured 115mm between the front panel “flap” cutout and the inside of the fold towards the right side of the chassis in this image. Use this information as you wish.
The power button and status LED is on a separate PCB. The power switch is a high quality unit with a brass actuator – this should last a long while. The integrated LED is a bright white, however it is markedly subdued once the shell is installed, leaving a nice subtle white status light.
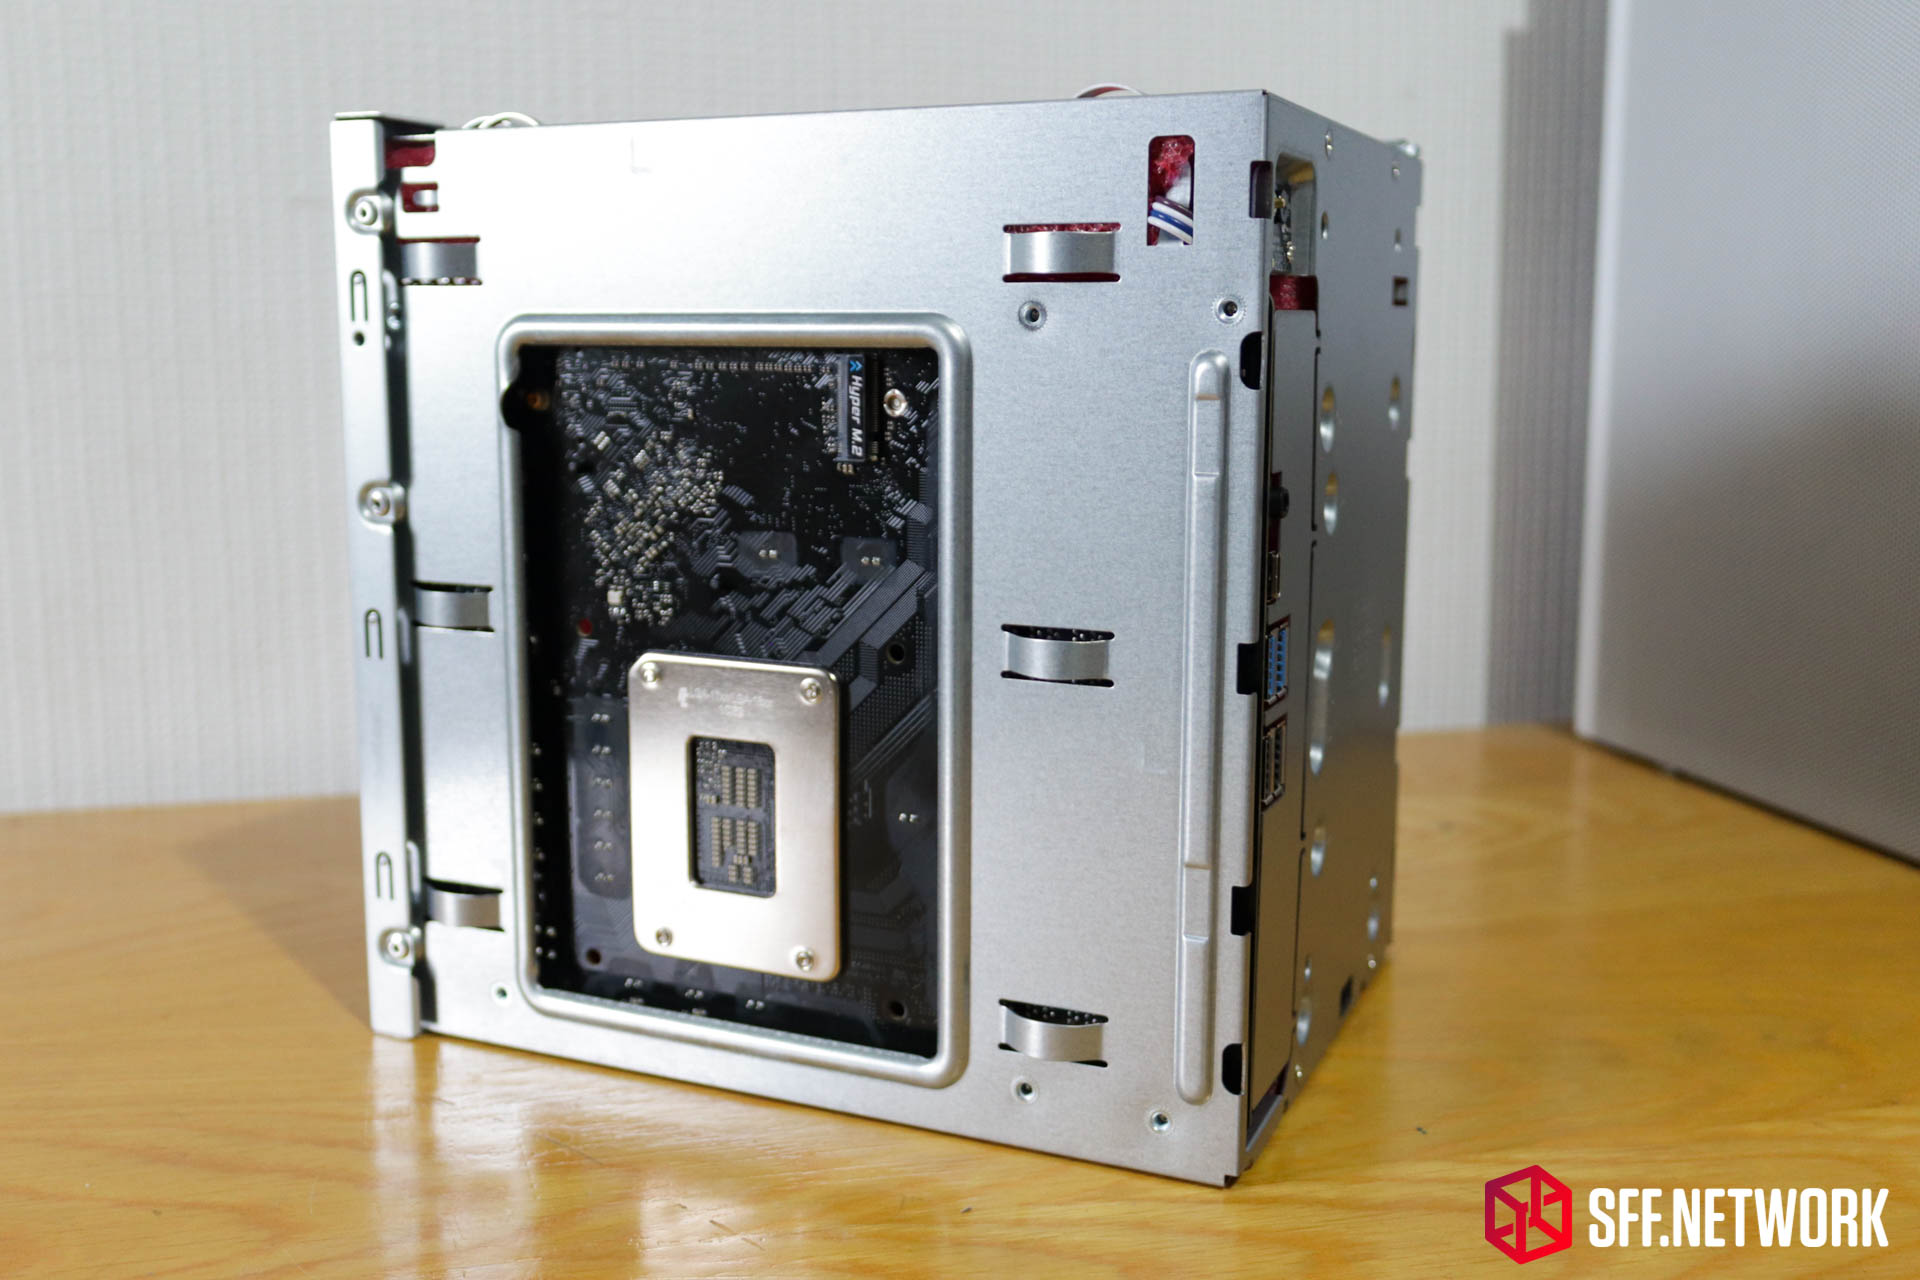
Underneath the motherboard, a sizeable cutout is in place, making for easy CPU cooler installation, as well as easy access to the backside M.2 slot. There are 6 cutouts around this access hole, which in a normal case would be cable routing mounts. In this case, I can’t see any use for them aside from positioning this internal chassis inside the outer shell.
One thing to remember, if you’re installing one M.2 SSD, it’s best to put it on the top side of the board. That way, when you go to upgrade with a second drive later on, installation at the backside of the board here will be a lot easier than disassembling half the system to get to the other slot.

Ok, let’s remove the pink foam to find… an ATX power supply. ATX? Wait… Isn’t this a SFF product? Aside from the difficult to recycle pink foam, packaging the power supply inside the chassis is a great shipping saver – a smaller outer box for the product.
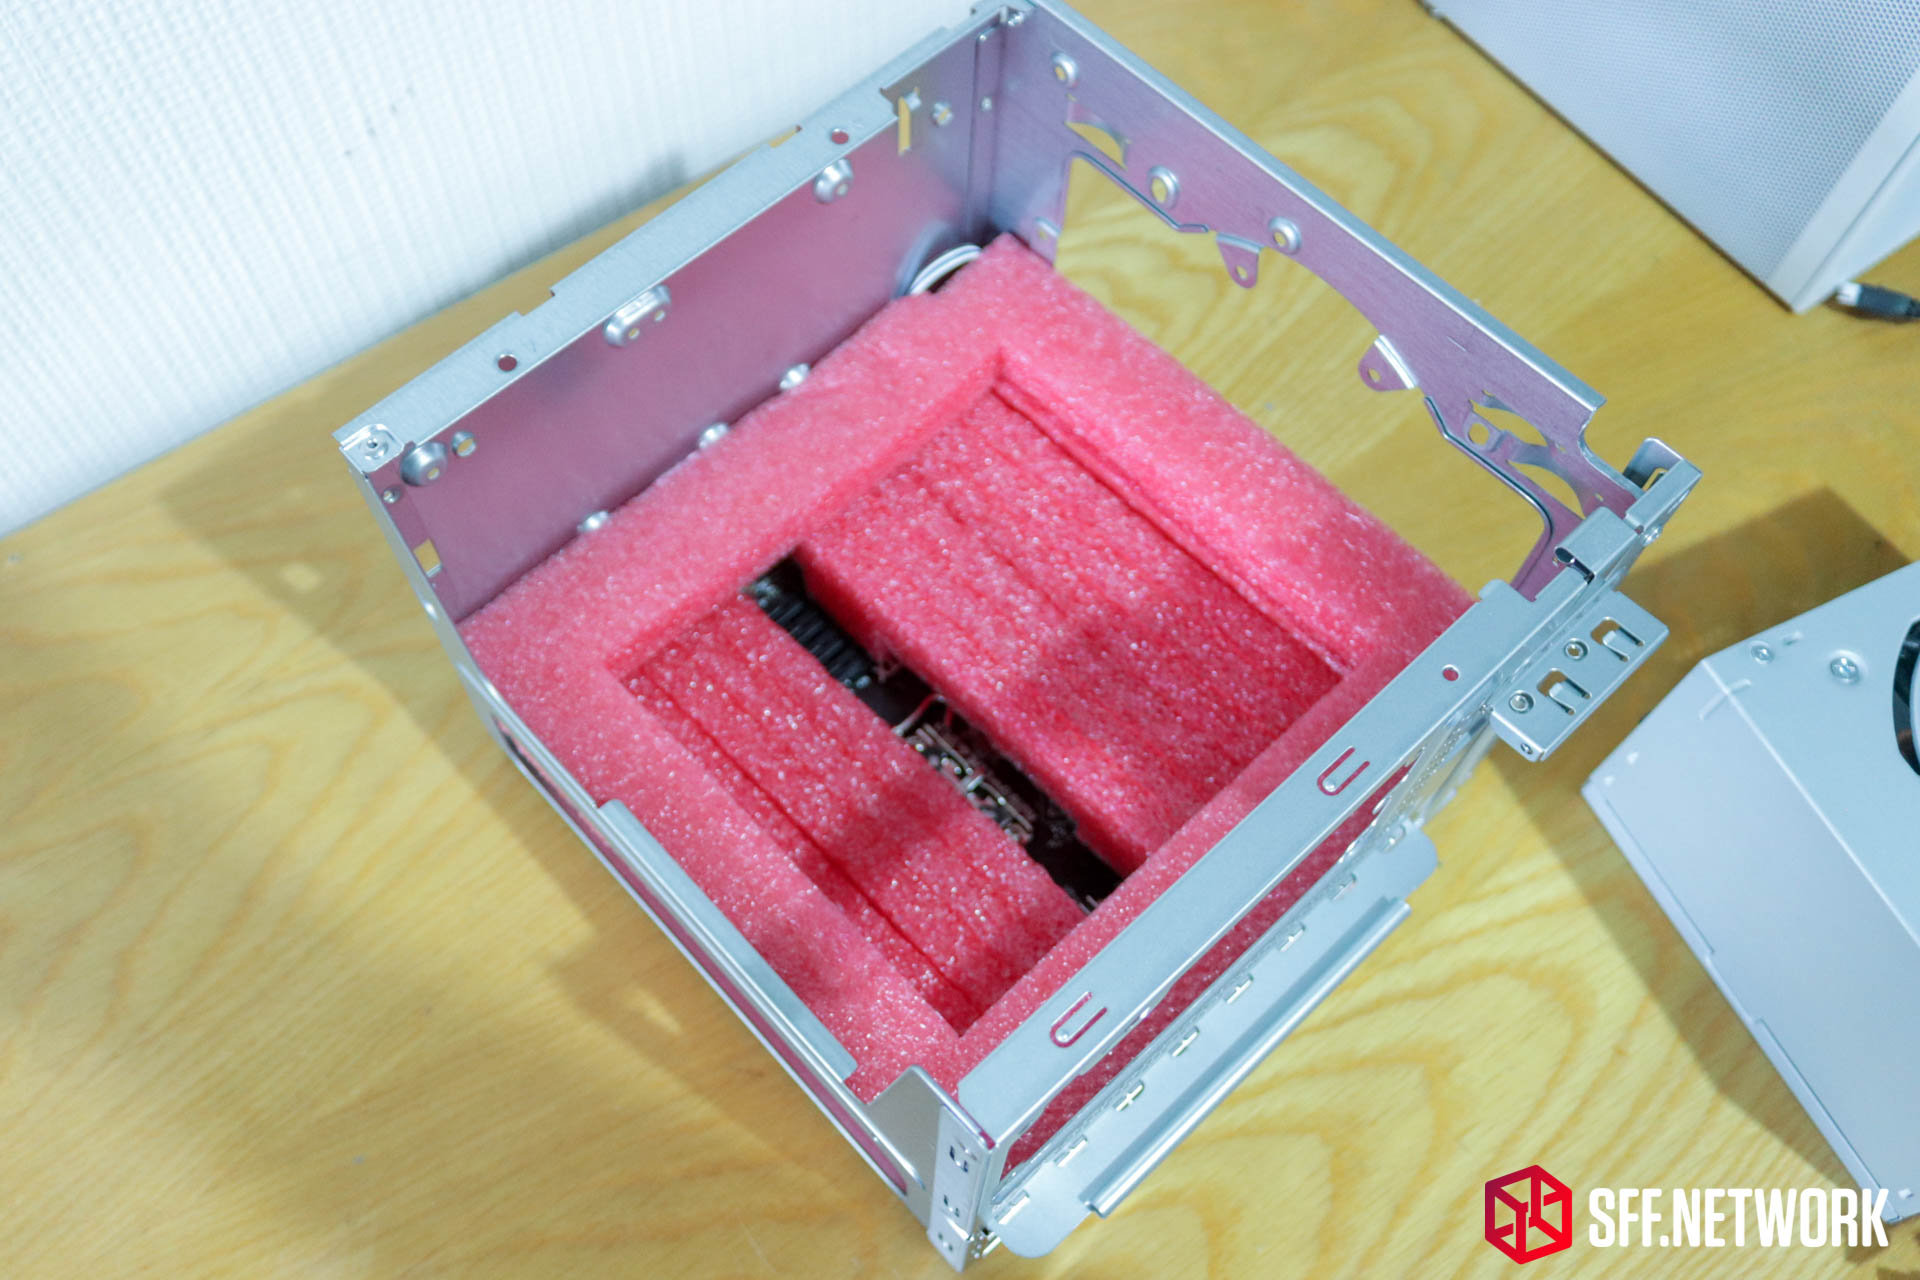
Under the power supply is another layer of foam protecting the motherboard.

And here we have the motherboard. That’s not M-ITX?! That’s correct. This is what our community and ASRock have denoted as “deep-ITX”. The board measures in at 170mm high and 210mm wide.
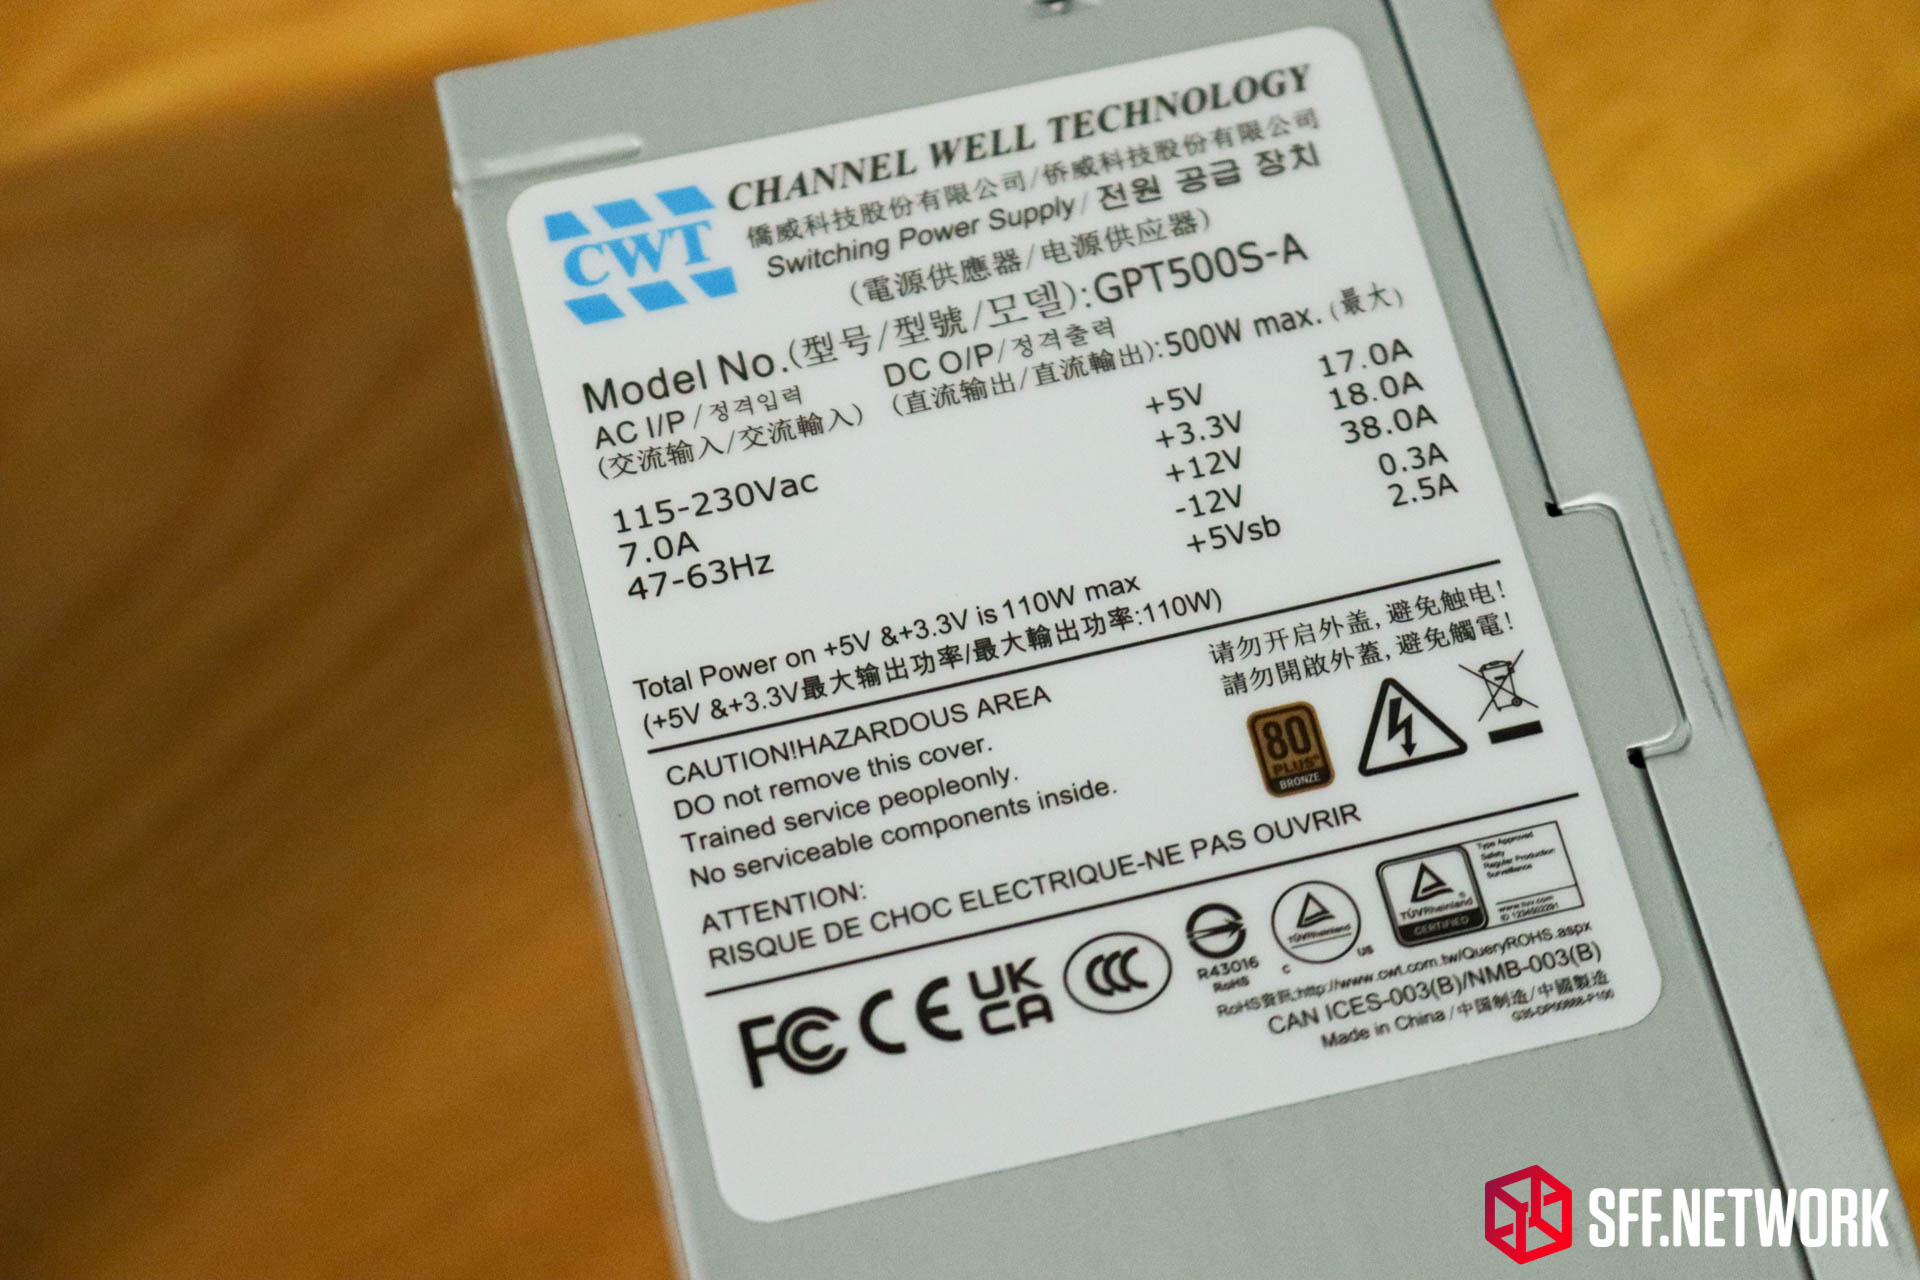
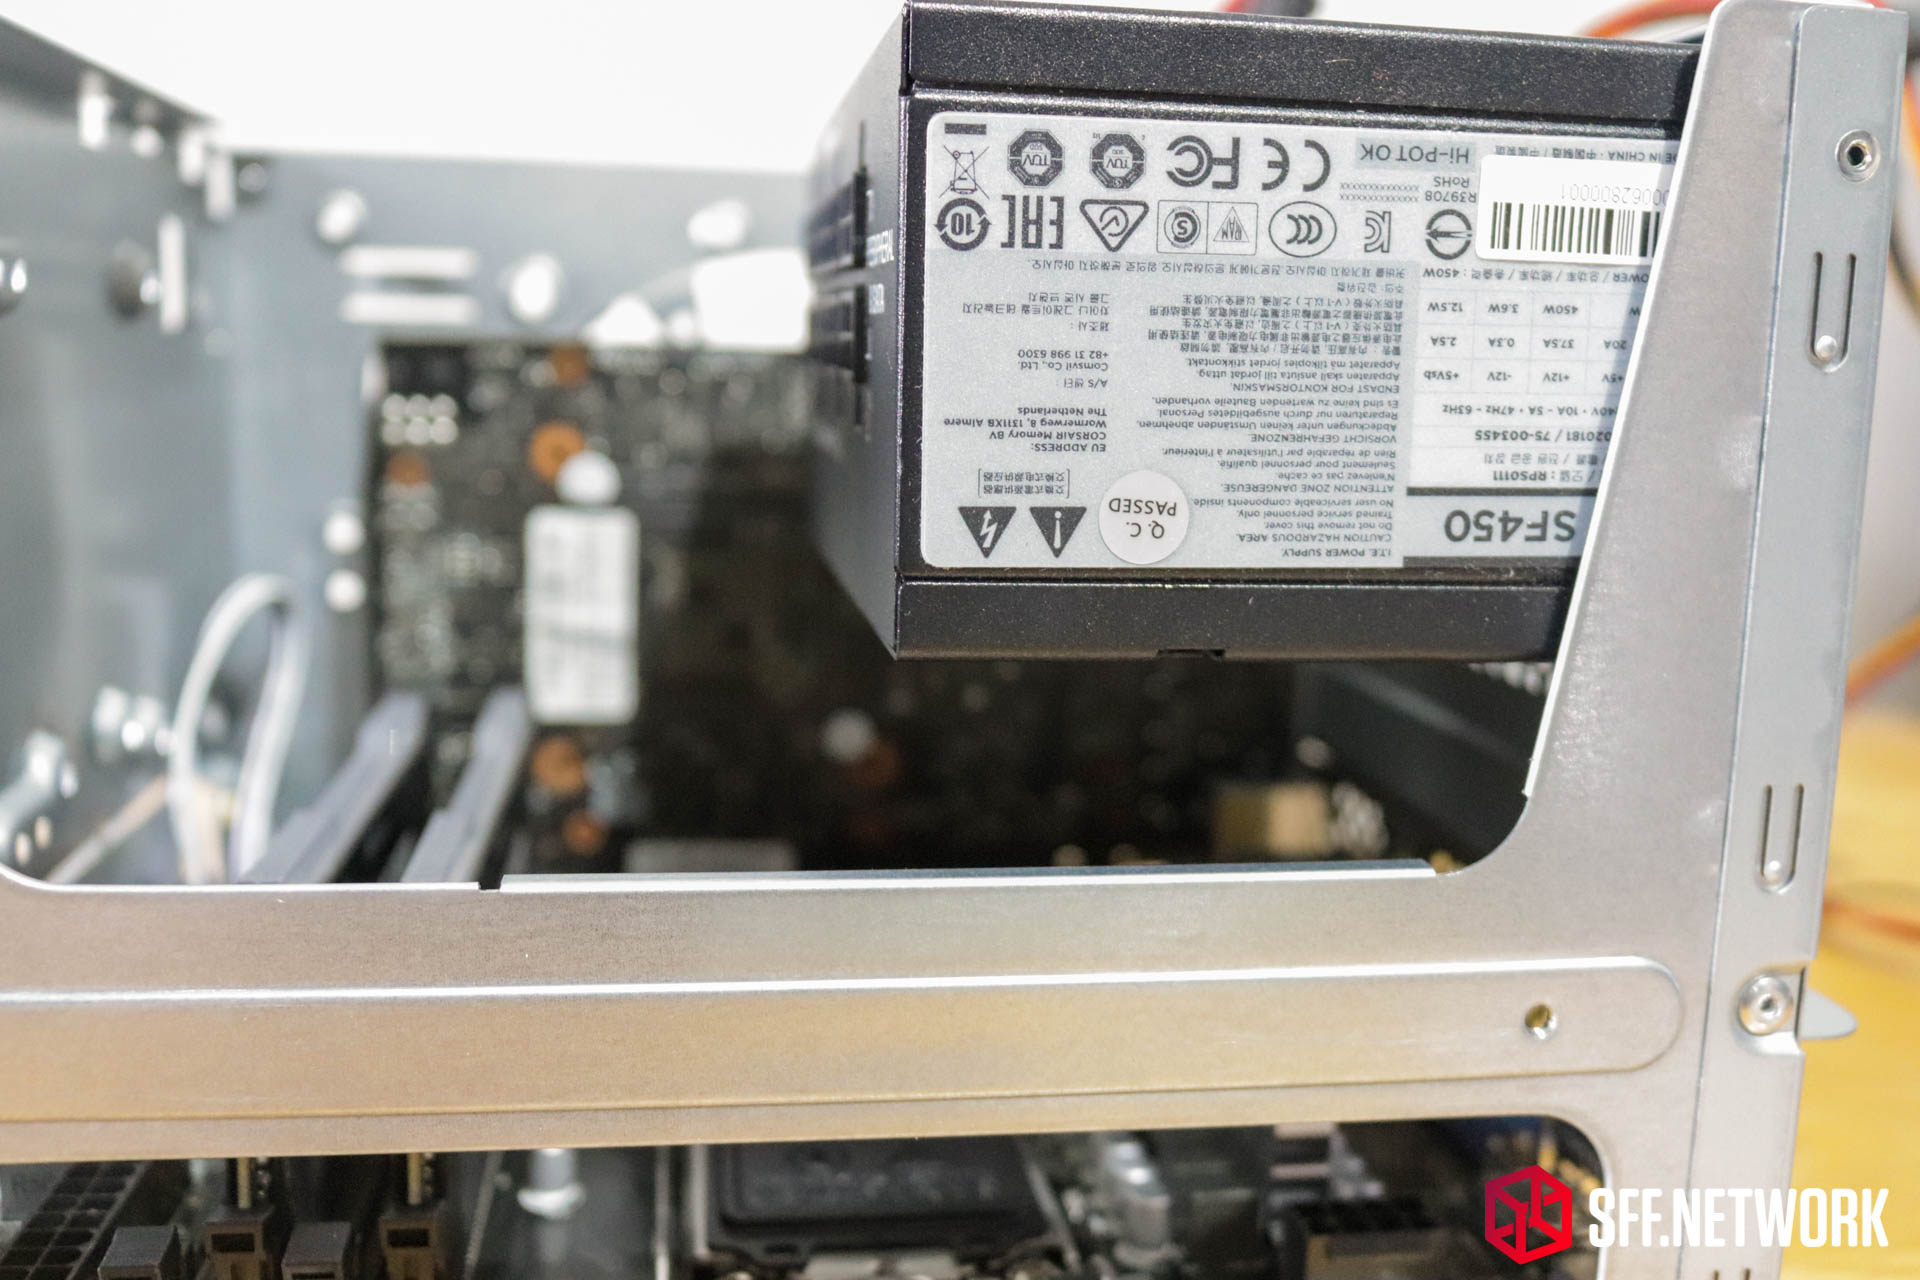
Included with the DeskMeet is a 500w 80+ Bronze rated Channel Well Technology power supply. A well known brand, albeit usually providing OEM services to some of the more well known brands at retail. ASRock literature quotes this power supply as being able to handle a 550w peak draw, however the power supply sticker states 500w max. As an aside, cooling 500w inside this chassis may be a bit challenging! The power supply model lists as a generic model in Channel Well’s range, however, that’s rather misleading…
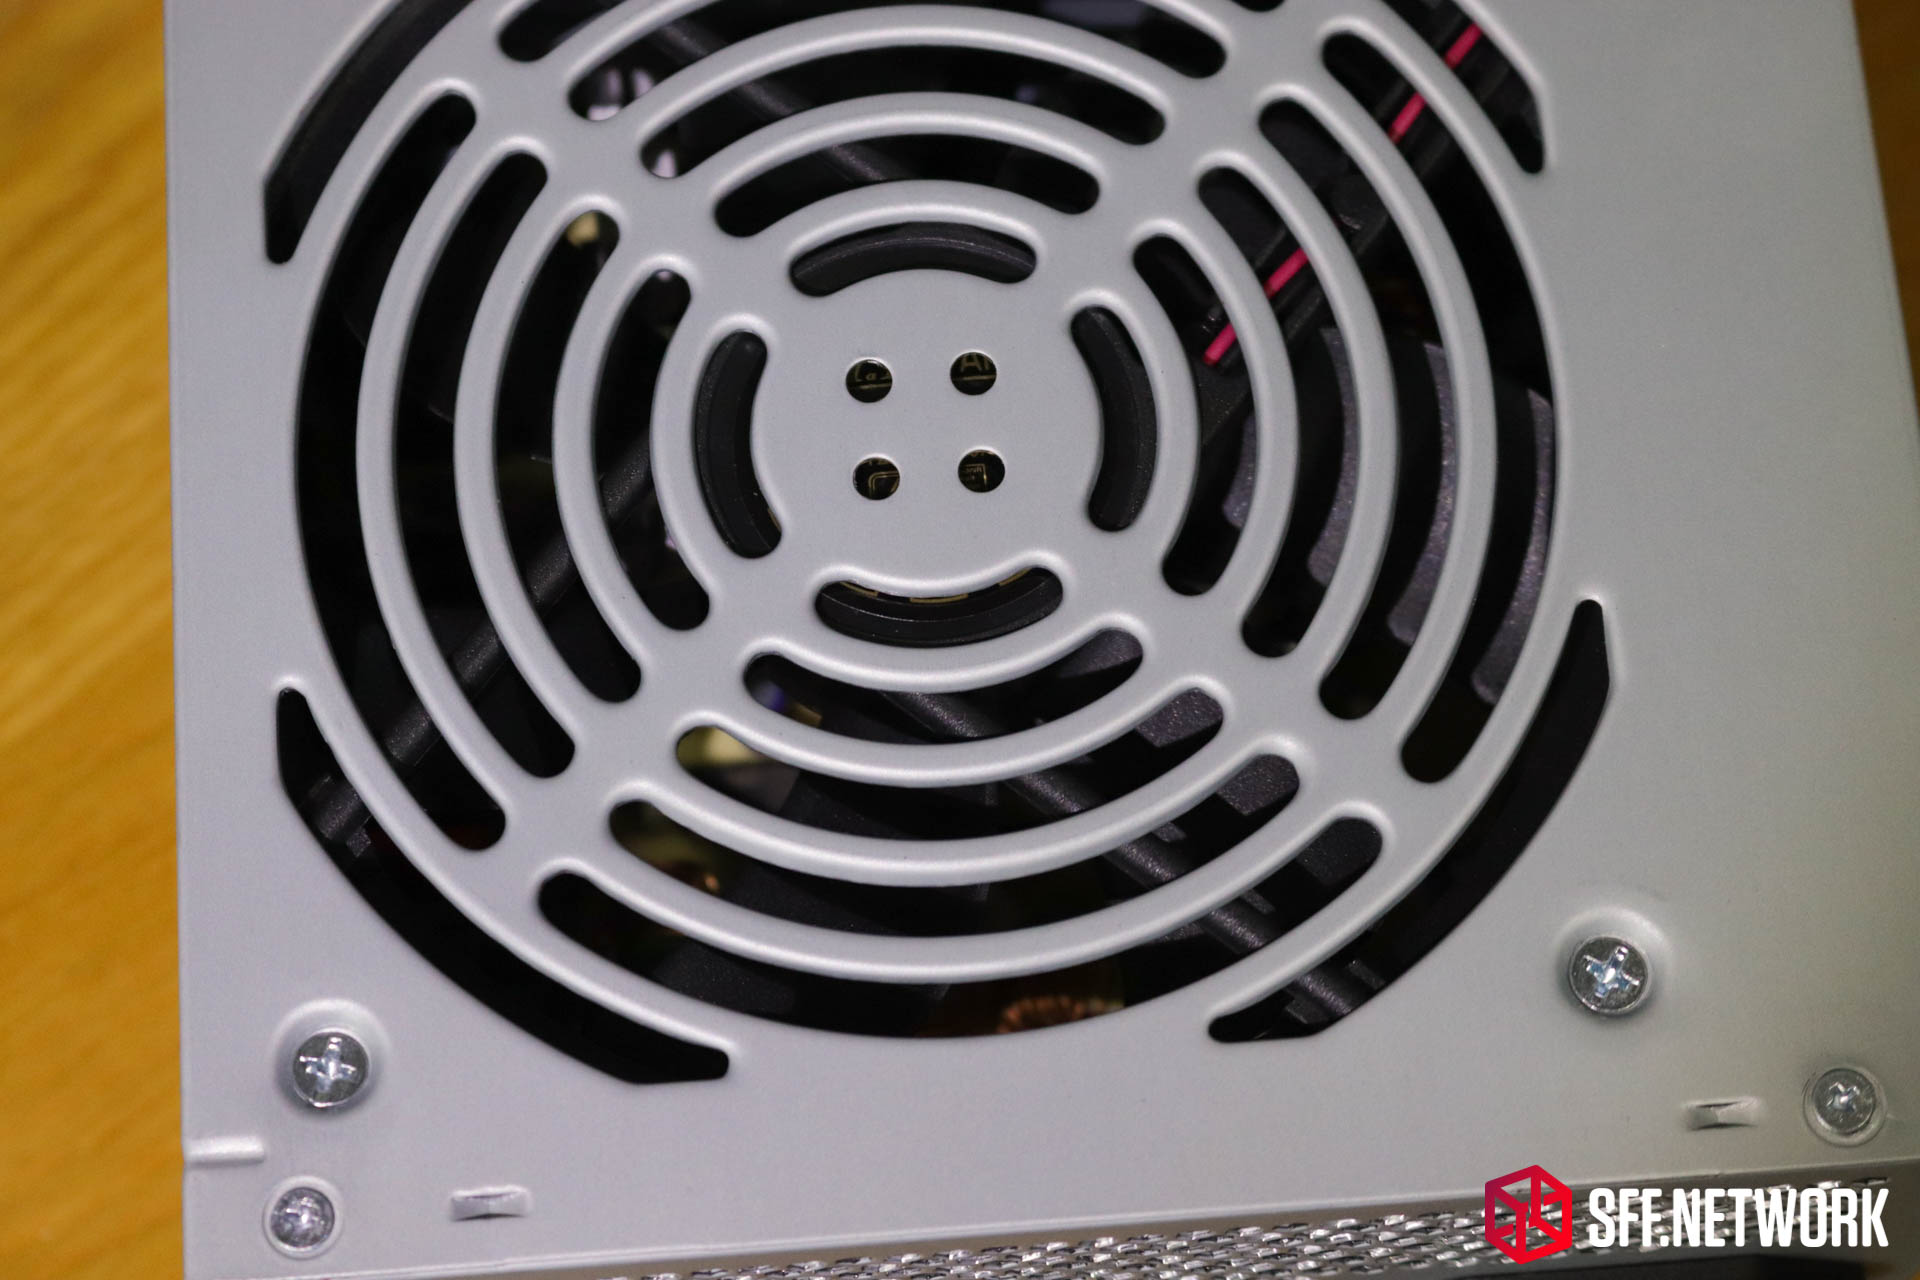
It’s hard to see, but that power supply fan is backwards. Yes, ASRock uses the power supply fan as an intake fan, drawing air past the power supply components to cool the system. This does mean that the power supply isn’t easily replaceable if it fails – unless you are comfortable opening up a power supply – which I wouldn’t recommend to most folks. Being Bronze rated means, at max load, this power supply could be pushing up to 90 watts of heat into the chassis. Ouch.
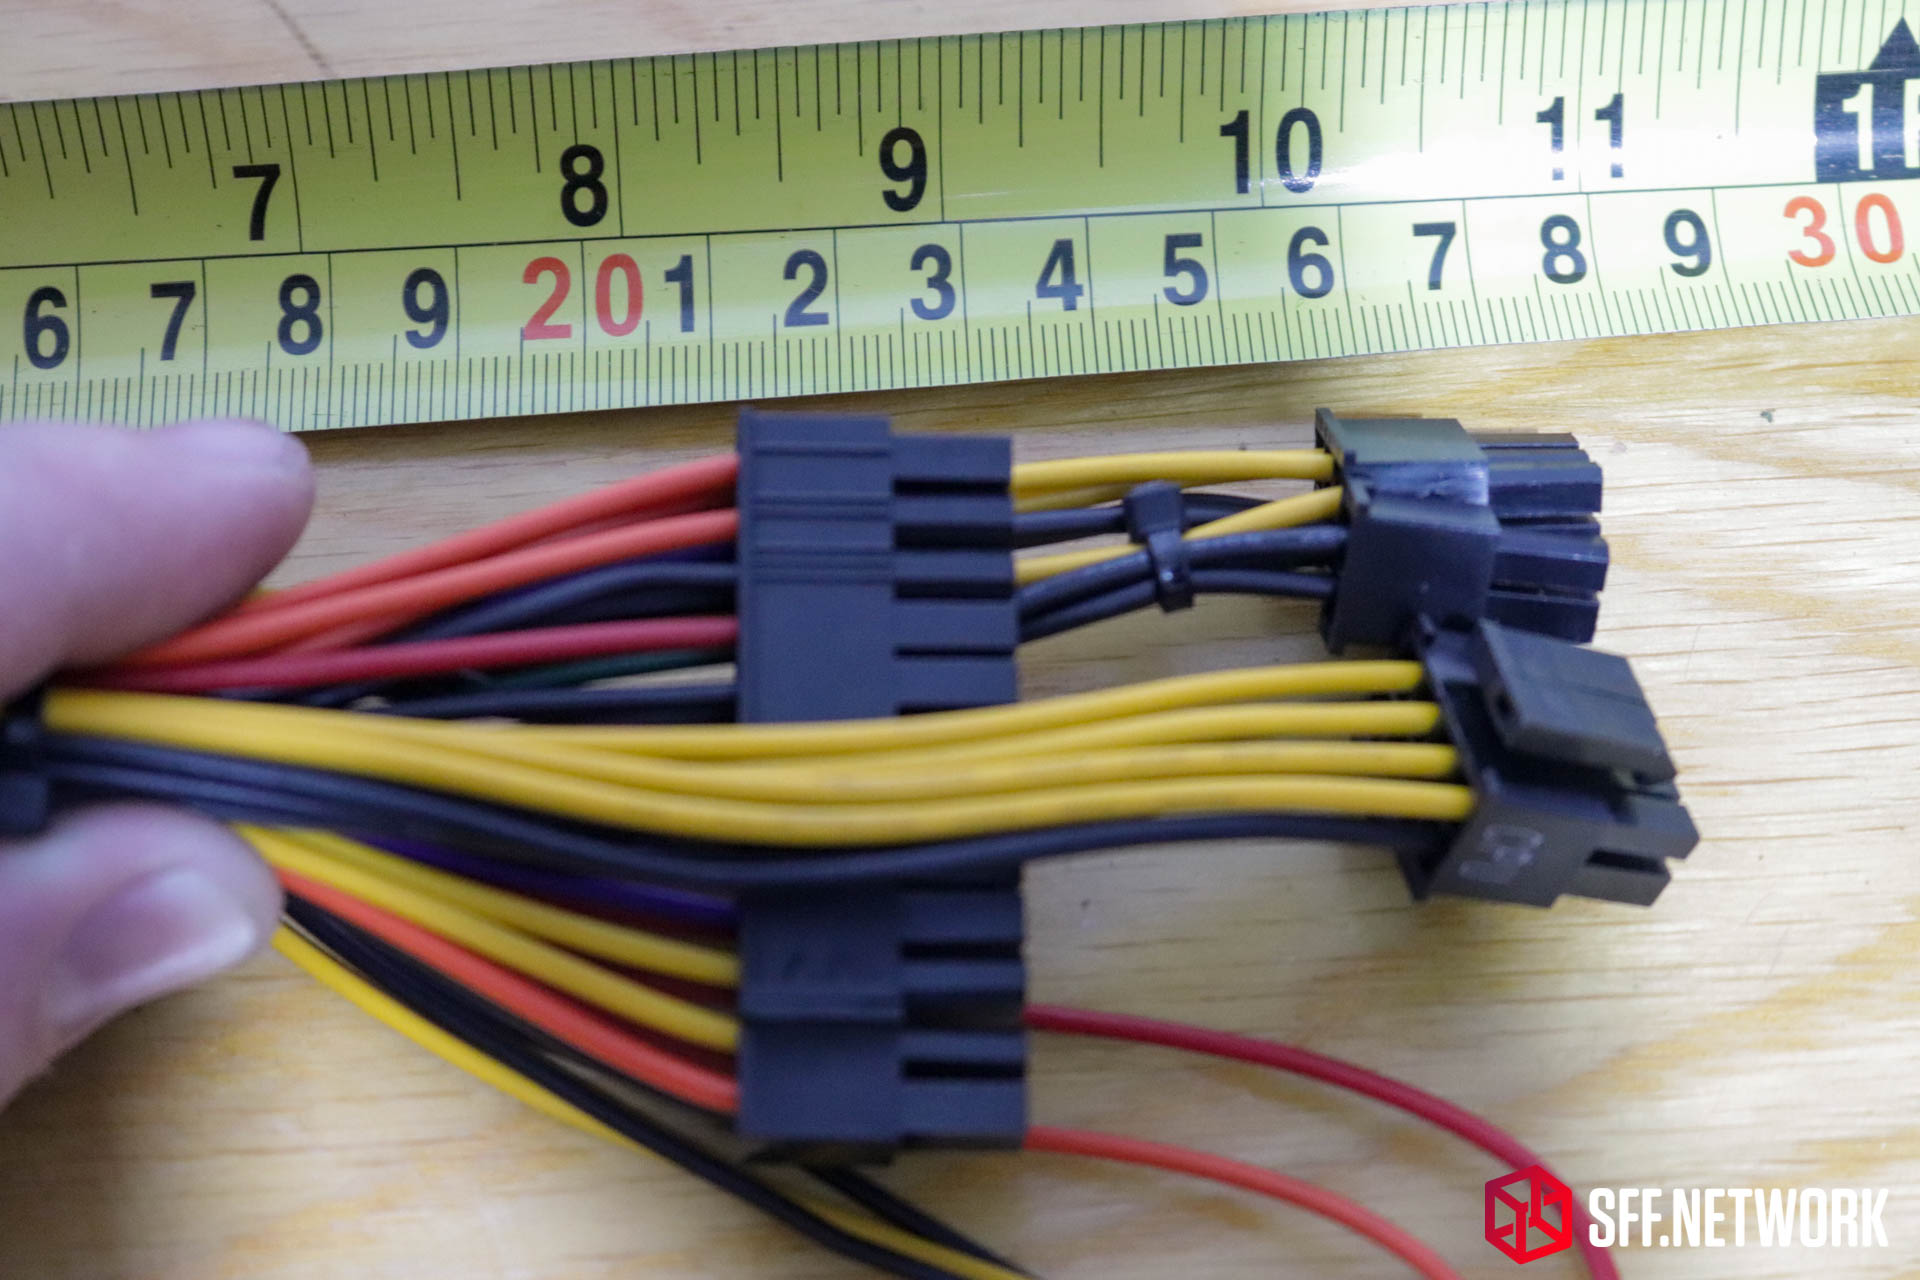
The ATX connector measures in at 210mm before the connector. The EPS 8 pin and PCIe 6+2 pin connectors reach a little further to 255mm. ASRock’s marketing states that the power supply they have selected ensures that the cables aren’t too long for the chassis. Multicoloured and non-modular. What is this, 2005?
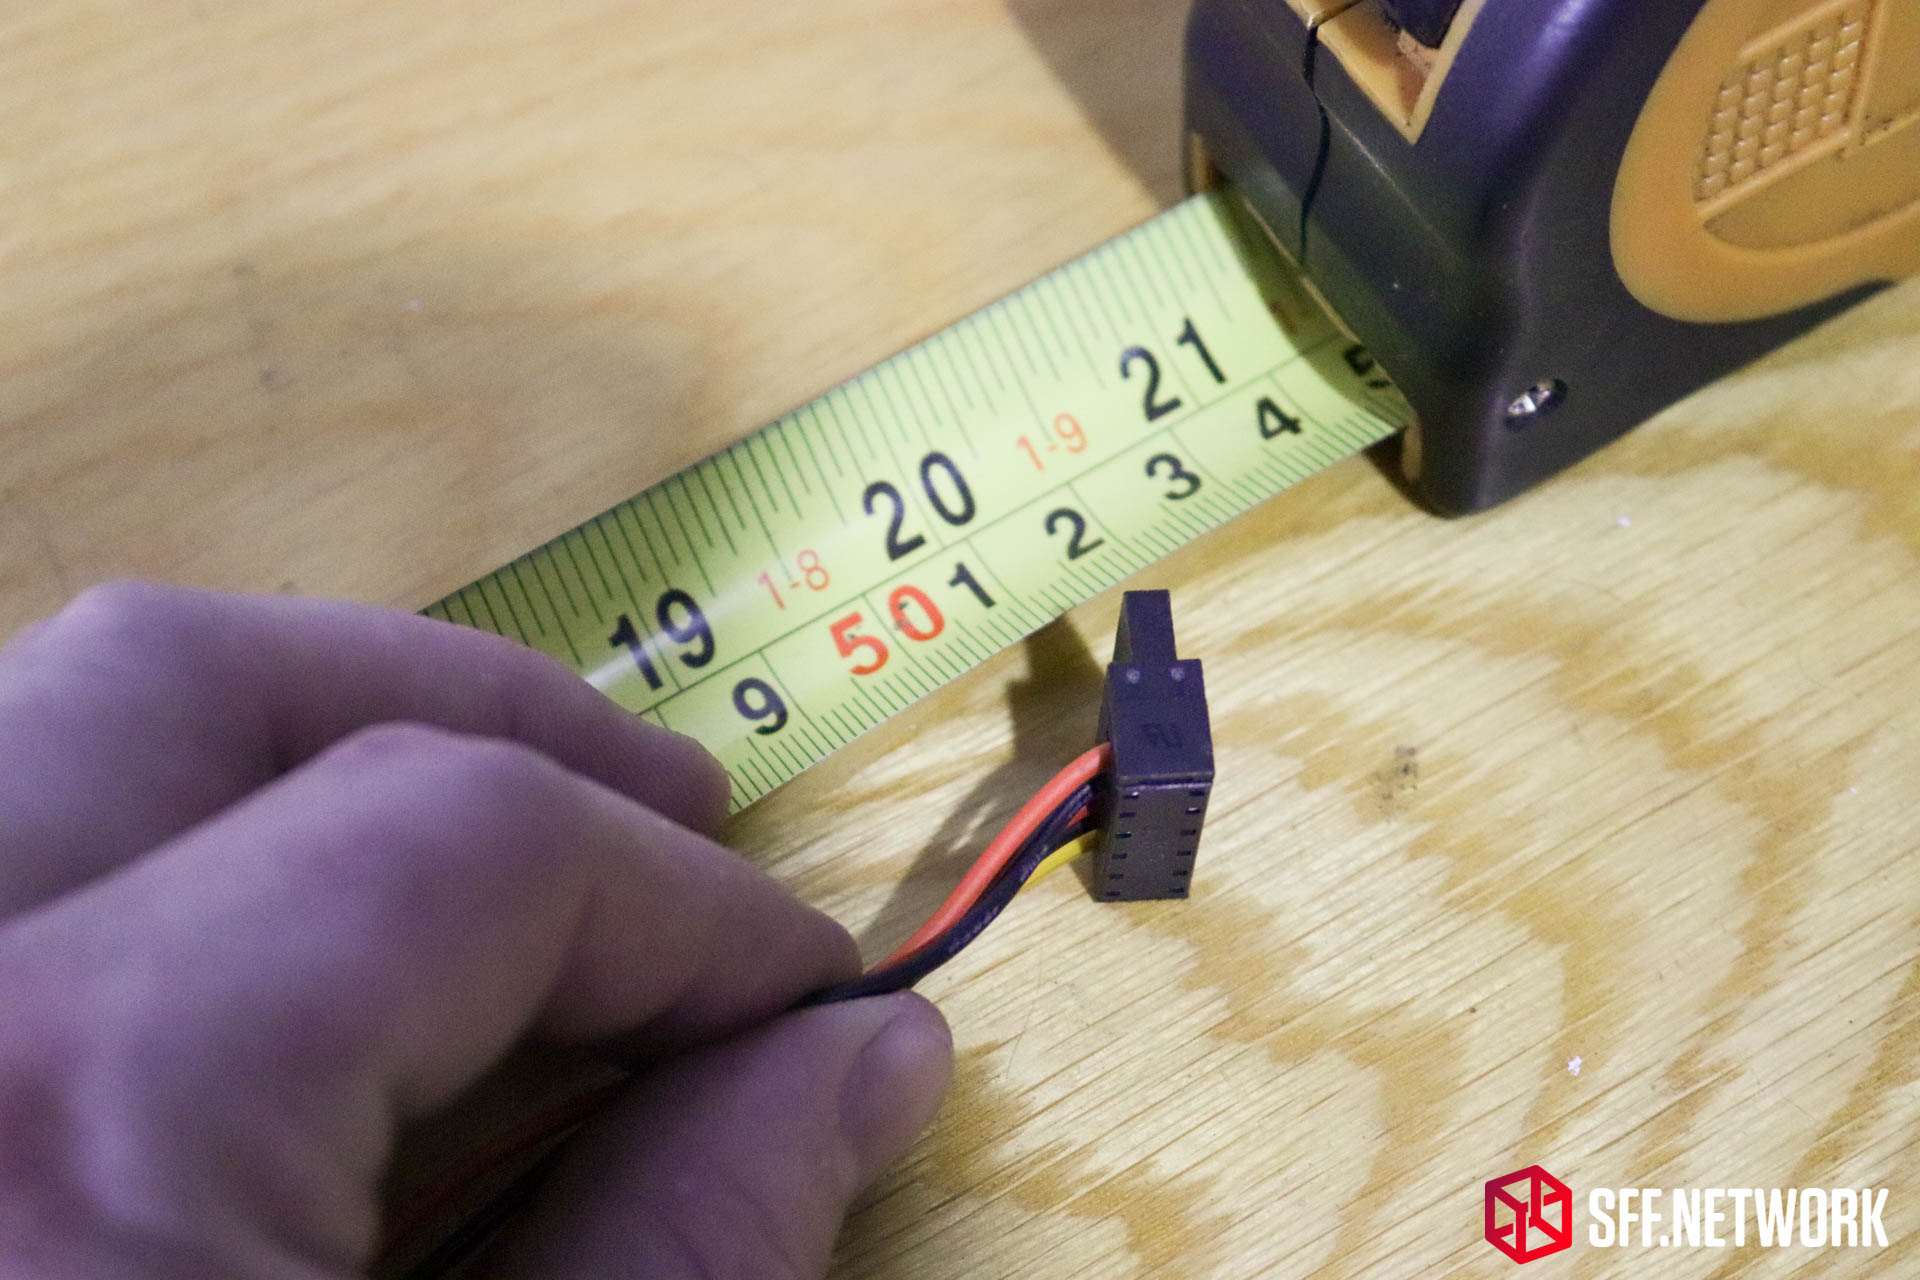
The SATA power connector includes two connectors, with the furthest one being at 500mm from the power supply. During testing, I did find this cable to be annoying – as I did not use any 2.5 or 3.5″ devices.
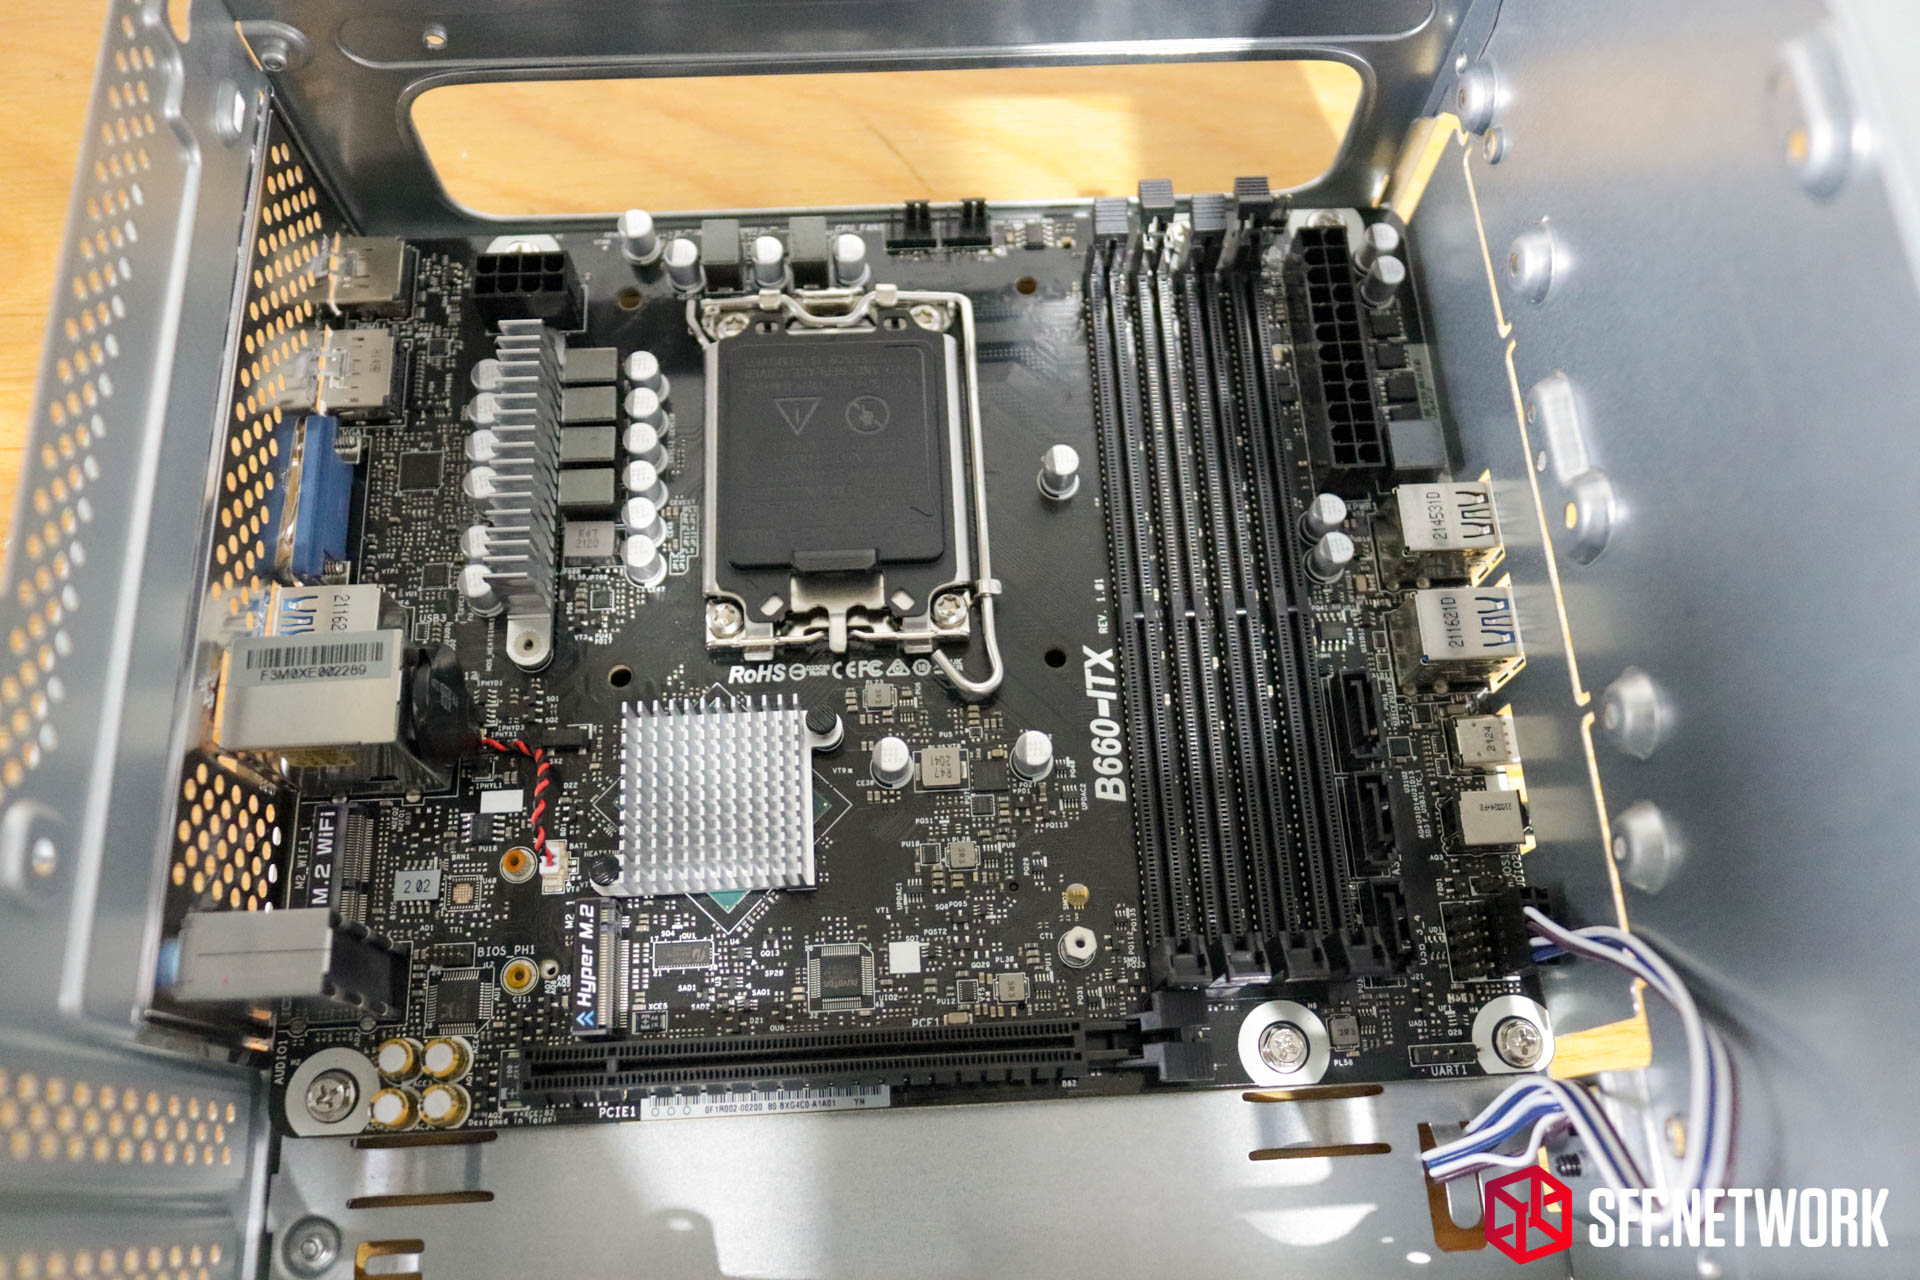
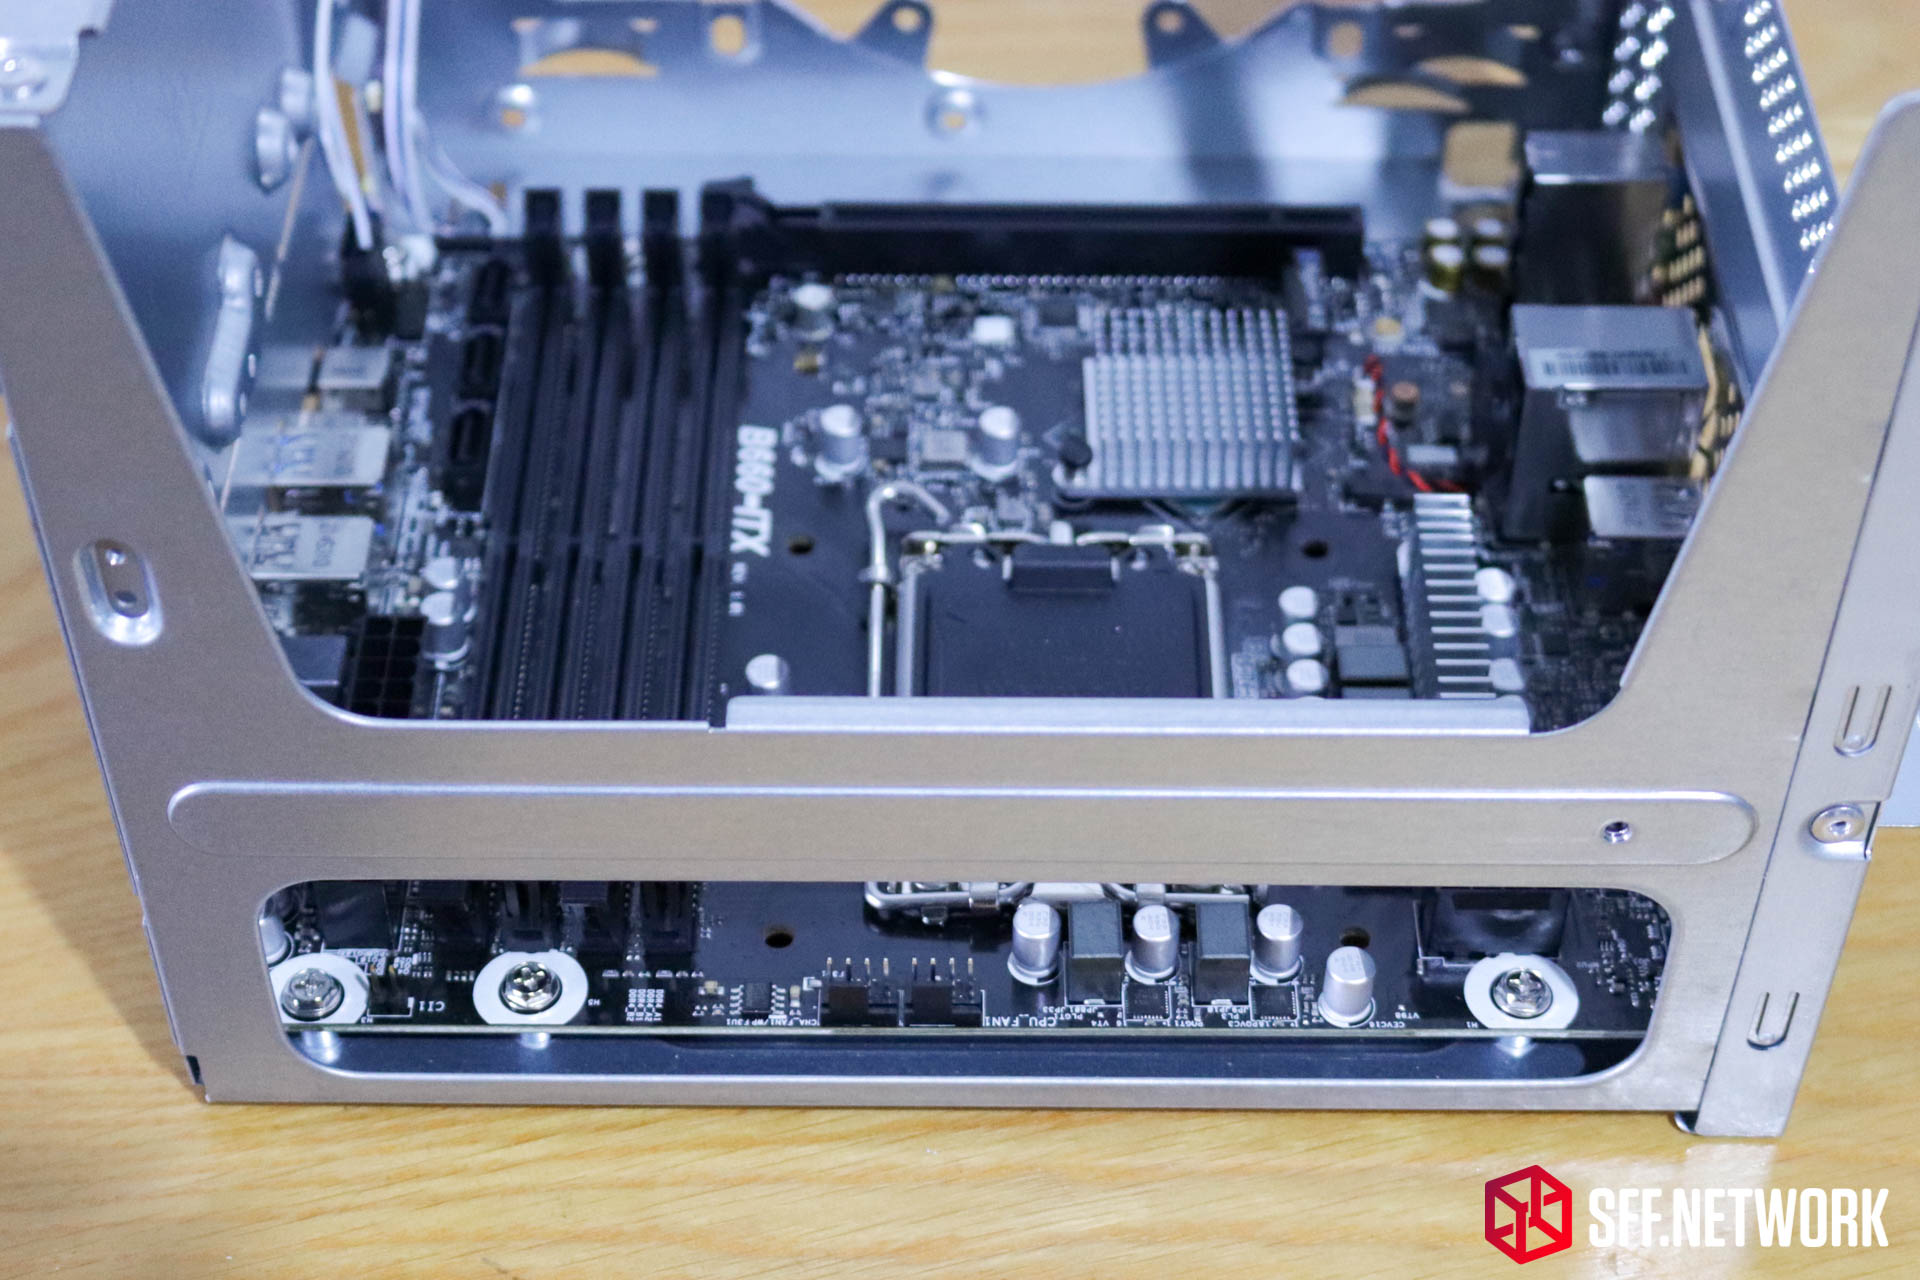
Our first look at the “deep-ITX” board included in the DeskMeet. When ASRock initially teased the DeskMeet, it was this board that intrigued and excited me – 4 full size RAM slots in a board that isn’t too much bigger than M-ITX. The AMD version of the DeskMeet excited me more but beggars can’t be choosers! The board opens up quite a few new options for new case designers, go nuts!
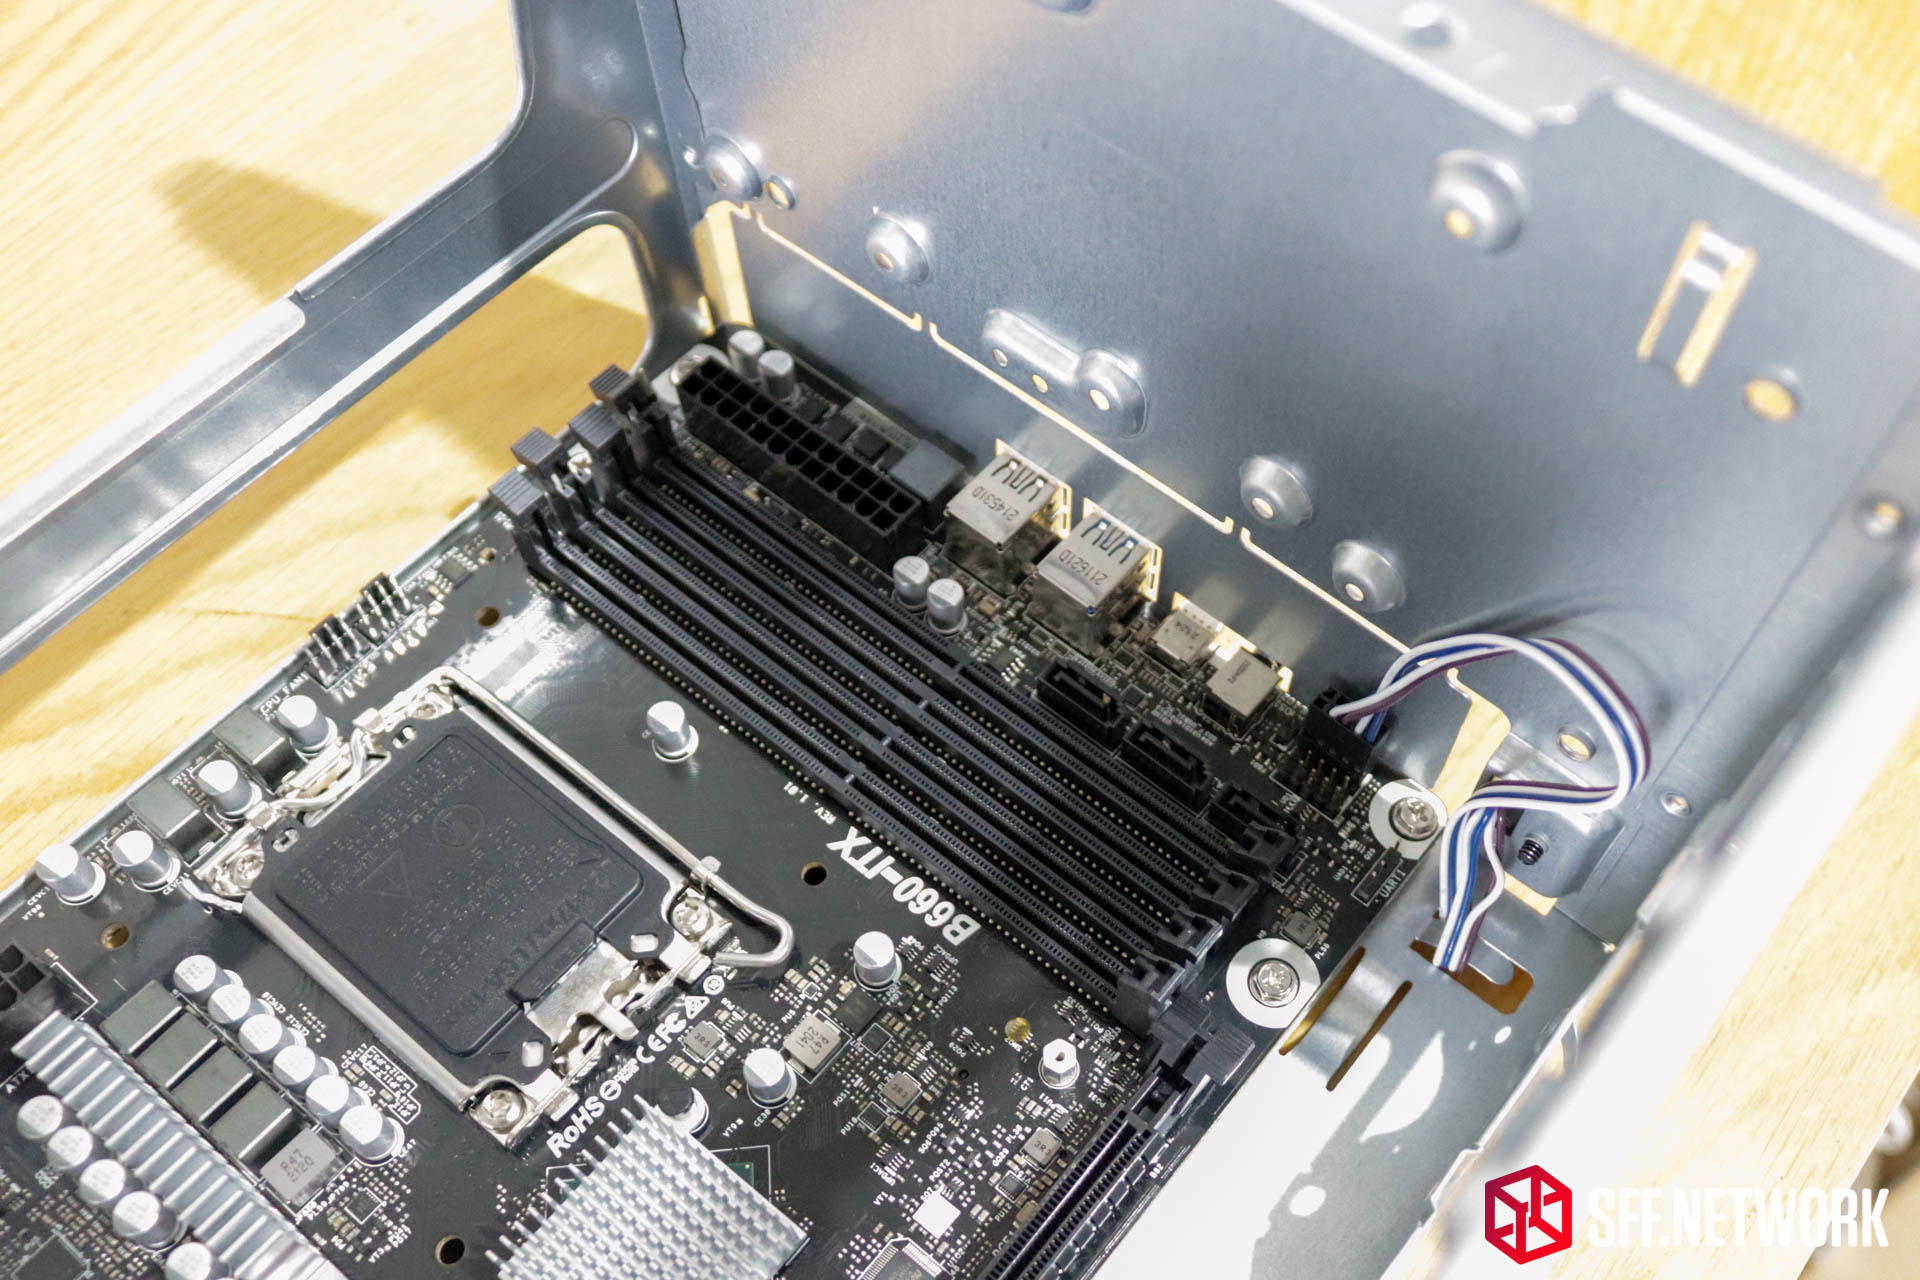
A look towards the front – the power button and status LED are the only front IO not integrated into the motherboard. This does limit case selection for this board markedly, but after all it is designed to be sold integrated into a chassis.
Another look at the dimpled front panel – many drive mounting options here. Around the integrated front panel ports is a cutout “flap” – likely designed to bend out of the way to aid board installation.
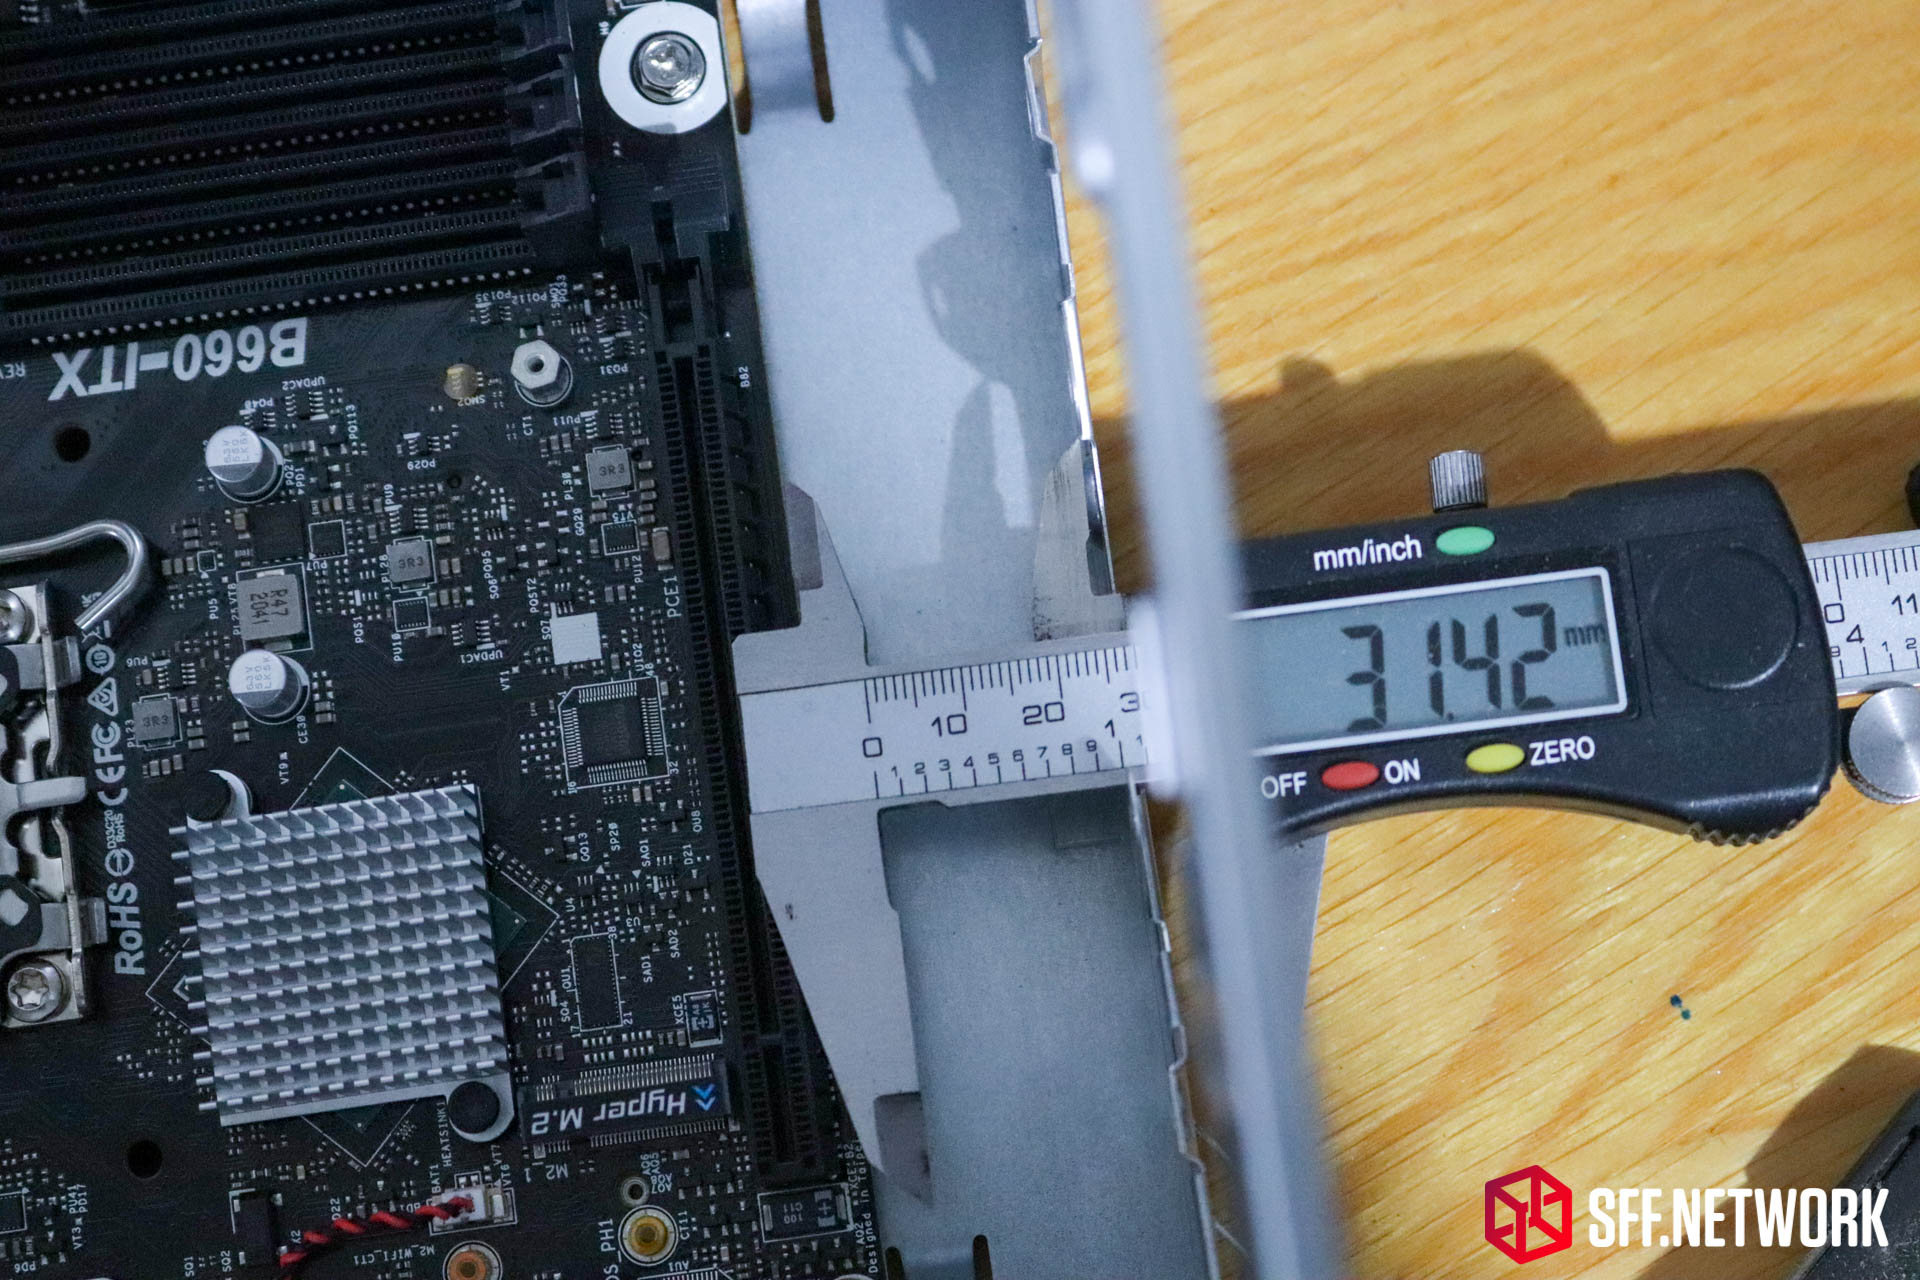
Out come the digital calipers – ahh, it’s been a while. 31.4mm between the board and chassis in this location.
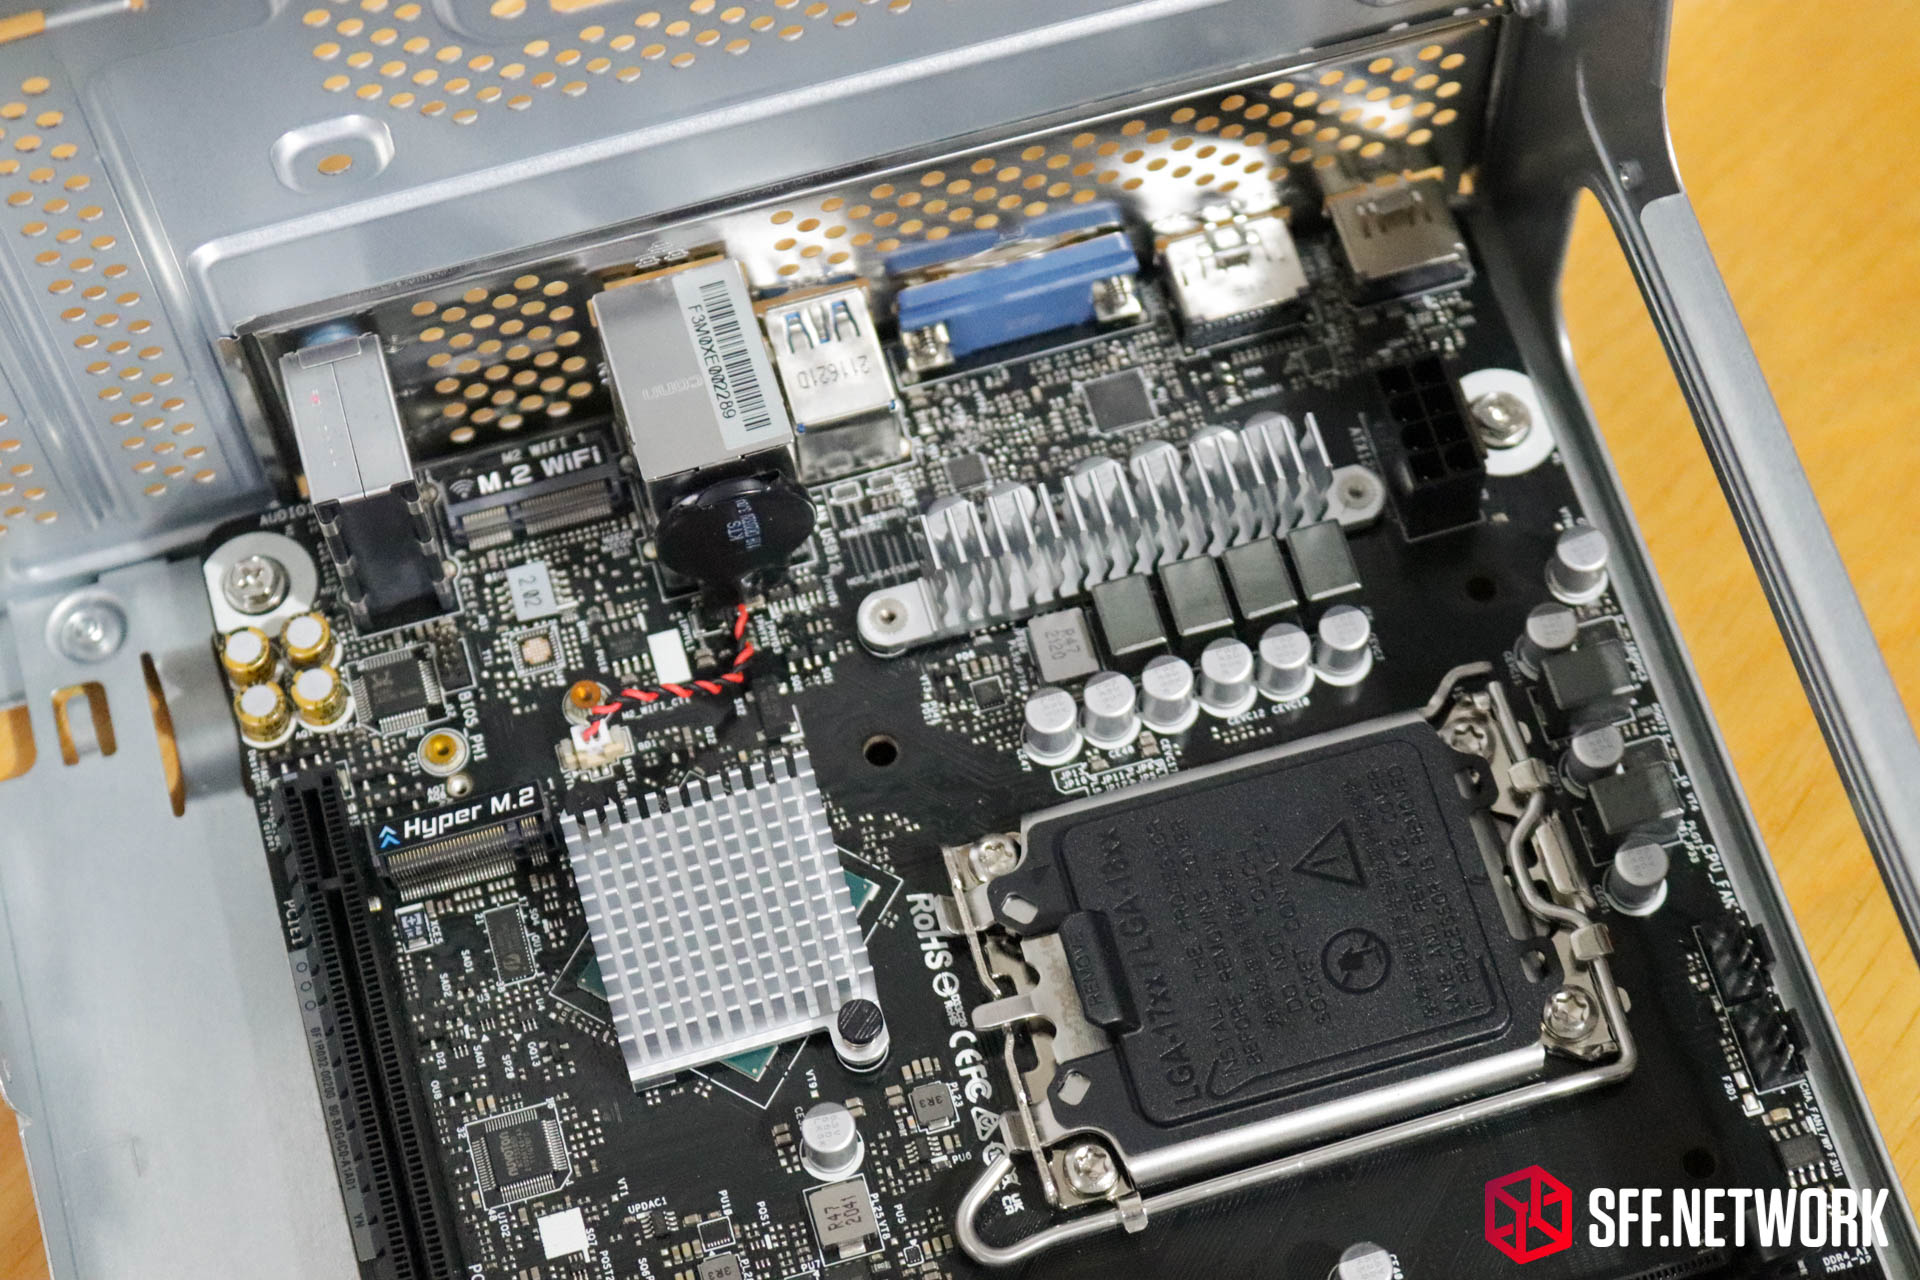
A single wavy heatsink on the basic VRM setup. There’s a reason this board is rated only for processors up to 65W. I’ll dig deeper into the board later in this article.
At the bottom of the chassis (when sitting on the case feet) is a large SECC steel section holding it all together. The included ATX power supply rests against the small folded section.
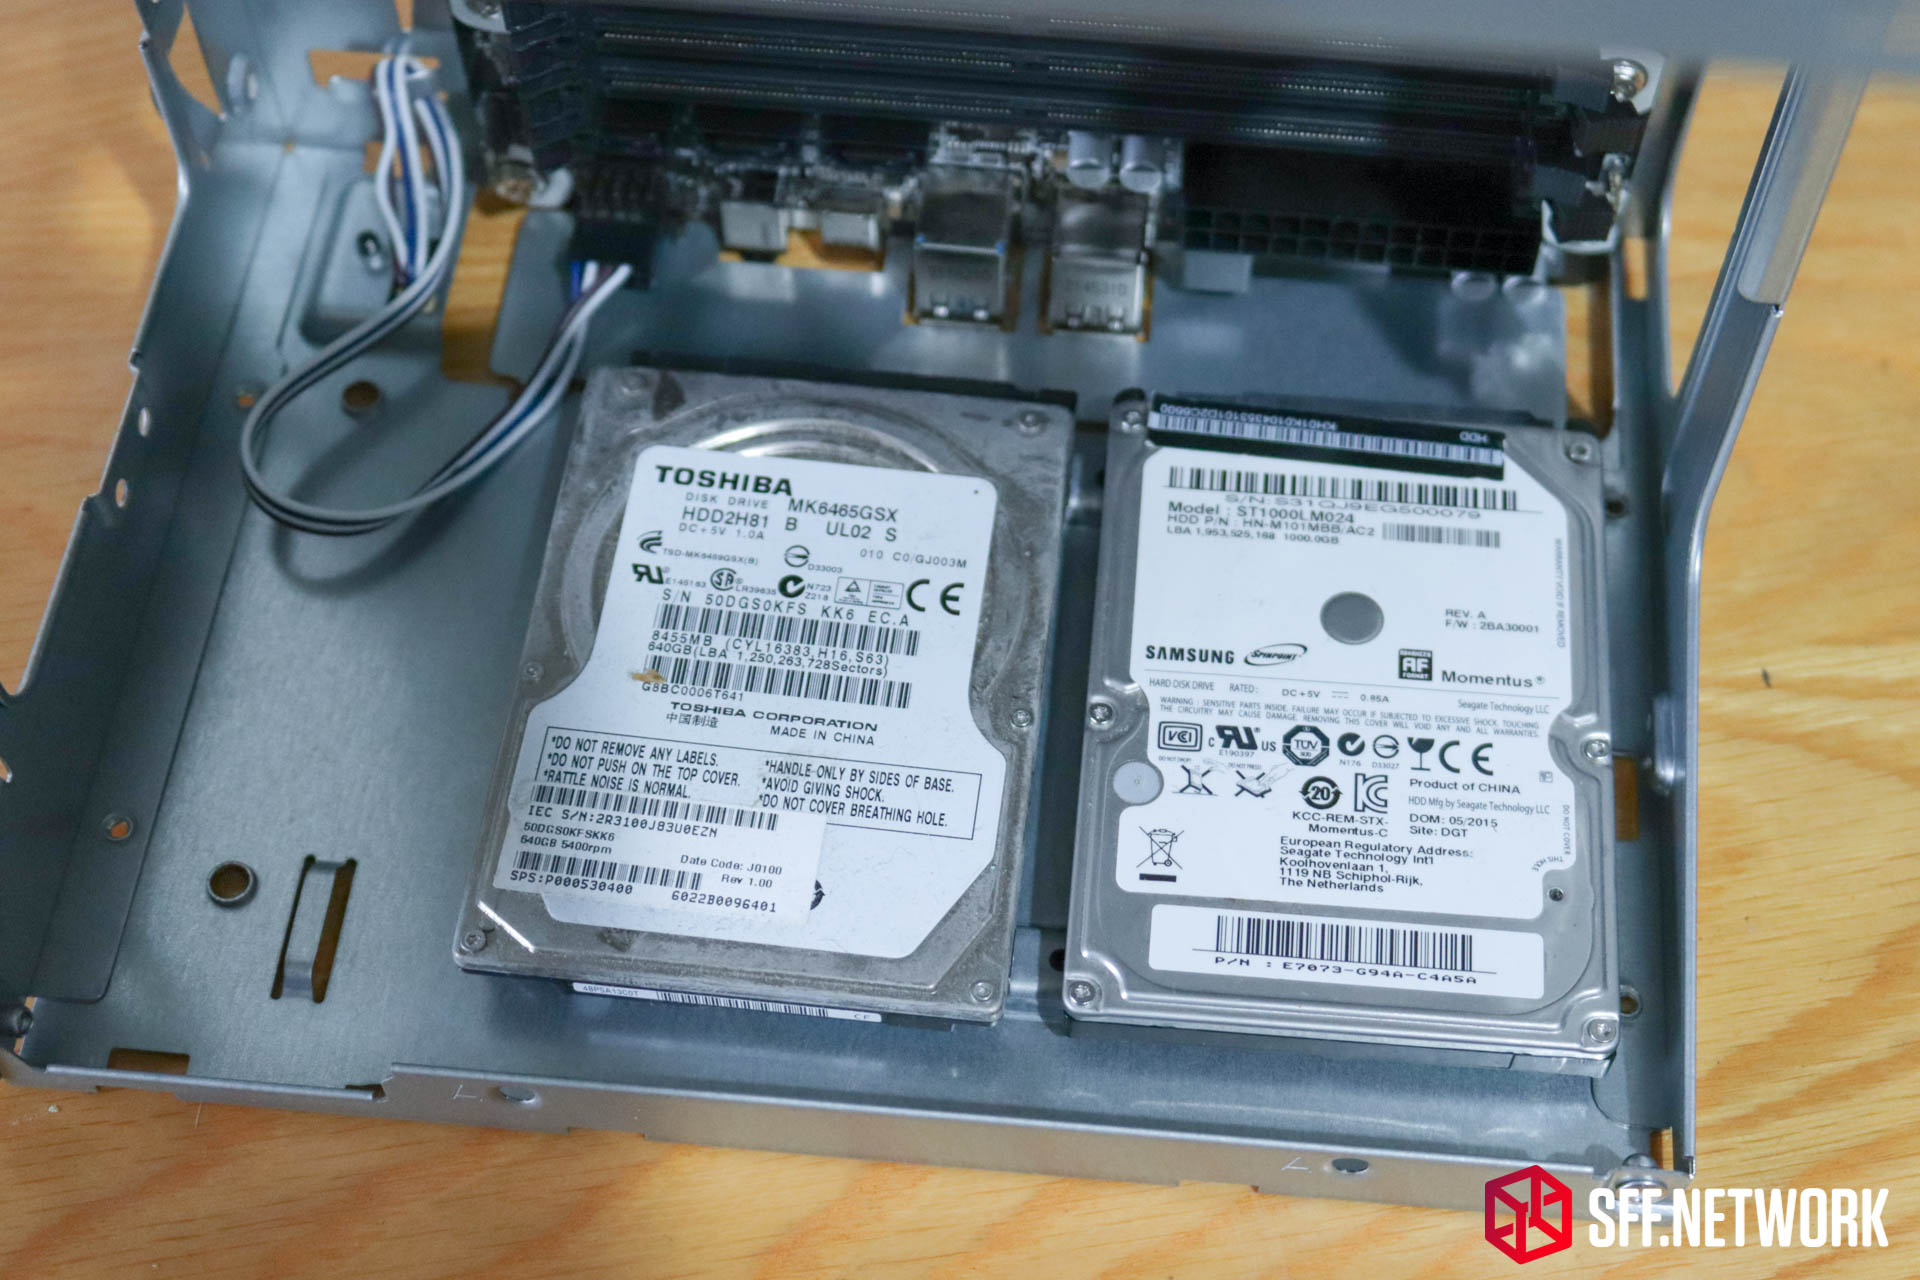
Righto – drive configuration. At the front of the chassis, you can mount a pair of 2.5″ drives (spinning rust in place of SSDs – all my 2.5″ SSDs are in use)…
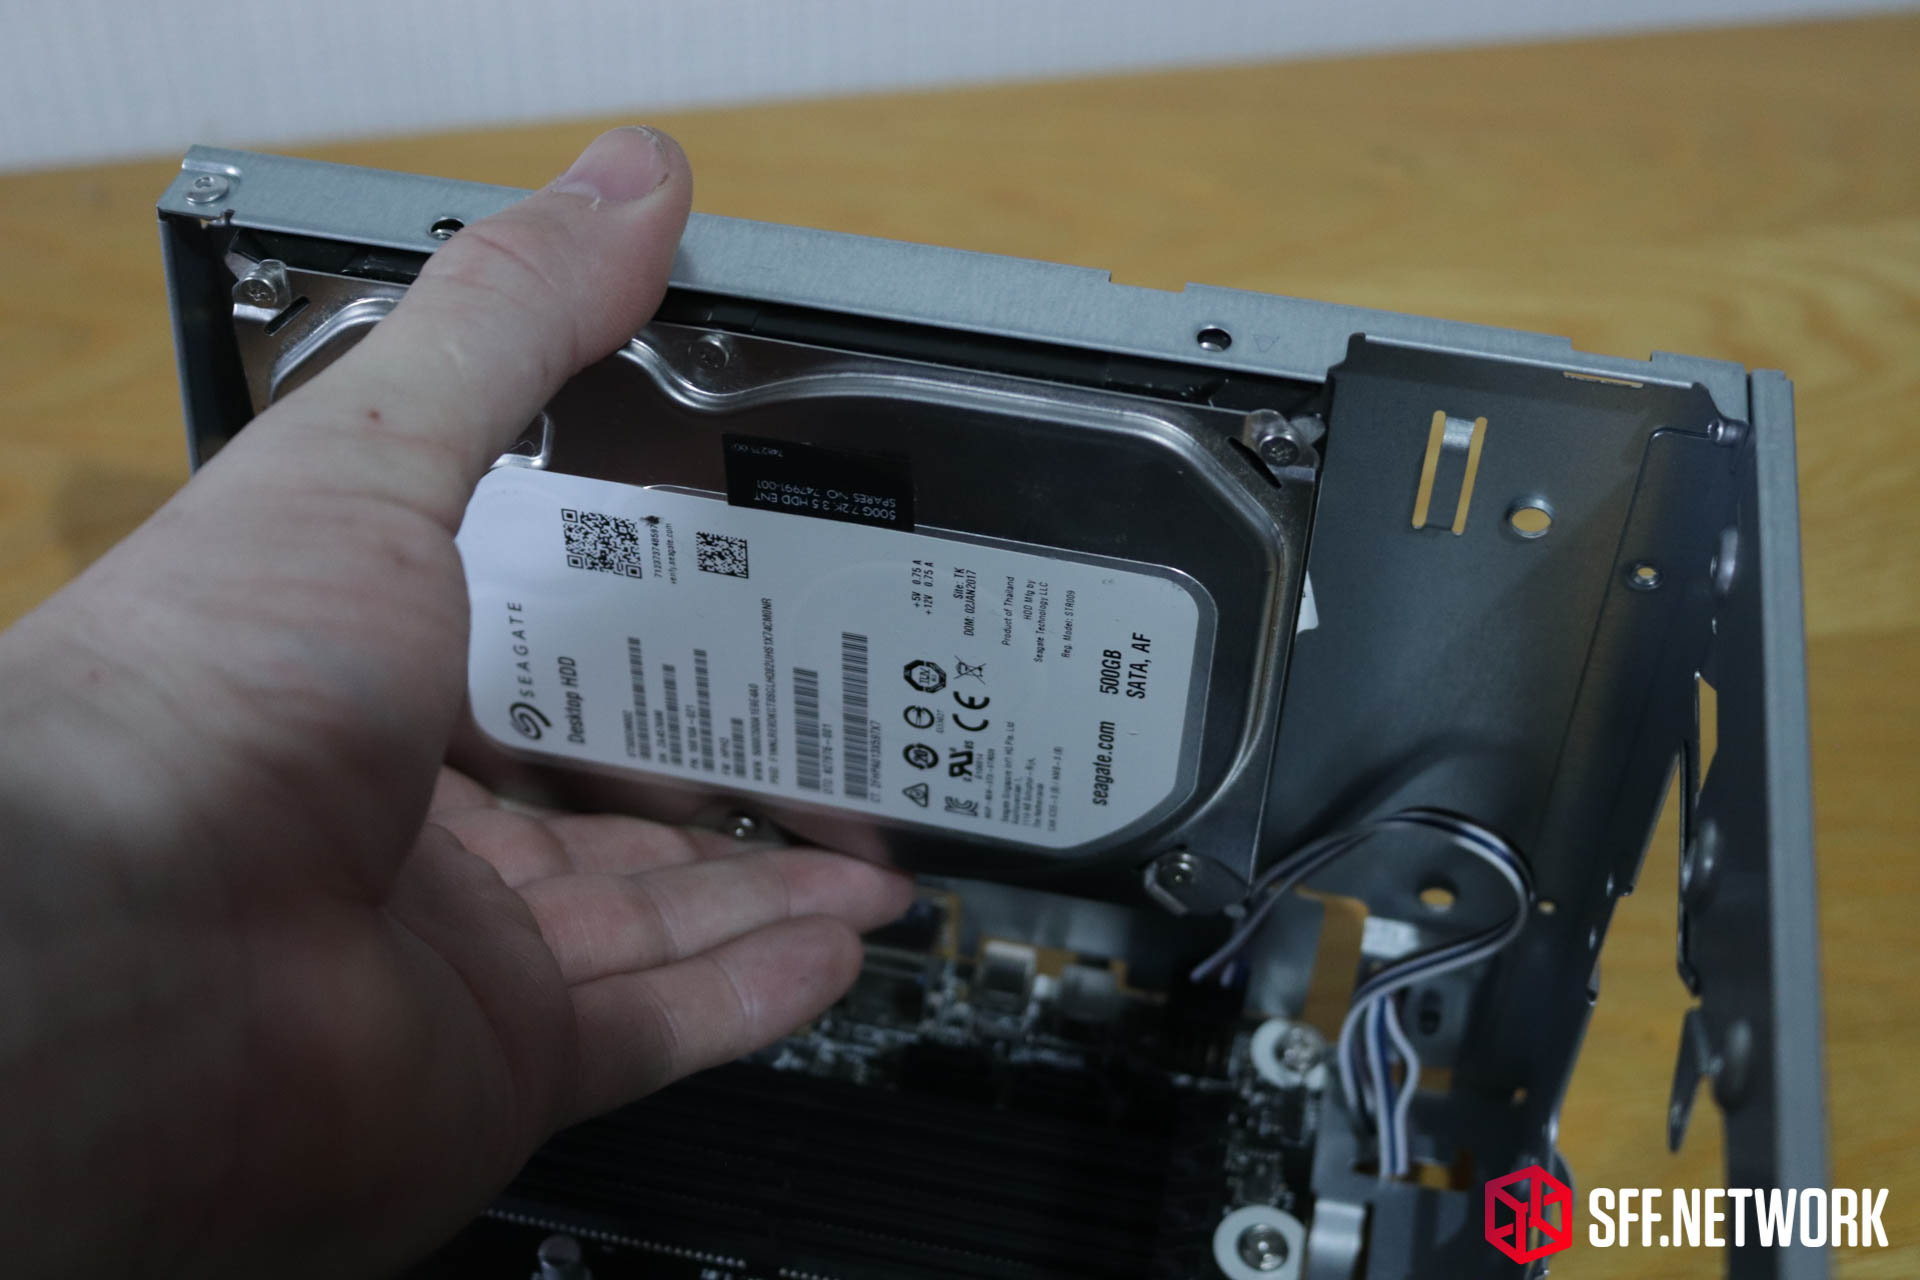
Or a lone big boy 3.5″ drive.
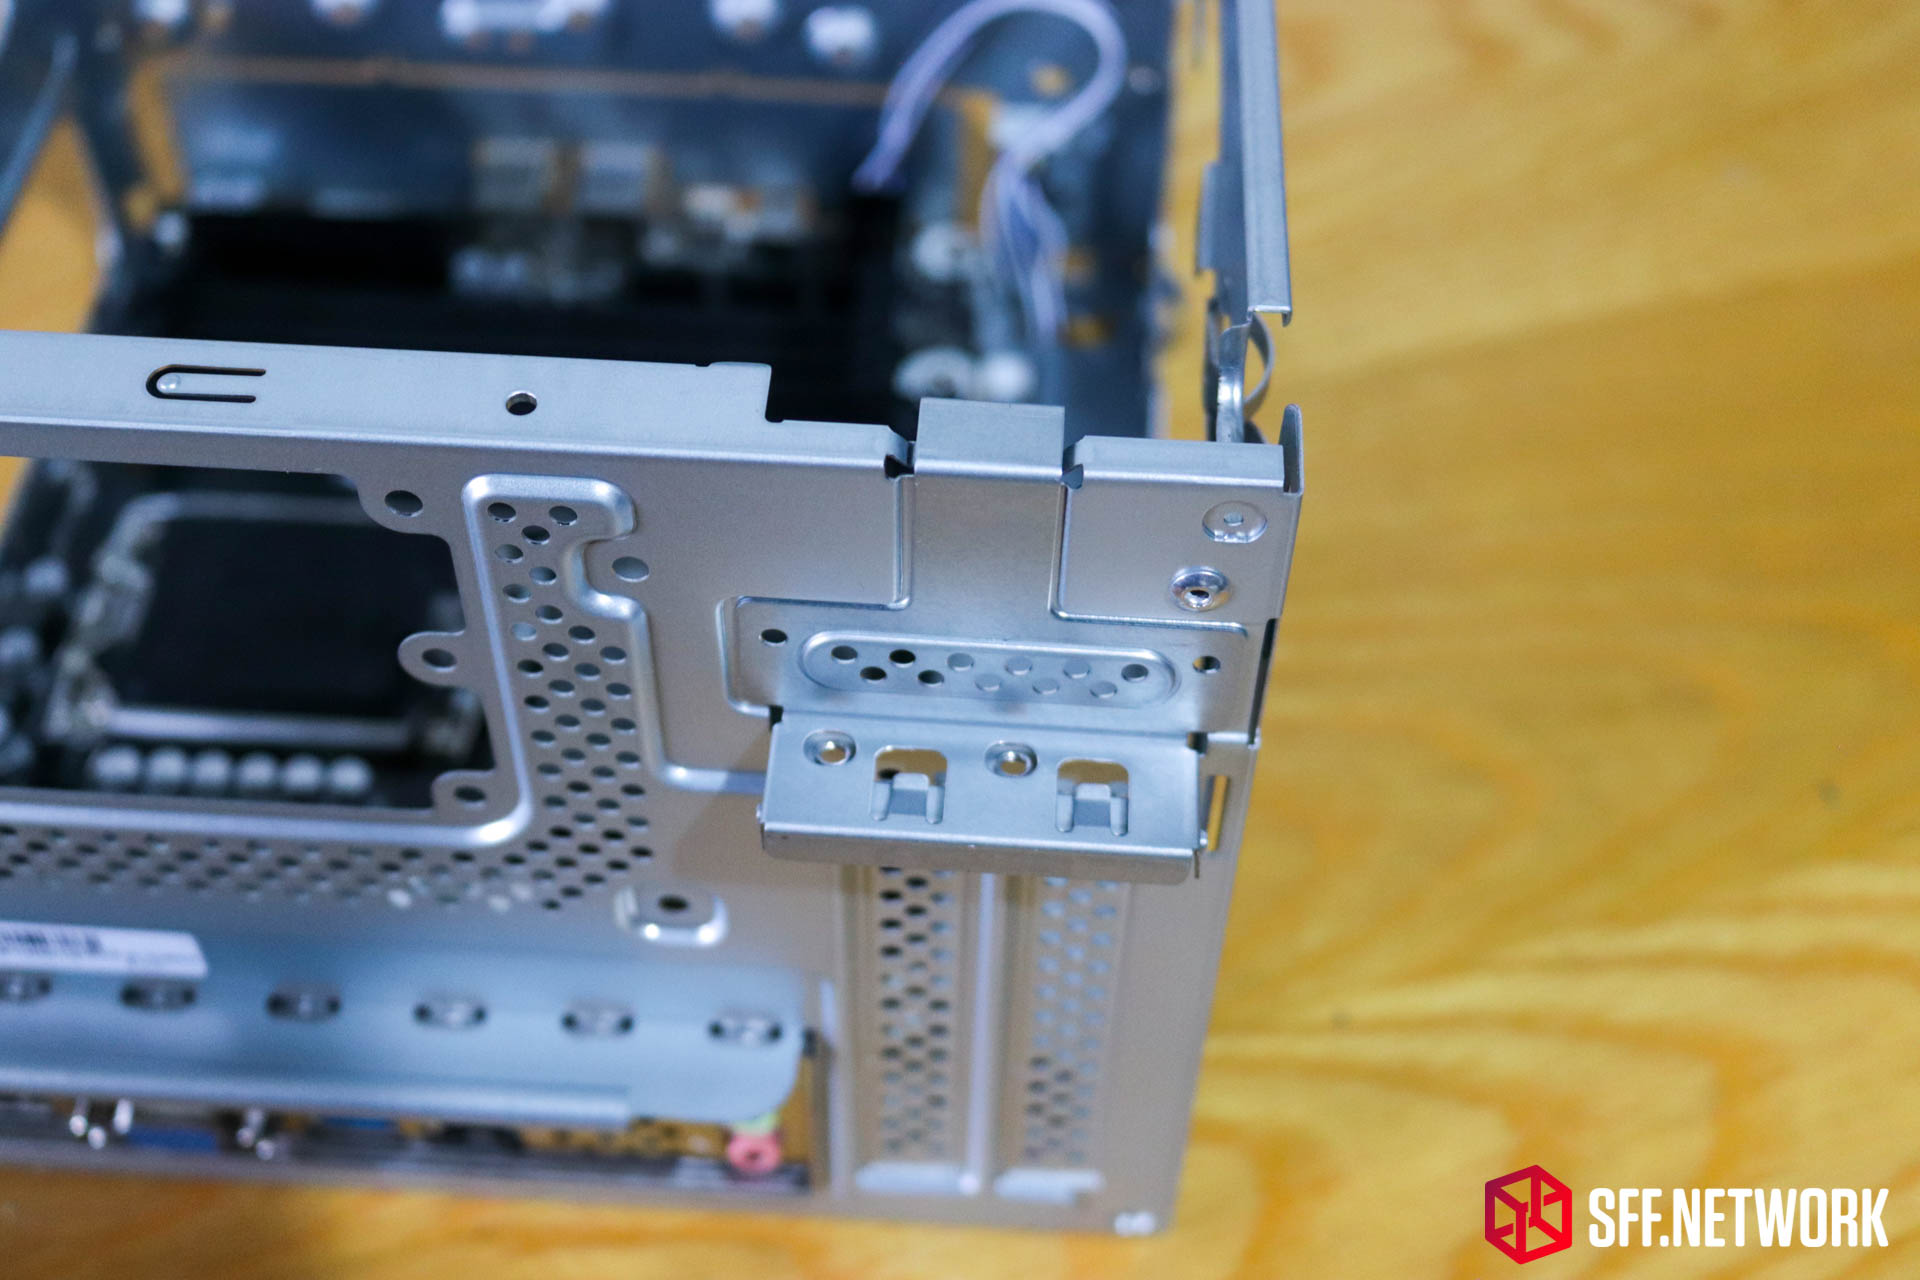
On to expansion card mounting. This little flippy metal bracket holds the expansion card in with spring tension. Cheap, but does the job.

Sproing! I’m not a big fan of this setup. You can, of course, use screws to retain the card.

Well well well, 1998, we meet again. Stamped, single use expansion slot covers? Is a blood sacrifice to the PC gods incoming?
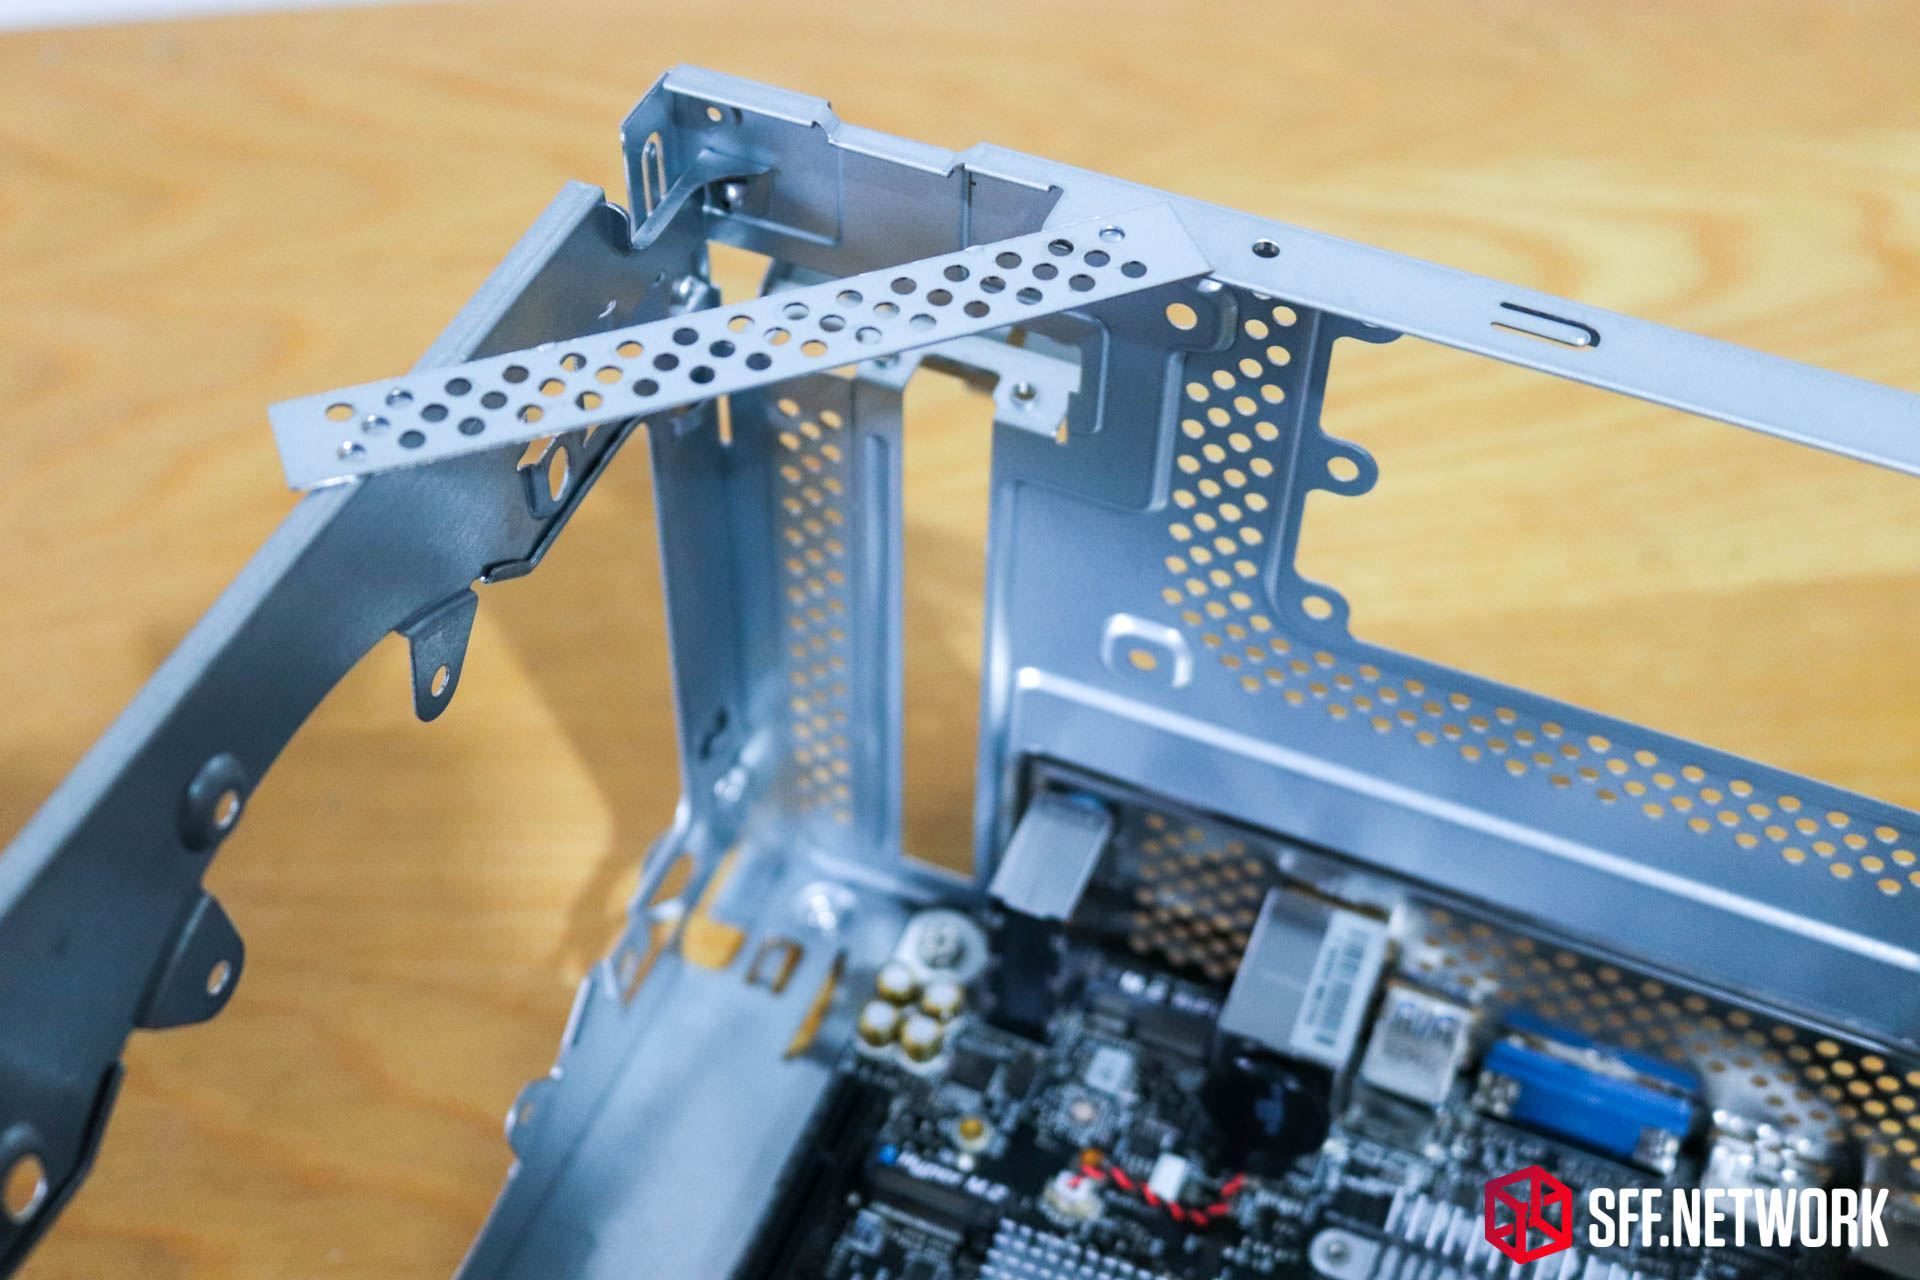
Yeah, I’m not a fan. My scars from the dark days of PC building tingled at the sight of these. However, in this instance, no new injuries were incurred.
Let’s slap a card in there, now that I can’t cover the expansion slot holes. An EVGA GTX1060 will do nicely.
Disclosure: ASRock provided one of their Challenger RX6400 cards to use in the review, but a GTX1060 is more representative of what our readers would use. I bought the GTX1060 out of my own pocket for this review before I found out ASRock was providing a card, and I’m going to use it! (My personal SFF spec RTX2060 is in a custom water cooling loop, so not so easy to throw in for testing). I’ll look at the Challenger RX6400 in an upcoming article.
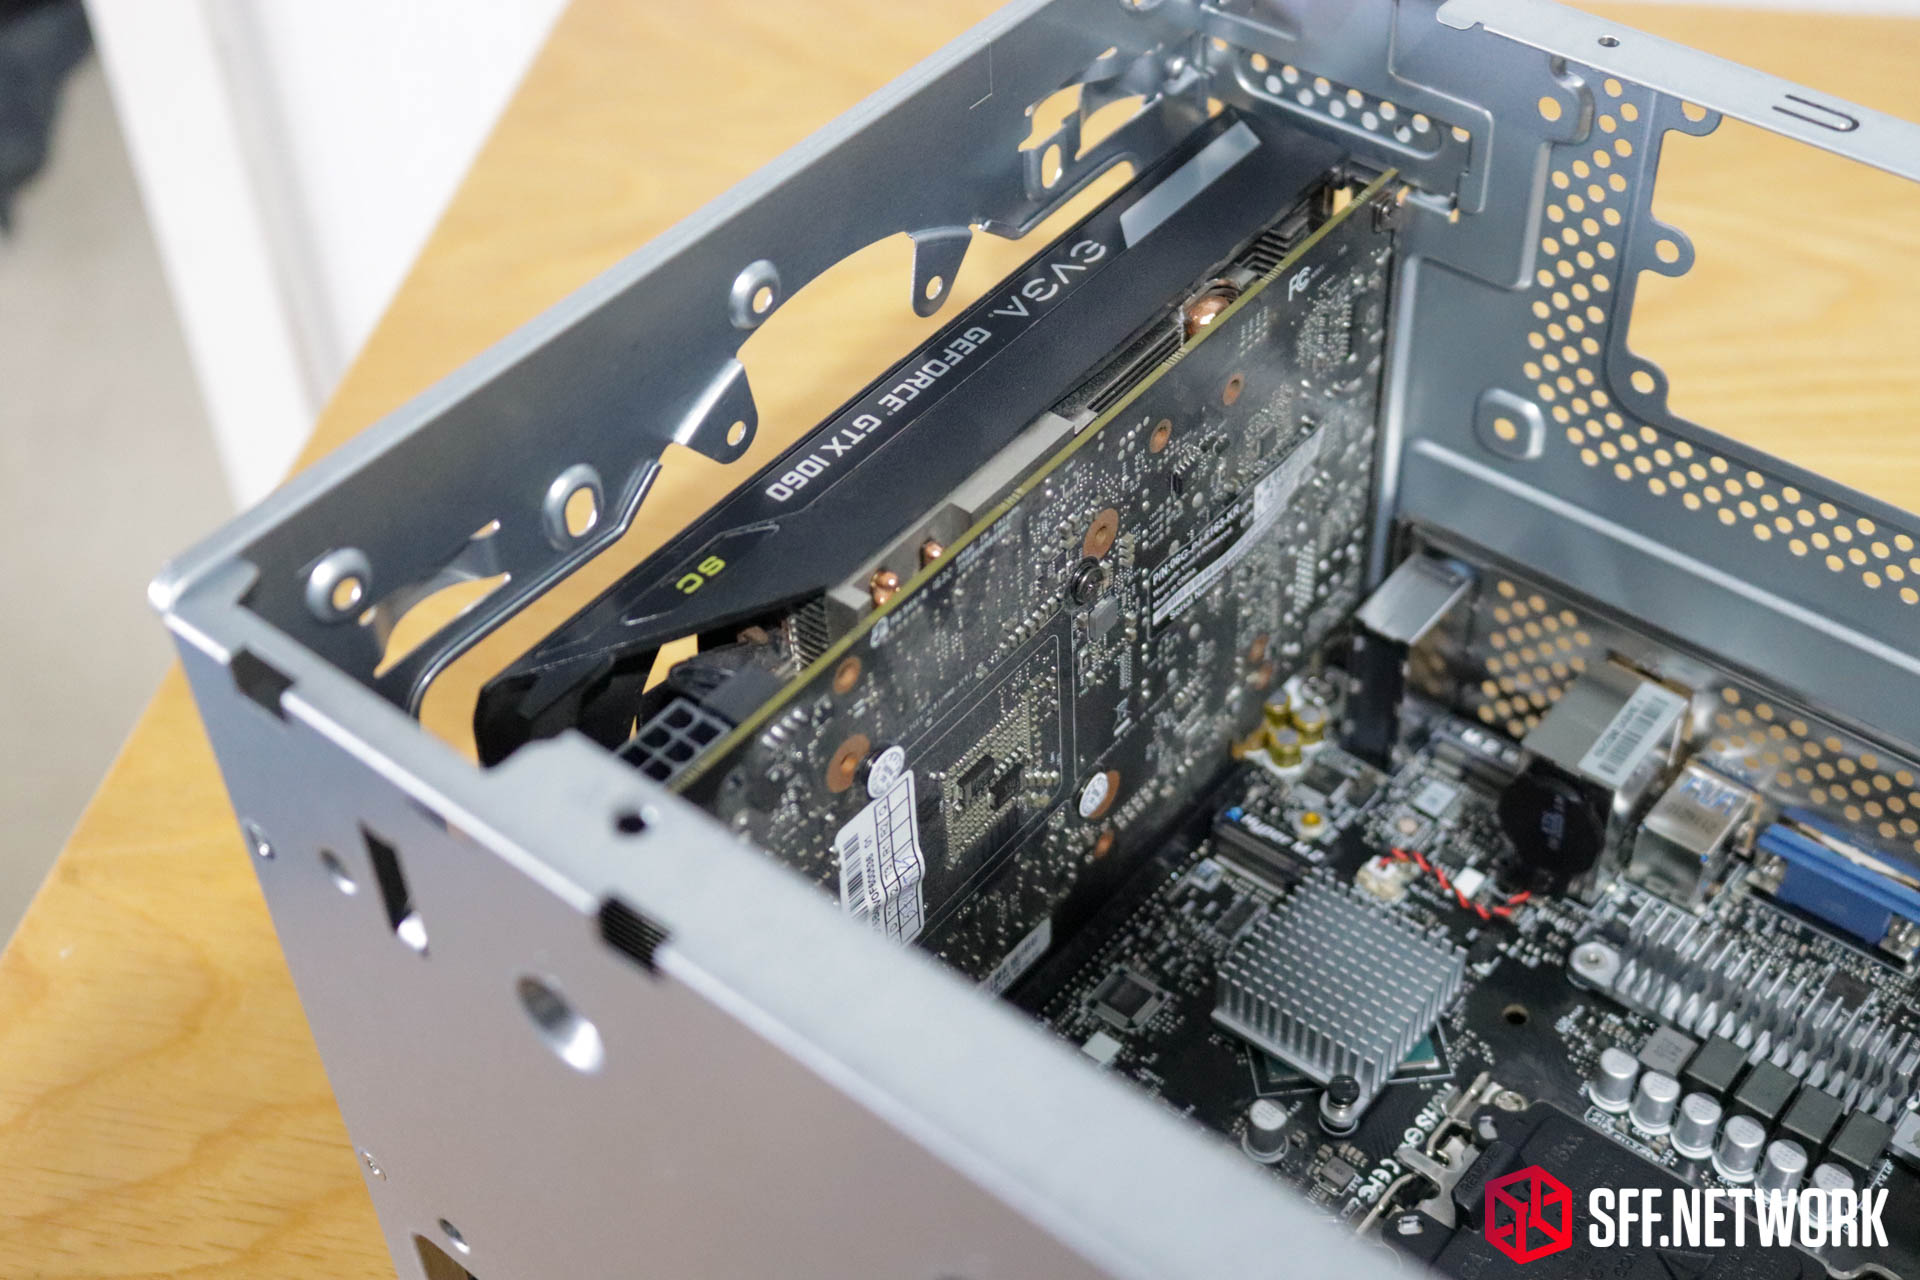
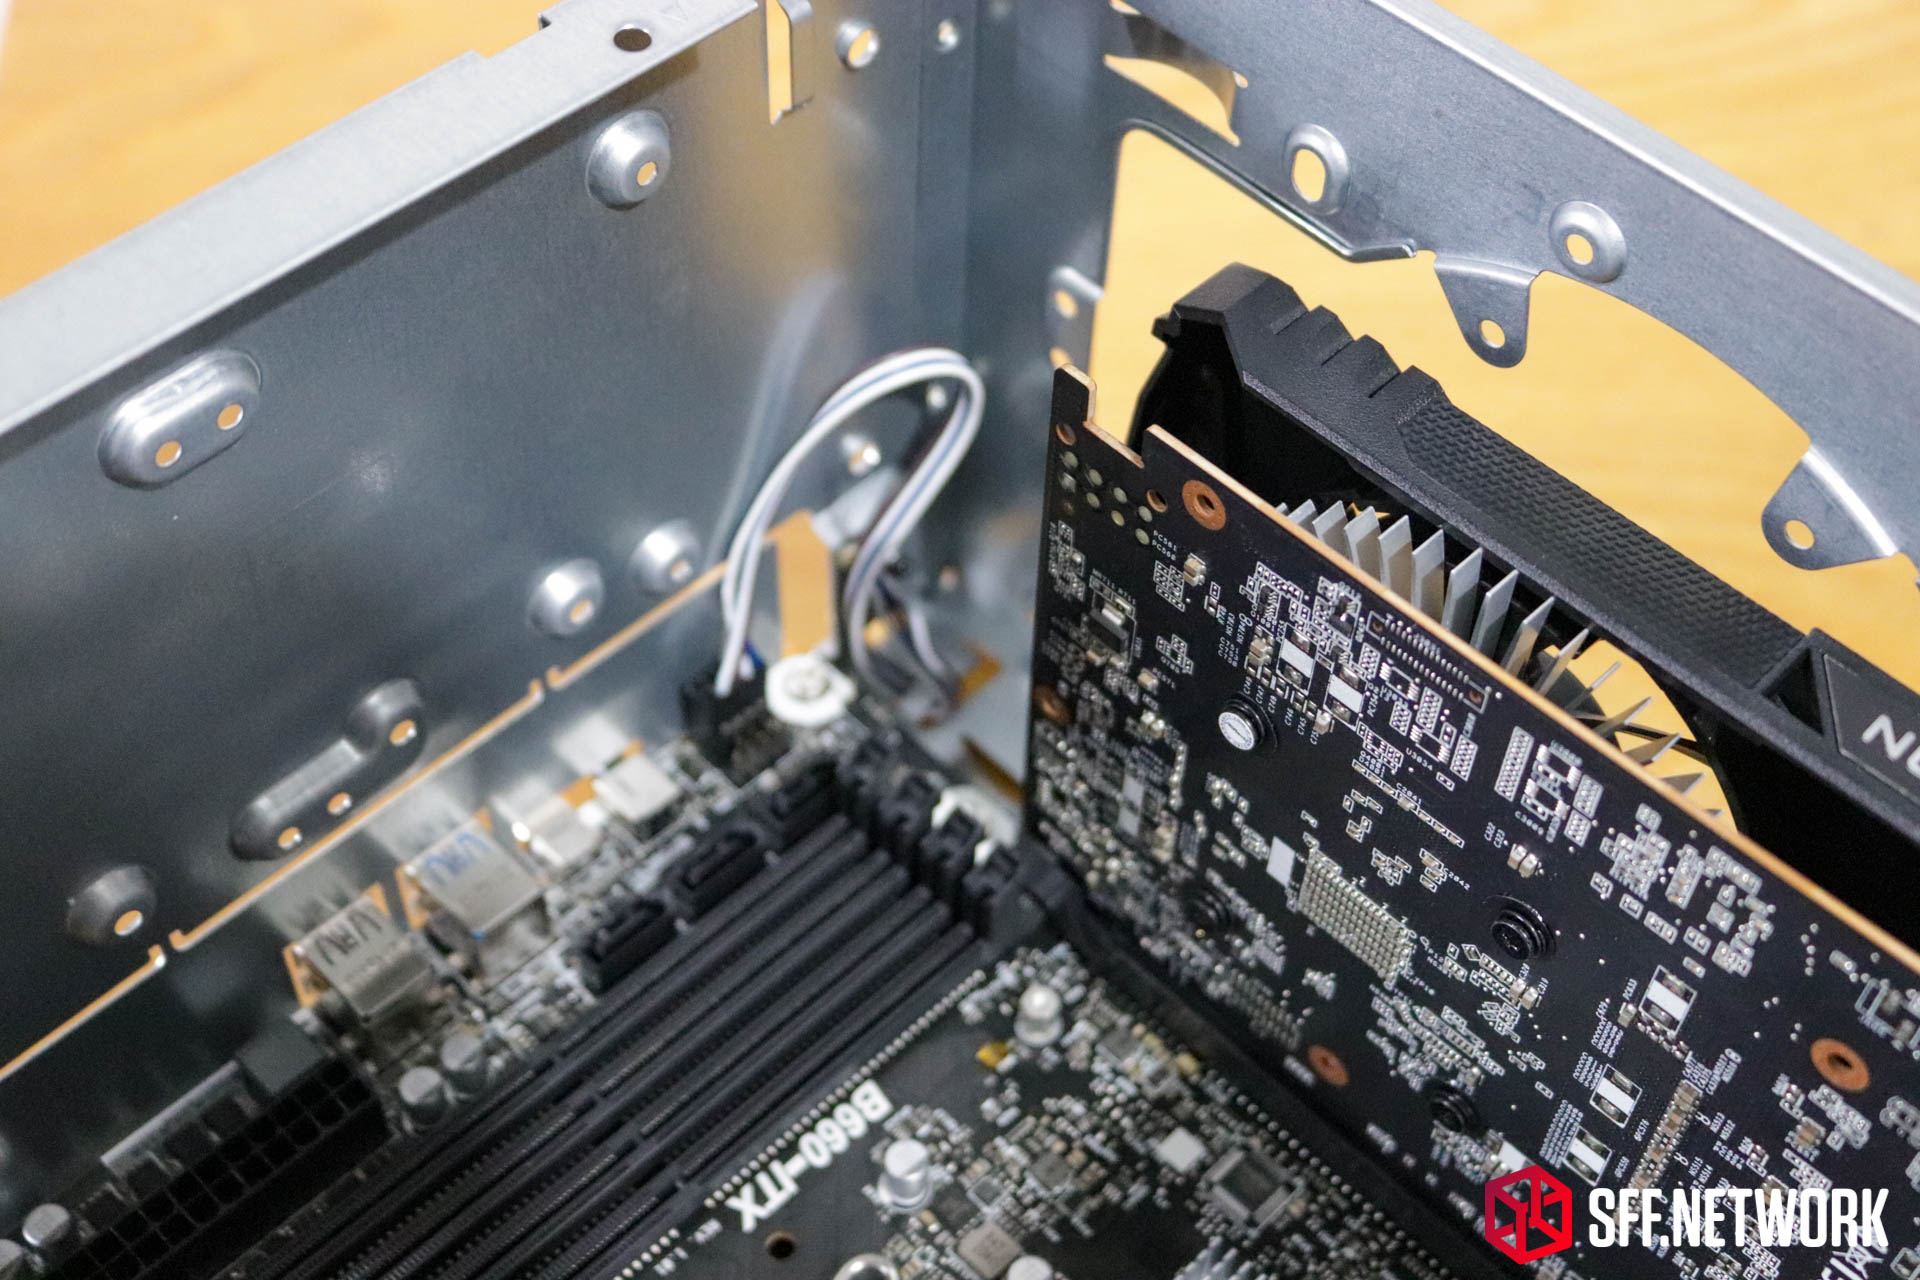
Quite a big cutout internally for GPU cooling, enabling single and dual fan GPUs up to 200mm long. Also to note, if you haven’t installed a graphics card in your DeskMeet, you have the option of mounting a slim(!) 120mm closed loop cooler, a 120mm intake fan, two 2.5″ drives, or a single 2.5″ drive. Note, the board only has 3 SATA ports in the B660 guise, and two in the X300 AMD guise.
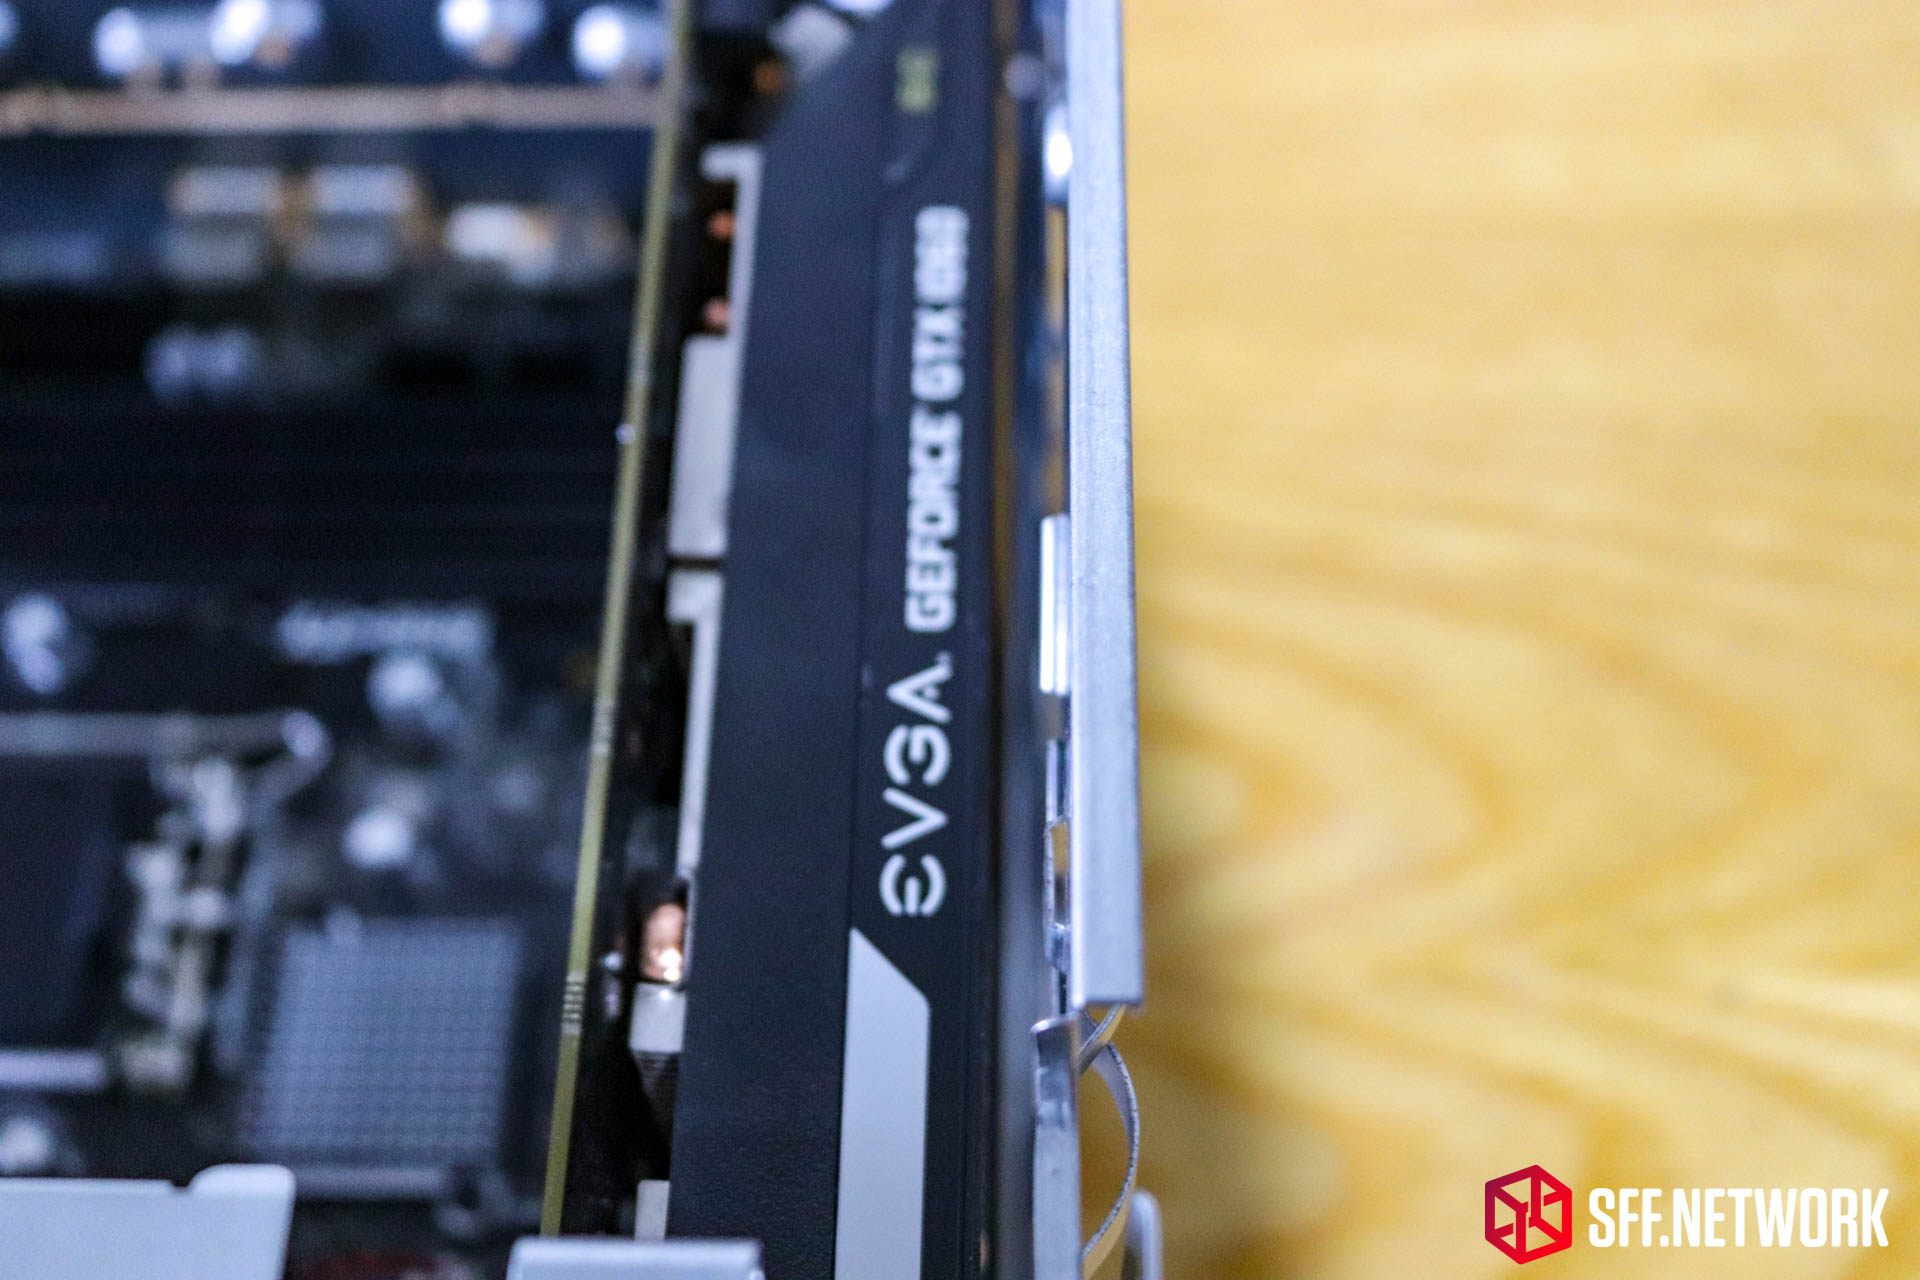
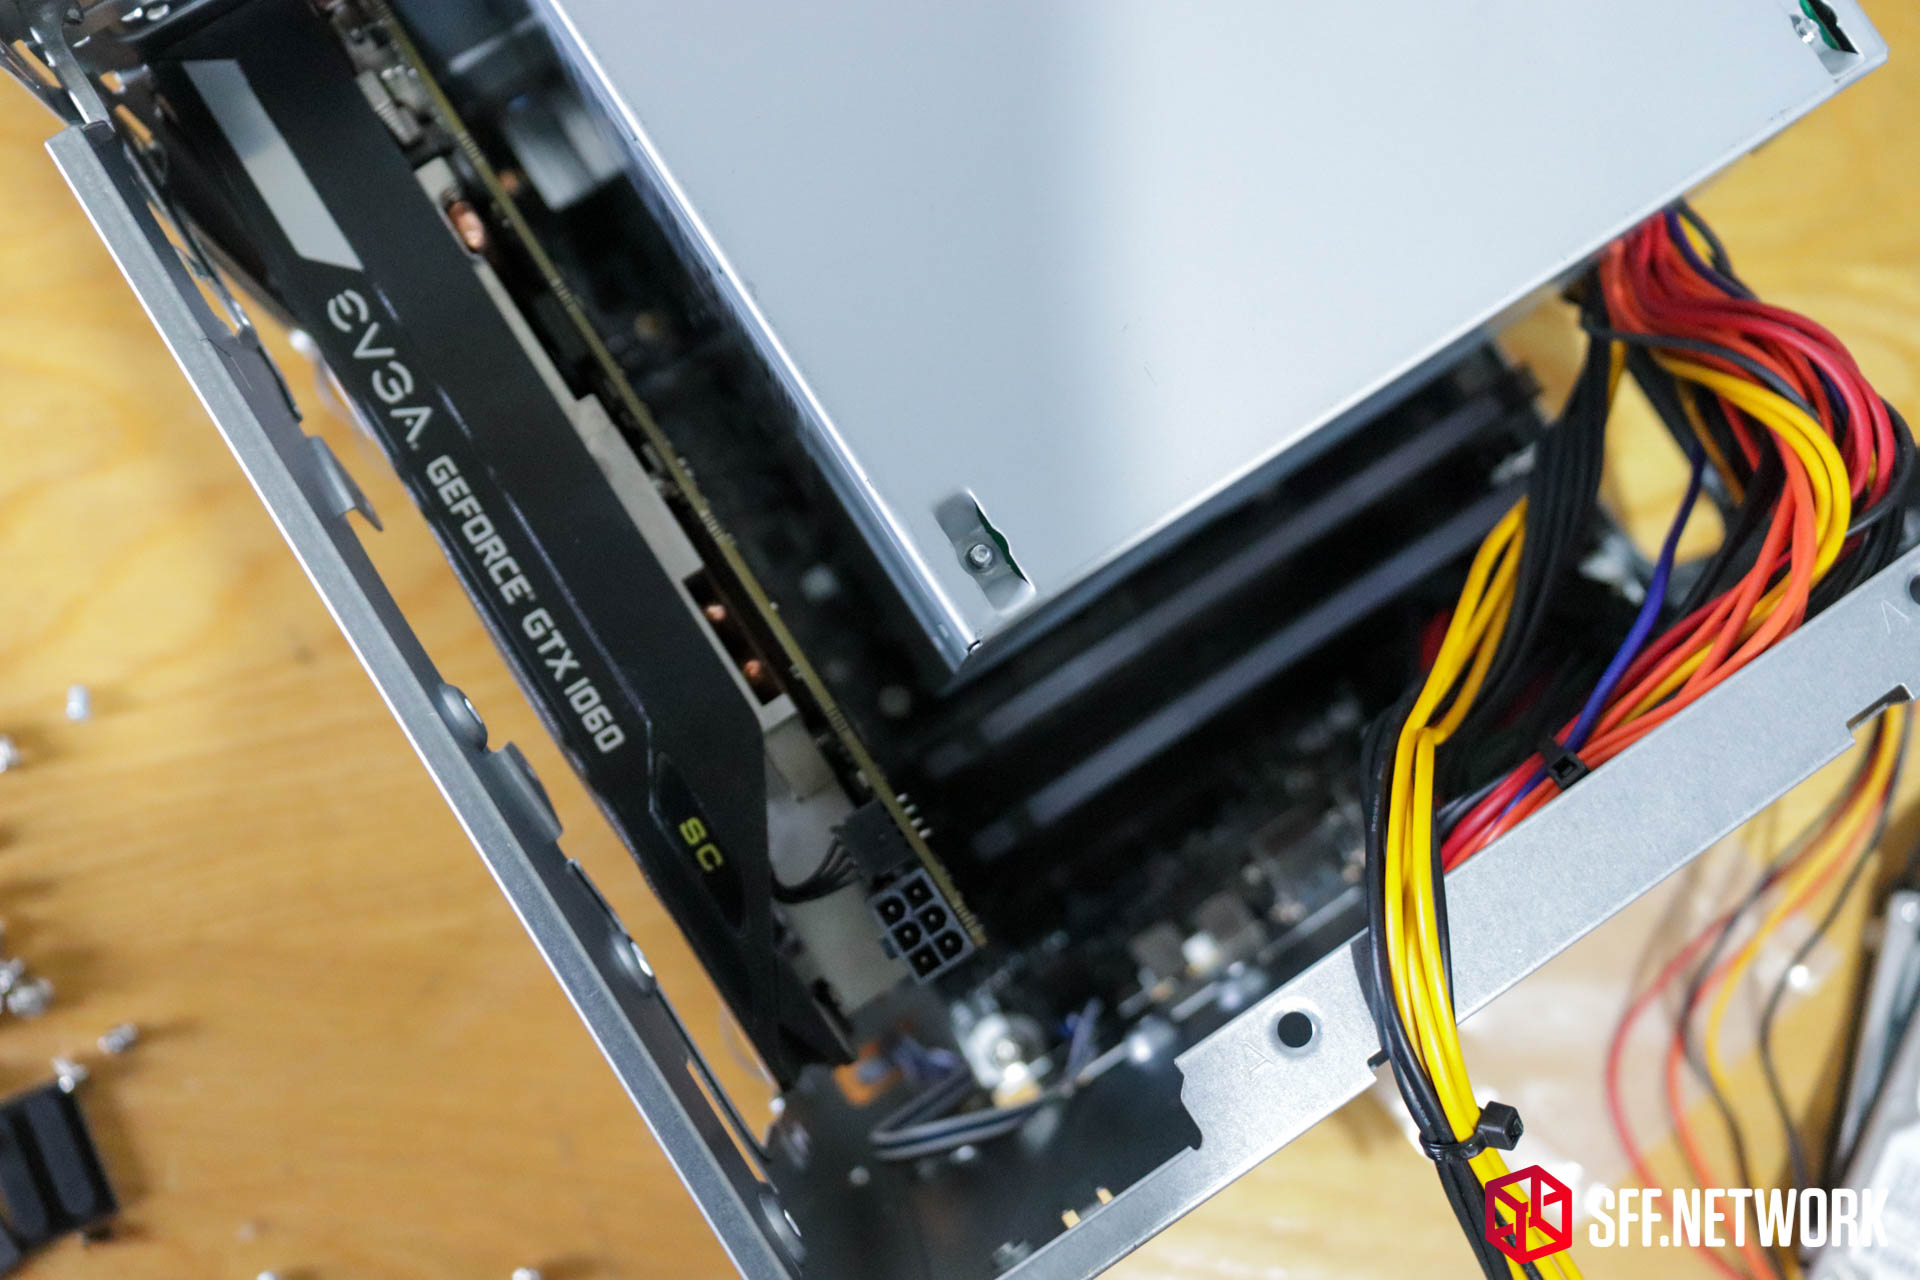
Super tight clearance between this true dual slot card and the case, anything thicker will likely not fit. There is some headroom for taller cards, but it’s rare to find cards that are true dual slot and taller than the norm.
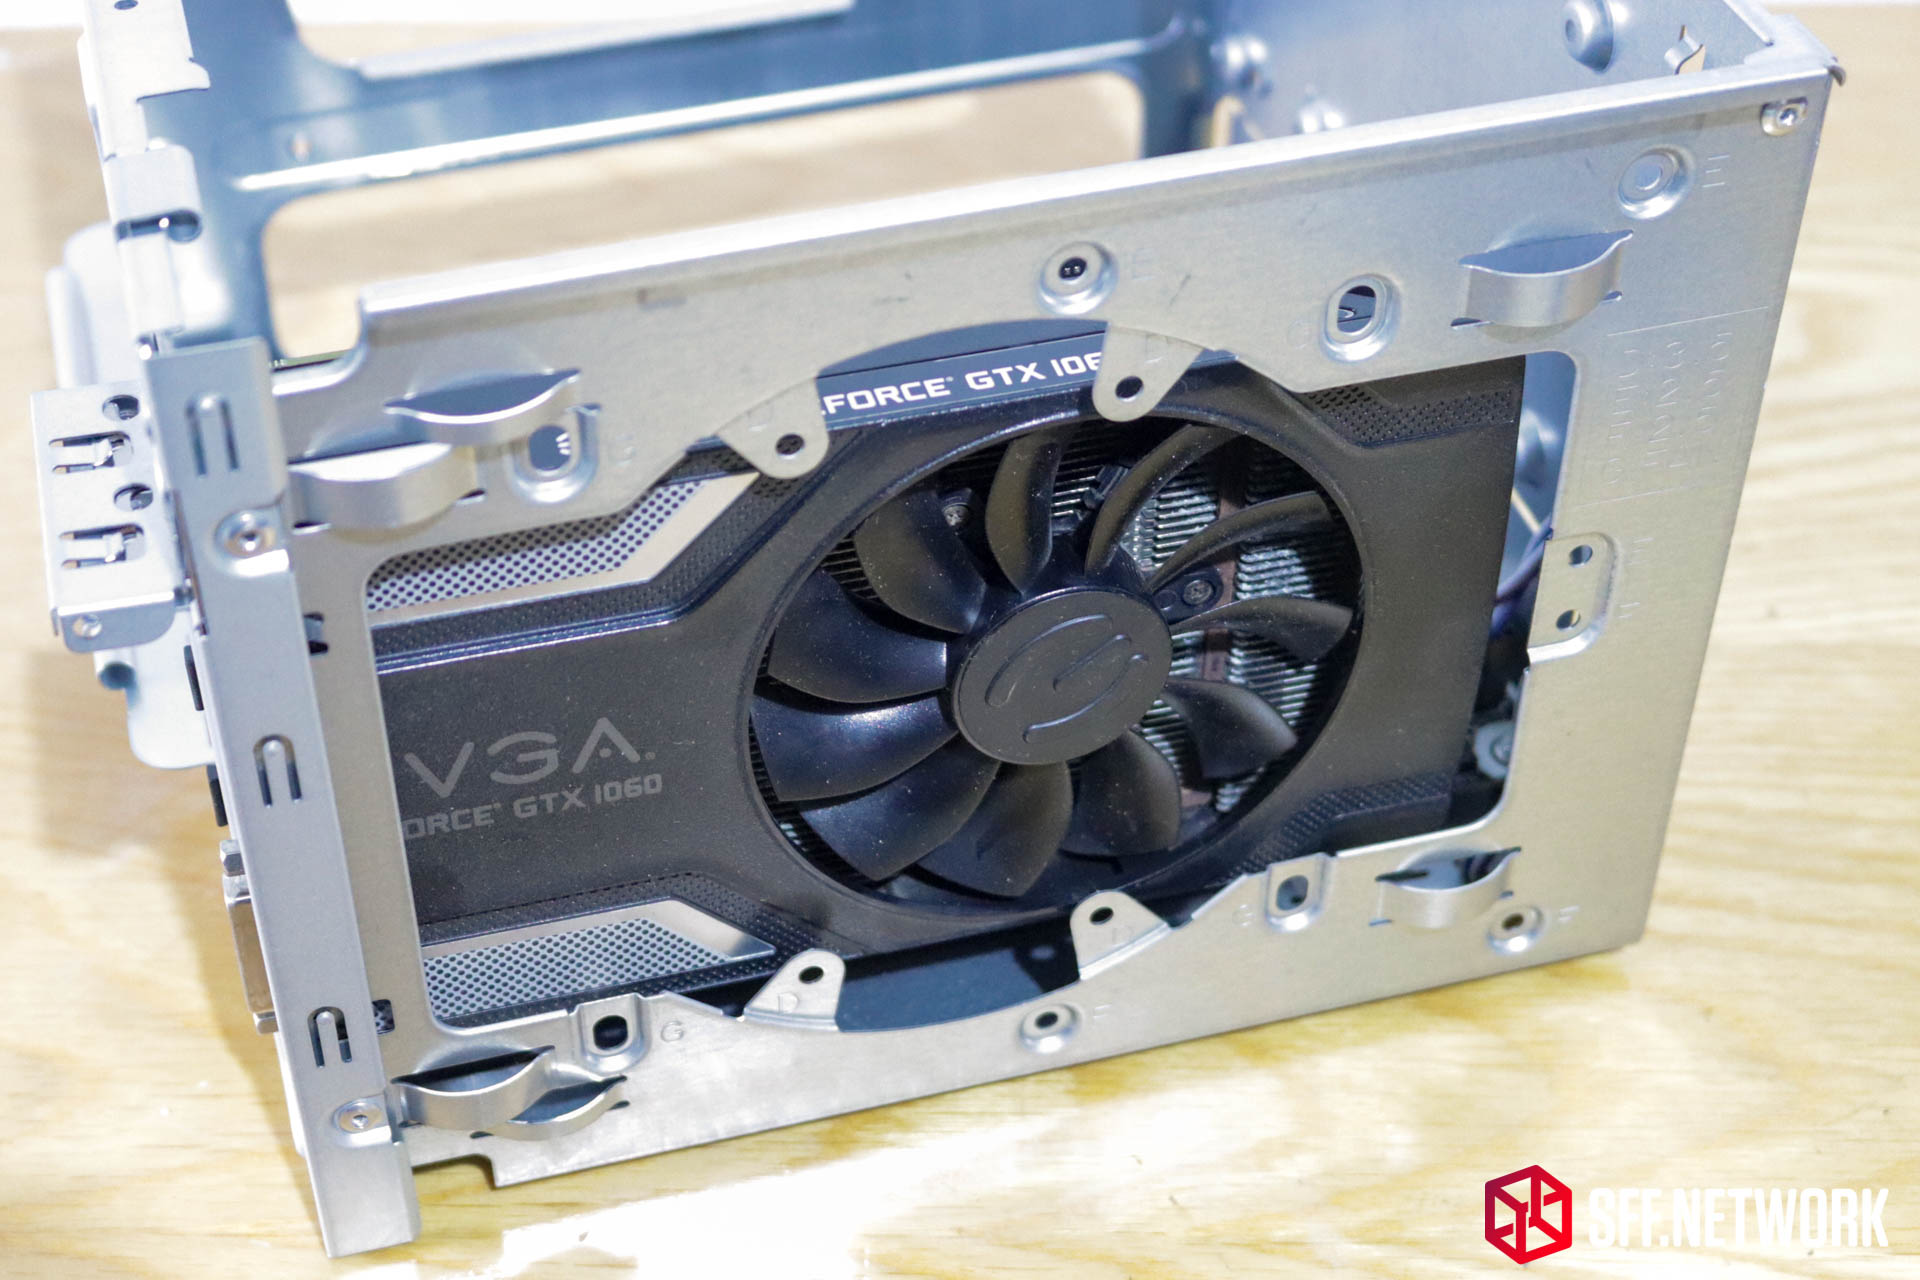
Throwing ASRock’s Challenger ITX RX6400 in, we can see a bit more room at the end of the card.
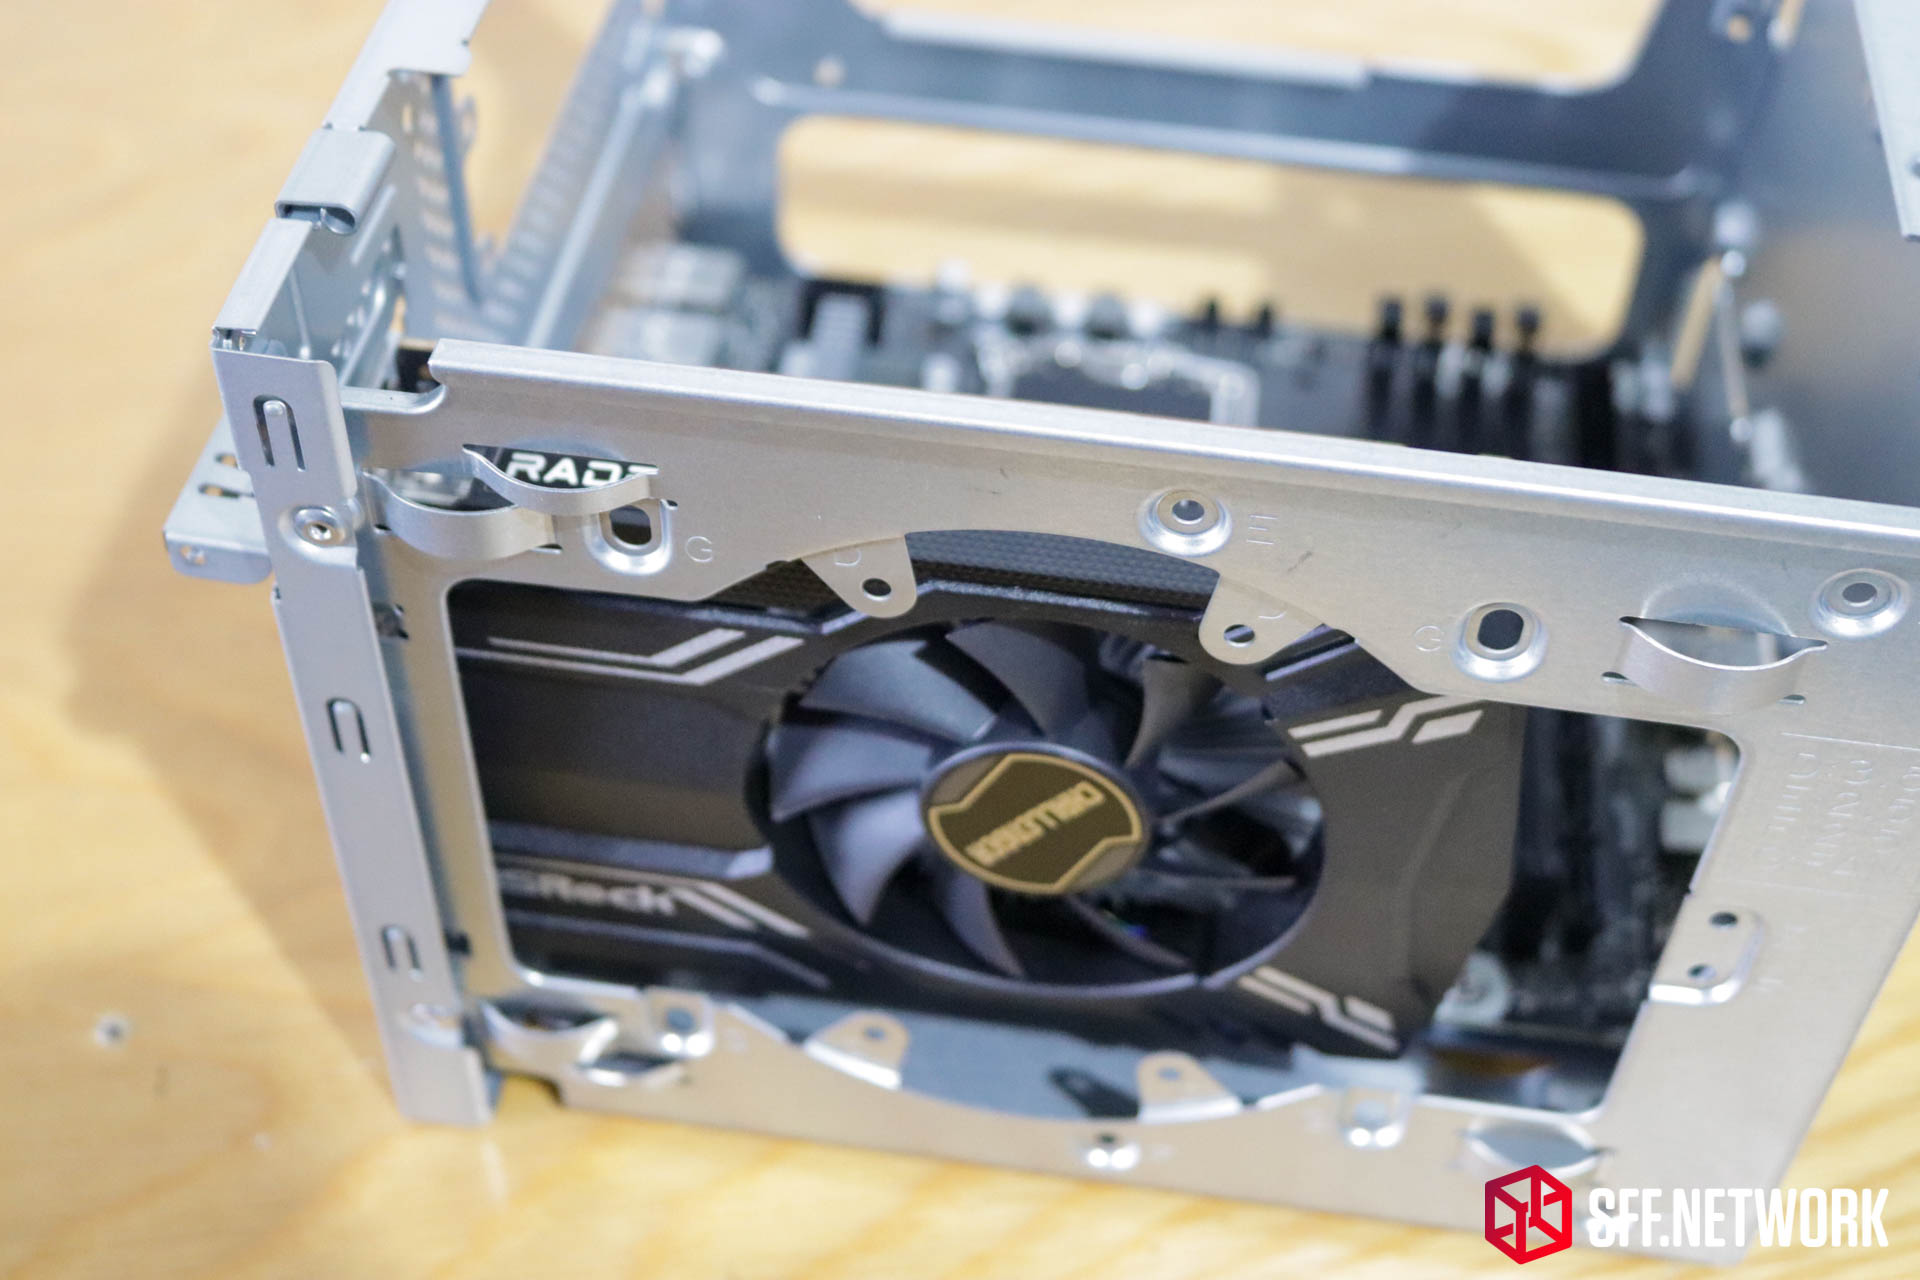
A nice centered fit for the GPU fan on this card. It does make me wonder though… Pull the fan and shroud off a GPU and intall a 120mm intake fan into the mounting holes provided? Could aid in any cooling issues (although I will be testing thermals a little later).
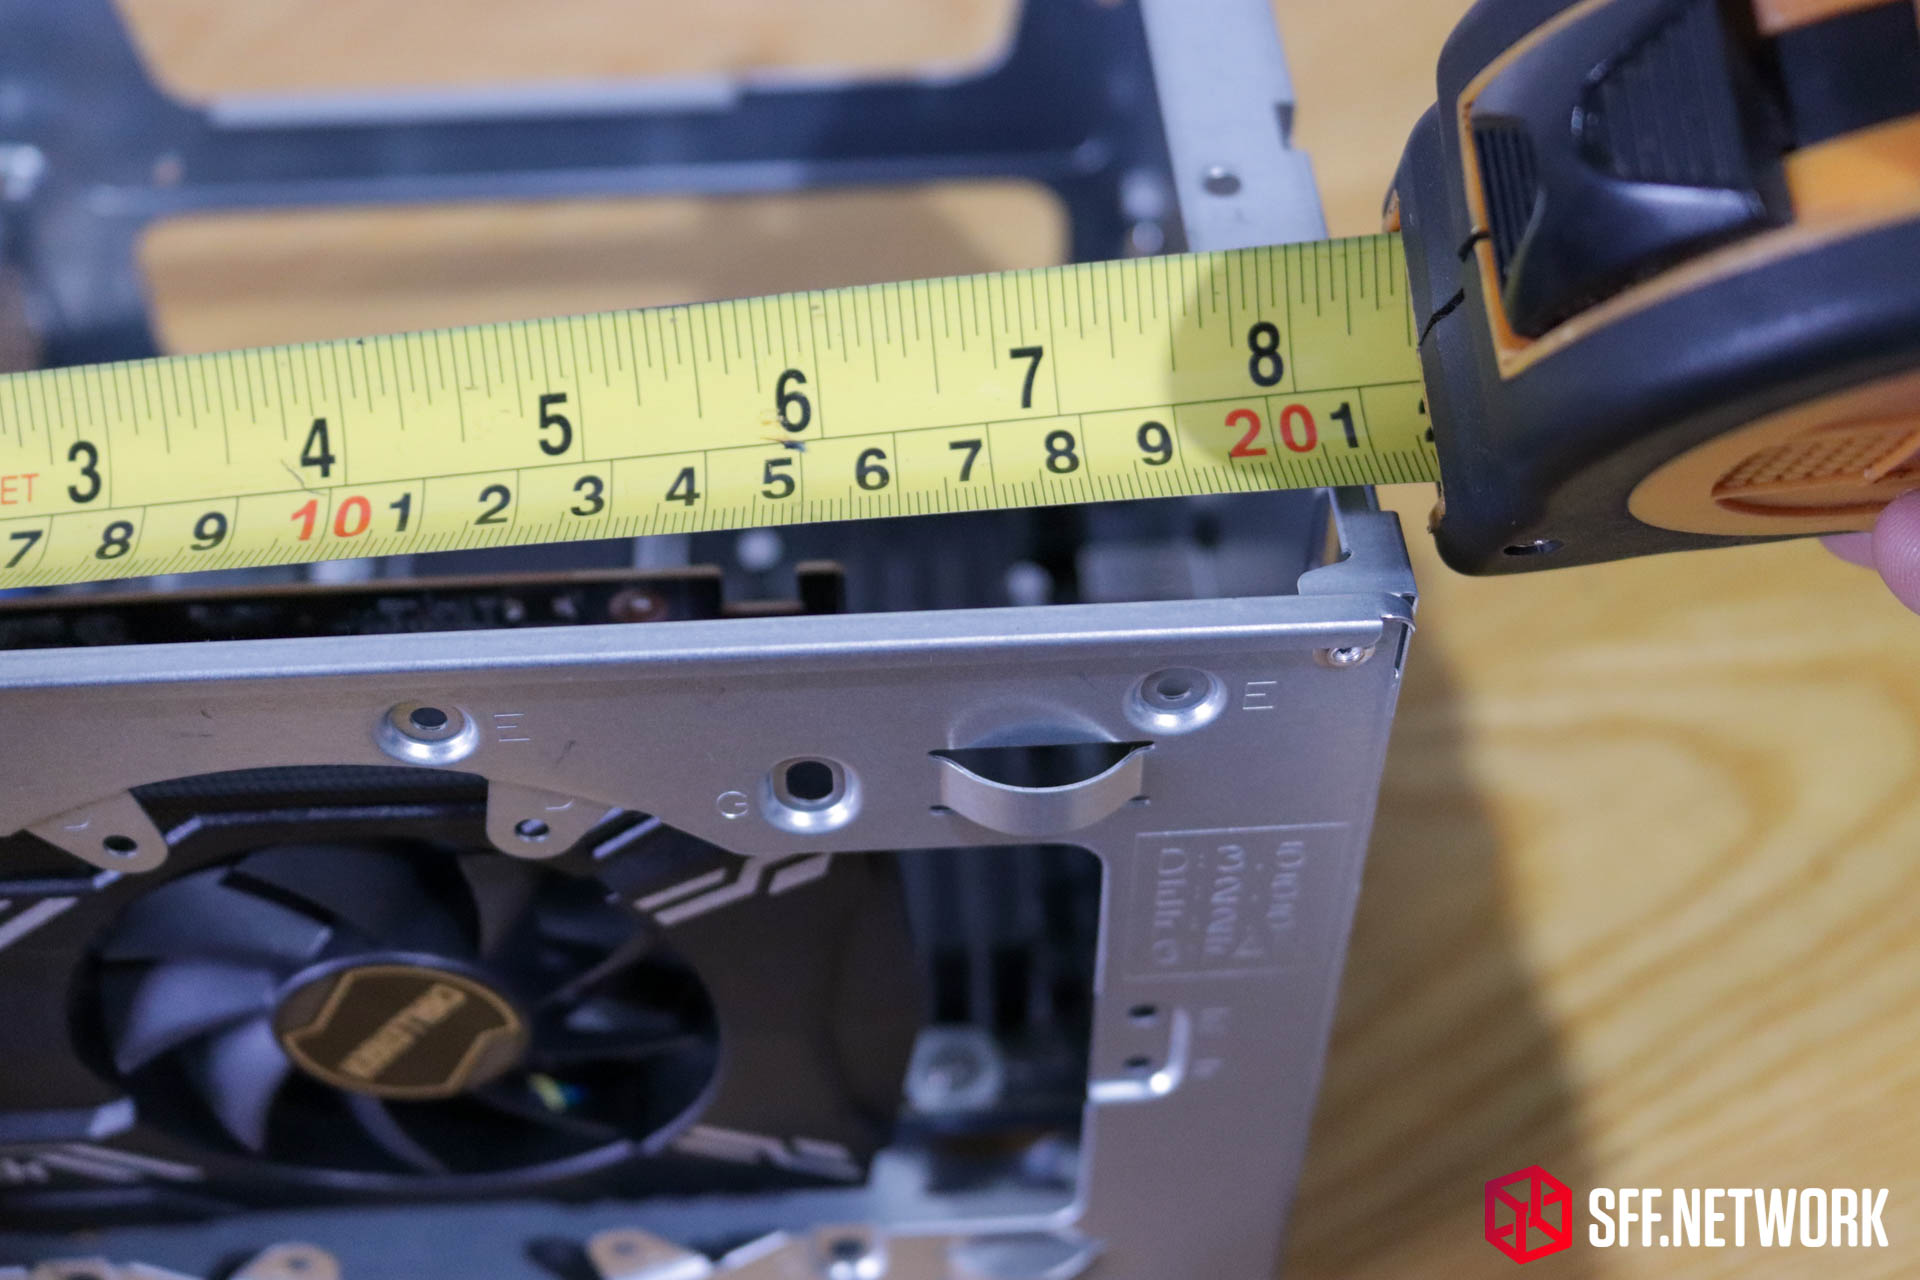
As ASRock stated, a 200mm card is the limit. It’s a hard limit, unless you’re one of our community members that like to dabble in bending the laws of physics.
Installing the included power supply is an interesting process, with the use of shouldered screws. Only two are included in the screw bag, so be careful not to lose them!
You install the two shouldered screws on the left side (in this image) of the power supply, slide the power supply in using the slotted holes, and then retain the unit with the remaining two screws. A nifty way to aid installation, and to avoid accidentally dropping your PSU on to the CPU cooler during installation. I’ve done that a few times in other cases!
It’s a little tight after the power supply is installed, I’d suggest installing the EPS 8 pin connector prior – Although I did manage to squeeze it in when setting up for this photo. The ATX 24 pin connector is also a tight squeeze, but more accessible.
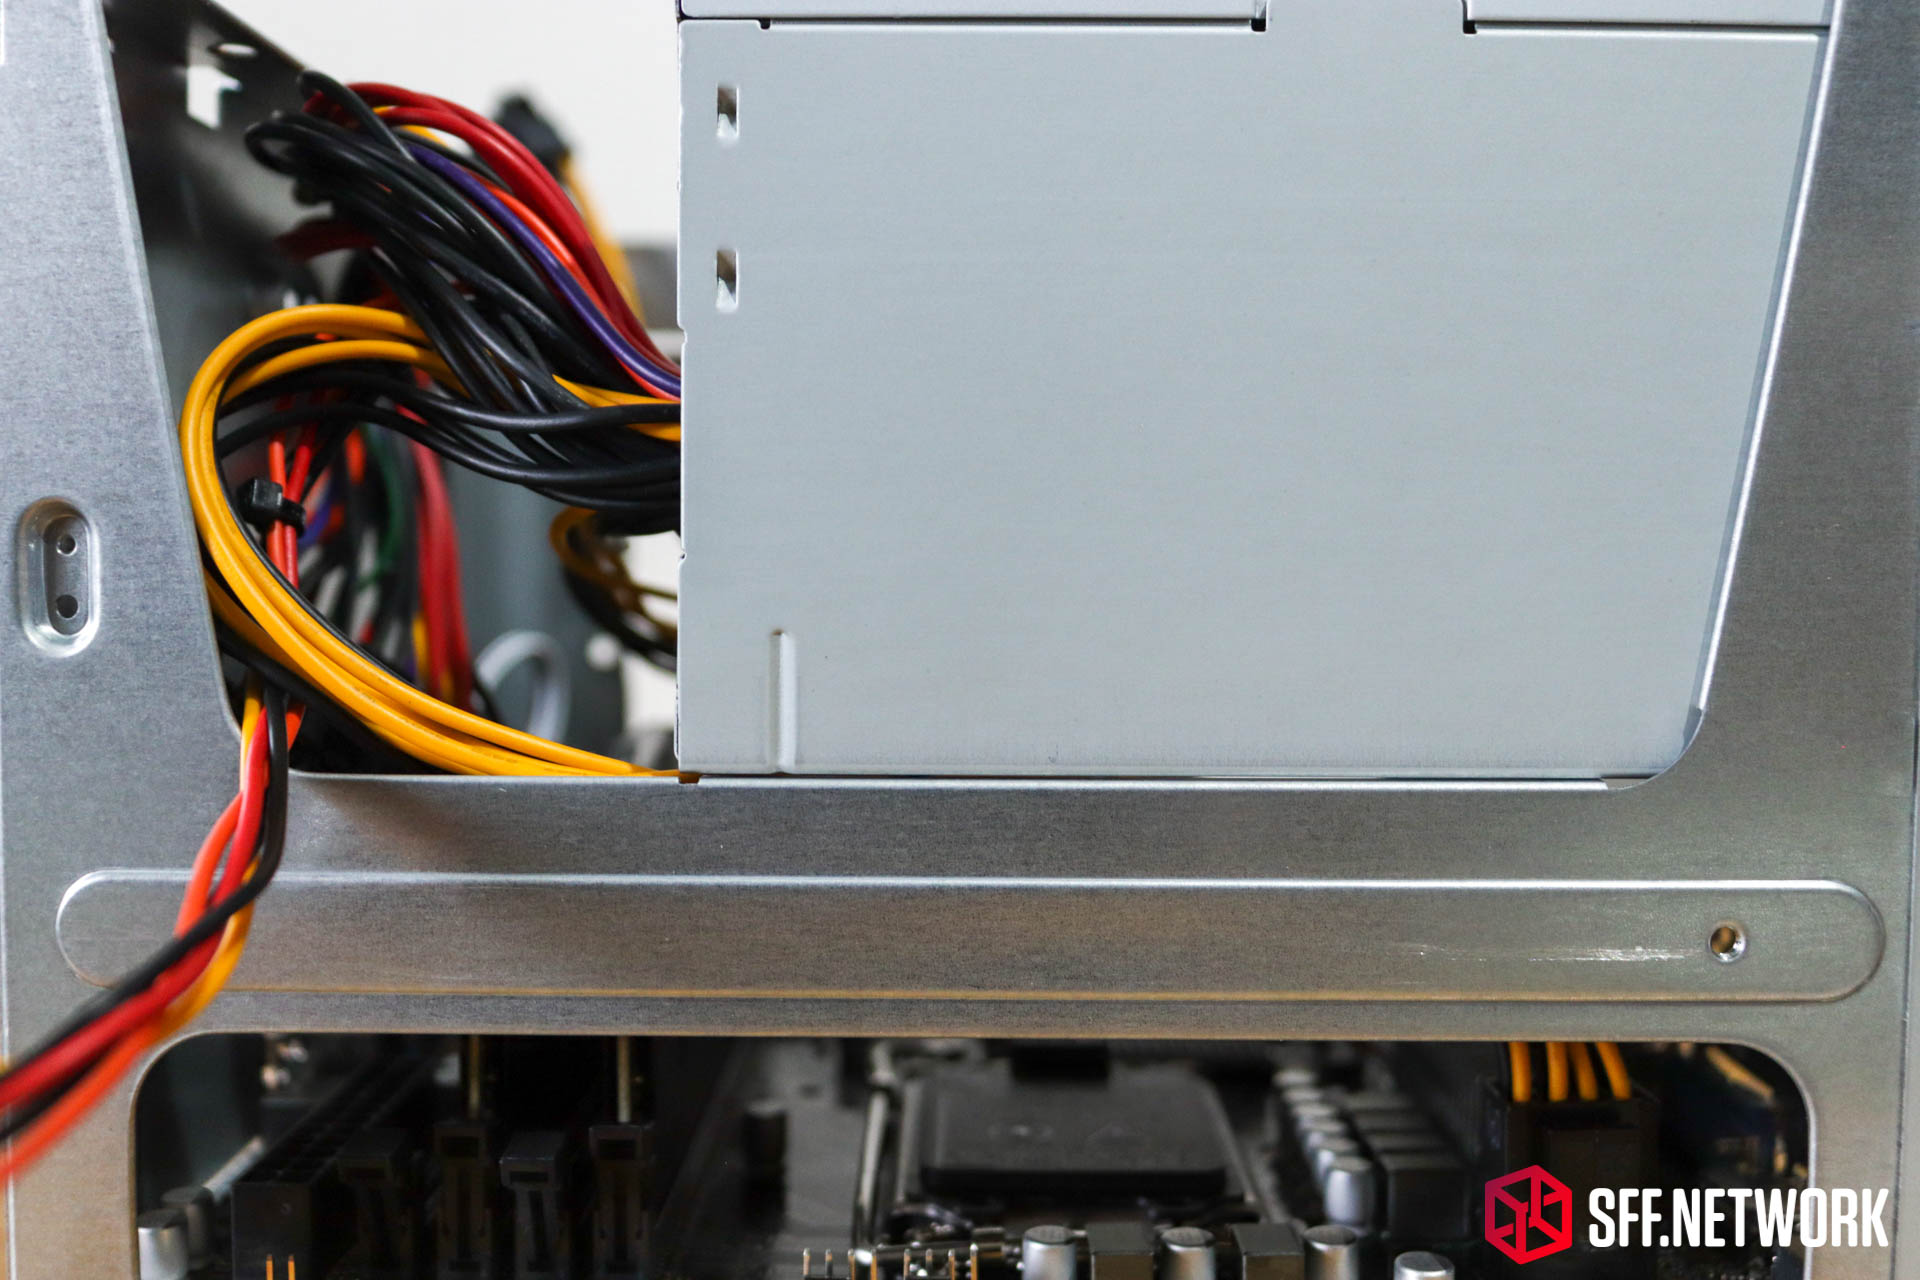
The power supply rests against a little folded ledge, aiding in some rigidity towards the front of the chassis.
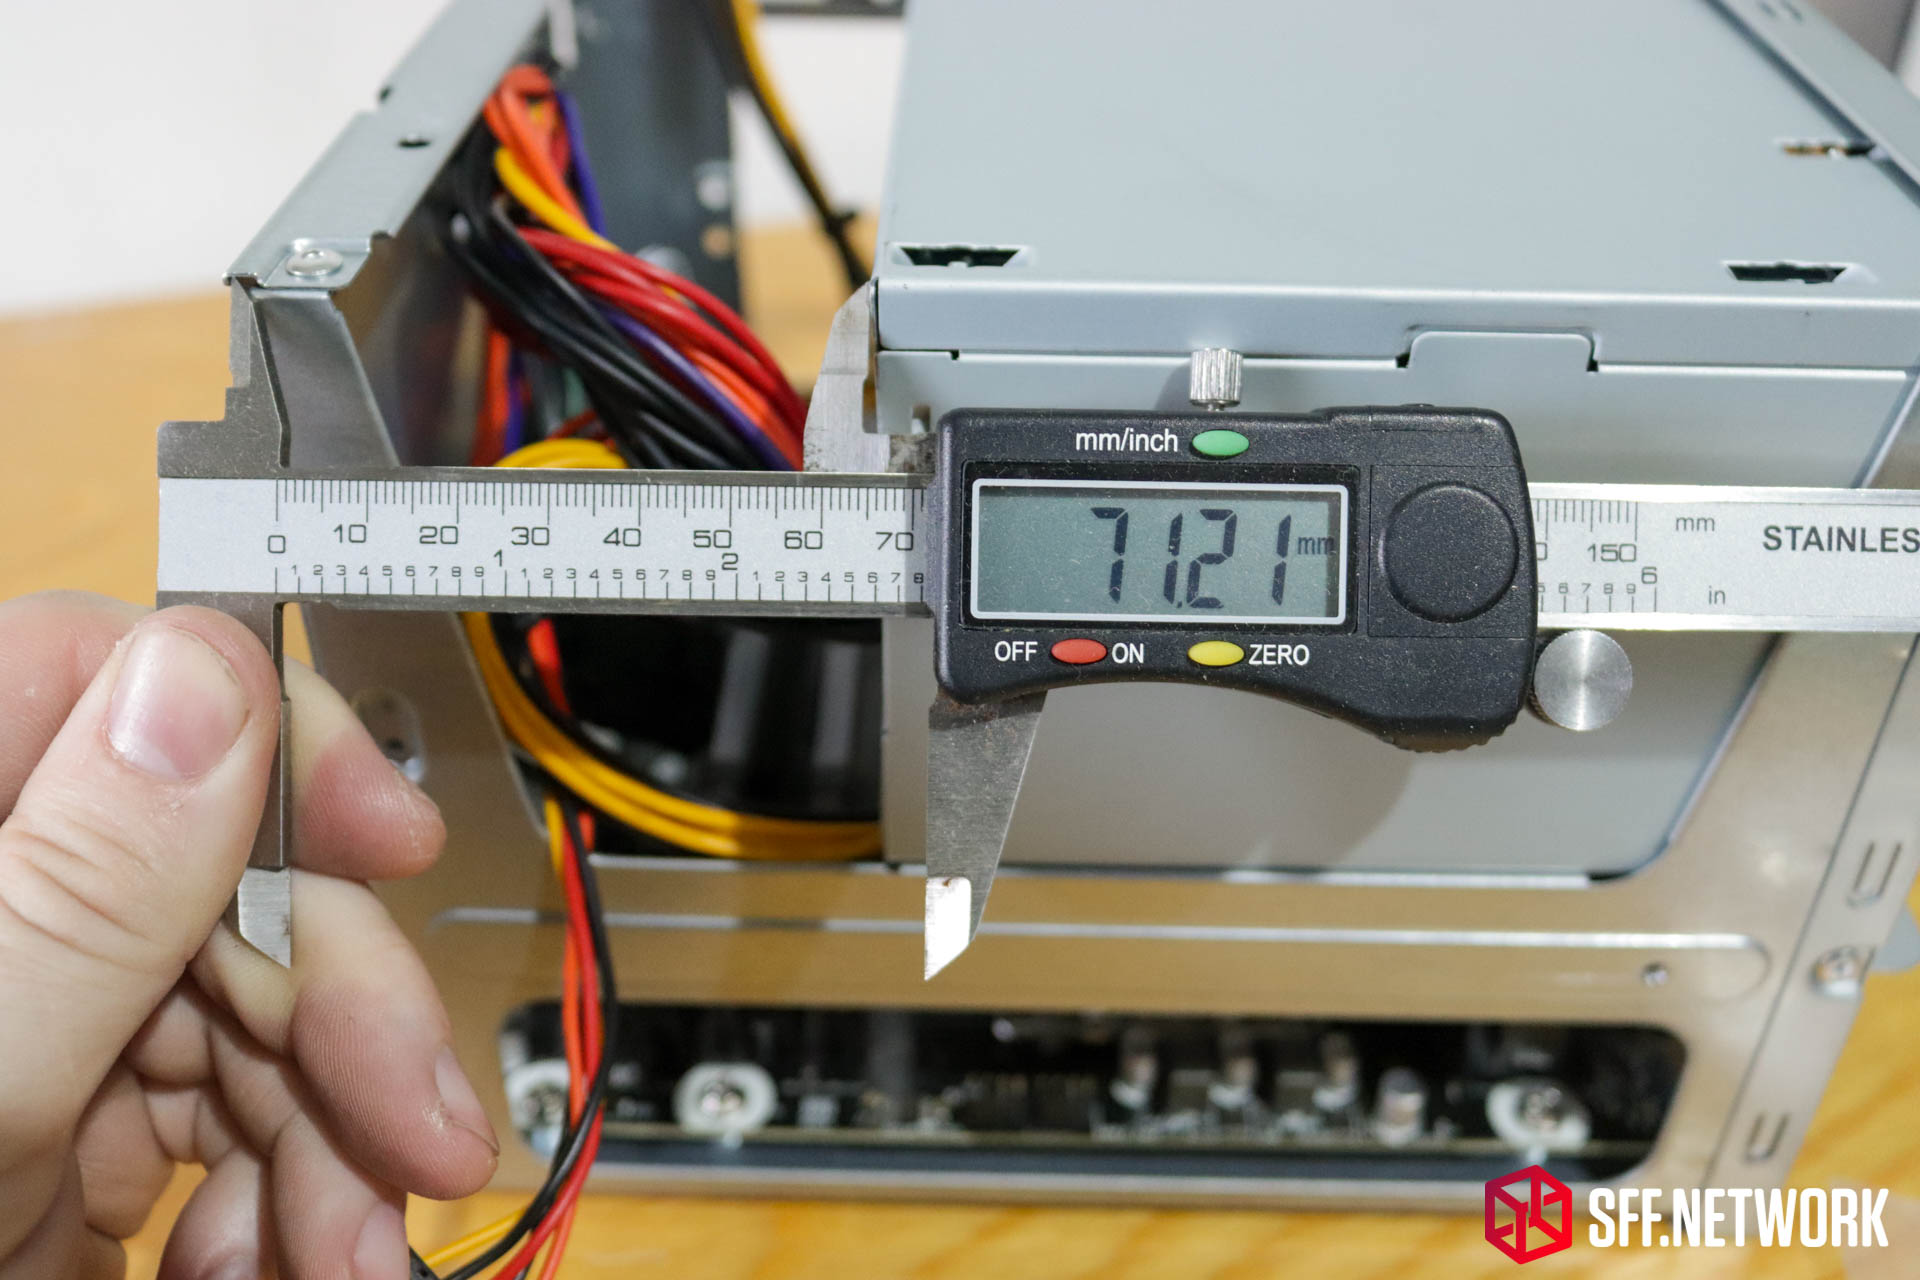
Clearance behind the power supply measures in at around 71mm before installation of drives.
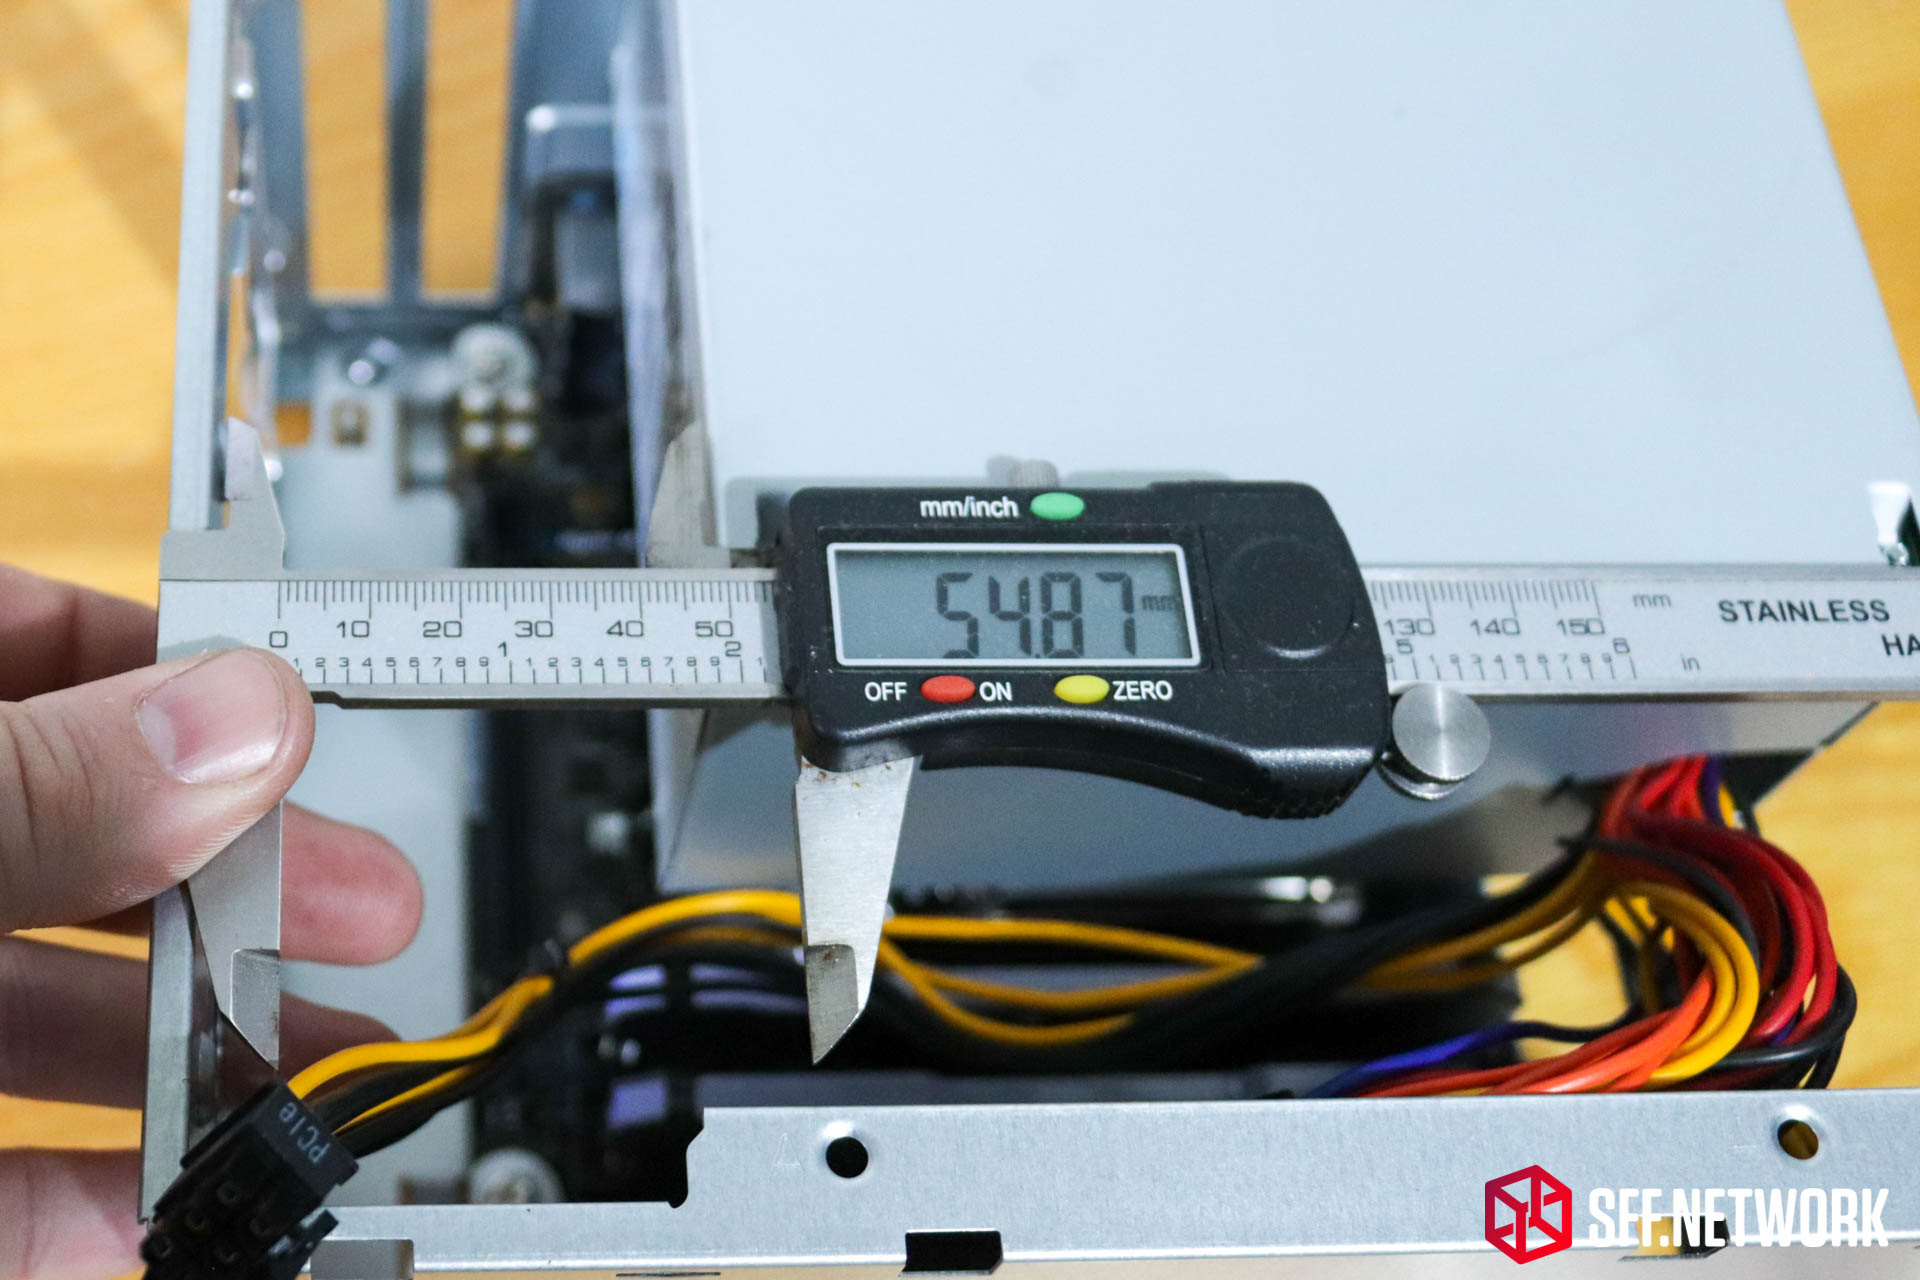
And we have just under 55mm between the power supply and the expansion slot end of the chassis.
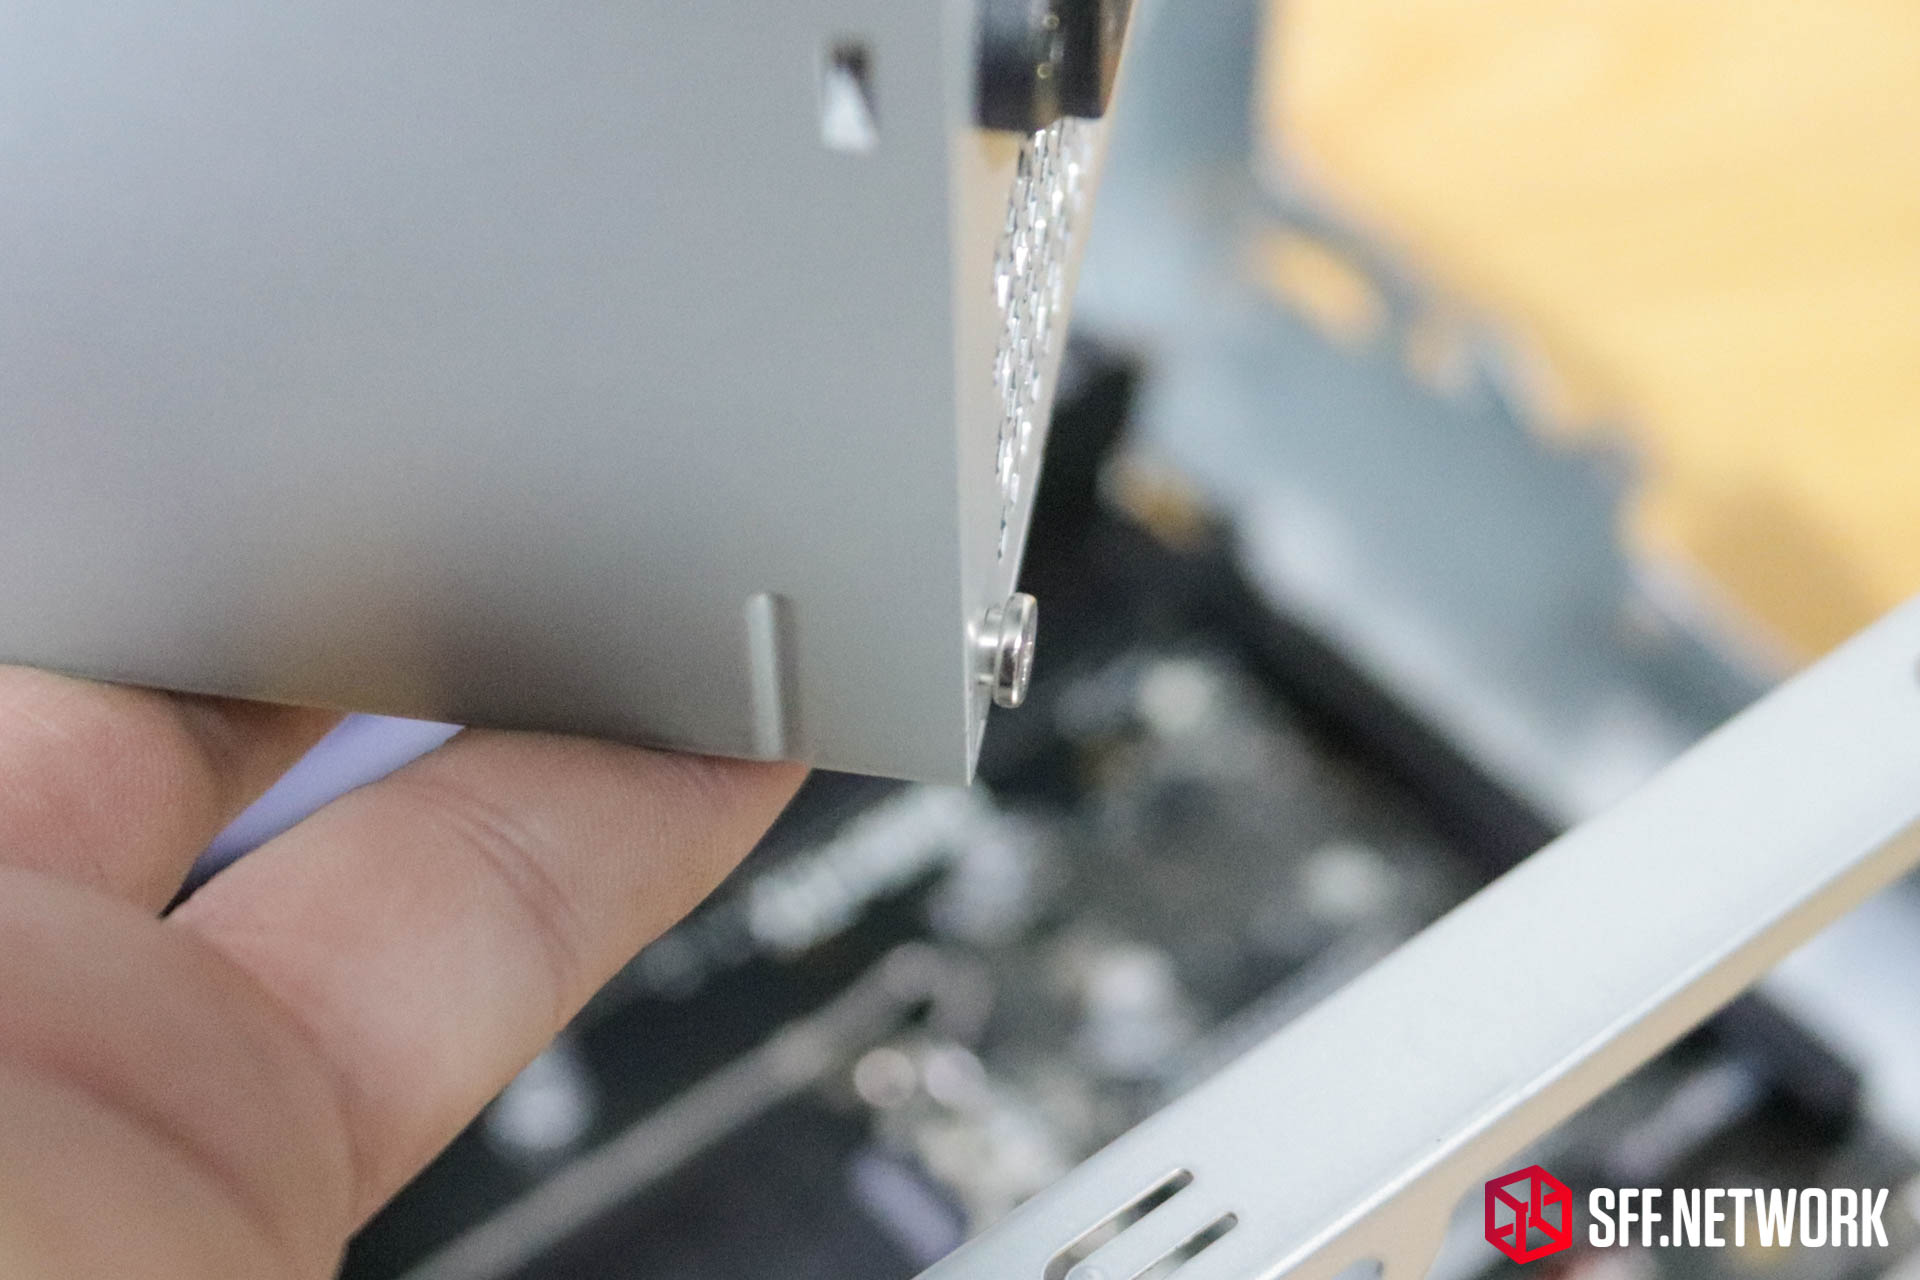
It’s a tight fit, but any card with a backplate should fit with no problems.
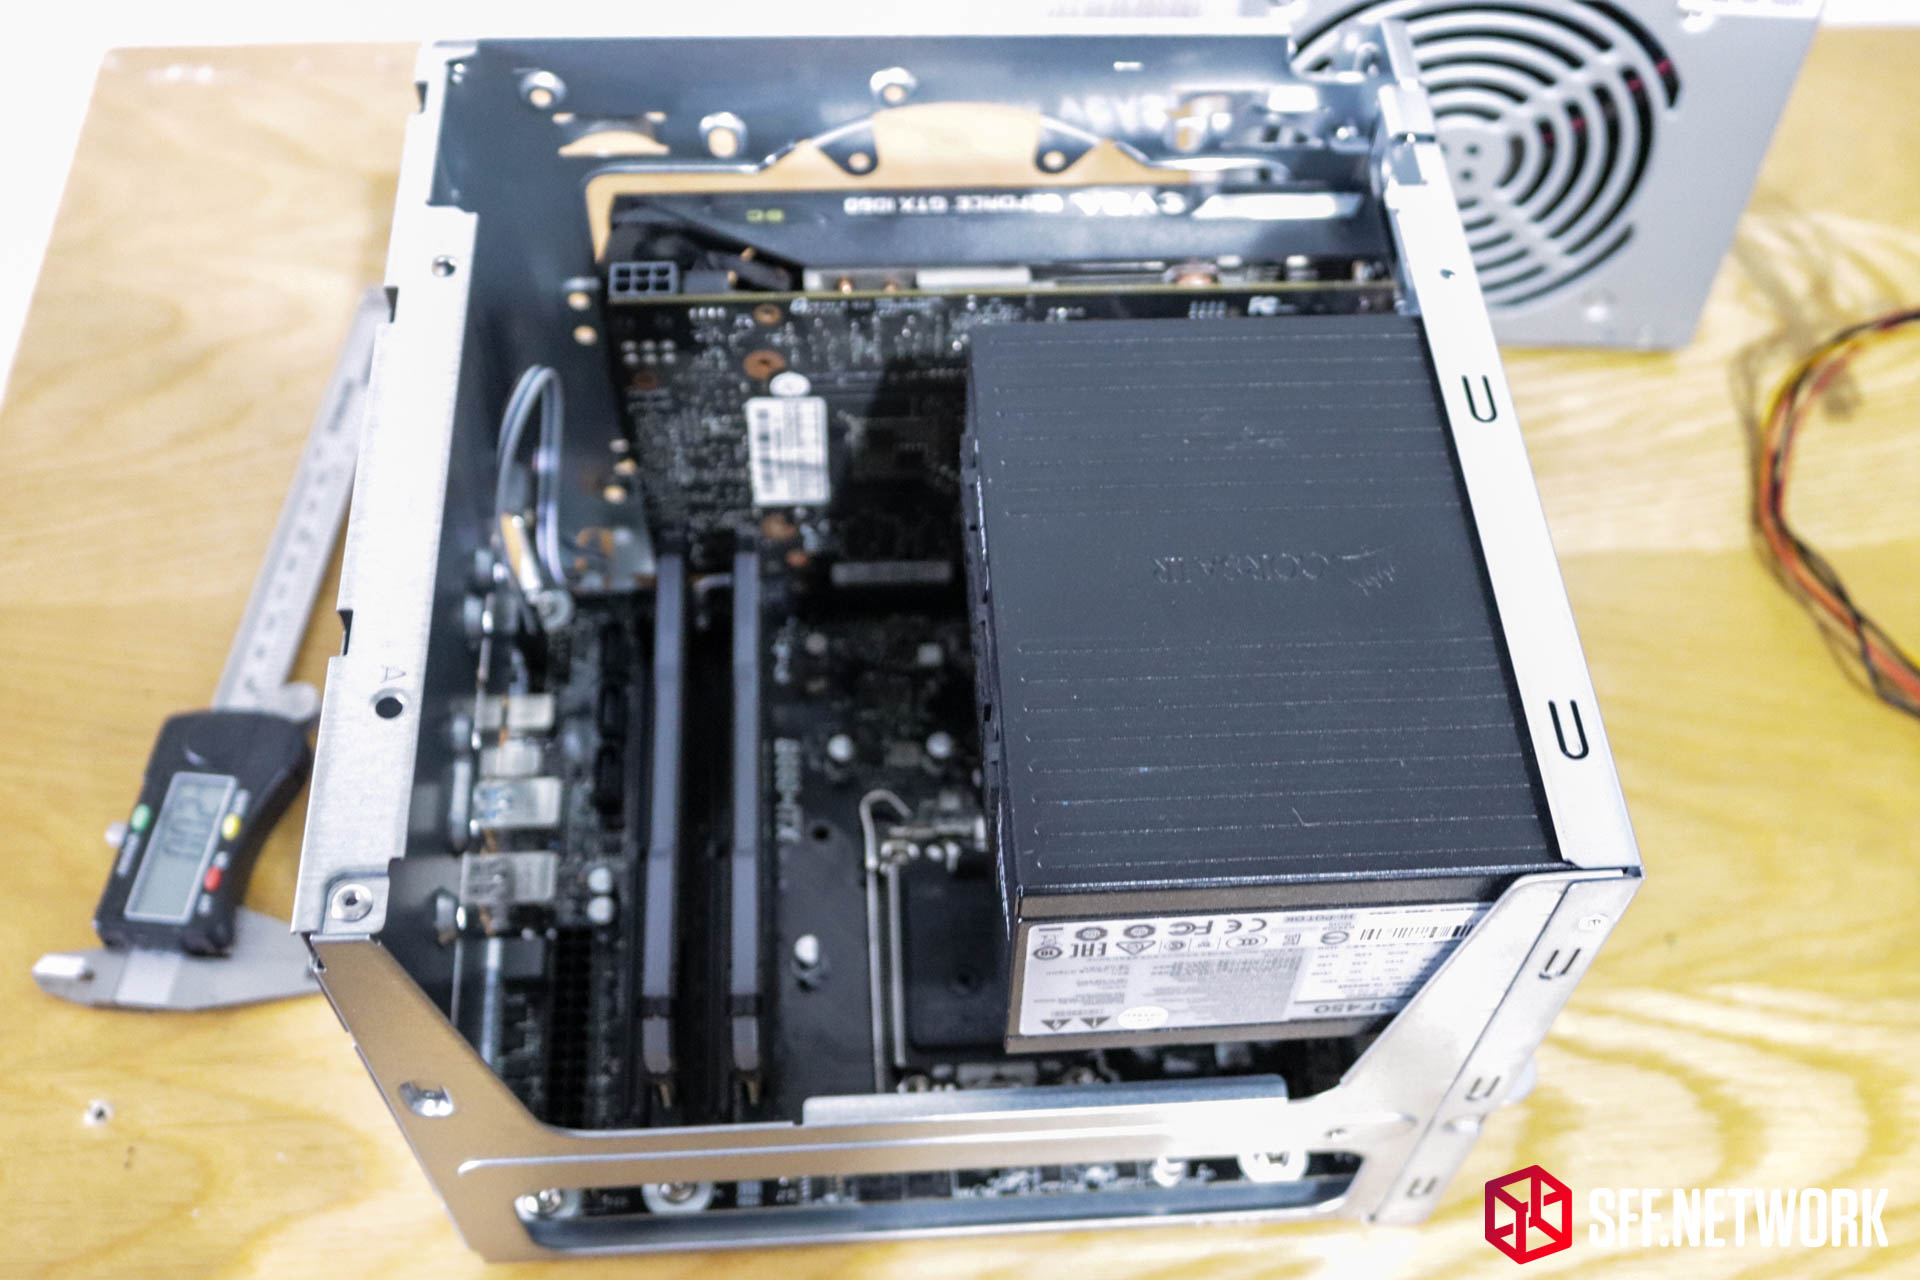
Installing a SFX power supply gains us a load of space, at the expense of removing the only intake fan in the chassis. It’s possible that you could reverse the orientation of your SFX(-L) power supply’s fan, but that carries significant risk.
A load more room!

And 20.7mm more CPU cooler headroom. Again, the designed airflow in this chassis is for the power supply to be used as an intake fan – so this configuration may cause issues.

That CPU cooler headroom is quoted as 54mm, but I measured 60mm. Likely the differential in measurements here is to avoid fan on fan violence. (Oh, and airflow turbulence leading to noise).
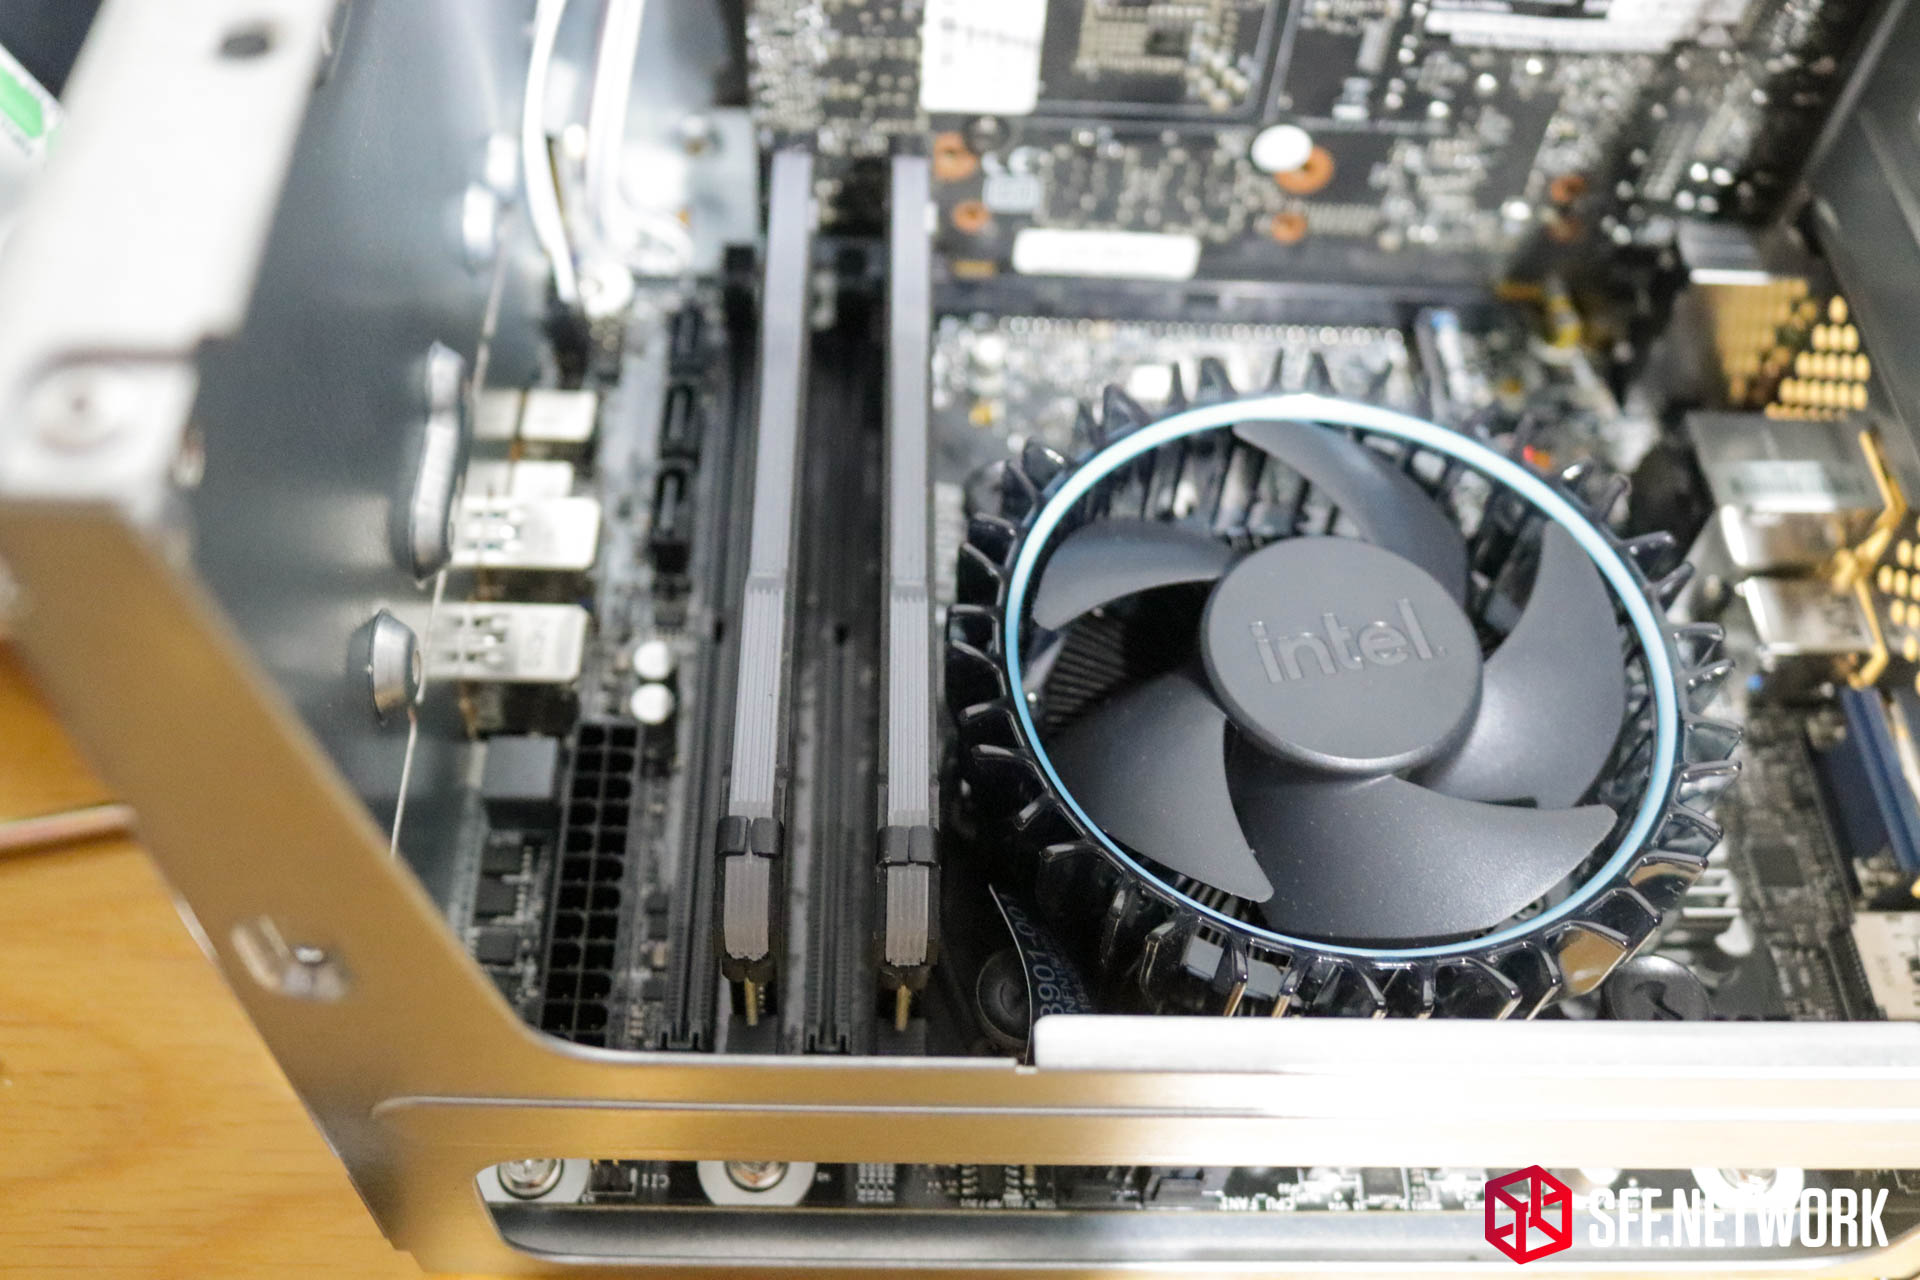
CPU cooler to RAM clearance is expectedly tight, in this case using the new LGA1700 Intel Stock Cooler (which is actually kind of nice aesthetically).

Sitting at around the same level as the top of these (dead) Corsair Vengeance Pro DIMMs.
Righto, let’s get into performance testing.
Testing Setup
Configuration:
| Case | ASRock DeskMeet |
| Motherboard | ASRock B660-ITX |
| CPU | Intel Core i5-12500 |
| RAM | G.SKILL Ripjaws V Series Black DDR4 3600Mhz 8gb x 4 DIMMs |
| CPU Cooler | Intel LGA1700 stock cooler |
| Storage Drive | Samsung 980 Pro 500GB NVMe PCIE 4.0 SSD |
| Power Supply | Included Channel Well GPT-500S-A 500w ATX |
| Graphics Card | EVGA GTX1060 SC 6gb or ASRock Challenger ITX 4GB |
When first seeing the chassis and the unconventional cooling layout, my first concerns were cooling related – how can the system cope with a decently loaded up system? The power supply is rated for 500w, but, alas I don’t have hardware on hand to push the power supply to the limit inside this chassis. However, I do have a new-to-me EVGA GTX 1060 SC 6GB to throw some heat at the situation. Funding the testing hardware out of my own pocket limited me to an i5-12500, but I do think this is a good mid-high range processor that will likely be used in such a system. I believe testing with the utmost peak hardware, whilst fun, isn’t representative of the use that the significant majority of readers will have for this system.
In this article, I will test the system as shipped, however I am planning to follow this article up with an “alternative airflow” feature in the near future.
Performance Testing
First up, a quick run of performance tests using the freely available UserBenchmark.com utility. I’re keeping performance benchmarks simple here, as I don’t have a library of other systems to compare this to. However, the aforementioned benchmark utility has that library, so it’s a useful too. Again, like our system configuration, the UserBenchmark utility tests for performance for typical consumers.
See this system’s results in depth here.

On average, the i5-12500 performs at around 98% on the UserBenchmark testing, so it’s doing very well here in the DeskMeet B660. Remember, this is under stock cooling!
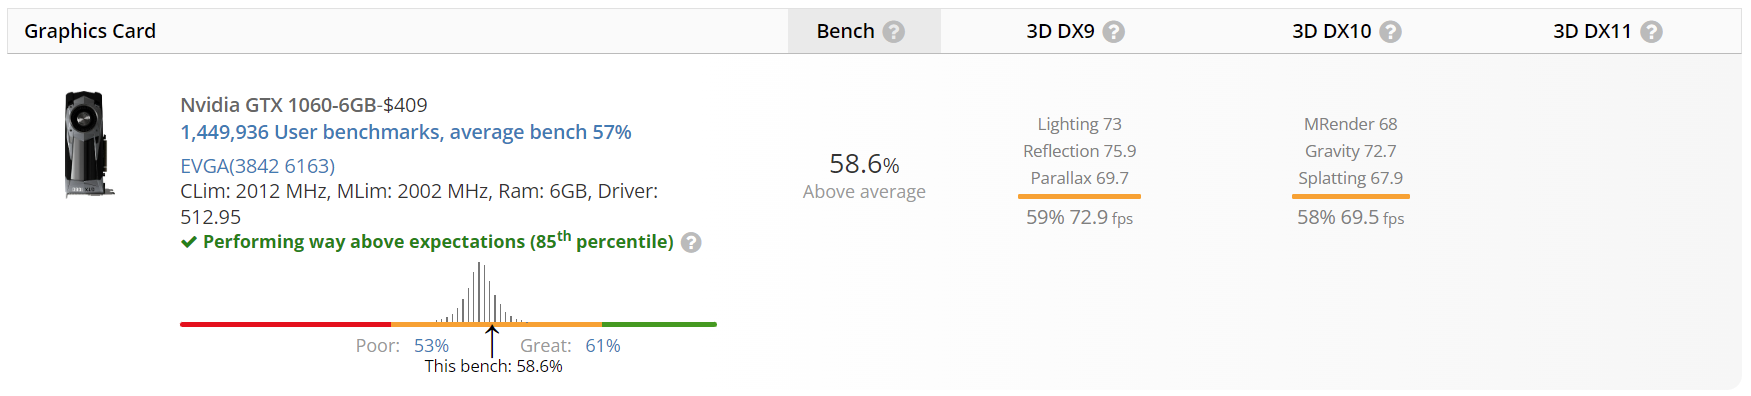
My GTX1060SC 6GB is a well used example. Again, it performs a little above average, meaning the ASRock B660 ITX board isn’t leaving any performance on the table compared to typical builds.
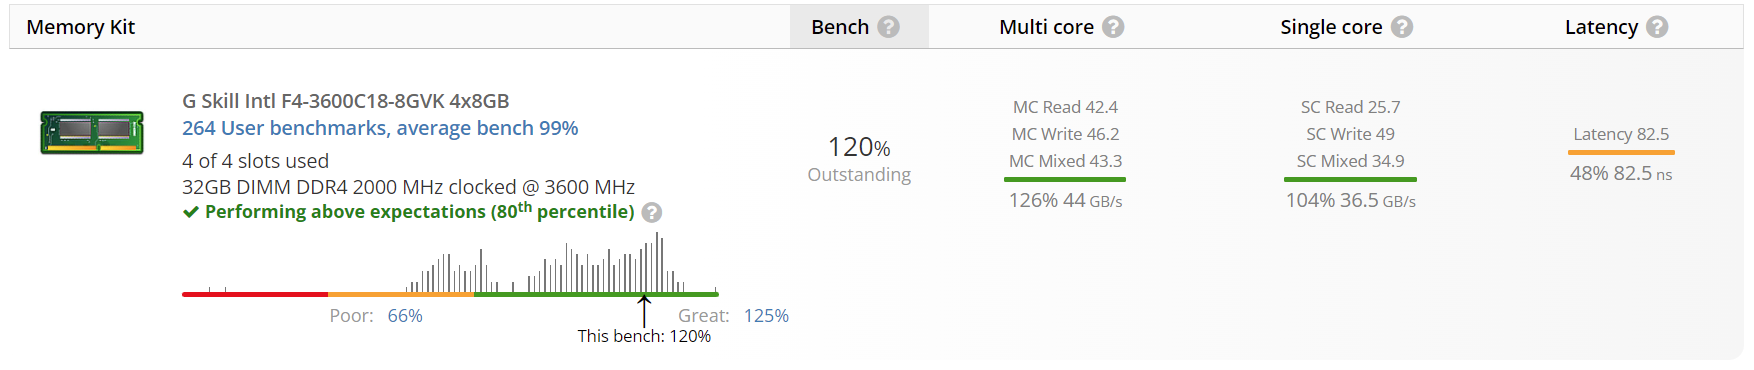
The memory kit I have used is comprised of 2 pairs of G-Skill F4-3600C18-8GVK, making up 32gb total. A not inexpensive configuration, but definitely affordable. As the score shows, this is a good configuration for this system. However, it does seem like users may not be using the correct speed for this model of memory, with a few benchmark results for this kit running at 2133mHz.
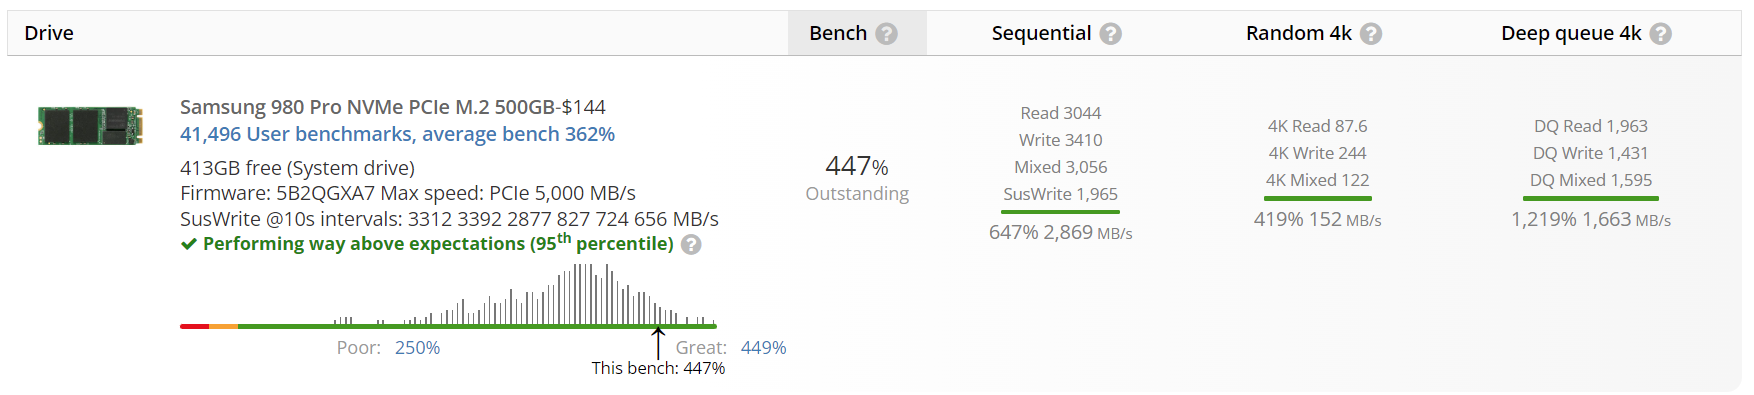
Testing the speed of the PCIe Gen 4 M.2 slots was a key factor for me, as my current desktop is an older Z370 based system. The Samsung 980 Pro PCIe 4.0 500gb was an affordable option for me, so I popped into the local PBTech and bought one. Speedy is right! However, a bit lower than the Samsung quoted specs in sequential mode.
| Samsung | As tested | |
| Sequential Read | 6900 MB/s | 3044 MB/s |
| Sequential Write | 5000 MB/s | 3410 MB/s |
| Random Read 4K QD1 | 22,000 IOPS – 88MB/s* | 87.6 MB/s |
| Random Write 4K QD1 | 60,000 IOPS – 240 MB/s* | 244 MB/s |
*IOPS x packet size
Thermal Testing
So, with the alternative airflow configuration of this system, was it worth ASRock going to the extra effort to get a custom set up power supply for the DeskMeet? Let’s find out.
First up, Prime95 in Blend mode. Whilst a lot of people are a fan of small FFTs mode for thermal testing, I find Blend mode to be more realistic of a heavy real world workload – as it stresses not only the CPU, but the RAM and chipset too.
The results? An increase over ambient of 61.2 degrees Celsius, and drawing 109 watts from the wall (~230V, 50Hz, 100% wind/hydroelectric for those wondering).
Ok, let’s throw a GPU load in. How about Unigine Valley? Running this at high settings at 1080p raised the power draw to 205 watts, about what I’d expect as a realistic maximum load for this configuration. With this load, the CPU reached a maximum of 59°C over ambient, and the GTX1060 6GB SC sat happily, and obscenely loudly, at 68°C above ambient. No thermal throttling was observed.
Killing Prime95 to let the CPU take a breath, the power draw at the wall dropped to 160 Watts. The i5-12500 idled at 37.1°C above ambient, and the GPU continued screaming at a lower 56.1°C above ambient. Framerates improved, mostly by virtue of actually having some CPU time available to it.
After getting the above results, I decided to see what would happen if I converted the power supply to a conventional airflow configuration. The summary: bad things. very bad things. ASRock knew what they were doing when implementing the reverse air flow in the power supply – an obvious conclusion, but one I had to check. The system was thermal throttling on all cores within a couple of minutes.
Teardown
Let’s have a deeper look.
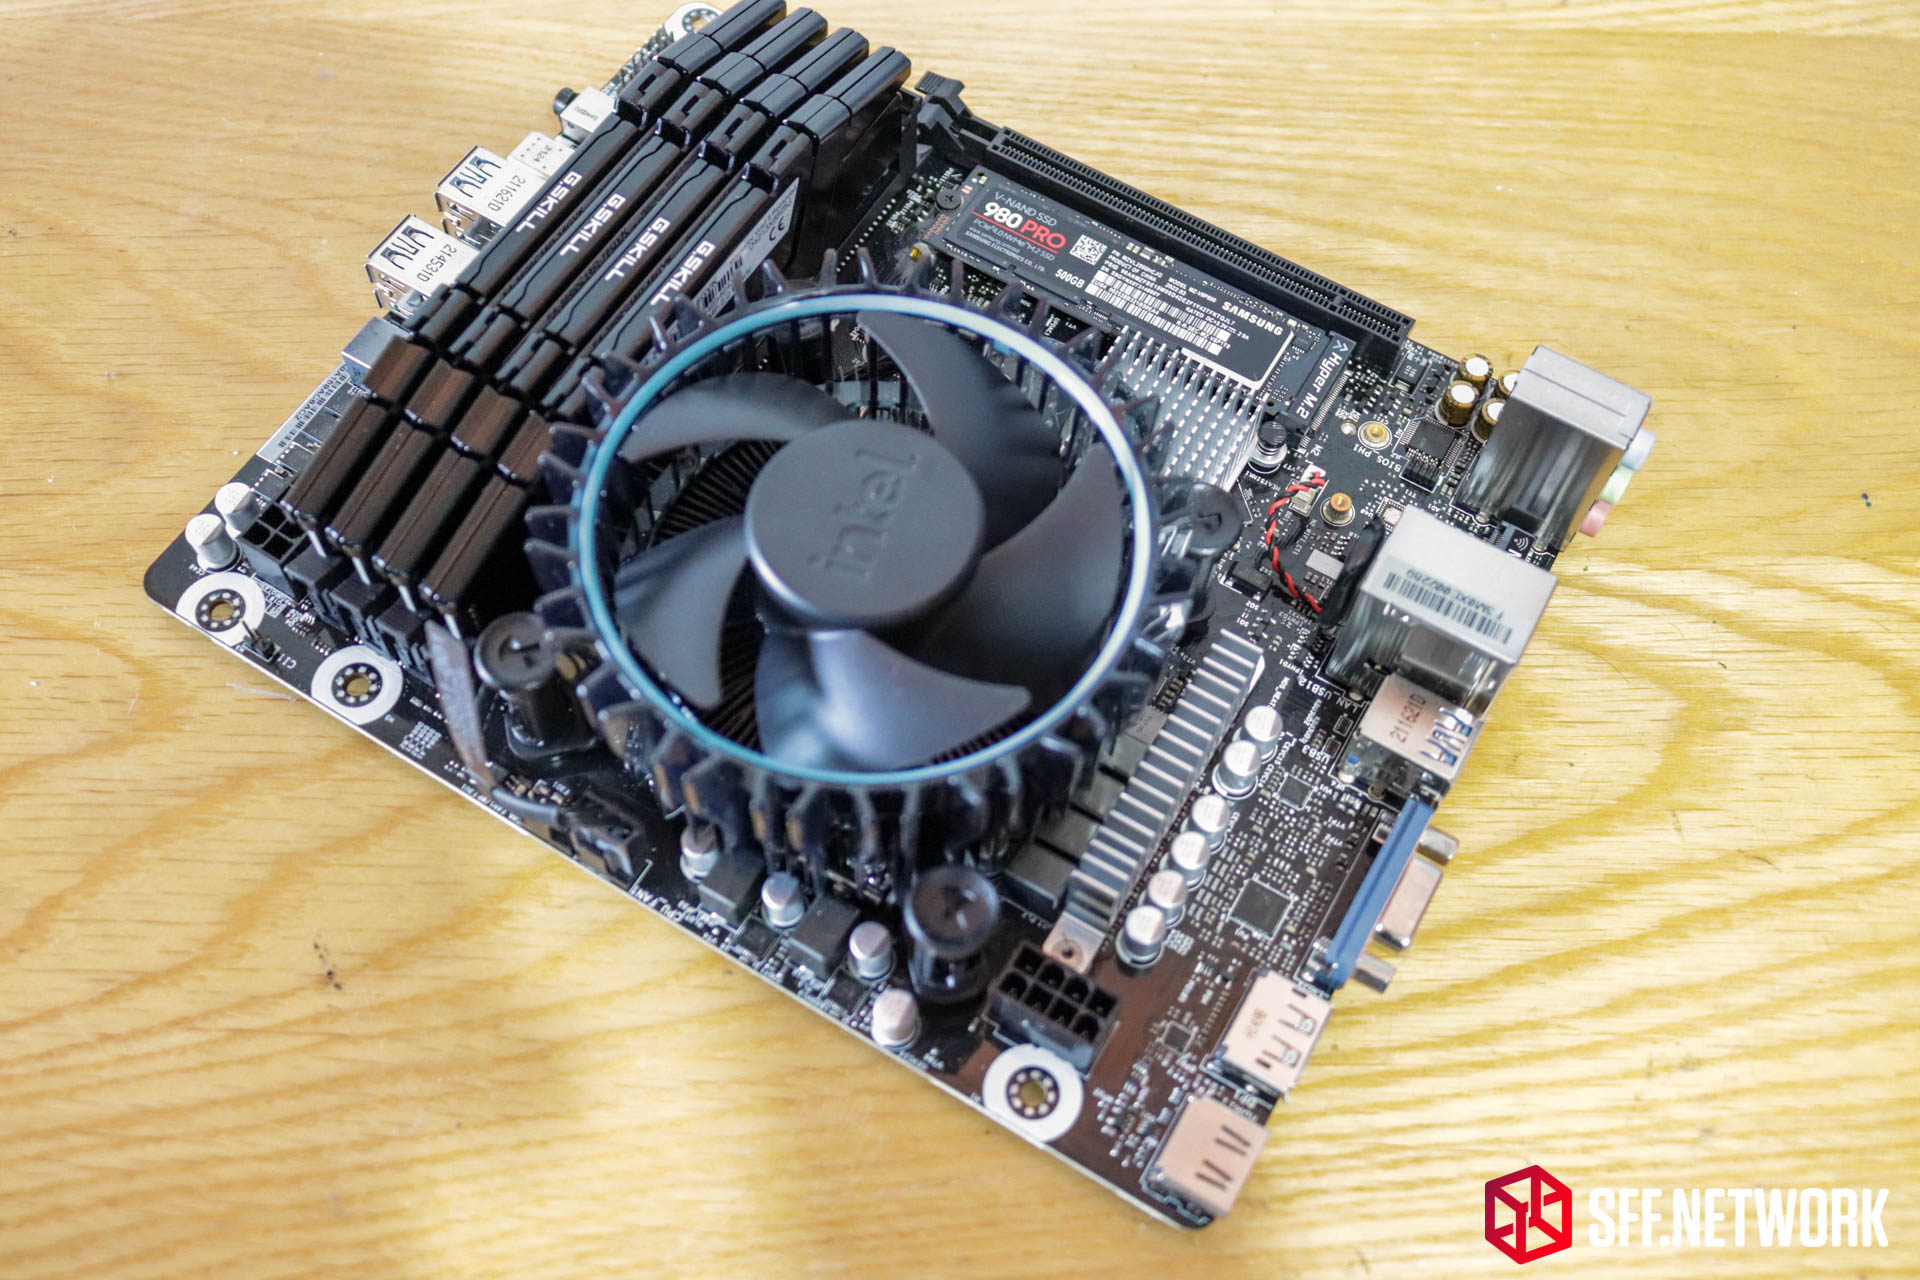
This was the configuration I tested with – doesn’t the quad DIMM install look awesome?! For what it’s worth, yes, the “flap” in the front of the case I mentioned earlier, is definitely necessary to bend it out to remove the board.
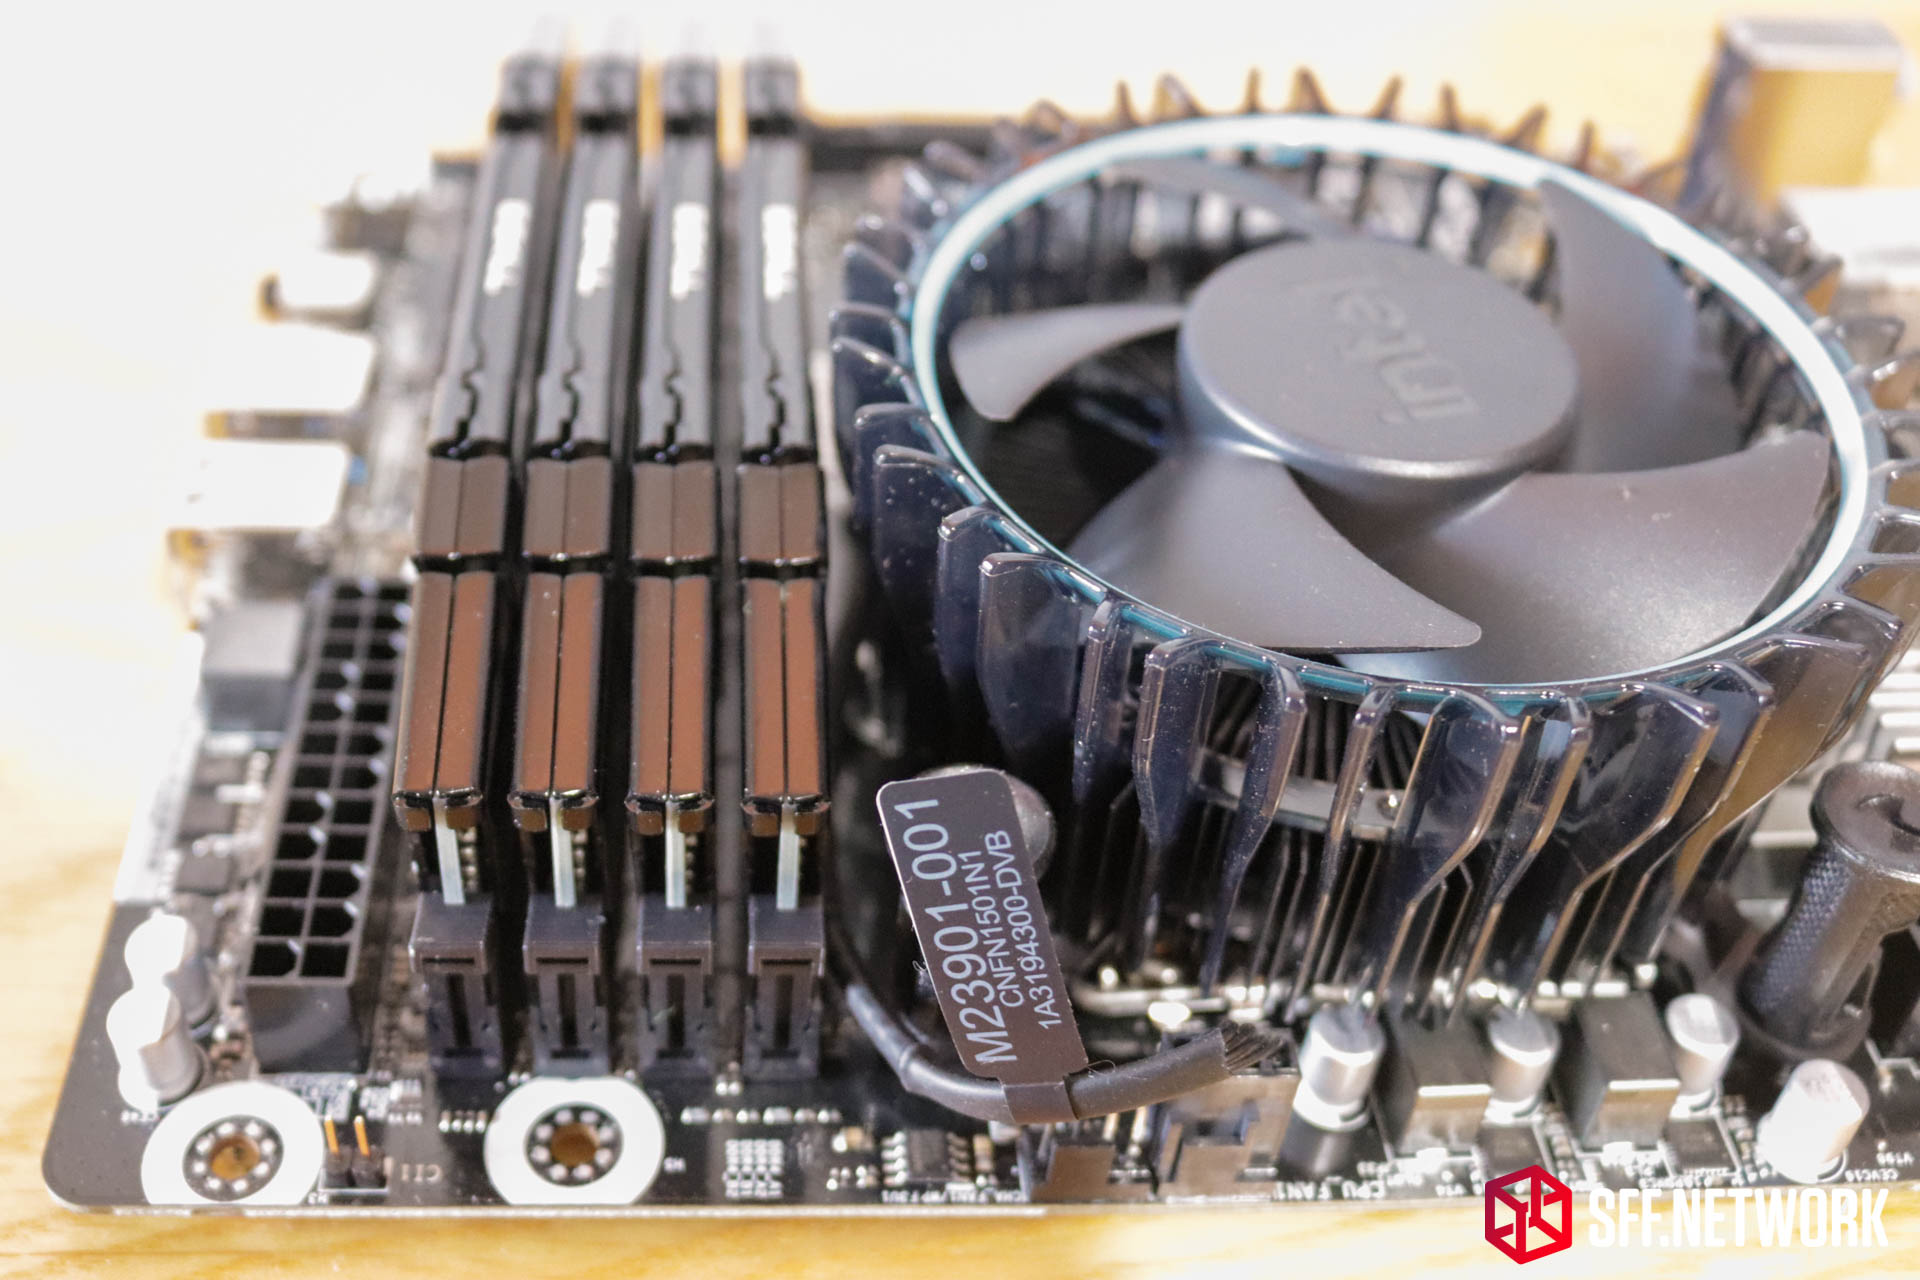
The RAM to CPU cooler clearance is the same with these DIMMs as it was with the Corsair Vengeance I installed earlier in this article. Again, can we acknowledge the significant improvement Intel has made as to the fan and aesthetics on their stock coolers?
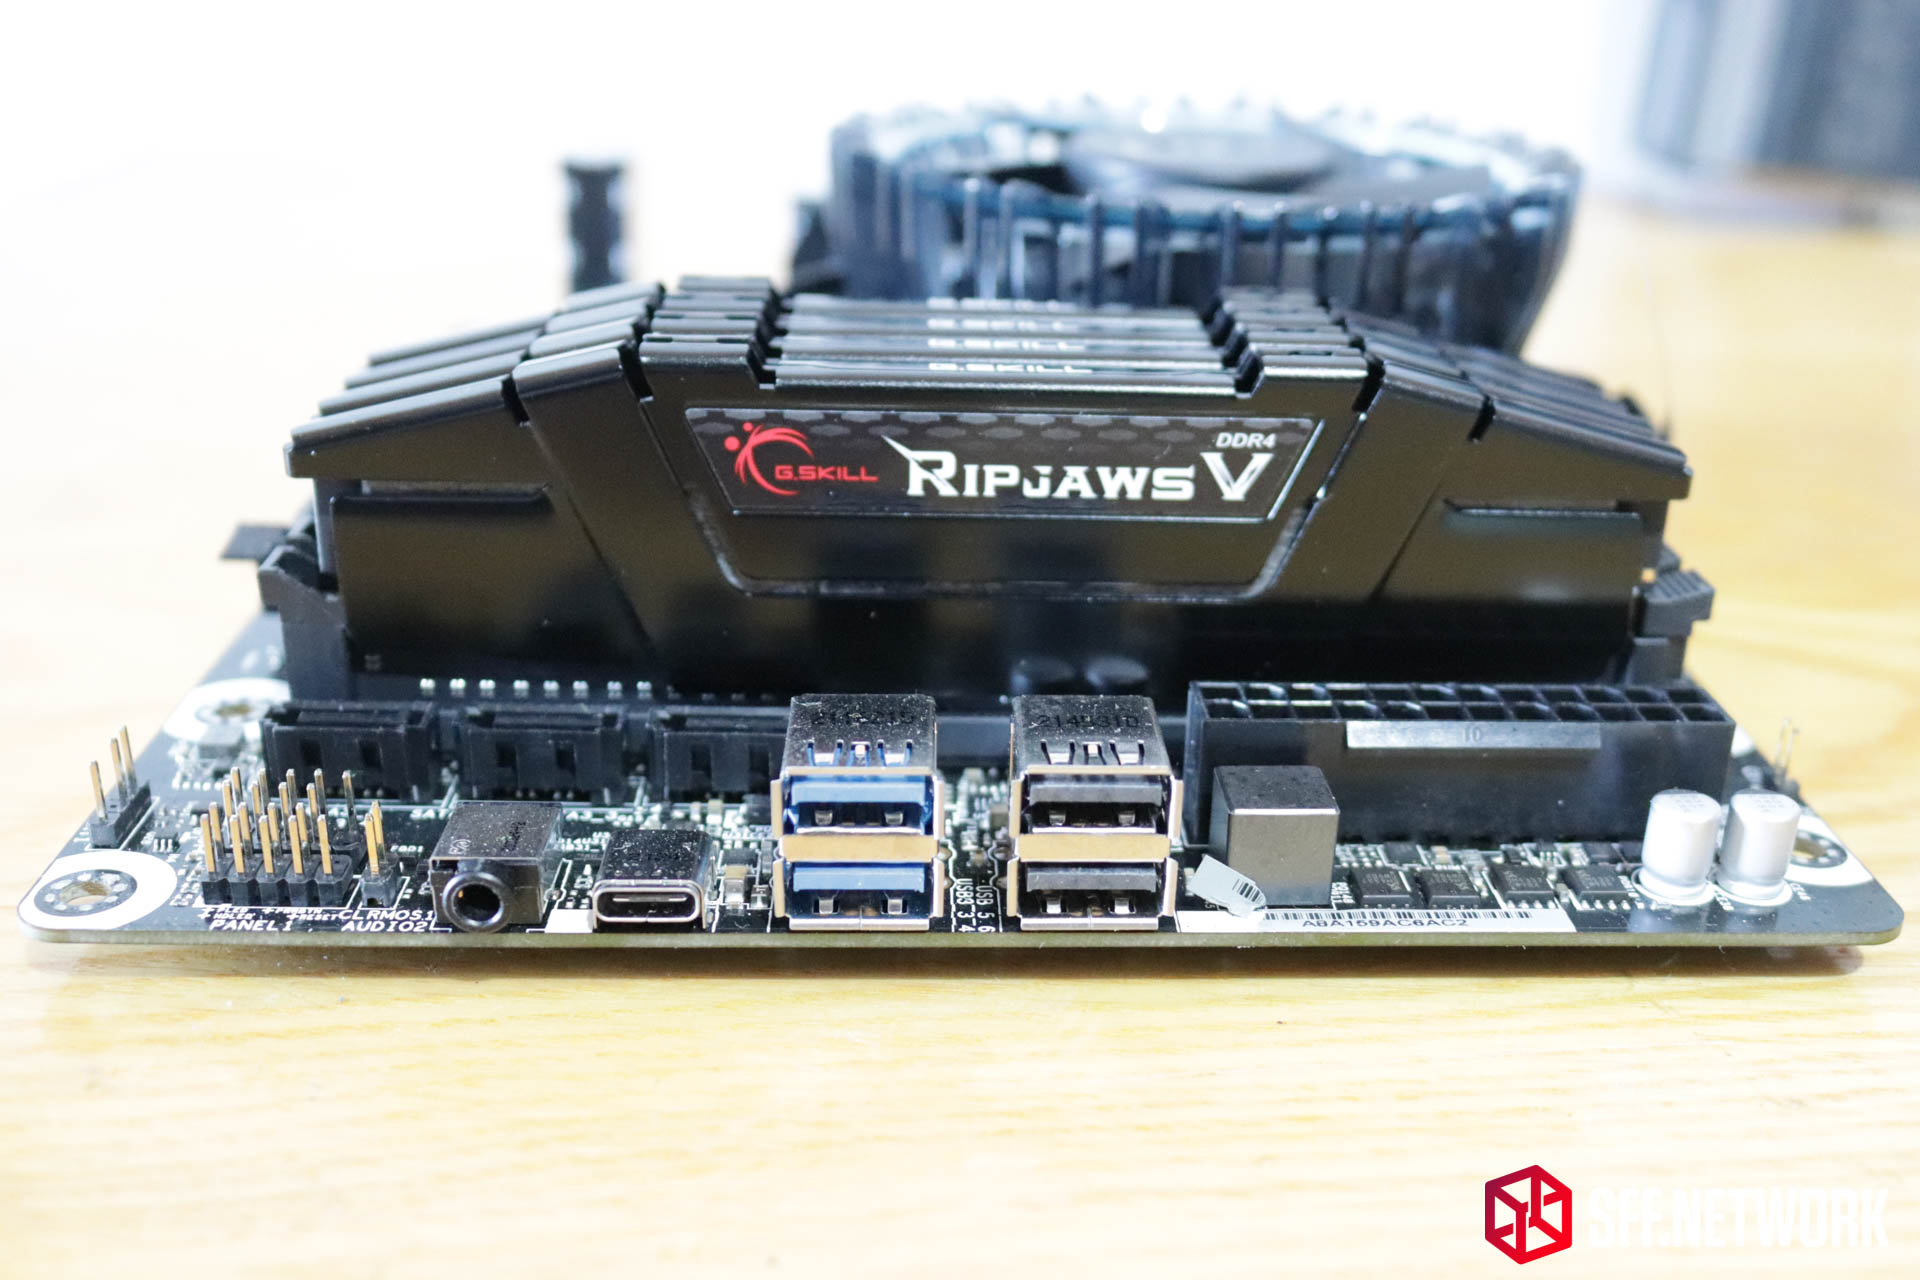
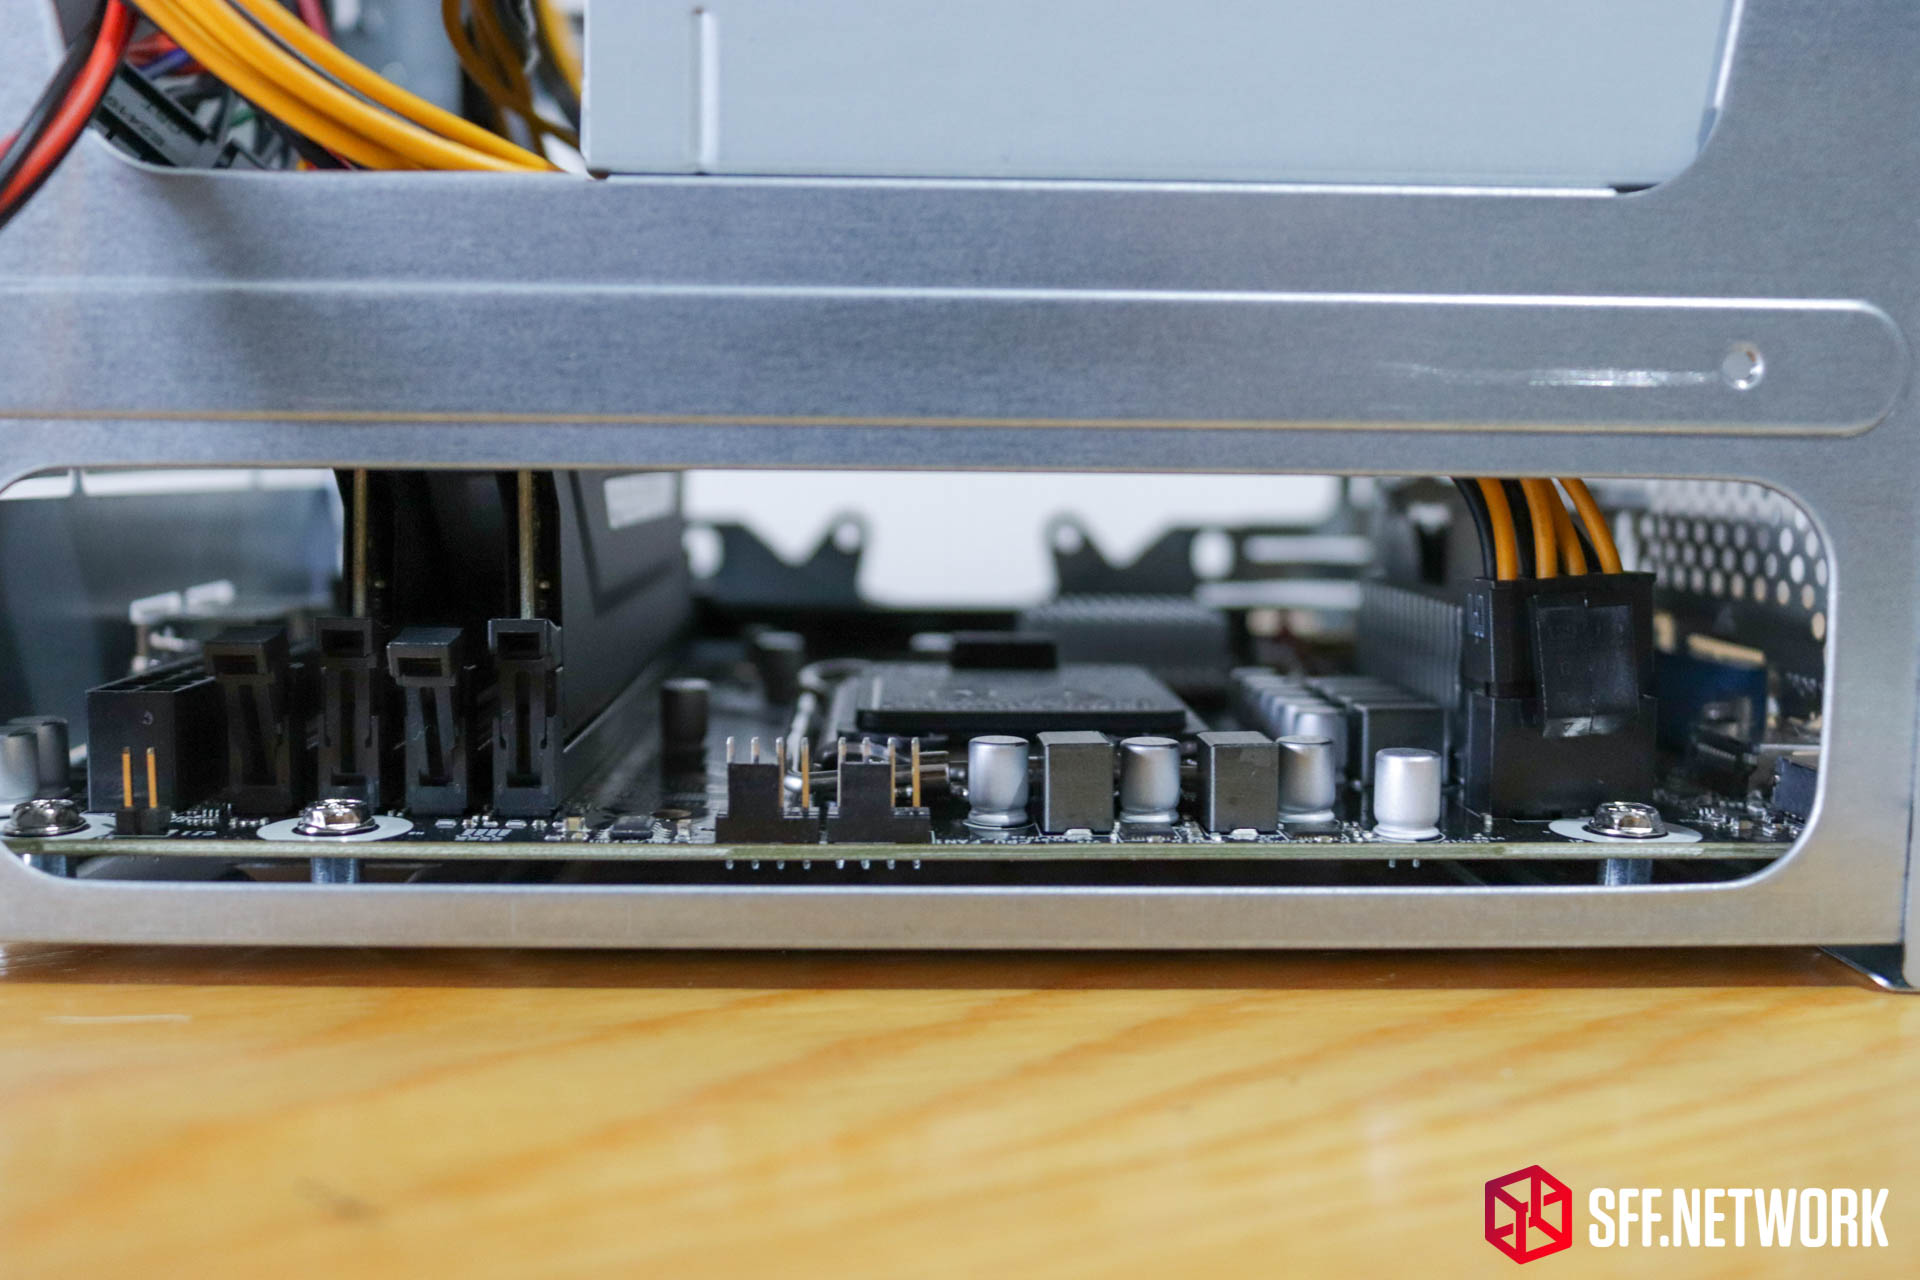
To the front of the board, the front IO exposed! Nothing special hiding here, just a few VRMs to the right hand side in front of the 24 Pin ATX connector, and a few headers to mention.
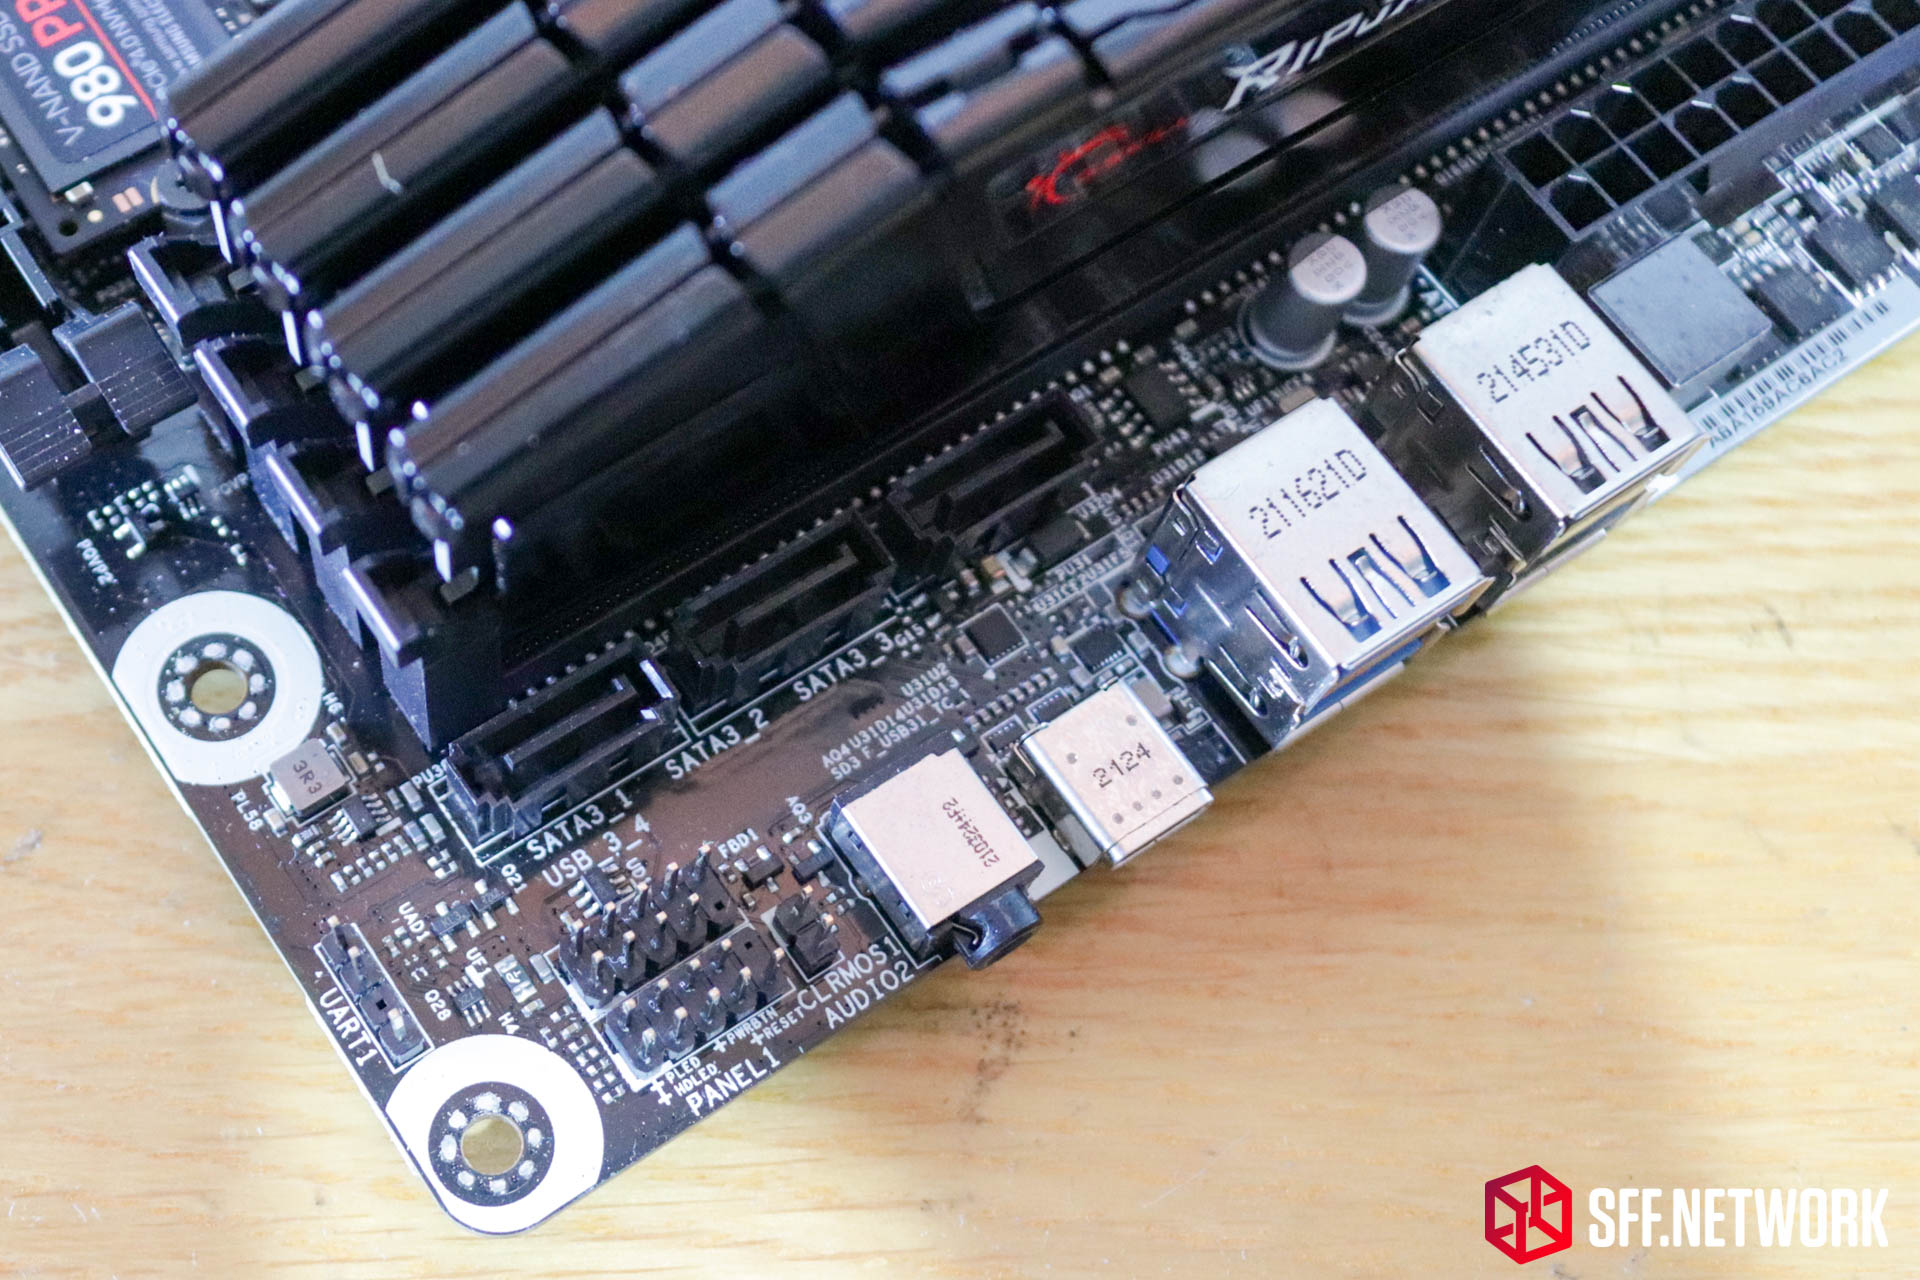
Triple SATA3 6.0Gb/s (a 13 year old standard at this point! – I really guess NVMe drives have become the future of system storage), a standard FP_Header for front panel buttons and LEDs, a USB2.0 header for even more connectivity and a UART header. It’s not mentioned in the manual, so I figure this is a factory use only header.
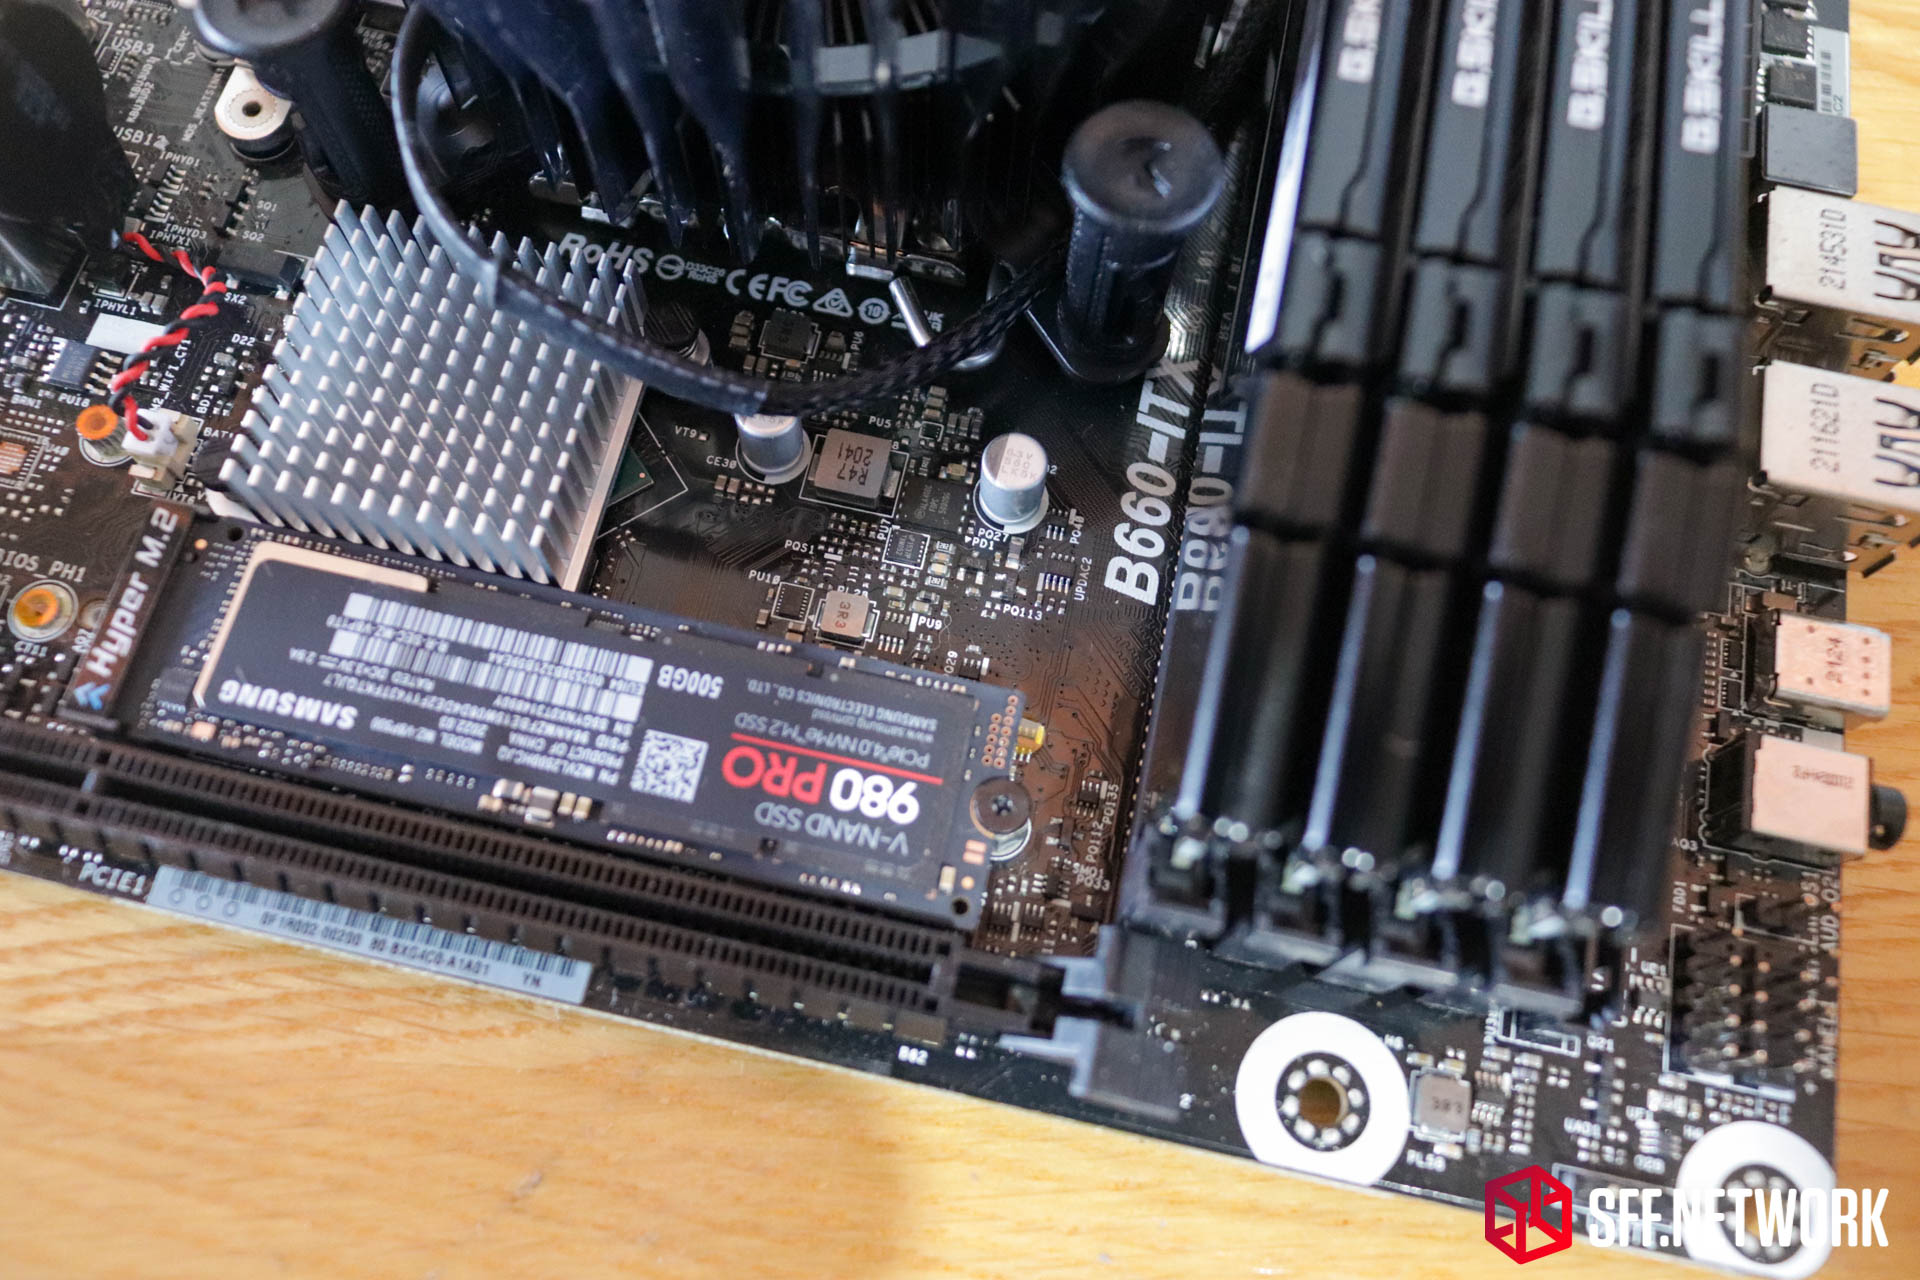
Near the top M.2 slot we have a small amount of circuitry, including an ON Semiconductor FDPC5030SG (PDF link) dual N-Channel MOSFET for use in Buck power circuits – likely part of the chipset power supply. Just under that is another smaller Buck chip from uPI group.
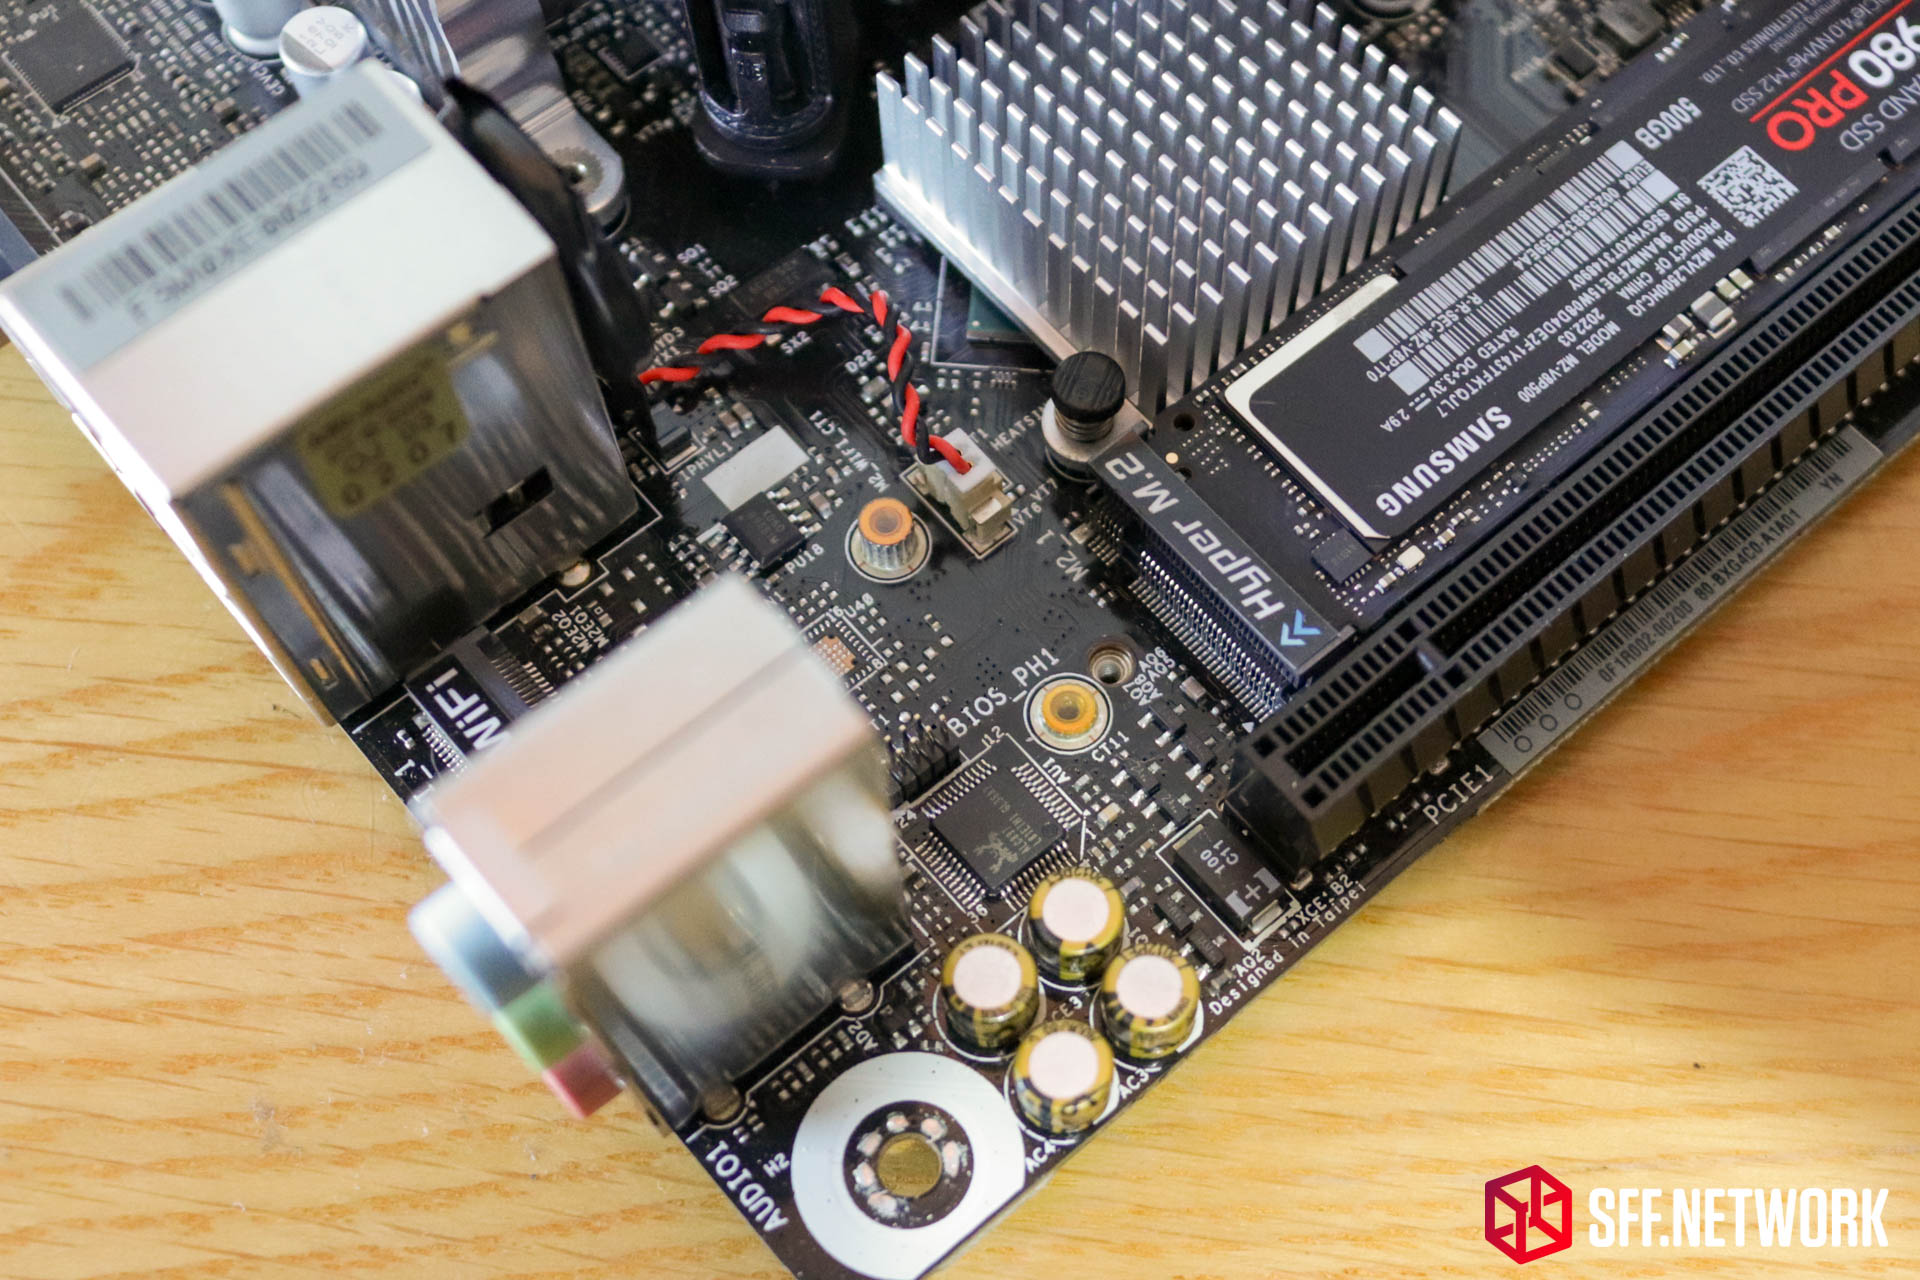
Rotating around to the audio section, here’s a basic configuration around a Realtek ALC897 chip. Nothing exciting, but more than enough for the business orientated focus of this system. There’s more than enough USB to have a dedicated USB DAC for audio.
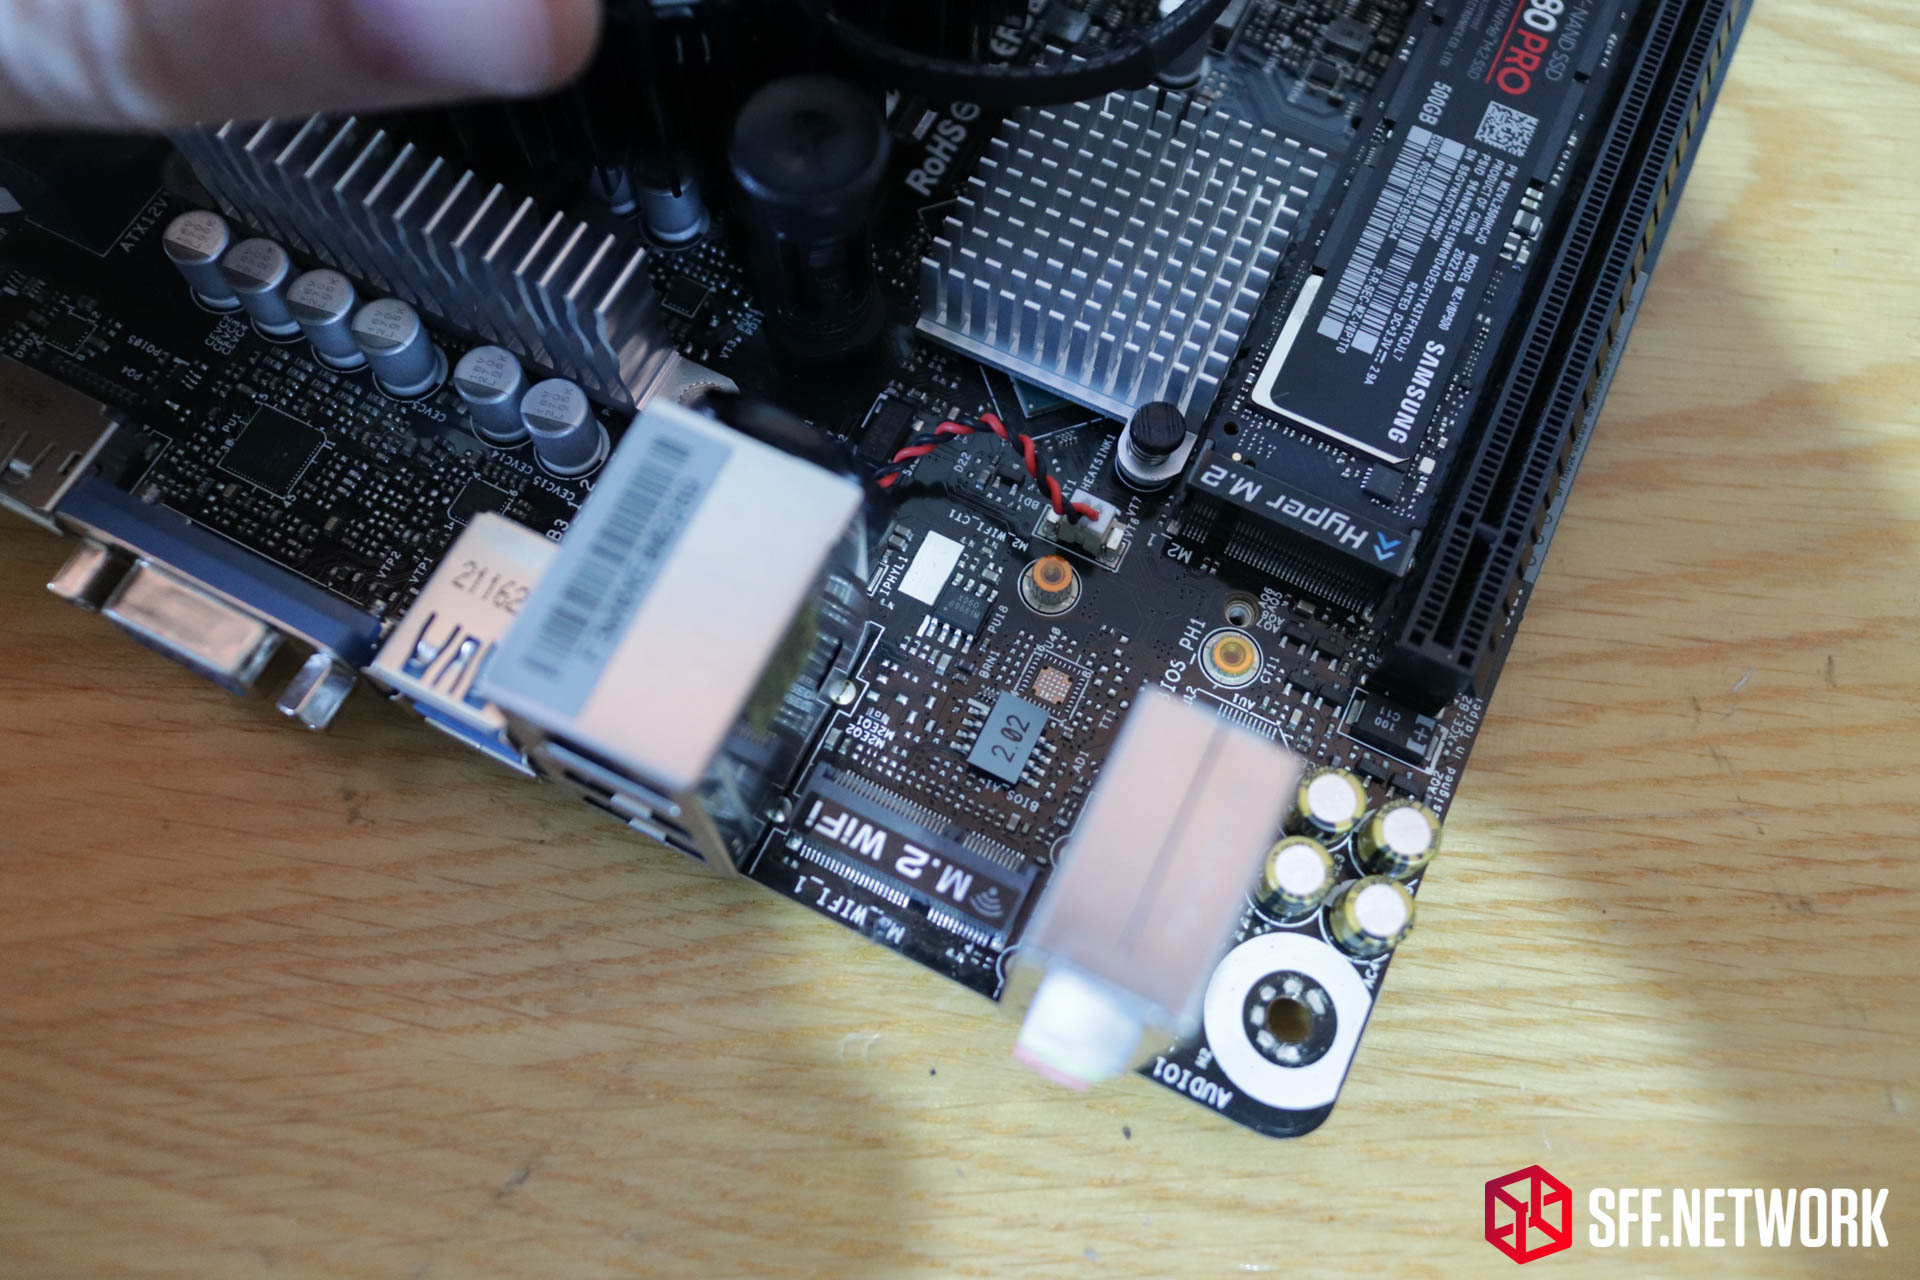
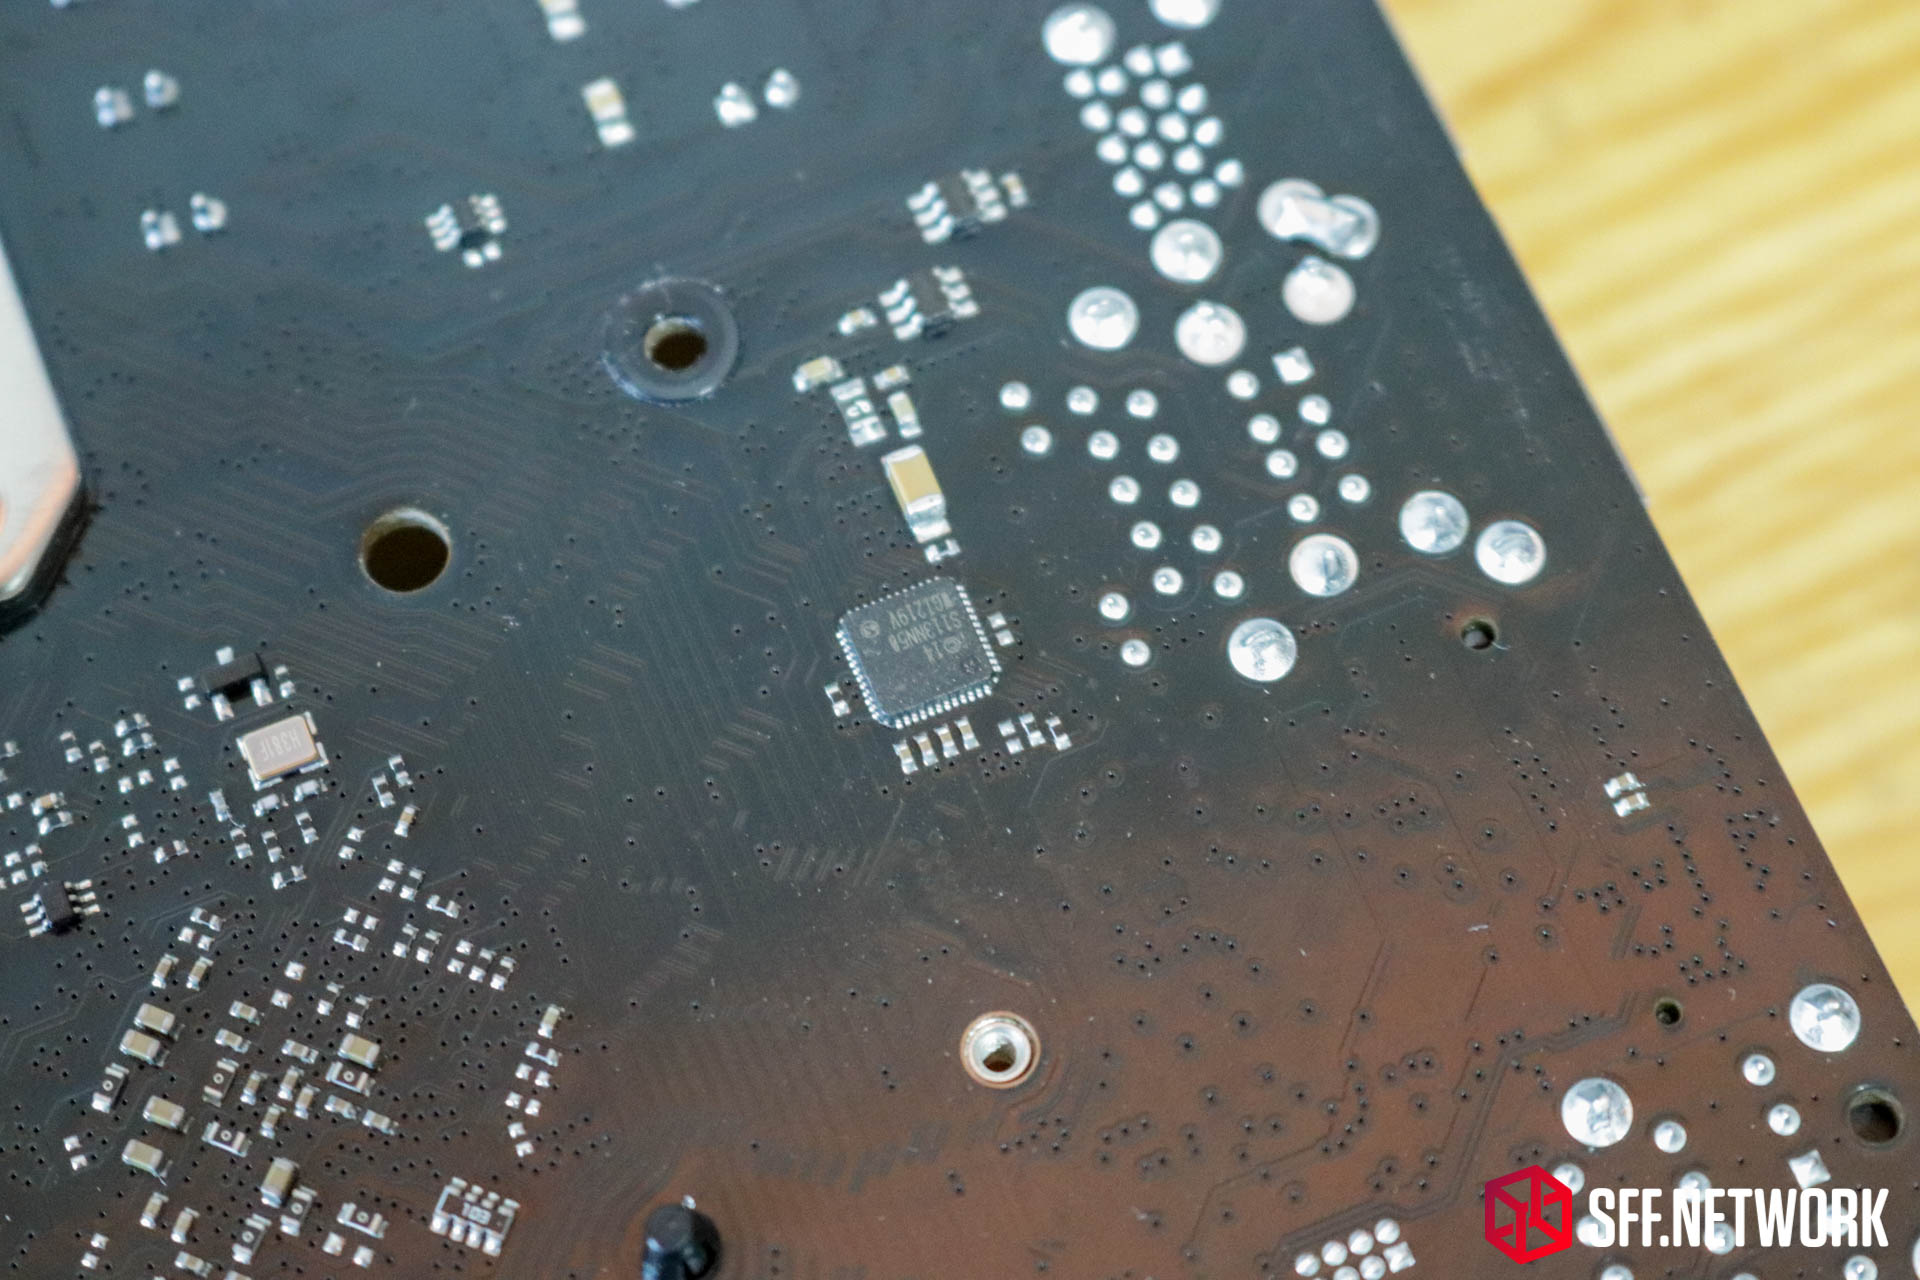
Squeezed into the rear IO is the super small M.2 slot for WiFi adapters. The chip marked 2.02 is the CMOS/BIOS chip, with v2.02 on board, the latest at time of review. The small chip nearest the screw standoff is a G9661M (PDF Link), a voltage regulator. The traces disappear into the multiple layer PCB, so I can’t be sure as to what it powers.

Continuing round, behind the rear IO, is the CPU VRM section. From the right, the three larger chips are an unknown chip marked “3532 GABB 120”, a Richtek RT3628AE Intel IMVP9.1 compatible PWM controller, and an ITE IT6516BFN Displayport to VGA converter.
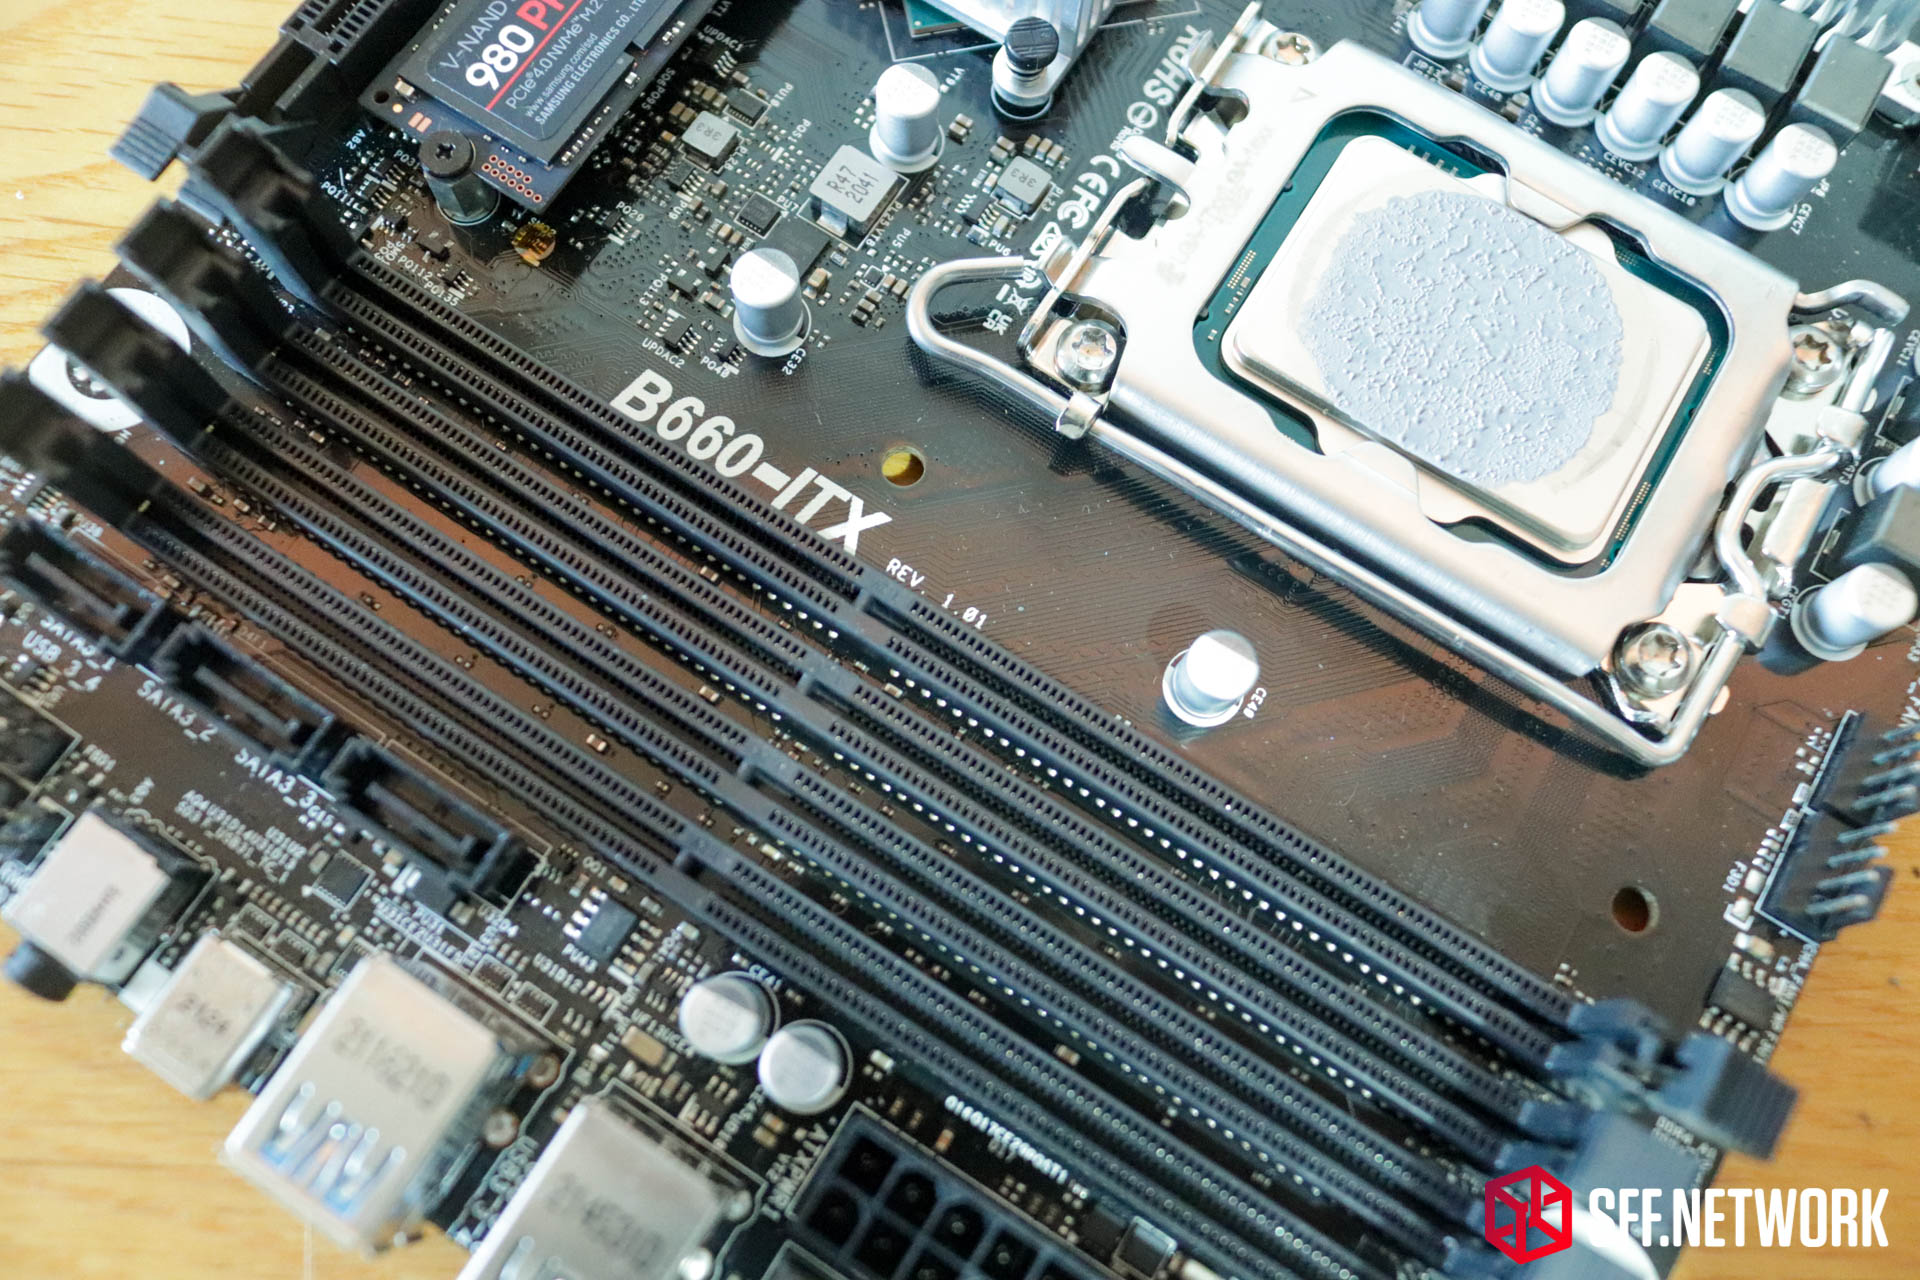
Yes, this board is marked as a B660-ITX, which would be a little misleading if the board was sold separately, considering the physical configuration of the board.

From the left – a pair of 4 pin fan headers, a CPU fan header, and a secondary one that can be changed in the BIOS to control water pumps or a chassis fan. Back to chip deciphering – the pair of chips under the grey inductors are Vishay SIC654 (PDF Link), integrated power stages, a part of the CPU power supply.
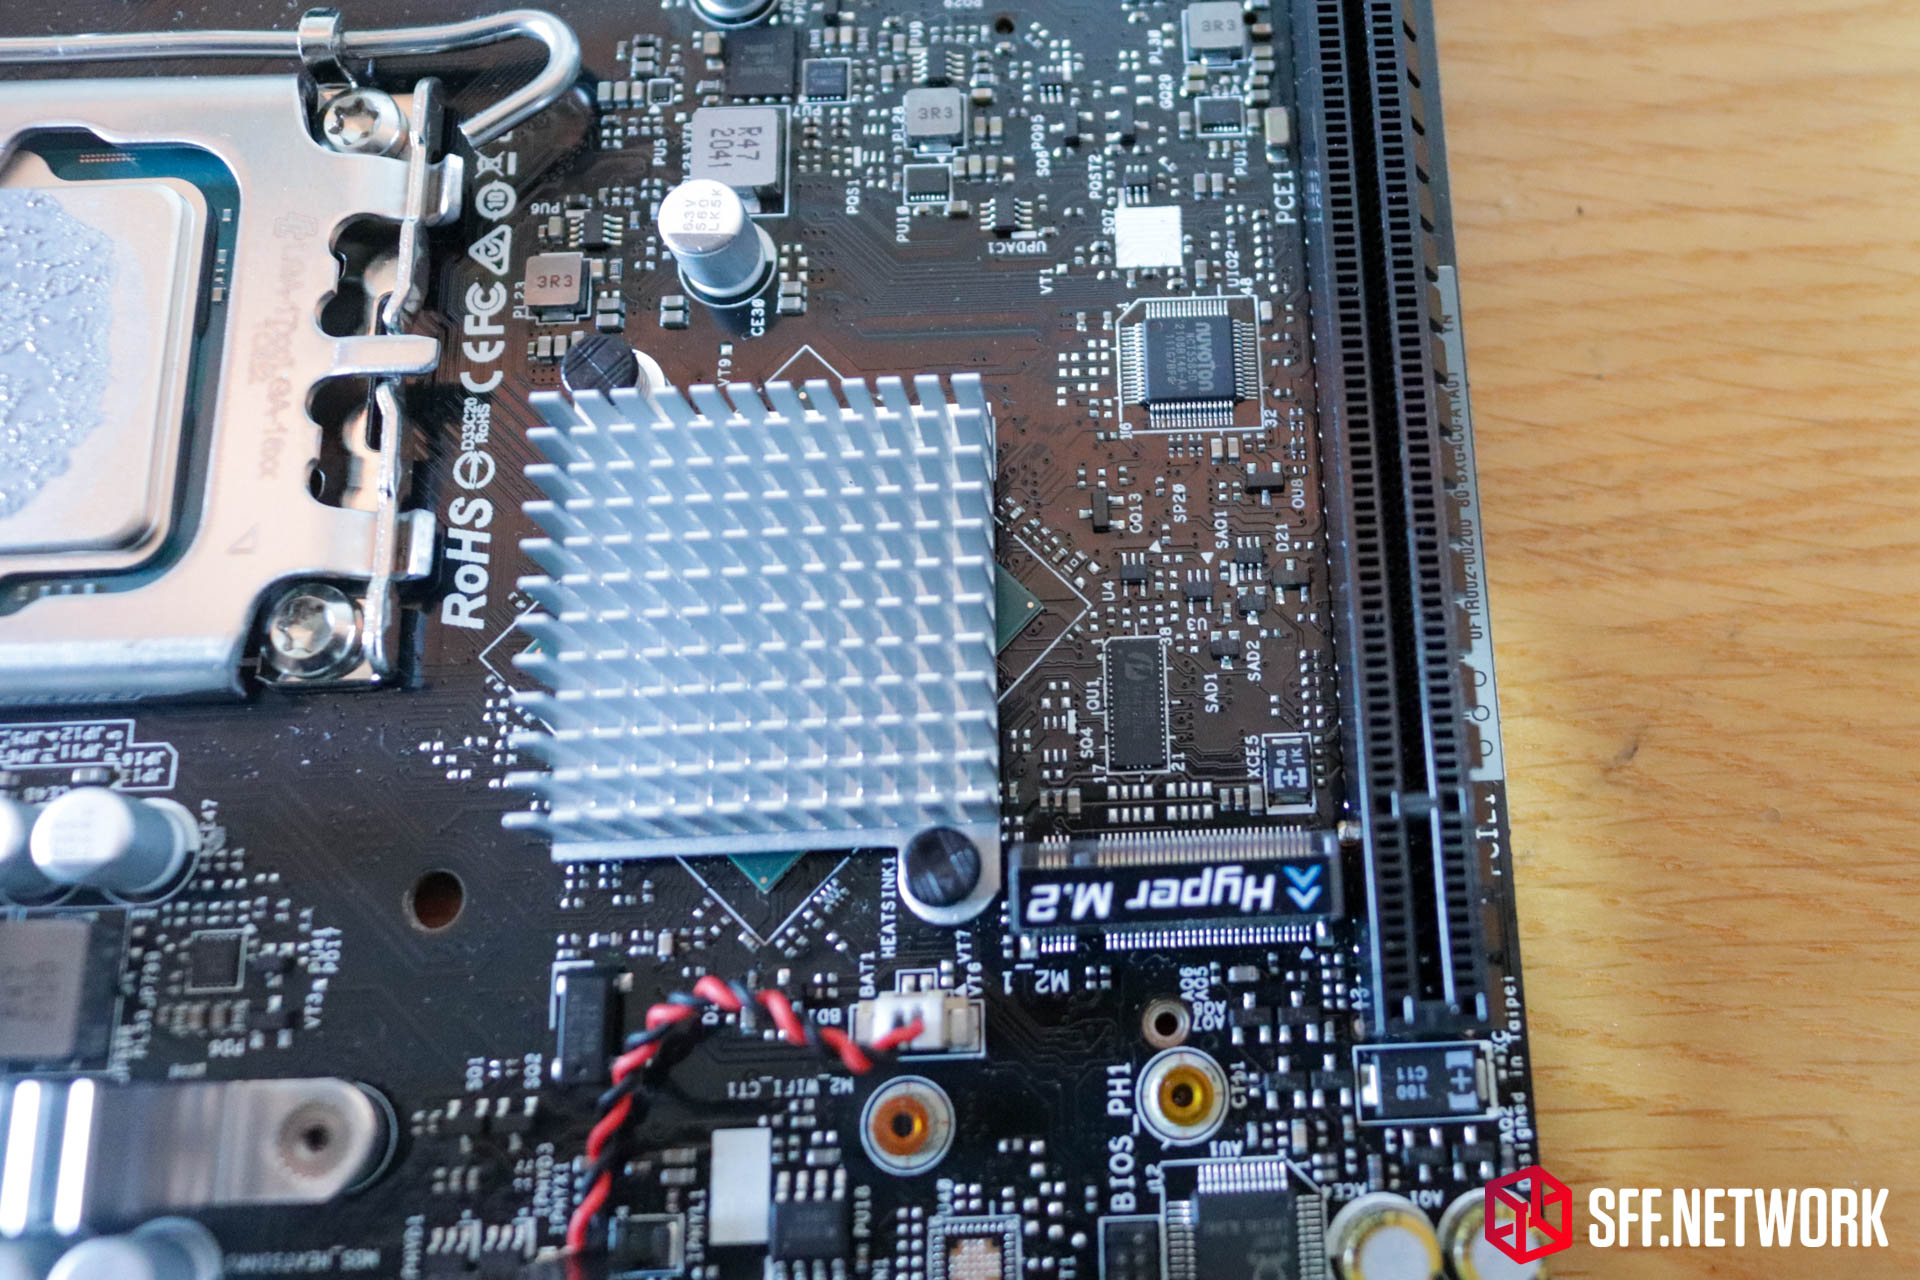
Hiding under the M.2 port, a pair of chips, a Diodes Incorporated PI3DBS16413 (PDF link), a (de)multiplexer chip that is likely here to switch between SATA and PCIe 4.0 for the M.2 port, and an a Nuvoton NCT8858D, a Super I/O chip that will be keeping the system cool, voltages in check and the system running quietly.
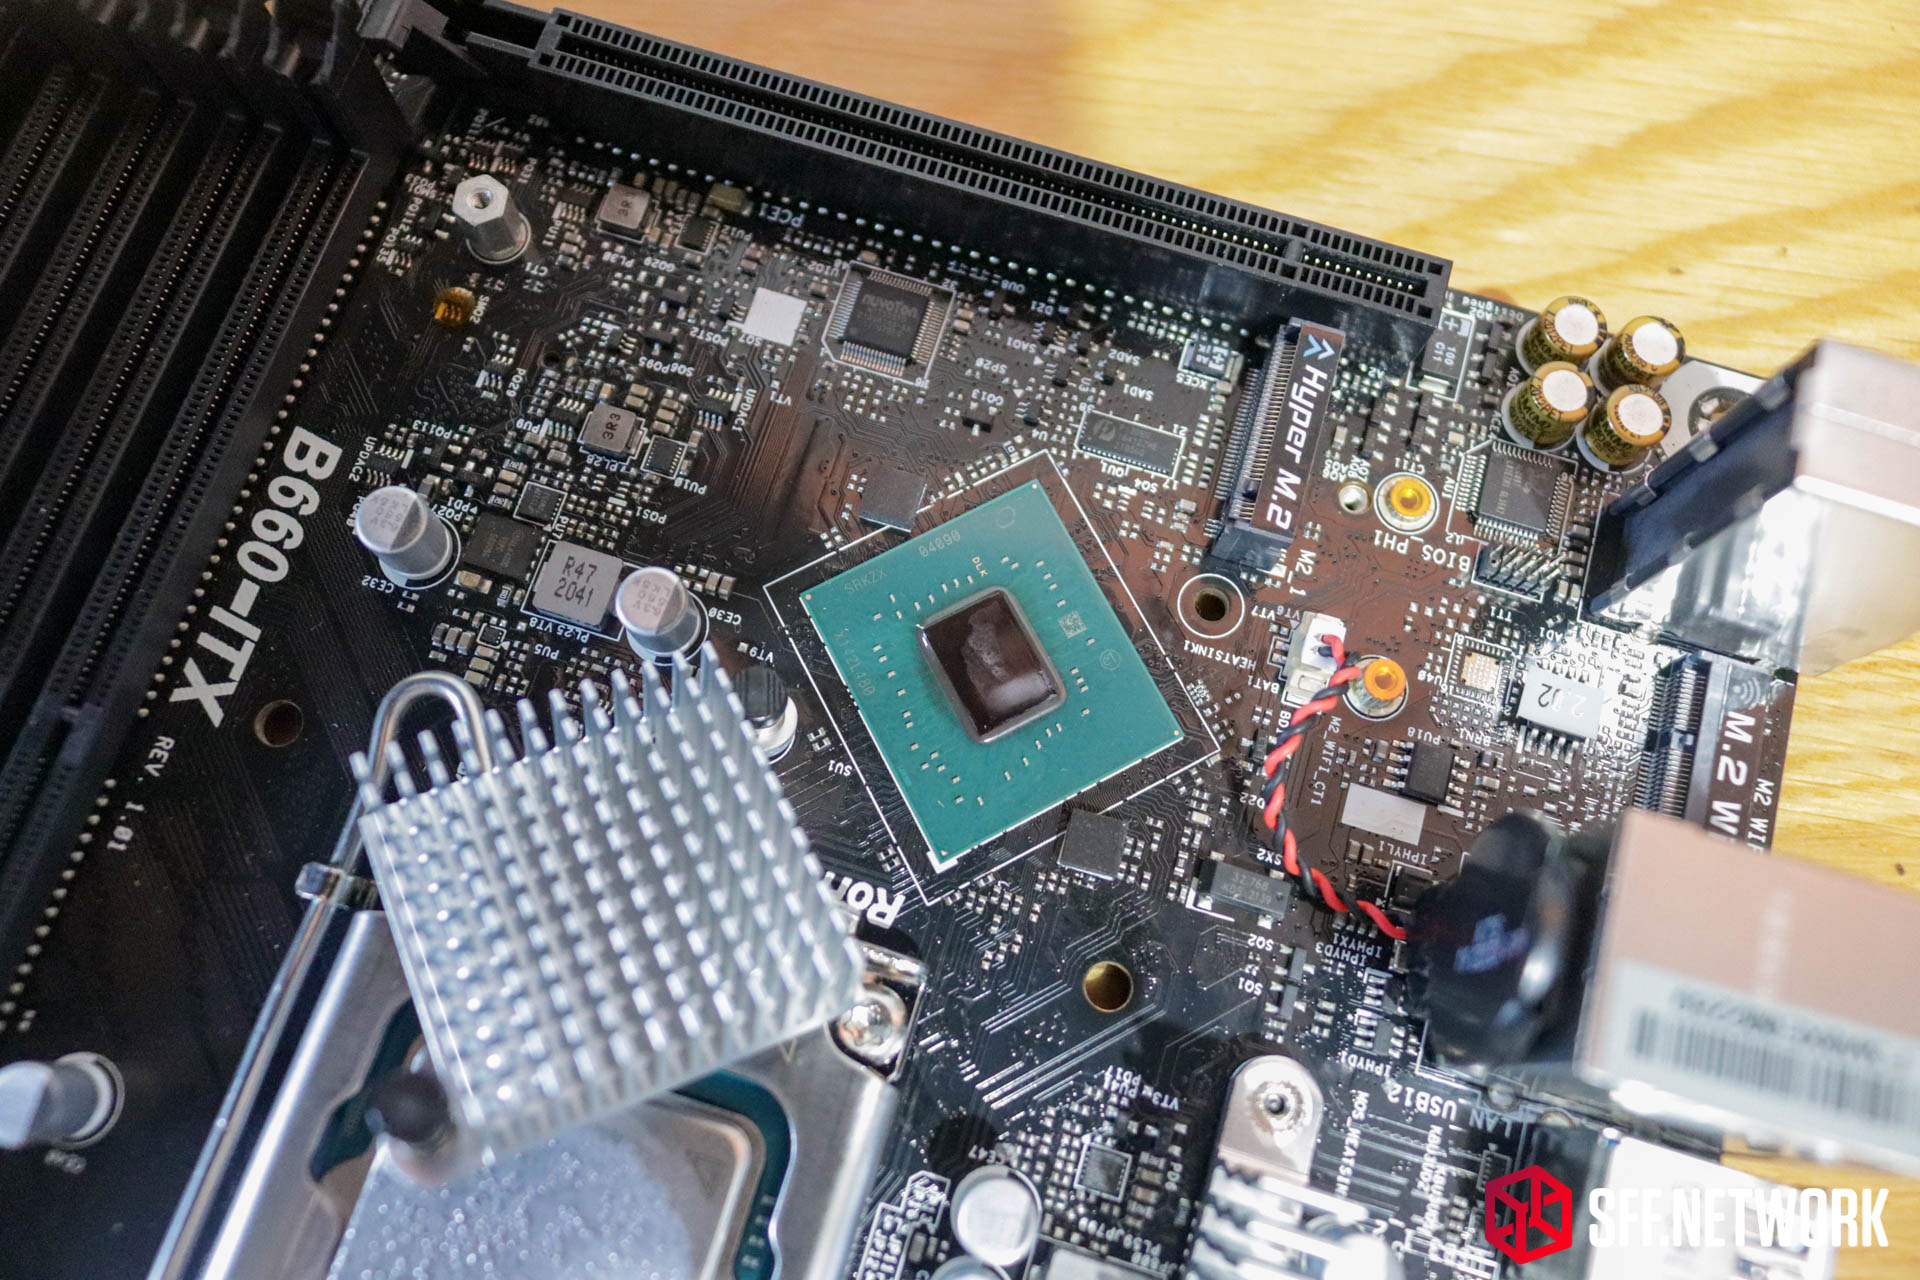
Naked silicon! Here lies the Intel SRKZX, better known as the Intel B660 chipset. The 45 degree rotation of the chipset heatsink versus the chip itself is likely a result of just having to find a spot amongst the many PCB layers to have two holes for retention clip mounting, but I have to admit it does look a little odd with the four green corners poking out when the heatsink is installed.
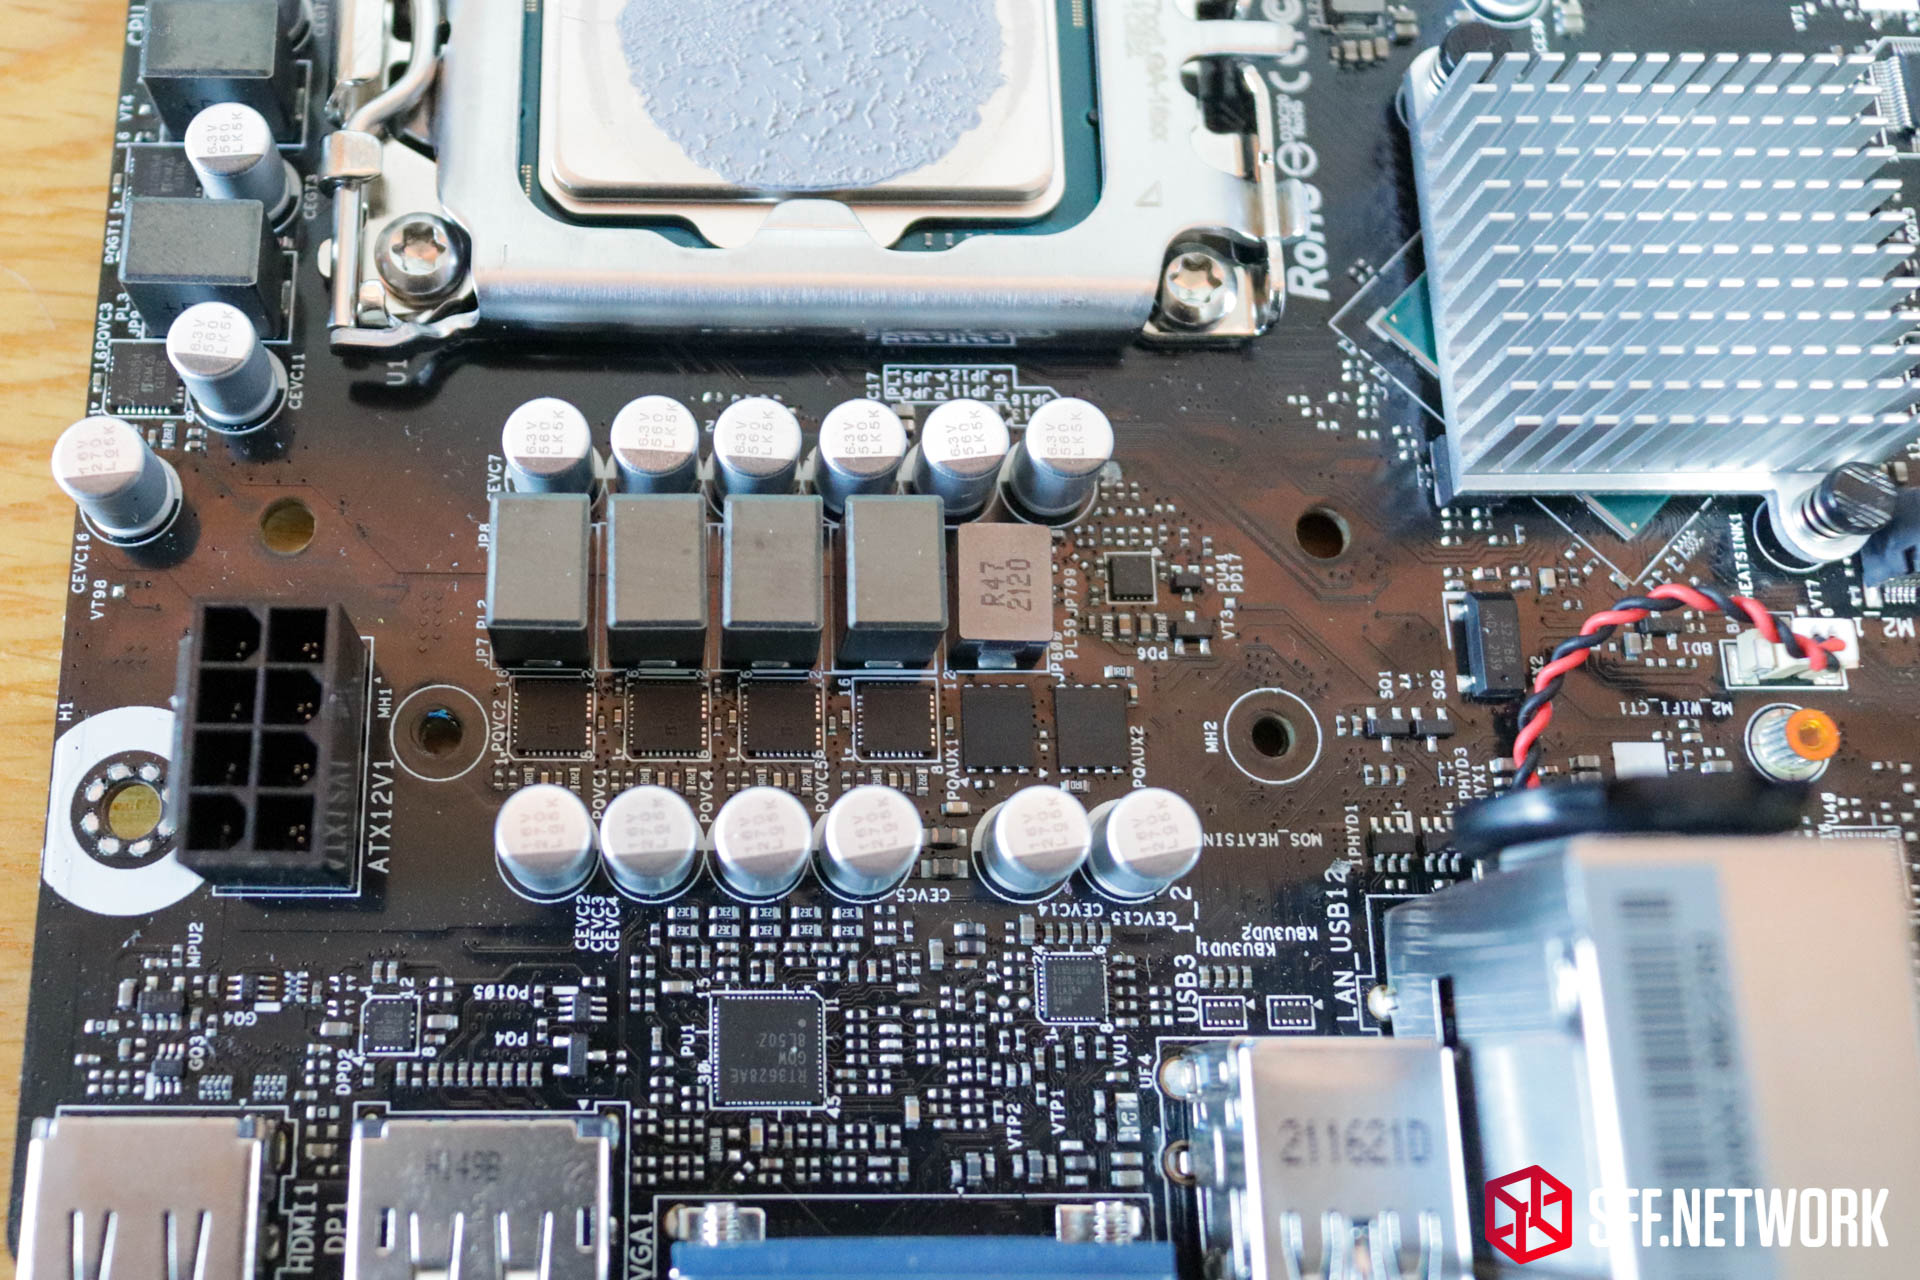
Power! VRMs! Yeah, this is a pretty basic setup, a given considering the board is rated for 65w TDP chips and no K spec processors. Four more Vishay SIC654 integrated power stages make up the remainder of the VRM section, with a pair of ON Semiconductor FDPC5030SG chipsets playing support. We’ve already seen one of these helping power the chipset!
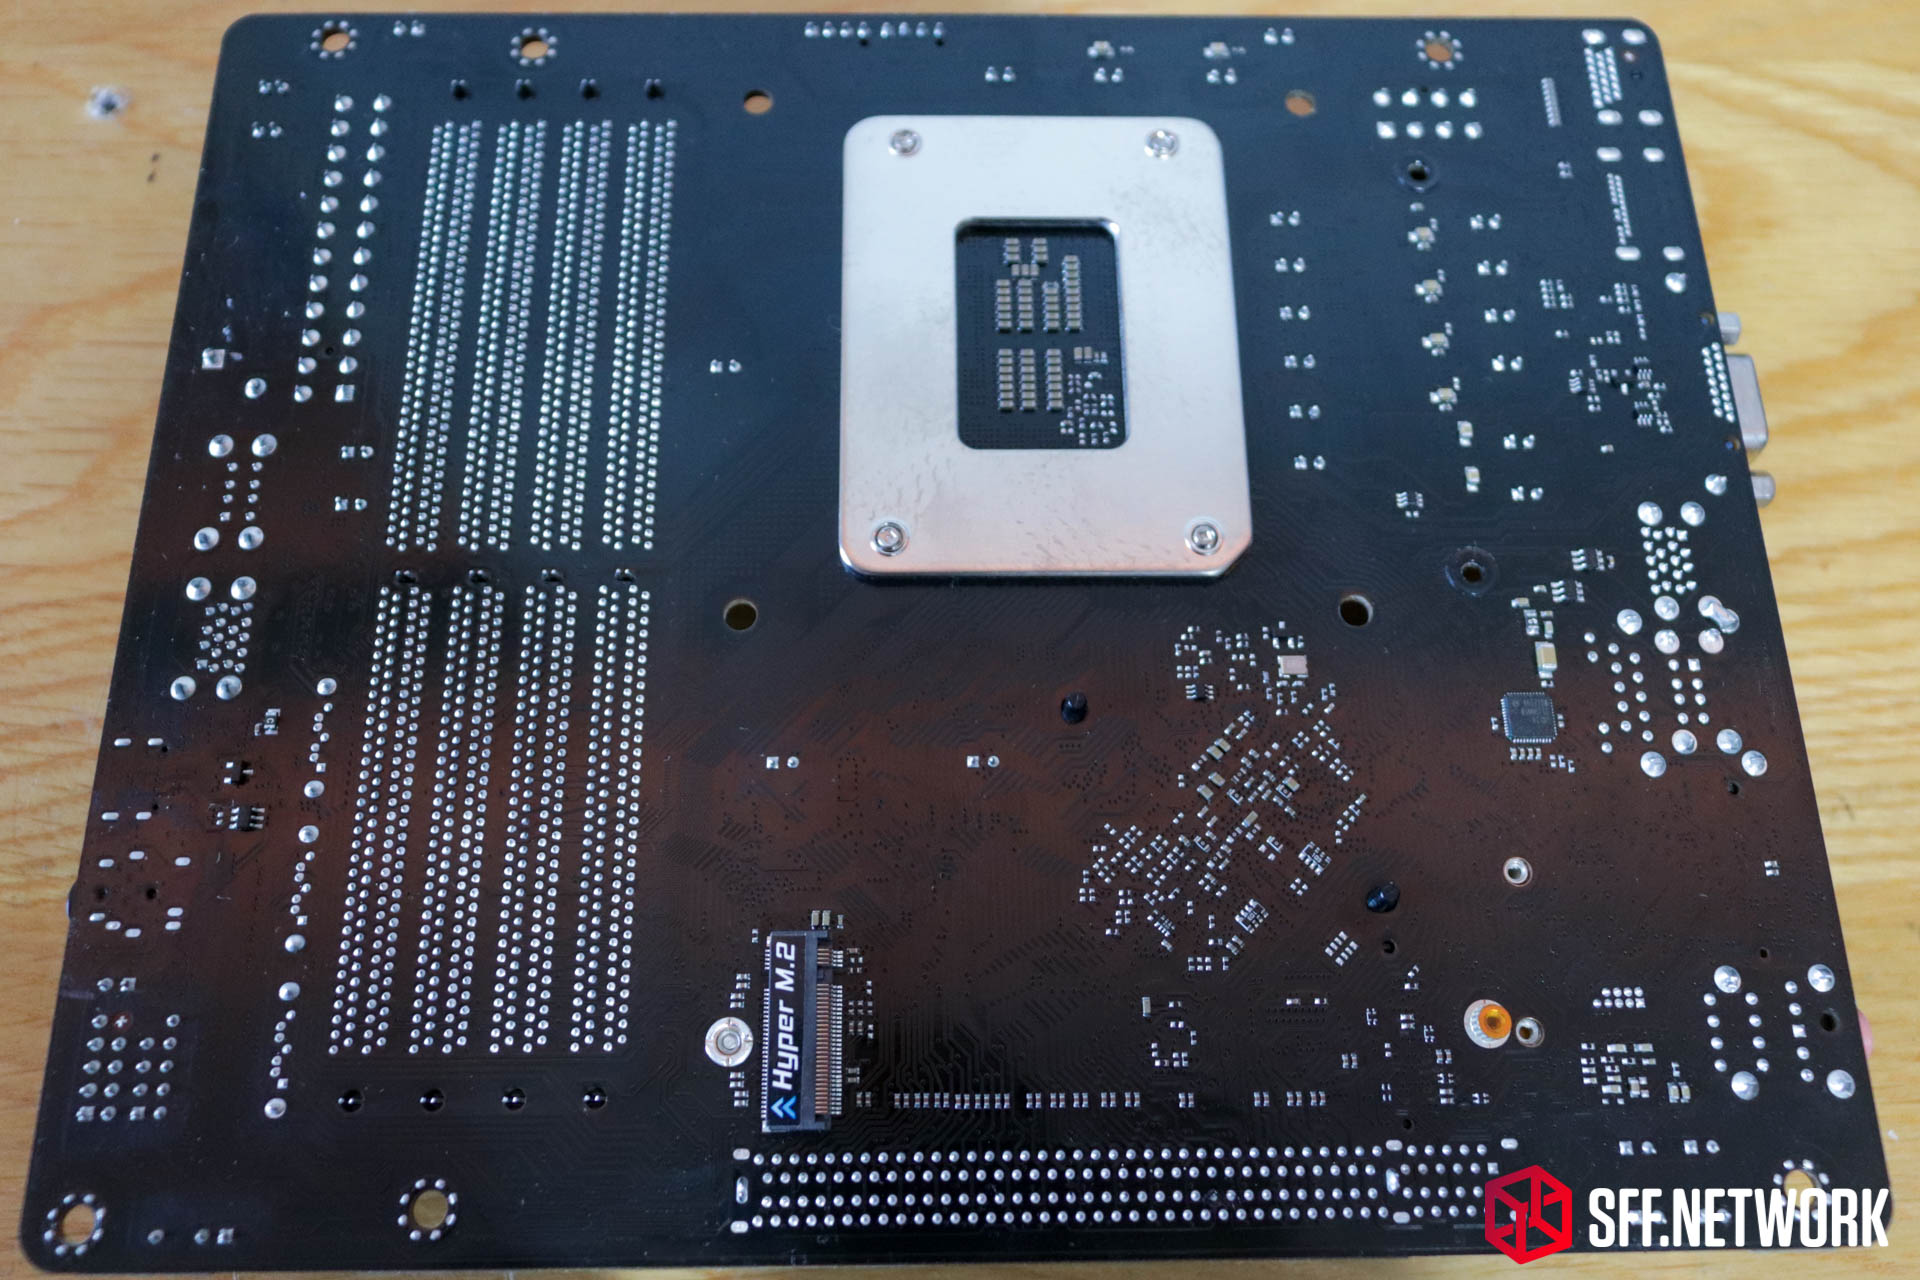
Under the board is a very, very simple affair. The second M.2 slot is present, and a lone chip.
Which happens to be an Intel i219LM-E Ethernet chip.
Conclusion
This is a conclusion in two parts – within the product itself lies merit, but the execution, in my opinion, leaves it lacking in a few areas.
Firstly, the product itself. The idea of extending the M-ITX form factor to add in support for more memory, and a fixed front panel, has merit. With most SFF cases having limited, or altogether eschewing front panel I/O, the DeskMeet breaks the rules with 5, count em, 5 USB ports on the front panel. A creative user’s dream – all the easily accessible USB without needing a USB hub. The addition of two extra DIMM slots versus the usual two on M-ITX is a great feature, as many of us now have 1, 2 or more pairs of DDR4 DIMMs from SFF builds. Combining a couple sets to get 32, 64 or even 128GB of memory really does extend one’s system.
The DeskMeet isn’t really intended to be a high end gaming system, however the marketing appears to be more orientated at business, creative, or HTPC use. Smaller GPU support, but more storage and RAM for those big projects. 4k video editing in 8 litres? Here we are! The potential is very much there.
The execution, whilst creative, does have issues. ASRock has used the ATX power supply in a reverse air flow configuration to cool the system effectively, I’m more than happy to confirm. However, the use of a reverse flow power supply warrants concern – if the power supply fails, no off-the-shelf power supply will cool the system unless one opens it up and flips the fan over. With only a 1 year manufacturer warranty, this could become an issue in the future (although Channel Well Technology does have a good track record for reliability in my experience).
UPDATED, ASRock has provided me with a MSRP and availability – US$224 and it should be on NewEgg soon.
At a MSRP of US$224, even taking into account the product’s limitations, the ASRock DeskMeet is a great value proposition compared to M-ITX boards with the same chipset. At the time of writing, aside from ASRock’s own M-ITX boards, you could buy an entire DeskMeet B660 for the price of a competitor’s bare motherboard. With the extra features the DeskMeet offers over the competitors (more RAM slot capacity, a chassis and custom power supply included), this is a product I’m happy to recommend. Oh, and for all the modders out there, go crazy! I know I will.

Original final conclusion below;
At the time of publishing, ASRock does not have a launch date or MSRP for the DeskMeet B660. It’s incredibly difficult to judge a product without knowing what an end user will pay for it, so I have to reserve my judgement somewhat. Despite this, with the poor 1 year warranty, custom power supply (that cannot be replaced in the after-market), and average chassis build quality, I just cannot recommend the ASRock DeskMeet B660 at this time, unless you intend to use the board inside in a custom build.
With a better chassis and power supply solution, the ASRock B660-ITX board has much more potential.
Have a chat about this article in the forum here, or join our Discord here (requires forum membership).
Many thanks to ASRock for providing this review unit for our testing.


