Absolutely, here: https://thor-zone.com/manuals/TZ-NQS1-R1-CC_SF600-750_eng.pdf
Please note, these are for Cosair SF-600 and SF-750.
Following up on this now that it's been a month or so. @AlexTzone please make this bracket available for the NanoQ S, even if it's an add-on part. The space savings are going to be crucial for SFX-L PSU users. I'm waiting to buy cables until I know for sure what the orientation of the PSU is going to be, and knowing that this is obviously the best way to go, I'm holding out hope.I made a mistake, the PSU rails on the NANOQ S and R are different, the former has a mounting hole on top of the rail, while the latter has a mounting hole on the end of the rail (center point of the stainless steel bar). Meaning it’s not possible to add a simple extra rail. However; an L-bracket that gets connected to the PSU rails and has dedicated PSU screws holes should work. But the 3D printed version should be pretty thick, otherwise there’s a risk of it breaking under the weight of the PSU. As for a future addon, it would likely be 2 CNCd parts so it’s properly robust.
Also, the power connector sticks up roughly 17mm above the PSU, haven’t measured exactly how much it would invade the front fan space yet, but I’d think you loose the opportunity to use a 120x25 fan and instead need to go for 120x15.
Following up on this now that it's been a month or so. @AlexTzone please make this bracket available for the NanoQ S, even if it's an add-on part. The space savings are going to be crucial for SFX-L PSU users. I'm waiting to buy cables until I know for sure what the orientation of the PSU is going to be, and knowing that this is obviously the best way to go, I'm holding out hope.


Thanks @AlexTzone! I don’t have a 3d printer, but I’m sure I can find a friend or service who doesDone, here are 2 versions, one that is shorter so you still can use a 15mm slim fan on the front (however, the PSU connectors are really close to the motherboard) and another that maximally offsets the PSU towards the front (you can't use a slim fan anymore but there will be more distance between the PSU connectors and the motherboard).
Short L Bracket
Long L Bracket
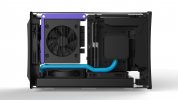
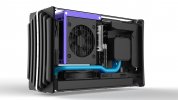
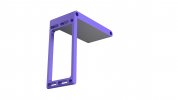
Here are a few pics:
View attachment 3285
View attachment 3286 View attachment 3287
The purple color is just to help you distinguish the bracket from the rest of the case.
These brackets should fit SFX and SFX-L, but SFX-L will be really tight on the motherboard side with the short bracket (it looks like cables might cover the motherboard IO ports).This braket is for an sfx psu? if not can you make one that maximizes space between front and psu?
After you reply I am going to print one to check if it's sturdy enough.
These brackets should fit SFX and SFX-L, but SFX-L will be really tight on the motherboard side with the short bracket (it looks like cables might cover the motherboard IO ports).
@AlexTzone do you have any mockups/renders with SFX-L on the short bracket?
will do.Exactly right, technically the bracket can mount SFX-L without any problems; however, the SFX-L is too long even when using the maximally extended bracket (Long L Bracket), it's going to interfere with the motherboard. So it would be awesome if you could print one of these @turboleak and let me know if it's rigid enough or if I need to adjust it somehow
Any options for those that missed pre-order window on the Nano, or just stuck waiting for next pre-order batch? Case looks great and need a bit more space for wc.
Please let us all know how it turns out! Really hoping to print my own to fit my Loki in the Swill do.
I have already printed it and it has some issues. I modded it and will print what I believe is an improved version. after that I will leave my conclusions here but what I noticed on the version that Alex posted is:Please let us all know how it turns out! Really hoping to print my own to fit my Loki in the S
I have already printed it and it has some issues. I modded it and will print what I believe is an improved version. after that I will leave my conclusions here but what I noticed on the version that Alex posted is:
- Regarding the side part where the PSU is secured, the only part needed is the upper part with the two screws. everything else bellow can be removed as it provides no structural function.
- because the PSU is secured to the bracket from the side instead of from the top, it wants to roll to the right. This puts alot of stress on the bend ( the vertice of the L bracket ). More material is needed so that the weigh of the PSU trying to roll to the right does not overcome the plastic. On the original version what happens is that the PSU drops 1 or 2 degrees and it is kind of ugly.
- Alex made some very beautiful screw tapering holes, but for plastic, flat surfaces work much better.
Finally I have no idea how the bracket secures to the case.
Sorry for the delay, I was only able to work on this today.

Maybe I'm not understanding - if there are four mounting points where the PSU connects to the bracket (via the four screw holes in the back of the PSU), how do the two bottom holes not provide any structural function? Would they not reduce the weight and torsion applied to the two top screw holes by spreading out the surface area that's mounted across the four mounting points and better secure the unit?I have already printed it and it has some issues. I modded it and will print what I believe is an improved version. after that I will leave my conclusions here but what I noticed on the version that Alex posted is:
- Regarding the side part where the PSU is secured, the only part needed is the upper part with the two screws. everything else bellow can be removed as it provides no structural function.
- because the PSU is secured to the bracket from the side instead of from the top, it wants to roll to the right. This puts alot of stress on the bend ( the vertice of the L bracket ). More material is needed so that the weigh of the PSU trying to roll to the right does not overcome the plastic. On the original version what happens is that the PSU drops 1 or 2 degrees and it is kind of ugly.
- Alex made some very beautiful screw tapering holes, but for plastic, flat surfaces work much better.
Finally I have no idea how the bracket secures to the case.
Sorry for the delay, I was only able to work on this today.
they don't. if the vertice fails everything below it is meaningless.Maybe I'm not understanding - if there are four mounting points where the PSU connects to the bracket (via the four screw holes in the back of the PSU), how do the two bottom holes not provide any structural function? Would they not reduce the weight and torsion applied to the two top screw holes by spreading out the surface area that's mounted across the four mounting points and better secure the unit?
