When Craig reviewed ASRock’s B250 DeskMini GTX1080, we were impressed by the utter performance density offered by the platform. A GTX1080, with desktop GPU performance, in a box under 3 litres of volume. Today it’s my turn to look at a DeskMini GTX/RX model, albeit the next generation, based on Intel’s Z370 chipset.
The ASRock DeskMini GTX/RX line is based on the Micro-STX form factor, a variation on the STX form factor originally launched by Intel as “5×5” a few years back. ASRock realised that by adding in a mere 2 inches in length (ugh… metric plz) meant that the addition of an MXM slot was possible, opening up the form factor to upgrades of the GPU variety.
Lets’s see what this iteration of the DeskMini has to offer! A note before we begin; the ASRock DeskMini product line is a barebones product, with the chassis, power supply, WiFi card, motherboard and MXM graphics card included. You’ll have to add your own storage, CPU, CPU cooler and RAM for this system to be bootable.
This article will be published in two parts, due to the length of the content, and the detail I’ve gone into. Part two will be published in one weeks time and will be linked here when published.
The Aesthetics and Design
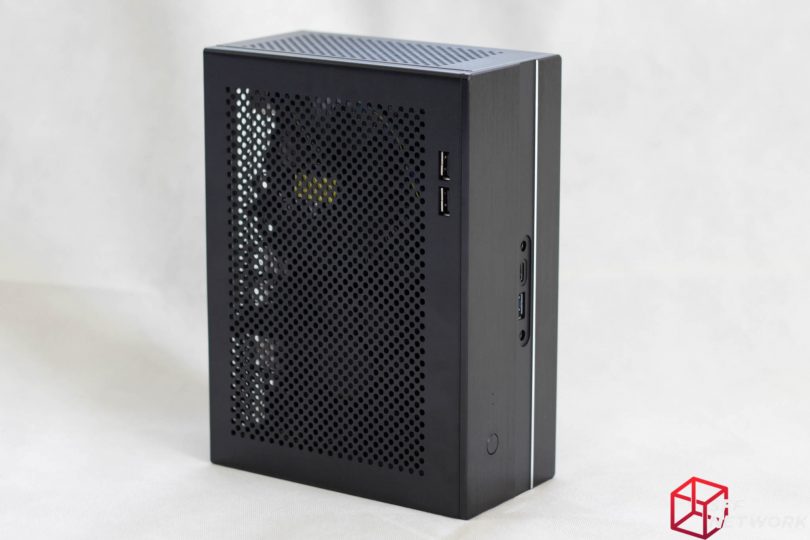
Simple, understated elegance is the hallmark of the DeskMini line thus far – no flashy RGB, gamer-esque plastic gubbins, just a subtle aesthetic. Notable is the large amount of ventilation holes – this little beasty can put out some incredible heat when pushed to the limits.
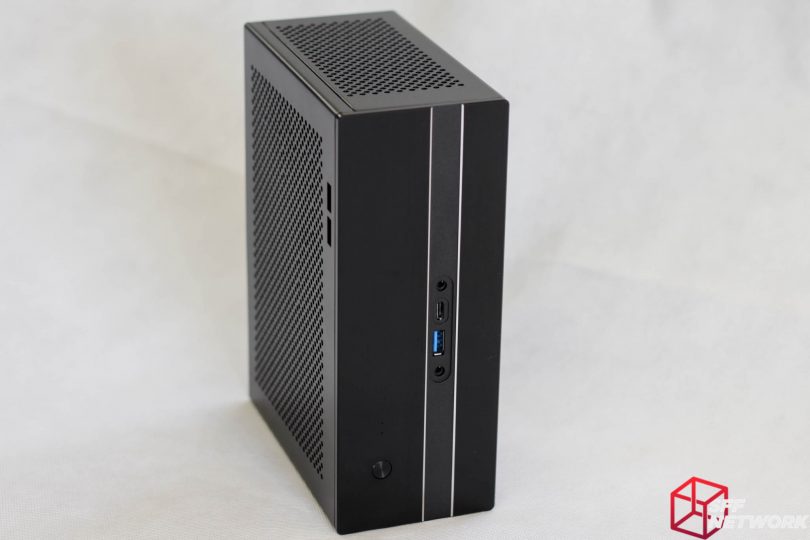
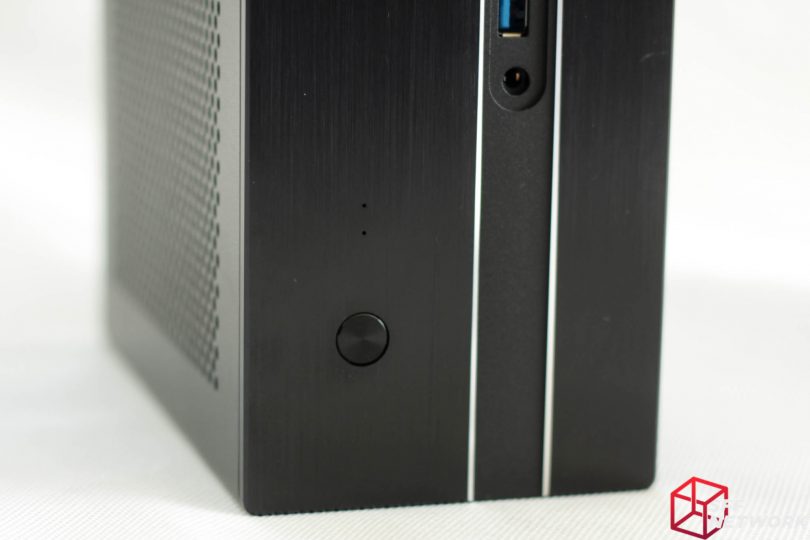
The front panel is made from a thick aluminium plate, CNC machined with the vertical slot recessed some. A “diamond-cut” finish is applied to the corners of this recess, adding in the only flashy design feature of the chassis. The power button is located near the bottom of the front panel, and has a satisfying click upon pressing it. Although difficult to see, there are two minuscule holes for the status LEDs – one for power, and one for HDD activity. The power LED is a subtle white LED, whilst the drive access light is a toned down blue LED. None of this retina searing blue LEDs from days gone.
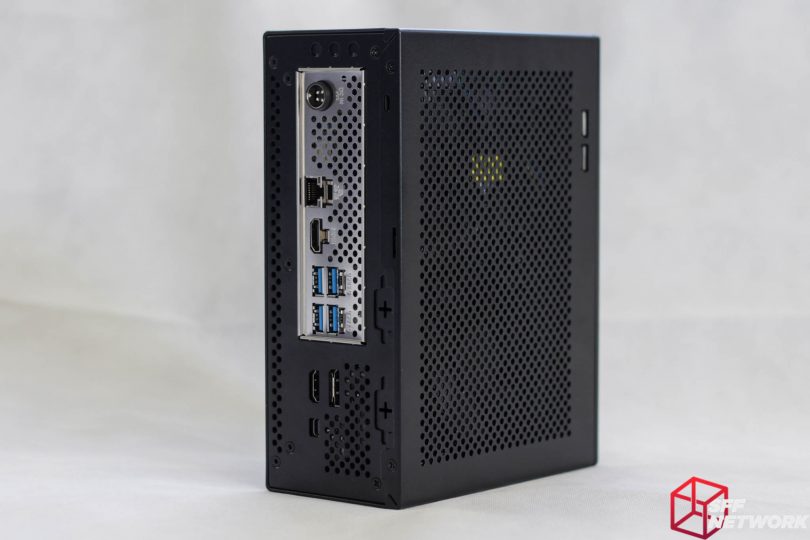
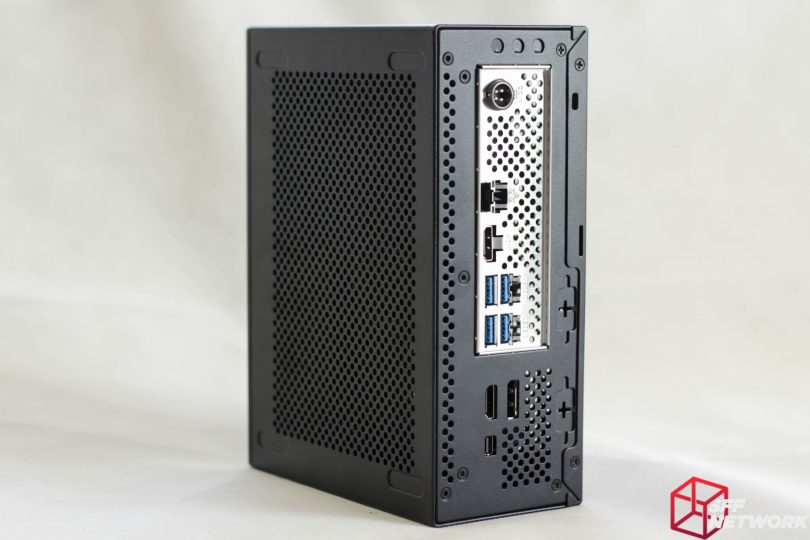
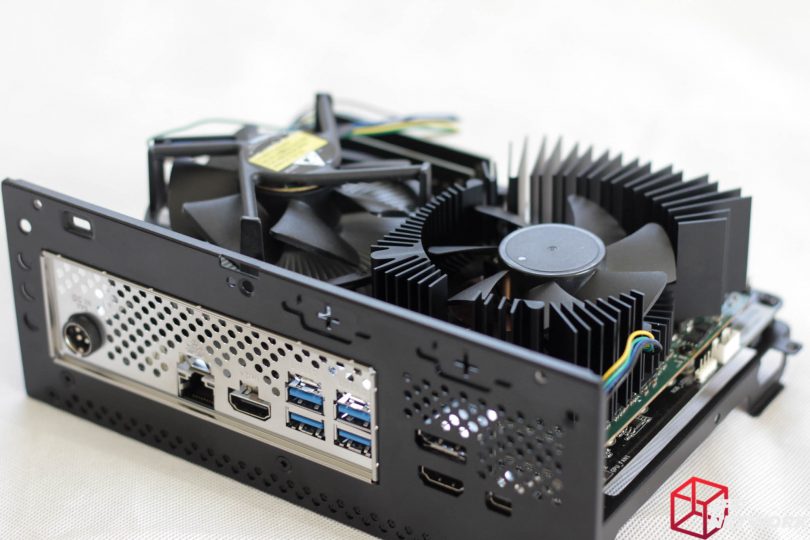
To the rear, we see the first improvement over the previous generation DeskMini GTX/RX – an additional two USB3.1 ports. These are very welcome, and somewhat sate my previous criticism of this part of the Micro-STX platform – the minimal rear IO. I am a heavy user of USB devices, with a USB keyboard, mouse, 7″ LCD, microphone, and phone connected at any one time, not to mention the addition of my DSLR when needed, as well as flash drives when transferring testing data between a system being tested and my own.
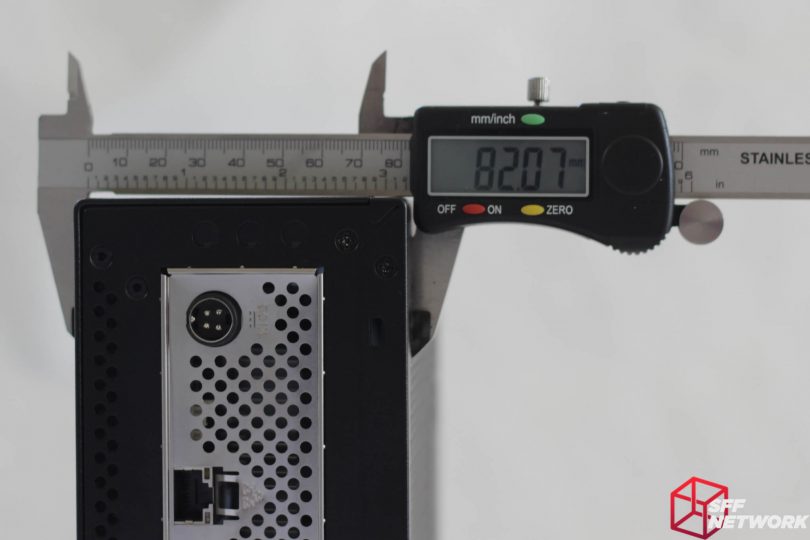
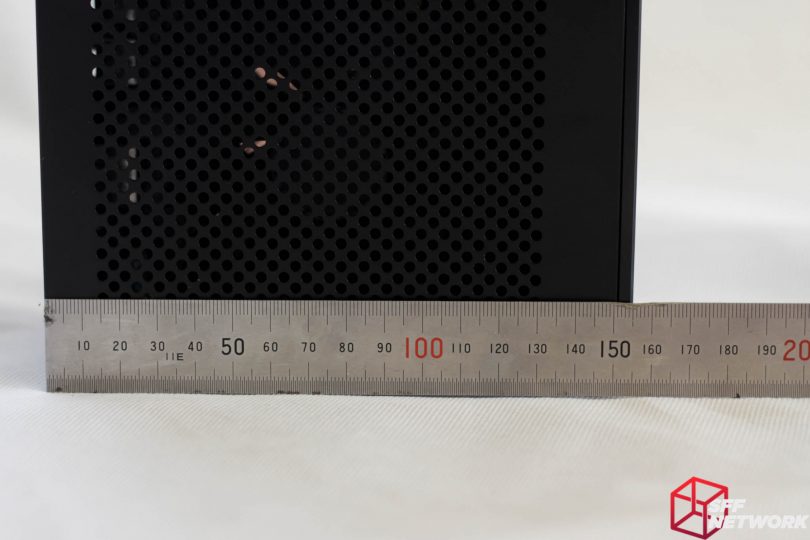
The DeskMini measures a measly 82 mm wide, obviously limiting CPU cooler capacity – ASRock states a 52MM CPU cooler limit for this system.
At 155 mm deep, this system won’t take up much room on your desk. The front panel itself is 4mm thick, which is not insubstantial.
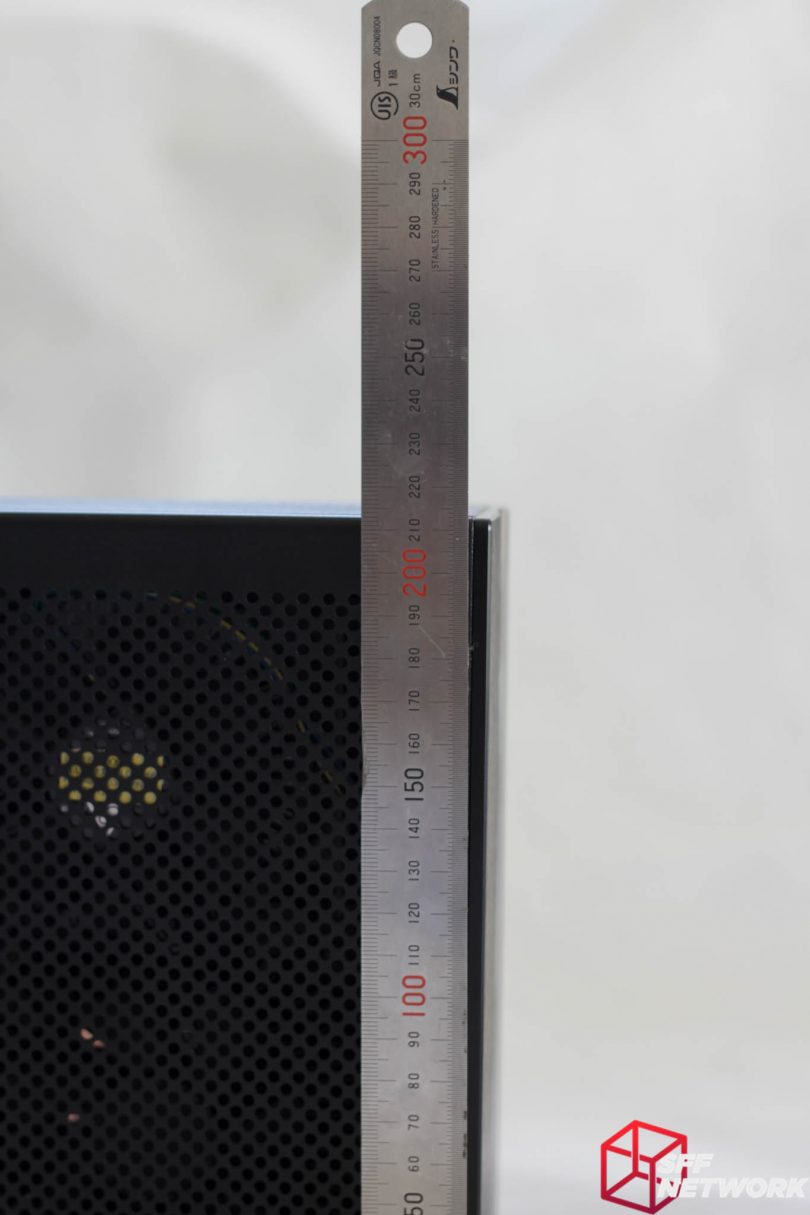
At around 213 mm tall, this rounds out the measurements needed to calculate the system’s volume, a tiny 2.7 litres.
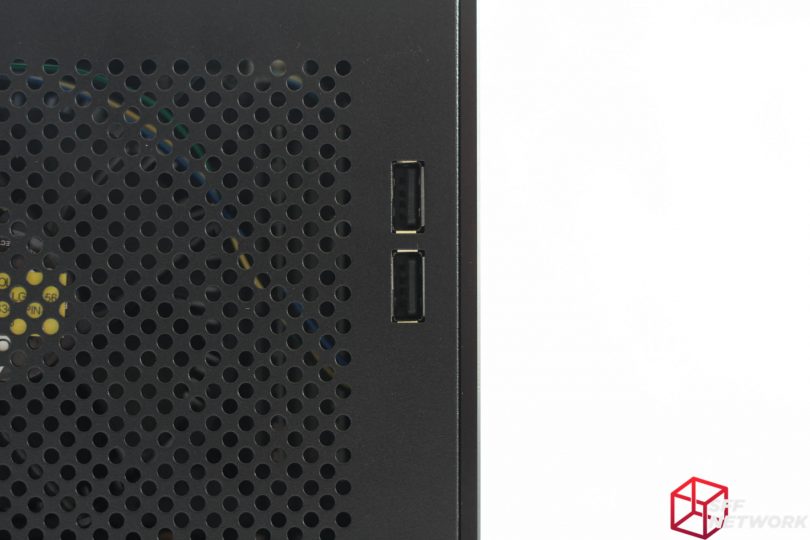
On the left side, we see the lone examples of legacy – a pair of USB2.0 ports. I do hope that in the future ASRock can implement more USB3 from the board – being that the standard is backwards compatible, we’d be at no loss if these 2.0 ports were replaced with 3.0/3.1 ports!
Precision machining in action. The front panel is very cleanly machined, with no extraneous rough edges, machine marks or absurd clearances between the panel and the chassis, ports or button. Those status LED holes are proper tiny!
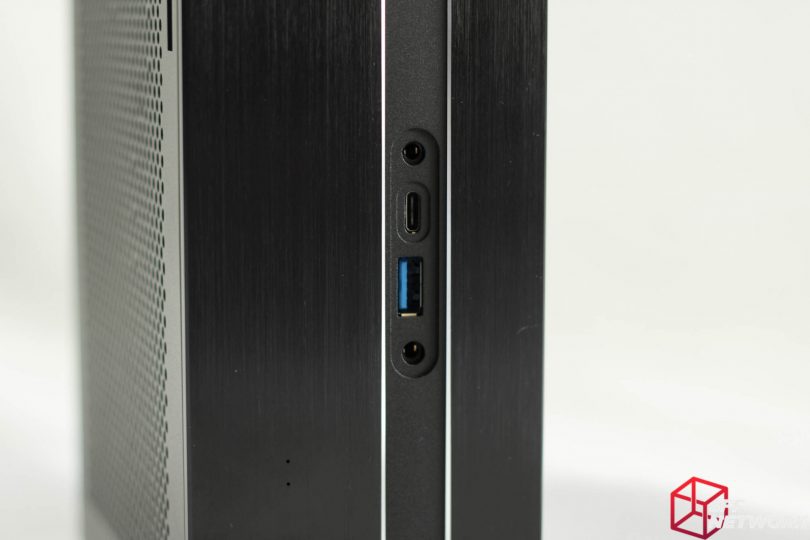
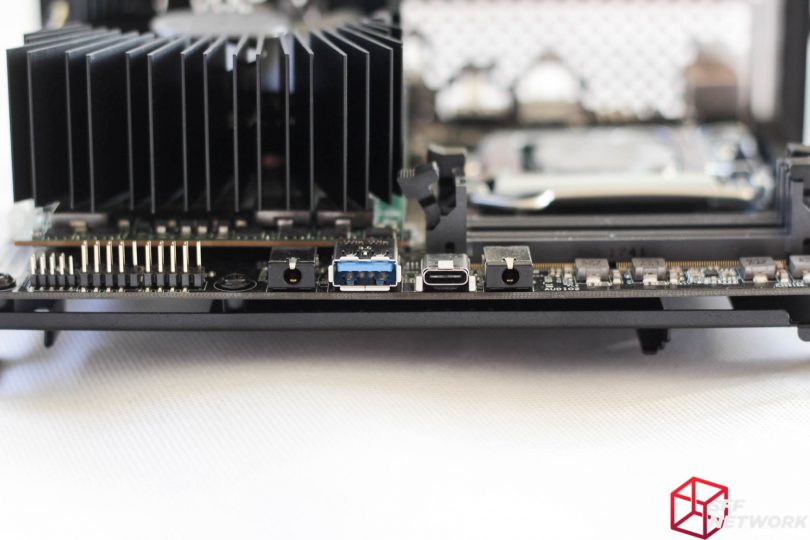
Up front, we see a modern port loadout, with the typical headphone and mic jacks, along with a USB3.1 Gen 1 Type A and a 3.1 Gen 1 Type C, to ensure your chosen peripheral has the right interconnect available. Unfortunately, the Type-C port is not Thunderbolt capable, a restriction brought on by the Intel Thunderbolt licencing process timeframe.
It’s clear that this system has a business alter-ego, with provisions available for adding a pair of RS232 ports for use with point of sales equipment or industrial hardware. Also present – the provision to add a loop for locking the system closed, and to a desk or other large object. On the side panel, there are 4 oblong shapes – these are 4 of the possible 8 locations for the included rubber case feet. The system is designed to lay flat, or stand up, depending on your preference.
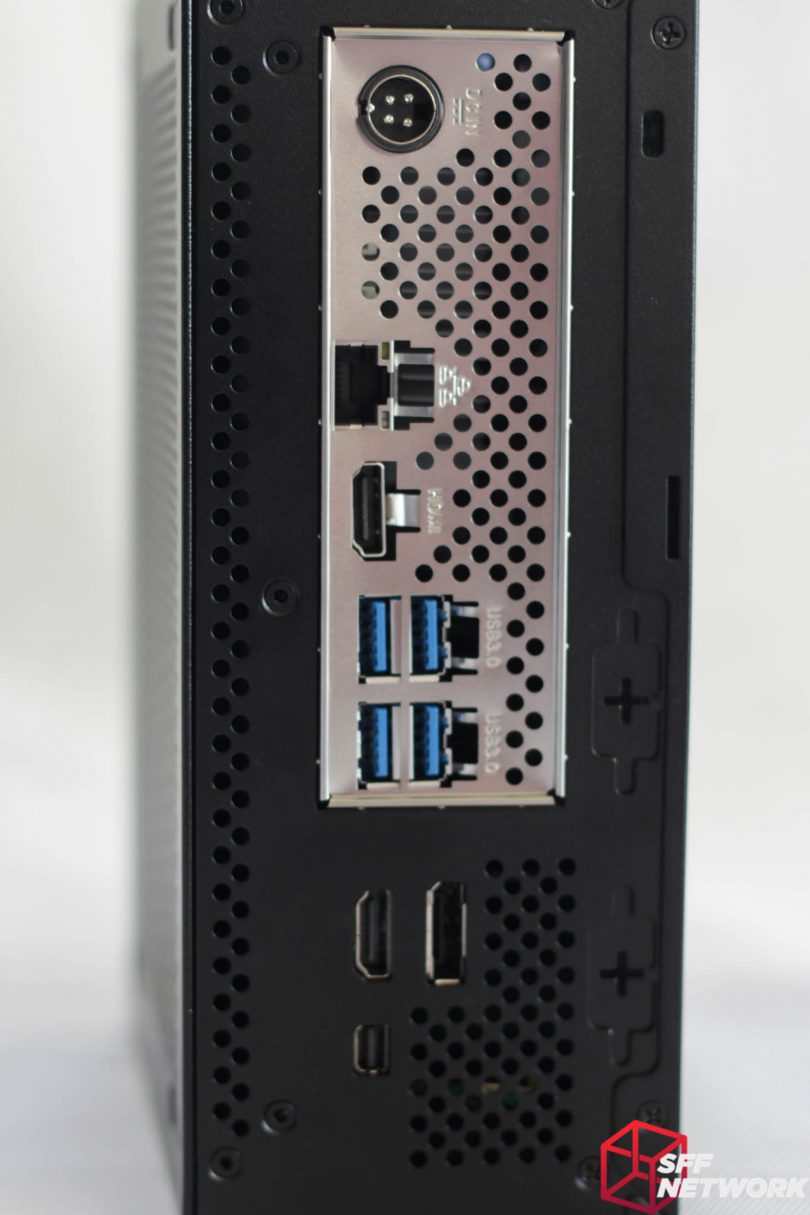
At 2.7 litres with a desktop CPU and a full fat (albeit MXM format) GPU, it would be quite the challenge implementing a completely internal power supply. Thus, a DC-In jack was a necessity, to connect the DeskMini to the not-insubstantial power brick. The 4-pin DIN form factor plug was chosen for the current handling capability, with the system needing more than the typical barrel jack can handle.
Below the mini-IO shield are the GPU outputs, which consist of a single port of HDMI, DisplayPort and Mini DisplayPort. ASRock specifies all three can handle 4K @ 60Hz.
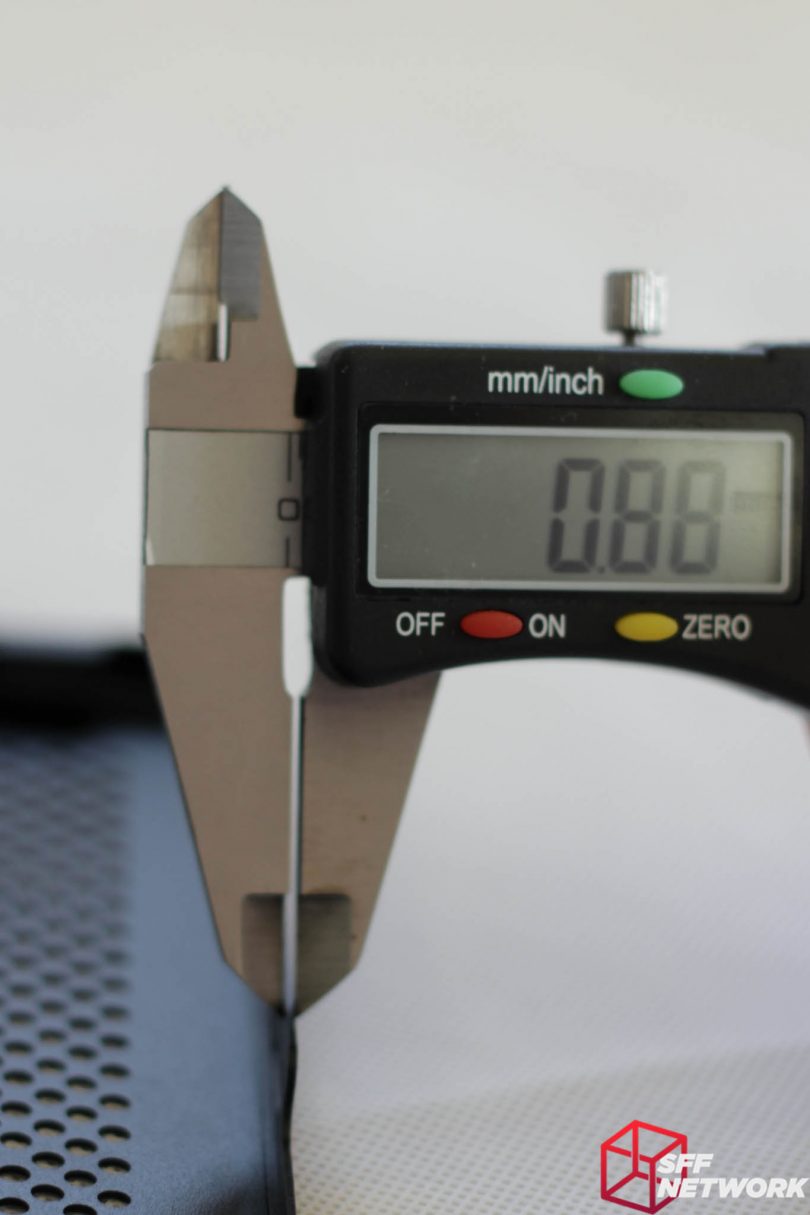
Including the powdercoat, the chassis measures around 0.88 mm thick, which is not insubstantial. Assuming a nominal thickness of around 0.04mm for the powdercoat, this leads to a thicker than normal 0.8mm steel by my guess. A bit thicker than the 0.5-0.7mm steel I am used to from other brand’s prebuilt and barebone offerings, which leads to a premium feel. Oh, and a challenge getting the side panel off! The chassis does feel very premium in hand – there’s a density and rigidity that a lot of other chassis lack.
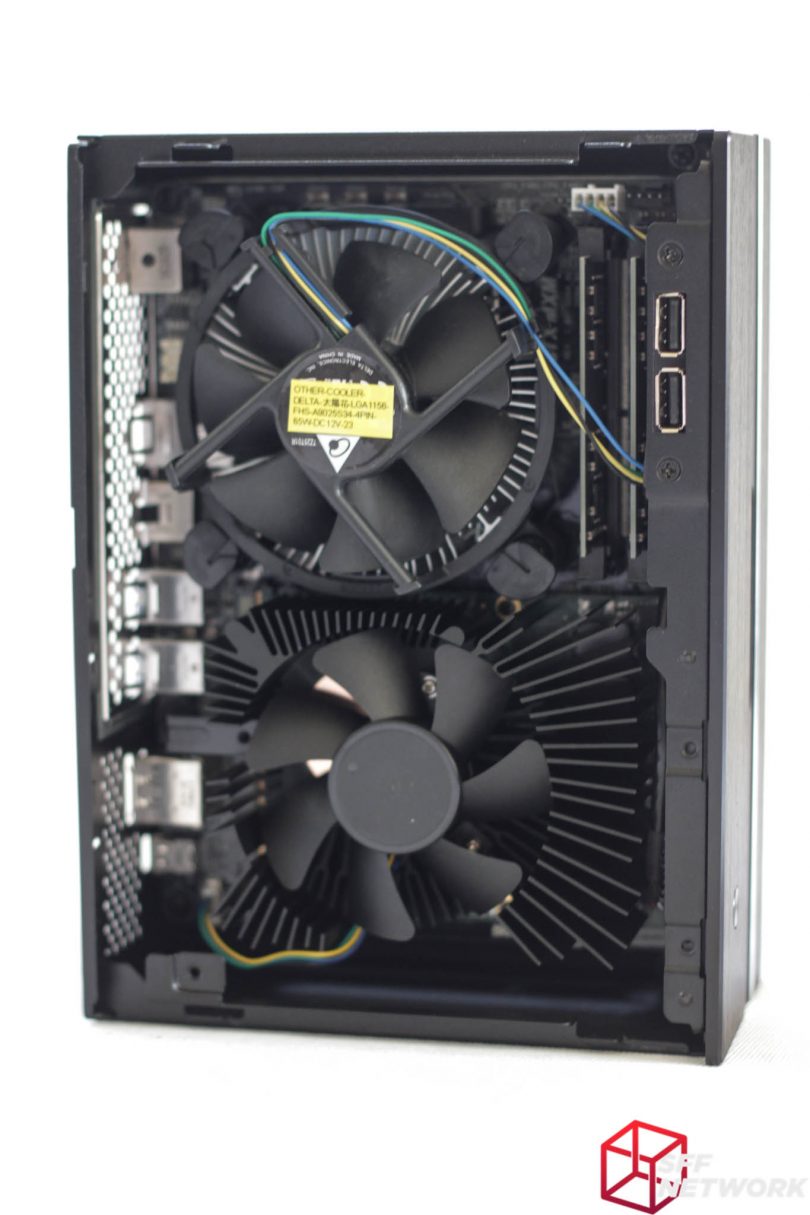
To our first view of the interior! Due to the layout of this particular form factor, our view is mostly heatsink, in fact, a pair of them. Note that a barebones unit from a retailer would not include the CPU cooler portion – our review unit included a processor and a Delta manufactured cooler based on the Intel reference design. Spoiler alert; it’s not quiet. In later testing I replaced the cooler with a Noctua NH-L9i, which is an upgrade I highly recommend over the stock cooler.
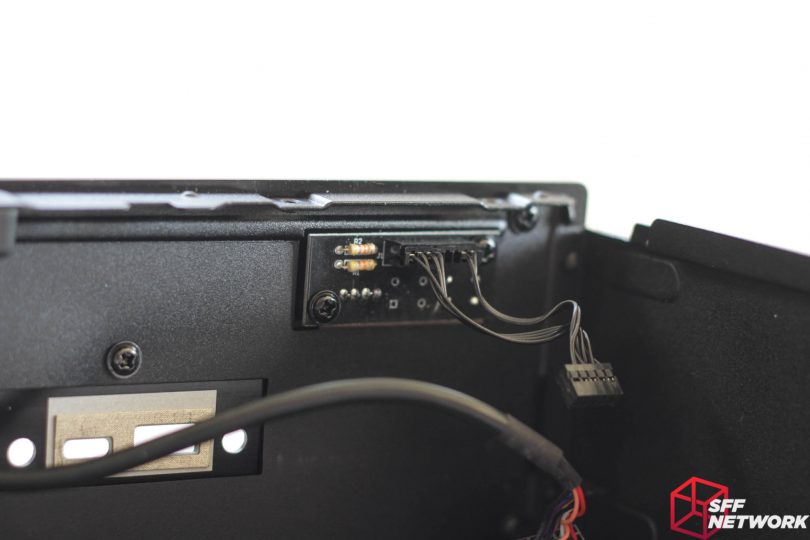
The front panel power button and status LEDs are mounted to a singular PCB mounted to the front panel by a pair of screws. Interesting to see a pair of through-hole resistors for the through-hole LEDs – no SMT cheapness here. These are connected to the motherboard with a single connector. This is a blessing – I am so tired of the continued prevalence of individual plugs for each front panel status indicator and button! The industry standardised on the Intel FP Header design some time ago, why do we still see the rats nest of individual connectors? On a negative note, this header is of a much smaller pin pitch than standard – an aspect to keep an eye on if you wish to design your own chassis.
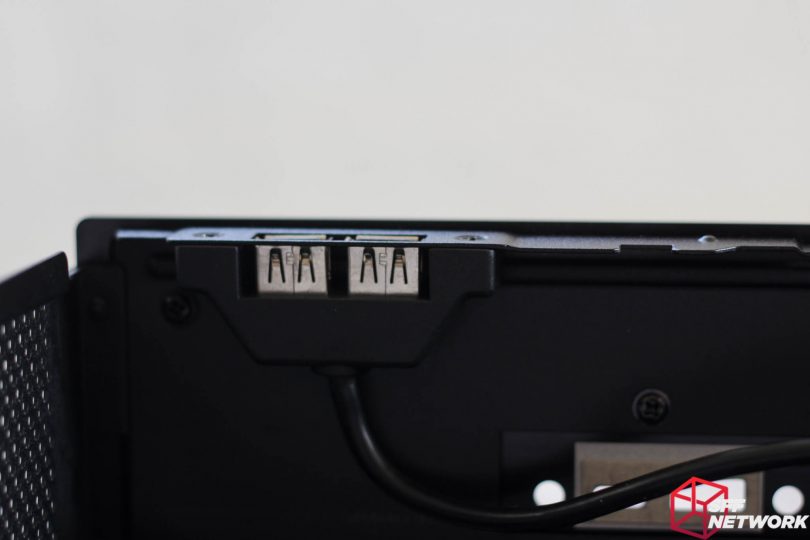
The USB 2.0 connectors, while replaceable, are limited by the availability of headers on the motherboard. In this case, the ASRock Z370-STX MXM does not feature any USB3 headers. However, this does avail the chassis to upgrades in the future when we see the next generation of Micro-STX motherboards.
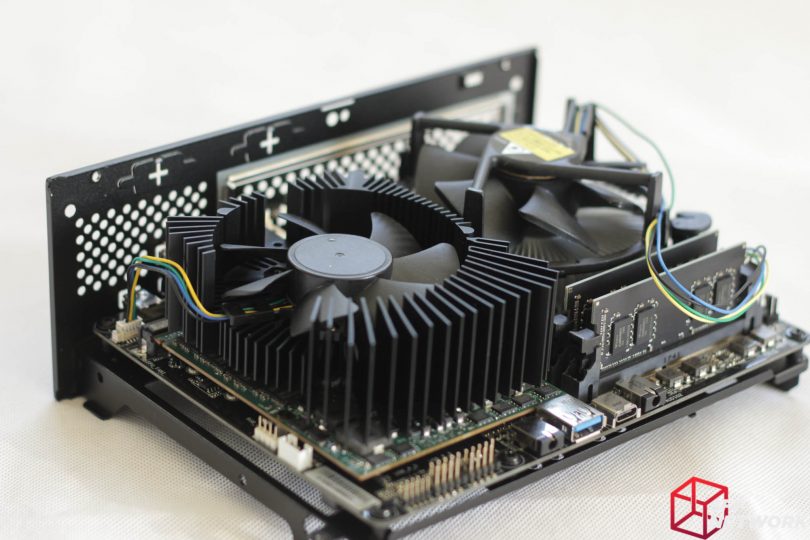
It’s naked! The layout of the DeskMini GTX/RX becomes more apparent in this shot. The MXM GPU sits barely (barely millimetres) above a mostly blank area of the motherboard. The front panel USB and audio jacks are soldered to the motherboard – if you want to change your system’s central front panel loadout, you’ll need a new board!
Looking again at the rear, we can see that the IO shield and display cutouts are relative to their sections of the board. The display outputs are next to the MXM GPU… well, excepting the lone HDMI in the IO shield area, which is driven by the IGP on the processor… *yawn*. However, the option for running both the GTX1060 and the IGP means that up to four displays can be driven from this itty bitty pc.
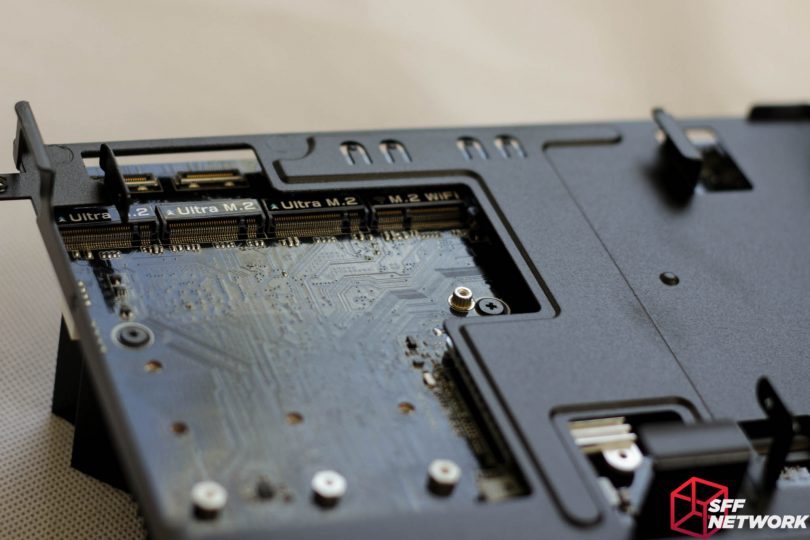
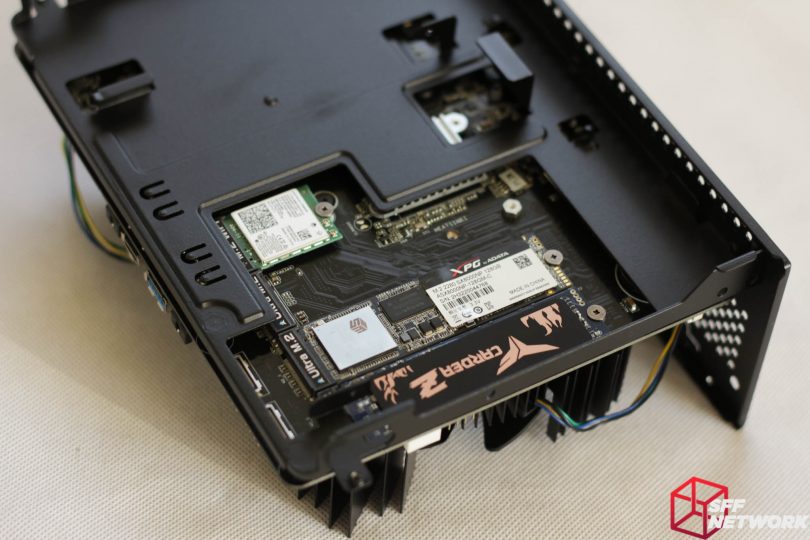
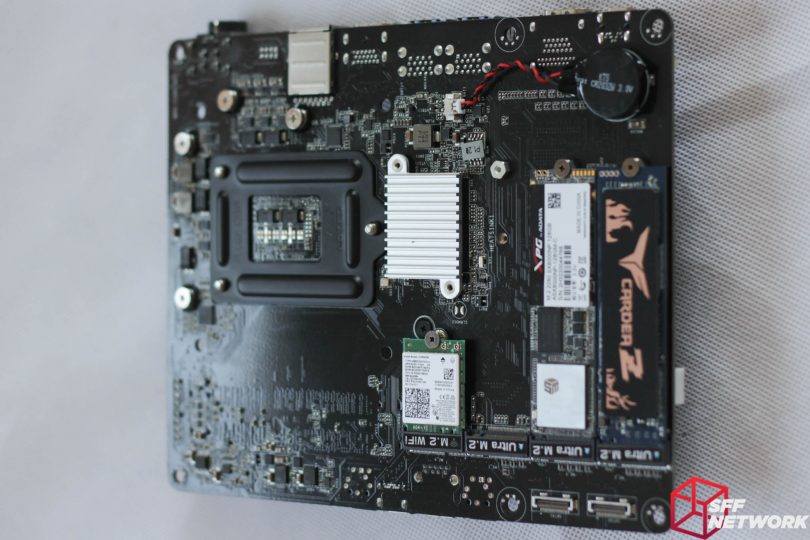
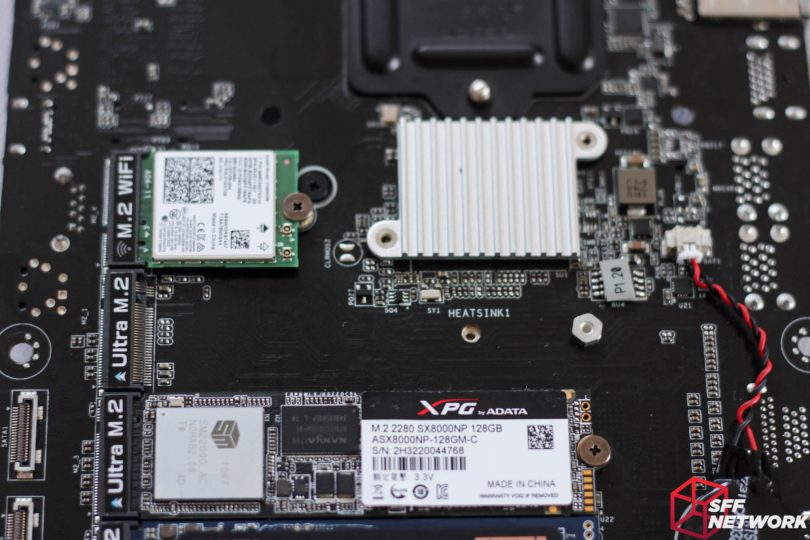
One of ASRock Micro-STX’s party pieces is the sheer plethora of M.2 storage expansion. Whilst most Mini-ITX boards make do with a singular slot, the ASRock boards have three slots, with slots 1 and 3 also supporting SATA mode. The 4th slot here is a M.2 slot keyed in the E specification, specifically for use with a WiFi/Bluetooth card. Towards the top, we catch a glimpse of the (frustrating) combination SATA data and power ports for the possible two 2.5″ drives.
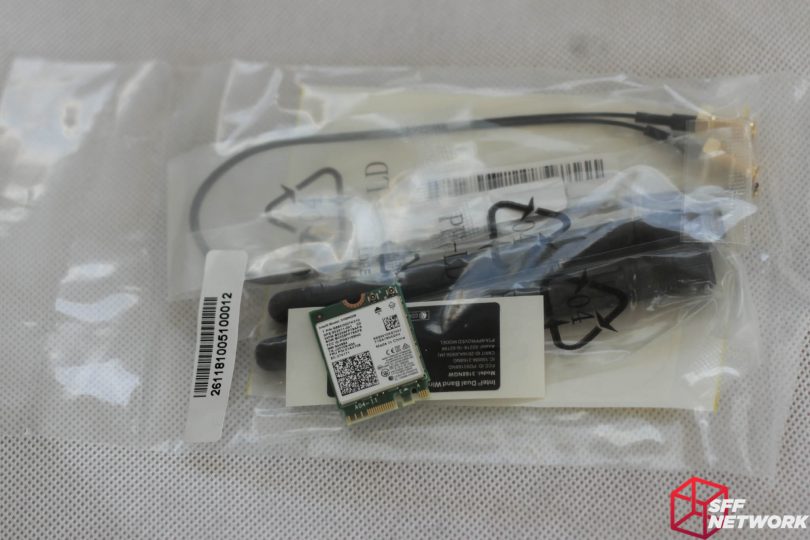
Speaking of the WiFi module, ASRock includes an Intel unit with this barebones product. Also included are cables to get the signals to the back panel, from the card, and a pair of simple WiFi antennae. A lone sticker is also included, to declare conformity with various regulations. If these apply to your situation, it would be wise to apply the sticker to the outside of the DeskMini chassis.
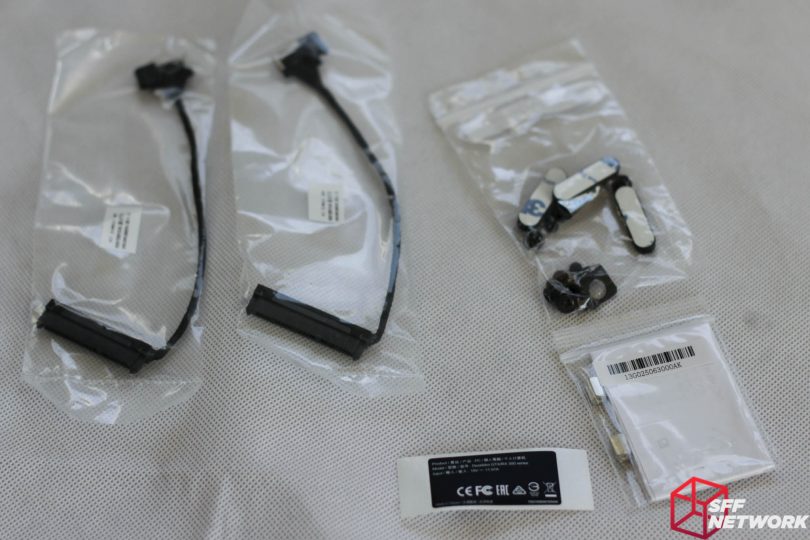
More accessories! From the left we have a pair of combo SATA/Power cables for 2.5″ drives, a model sticker to apply to the exterior of the chassis, a bag of screws with the rubber feet and a security locking plate, and a bag with standoffs for various upgrade options.
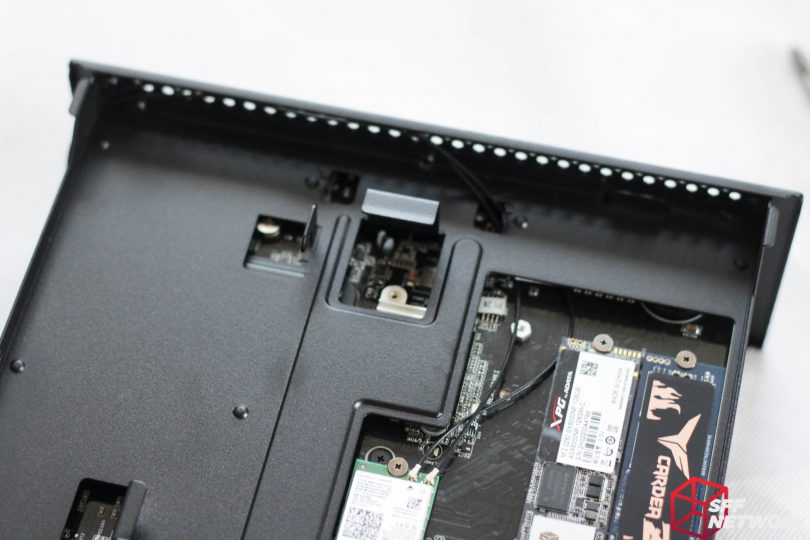
With a couple of NVMe drives and the WiFi card installed, the chassis is starting to look a little more populated. The chassis cutout is perfectly sized for these cards. Disappointingly though, there is no cutout for the CPU cooler backplate. I do, however, see why – such a cutout would weaken the motherboard tray significantly, with half of it already gone for the M.2 area.
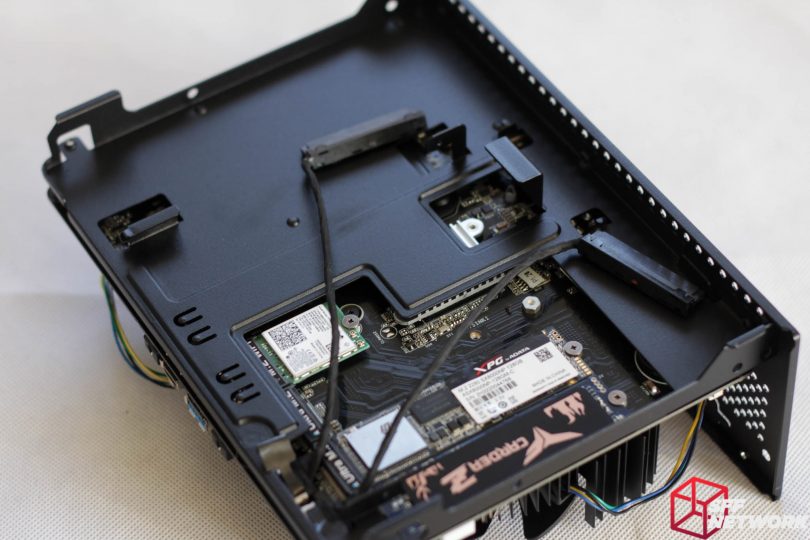
If you want to add 2.5″ drives, now is the time to do so. These cables are reminiscent of the cables used in some laptops, and in my opinion, should have stayed there. Installing the motherboard end of these cables I found to be a nightmare. The plugs are very difficult to align properly normally, but with the cutout being just barely the size of the two plugs, this is a very irritating endeavour.
Speaking to design aspects of the motherboard tray, it seems that provisions have been made for an alternate DeskMini model with a laptop style optical drive. An interesting addition, however, I’d expect the demand for such a model to be extremely small – optical is a dying format!
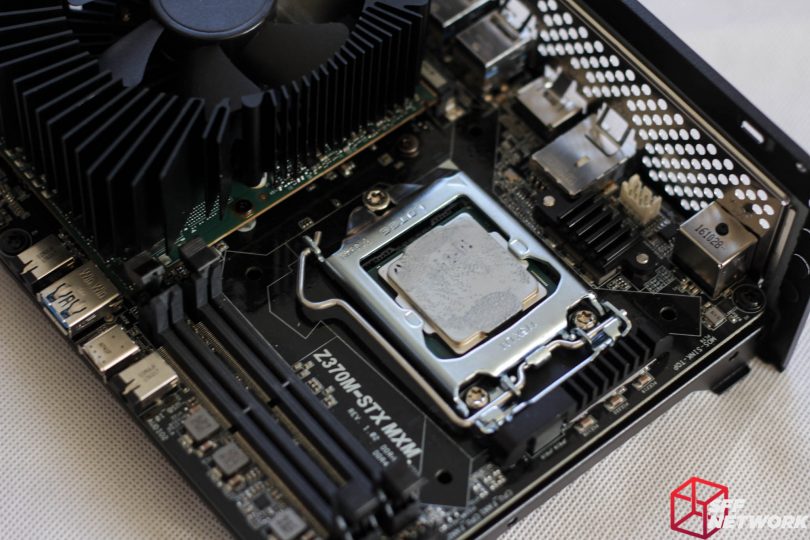
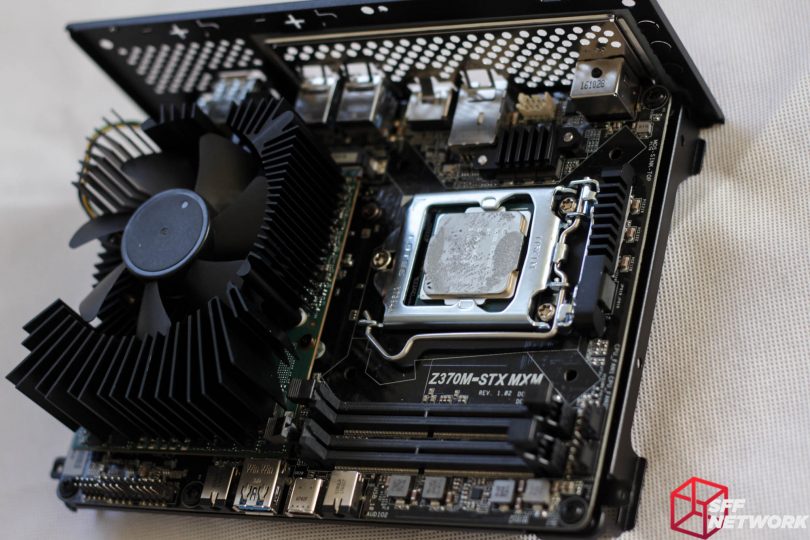
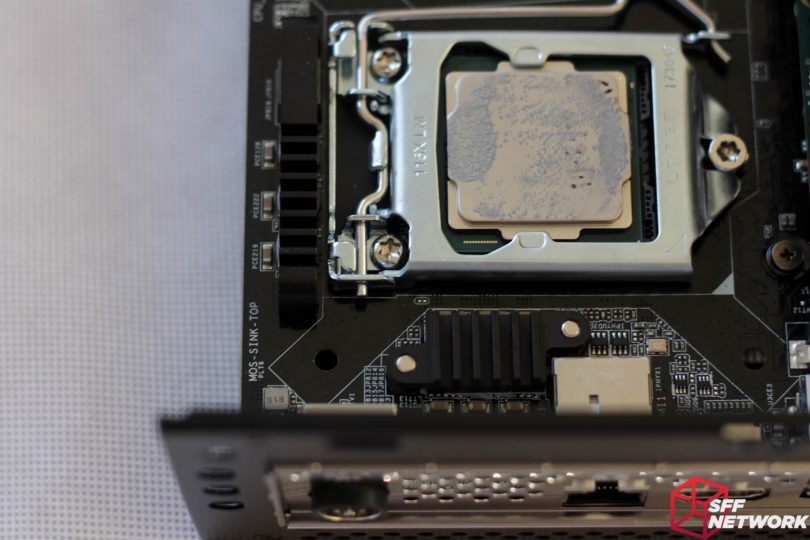
Around the Z370M-STX MXM’s CPU socket lay the minimal VRM heatsinks. I’d be wary of installing a 95w i7-8700K in this system – even though it is supported, physics means hard limits to the cooling capacity of the VRMs and total chassis cooling capacity! Remember that we are limited to a 52mm CPU cooler height ceiling.
The two SODIMM (yes, SODIMM, not DIMM) slots sit in the usual spot, between the CPU and the front of the board. I really do appreciate the increasing prevalence of SODIMMs in the desktop market – they just take up so much less space than their DIMM counterparts, and are available in 75% of the size and speed configurations.
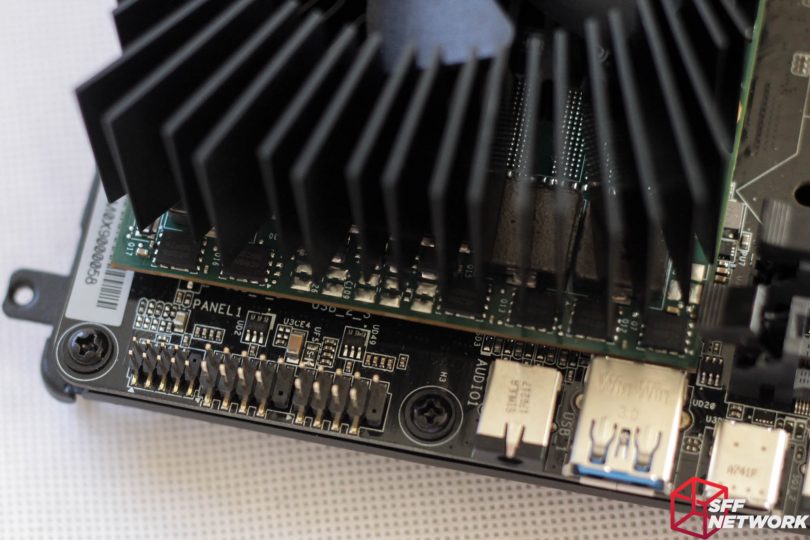
A closer look at the front panel, we see, from the left;
-Front panel header for buttons and status LEDs
-Two USB2.0 headers
-Headphone jack
-USB 3.1 Gen 1 Type-A port
-USB 3.1 Gen 1 Type-C port
-Microphone jack
-Memory VRMs
The aforementioned headers. Of note, the front panel status/button header is of a different, smaller pitch than usual, so keep that in mind if you plan on buying a DeskMini to strip for a custom chassis!
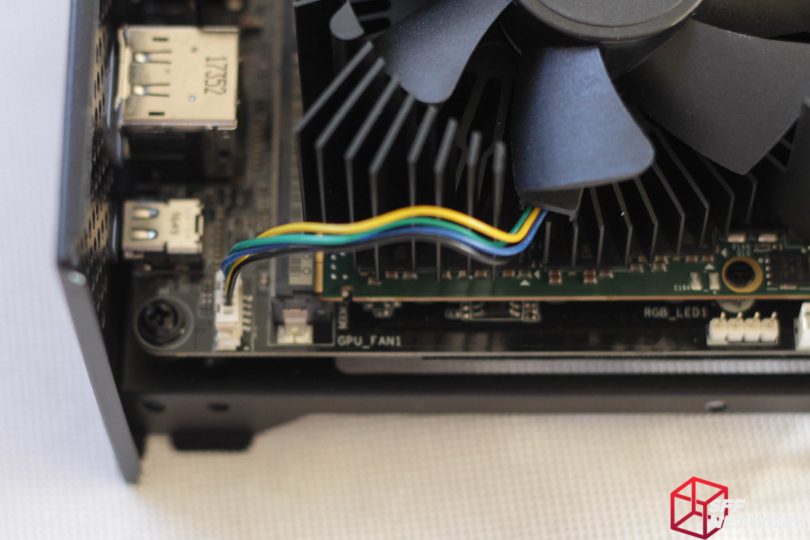
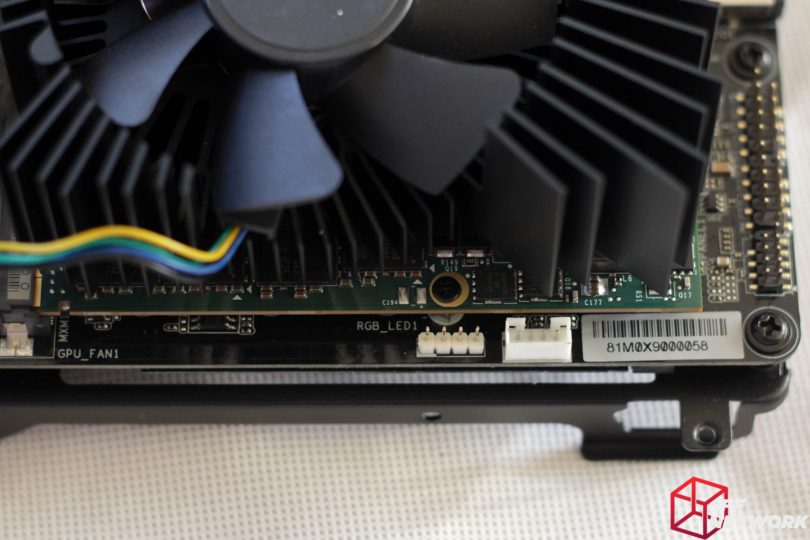
Cooling the GPU is a task controlled by the motherboard itself, with no fan header to be found on the MXM GPU – a normal thing in this form factor. The fan is a 4 pin, PWM unit, so control will be granular and precise, unlike voltage controlled fans of old.
Yes, that is a lone RGB header. One must cater to current tastes, unfortunately.
Due to the CPU VRMs being located within the typical “keep out” zone for coolers, ASRock has implemented low profile coolers for them, which sit below the top of the CPU heatspreader in height.
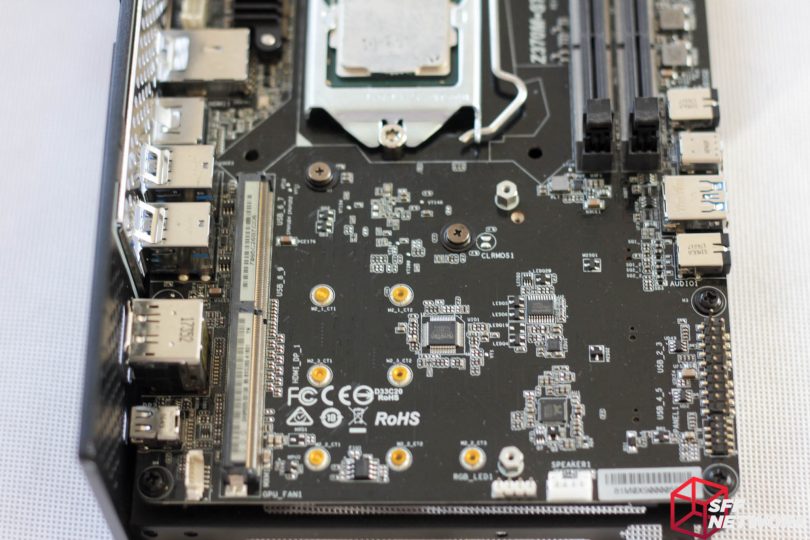
Underneath the MXM GPU is a pretty sparse fare, albeit punctuated with Kapton tape covering the rear of the M.2 mounts, and a pair of screws holding on the chipset heatsink underneath the board. Also notable here are a pair of Nuvoton IO chips, the Realtek sound chip and a few other minor components.
Without the GPU installed, this side of the board truly is bare! This is expected though, as the GPU sits only a couple of millimetres above the motherboard PCB.
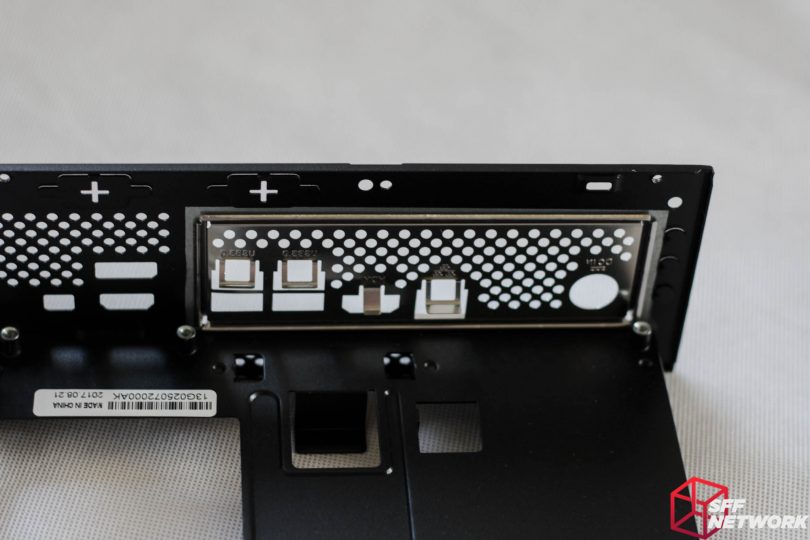
Removing the motherboard, we are left with what seems to be a typical IO shield, of a style we are used to with any system we have built. Not all is as it seems though…
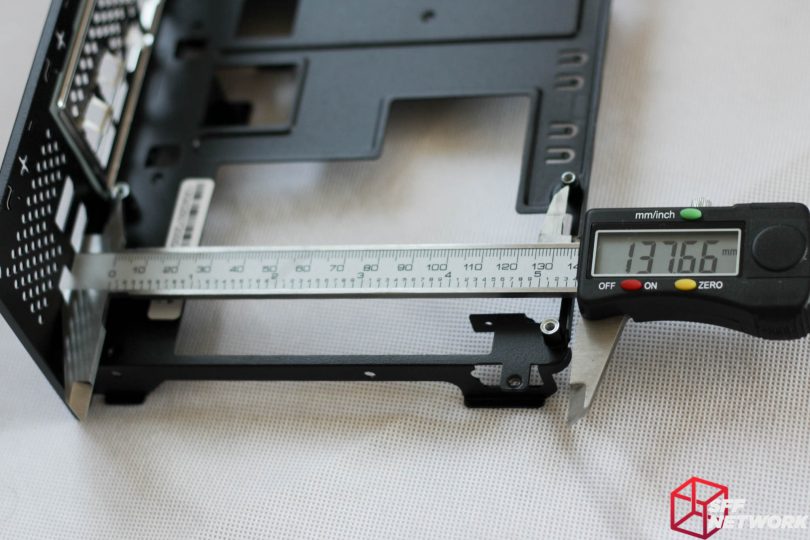
For those wondering, all three pairs of Micro-STX standoffs are around 138mm apart on this axis.
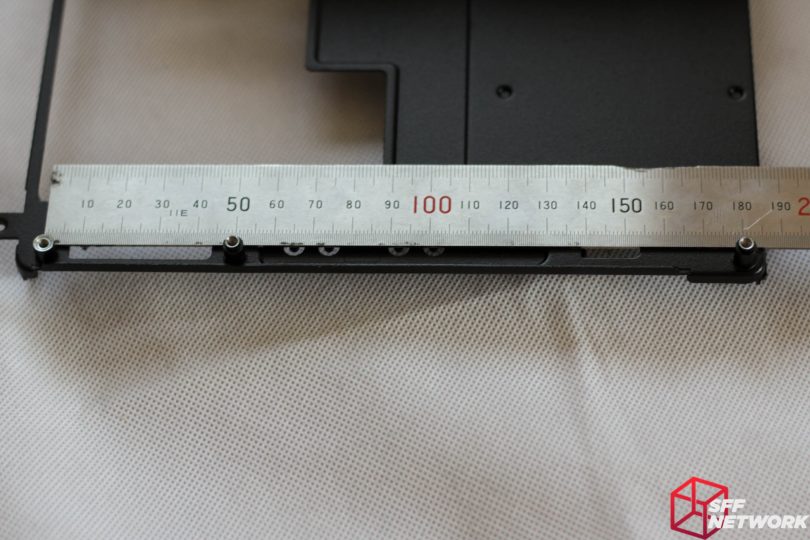
On this axis, the first two standoffs (unfortunately I had the ruler reversed in this image) are 130mm apart, and the final standoff is a further 50mm down the line.
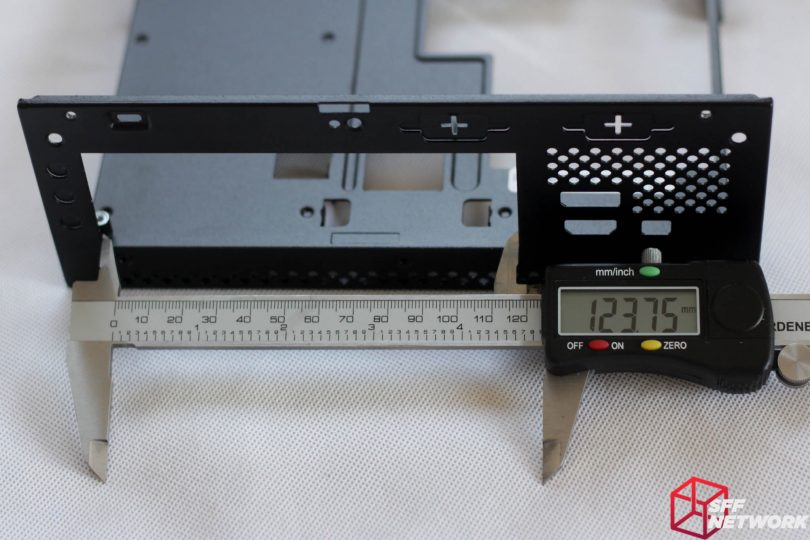
Remember how I said that the IO shield isn’t what it seems? It’s true – it’s a smaller unit to go with the smaller board. ATX based (including M-ITX) IO shields measure around 158.75 mm wide, compared to STX’s 123.75 mm.
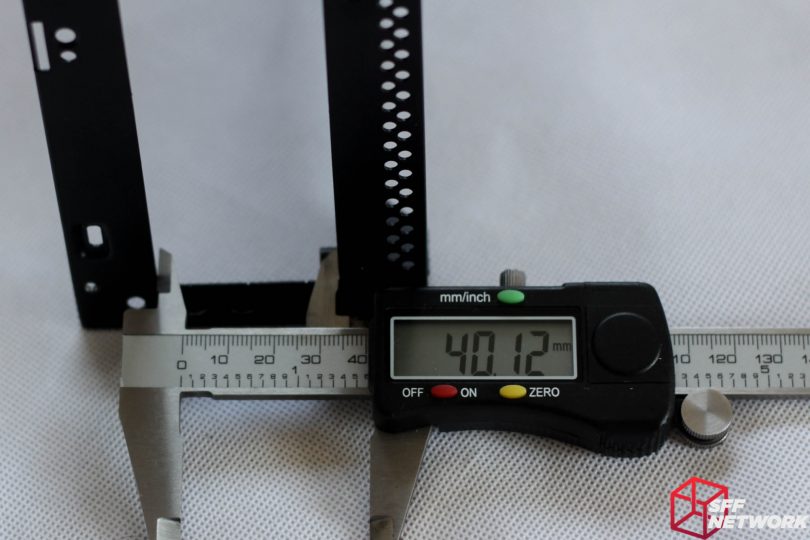
And on this axis, the traditional IO shield would measure 44.45 mm, compared to STX’s 40.15 mm (or thereabouts!)
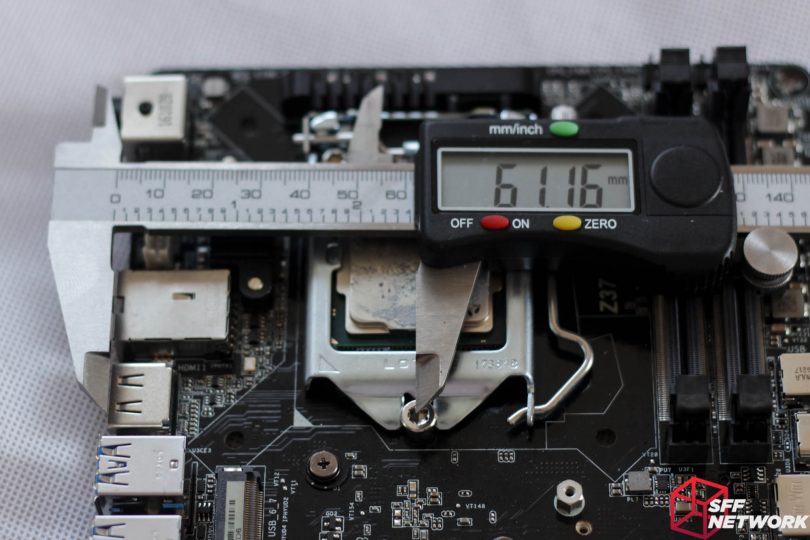
Some more measurements for our community members who are designing their own Mini and Micro-STX cases. This is the rear board edge to centre of the CPU socket.
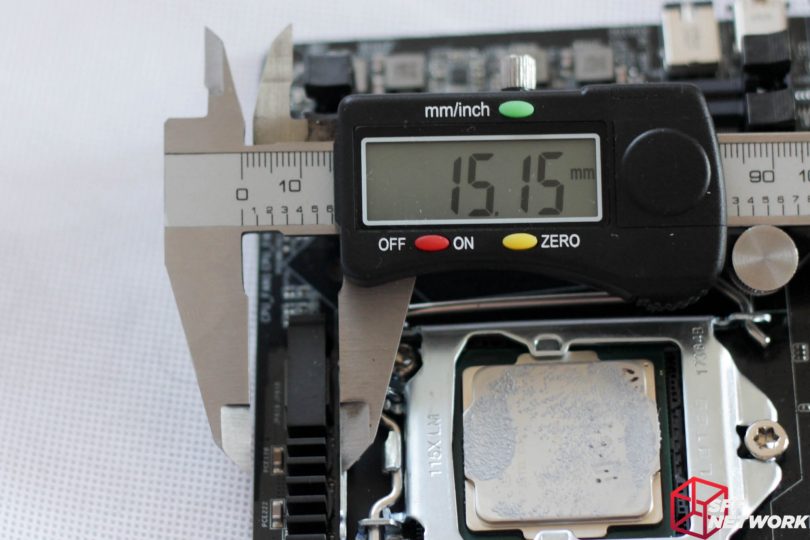
Top of board edge to top of CPU retention..
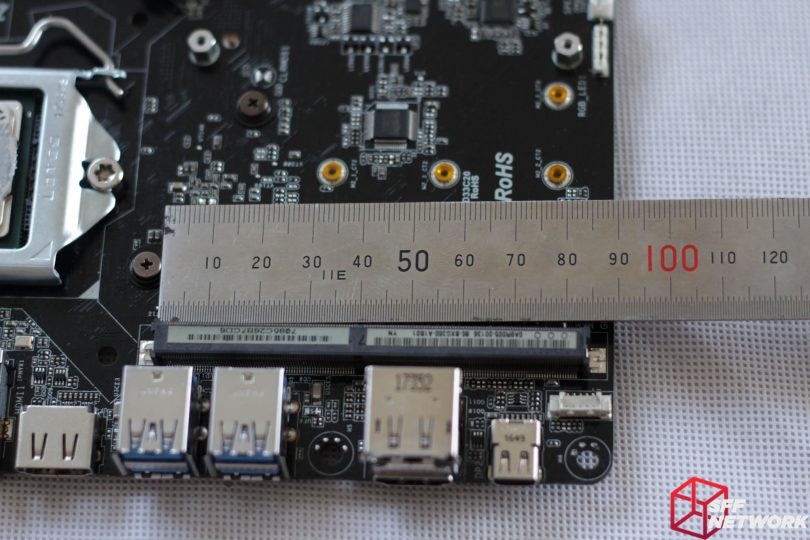
MXM slot dimensions in relation to the bottom edge of the board..
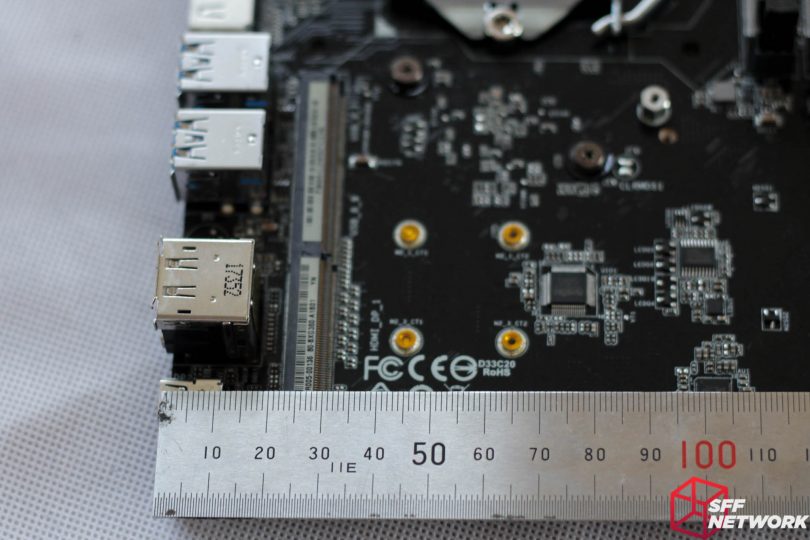
And distance to the rear..
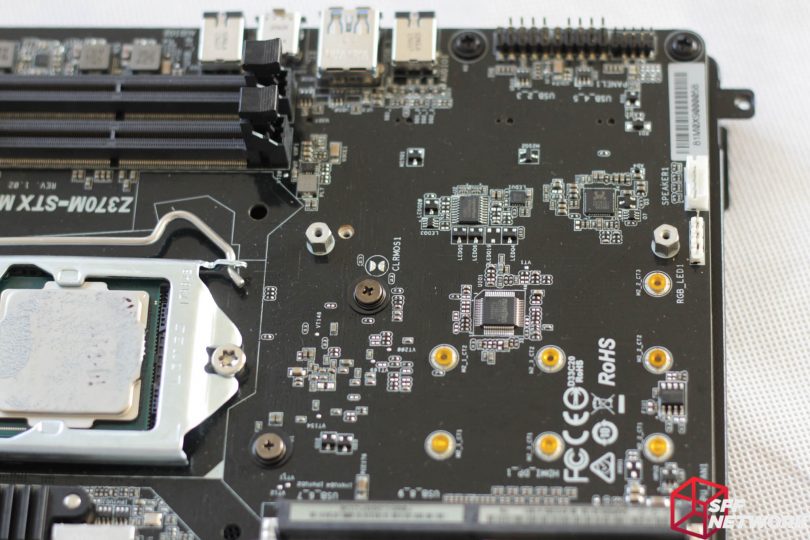
Now for a clearer look at the backside of the motherboard. For those coolers which require backplates to be installed, note that there are some components, like the mounting screws for the VRM cooling, as well as the chipset location that may cause issues.
What lies under Heatsink #1? The Z370 chipset (or more correctly, PCH) of course! It will run hotter than normal, with such a tiny heatsink, and being in such a restrictive location from an airflow perspective.
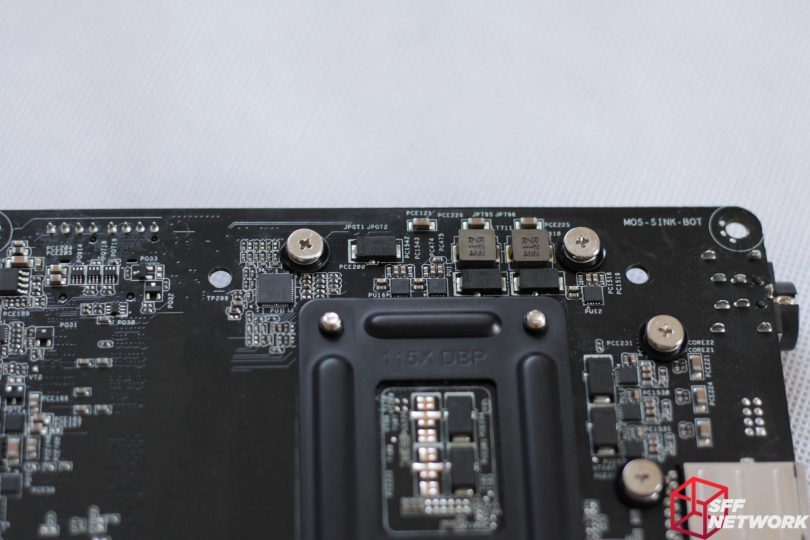
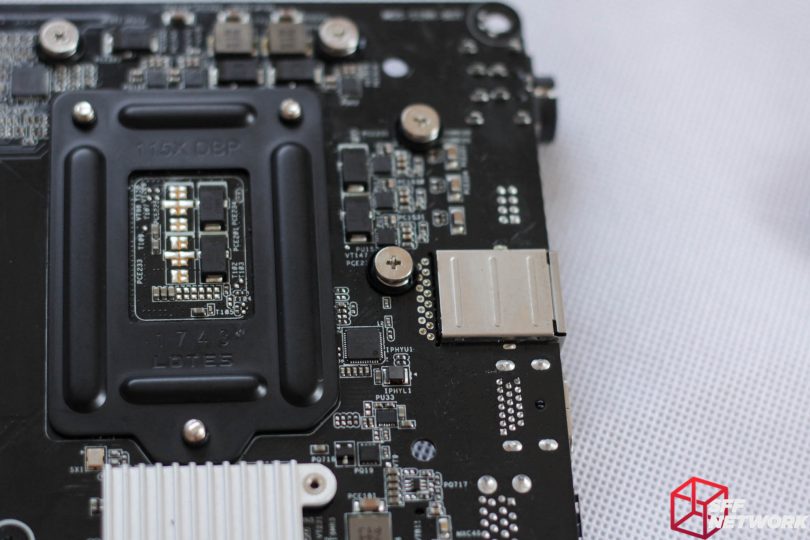
Because the board is such a compact piece of kit, the VRMs include a section on the underside of the motherboard!
This is a feature I can get (partially… haha) behind – recessed ports. This means that the port height is significantly lower – very important when some of the rear IO is in fact within the CPU cooler keep-out zone. This does result in a weakening of the motherboard PCB though, care must be taken to not over-tighten any aftermarket CPU cooler – I found that I had to back off the retention screws of my NH-L9i to ensure an appropriate level of banana motherboard.
Routing the WiFi signal cables is a relatively simple job, albeit with one negative factor – the downright frustrating “U.FL” connector standard. These connectors are tiny and difficult to use for those who don’t have the best fine motor control, such as myself.
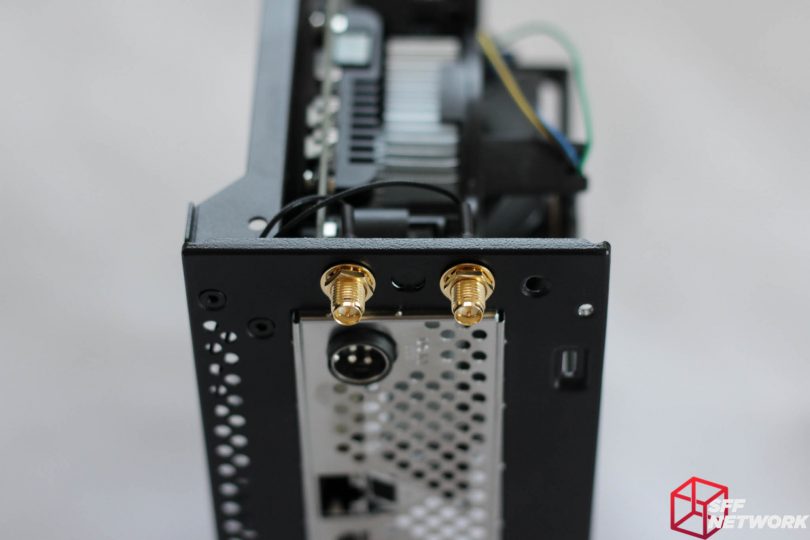
The antennae cables are then routed to the rear panel, where the SMA female connectors can be mounted. Note that there are three cutouts here – those WiFi solutions with an extra antennae have been accommodated.
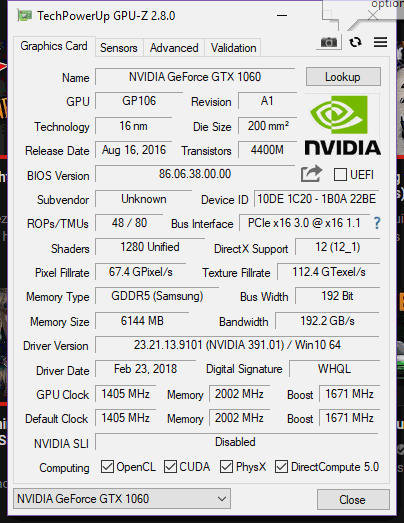
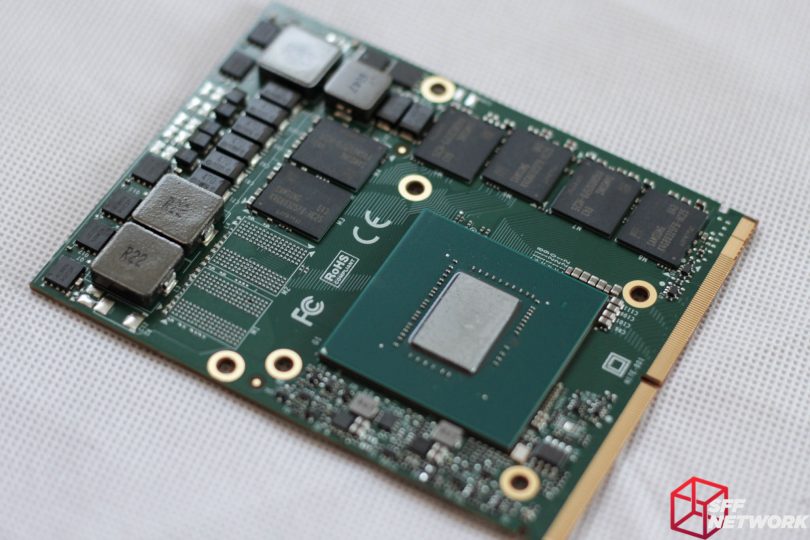
On to the GPU portion of our showcase, the MXM format GTX 1060 6GB. This is a full-fat GTX 1060 GPU, running at 1405mhz, boosting to a max of 1671, with a VRAM speed of 2002MHz in stock configuration.
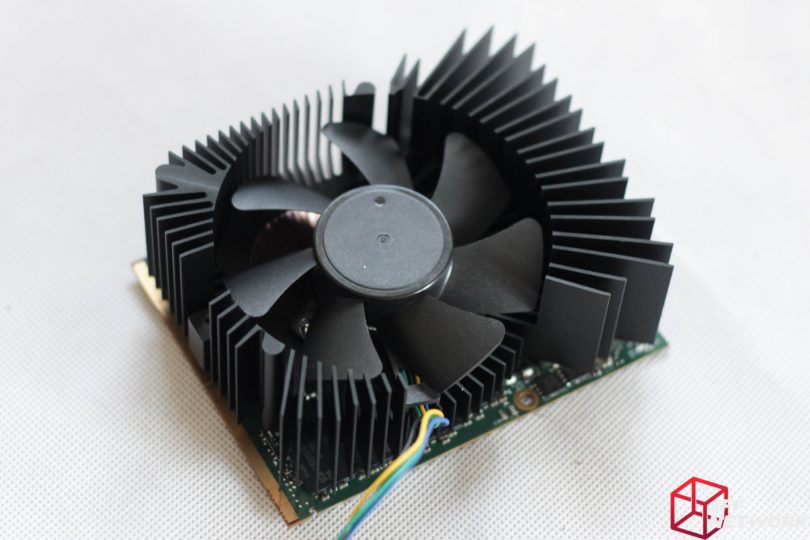
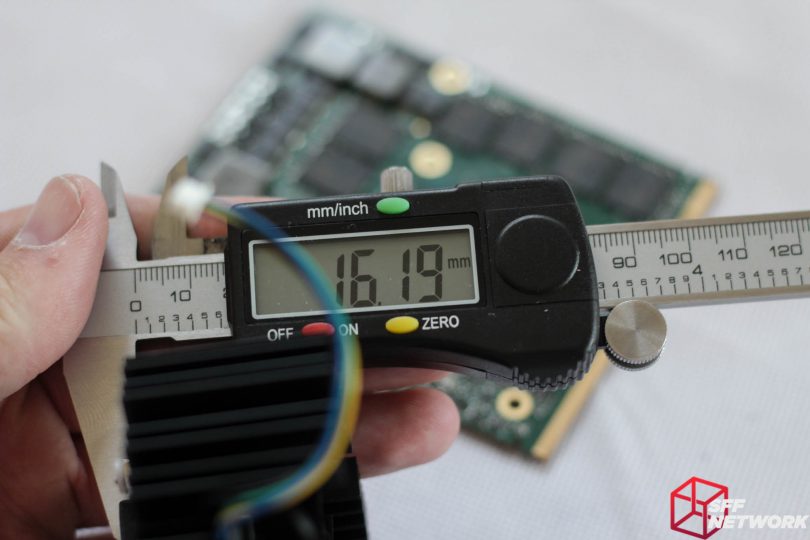
Cooling this GPU is a single fan cooler built from extruded aluminium, anodised black, with a solid copper core. The fan is 75 mm in diameter and 16 mm thick, and as mentioned earlier, is PWM controlled.
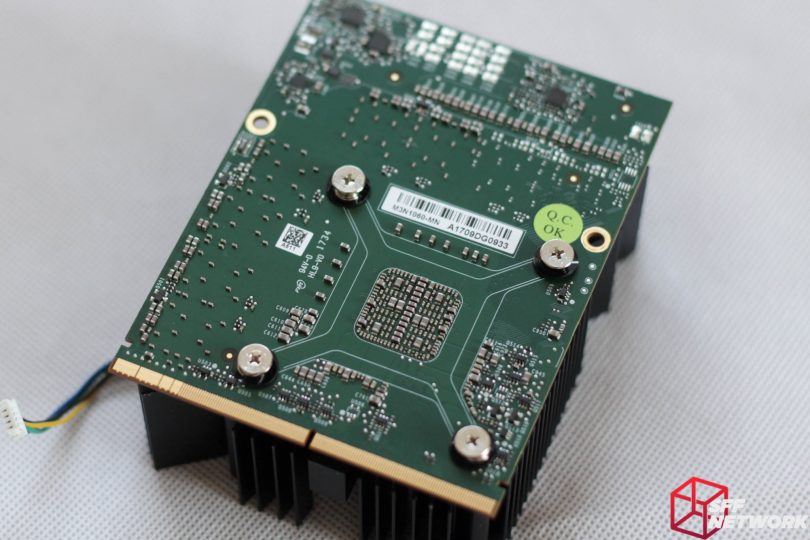
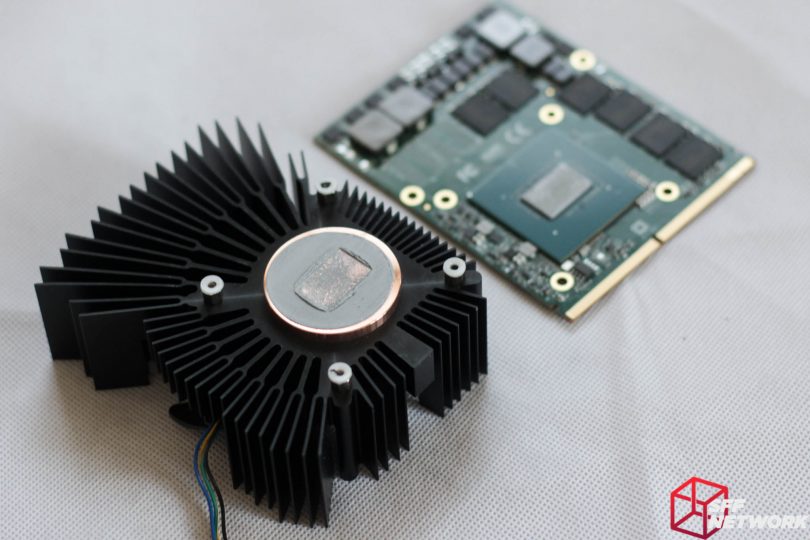
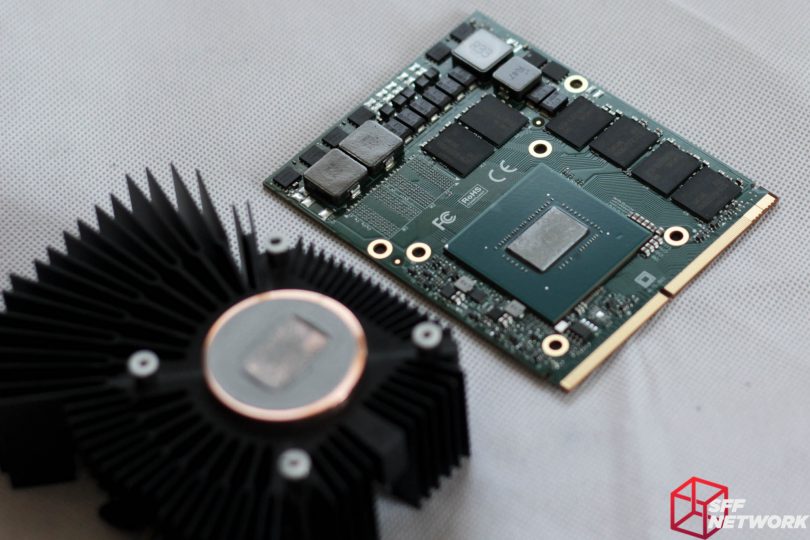
Removing the four screws keeping this heatsink attached, the copper core is more obvious. The thermal paste you see here was pre-applied at the factory, and is of moderate quality. There are no warranty voiding stickers in this barebones (epic win, thanks, ASRock!), so if you feel comfortable, you can replace this TIM if you so desire. Isolating the cooler from the PCB are a quartet of plastic washers.
Looking at the MXM card itself, we can see that, much like the motherboard, the card is densely packed. Aetina is the OEM for this particular card, and as I understand at this time, is the preferred partner for ASRock in this product space. However, action by NVIDIA to curtail the sales of MXM outside the laptop space may change this in the future.
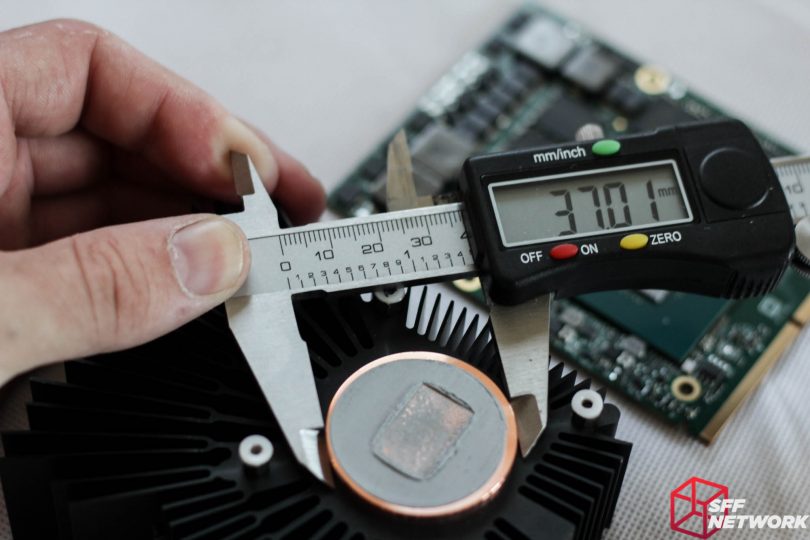
Measuring in at a diameter of 37 mm, the copper core is a pretty good size.
The cooler itself measures 16mm thick, plus a few mm for the copper core.
It seems that Aetina conformally coats their MXM GPUs – a welcome touch for a system that is more likely than most desktops to be used in a portable manner. We can see that there are only 6 VRAM spots populated, out of a total 8. Could an 8GB GTX1060 MXM card be possible? Would it even be worth it? (mmmm, diminishing returns).
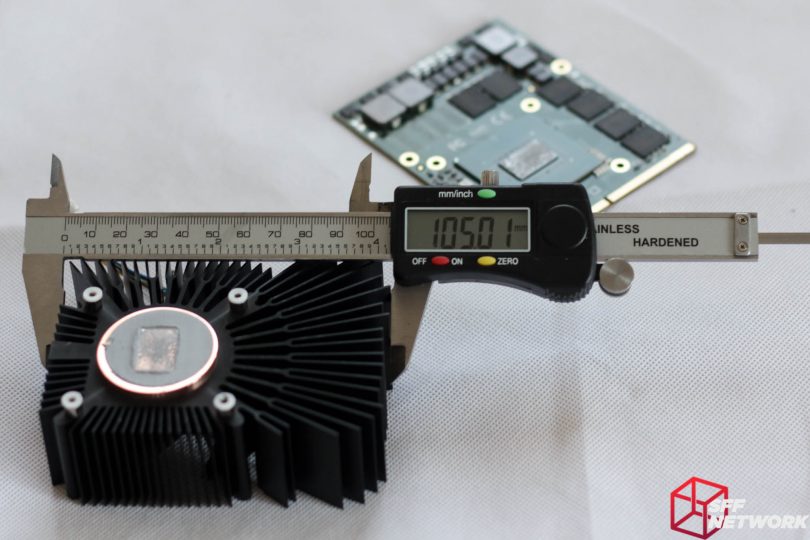
In the depth measurement, the cooler comes in at 105mm.
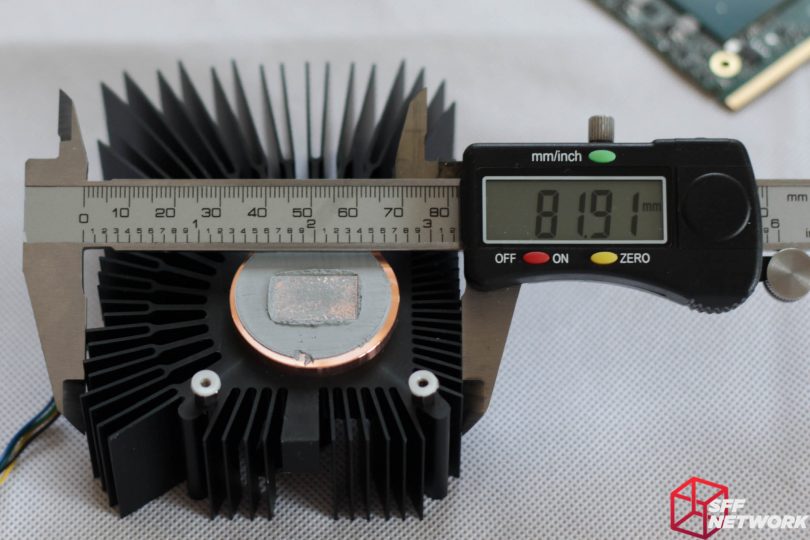
This goes along with the 82 mm width.
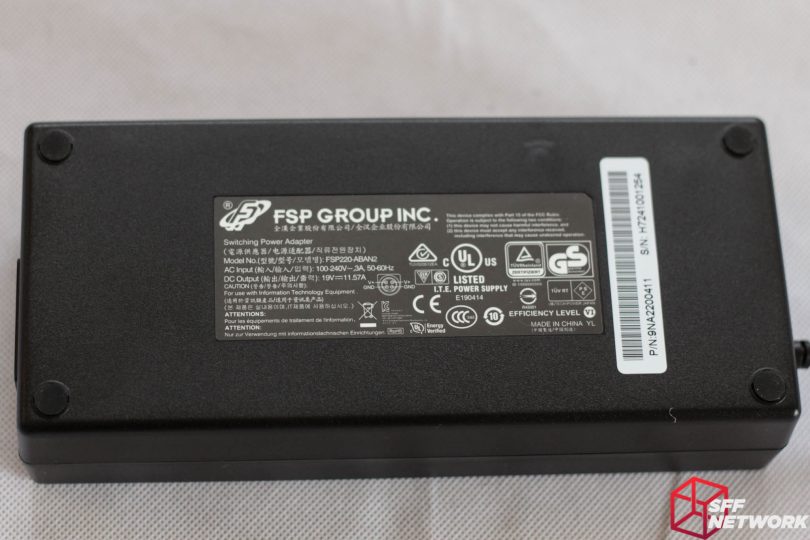
Finally, let’s look at the behemoth power brick. This unit is not small, with dimensions of 43.5 mm, 88 mm by 195 mm. This means that the brick itself is a hefty 0.75 litres in volume. Whilst the debate rages on regarding measurement of volume in regards to the use of internal vs external power supplies, all I can say is that I hope efficiency improves in future to the point where we can have smaller power bricks for such systems, or the ability to run an internal power supply.
The BIOS
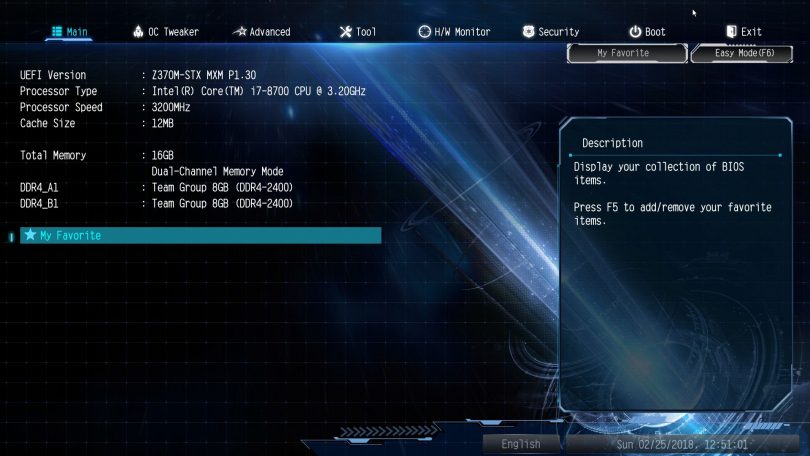
Being an Intel based board with no Fatal1ty branding, it seems fitting for the UEFI environment to be a shade of blue. The interface is clean, simple, with no flashy logos and gimmicks. Our review unit was specced out with 16 GB of RAM, and an i7-8700 processor.
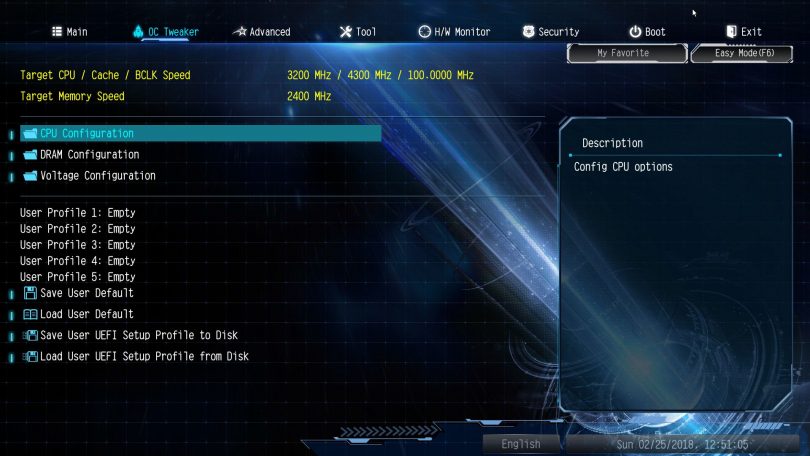
Under the OC tweaker menu, the usual overclocking and tweaking options hide. Multiple user profiles can be saved, as well as defaults reloaded. Submenus for CPU, RAM overclocking reside here, as well as a submenu for tweaking the voltages sent to componentry.
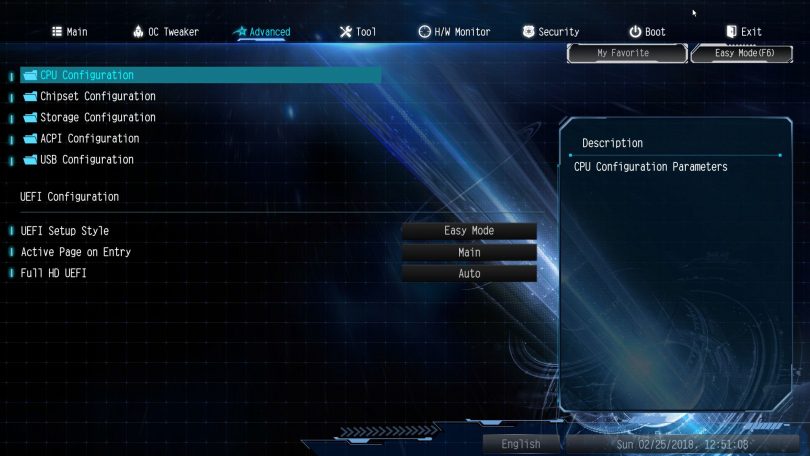
Next up, the advanced menu holds more in depth configuration of CPU, chipset, storage, power and USB functionality.
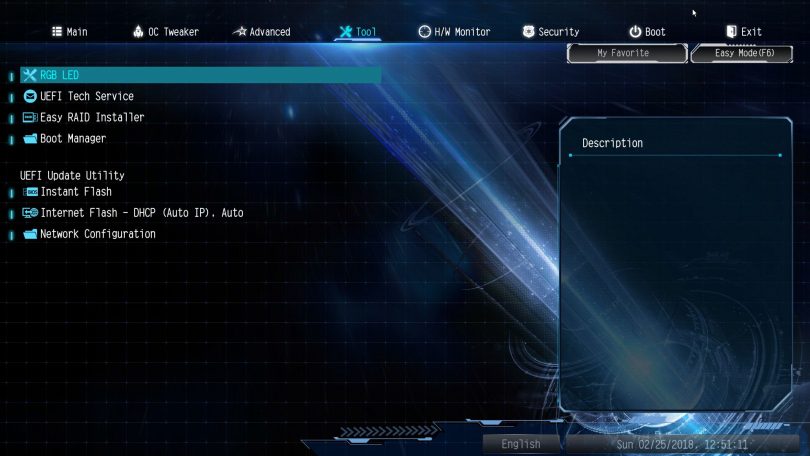
The tools menu holds such delights as the RGB LED configuration, RAID configuration, boot management, and finally UEFI update and support.
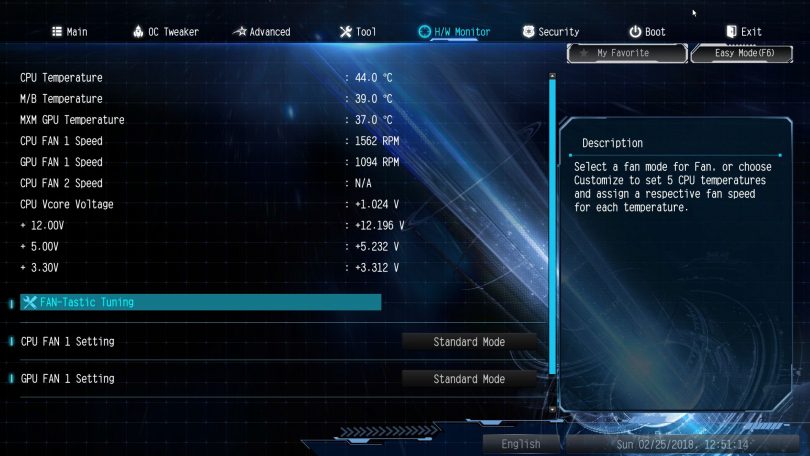
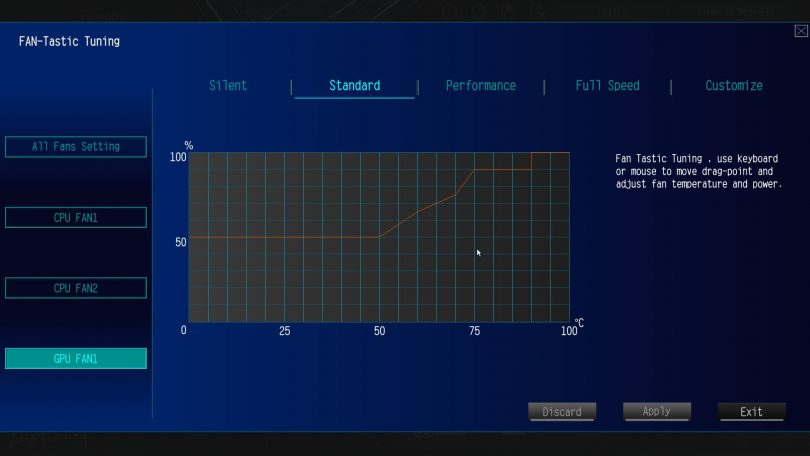
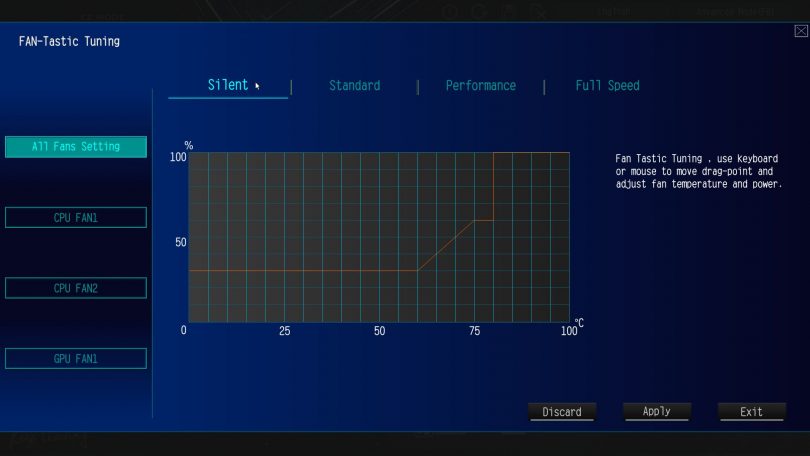
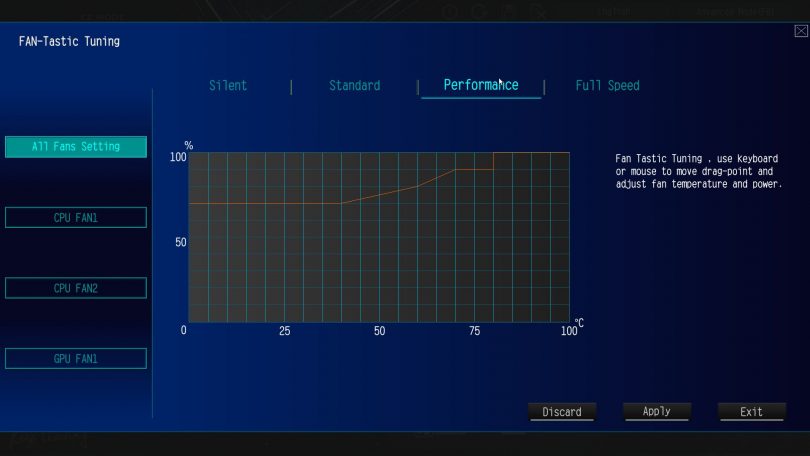
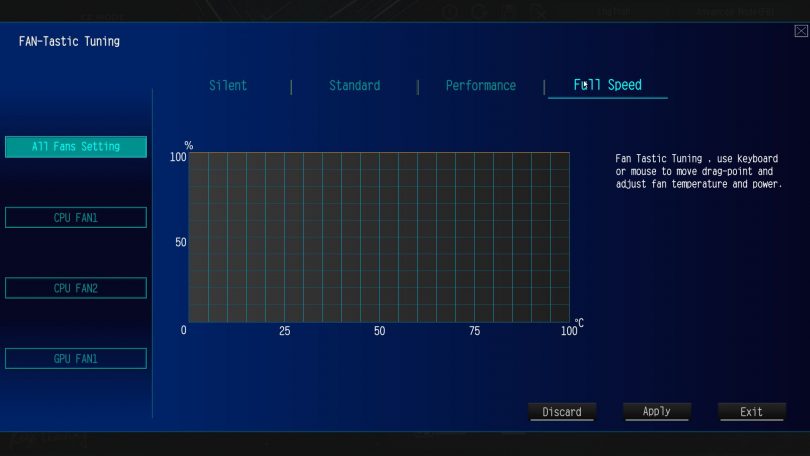
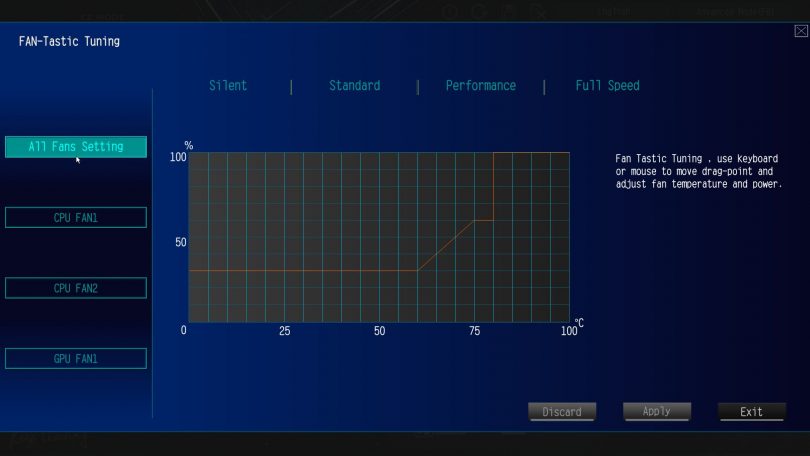
H/W Monitor – pretty self explanatory. FAN-Tasting tuning (pun intended, obviously) is the fan control submenu.
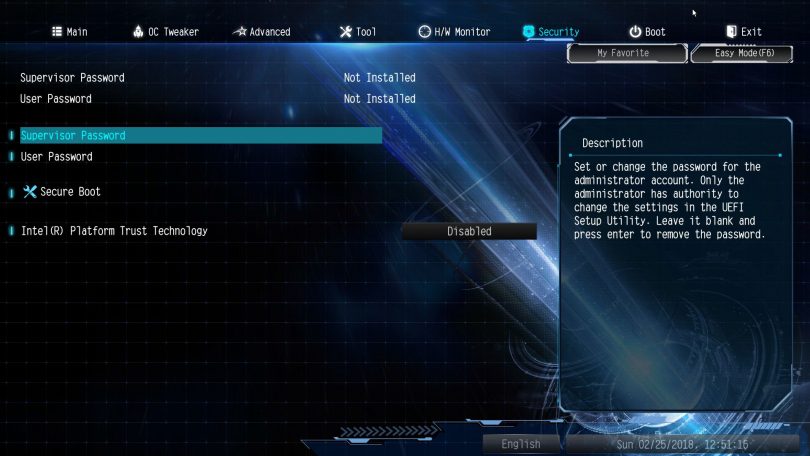
Nearing the end, the Security menu. Whilst the DeskMini is not compatible with a physical TPM, many security options remain.
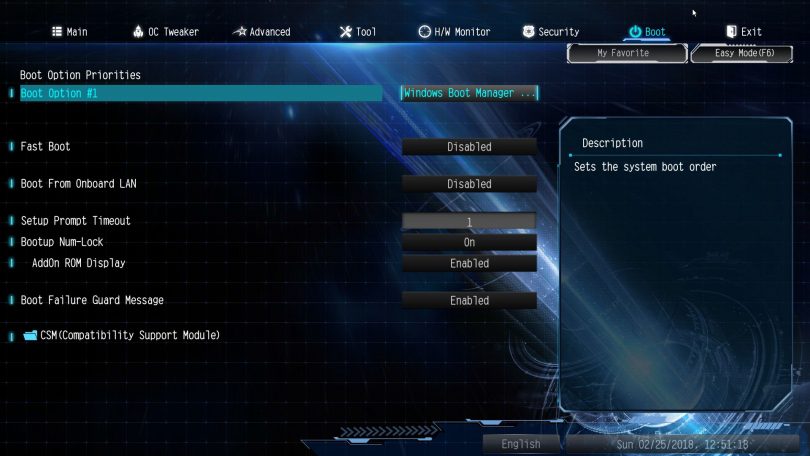
Second to last is the boot menu, which, like the hardware monitor page, is pretty self-explanatory.
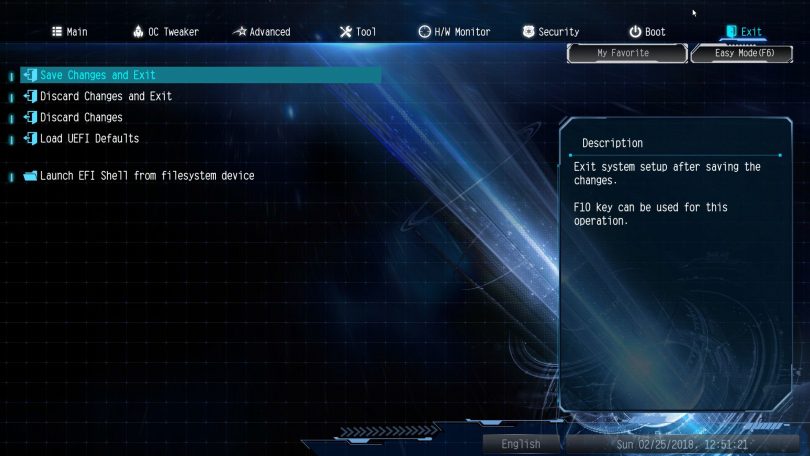
Let’s save our settings and get on to testing!
Well, after having a look at the fan profiles in the various default fan modes.
The Testing
This first article will feature only a simple result – the main testing I’ve done so far has been in every day use. However, I did max out the system a few times, including an absolute max power consumption run with Furmark and Prime95 Blend on – which resulted in a 212W max power draw at the wall, measured with an AC clamp ammeter. During this, frankly unrealistic, test, the GPU registered a maximum temperature delta of 51C. The GTX1060 6GB MXM card sat at 98% boost – 1189 MHz.
In part two of this review, we’ll delve deeper into performance, including underclocking, undervolting, and any overclocking I can eke out of my non-K i7-8700. Also in part 2, more in depth performance results in various gaming benchmarks.
The Conclusion
The ASRock DeskMini offers incredible performance in an itty bitty living space (apologies to Robin Williams’ Genie). This is not without compromise, however. Noise during operation is the major compromise in my eyes (or ears). This system is not a quiet unit under load, with fan noise at times becoming annoying – especially during gaming. Whilst this is somewhat negated with the implementation of a better than stock CPU cooler, the MXM cooler itself is responsible for it’s share of the overall noise.
Secondly, the sheer size of the power brick is almost in the realms of cheating in the design – it’s huge! Whilst it is a rock solid power supply, I can’t help but feel that certain products available within our market niche could make this smaller. In fact, I’m going to take this challenge up, and will be working on a project in the forum in the coming weeks to address this issue. I’d love to use the DeskMini as my daily driver workstation, but knowing that I have a 0.75 litre brick under the desk feels… wrong, especially as the system itself is only 2.7 litres!
Putting those issues aside, the Micro-STX form factor, and the DeskMini product range, are a welcome new generation to the Small Form Factor world. Innovation is key to keeping the smaller market segments growing and thriving, meaning that us enthusiasts, and the PC world in general, get to experience the best the tech world has to offer.
The DeskMini GTX/RX Z370 GTX 1060 in particular hits that sweet spot between price, performance, and density, coming it at a MSRP of US$850. Considering that at the time of writing, a Z370 ITX board costs US$150, a GTX1060 6GB comes in at around US$350, and a suitable SFF power supply (a HDPlex 300w AC-DC and 400w DC-DC combo pack) adds another $165, we’re looking at a cost difference of $185, a large proportion of which is easily taken up by the specification of a high quality chassis.
Whilst at this time, M-ITX offers greater upgrade options (with the better availability of PCIe graphics cards vs MXM format cards), we forsee this swinging to a happy medium, where the Micro-STX form factor becomes a staple of the SFF world.
ASRock’s inclusion of a couple more USB3 ports on the rear IO goes some way to dull my previous criticism of the platform, the lack of IO. However, the MXM elephant in the room still looms ominously, and I hope ASRock has plans to ease this upgrade issue.
Overall, I would recommend the ASRock DeskMini GTX/RX Z370 GTX1060. Whilst the only caveat in use is the aural profile, the specification of a better CPU cooler will go someway to mitigate this. I do wish that ASRock would work on a quieter MXM cooler as well too!
I’m now a Micro-STX convert. After years touting the benefits of M-ITX and more recently doubting the STX form factors, I believe ASRock has now brought the form factor into the mainstream, with a mature design and market ethos behind the product.
Keep an eye out for a second article in this review series – I will be looking at more in depth performance results, as well as undervolting, underclocking, as well as some system tweaks to make this a more every day build for a workstation.
Pros
- Performance density
- Comparable performance per dollar to M-ITX
- More ports than the previous generation
- Fantastic chassis design and build quality
- Innovation!
- All of the M.2 slots – putting M-ITX designs to shame in this department
Cons
- Cooler noise – whilst comparable to some single fan cards, some more work could be done – think heatpipes and thinner fins
- Lack of MXM cards available direct to the consumer
- The massive power brick
Nitpicks
- Even more rear I/O please? Pleeeeeeeease?
Thoughts? Discuss them in the forums.

