
It’s no secret that the majority of go-to cases found within our community are from the Indie scene, designed by fans and enthusiasts. Whilst Streacom may not be officially part of this Indie grouping, they are indeed a small bunch of enthusiasts determined to do something different in amongst the mainstream “SFF” offerings. Mentioning SFF by name in their mission statement, it seems the company has their eyes in the right place.
With this, the team at Streacom decided to create something to compete with the SFF stalwarts, with design decisions focused on space efficiency. We had our first eyes on this case at Computex 2018, and have been waiting for the case to hit market since. Let’s see if it does indeed live up to the promise.
Table of Contents
The Specifications
| Model | DA2 |
| Motherboard Support | Mini-ITX |
| Material | Aluminium 6063 |
| Dimensions | 340 x 268 x 180 mm – 17.5 Litres |
| PSU Support | SFX, SFX-L, ATX |
| Weight | 3.9kg |
| Fan Support | 92mm rear, up to 180mm side (x2) |
| Drive Support | Up to three 3.5″ or six 2.5″. |
| Expansion slot | Dual, full height, up to 330mm long |
| Finish | Sandblasted, anodised in silver or black |
The Unboxing
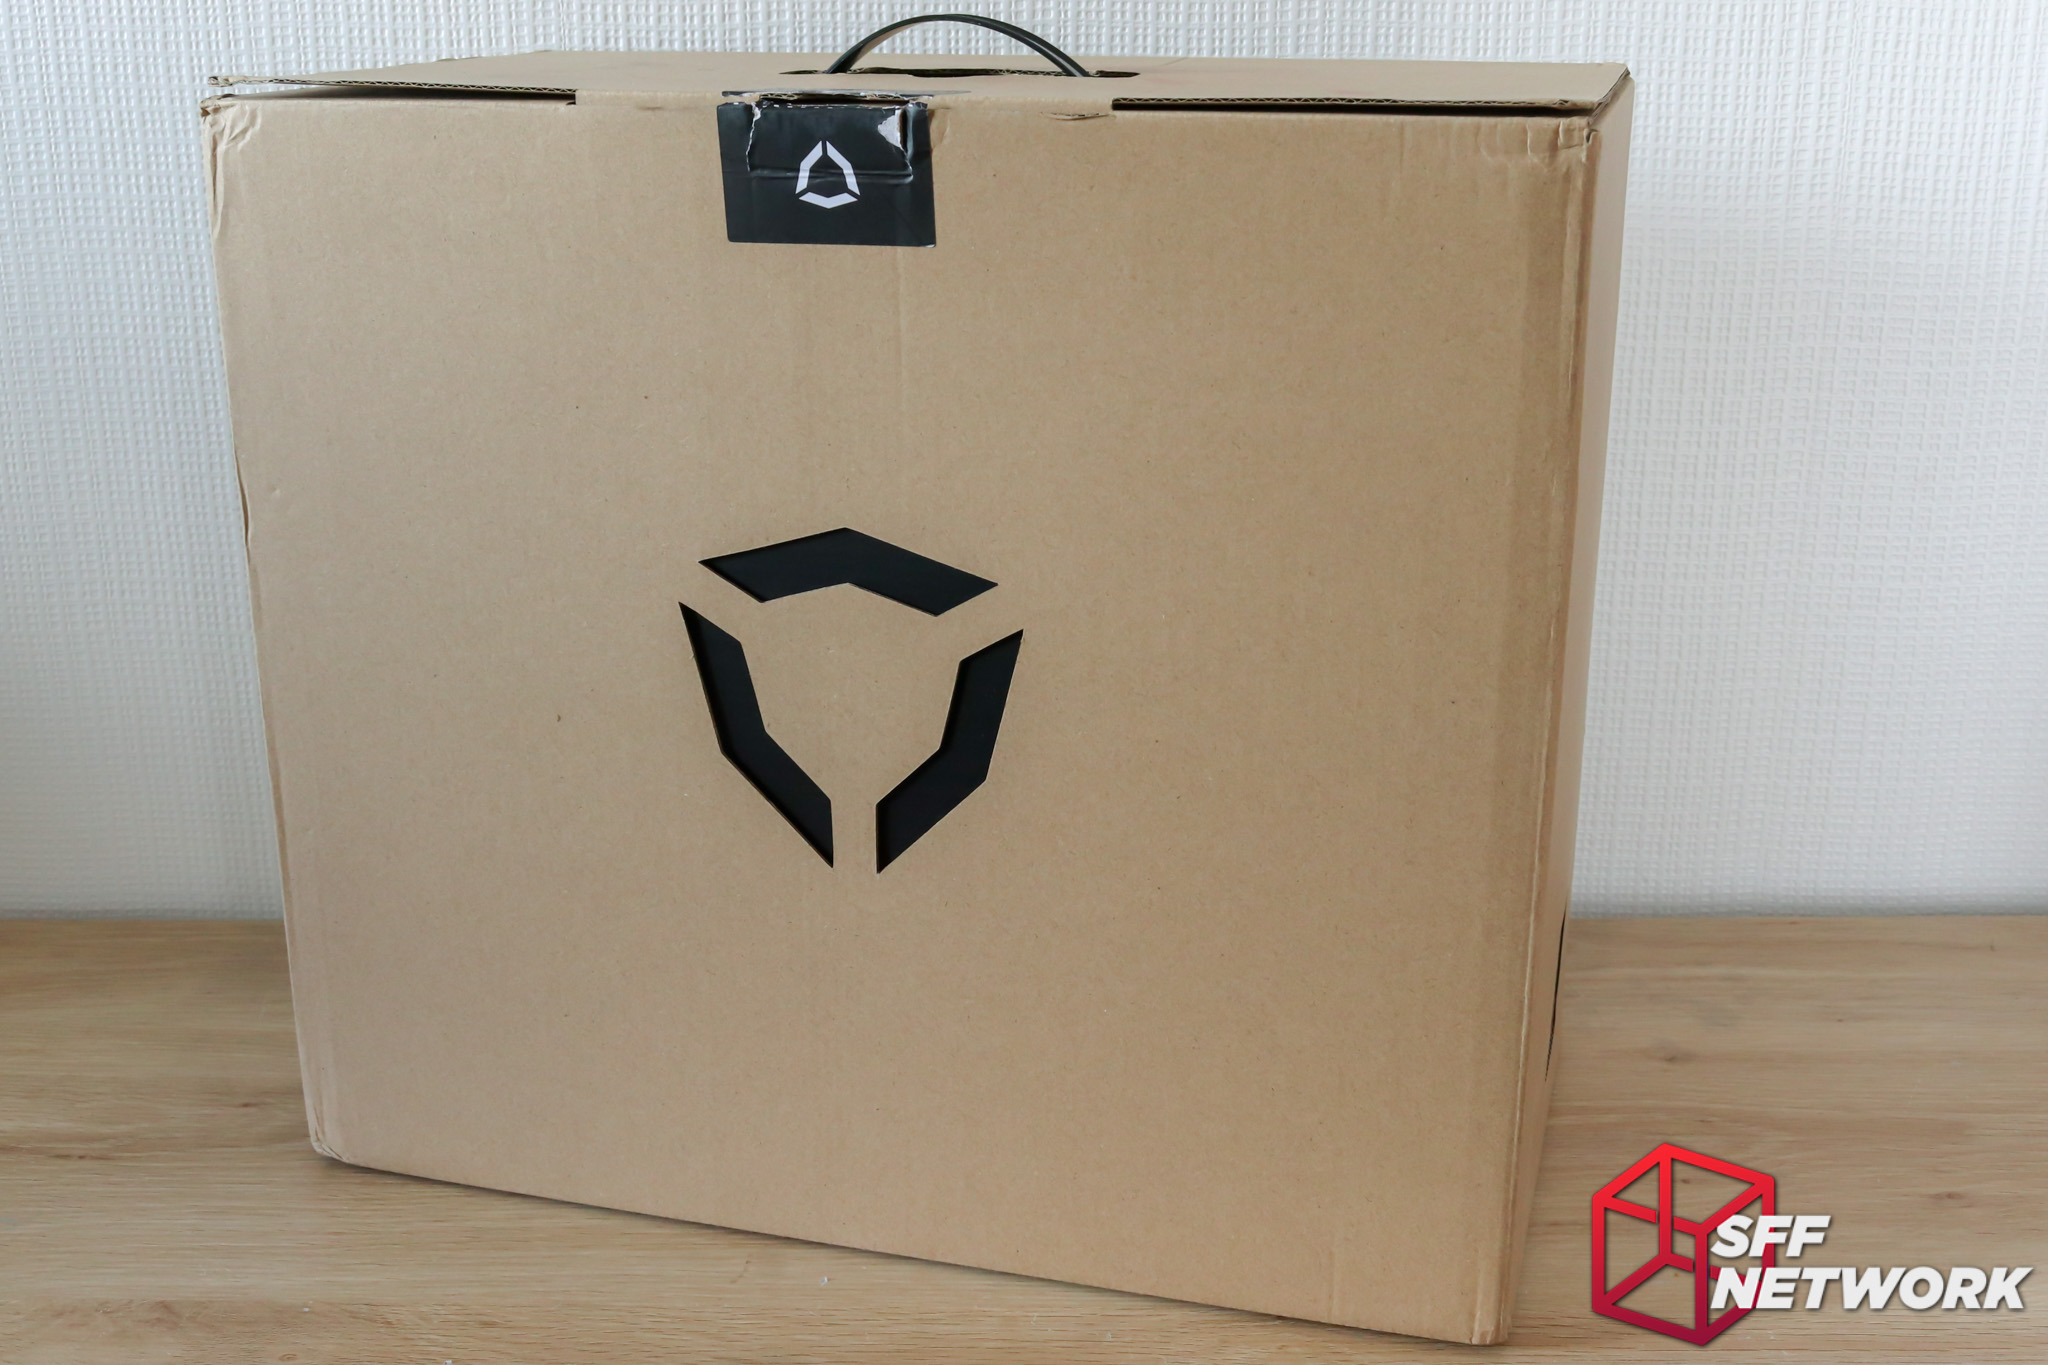
The Streacom DA2 comes in a dual layer shipping carton – the outer with a die cut Streacom logo…

… and the inner carton in (admittedly scuffed up) black.

On one end, the model, serial and batch number – this unit is #4 out of 500, it seems.
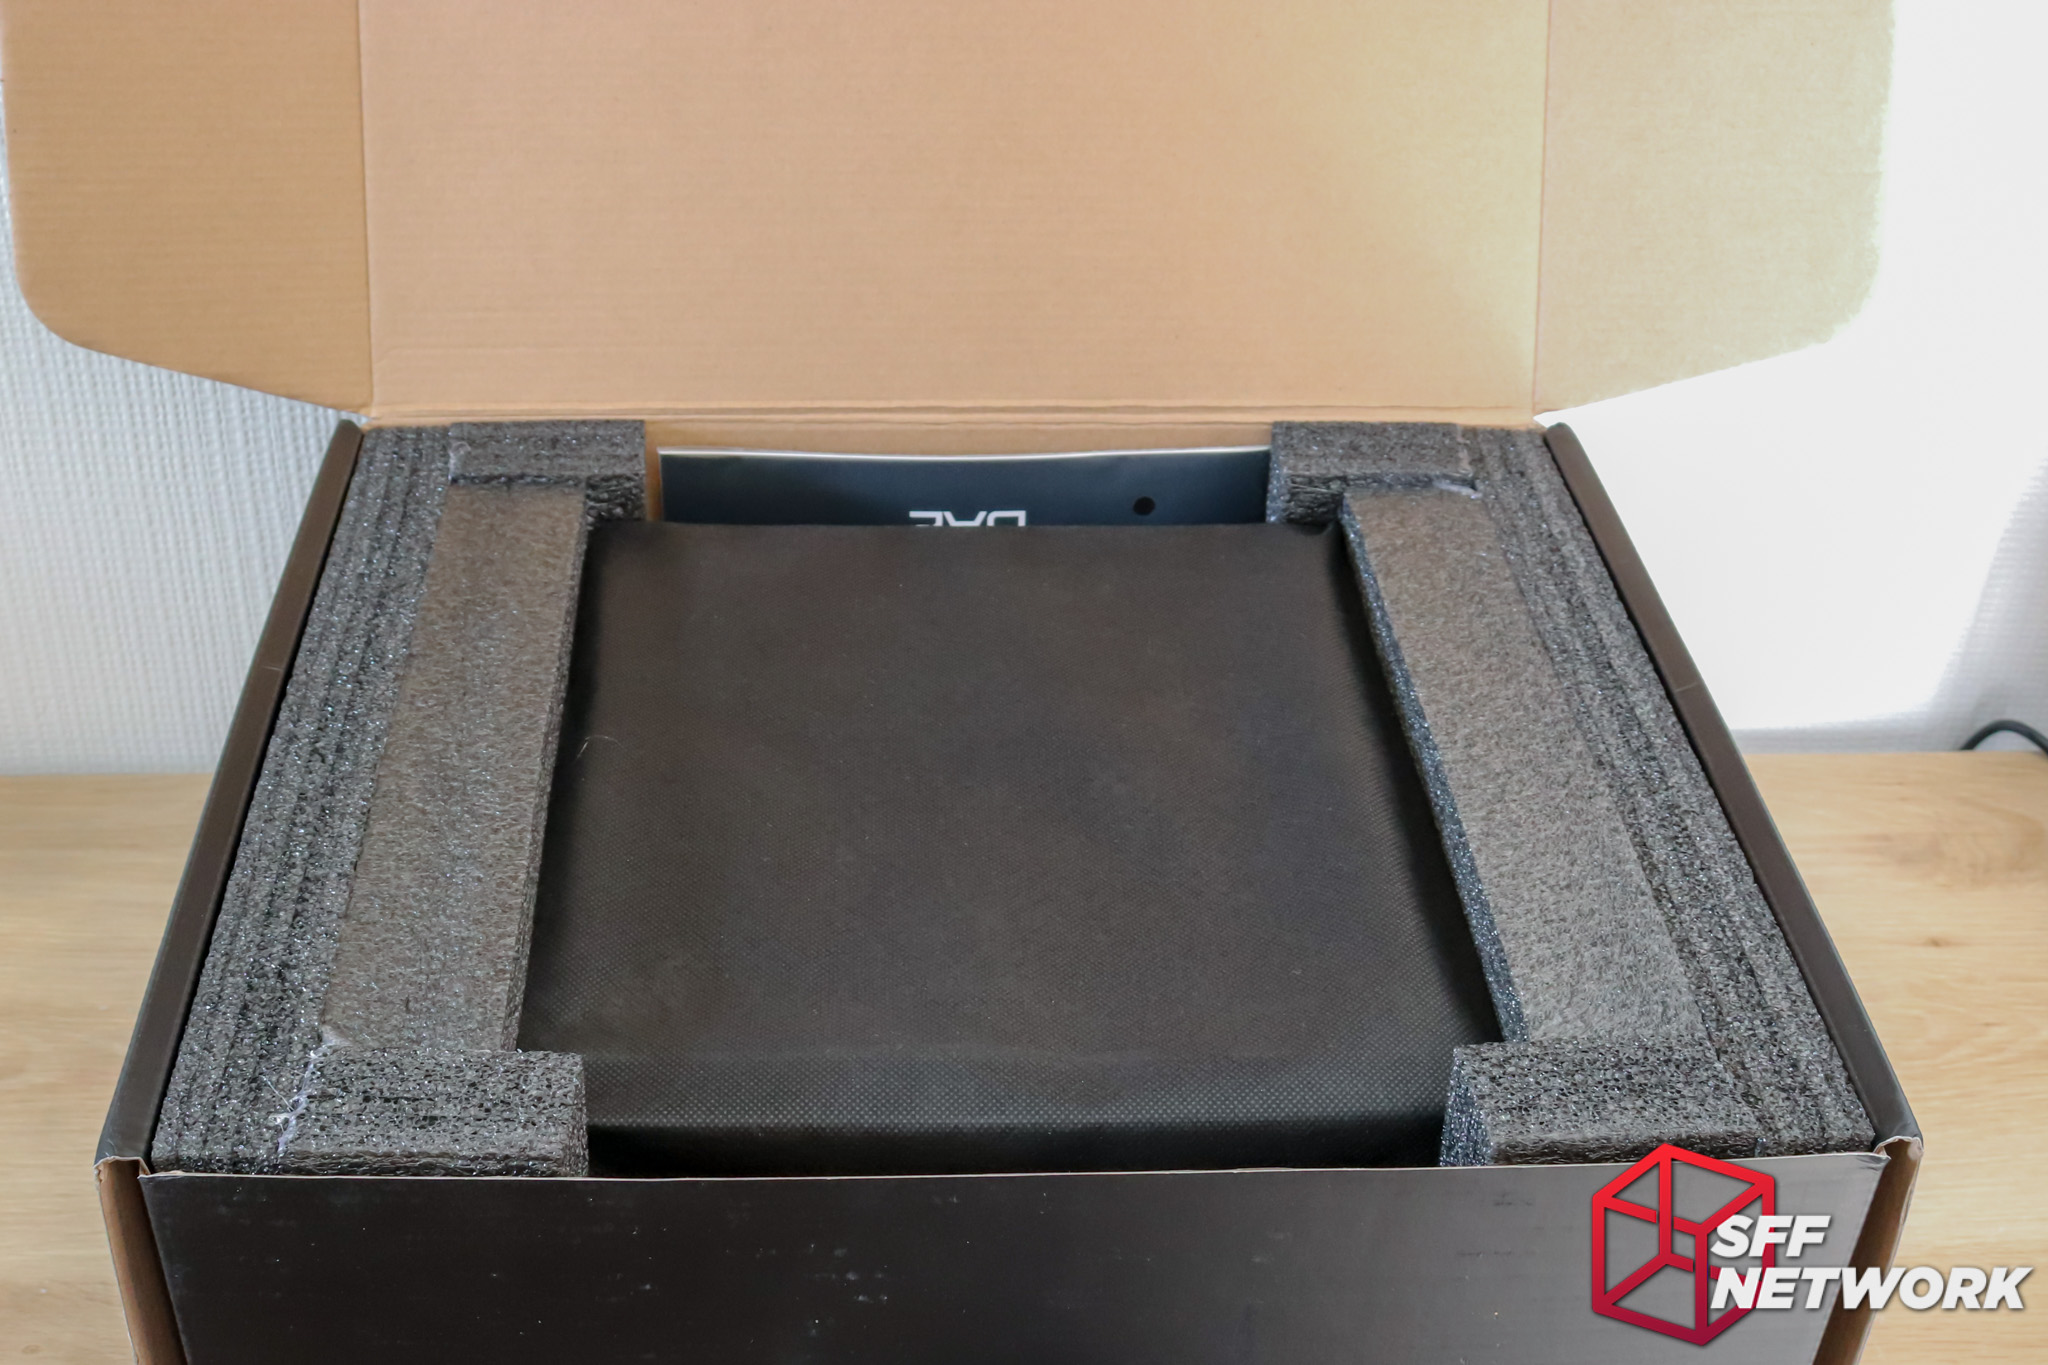
Protected by dense foam and a non-woven fabric bag, the DA2 should not arrive tarnished or damaged in the rigours of transit.

Nestled to the rear, a bag, holding the keys to the city. Actually, the (awesome, by the way) manual, screws and an Allen key.
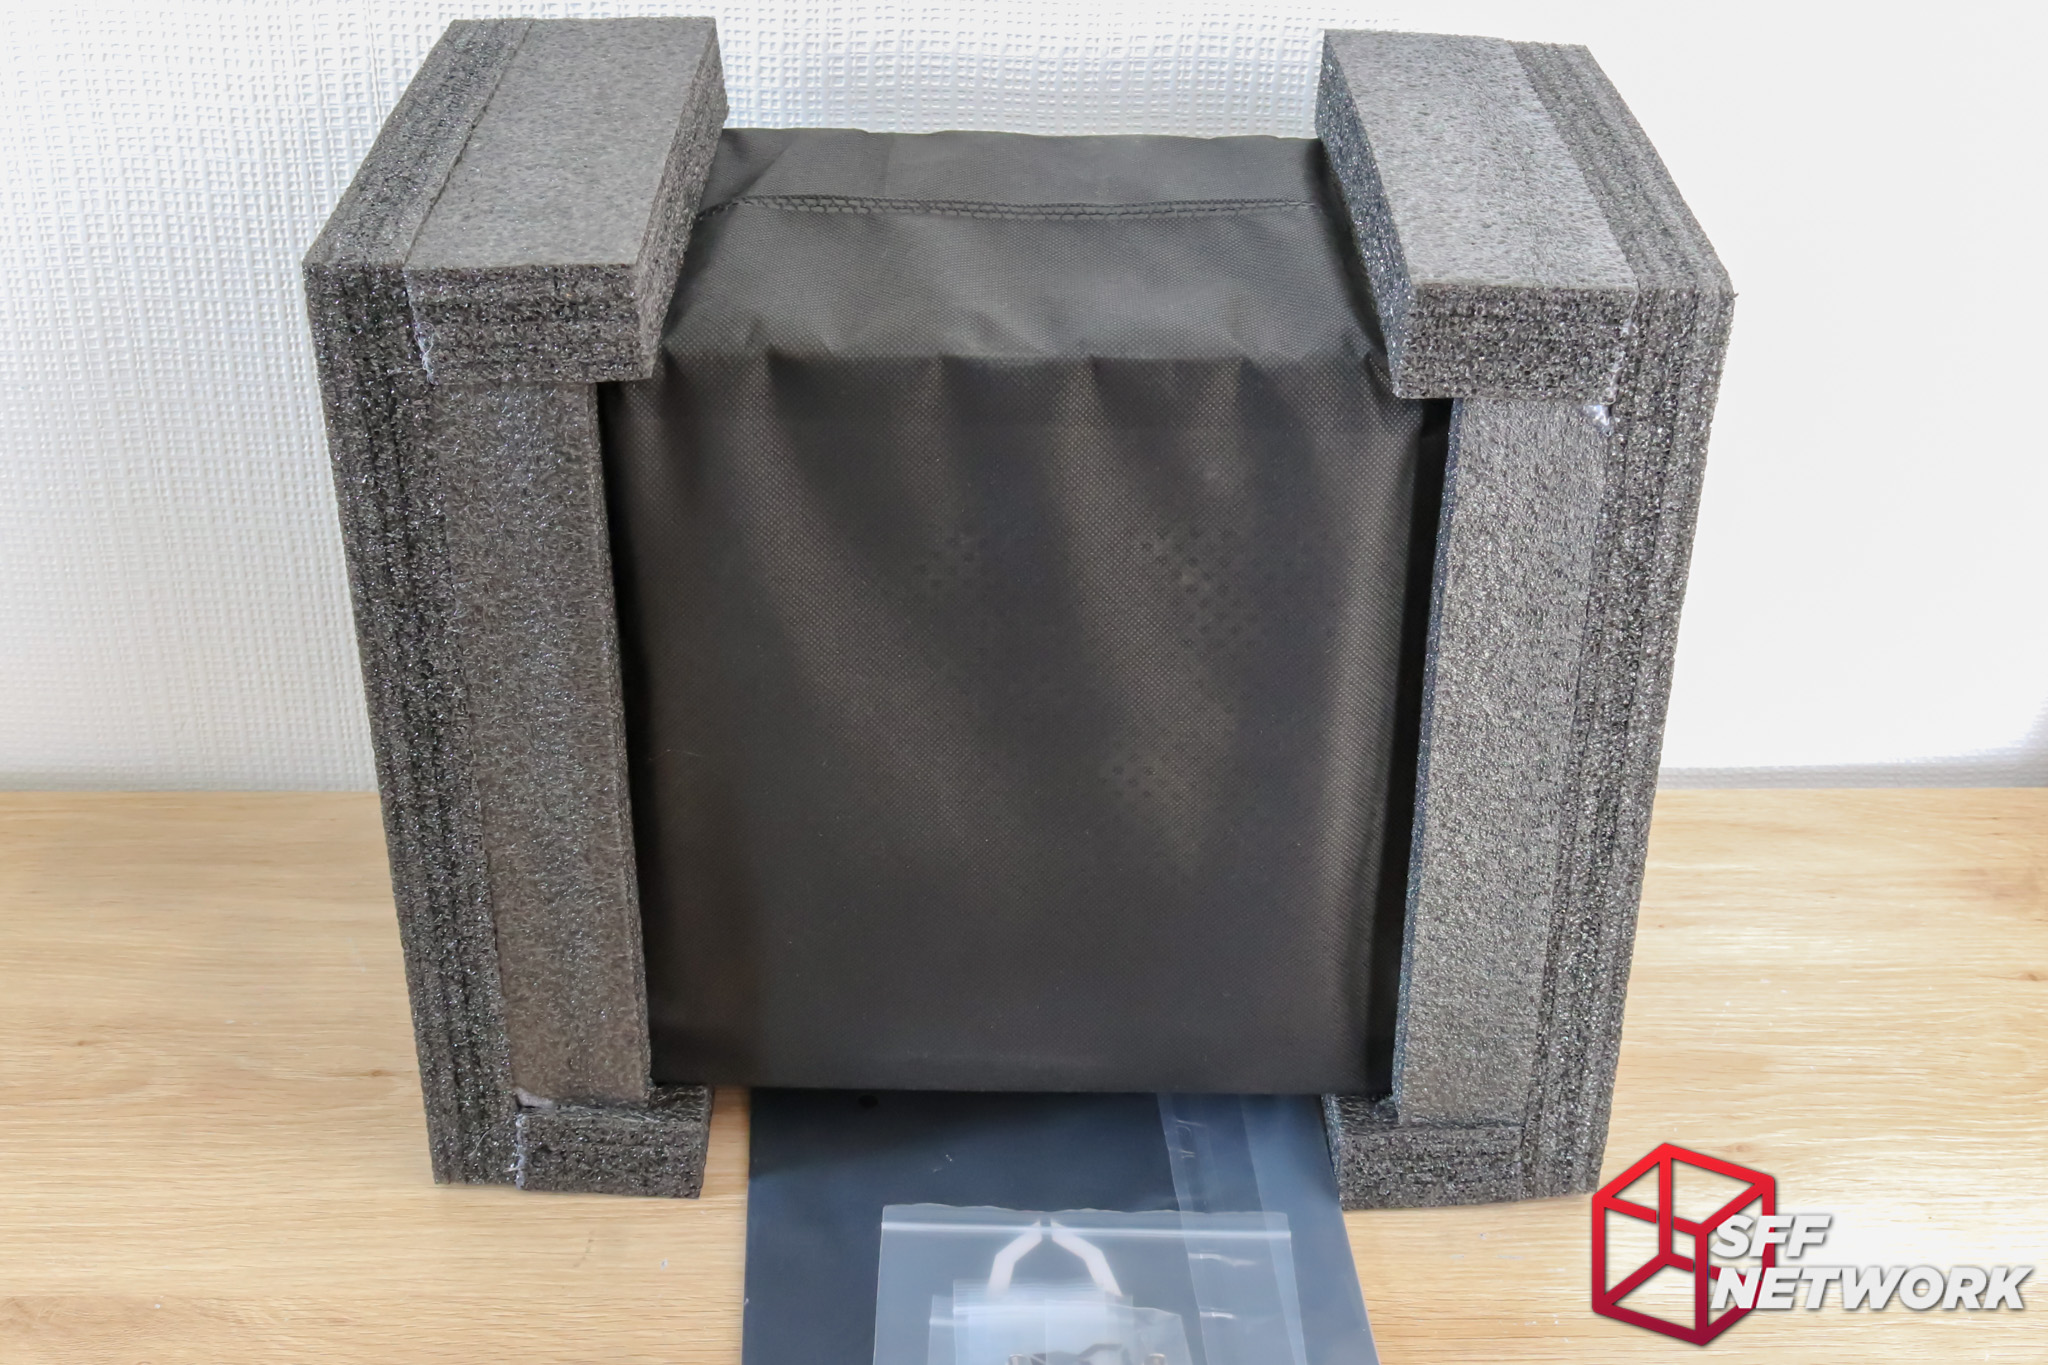
Finally, removing the case from the box shows clearly how much protection the case has in transportation – very impressive.
The Streacom DA2
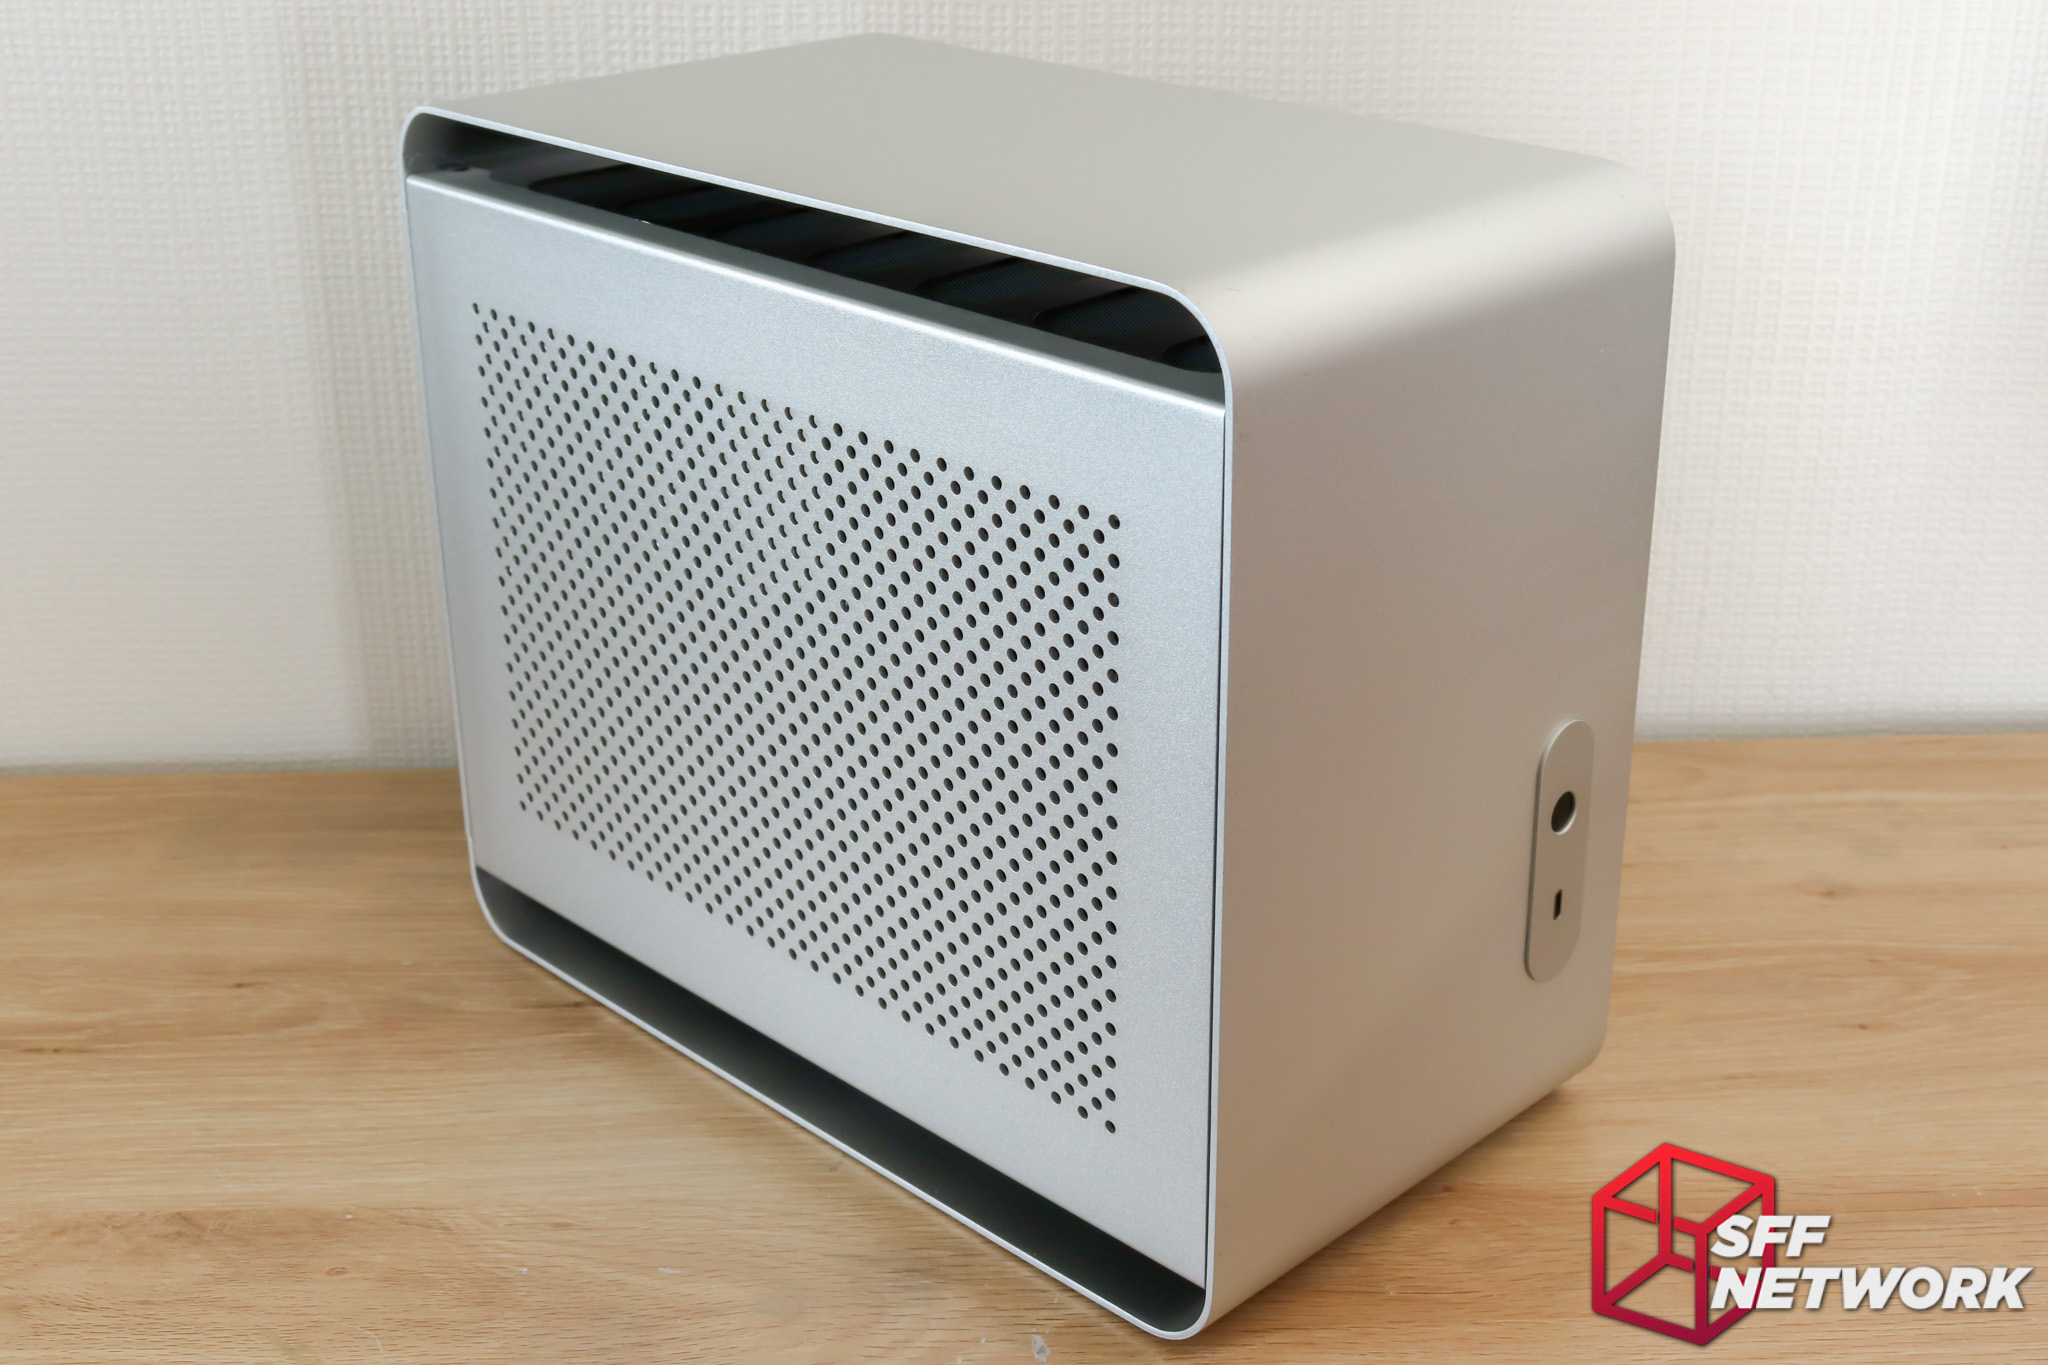
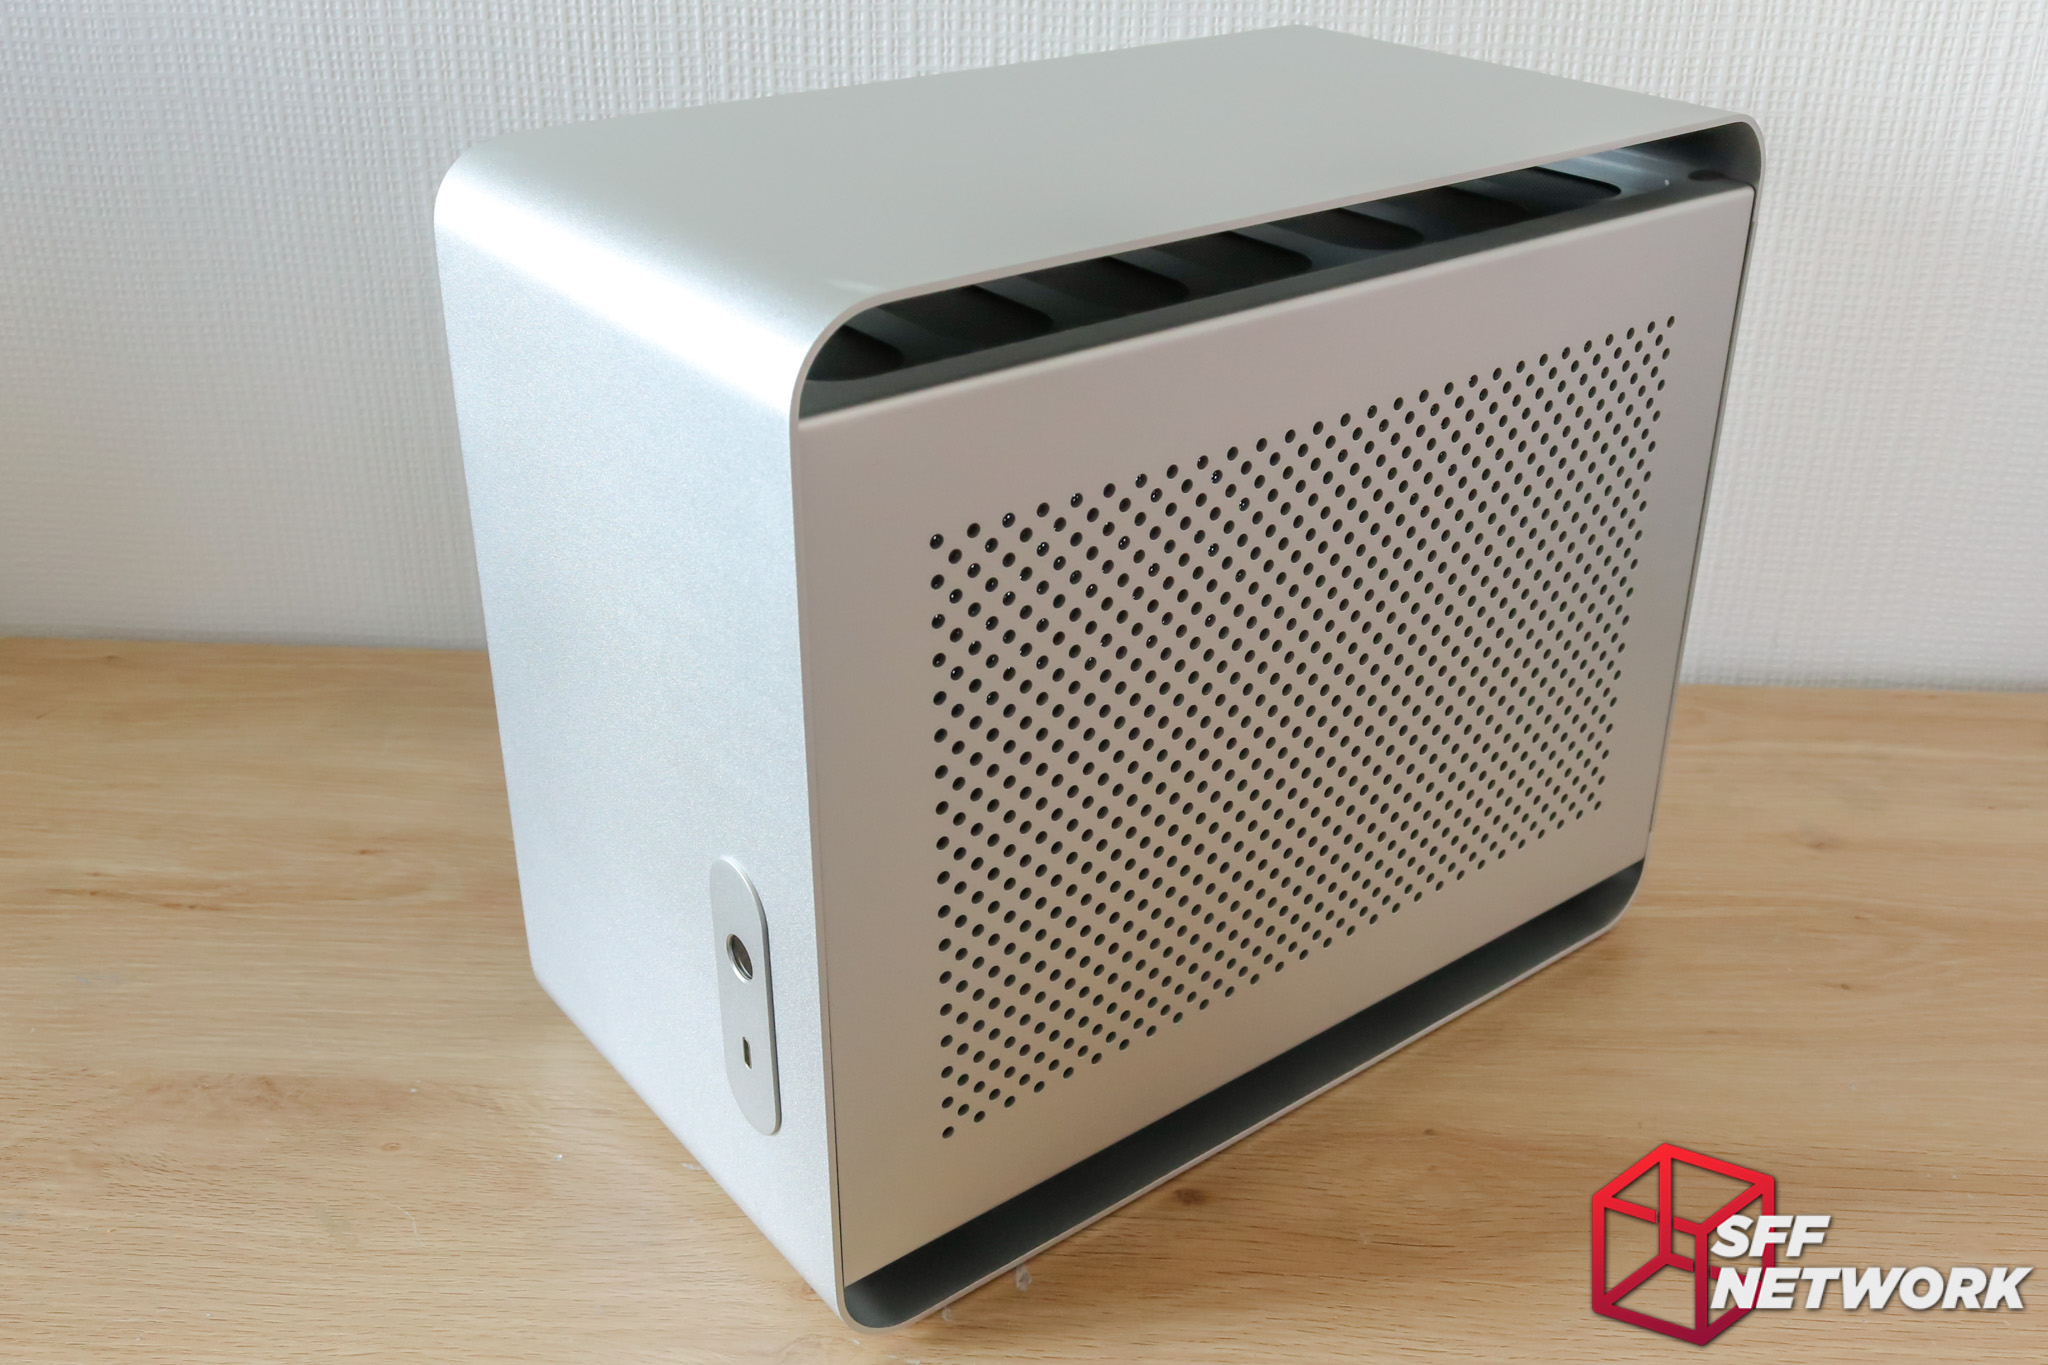
Anodised in silver, the DA2 is an exercise in subtlety – G4M3Rs need not apply. The surface finish is in a sandblasted fashion – not smooth, but not overly rough. Just enough, I figure, to avoid the fingerprints of doom on your schmick new build.
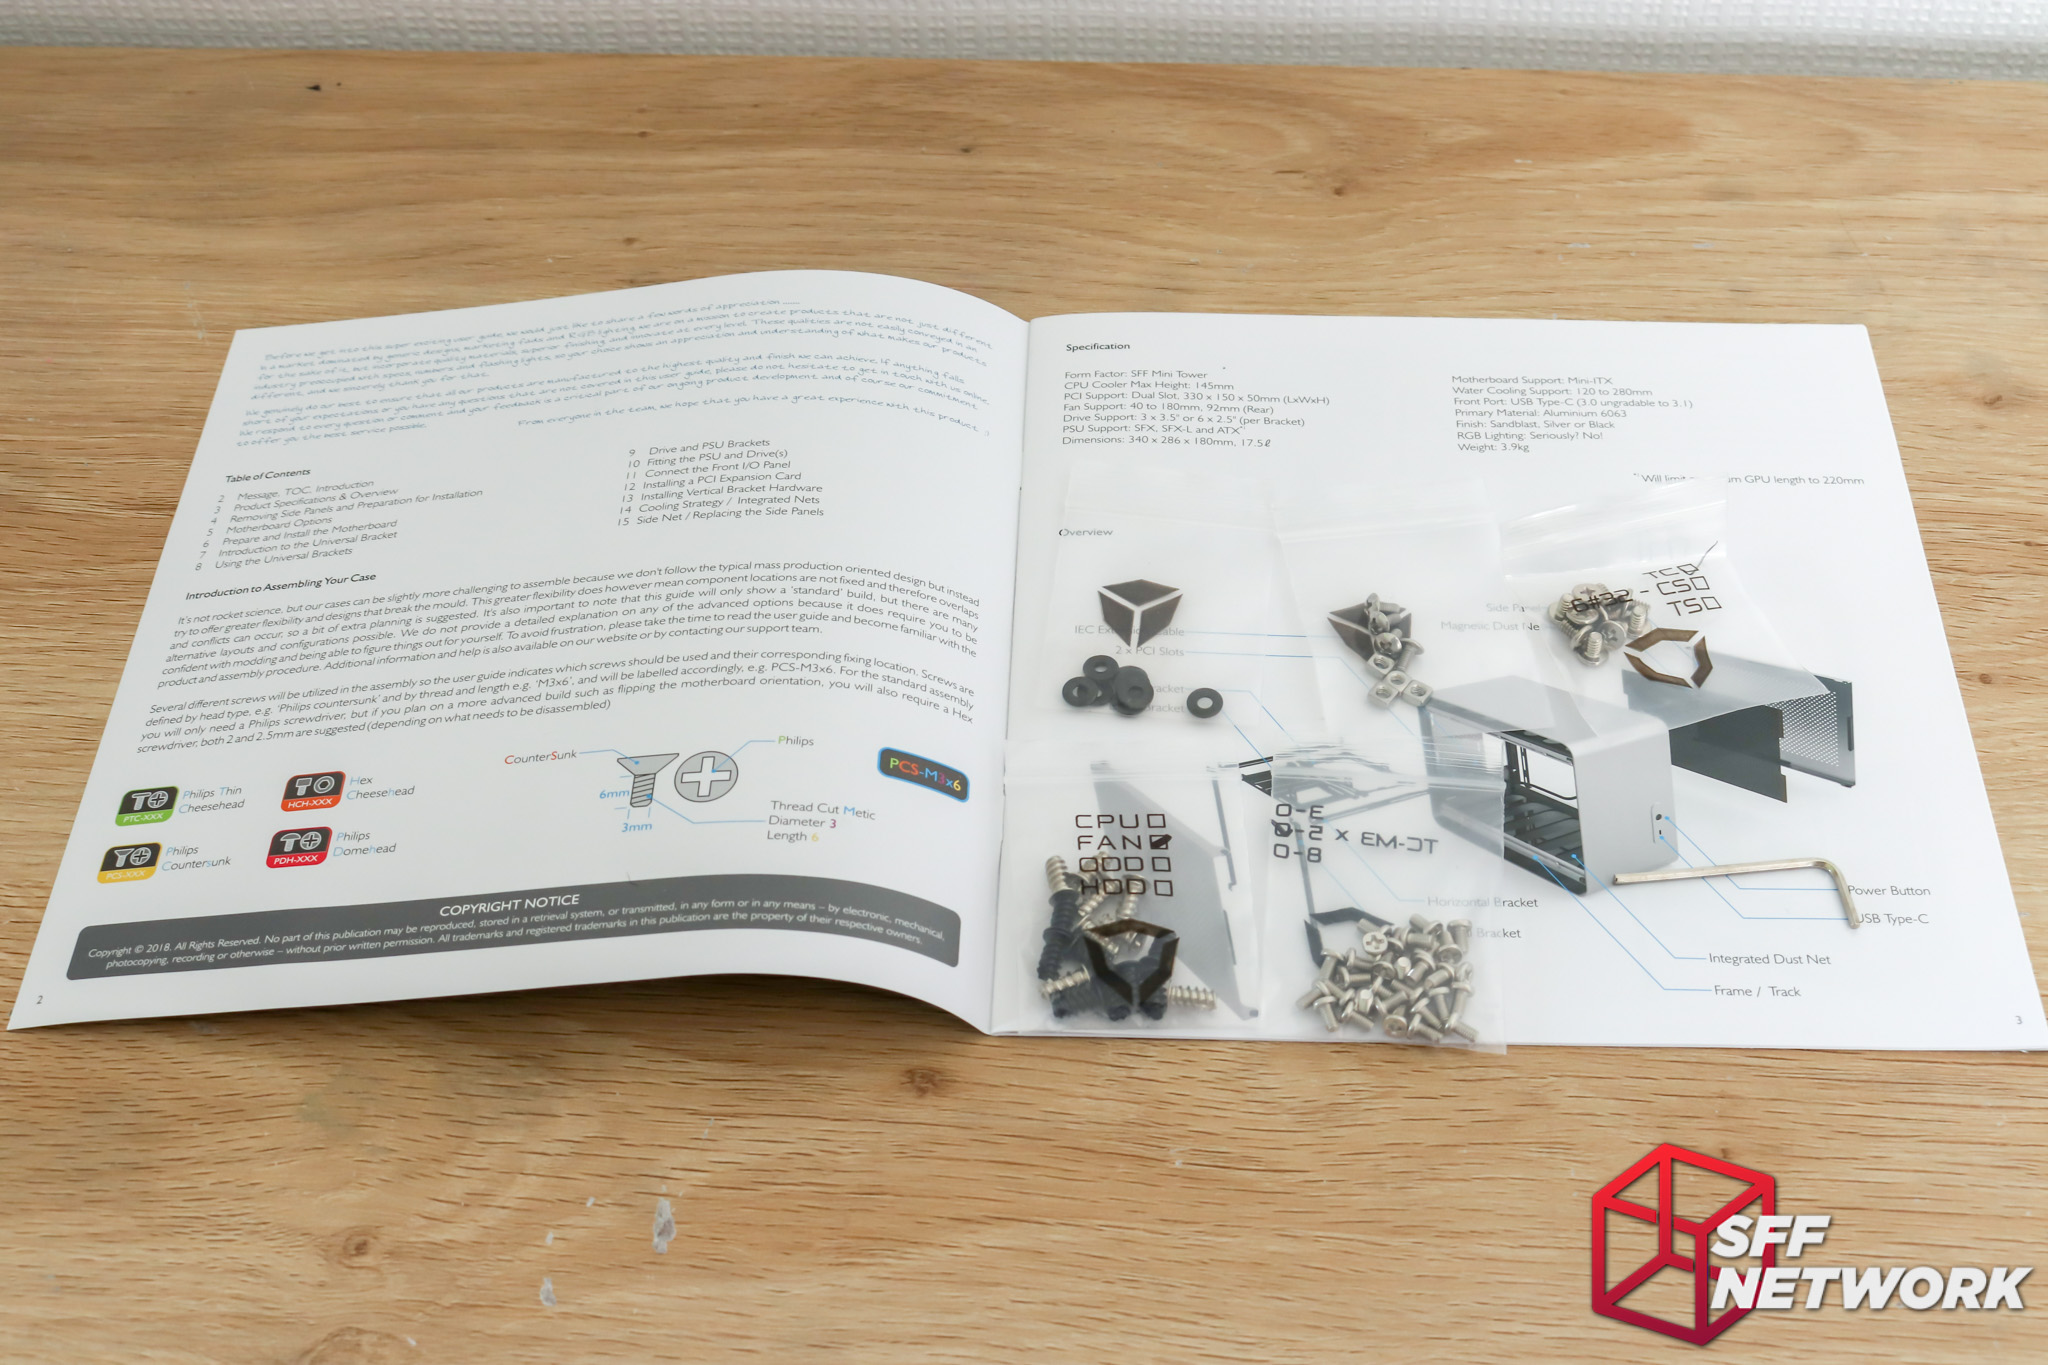
The manual and screw loadout. I highly recommend you check out the manual (2.6MB PDF file) – it’s an exercise in exactly what I think components should come with. None of this relying on forum threads and YouTube videos for teaching new users how to build in their case – physical documentation with clear imagery and descriptions is where it’s at. Many bonus points added for this inclusion.
A friendly welcome from the team – that personal touch.
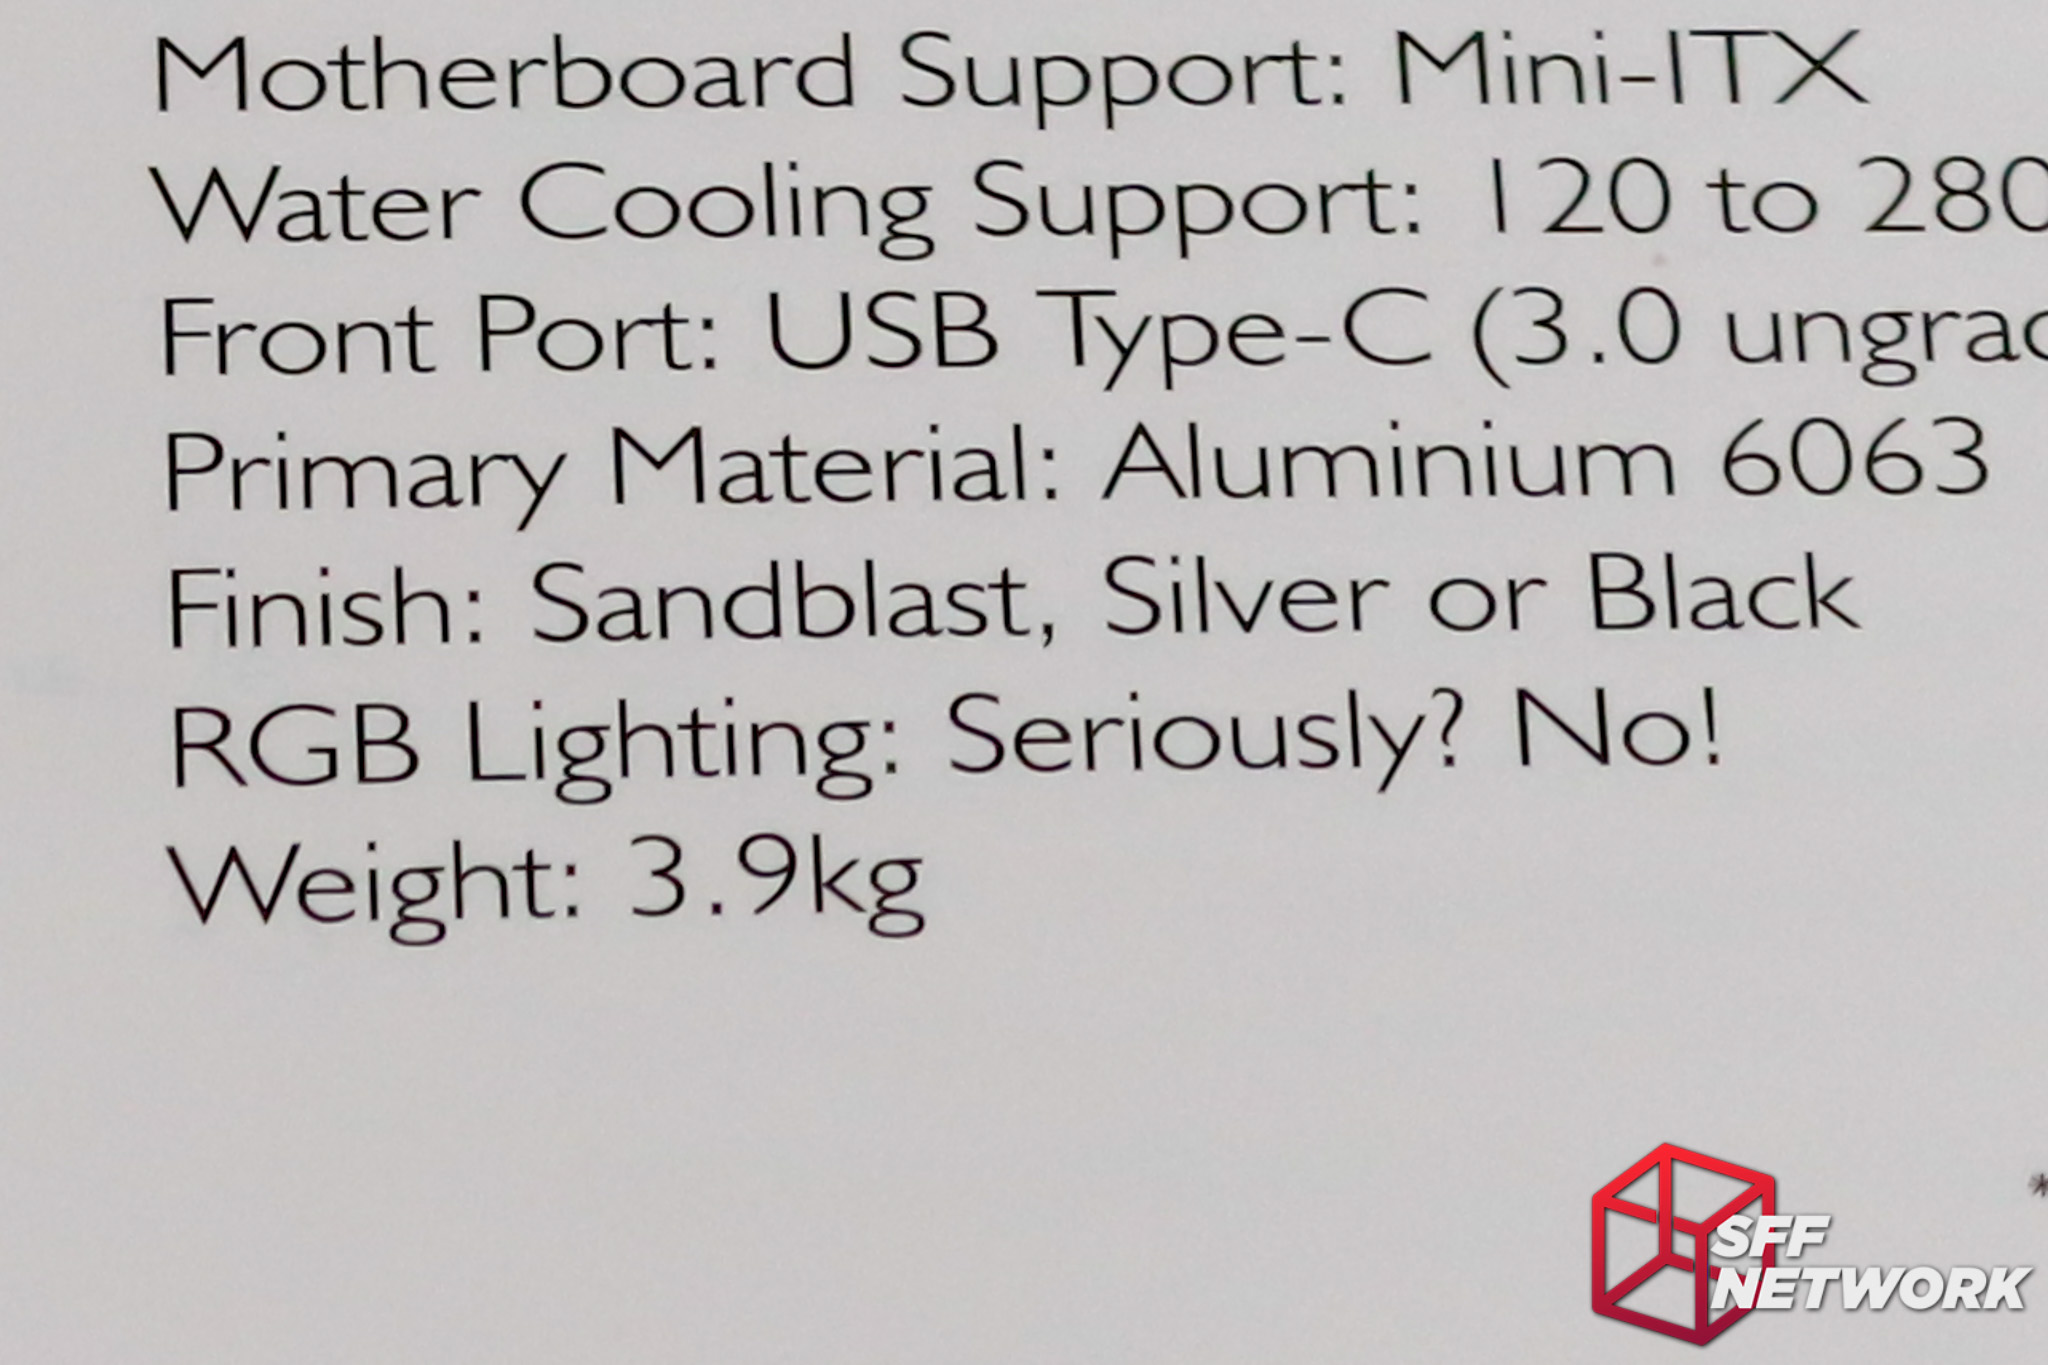
RGB – not here, my friends.
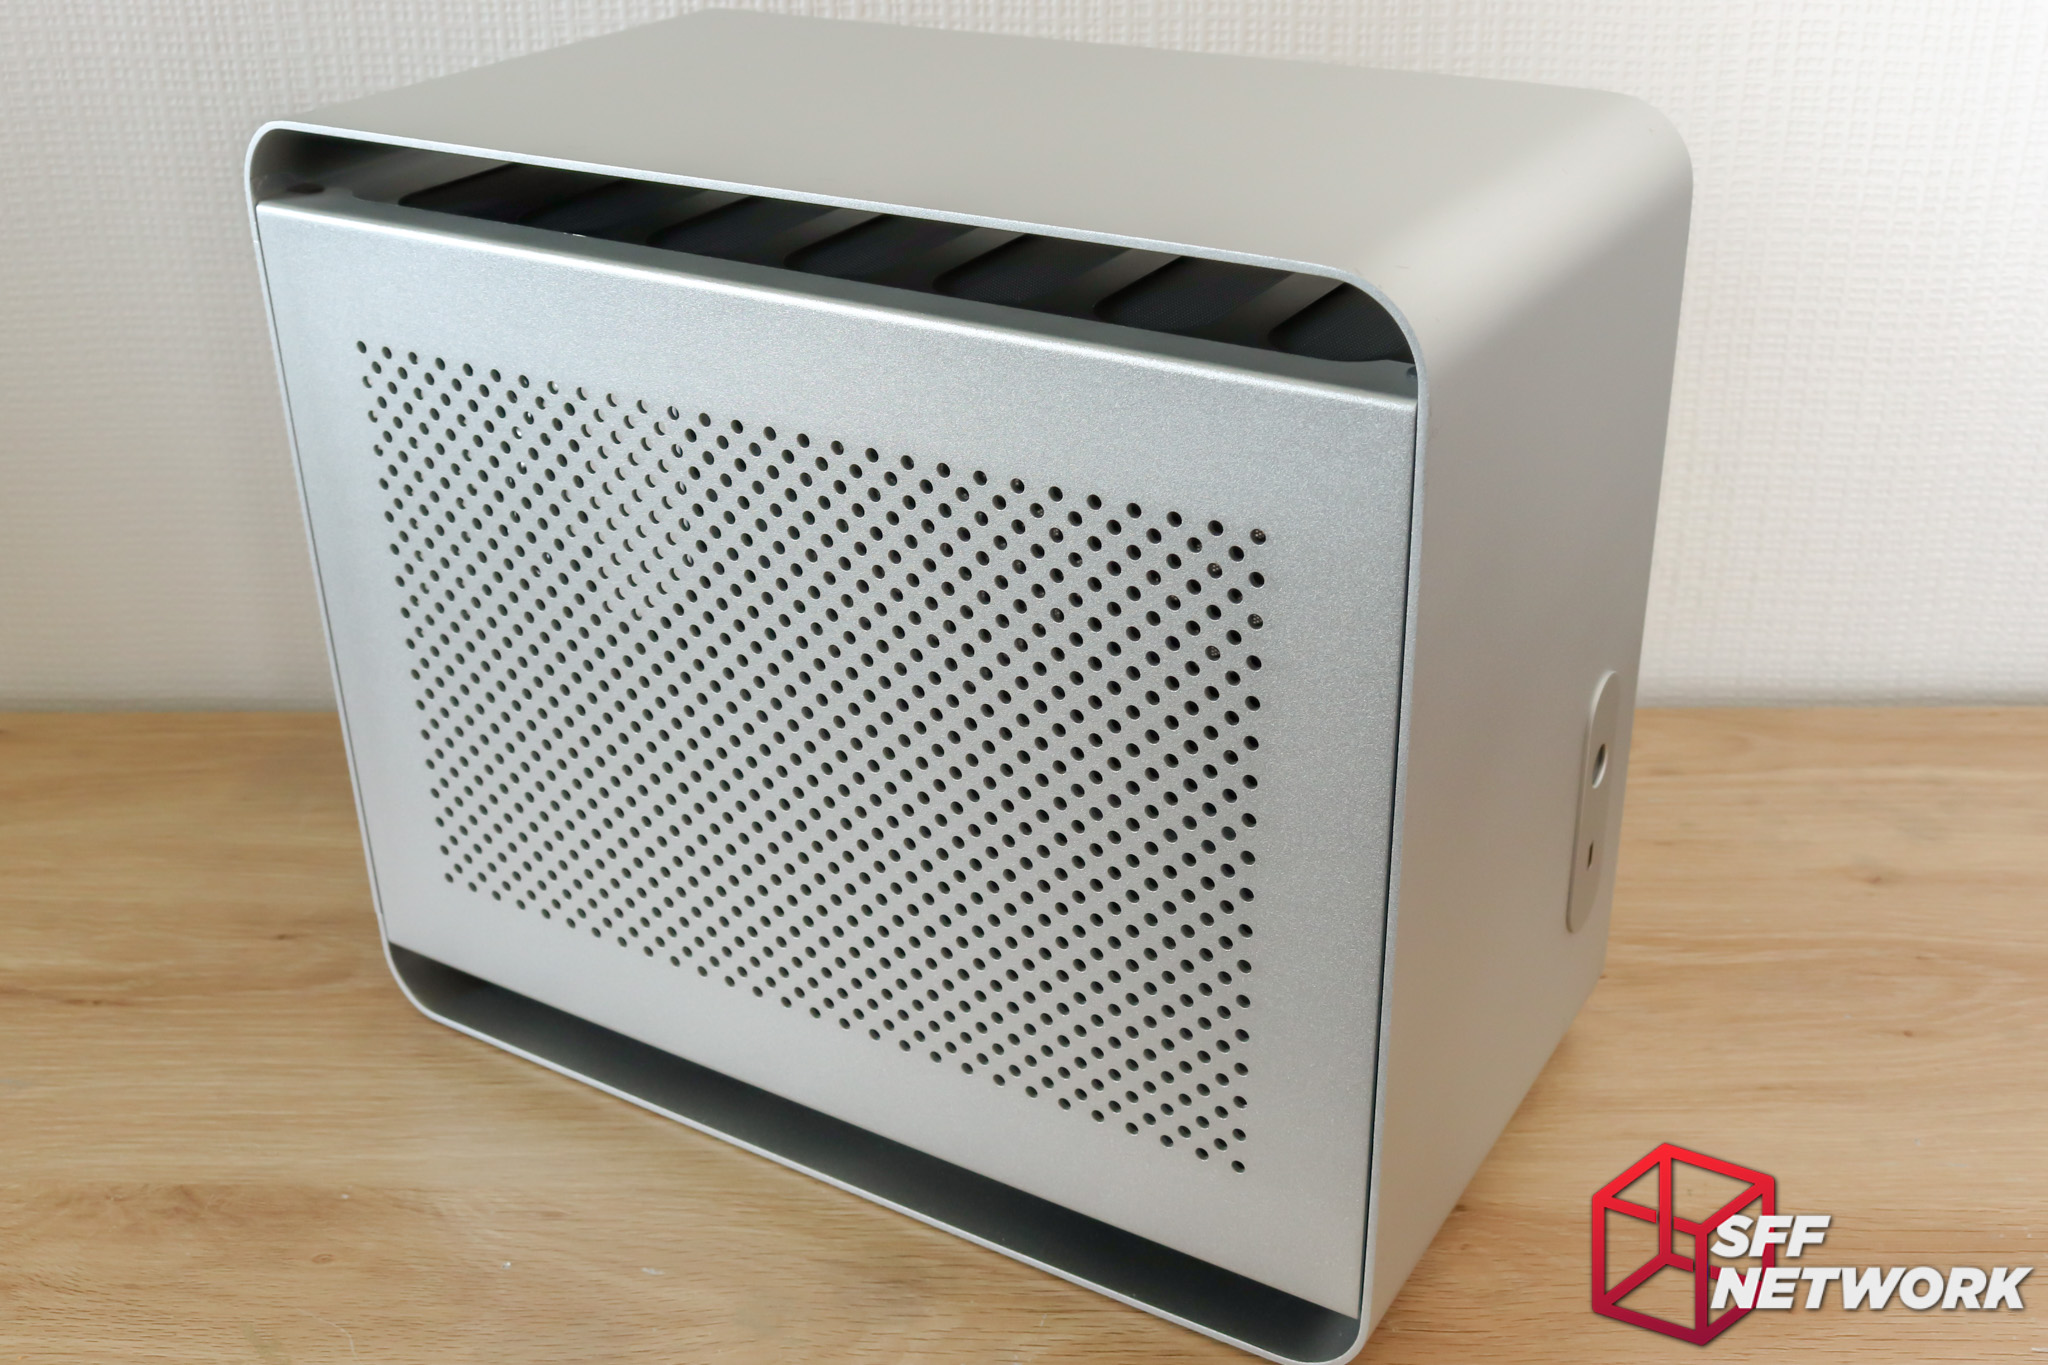
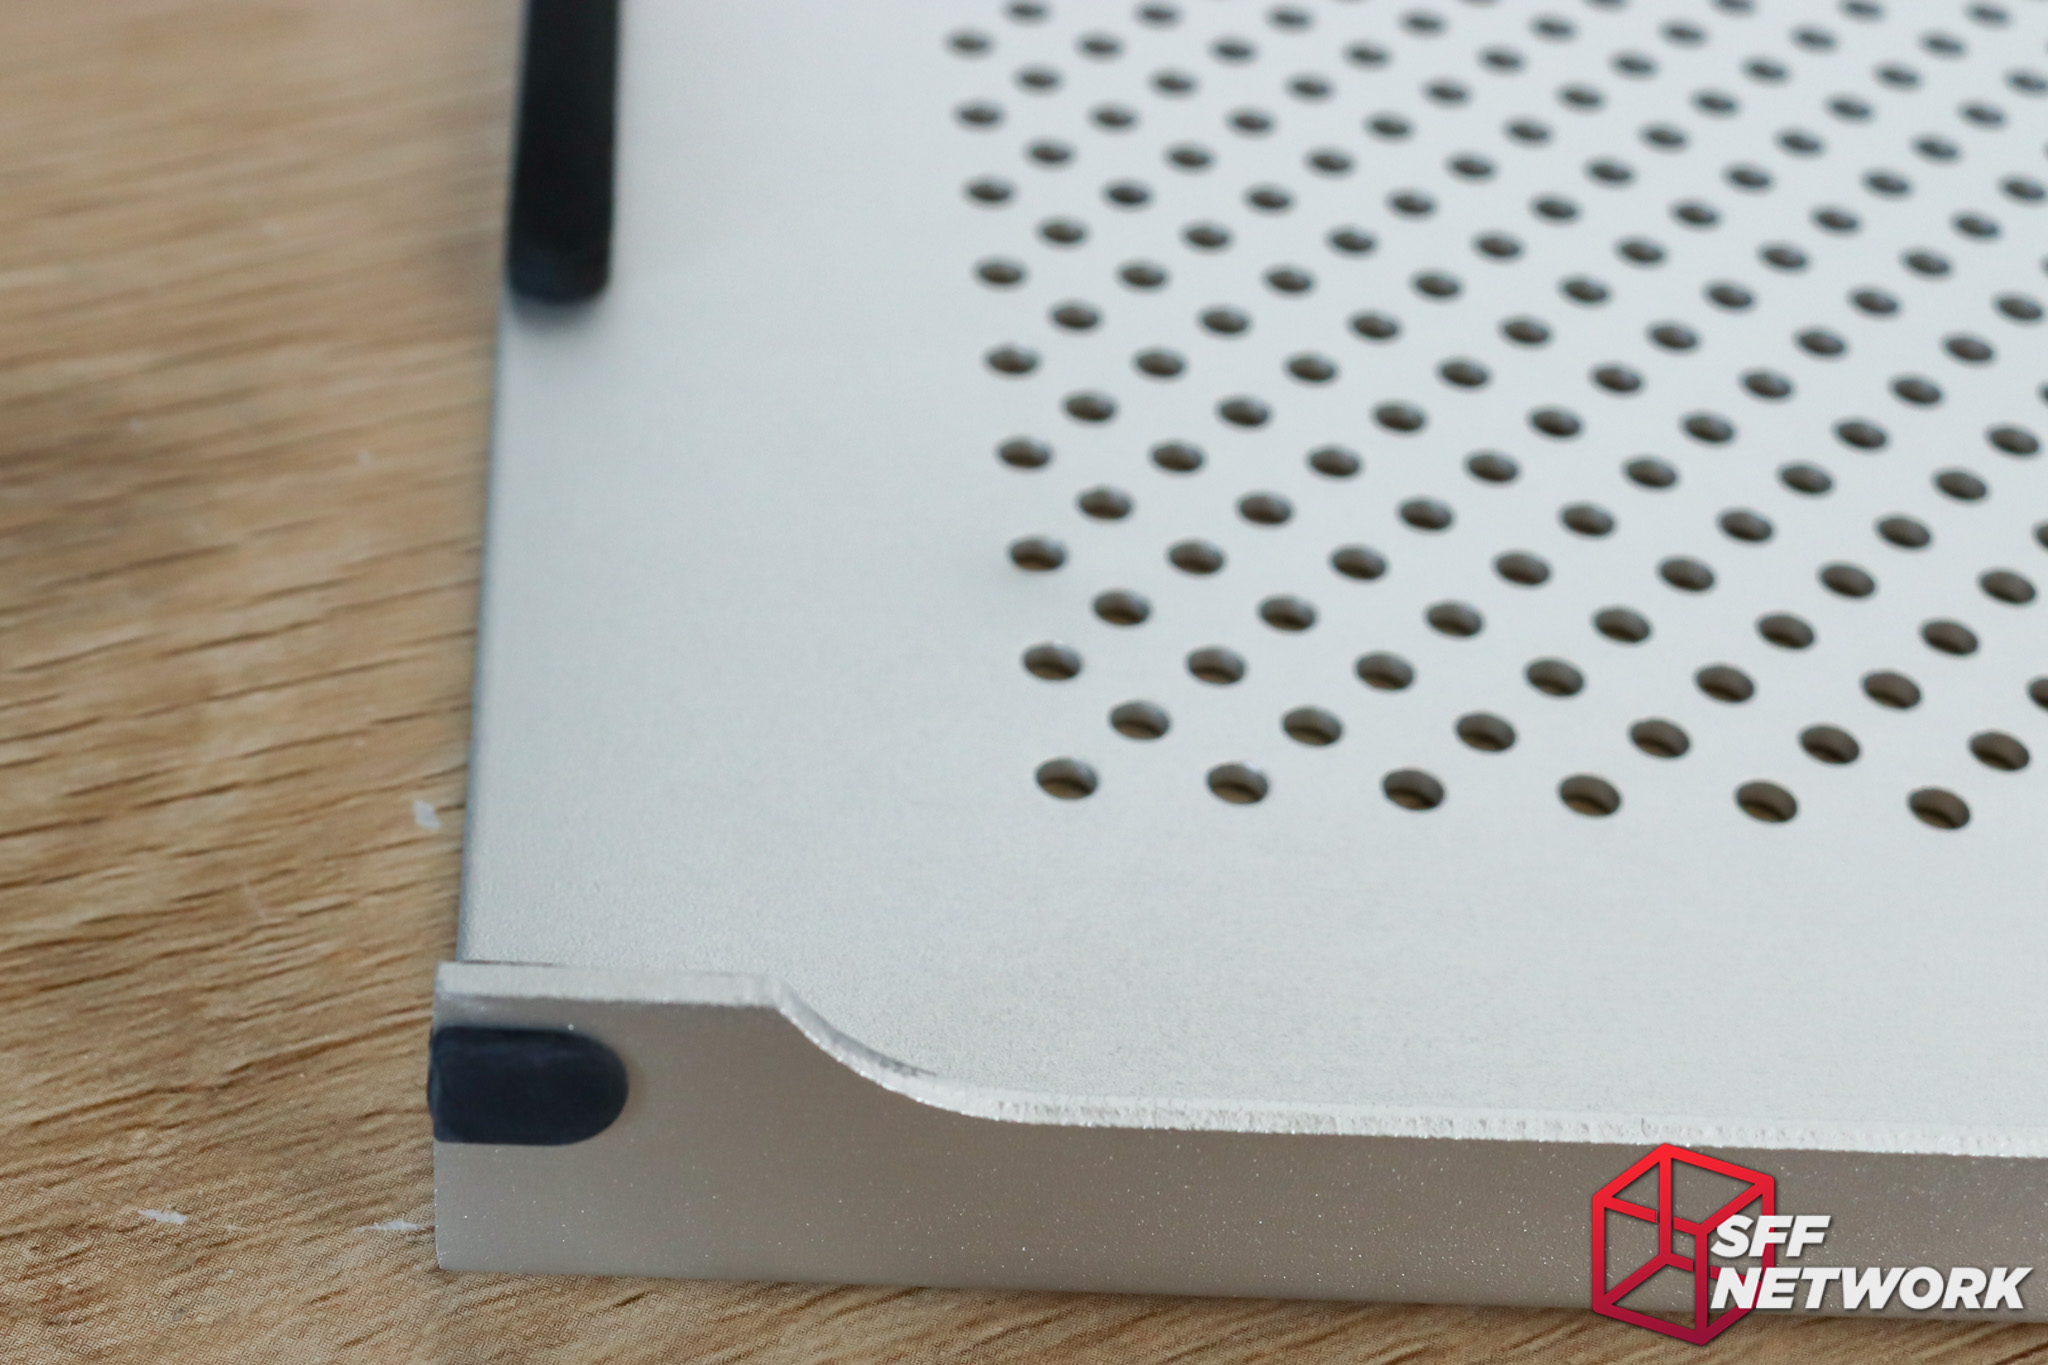
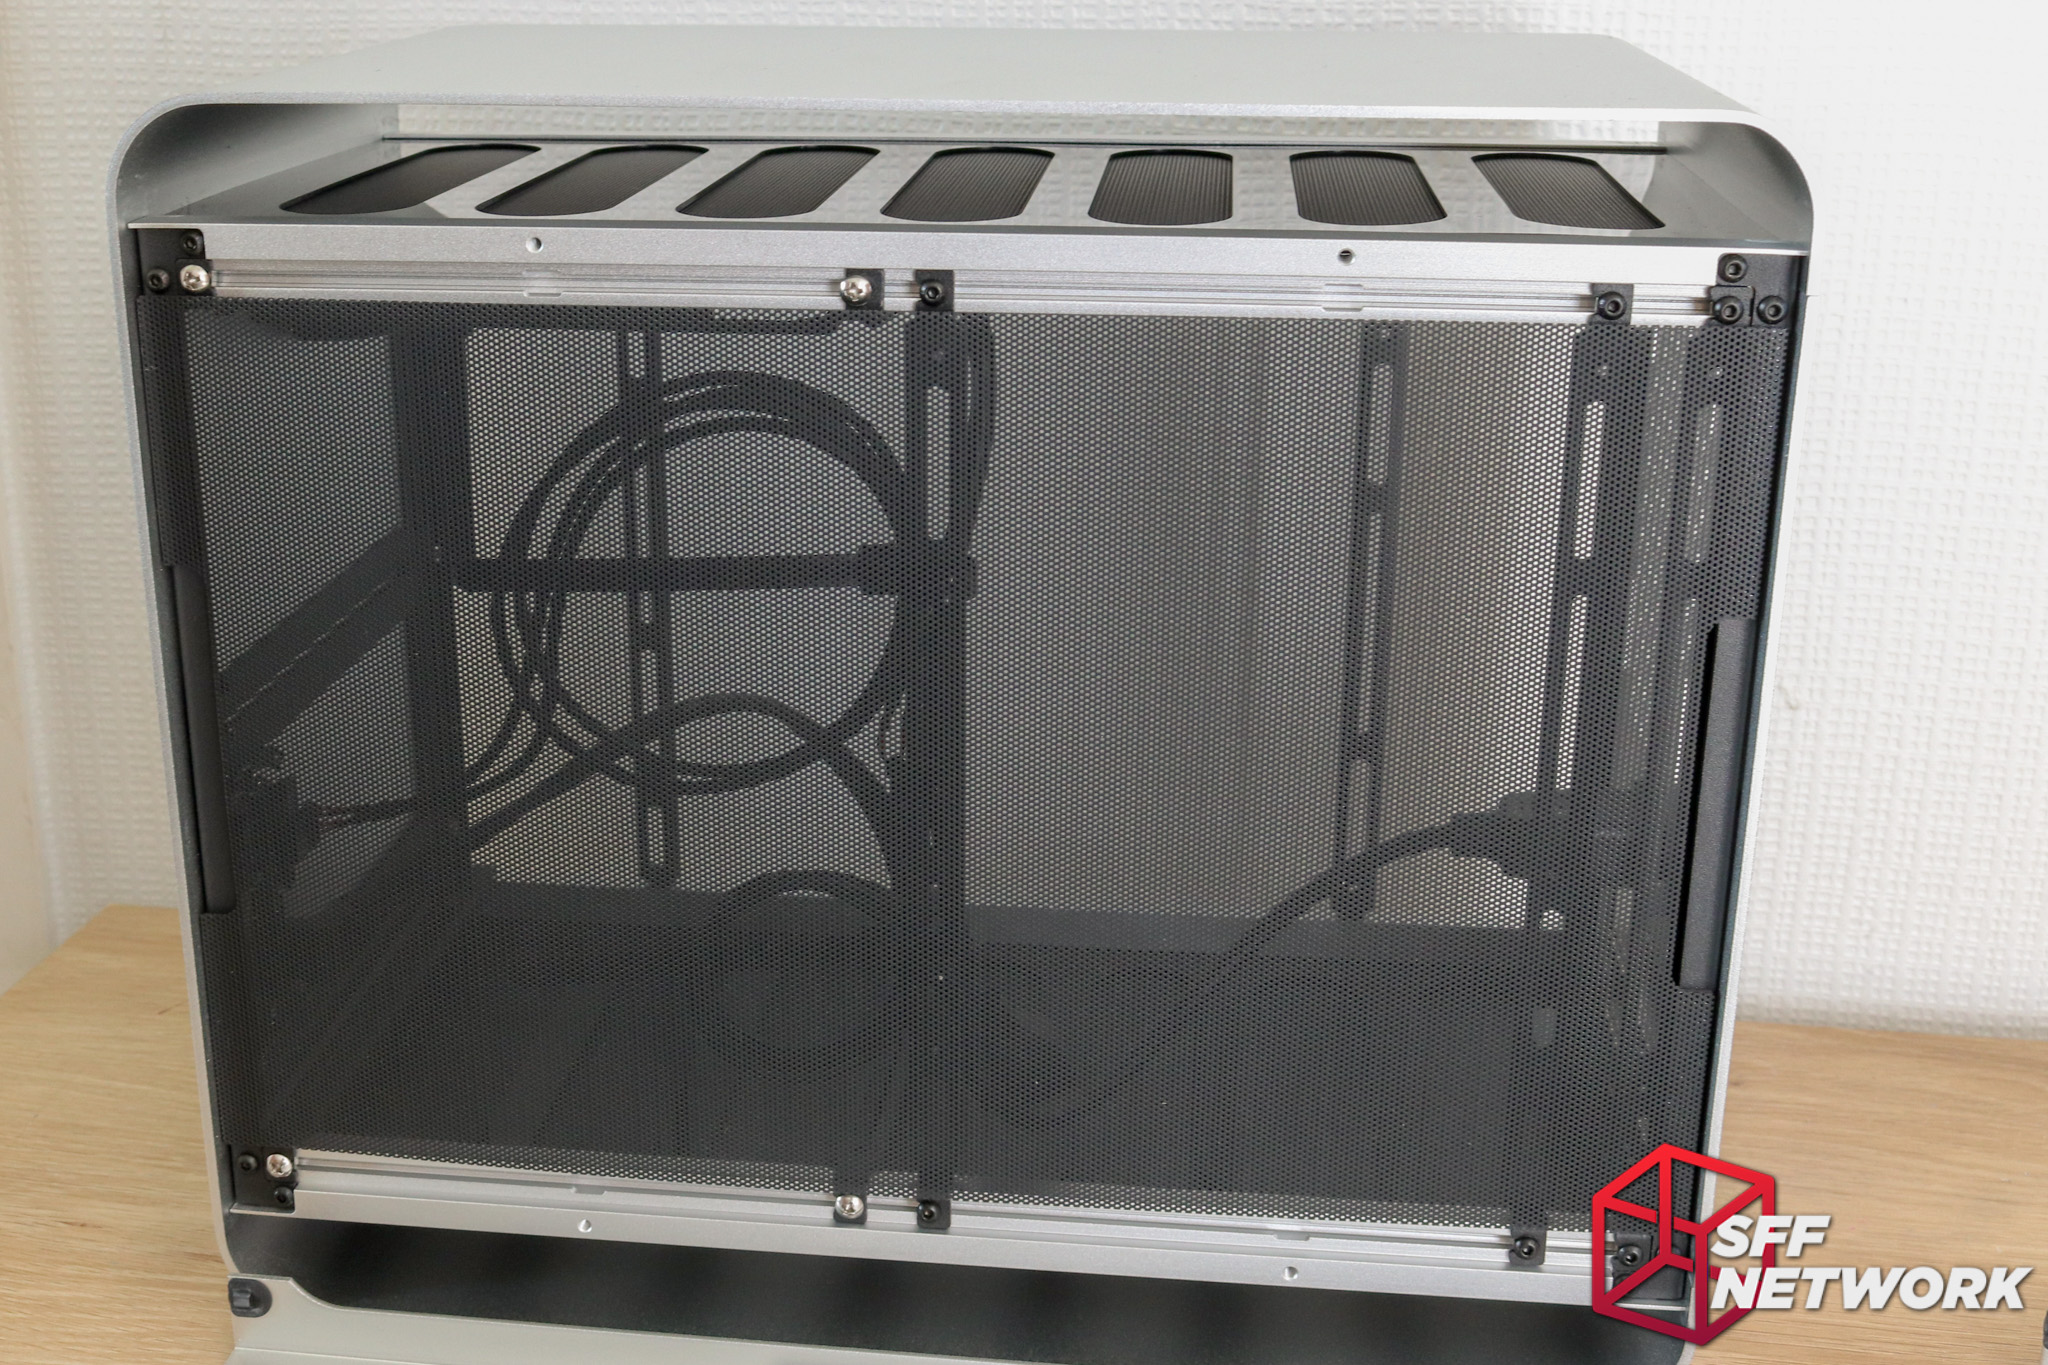
A chassis within a chassis of sorts – the inner case is held suspended by a 3.4mm thick aluminium shell. Speaking of materials – the side panels are 2mm thick, with 3.5mm diameter holes for ventilation.
Top and bottom we find filtered sections – allowing for the best ventilation without large visible holes.
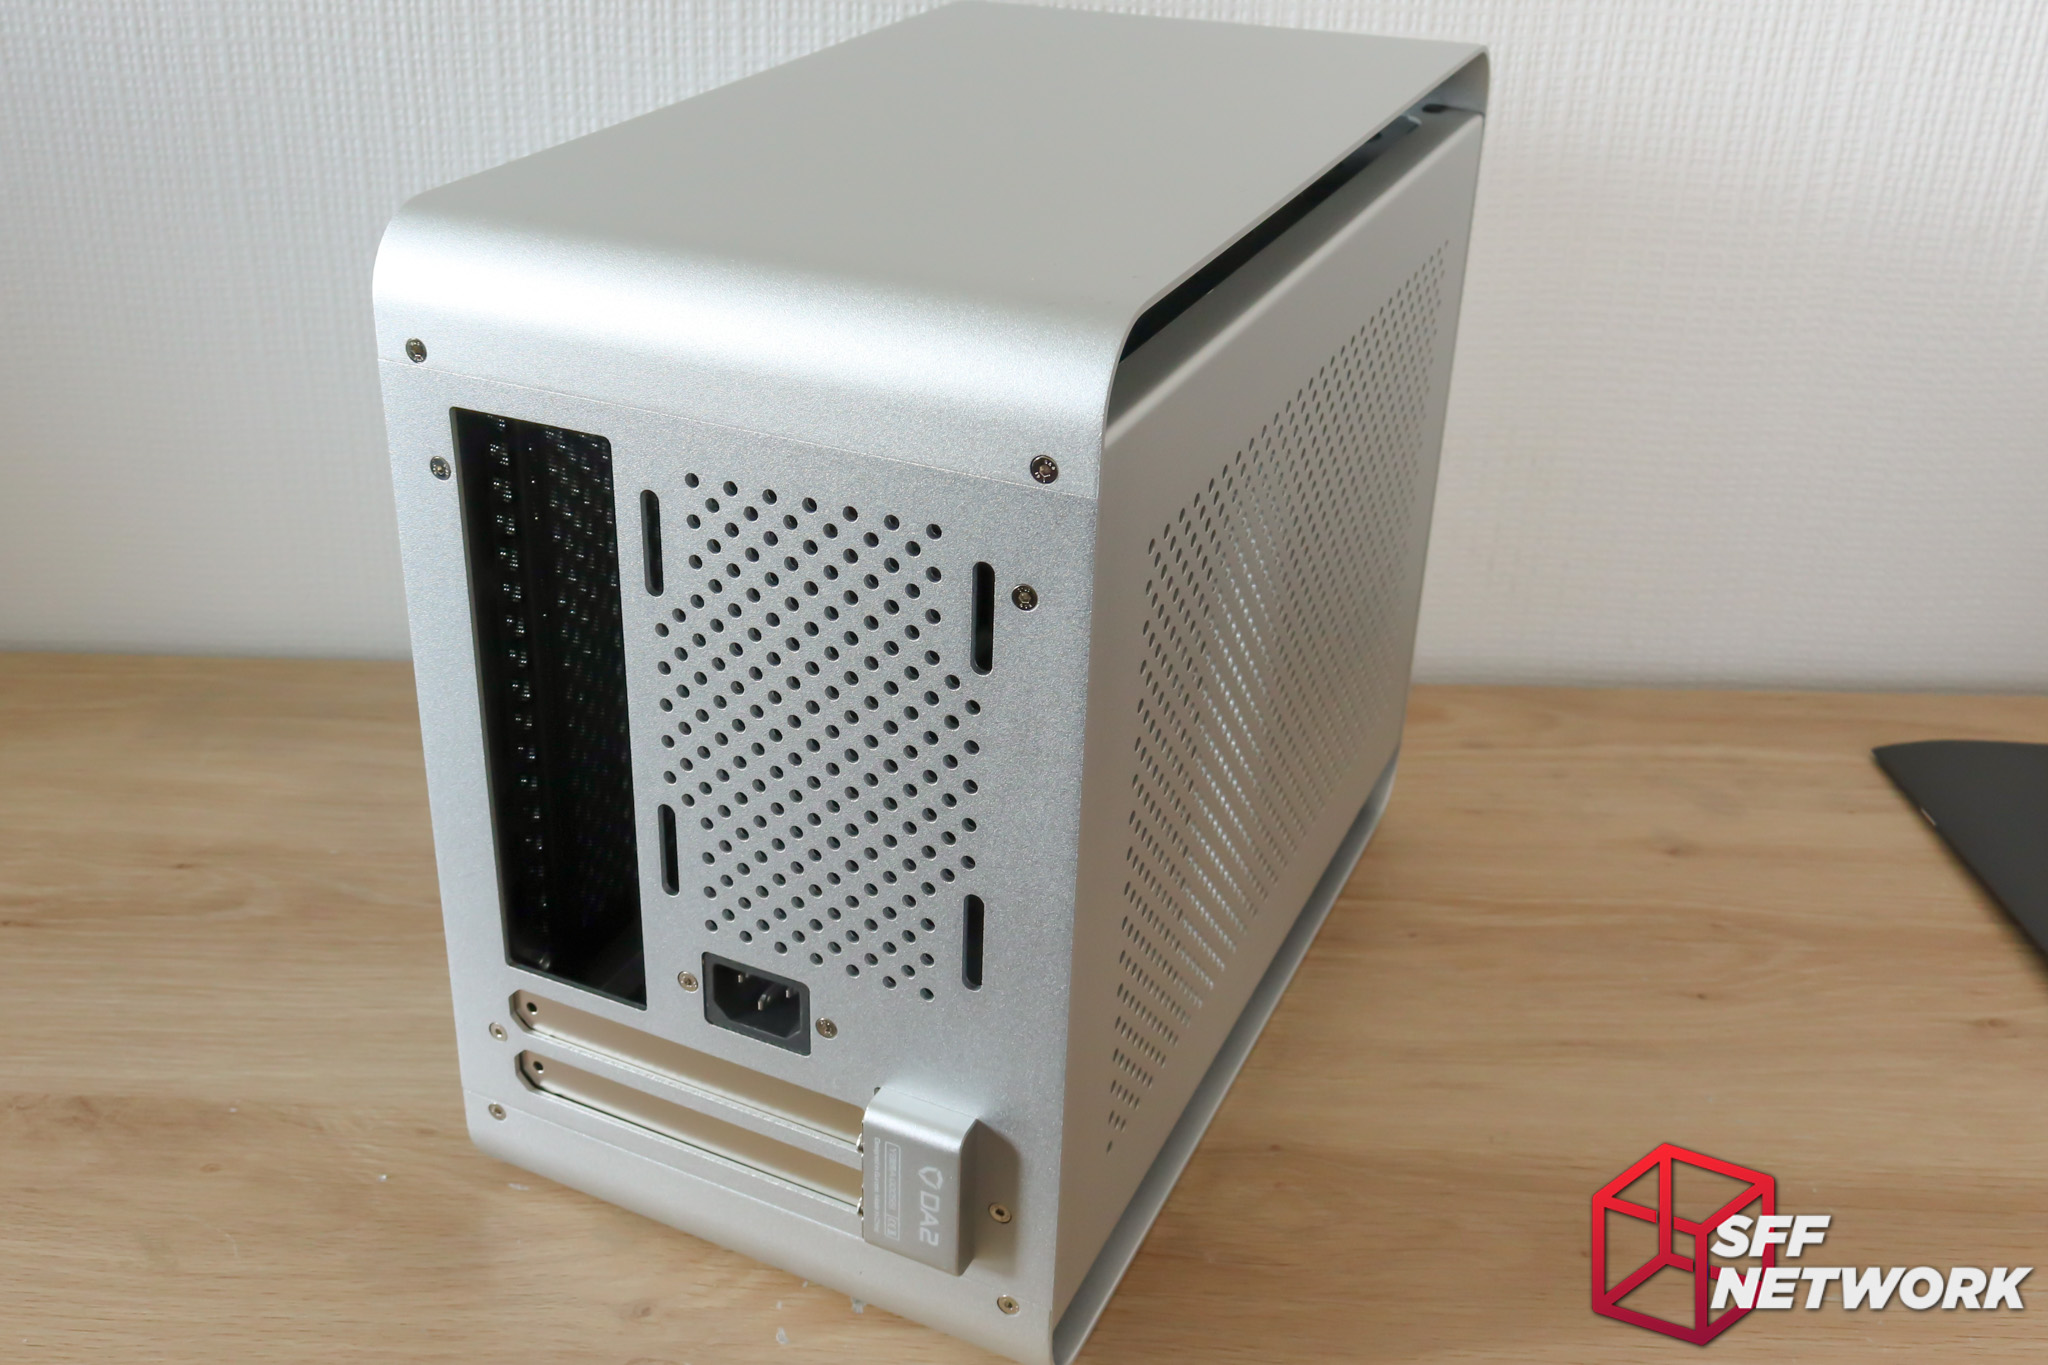
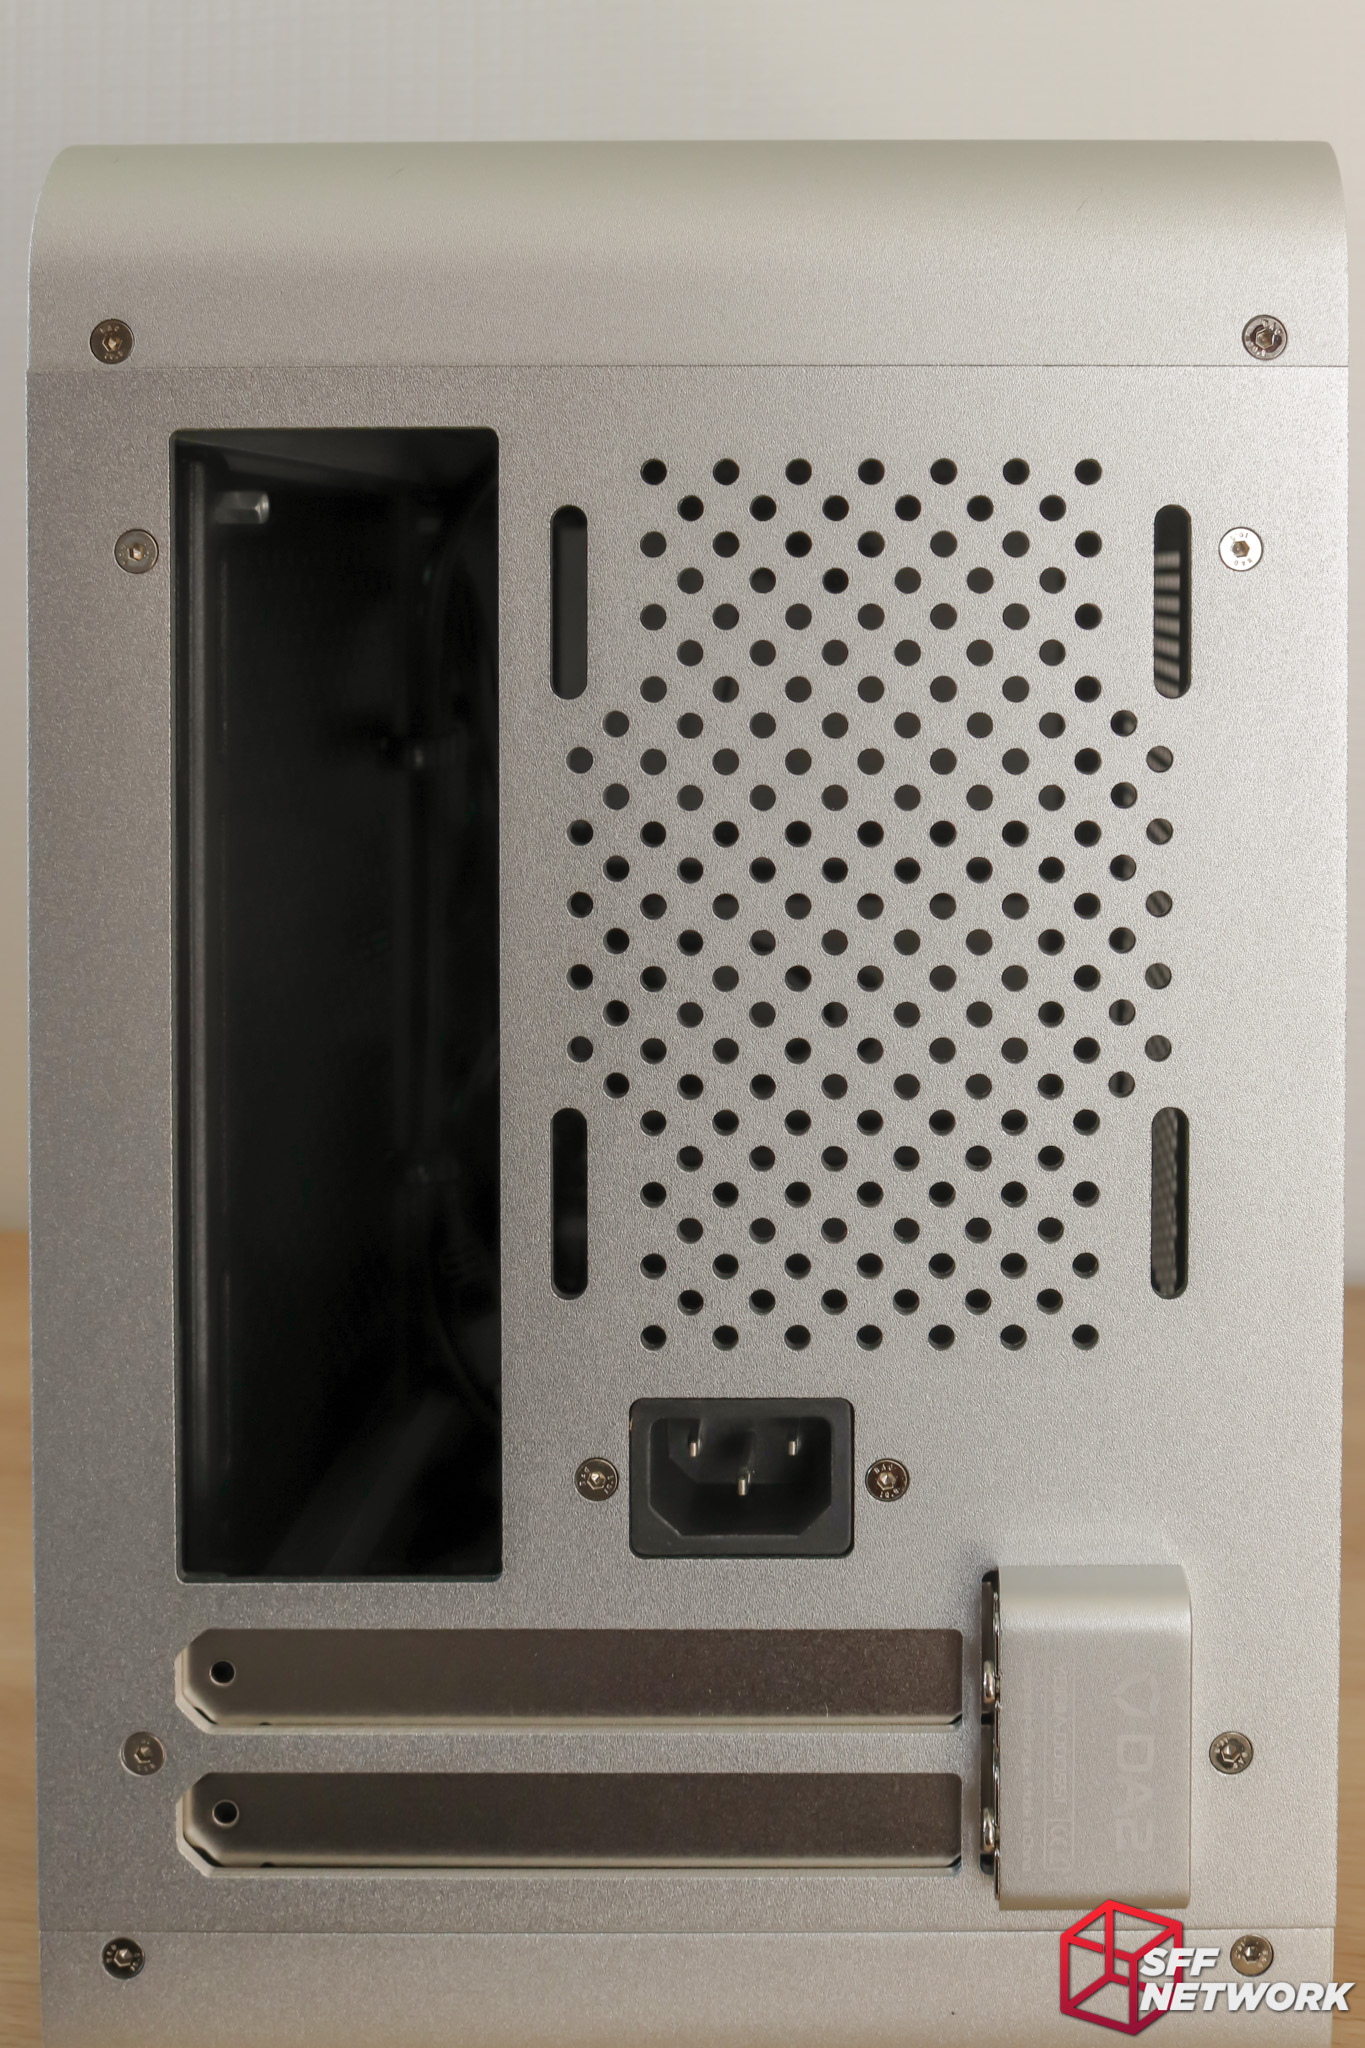
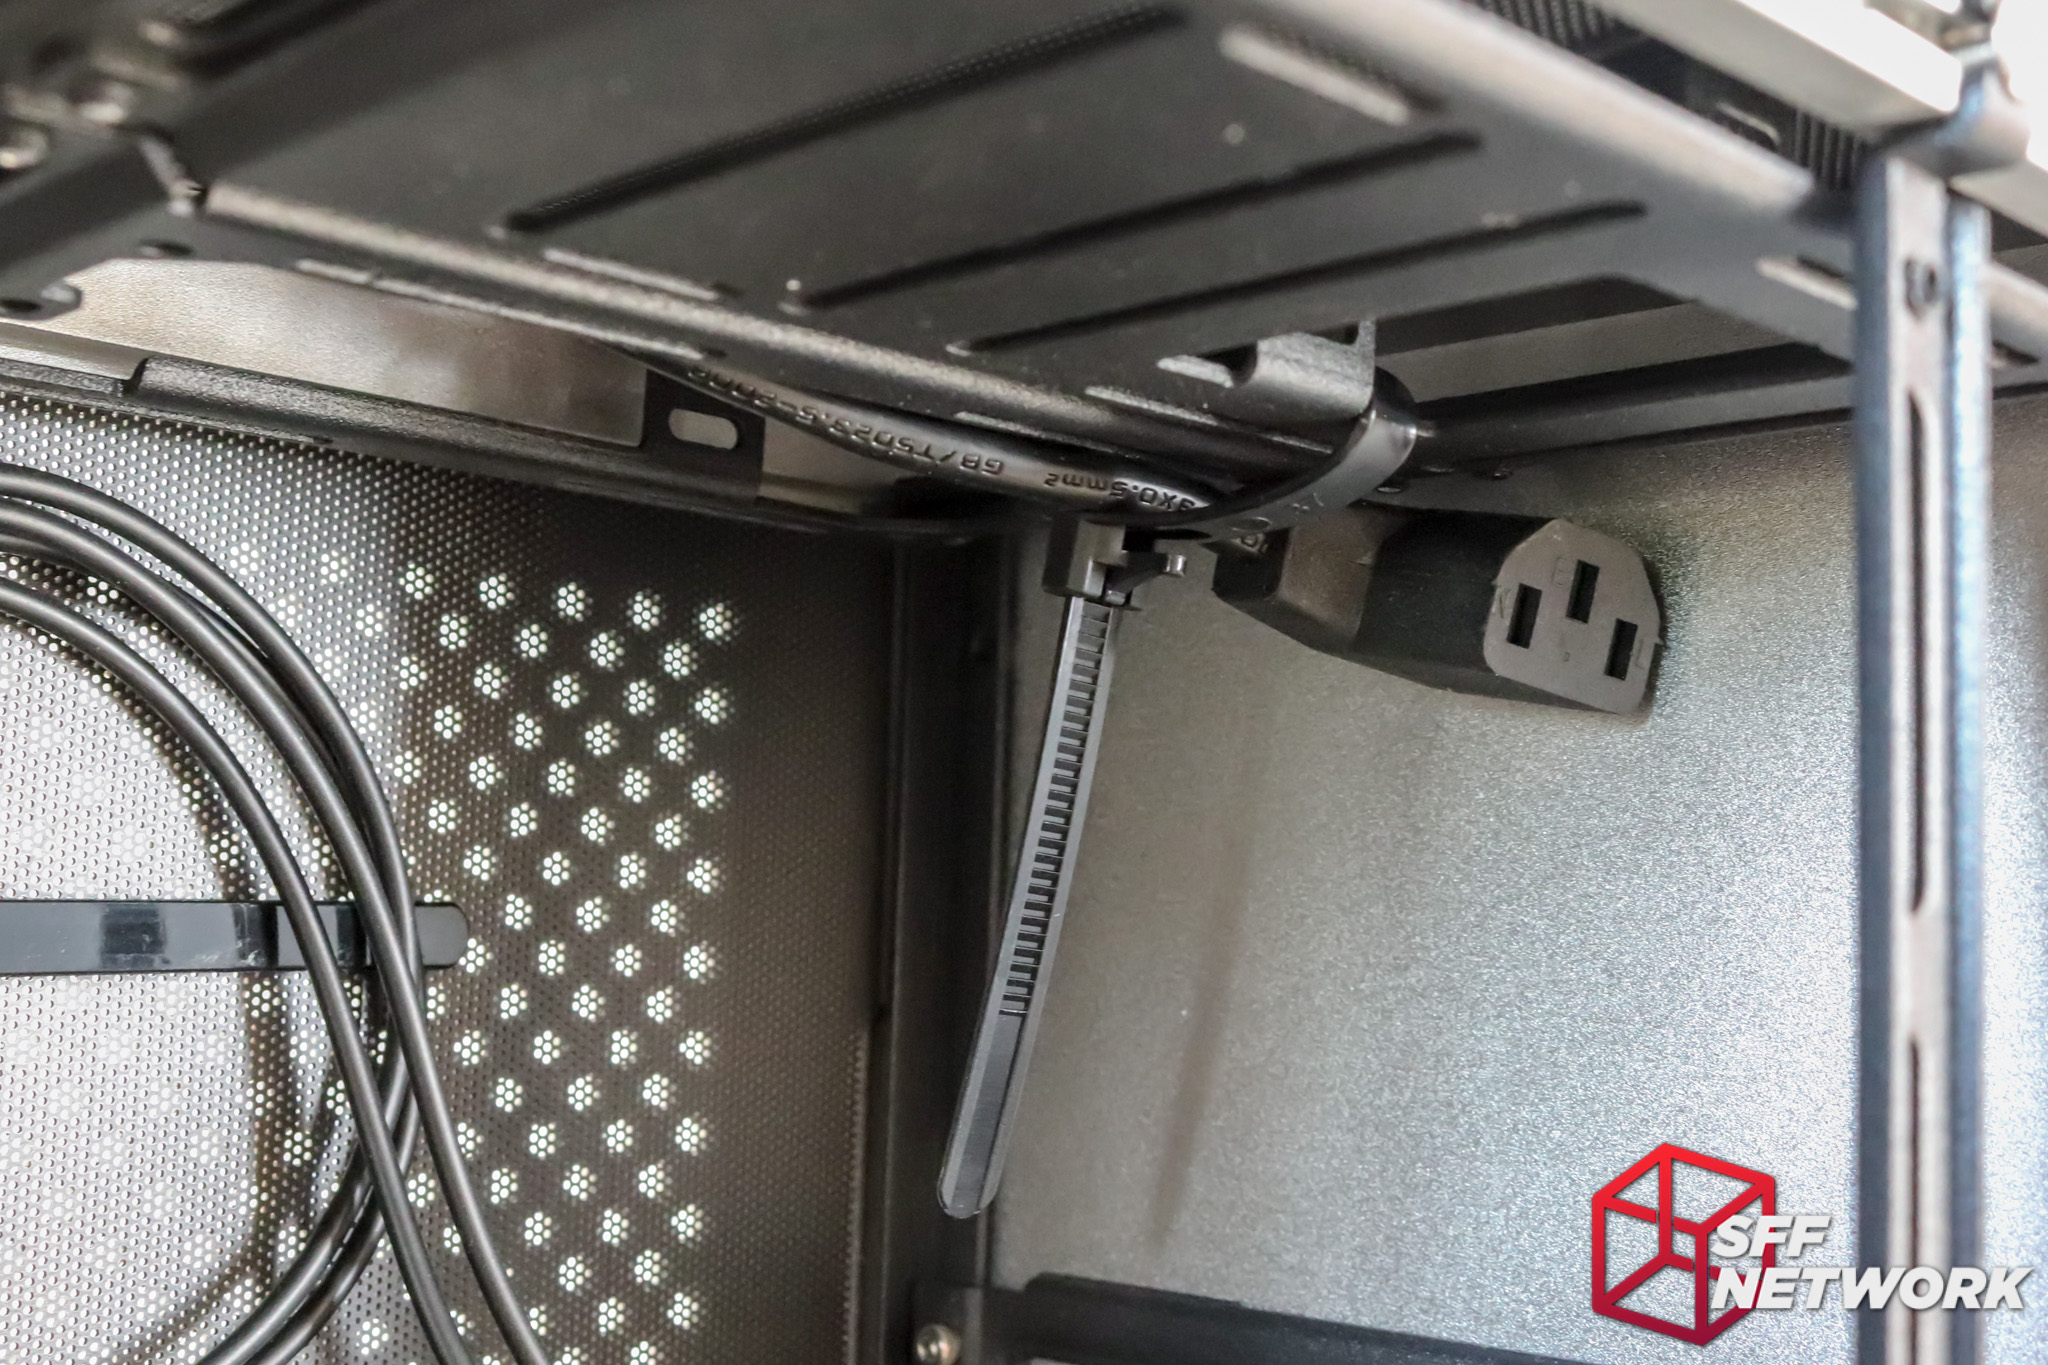
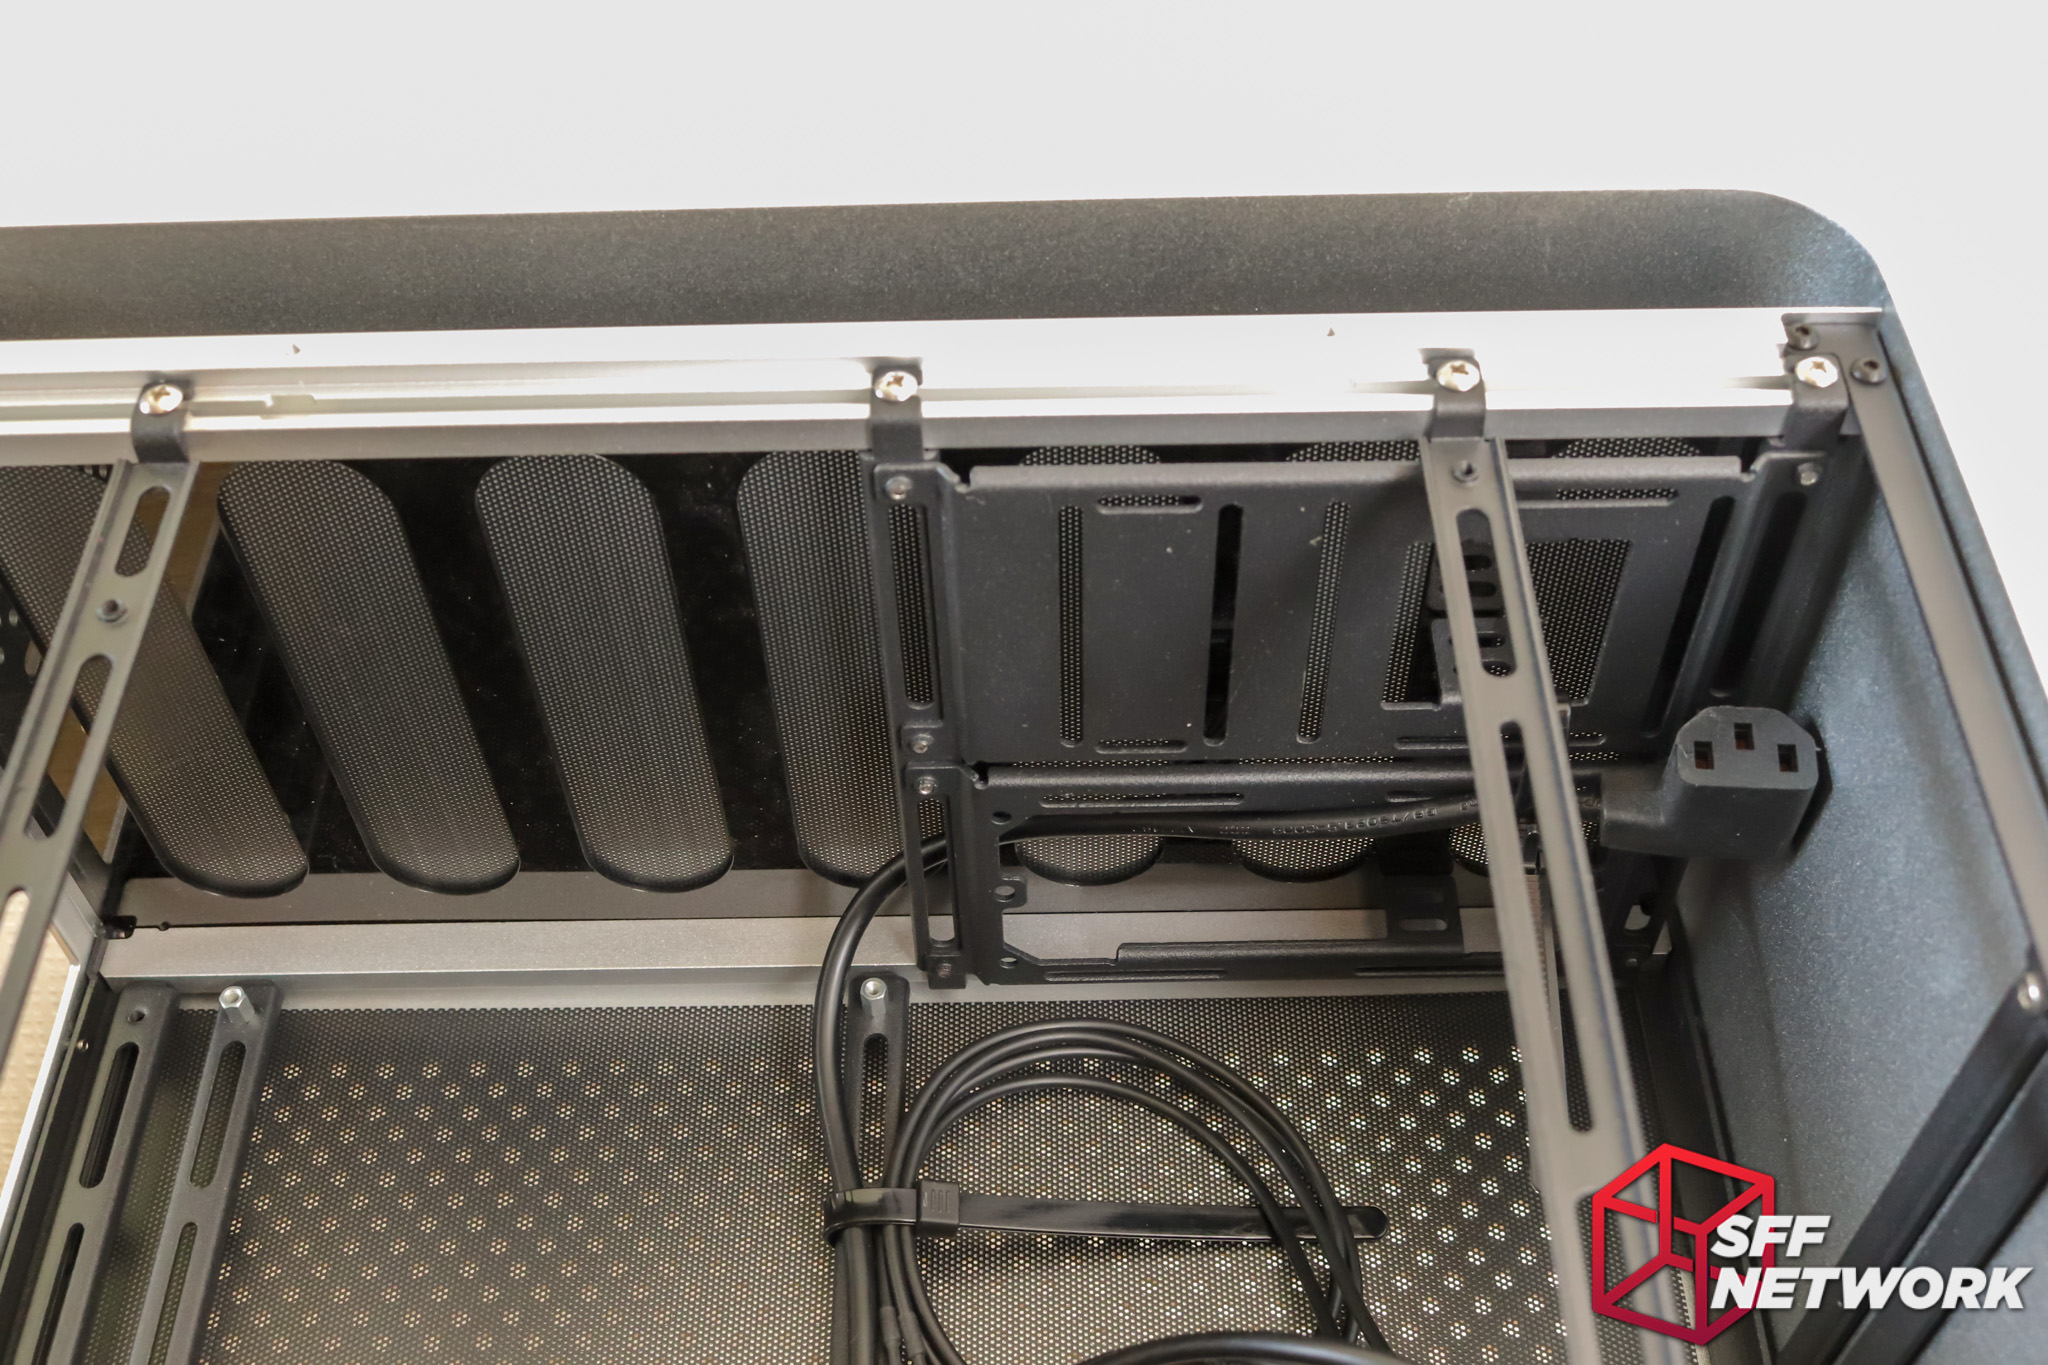
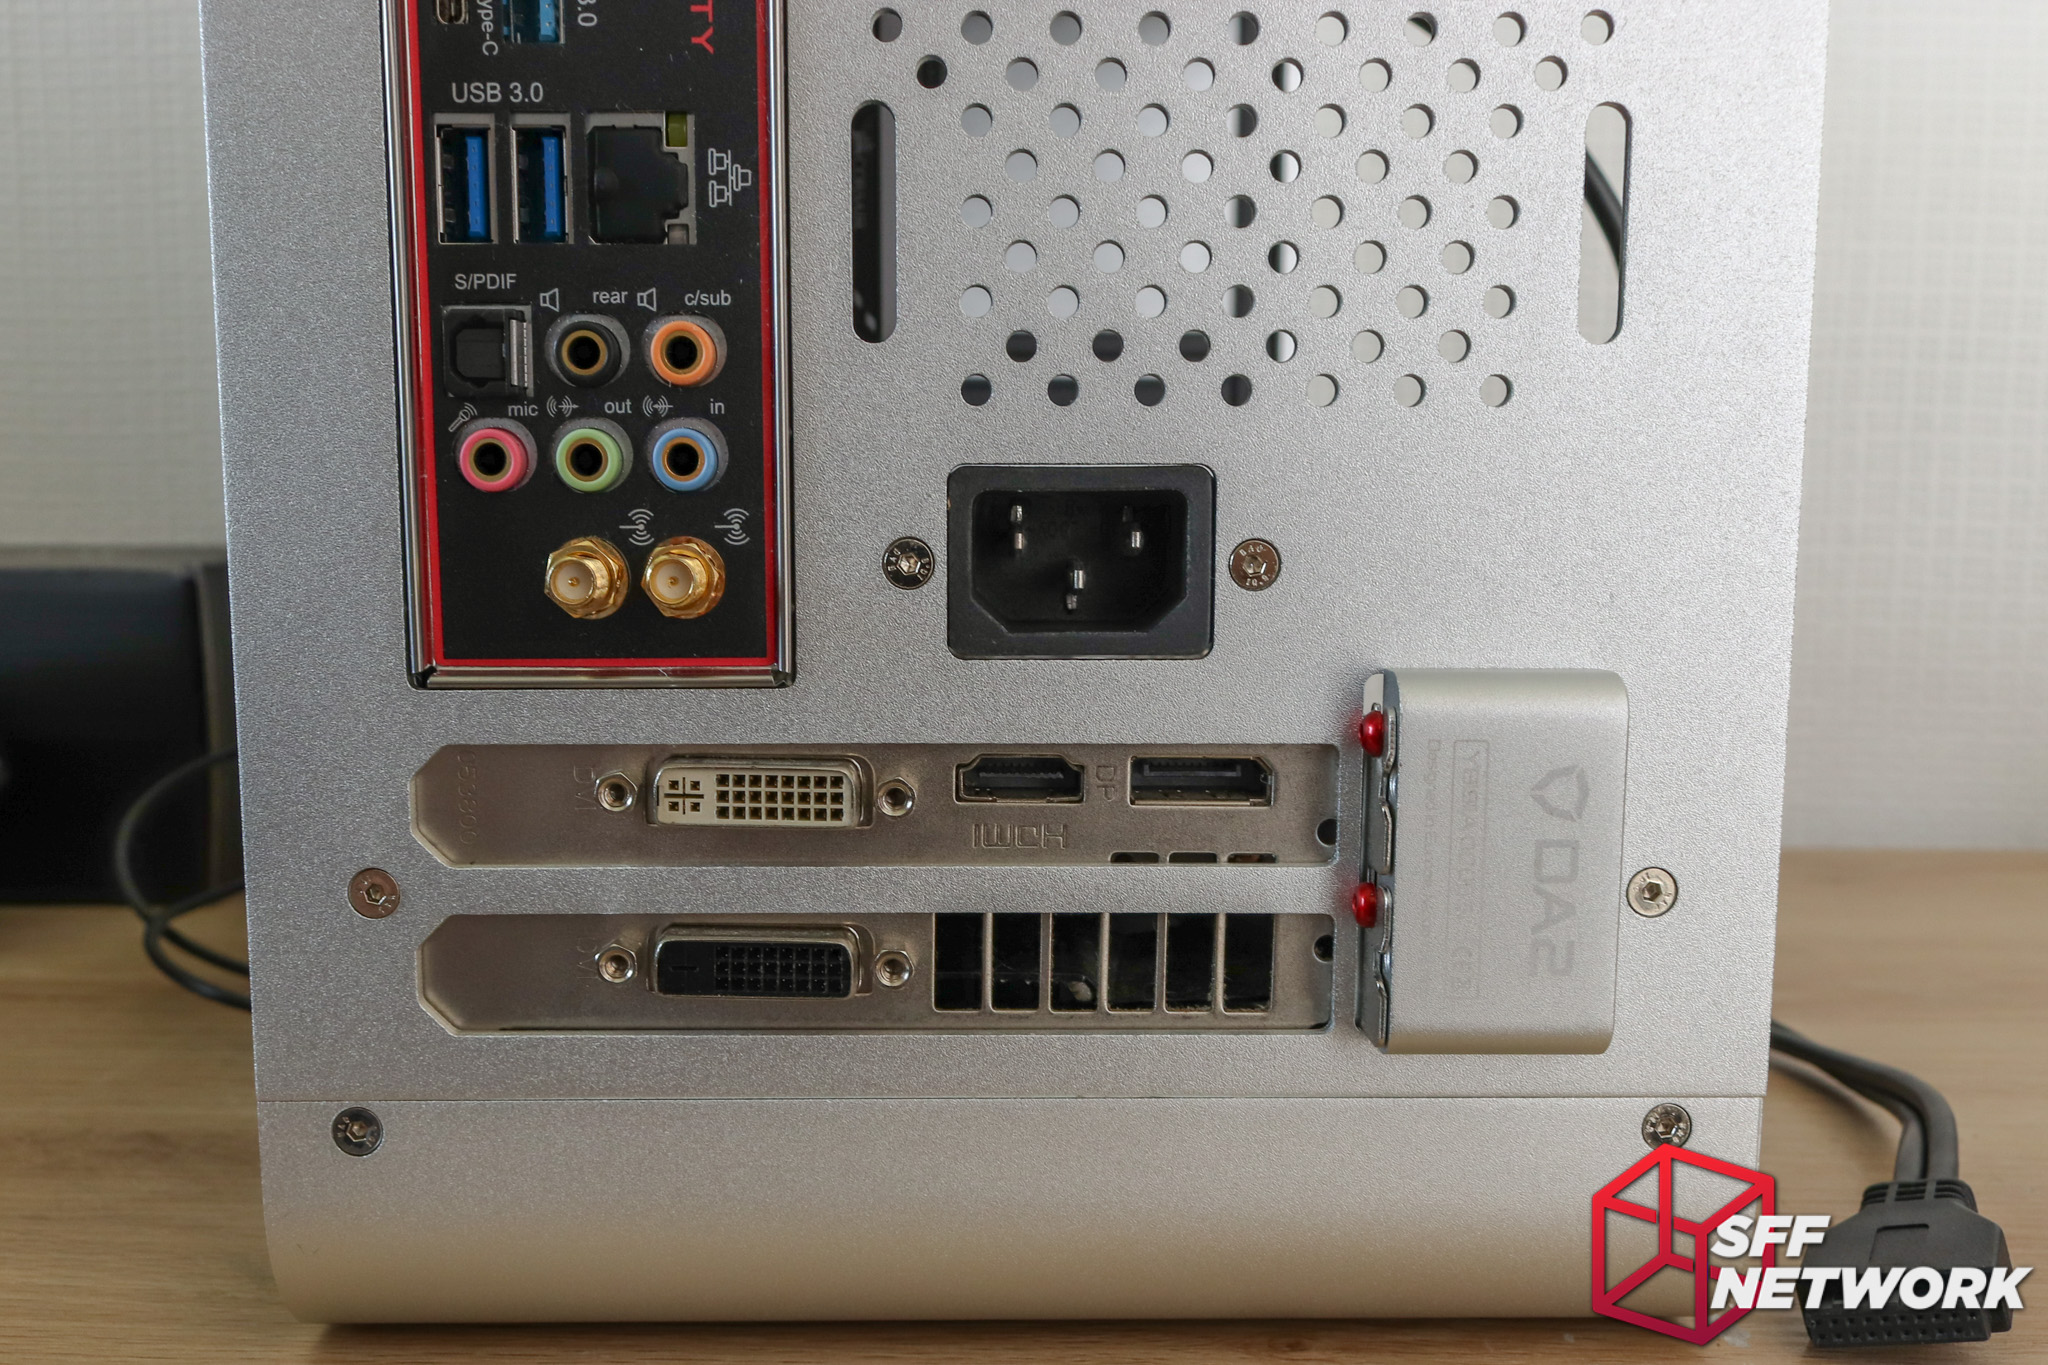
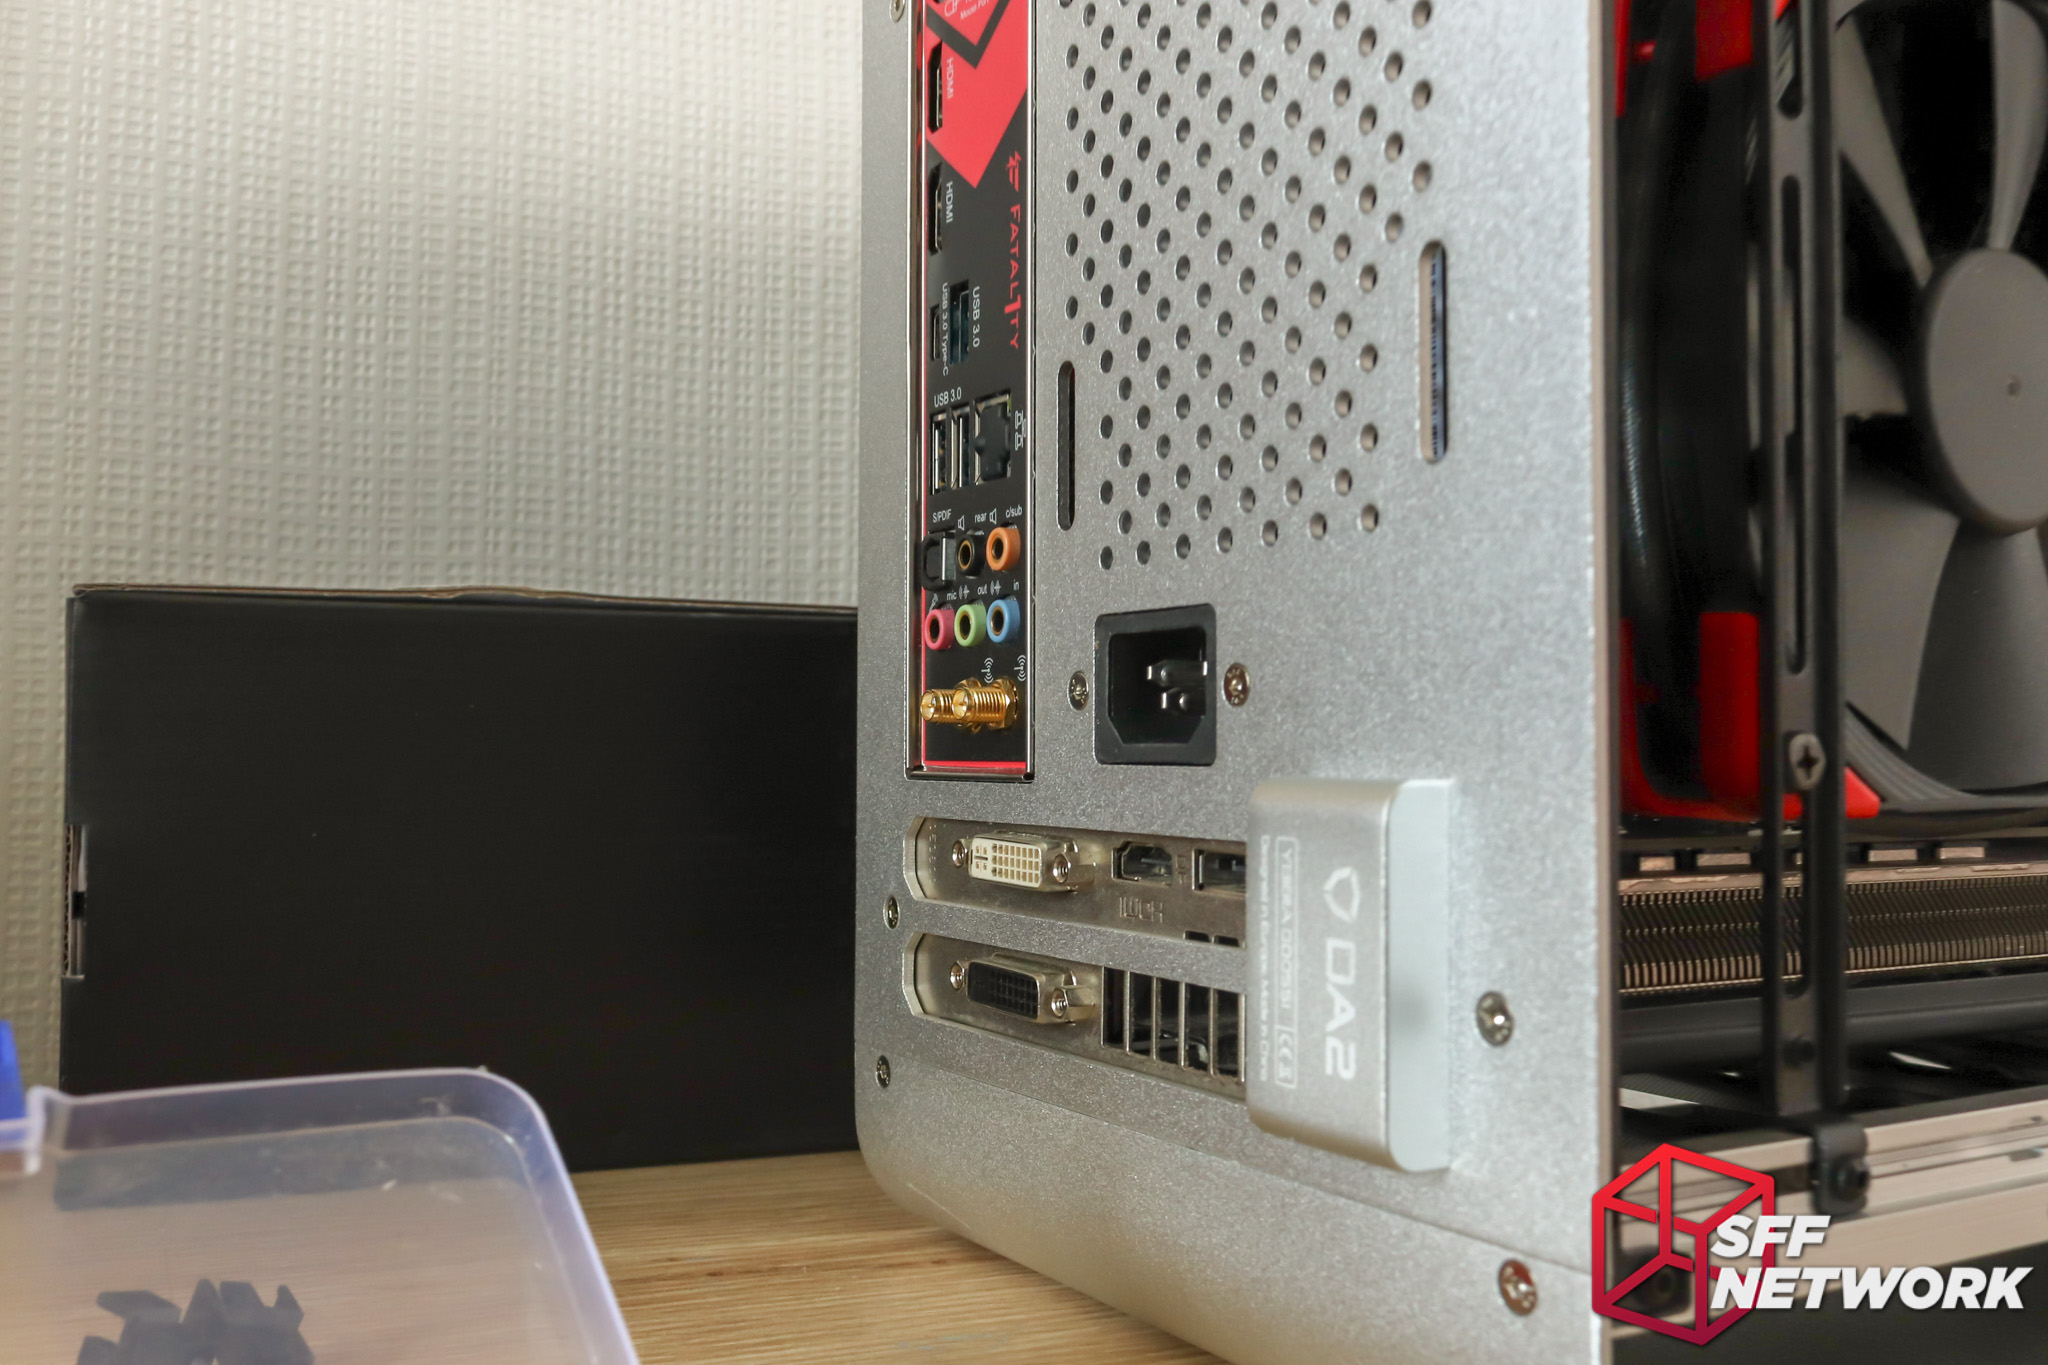
To the rear – support for a 92mm fan is present, as well as a dual slot expansion card. As the power supply is mounted to the front, an IEC C14 power plug is nestled between the cooling fan and the expansion card.
Alas, this leads to my first criticism – the position of the power inlet leads to a cable running across the top of the GPU and on up to the power supply. I’d have liked to have seen the fan mount moved lower and the power input moved to the top, making for cleaner cable management.
To the front quarter view. Tempered glass? RGB? Aggressive styling? Nope.
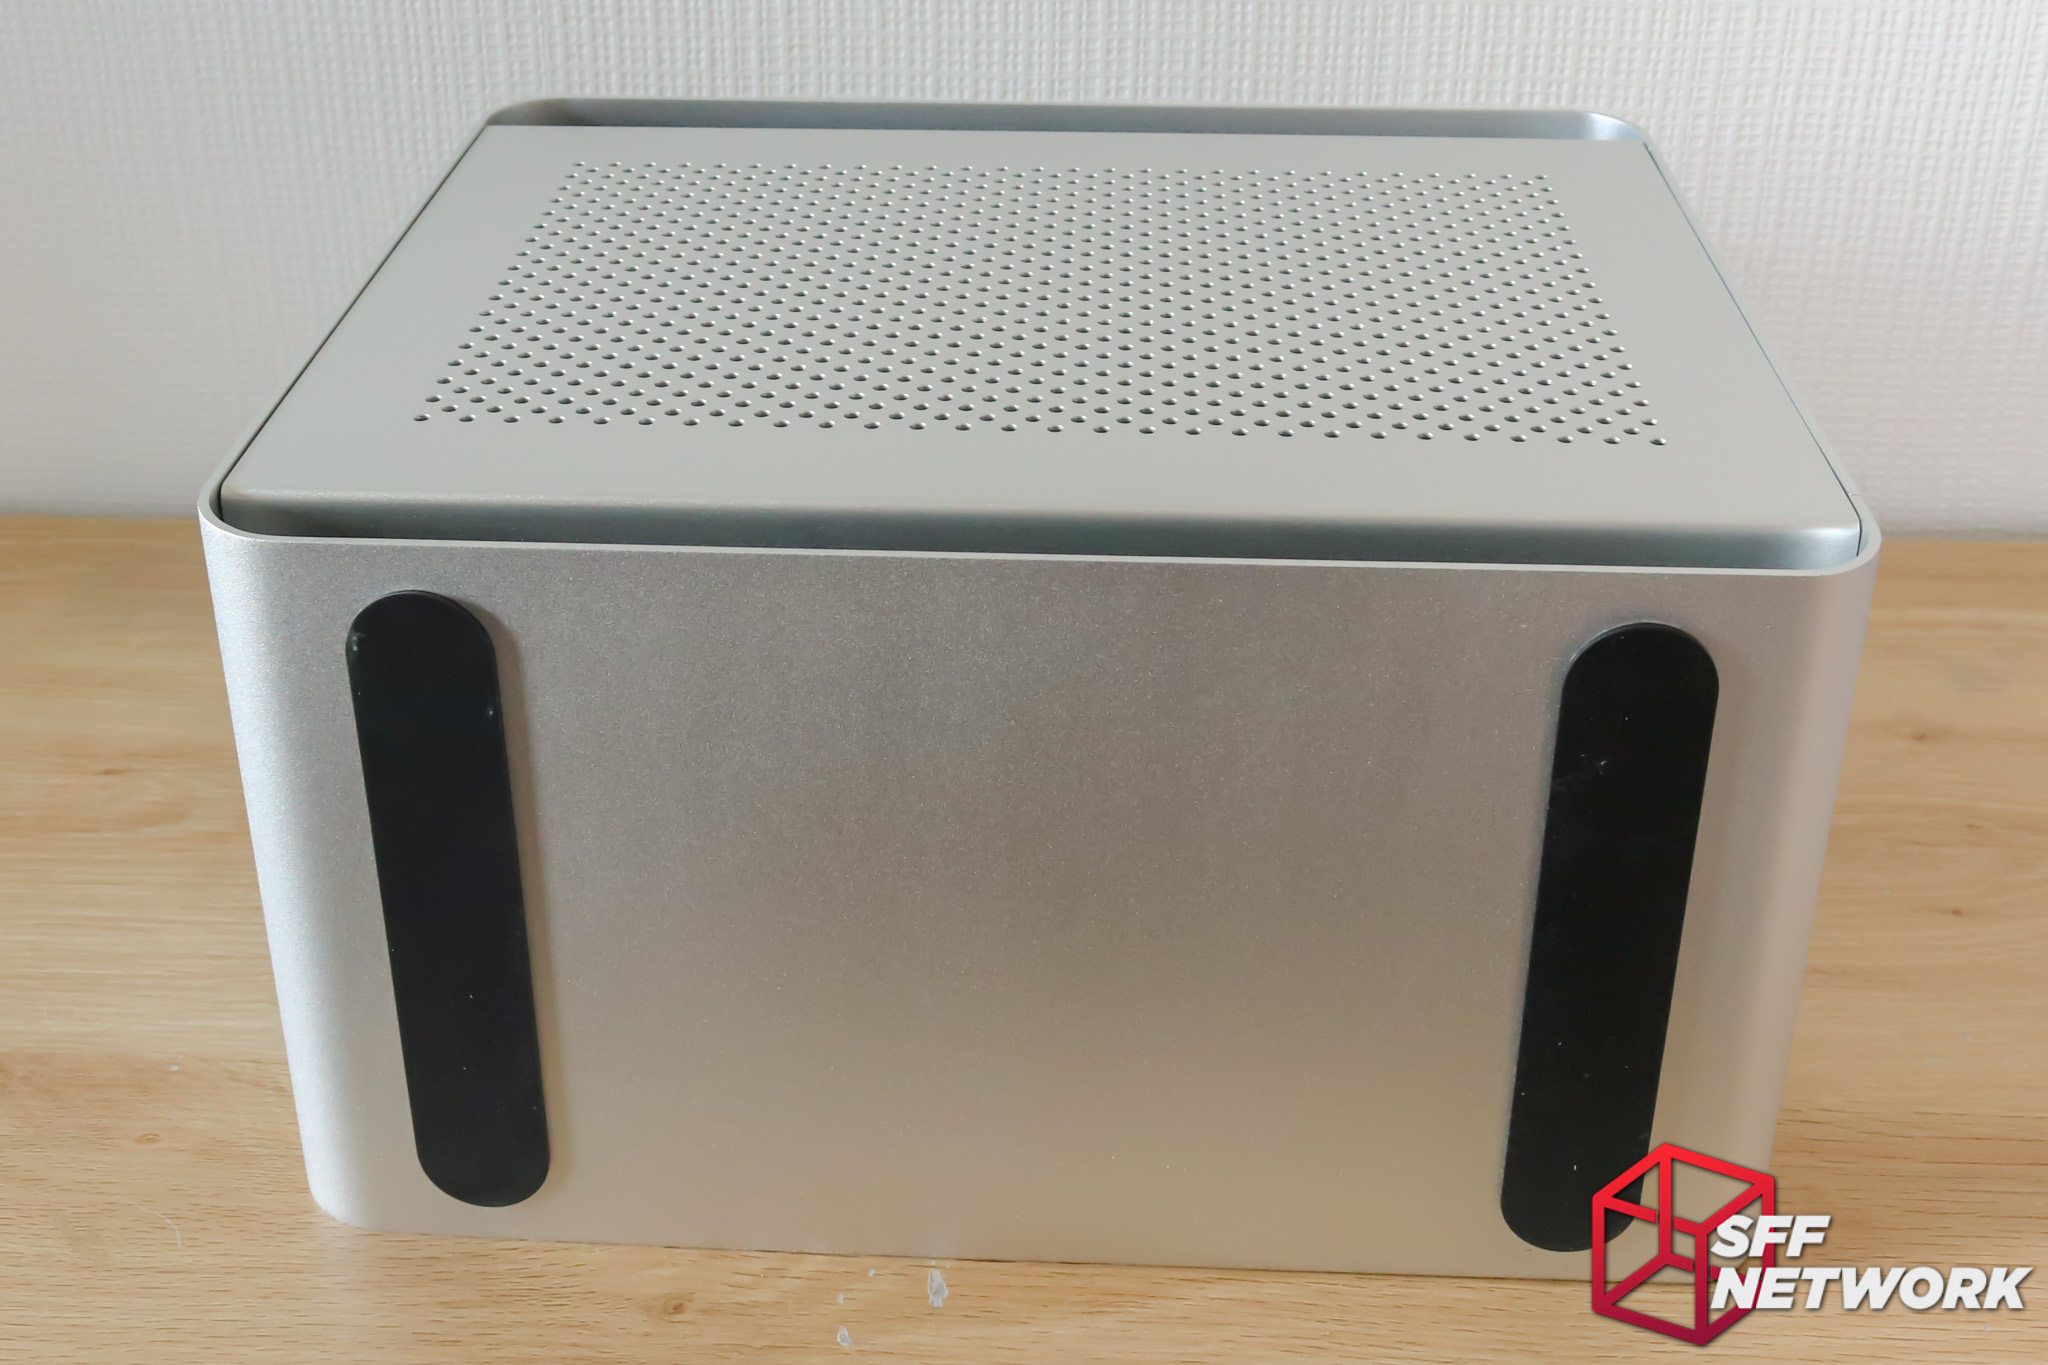
Thin rubber feet aid in reducing the vibrations transmitted from the system to your desk. No bottom intake here, so thick feet would be overkill. A word of advice here though – these feet just love to pick up dust from your desk.

Dual slot expansion cards as a maximum – although, let’s be honest, triple slot cards are just a waste of space. The retention mechanism is a solid hunk of aluminium.
This chunk of alu hosts the serial number of the case, as well as the model number. This is all the branding this case carries.
A solid piece of aluminium is much, much more forgiving to end users than simple folded metal to retain the expansion card. Much more resilient to thread stripping – there’s more than a mm or two to retain any screws.
The rear panel can be inverted (and the internal brackets, the same) for an inverted system layout. Nifty.
The side panels are retained with rubber grommets – dampening vibrations. I would have liked to have seen a couple spare of these included – at least one demounted during system installation and I almost lost it.

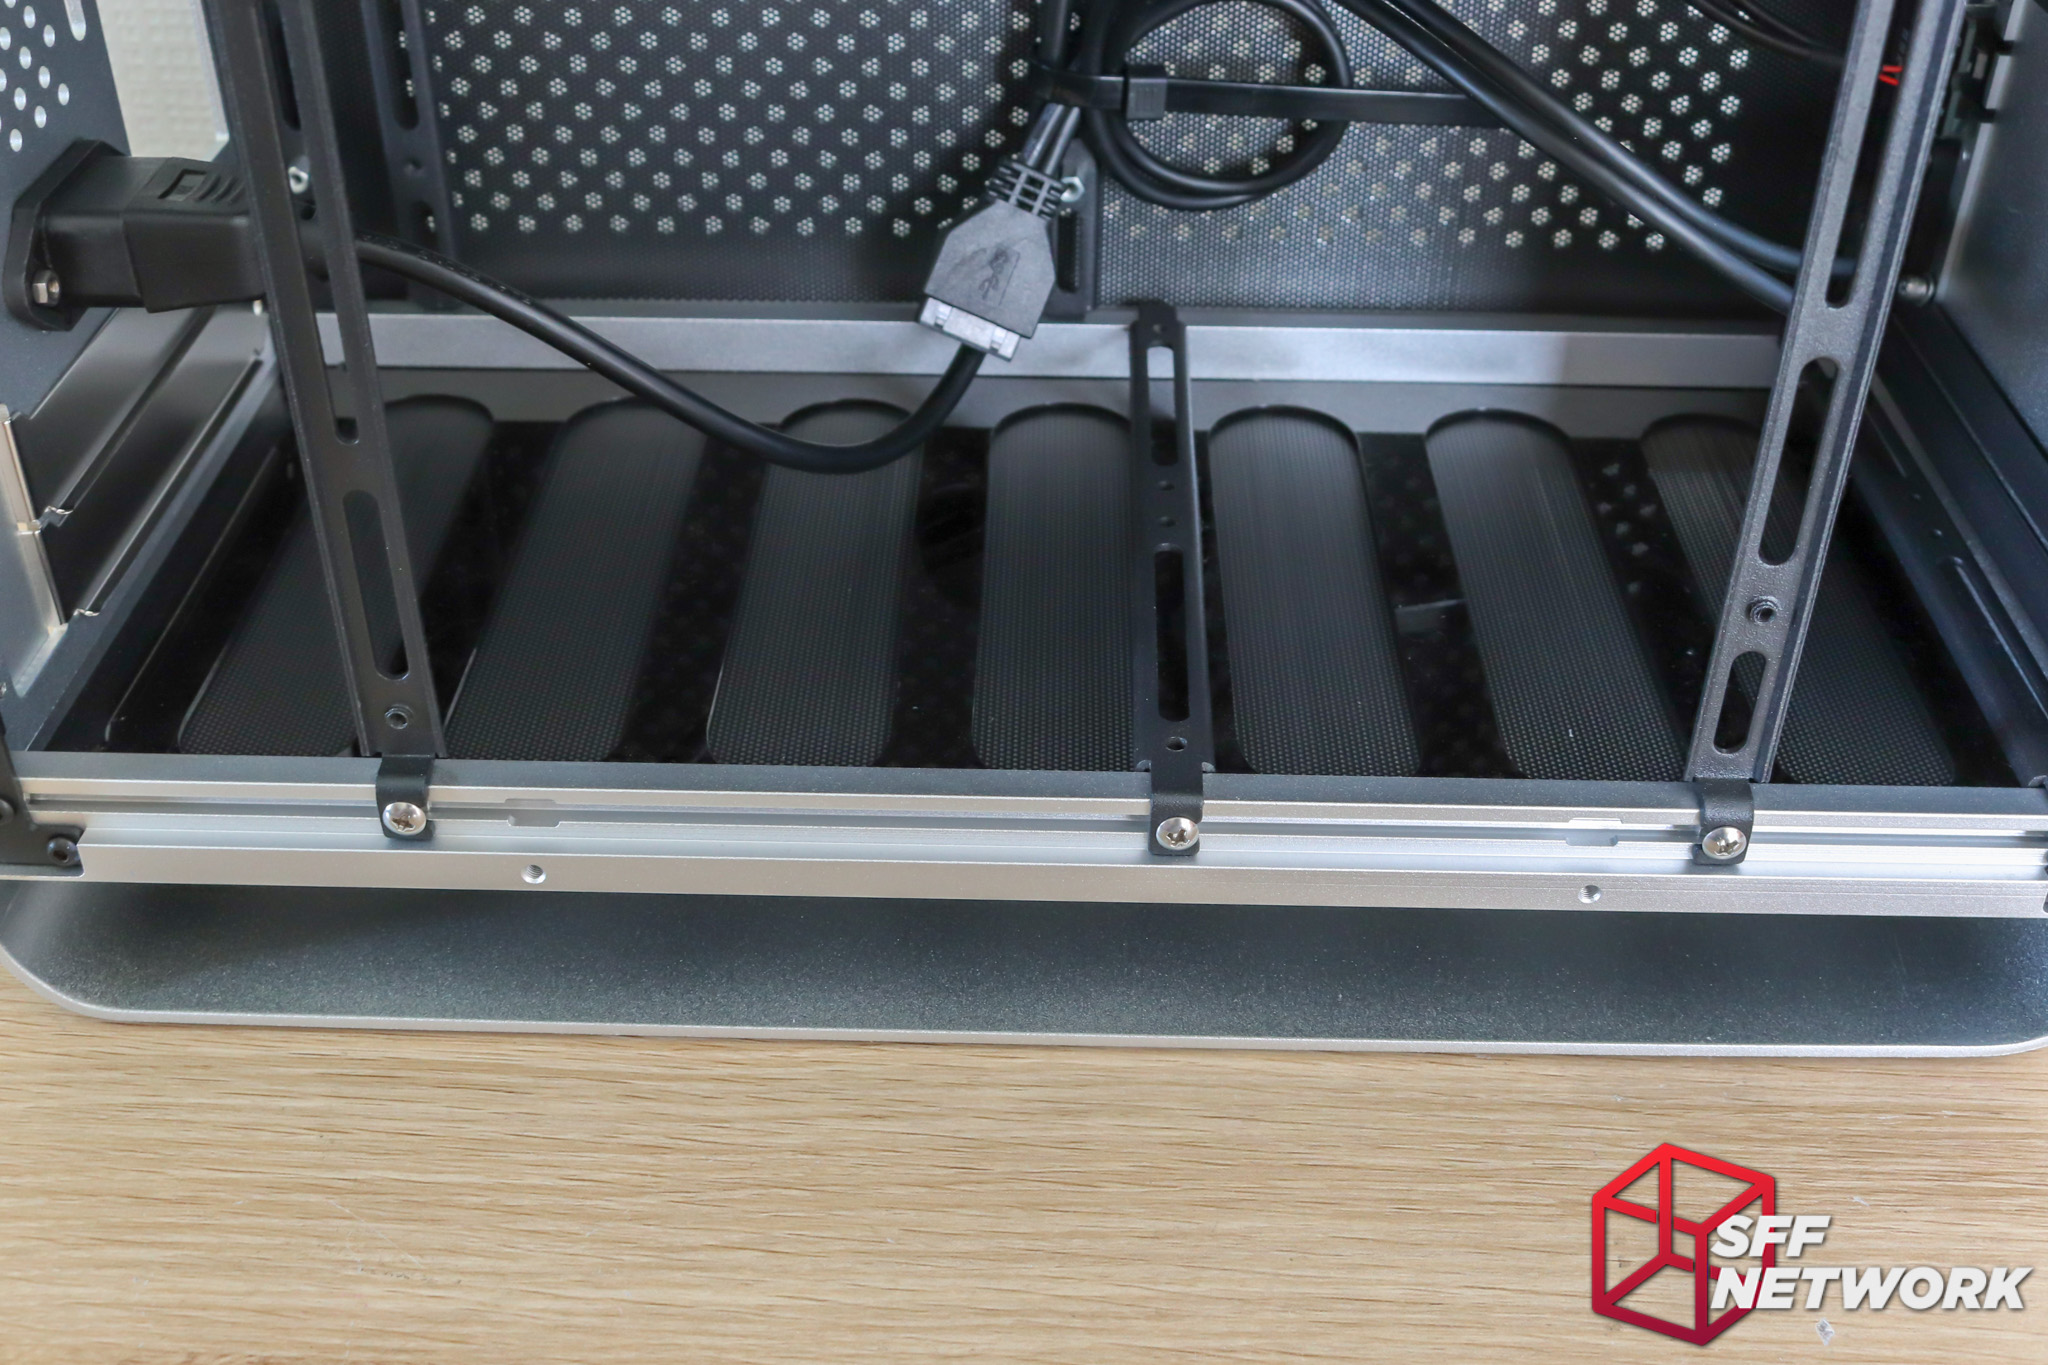
Internals! First up, the top and bottom filtered, ventilated panels are made more clear in this shot. They mount in the rails that form the main mounting mechanism for the DA2. These panels are made from plastic, and they deform if you cable manage against them.
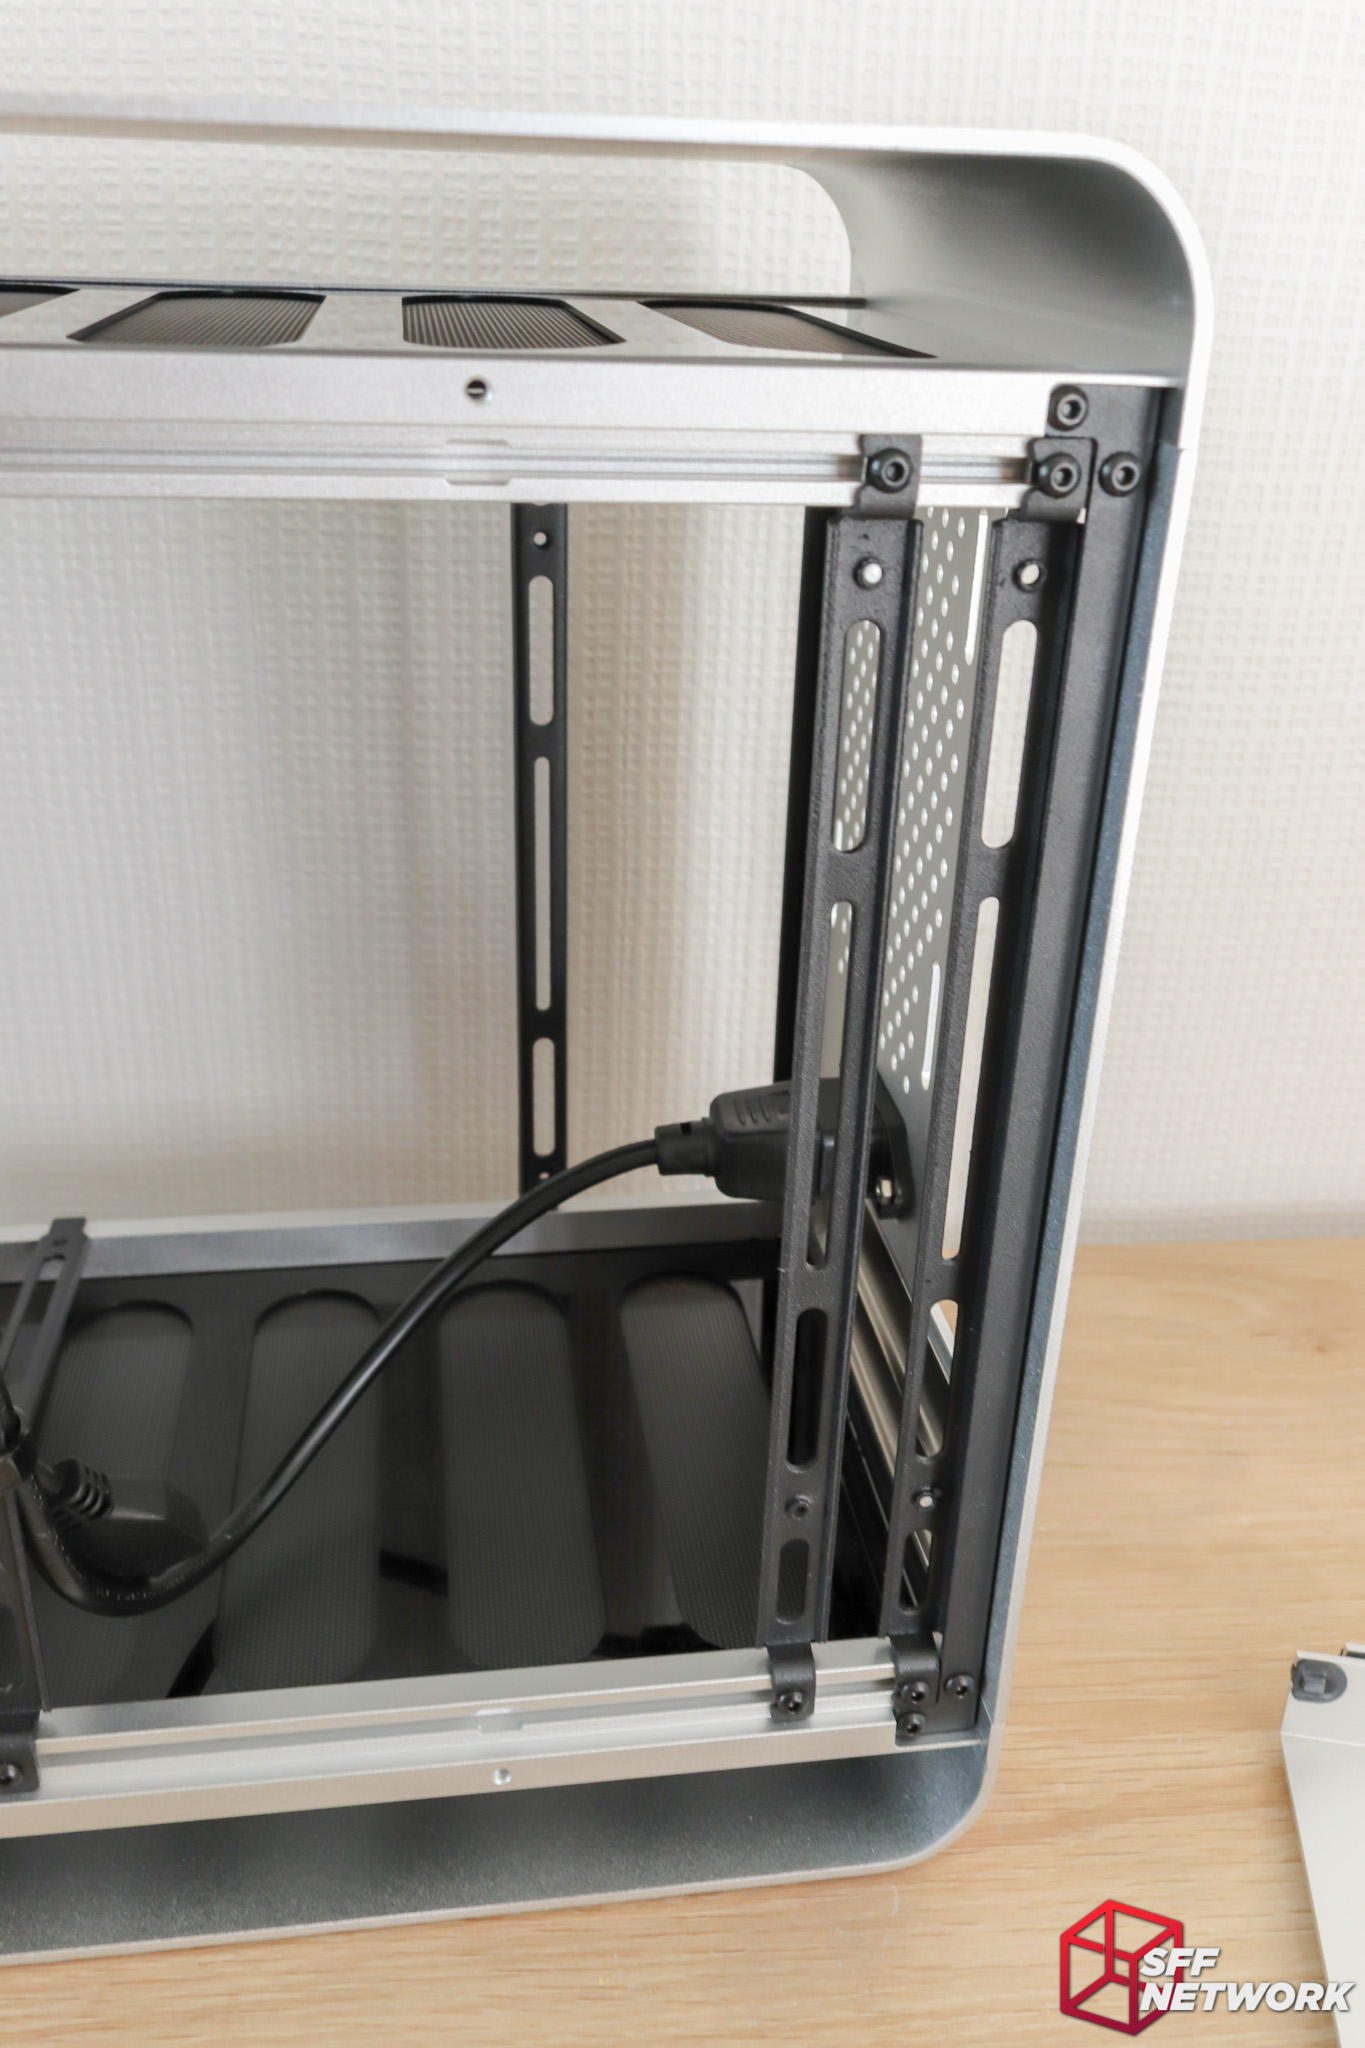
In front, a pair of brackets – the forte of this chassis. They can be moved to any position front to back, and can be removed entirely if you desire. Also visible the two brackets at the bottom – similar, but shorter than the aforementioned side brackets.
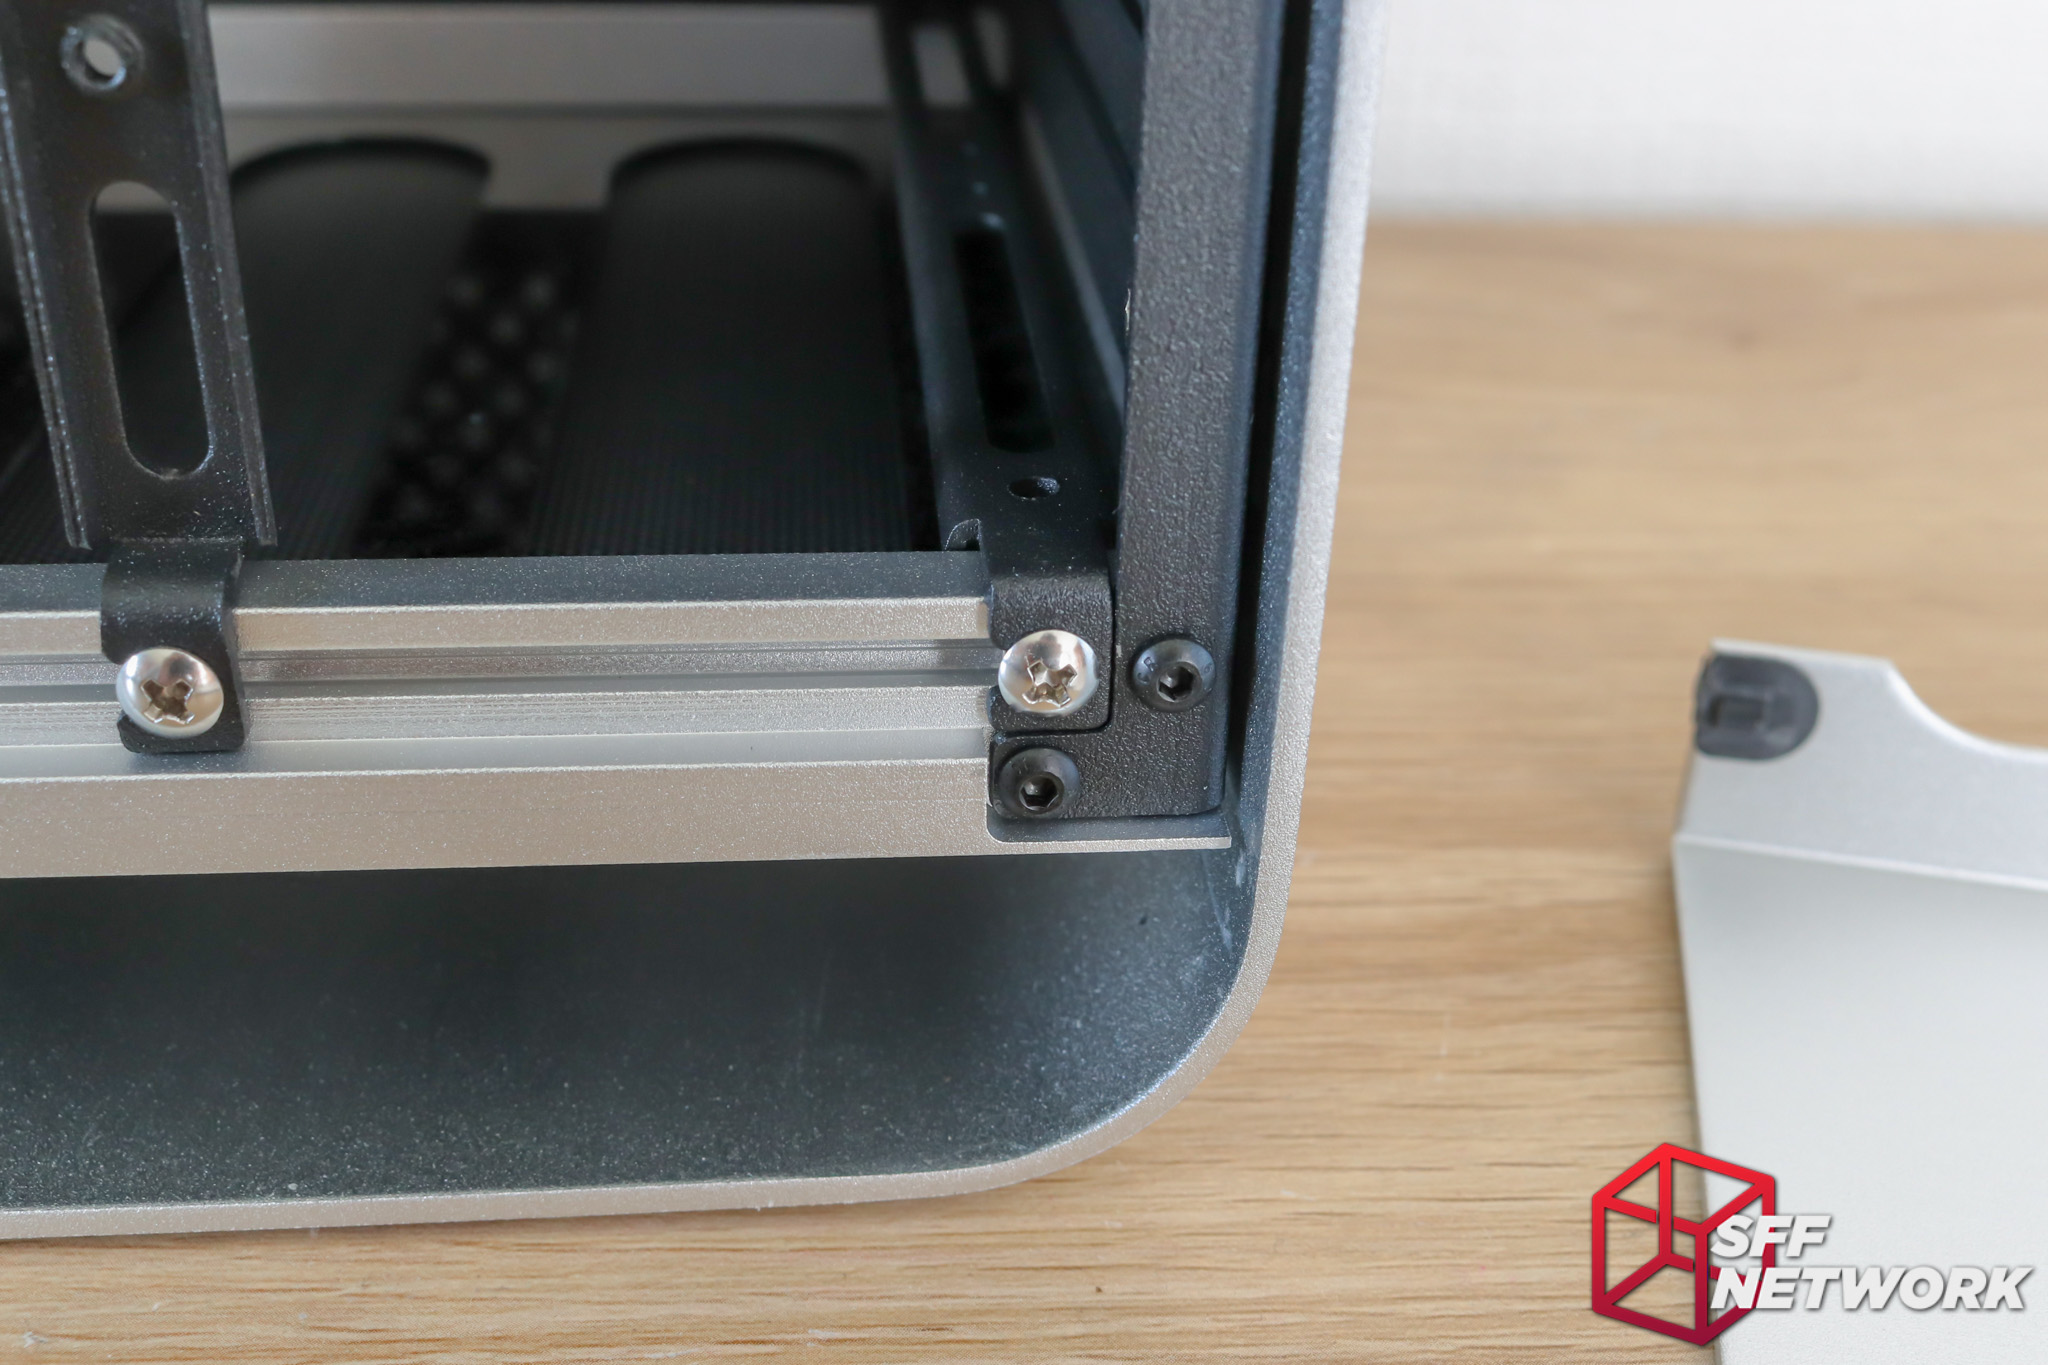
The chassis rails mount to the aluminium shell with no external fasteners – sleek!
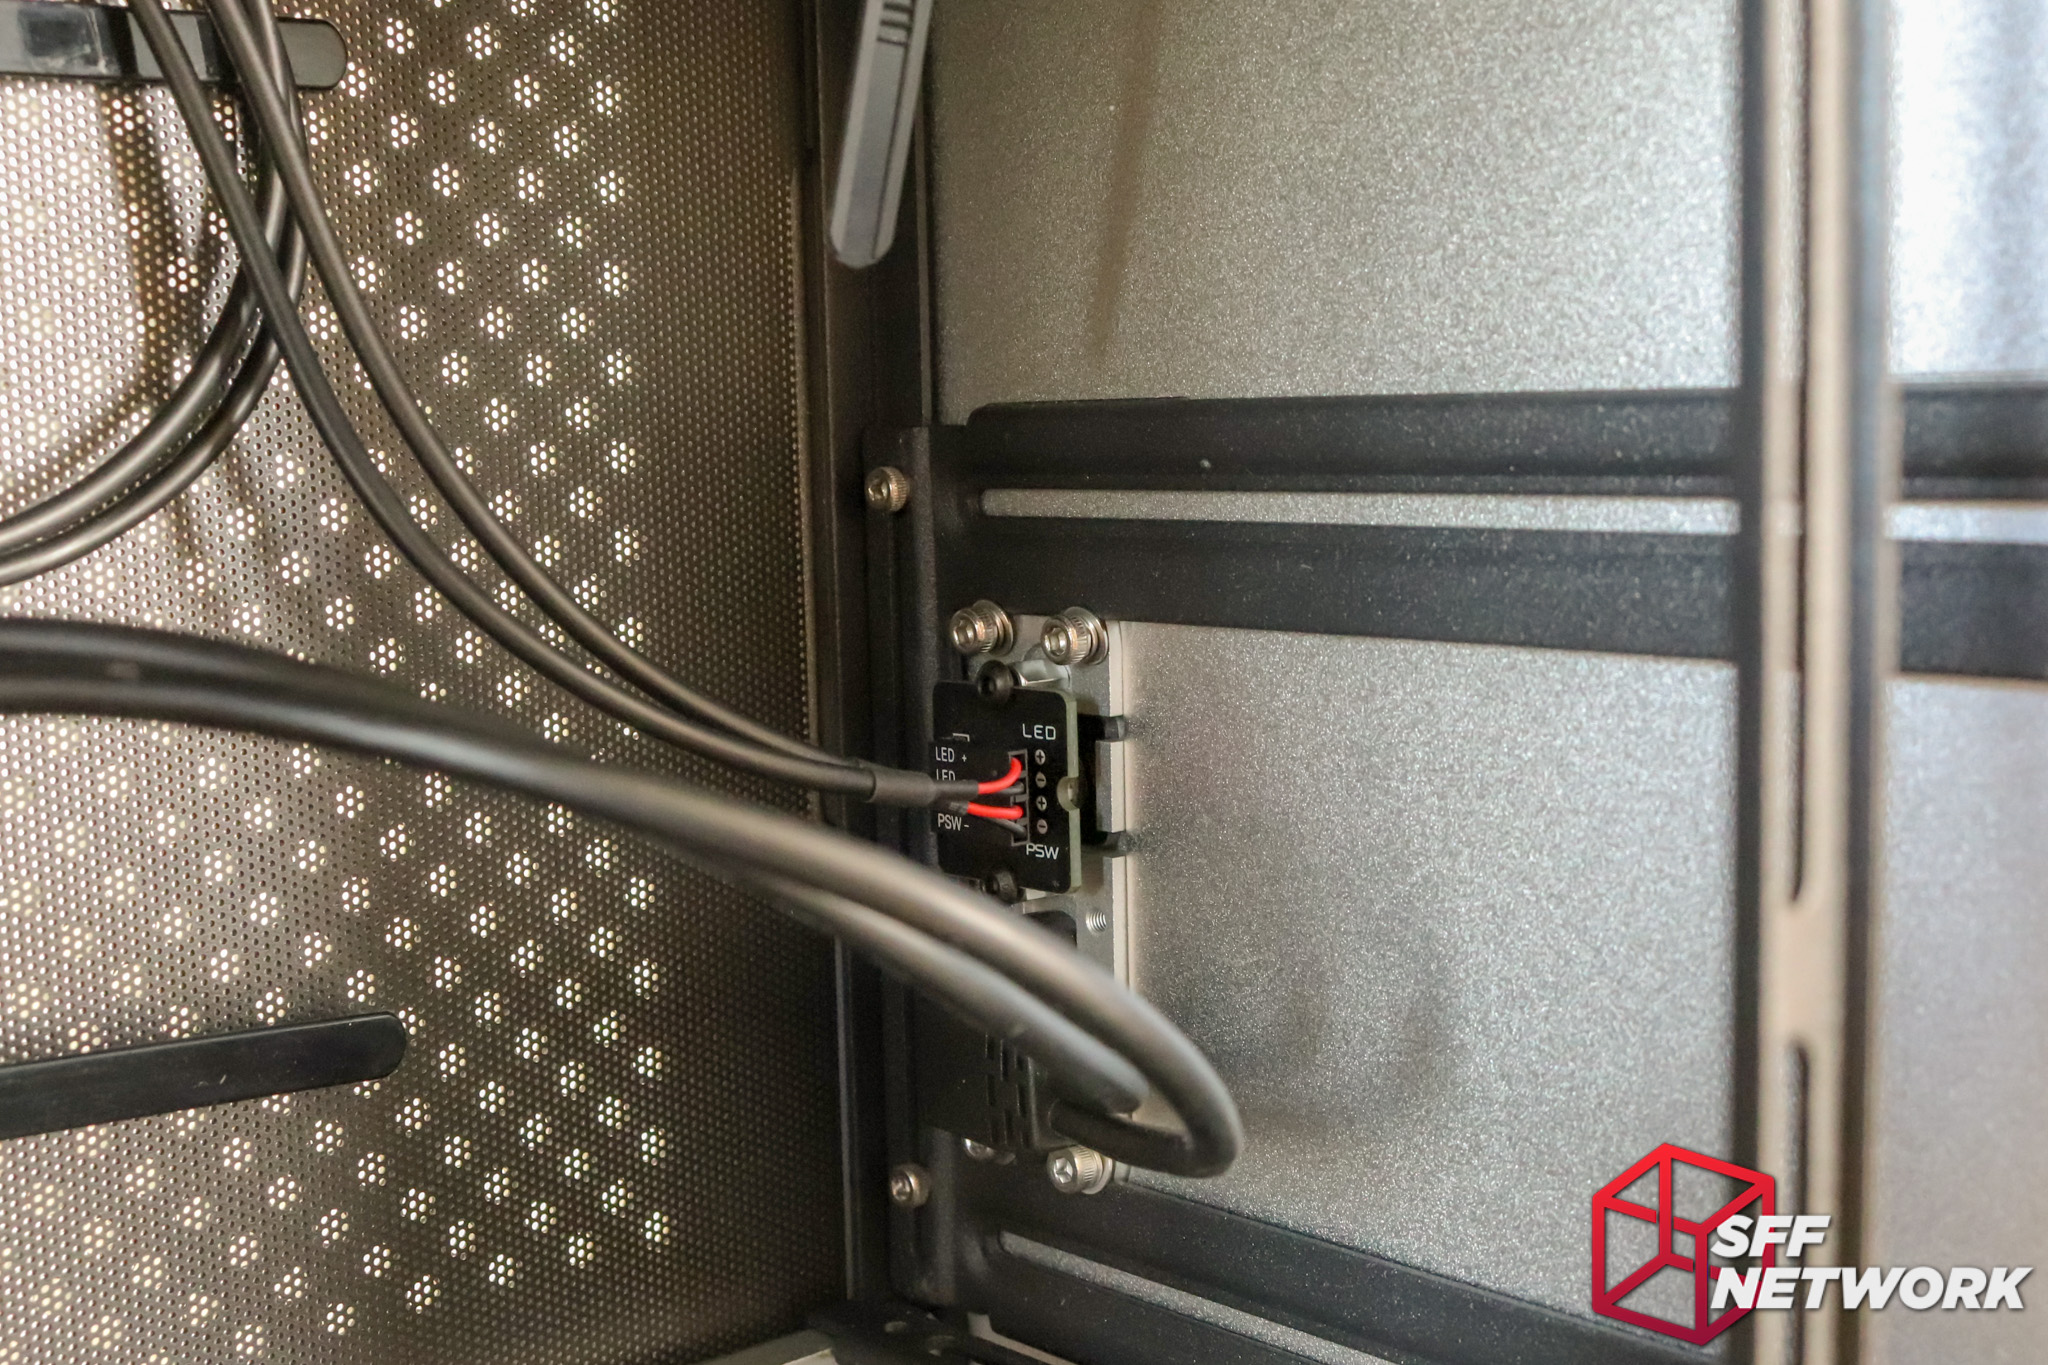
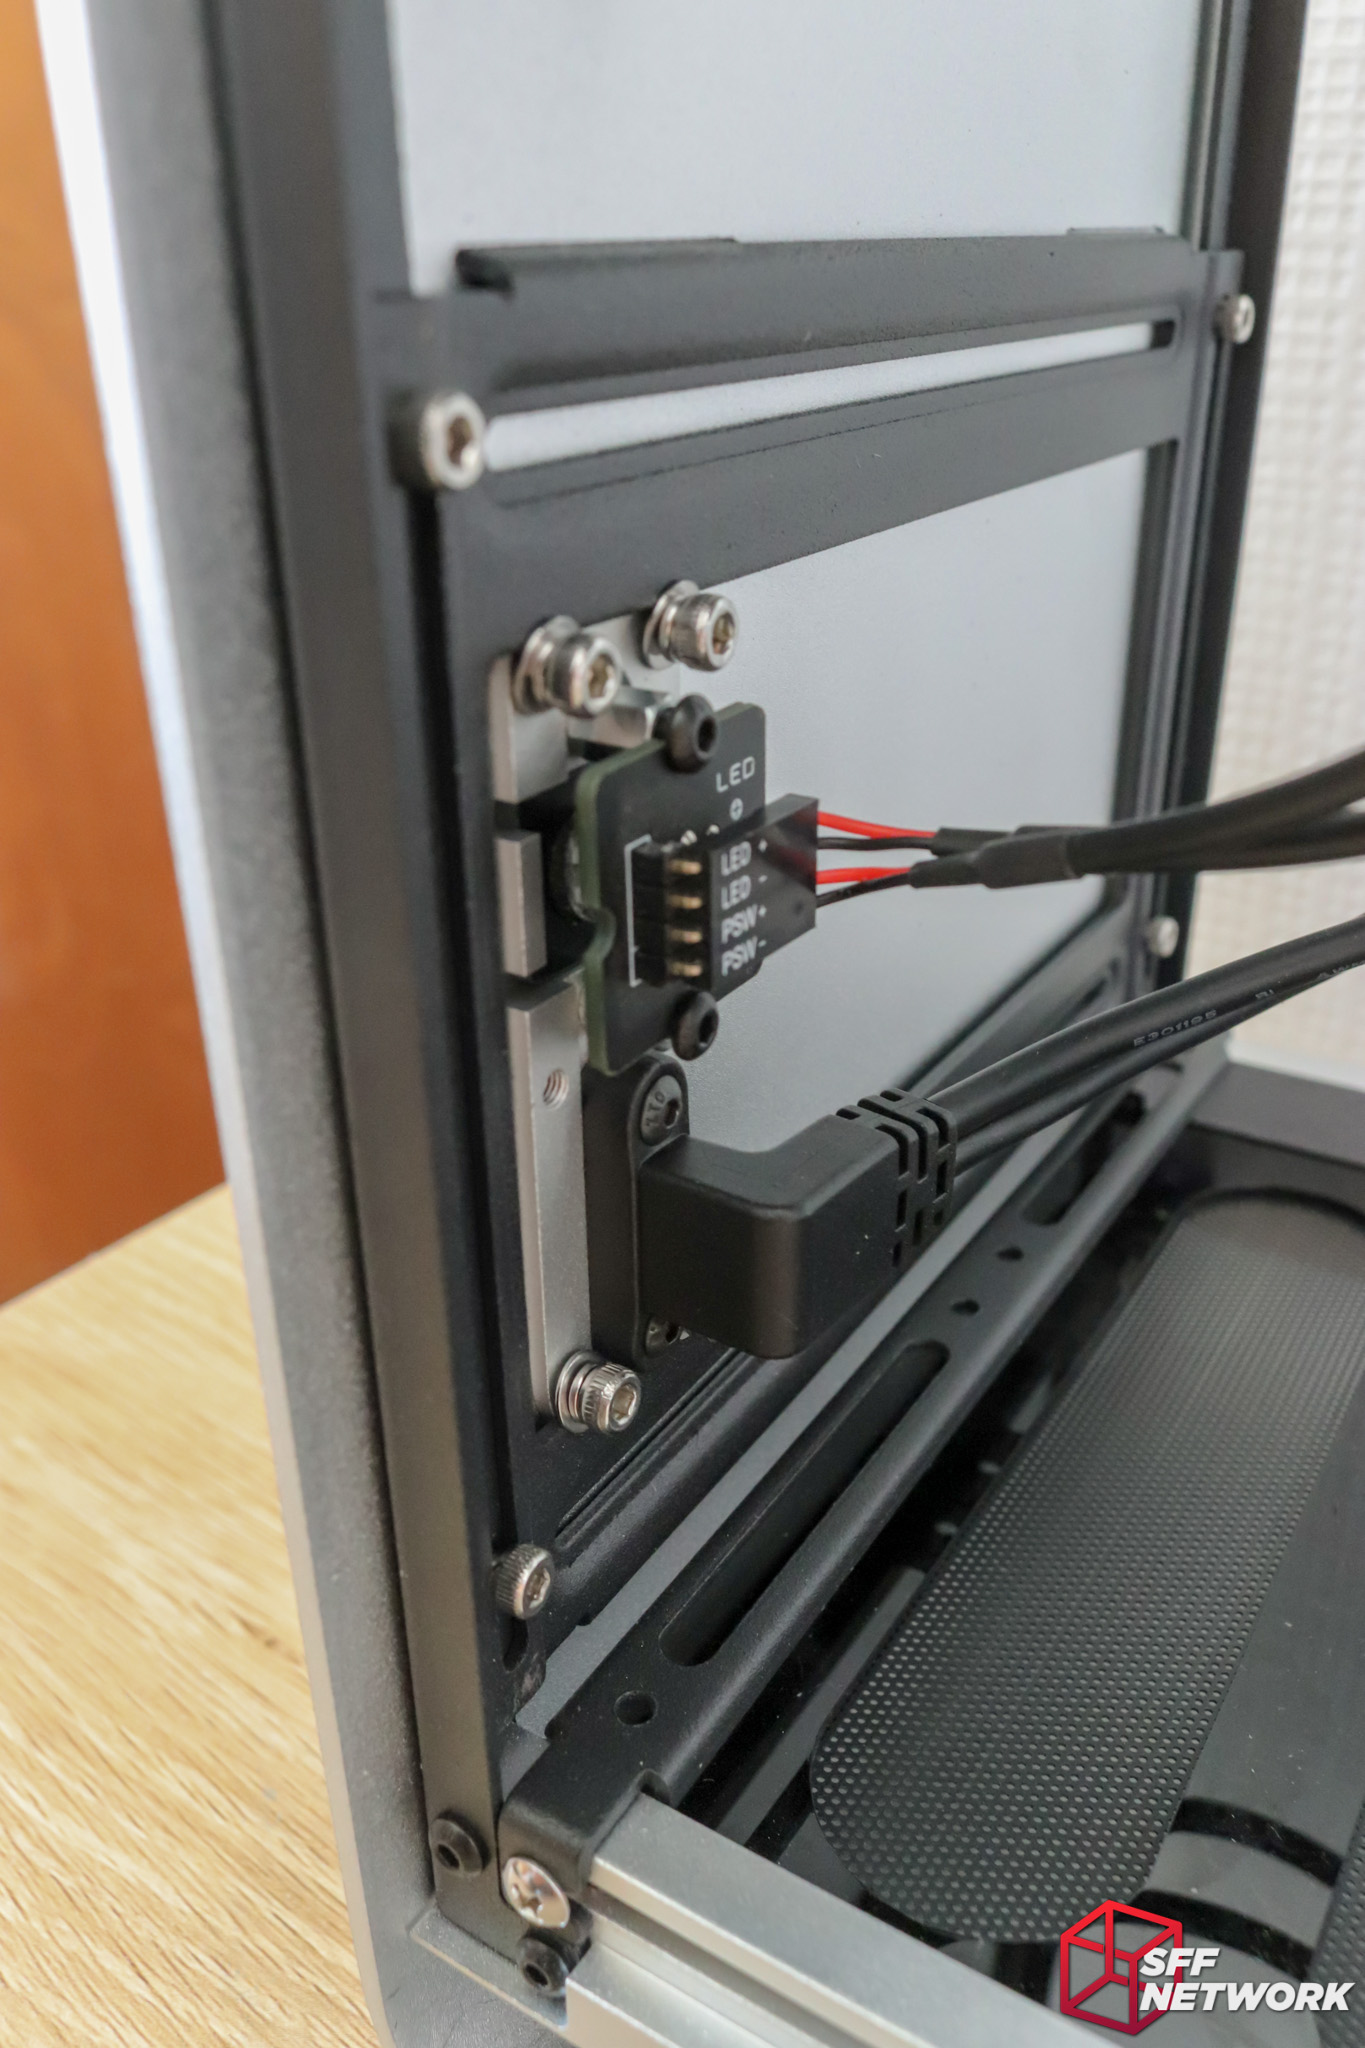
The front panel IO consists of a USB Type-C and a glass(!) power button with integrated white LED. Nothing more, nothing less. Interestingly, these form part of the mounting mechanism for the exterior shell – no wasted engineering here.
To the top, the PSU and drive bracket. Because these are mounted on the rails, these can be located wherever suits – although I do think Streacom nailed it with the stock placement.
As an aside, included with the case are a trifecta of reusable cable ties. A nice addition.
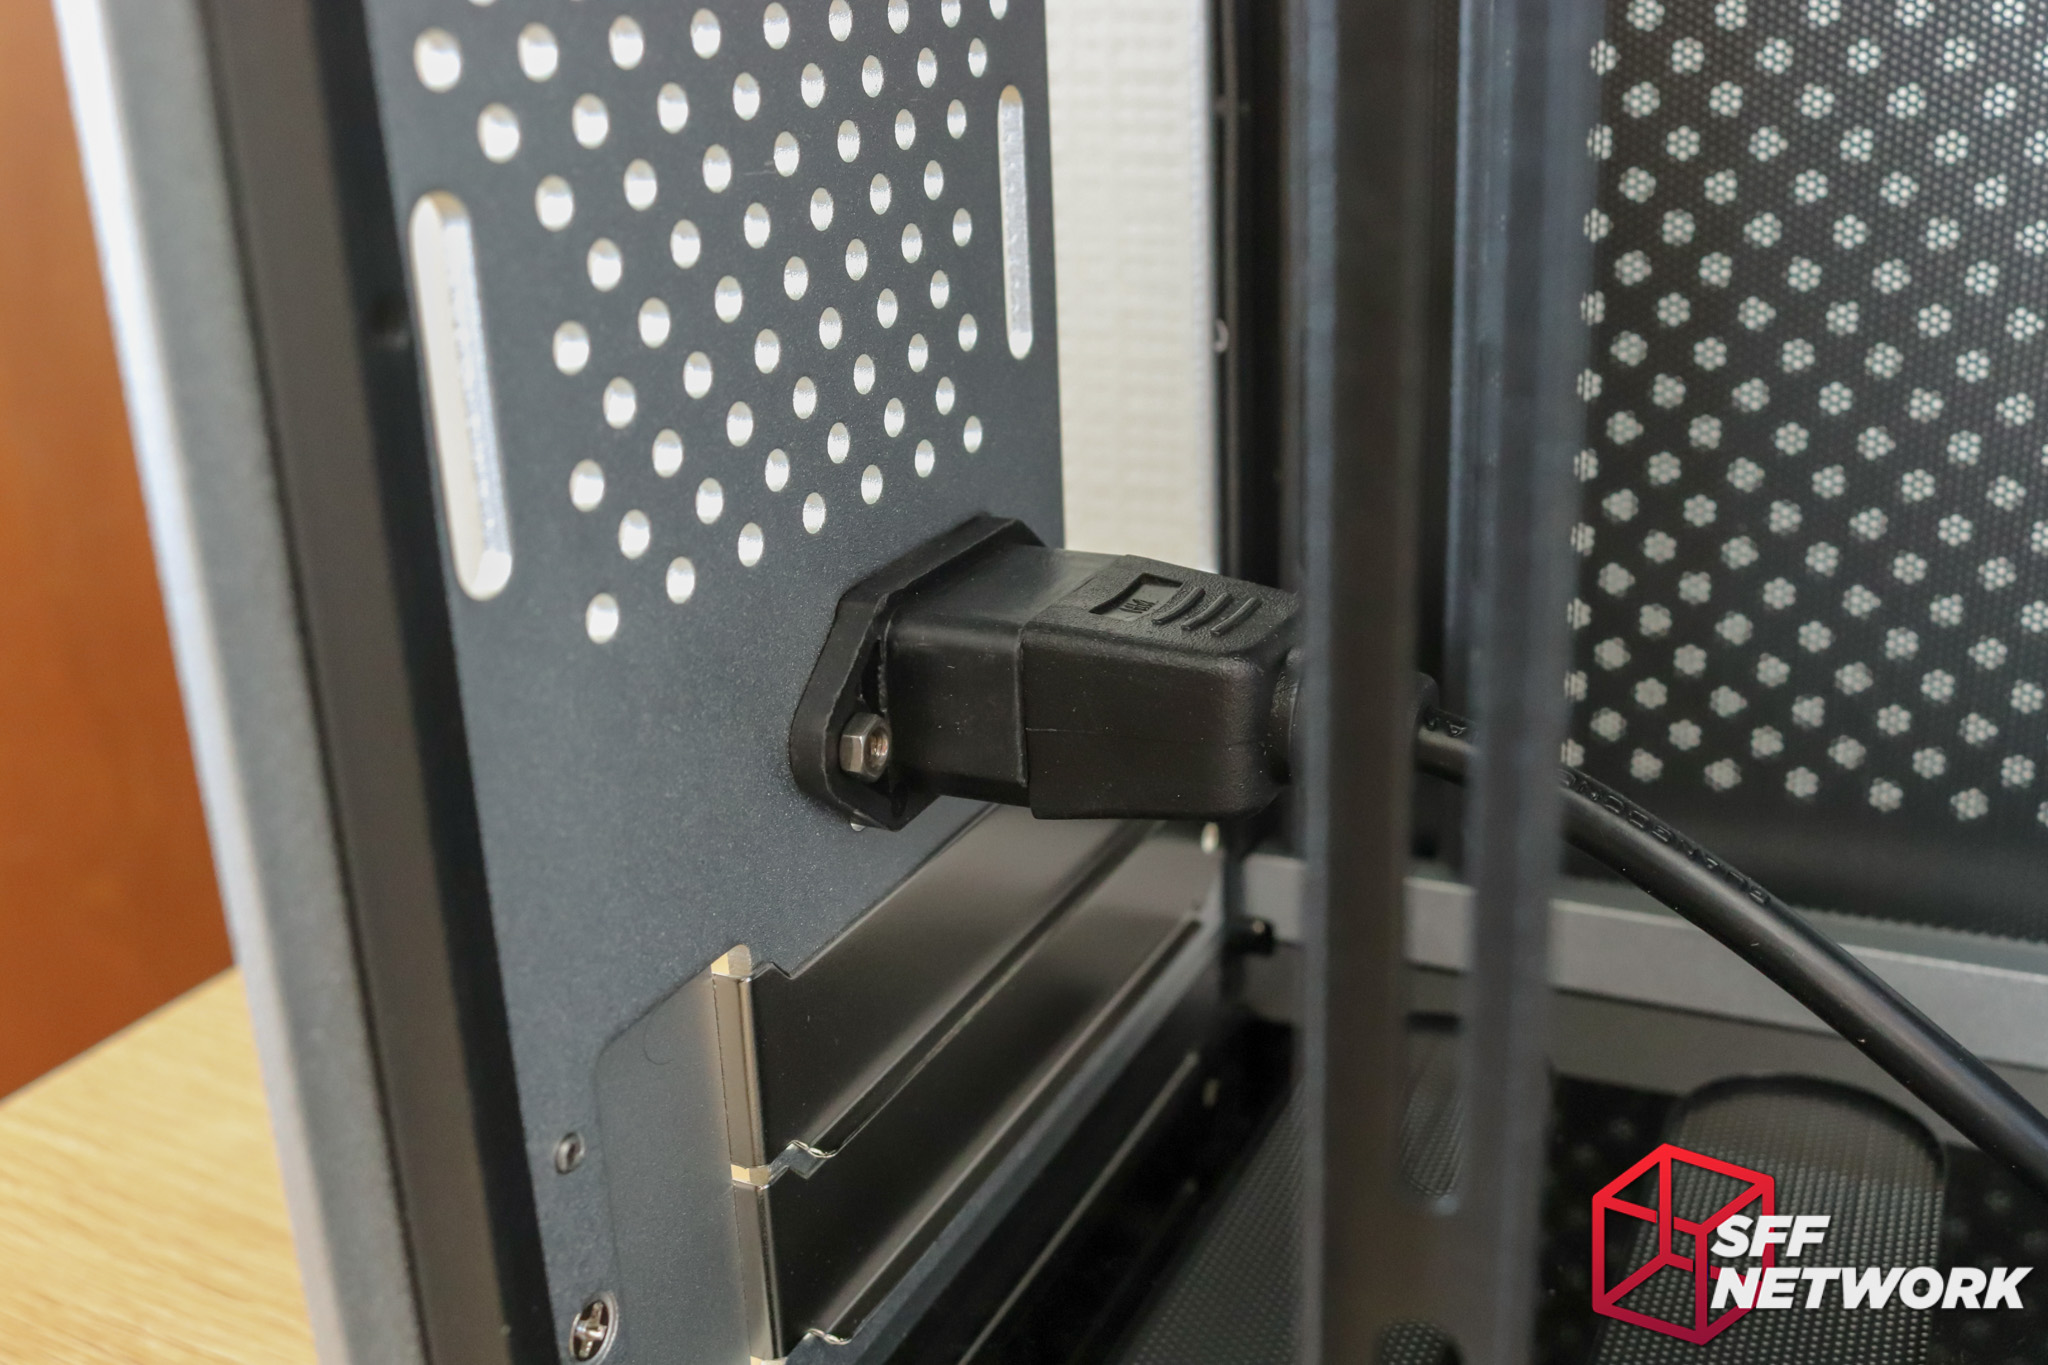
The rear mounted C14 power input sticks a fair way into the chassis. As I mentioned earlier, it’s placement isn’t ideal for cable management and aesthetics – eventually a Streacom (or aftermarket) windowed side panel will come to be, my money’s on it.
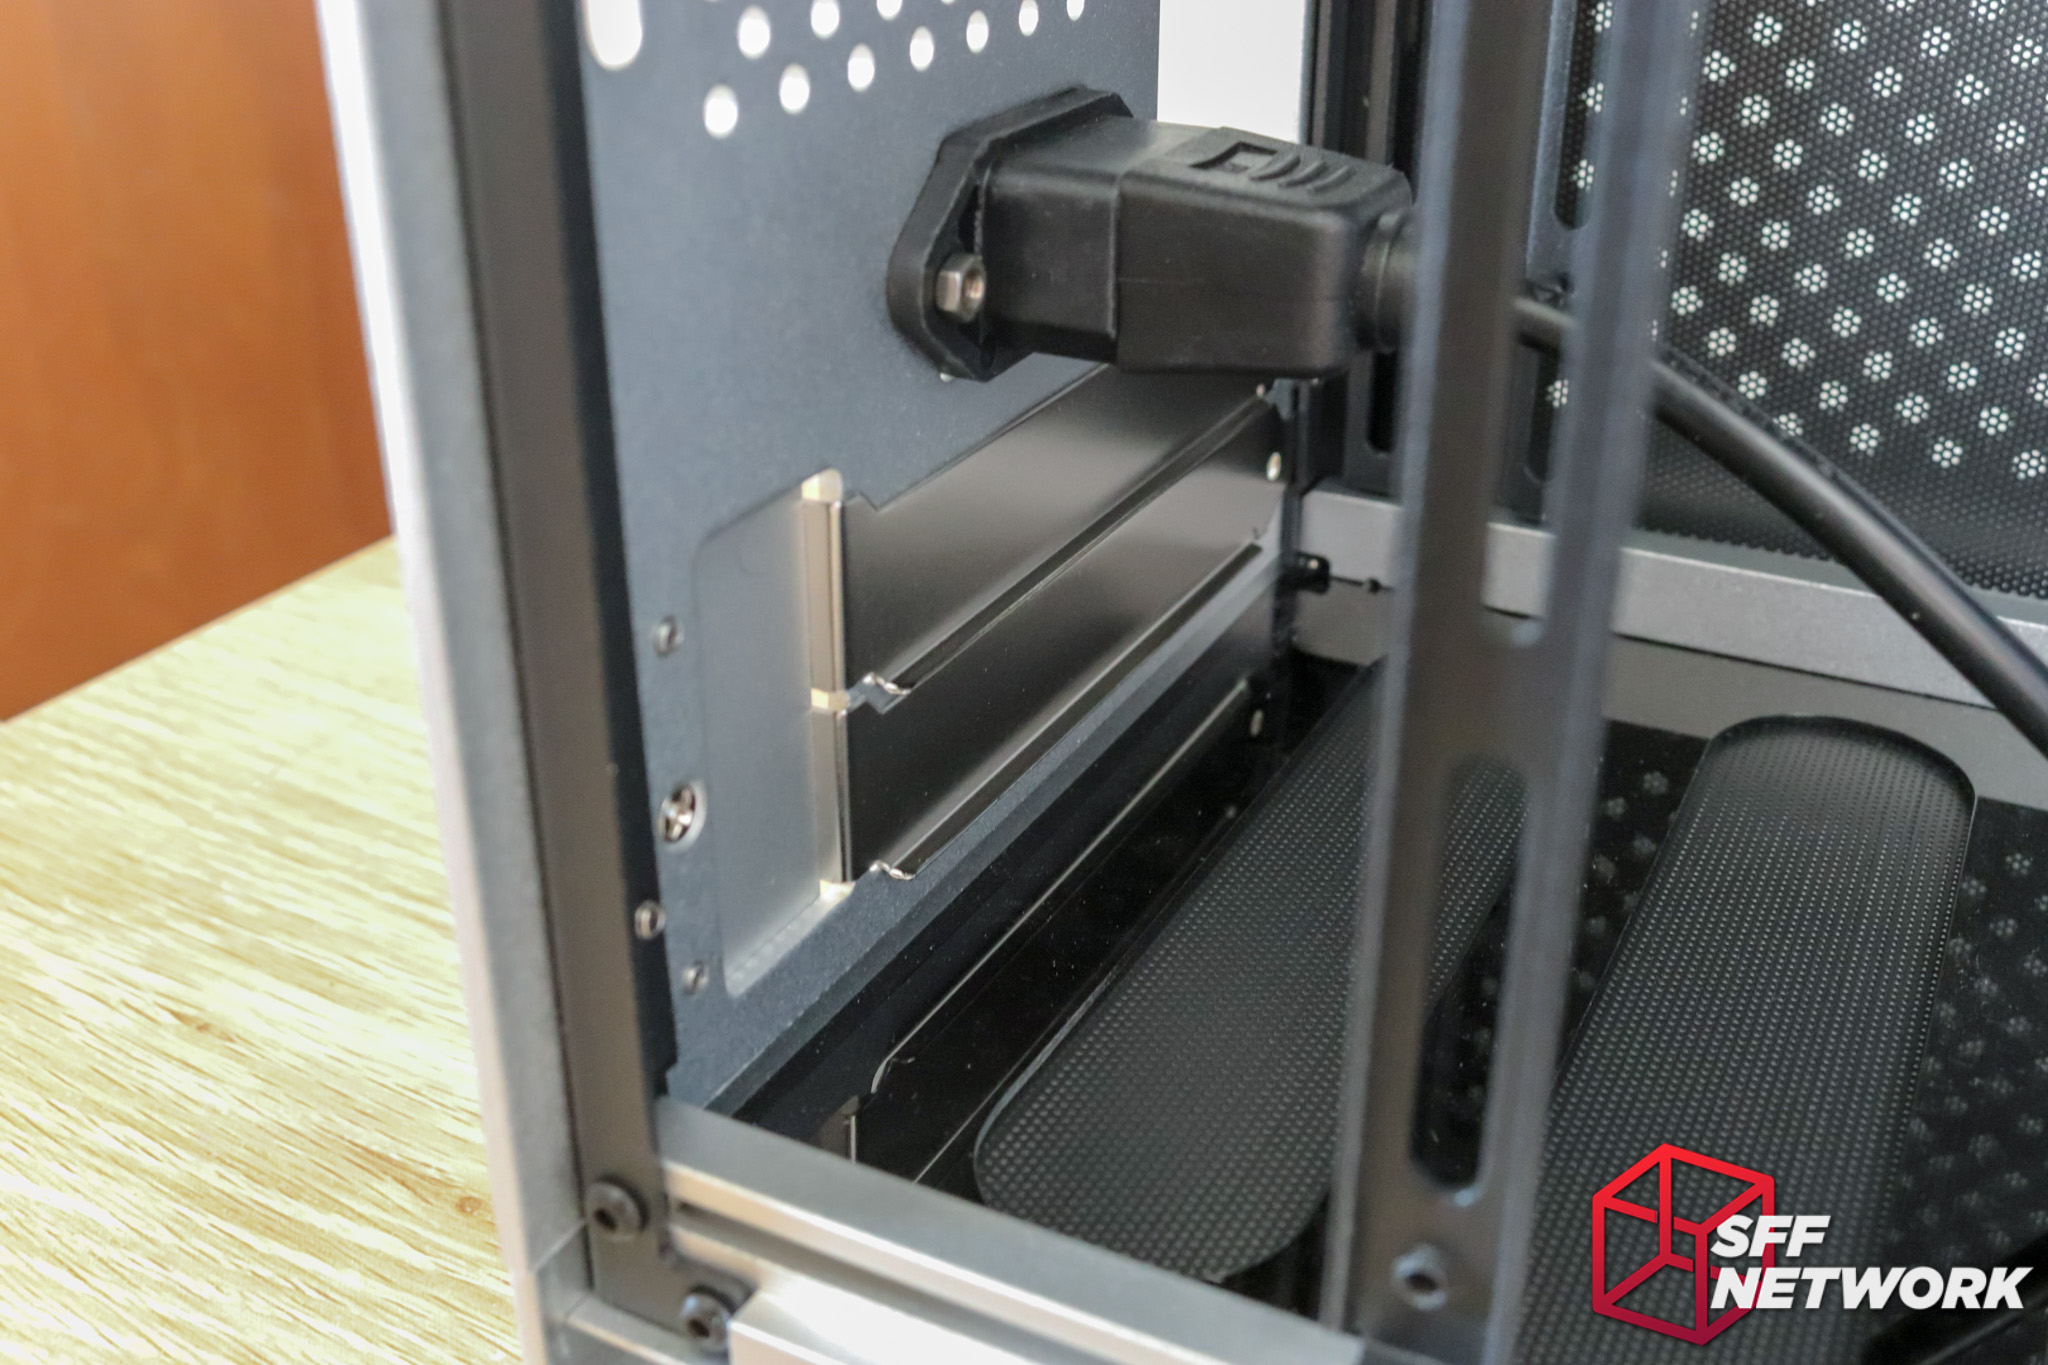
Down to the expansion card mounting. I did have an issue with this setup, but I’ll elaborate during the system build portion of the review.
Streacom has a methodology with their screw setup. Phillips screws mean these are the ones used to install and change the system. Allen screws mean you’re diving deeper than a regular user. Here be dragons.
There is something to be said for a uniform screw colouration – even if it means black Phillips screws here.
To the top – the power supply and drive bracket. SFX and ATX power supplies can be mounted here, but it’s pretty clear ATX is a secondary option – as it should be.
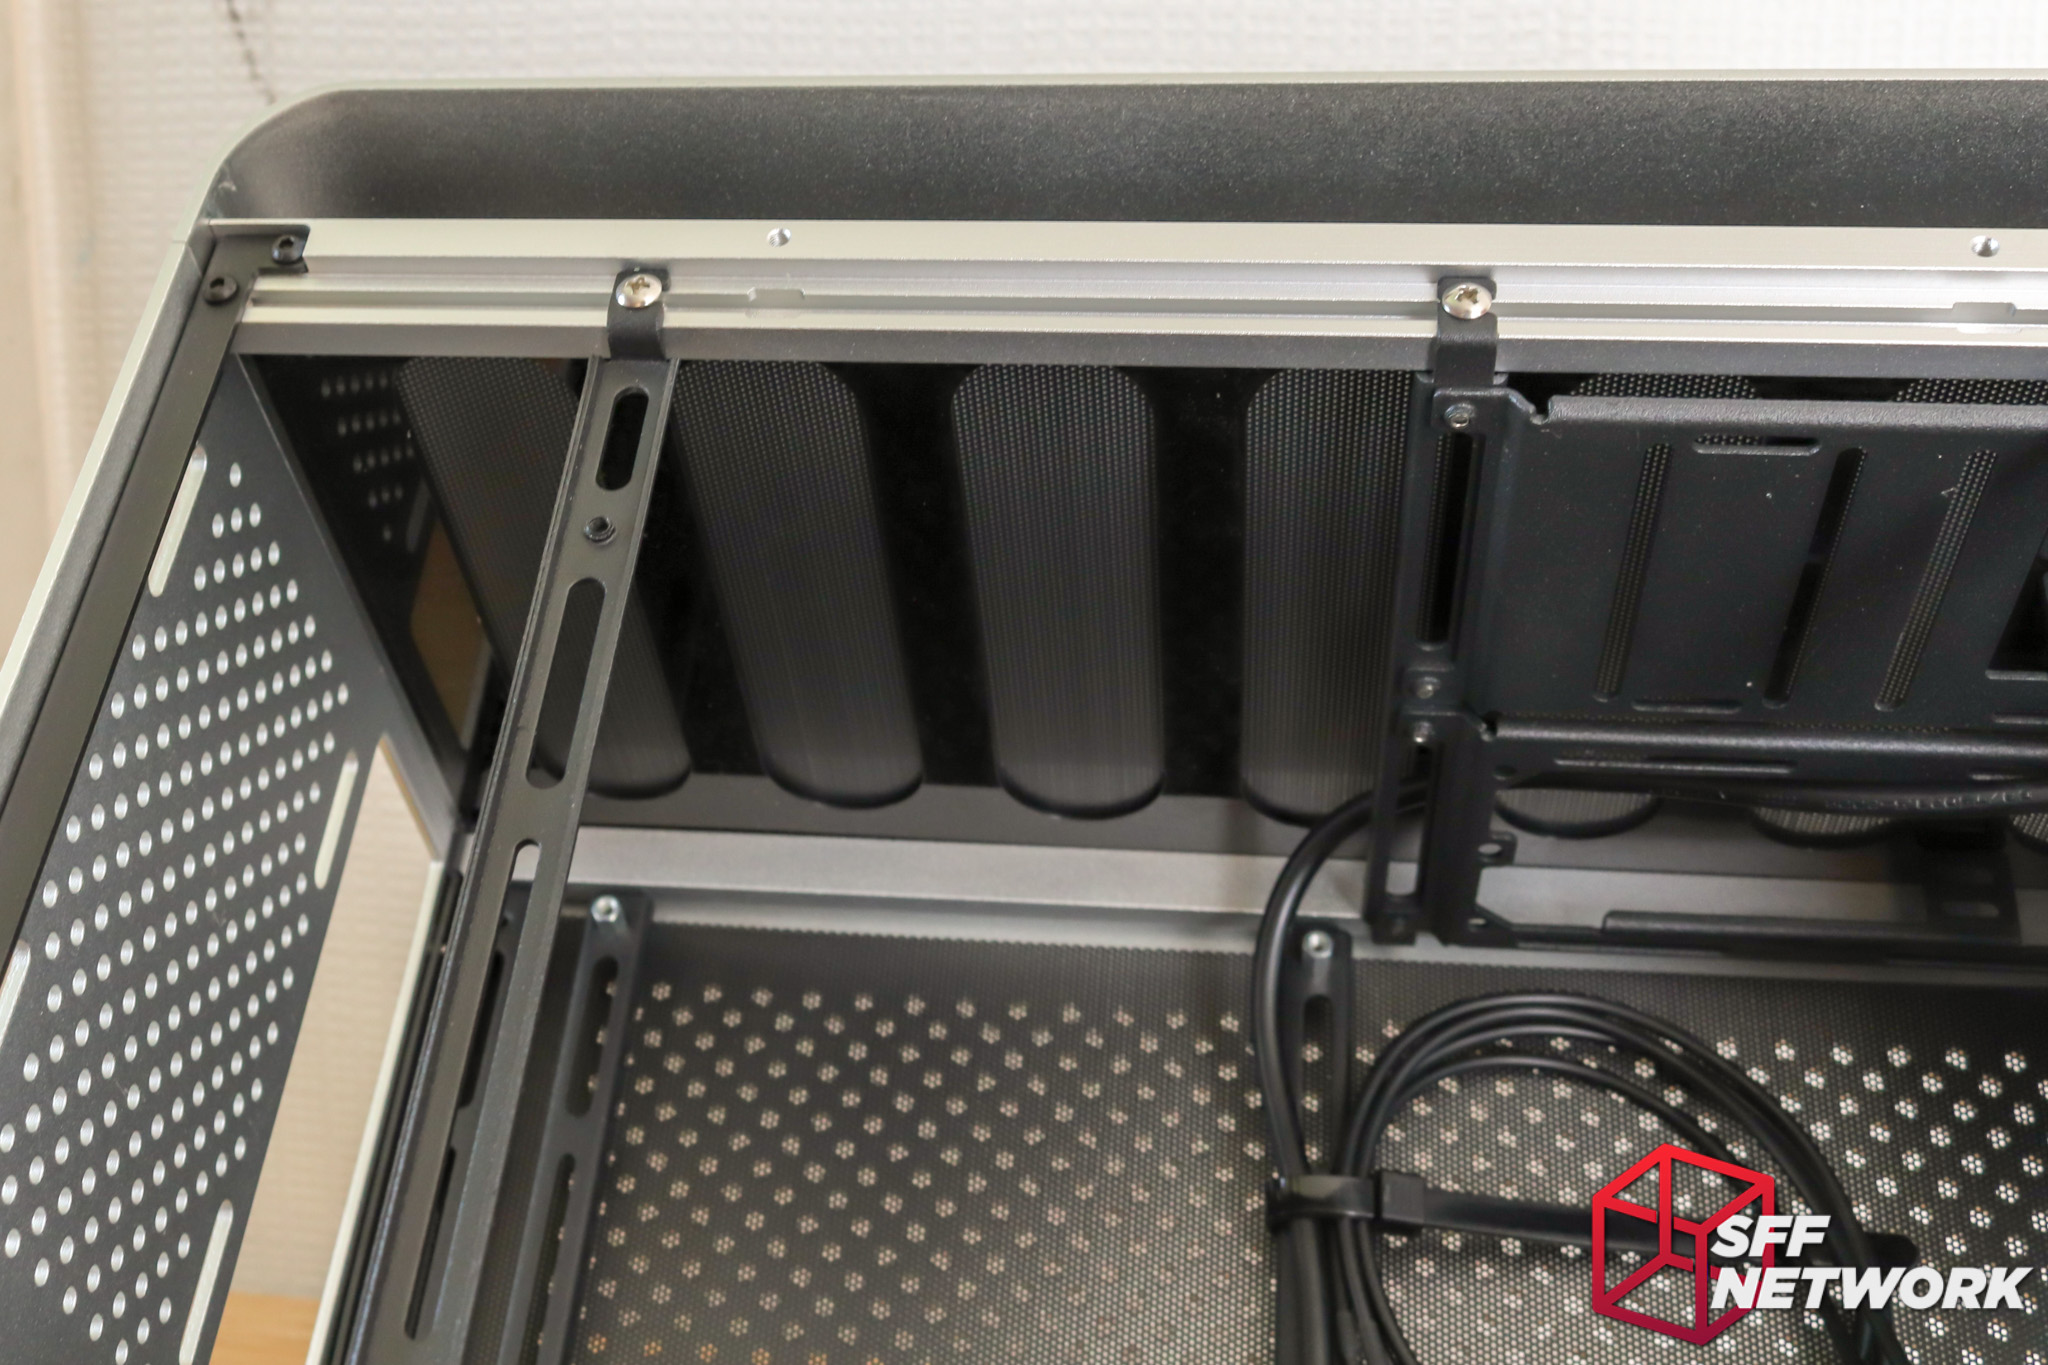
The top and bottom filtered panels are identical, and removable. This facilitates cleaning when required.

The glass (!) power button hides a subtle white LED to denote the system is powered on. Subtle. Also, only a single USB Type-C connector is found here – clean but somewhat limiting.
Included with the case is a single side panel air filter – install it on the side where you will see the most intake air. I hope Streacom offers these for sale – filtering all possible intakes would be ideal.
The filter mounts to the chassis with magnets.
A closer look at the front panel mounting. Whilst it’s mounted firmly, the angled washer retention design just seems… lacking.
Double brackets to the rear side of the motherboard mounting – a side effect of the obtuse ATX standard that M-ITX relies upon. The top rear offset screw hole is accounted for with this.
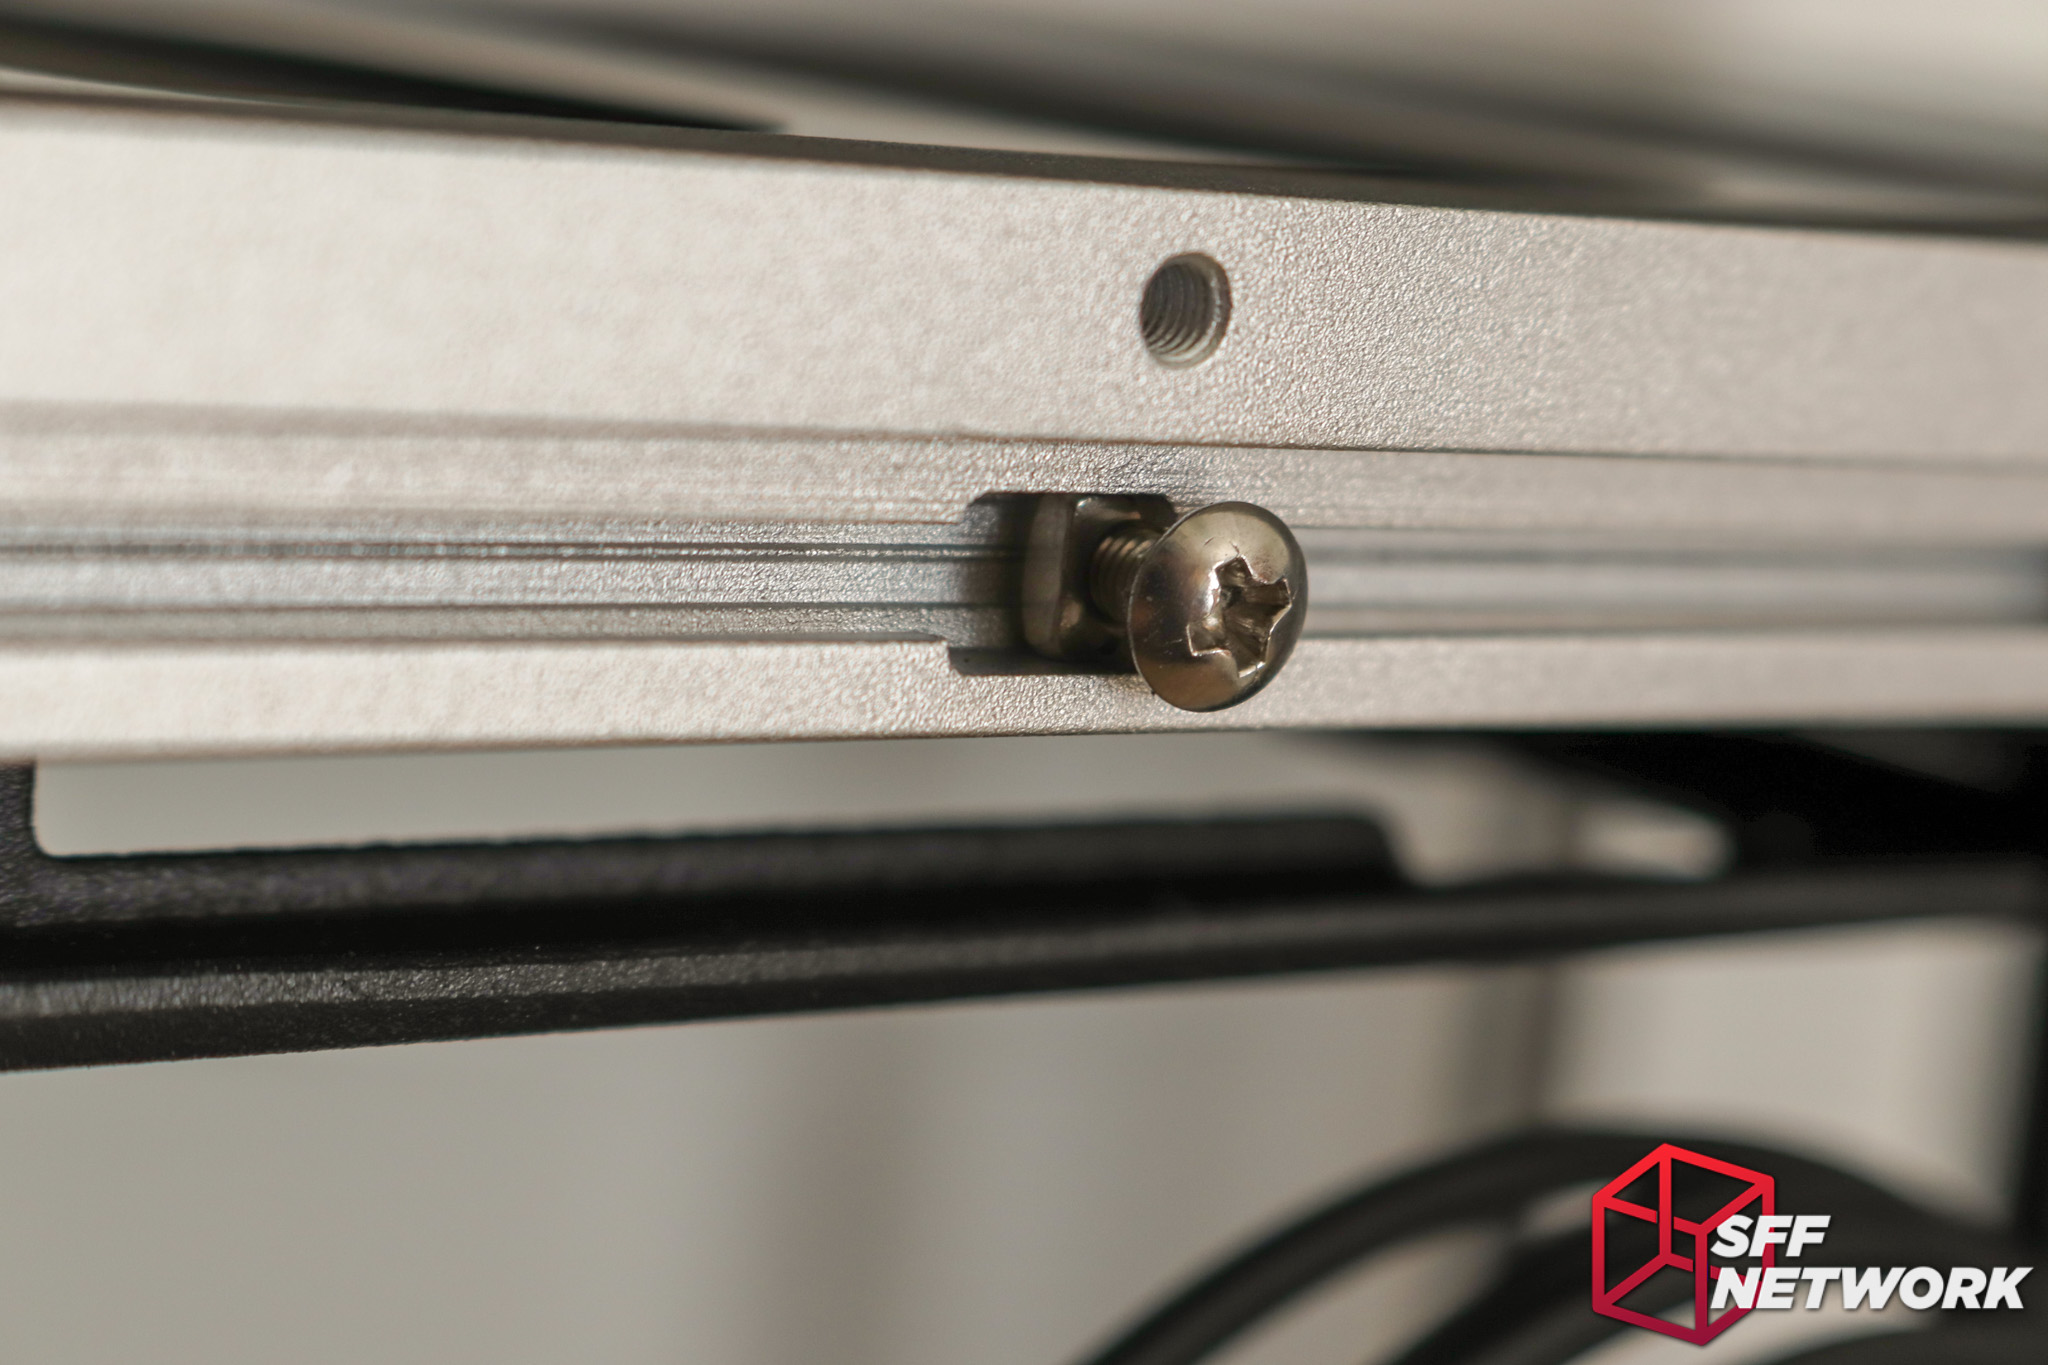
Speaking of mounting, the mechanism is beautiful in the simplicity. An extruded rail offers an internal rail into which a square nut is slid. Once the nut is slid past the access ports, screws can be added to retain brackets as needed.

The included bracketry, excluding the motherboard mounting units. At the top, the dual SFX/ATX/drive mounting unit. These mount to brackets identical to the bottom two units. In the middle, vertical brackets. The slot, rather than hole, mounting design means that you can preinstall your nut/screw combination in the rails, then slot the brackets into place, with only a quick tighten retaining the whole system – rather than fiddling with lining up screws with recessed nuts in a rail.
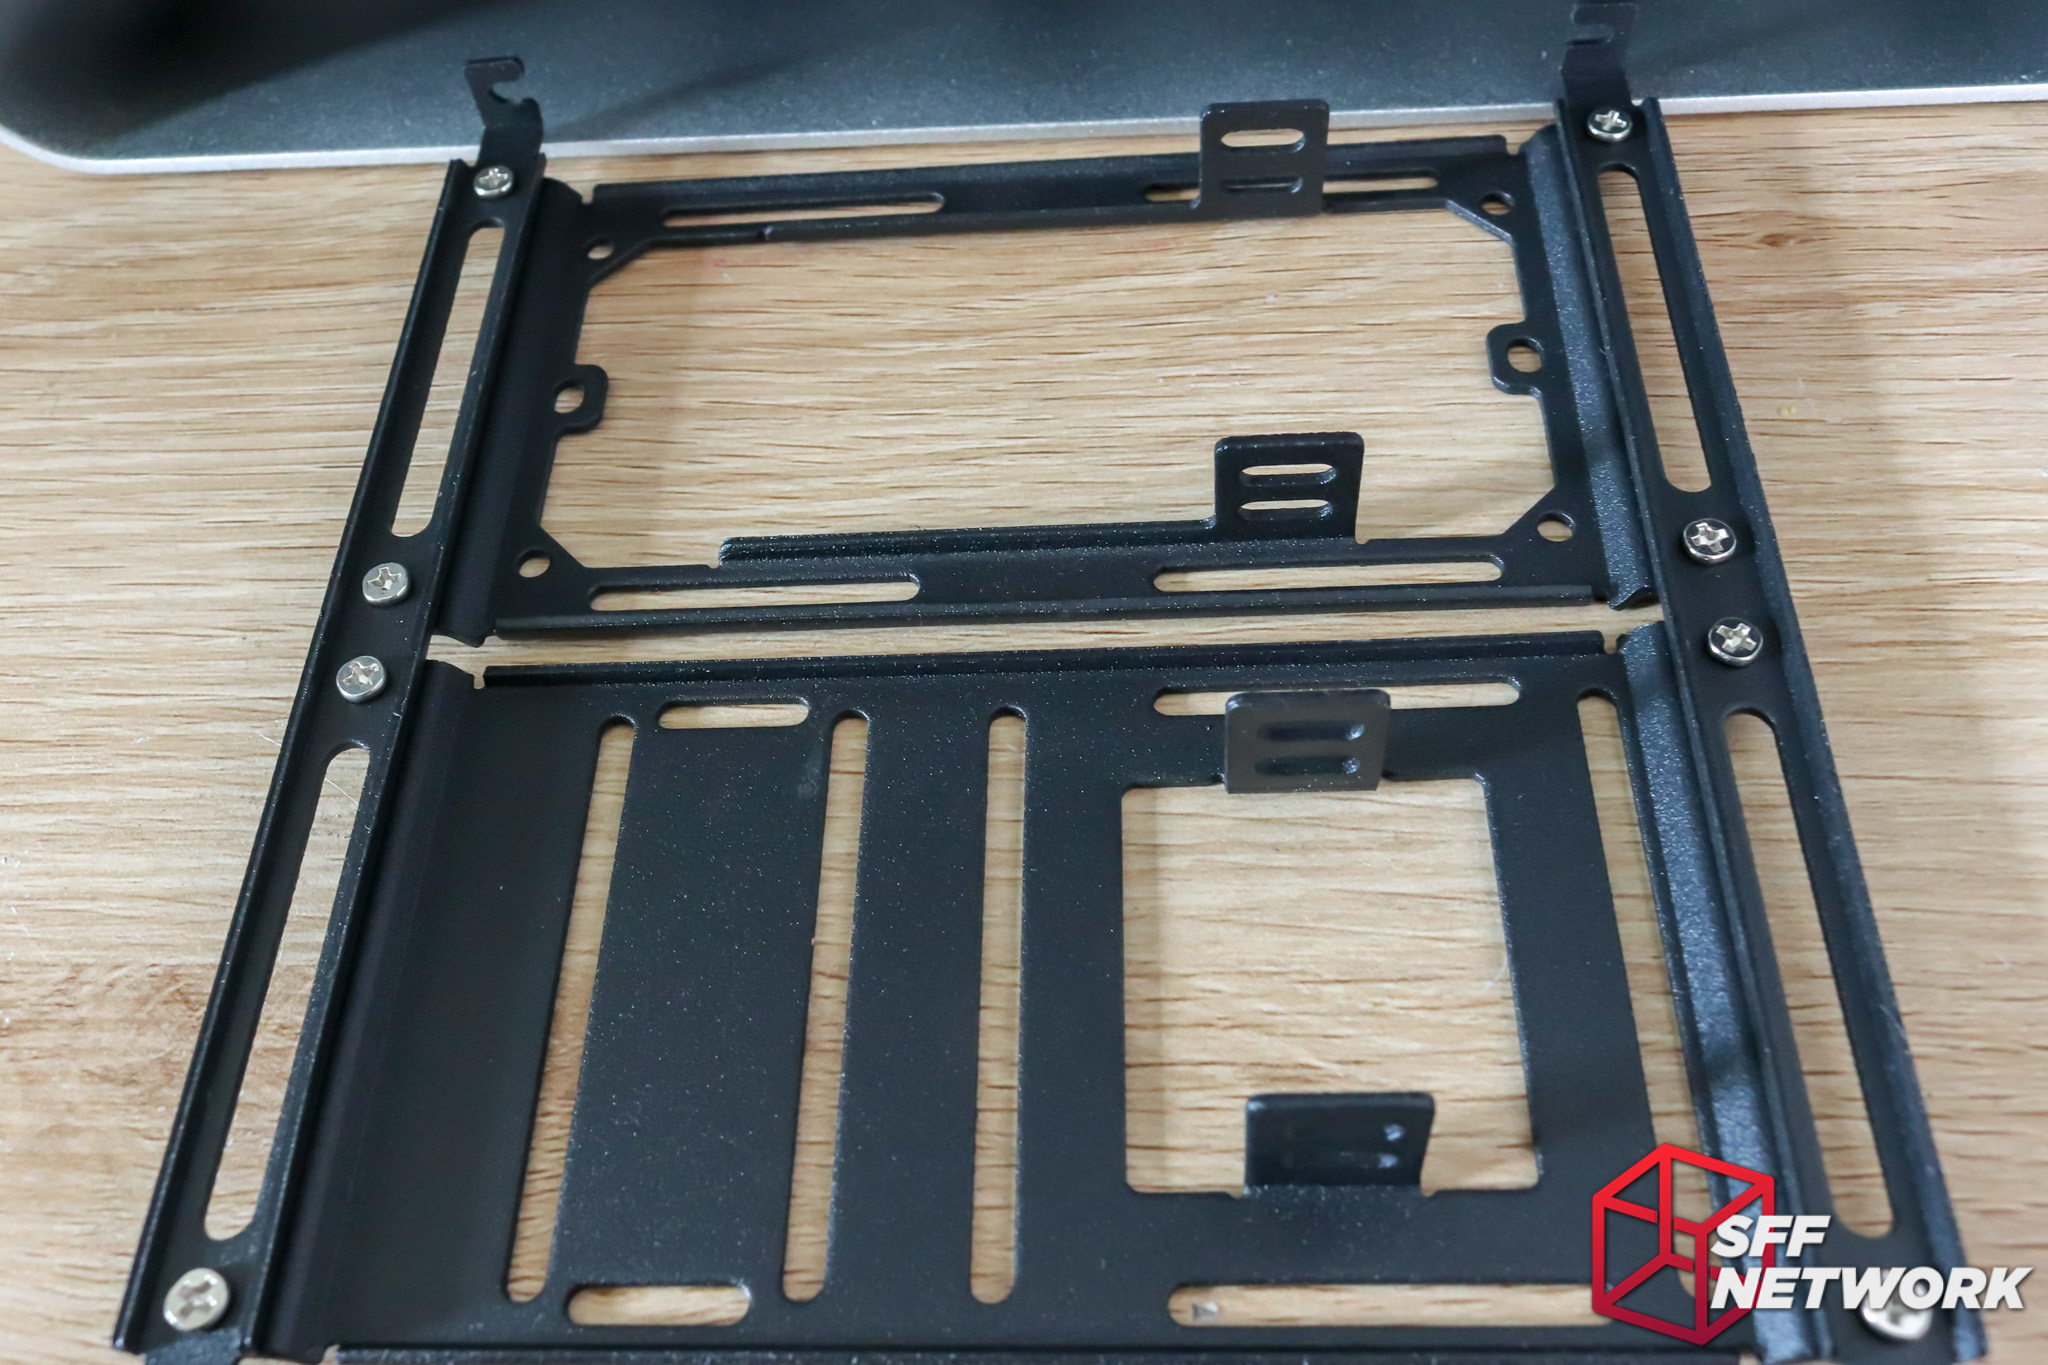
The top bracket (which can be mounted to the bottom if you are so inclined, albeit at the penalty of reduced expansion card length) is a four part unit, with a SFX bracket, a drive bracket and two rail mounting brackets. Using this entire setup, ATX power supplies can be mounted. Expect judgement for such a setup, though. With a SFX power supply mounted (the length of which determining expansion card support, it has to be noted), up to six 2.5″ drives, or 3 3.5″ drives can be mounted on the second bracket.
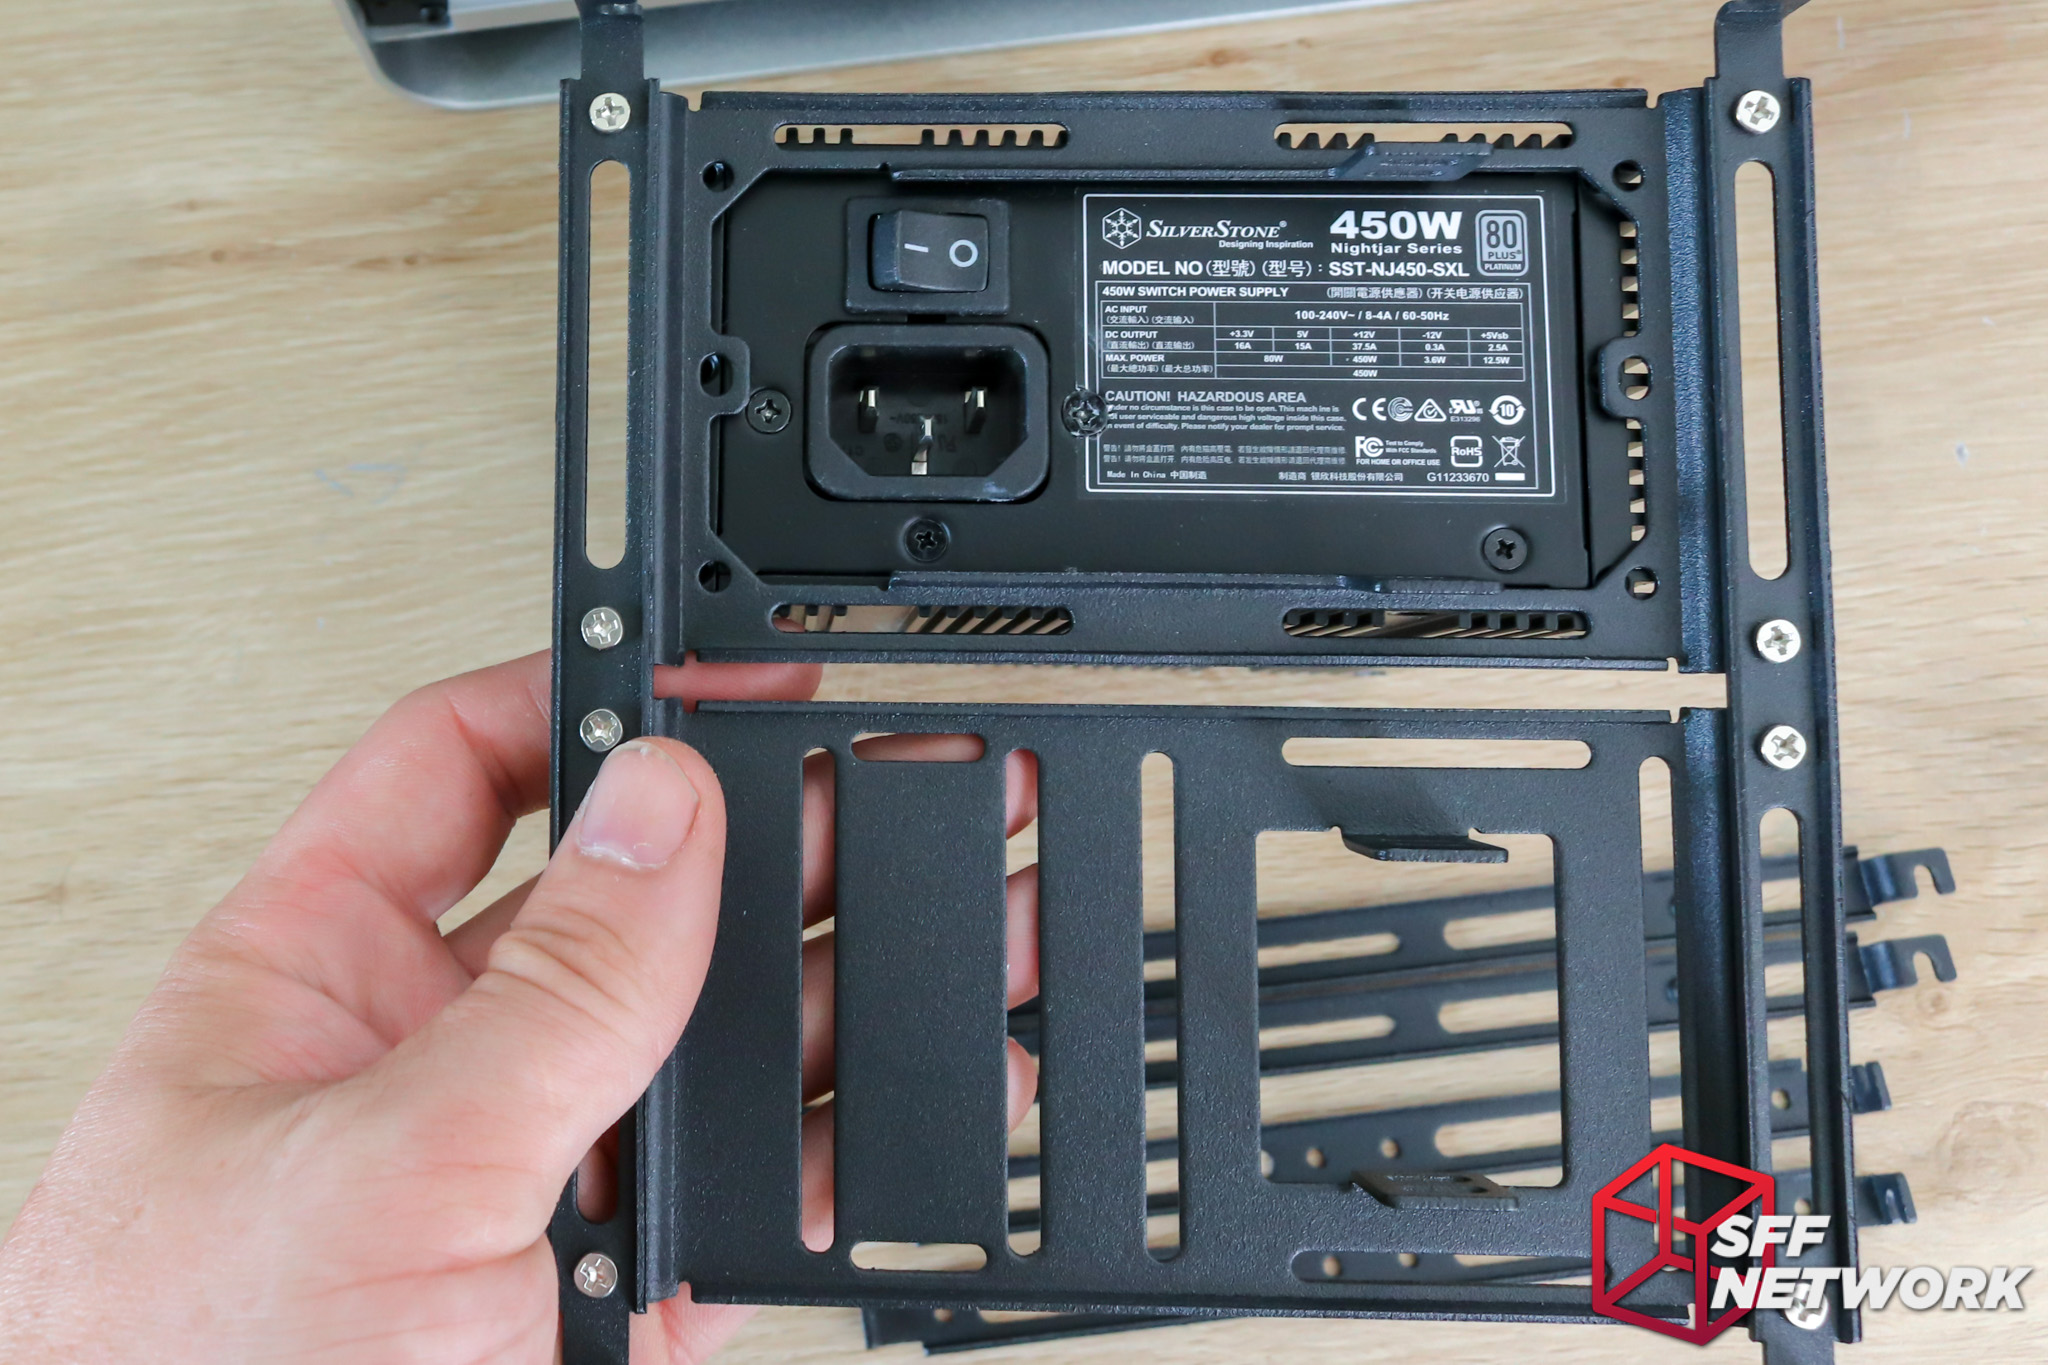
SFX power supplies should be the norm these days, and that is shown by the simplicity of mounting one – one bracket, 4 screws, done. It’s as if Streacom designed for the SilverStone NightJar NJ450-SXL power supply – with extra cutouts in the panel to ensure as much airflow as possible.
The Build
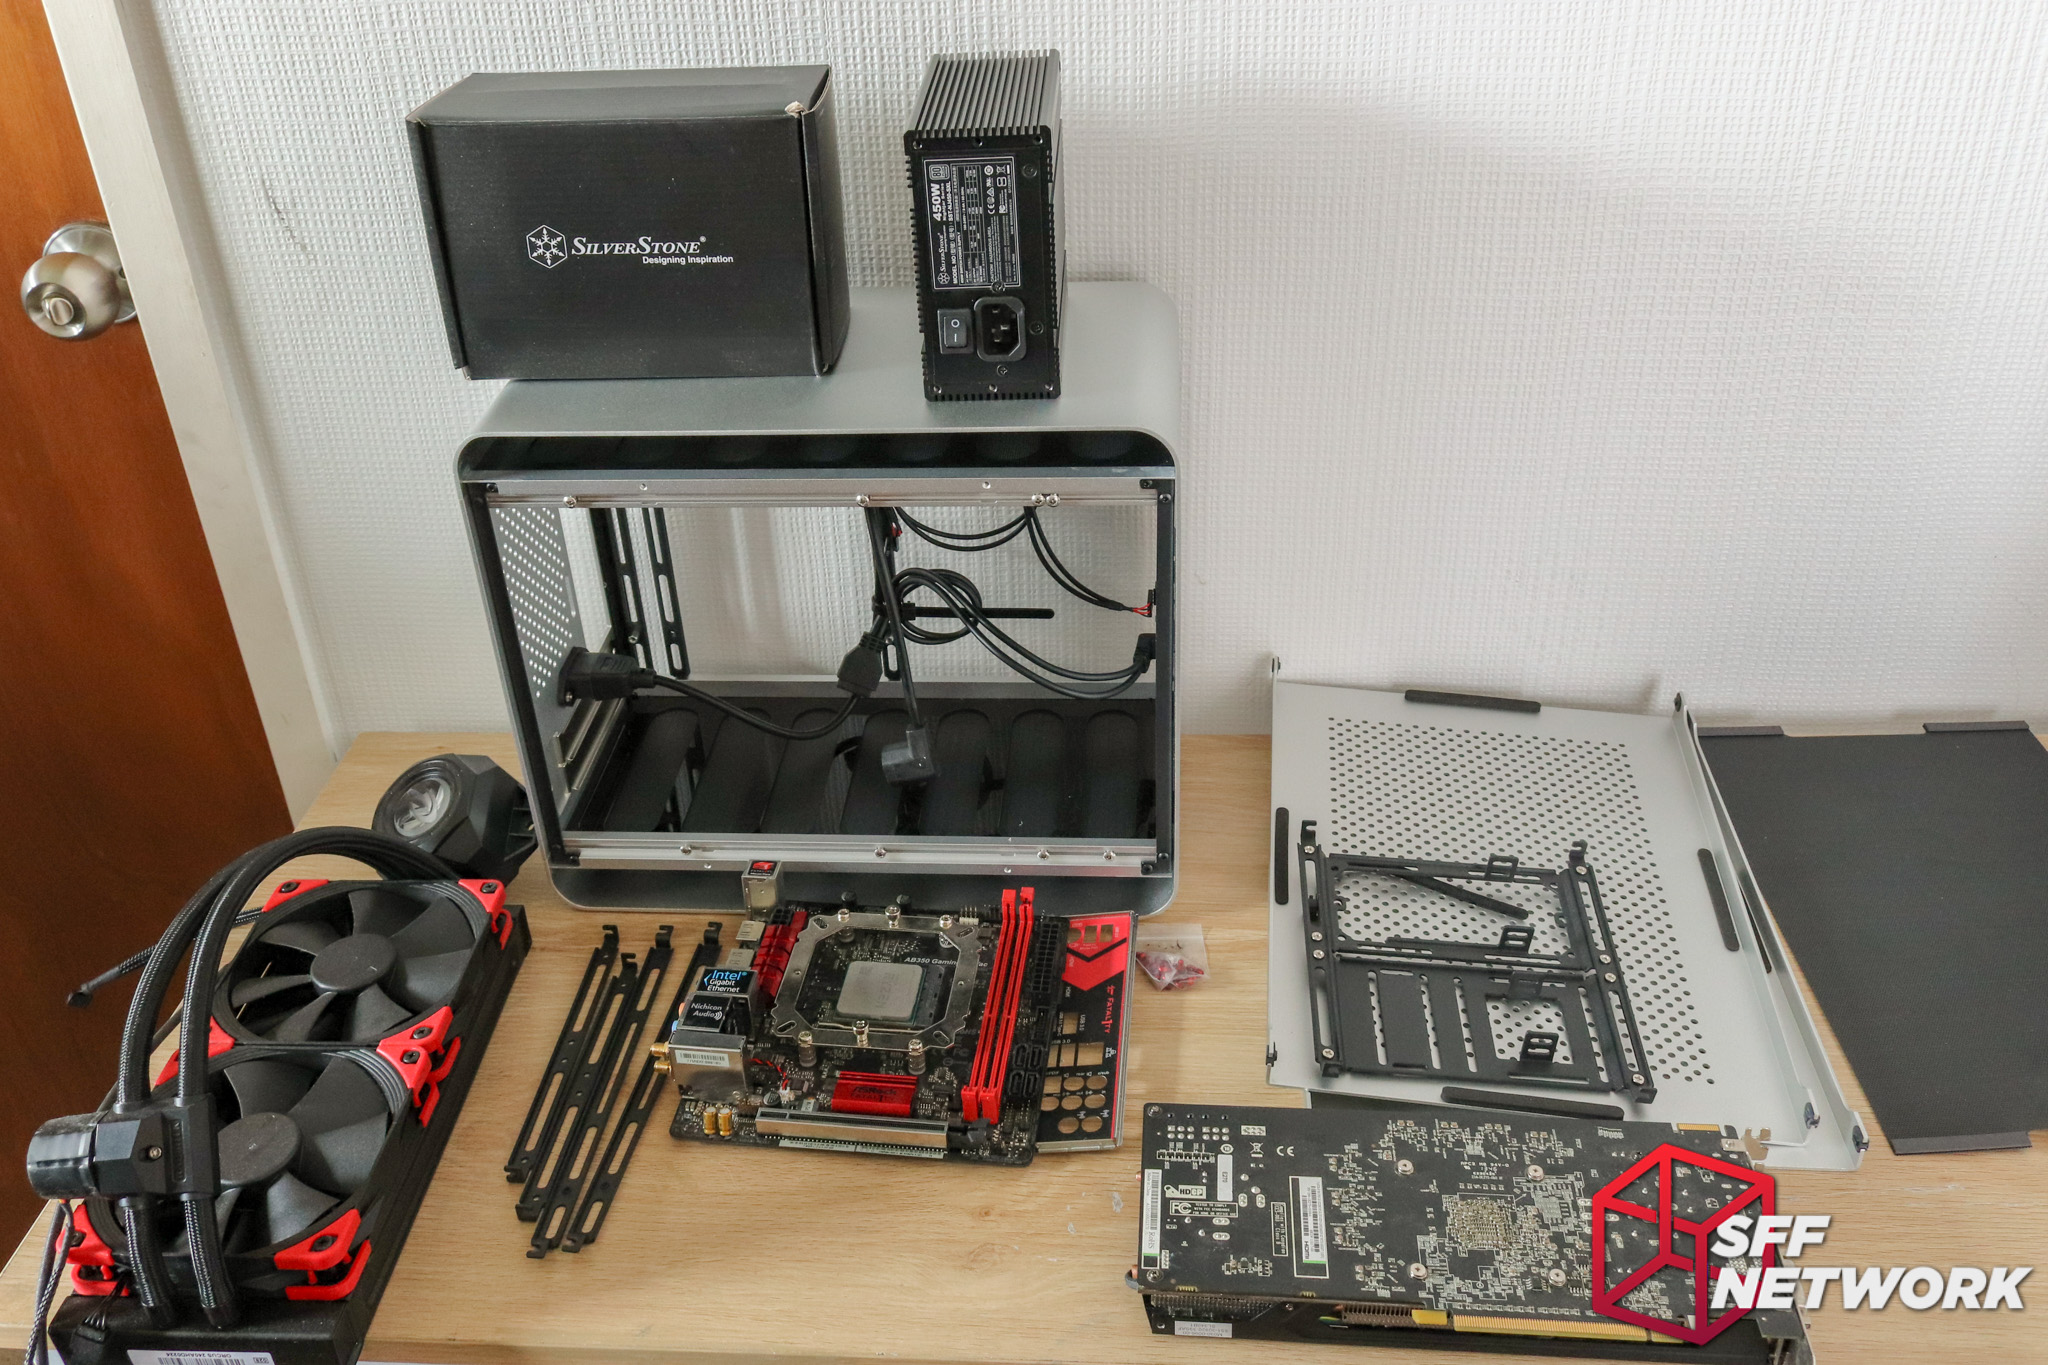
Will all of this fit? Let’s find out. (Spoiler alert: Yes.)
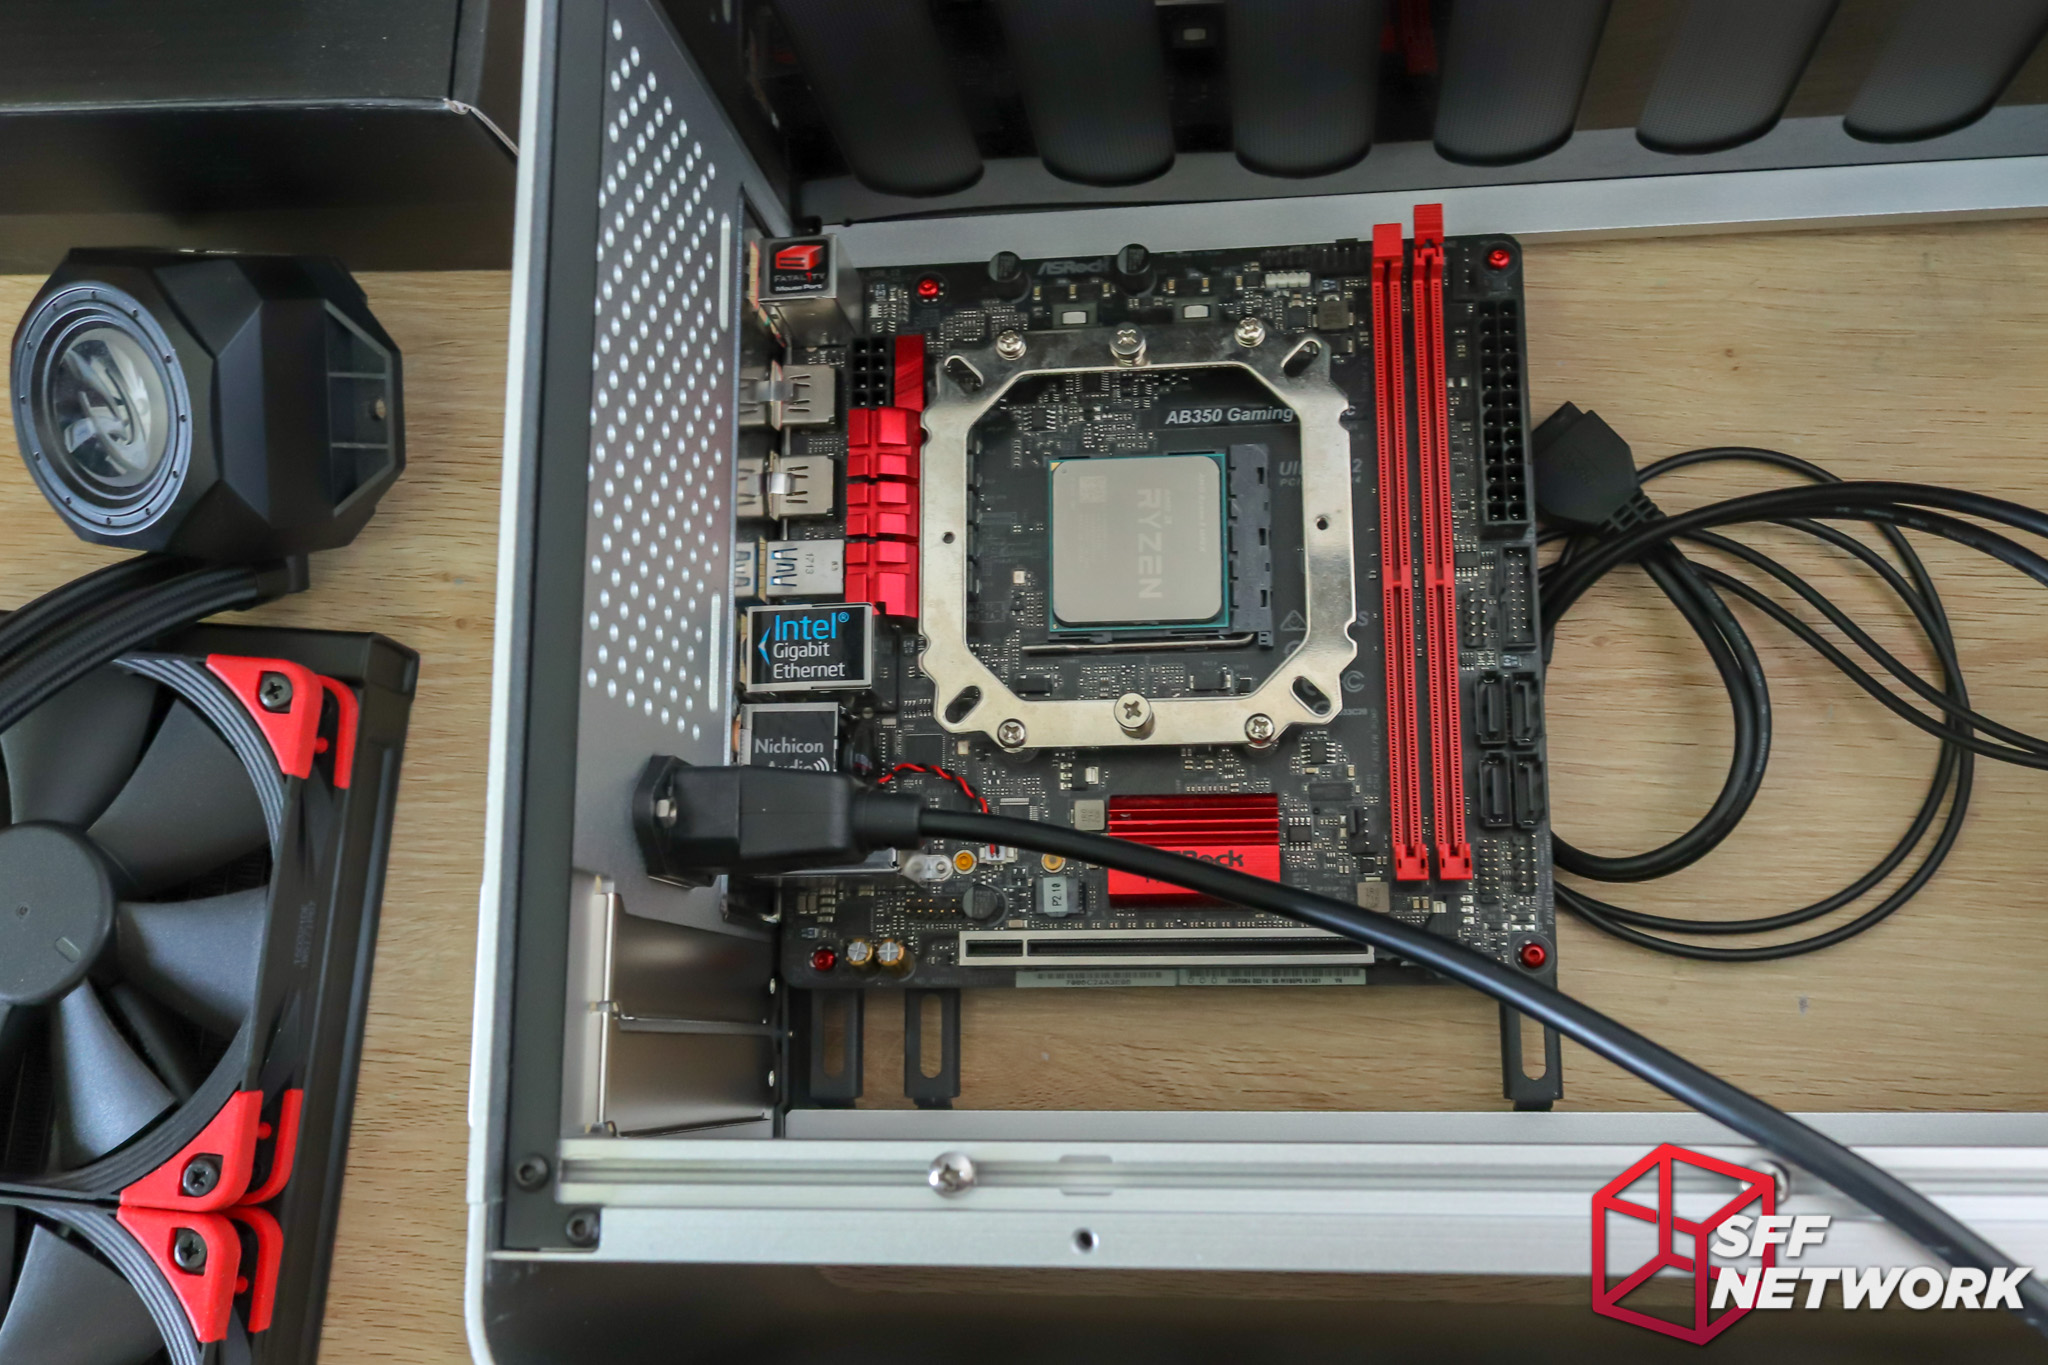
First up, motherboard mounting. I used custom screws here, because why not? Streacom is all about customisation and modding!

Mounting the power supply. Easy as! I chose the Silverstone NJ450-SXL power supply here – because it is just awesome.
Streacom notes in the manual (in red text no less) to ensure the power switch is turned on. Woops! Thankfully after the system build I was able to use a small screwdriver to toggle the power switch from this off position.
In position. Industrial as… . More custom screws installed. I’ll replace these with black ones in later images – at 6mm, they just aren’t long enough to strongly capture the nuts. With supply issues from my supplier in China, alas, I only have 6mm variants of these red anodised screws at this time.
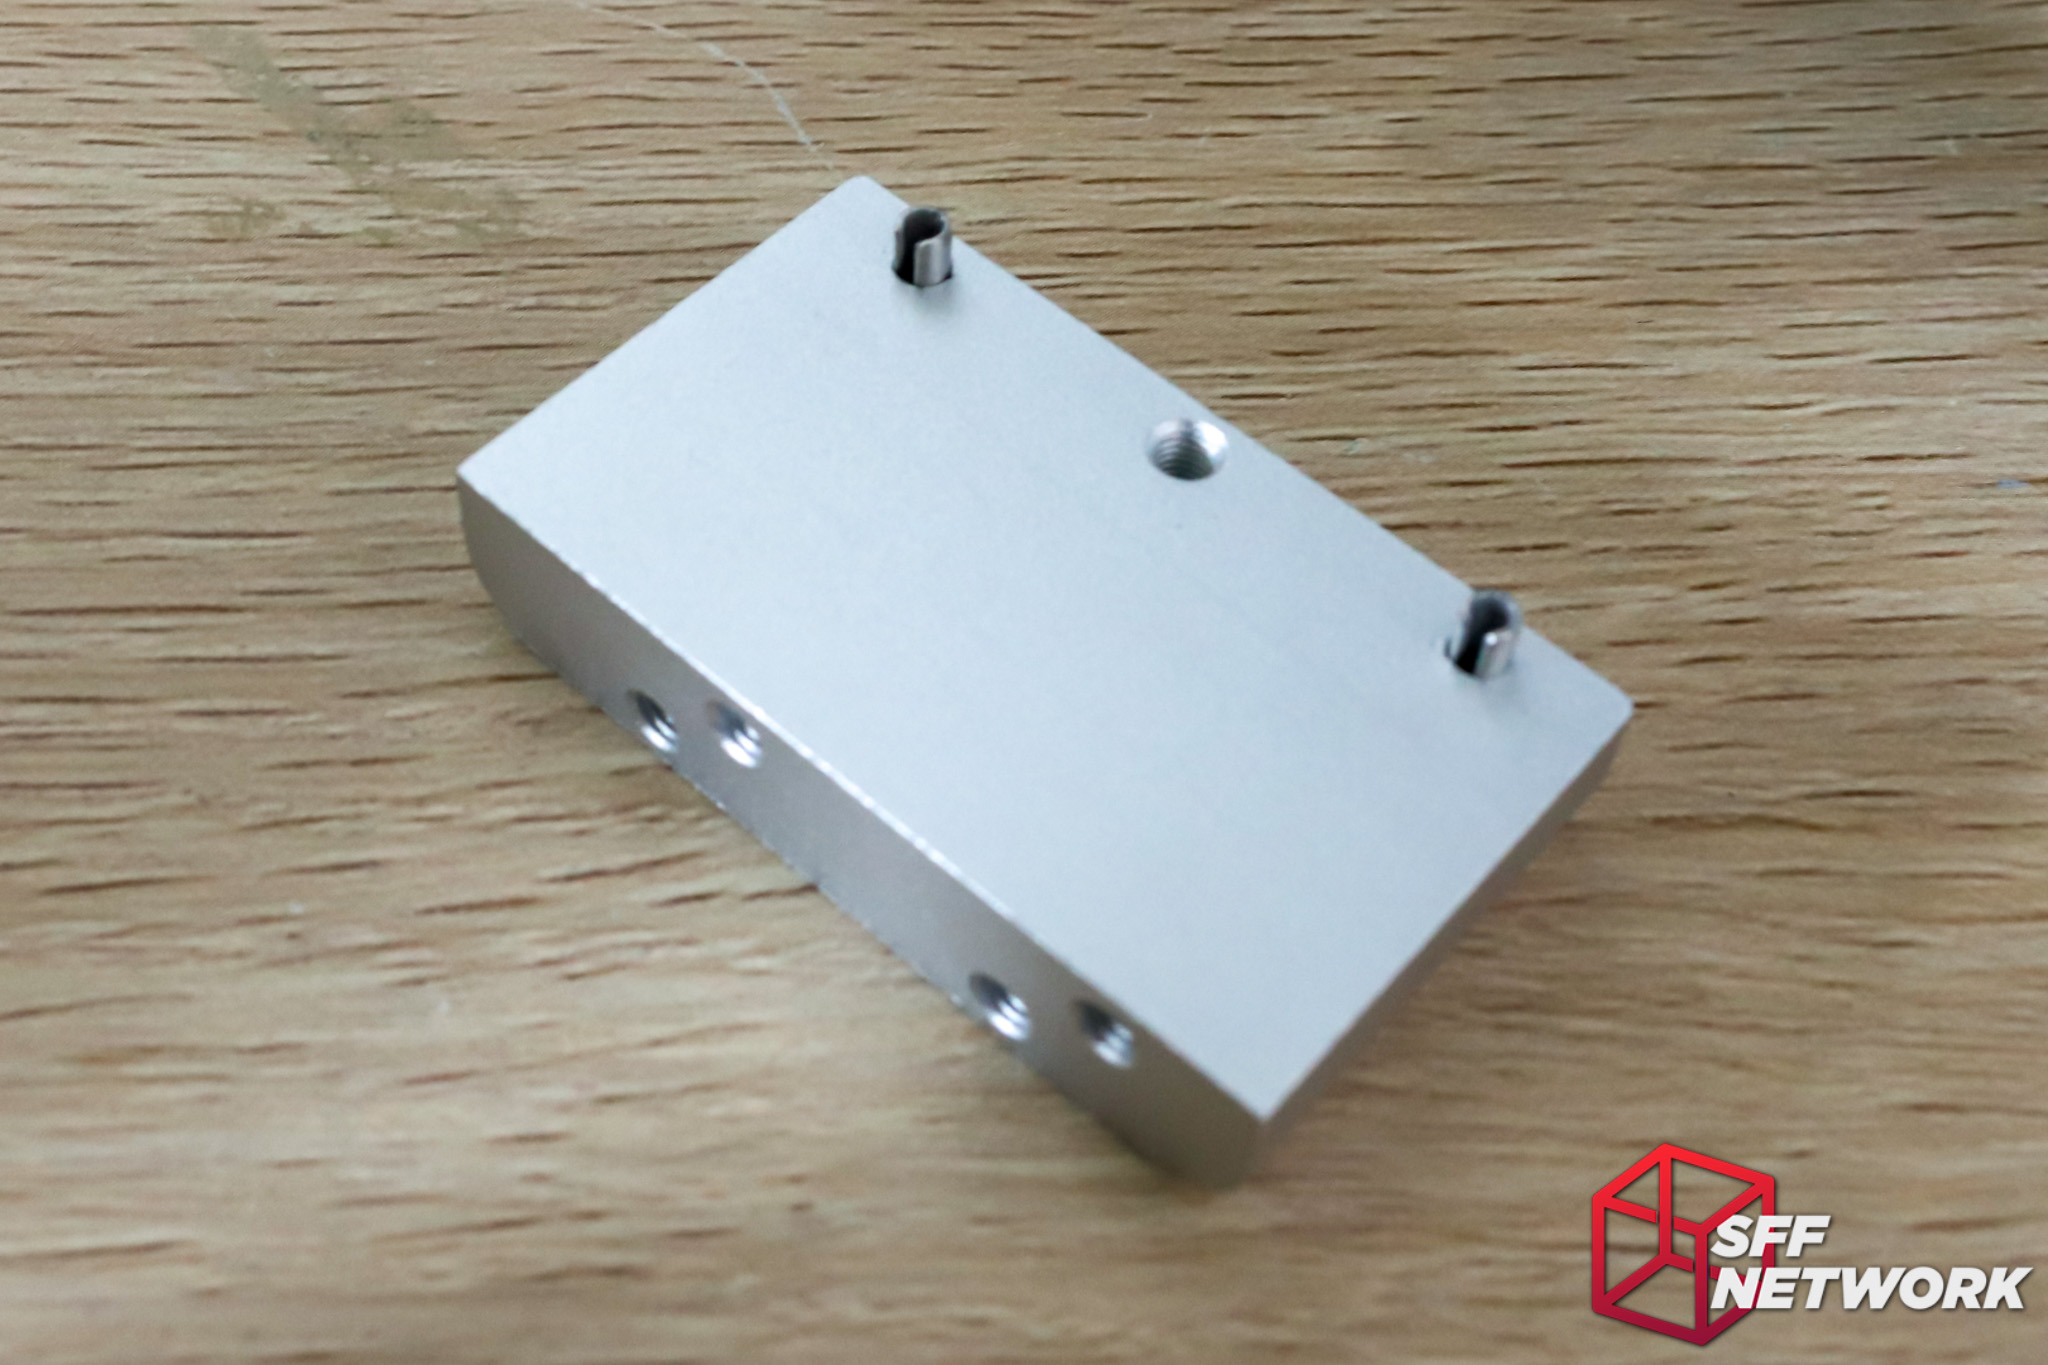
The expansion card retention chunk is further positioned with a pair of roll pins – a nice touch ensuring accurate and square mounting of cards.
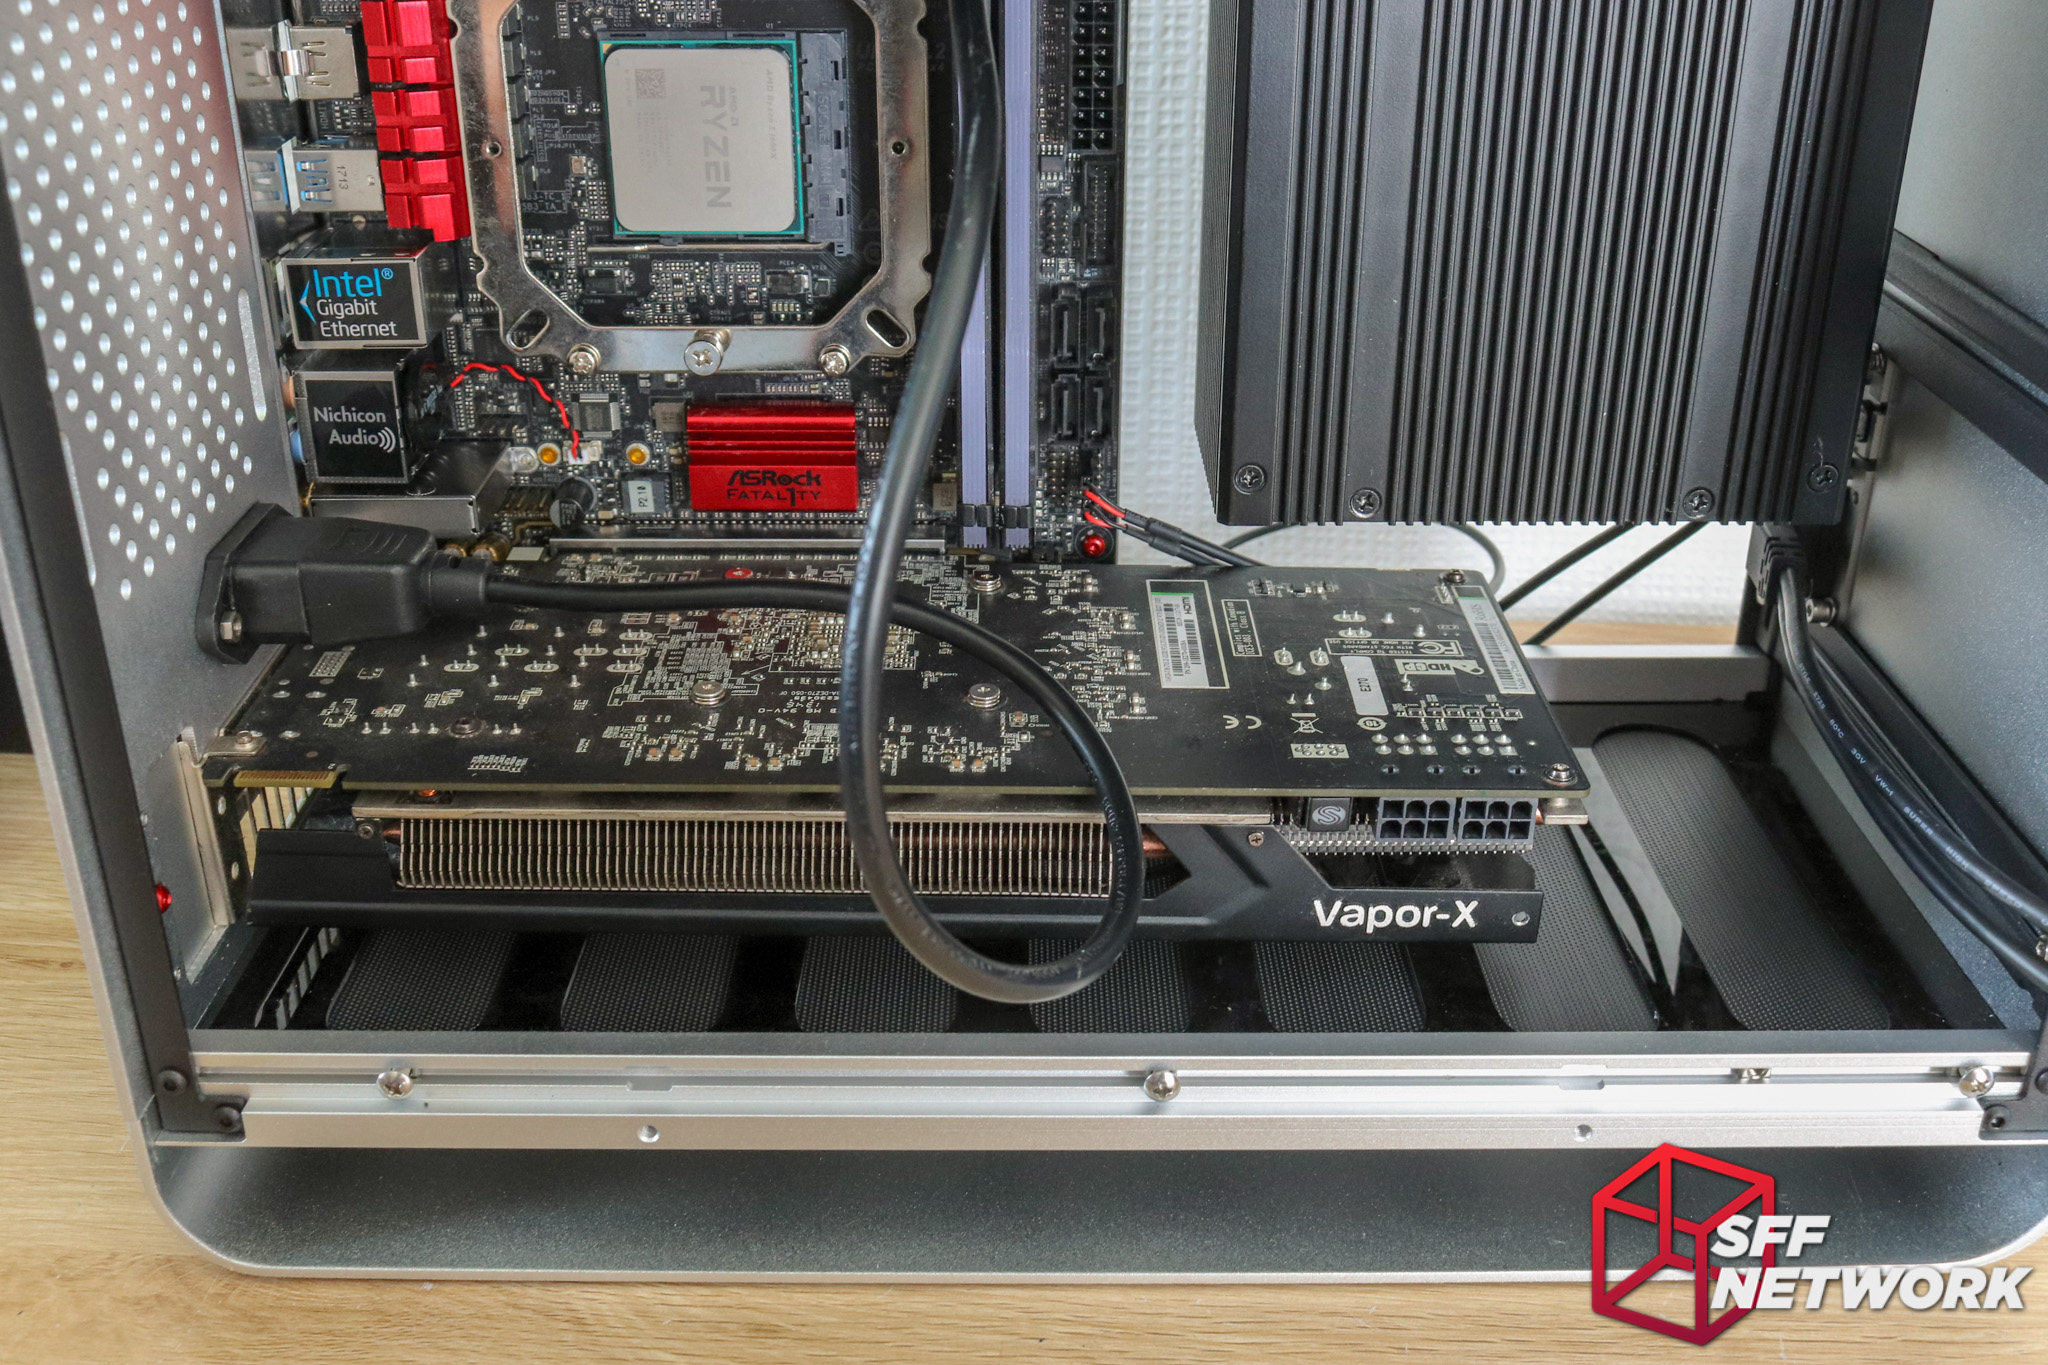
Wow, the GPU mounting was a challenge. The pointy ends of the rear bracket refused to slip into the slots made for them – meaning the rear end of the GPU just wouldn’t mount properly. To succeed, I loosened the Allen screw between the expansion slots, which enabled the card to slide in. Snug, but it works.
Getting there, and already the mains power input is bugging me. Sigh.

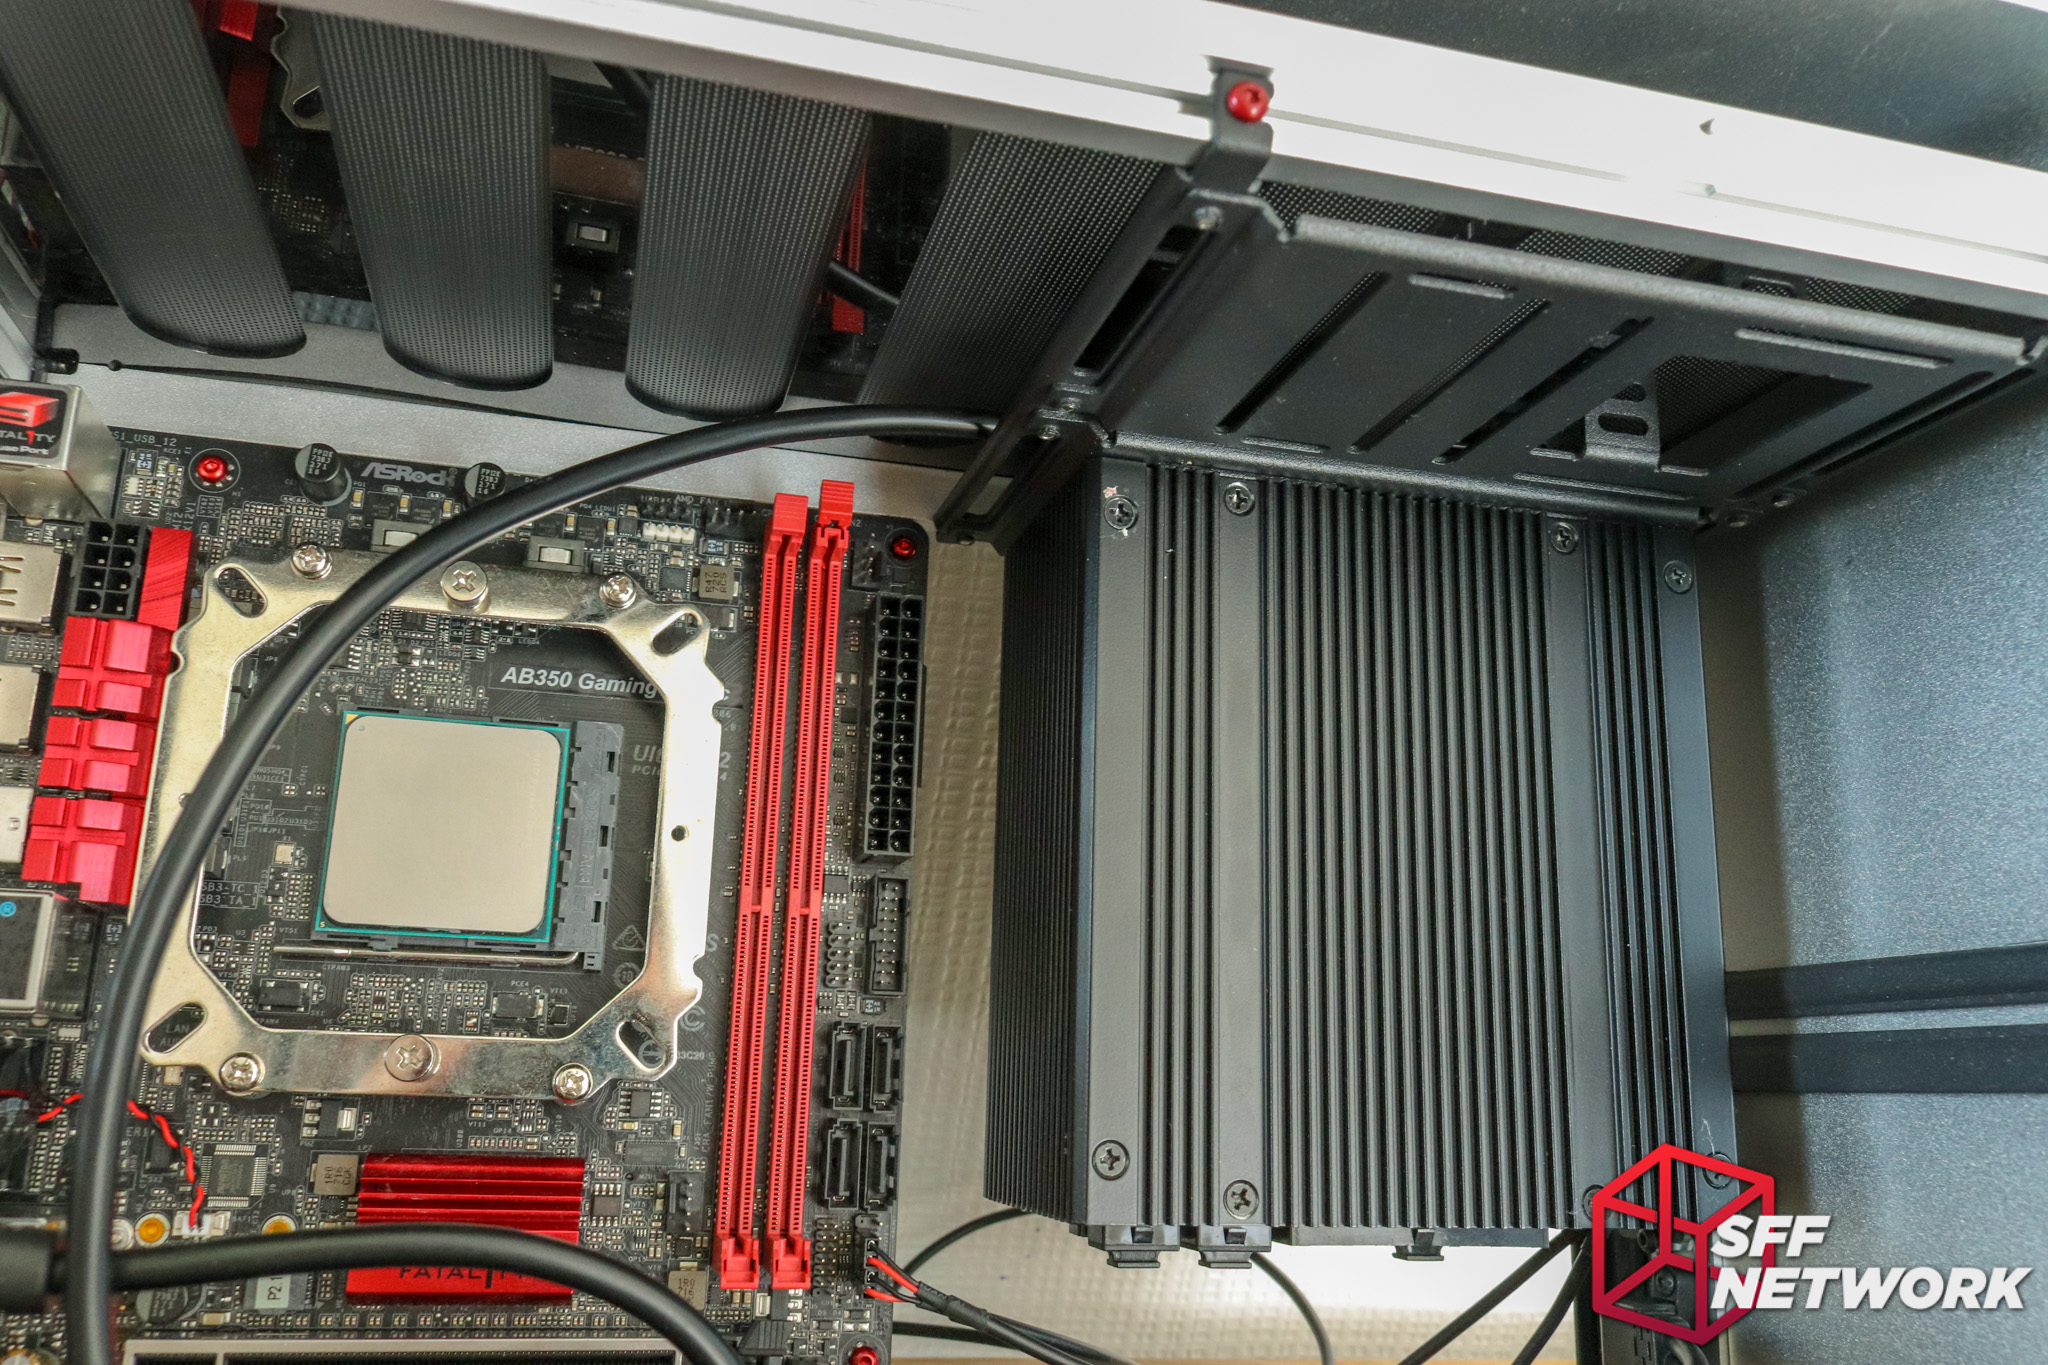
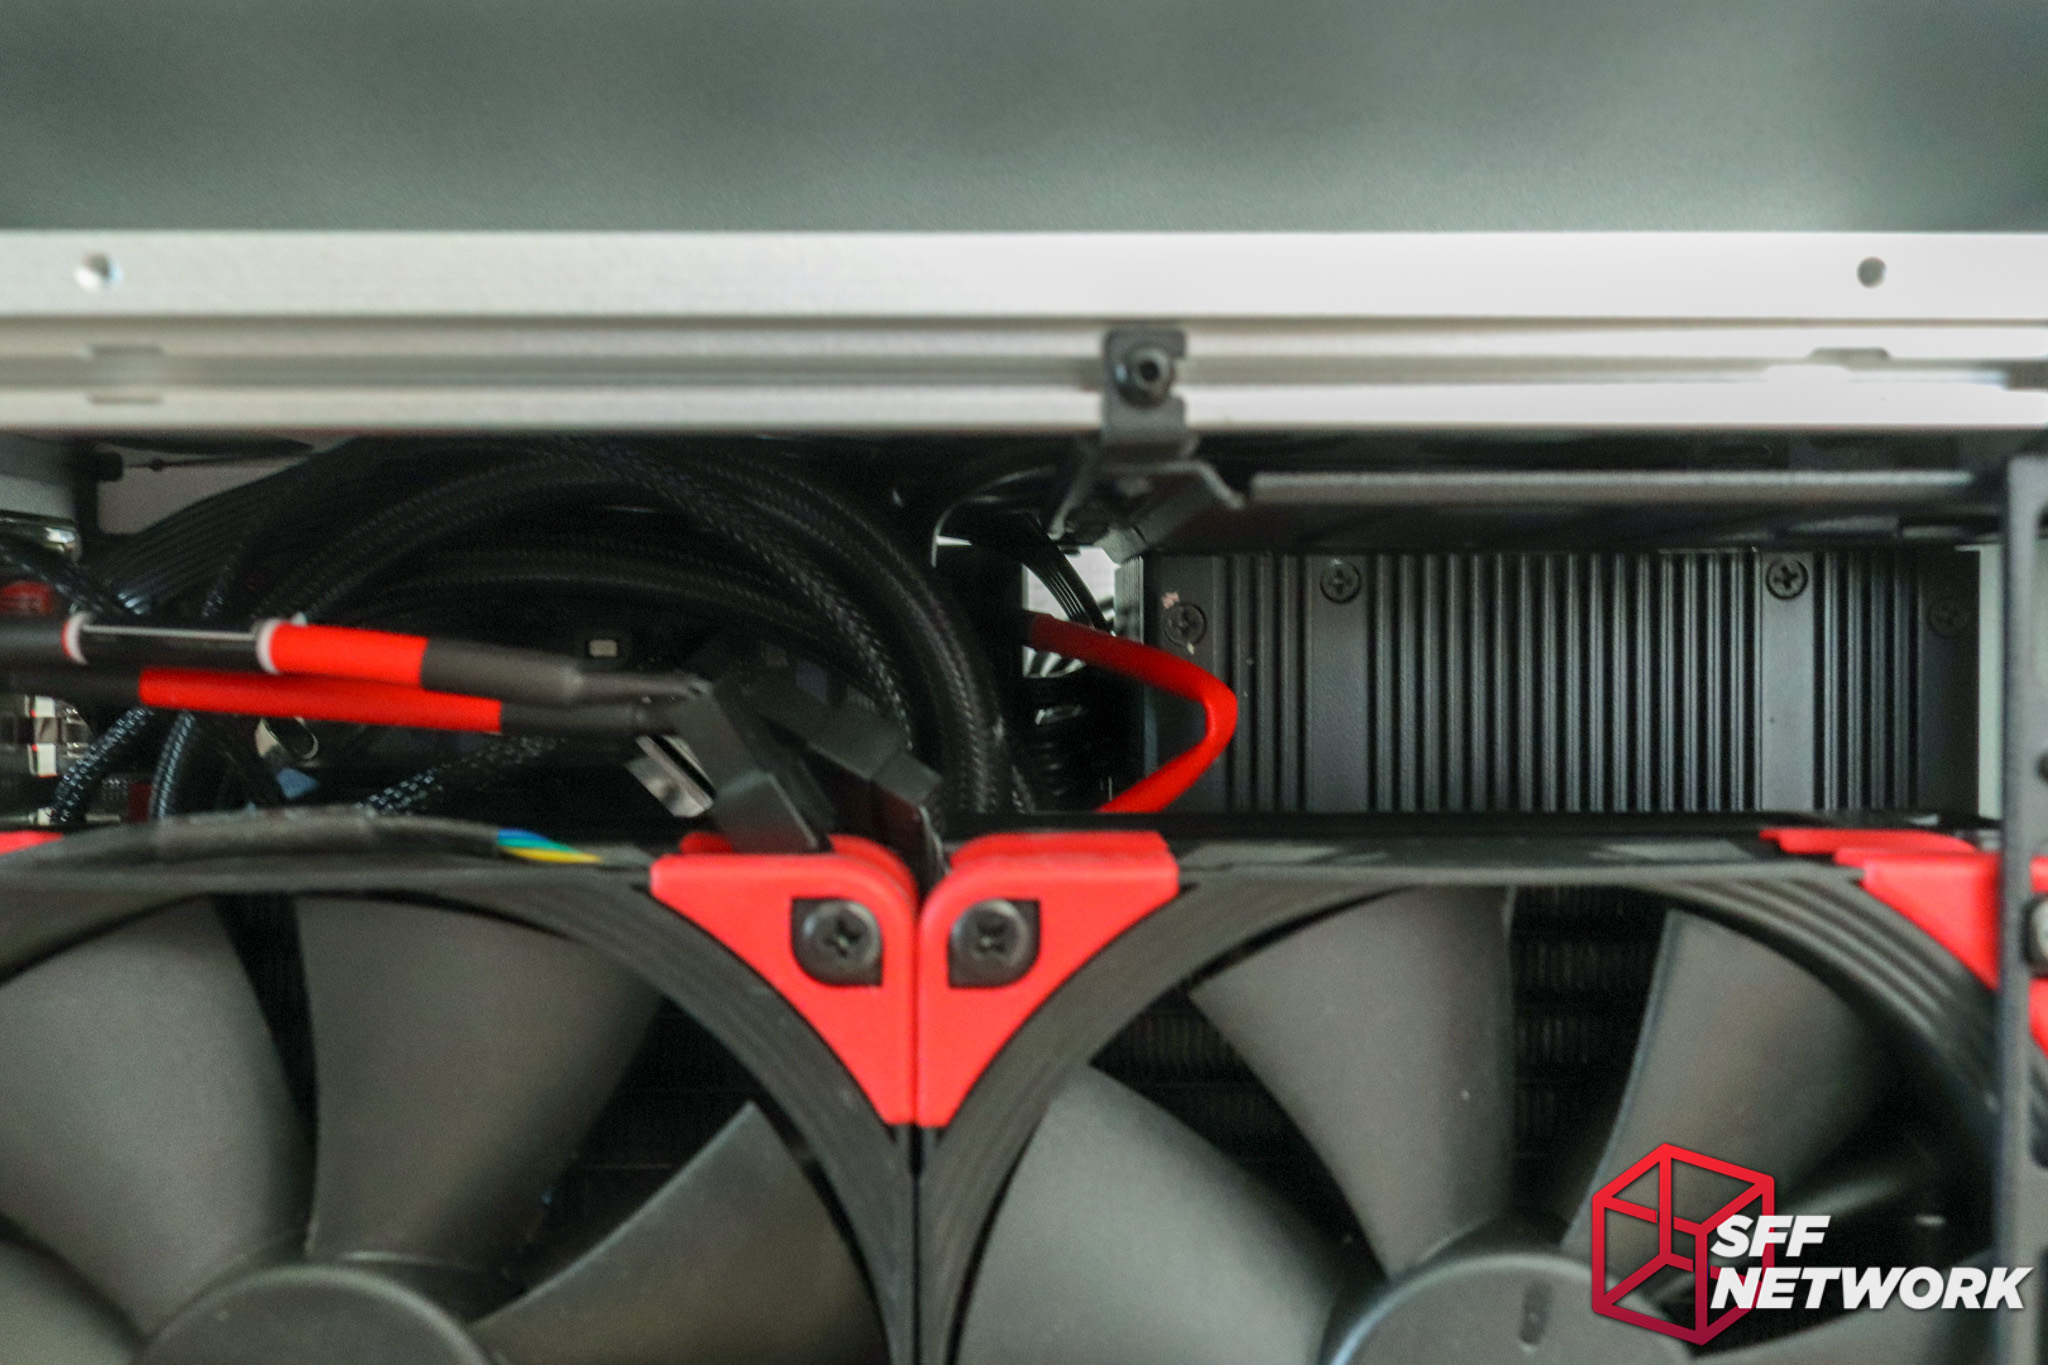
To power the system, we need these cables. You would need more if you were to run standalone drives, however, I have elected to only use a single M.2 NVMe drive.
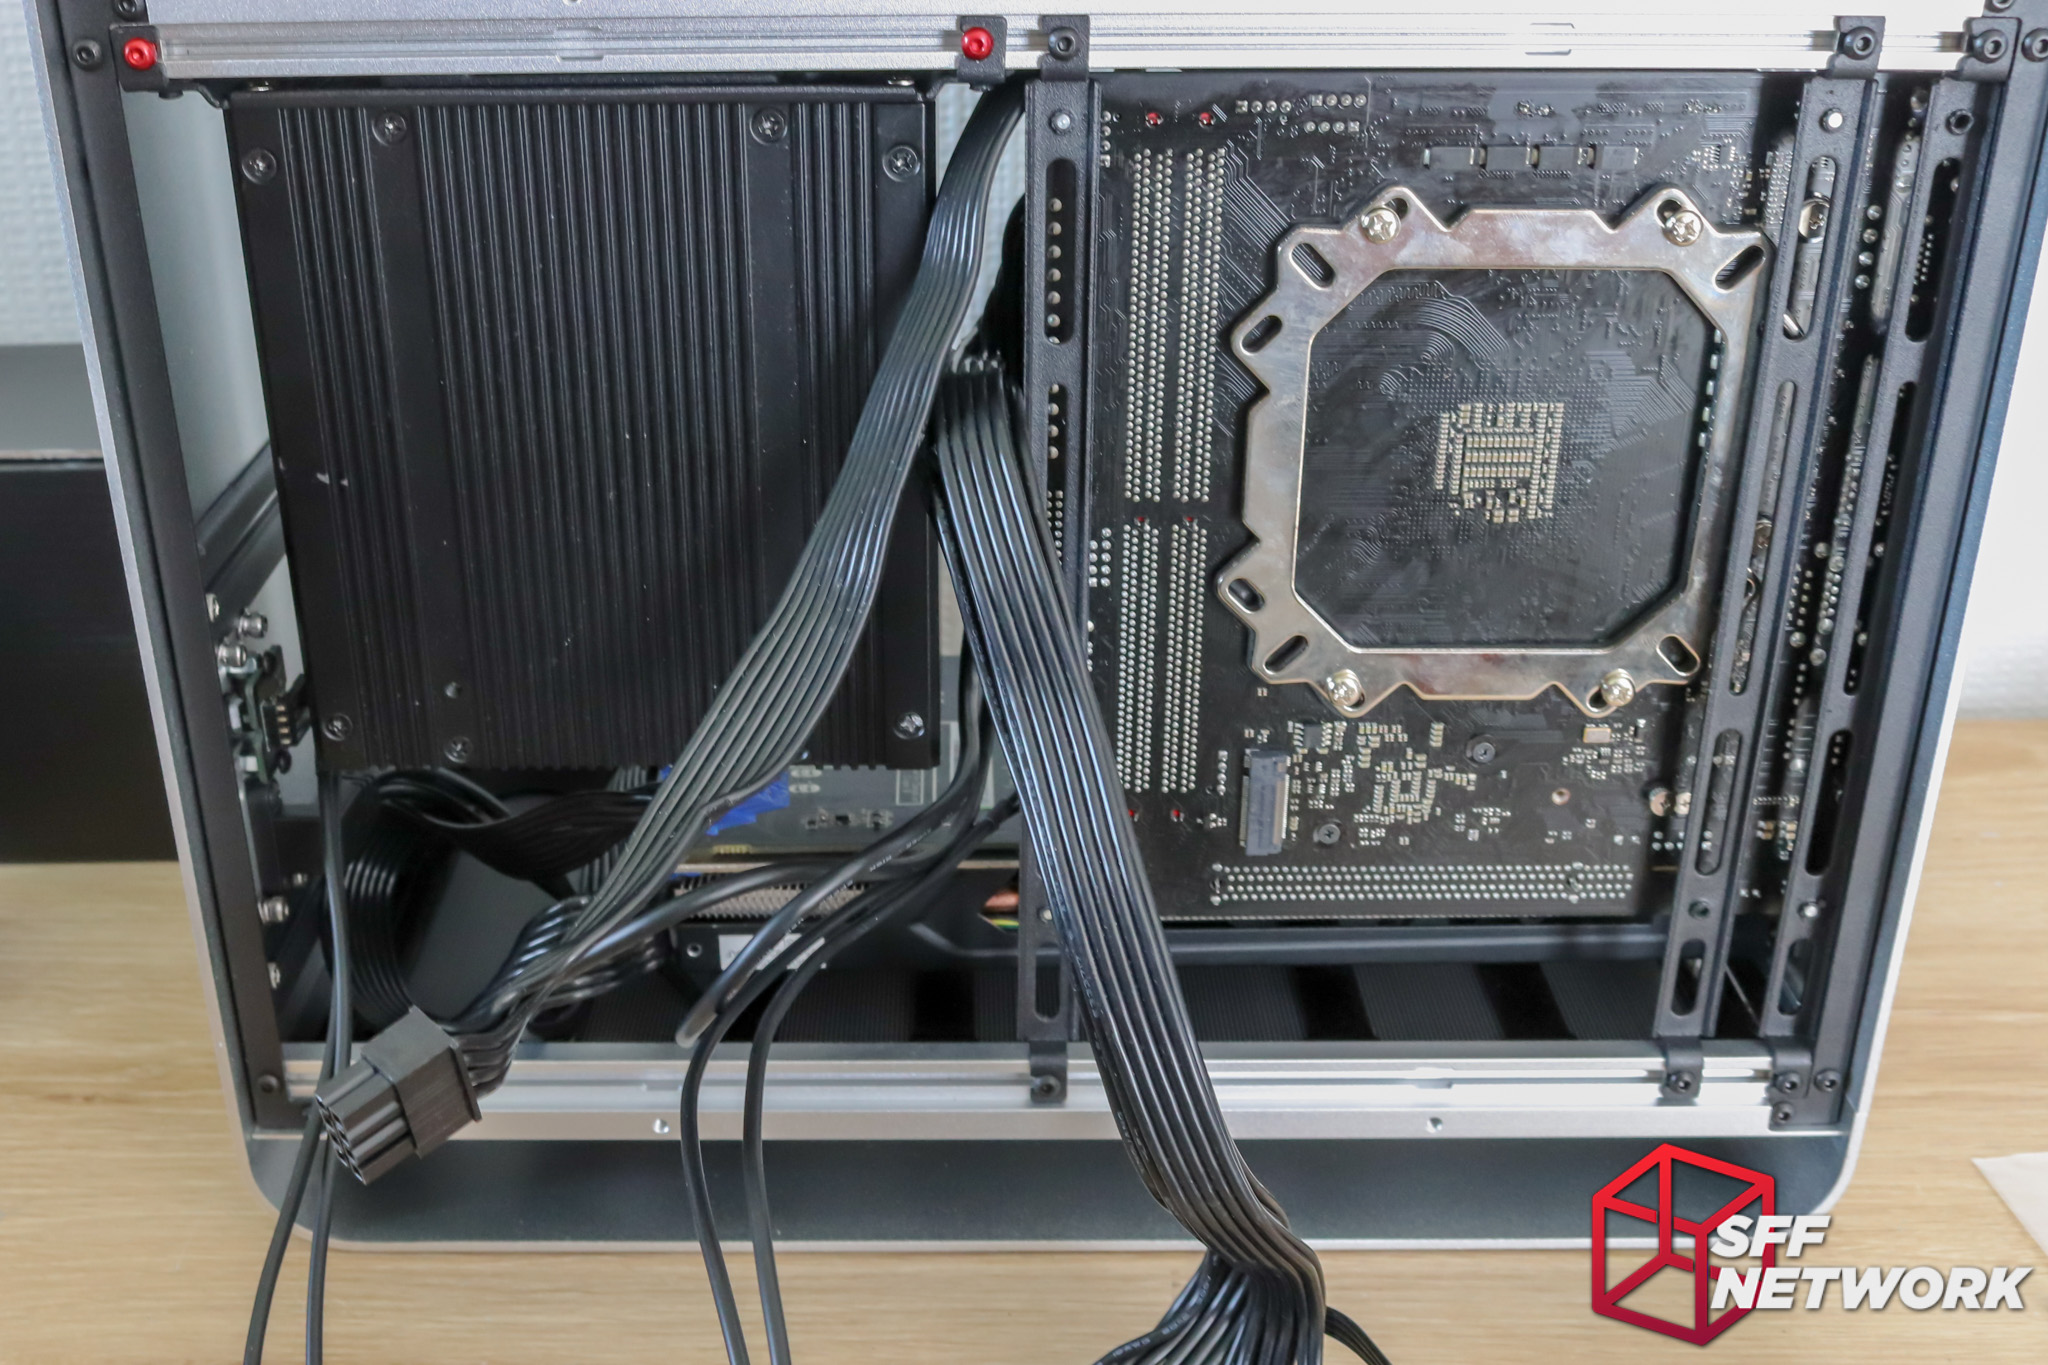
There is quite a bit of room to this side of the case – nice! Cable management here we go. Note that I forgot to mount the M.2 drive – easily done now though – as with any CPU cooler backplate. The design of the mounting brackets means free and easy access to the backside of the motherboard.
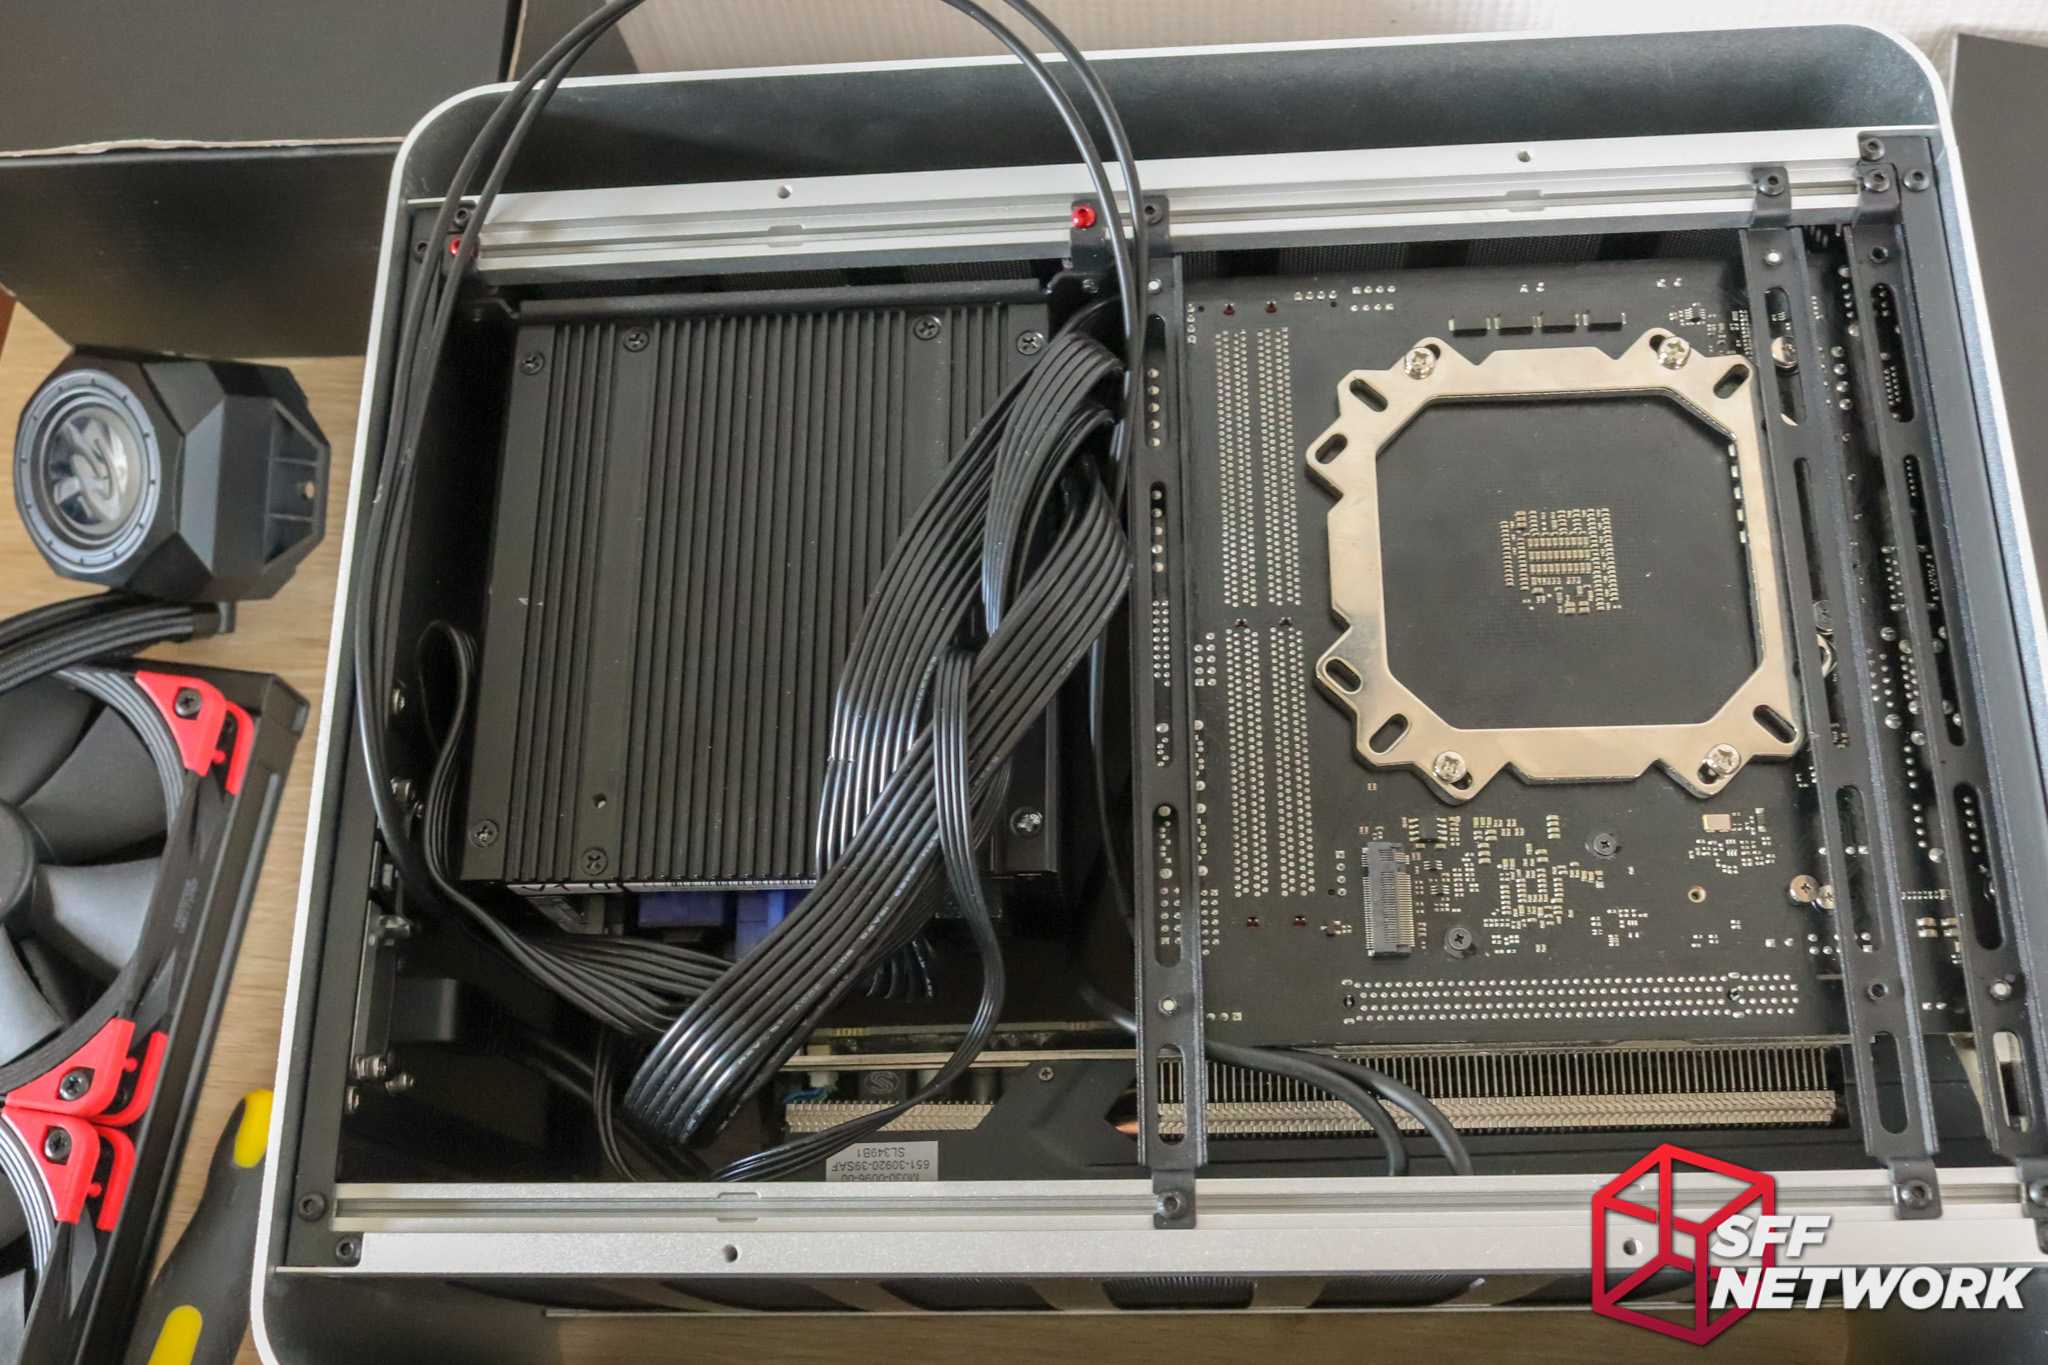
Almost there!
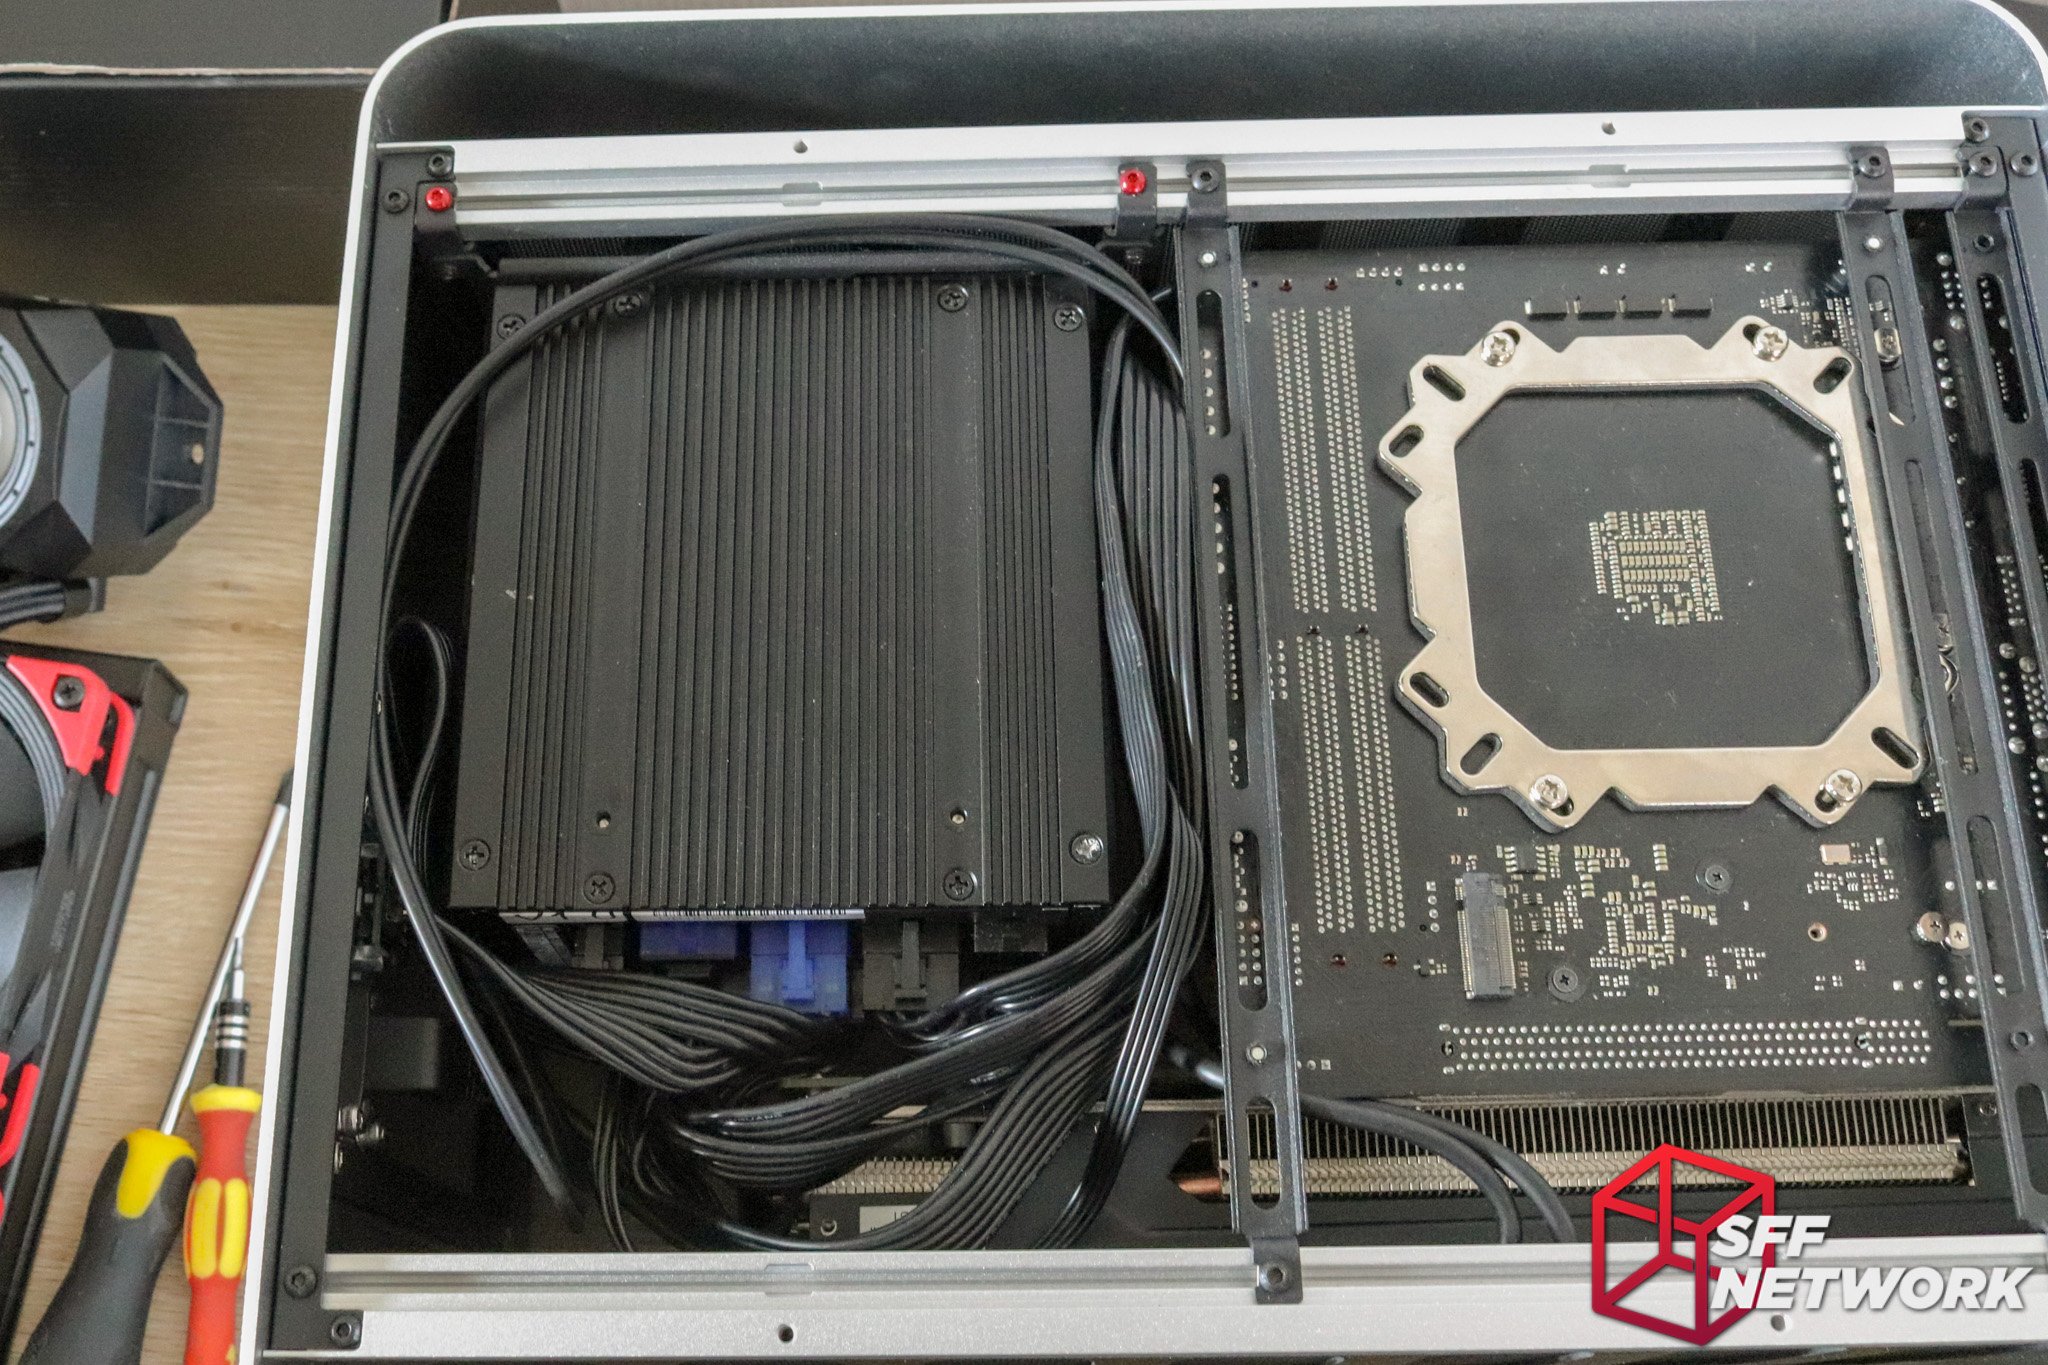
Done. No cable ties. but friction is your friend!
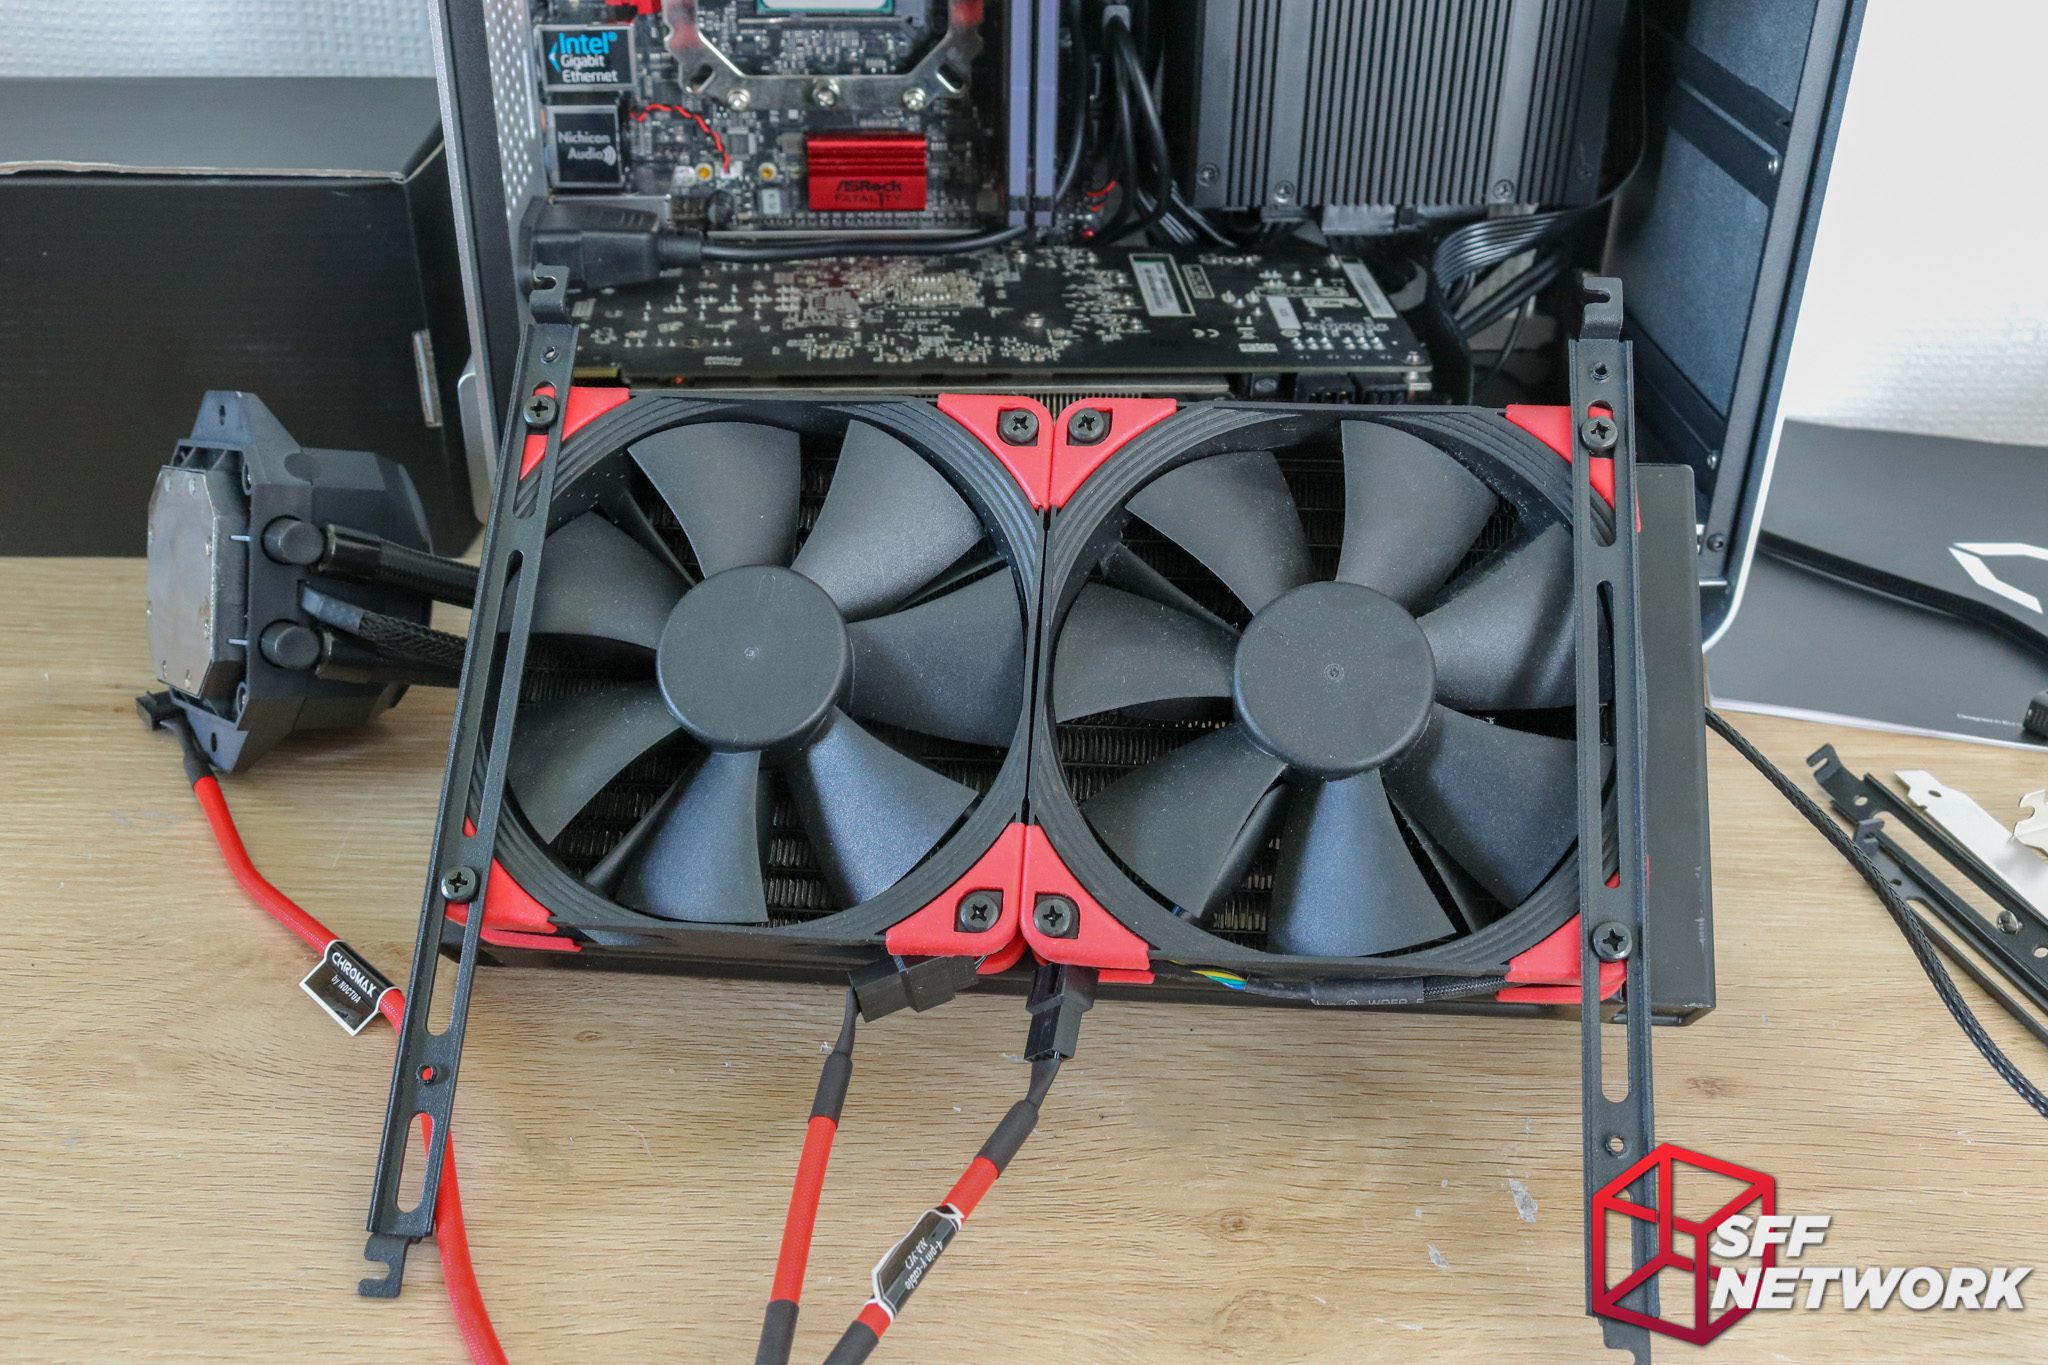
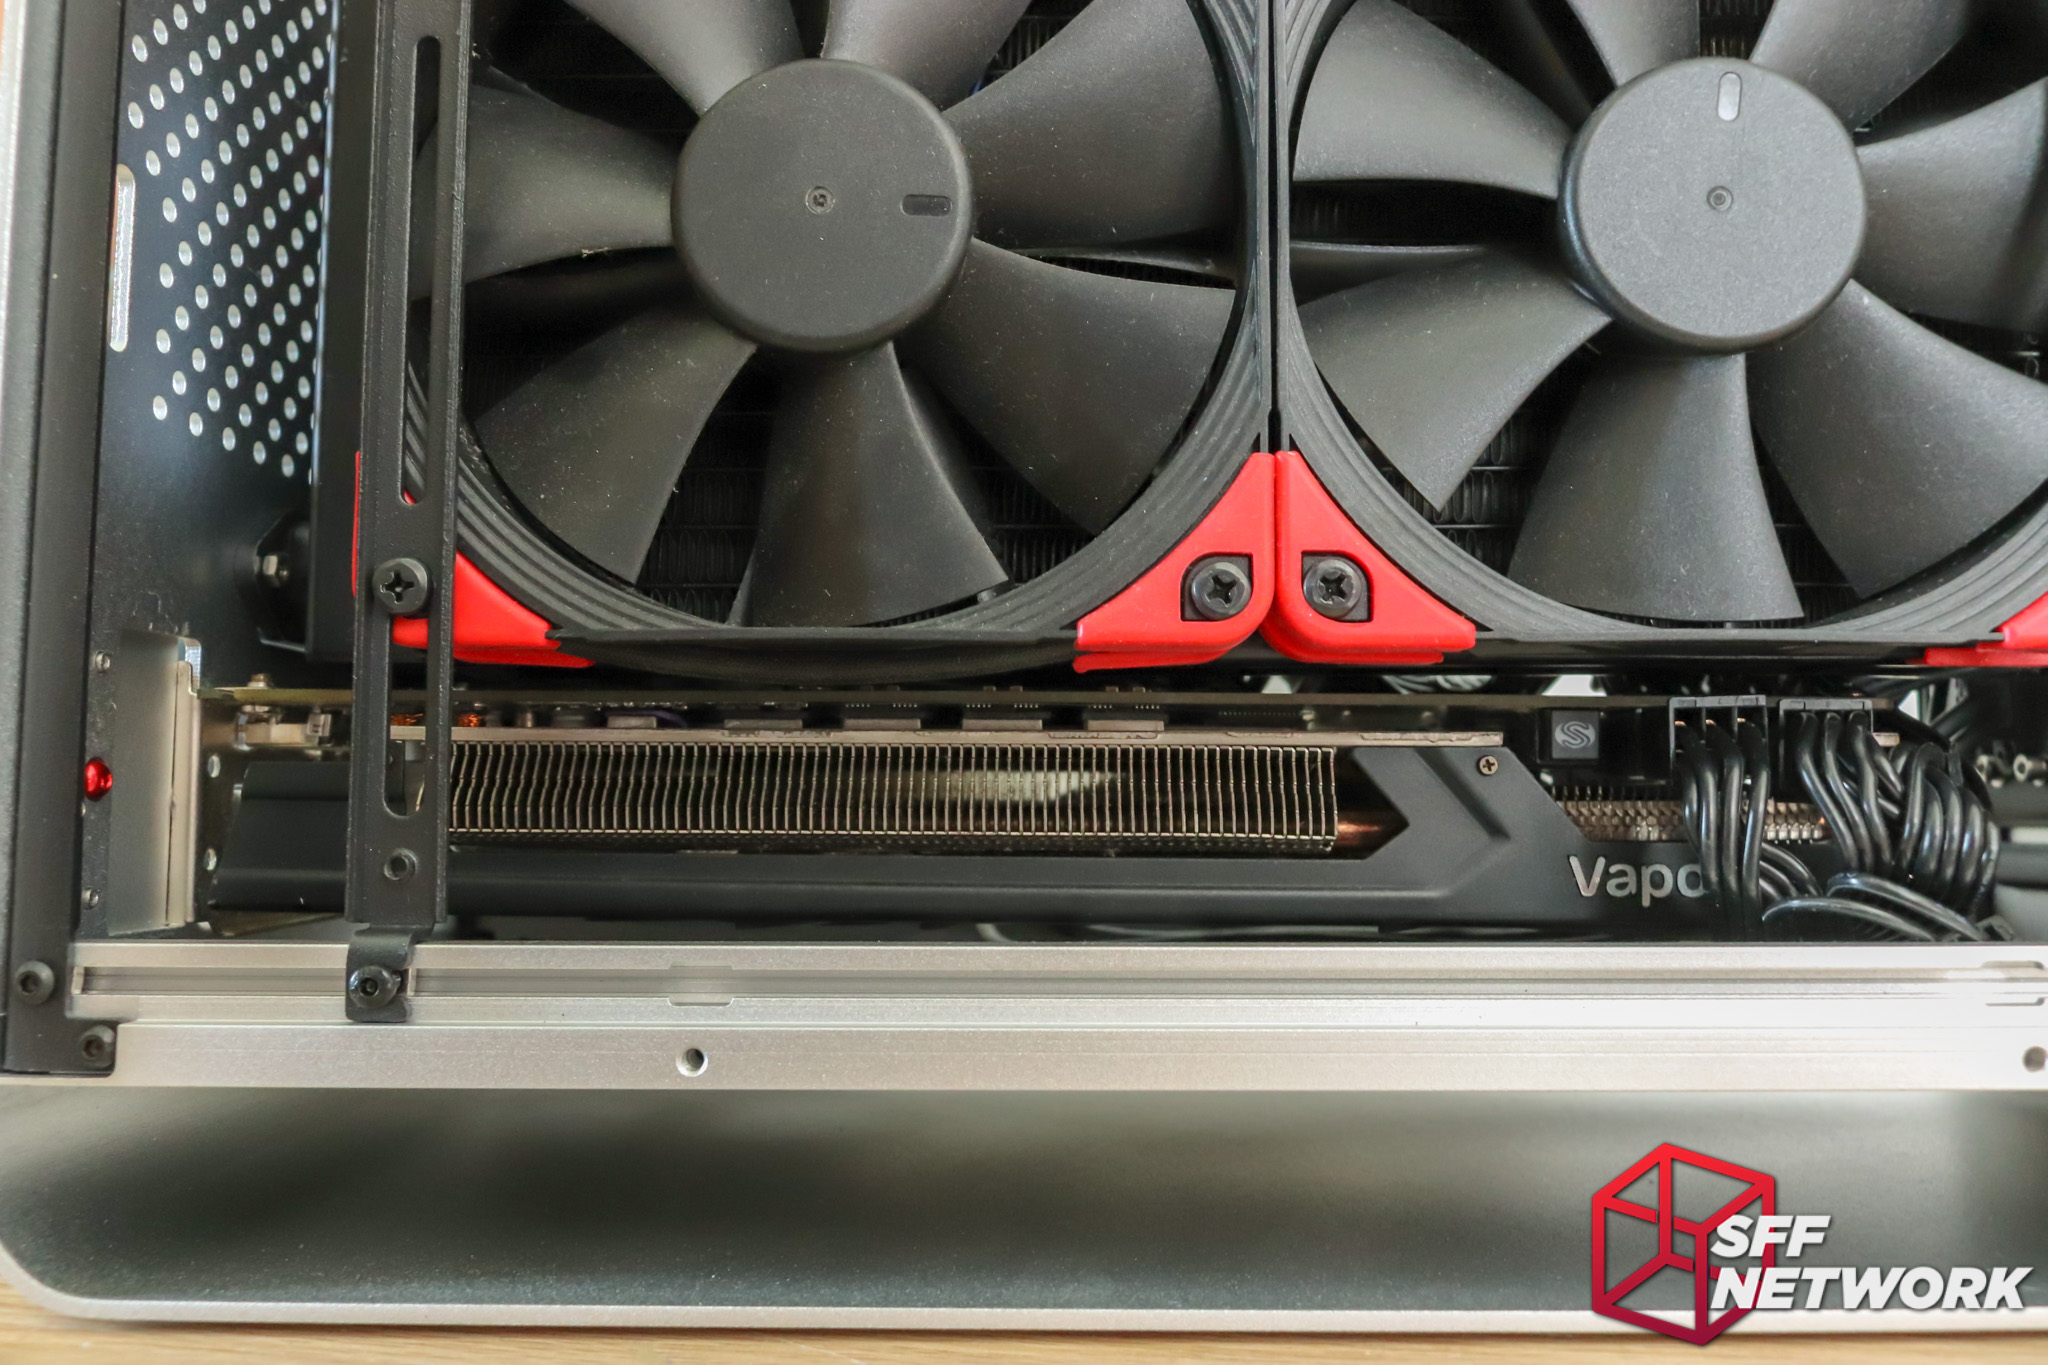
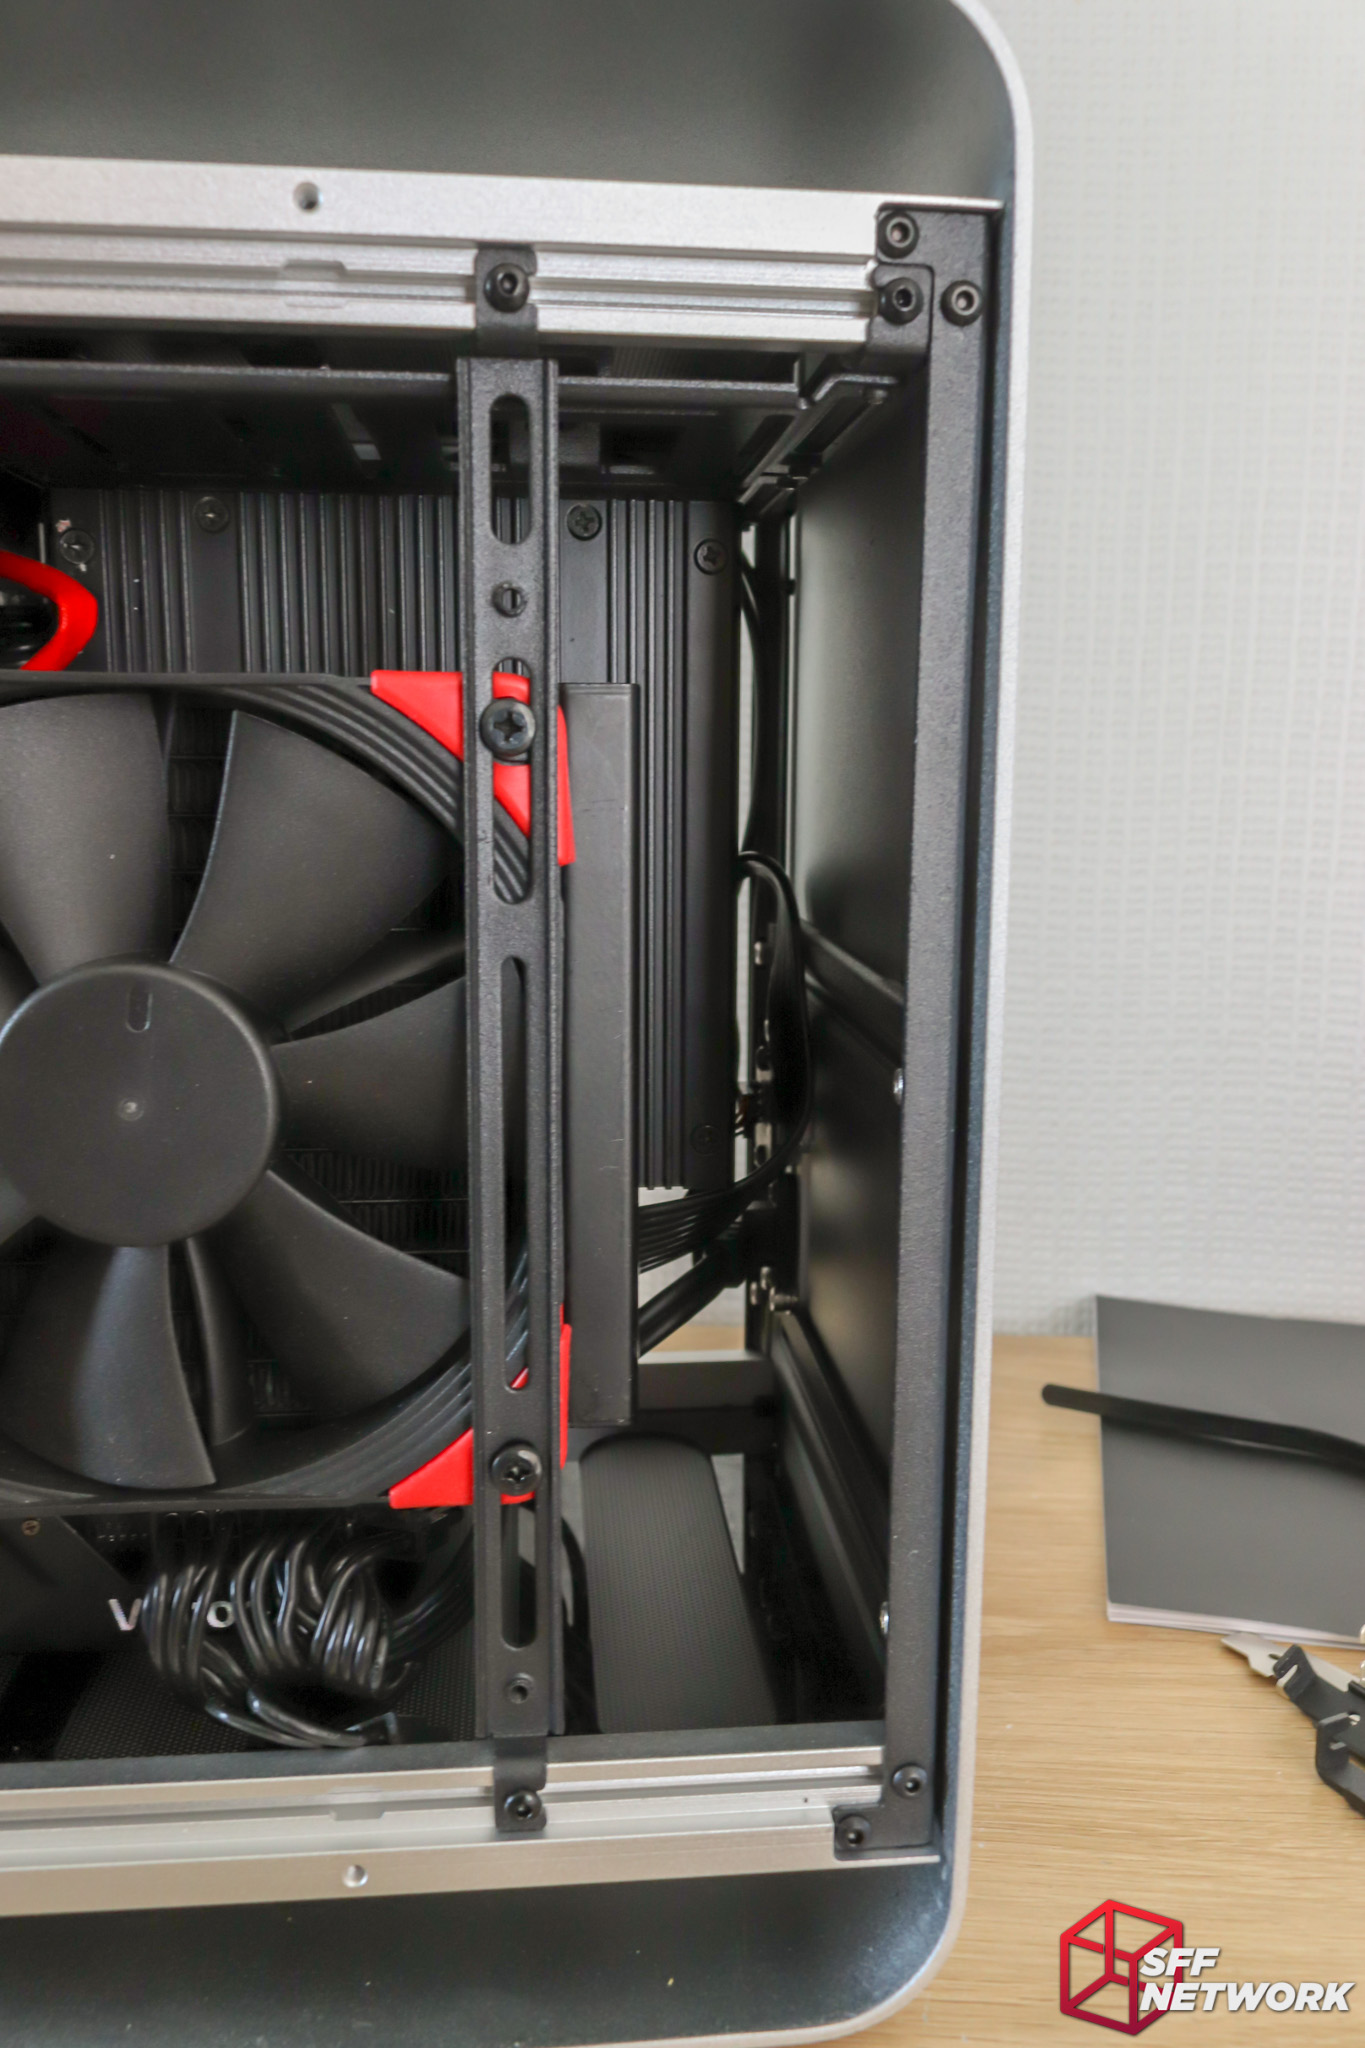
Time to mount the cooler – in this case, a Raijintek Orcus 240 Closed Loop cooler, with a pair of Noctua Chromax fans. These mount to the side vertical brackets as you see here!

With the waterblock fitted, it’s time to mount the radiator…

Wow, this was a tight fit. The mounting of the pump to the tubing section of the AIO cooler (to avoid Asetek’s patent, no doubt) means that there’s a huge lump in the way of installing the radiator. It took me no less than half an hour to get this to work! No fault of Streacom though – just a component selection to watch out for.
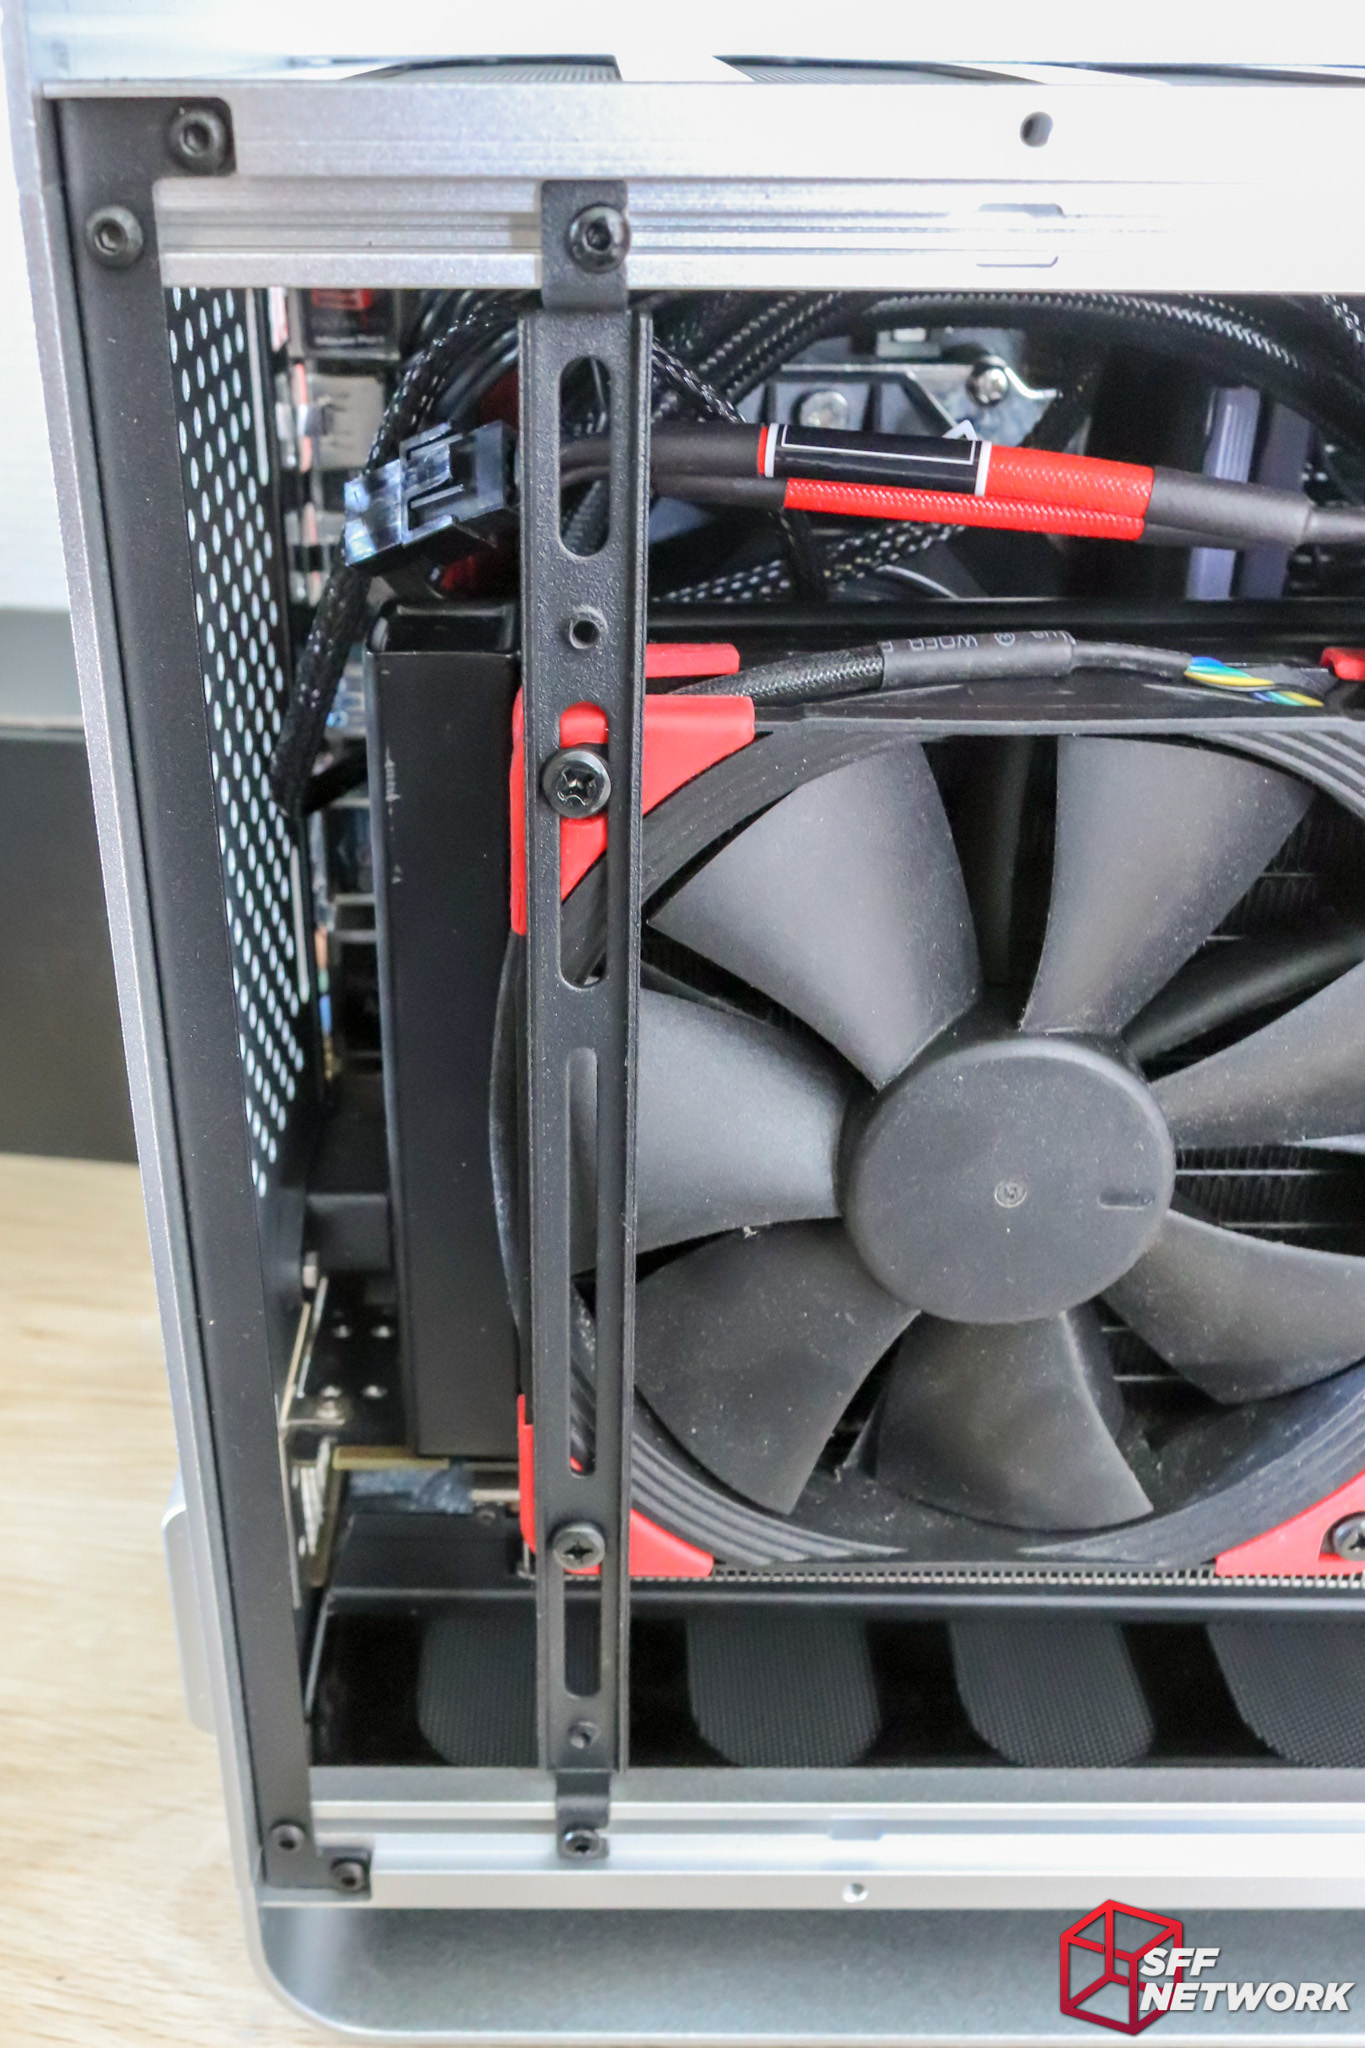
The slots on the vertical brackets make for relatively flexible mounting for devices – a necessity with the aforementioned tube pump lump.
Not much room left inside – just how it should be.
Up to a 280 radiator can be fitted – major cooling chops.

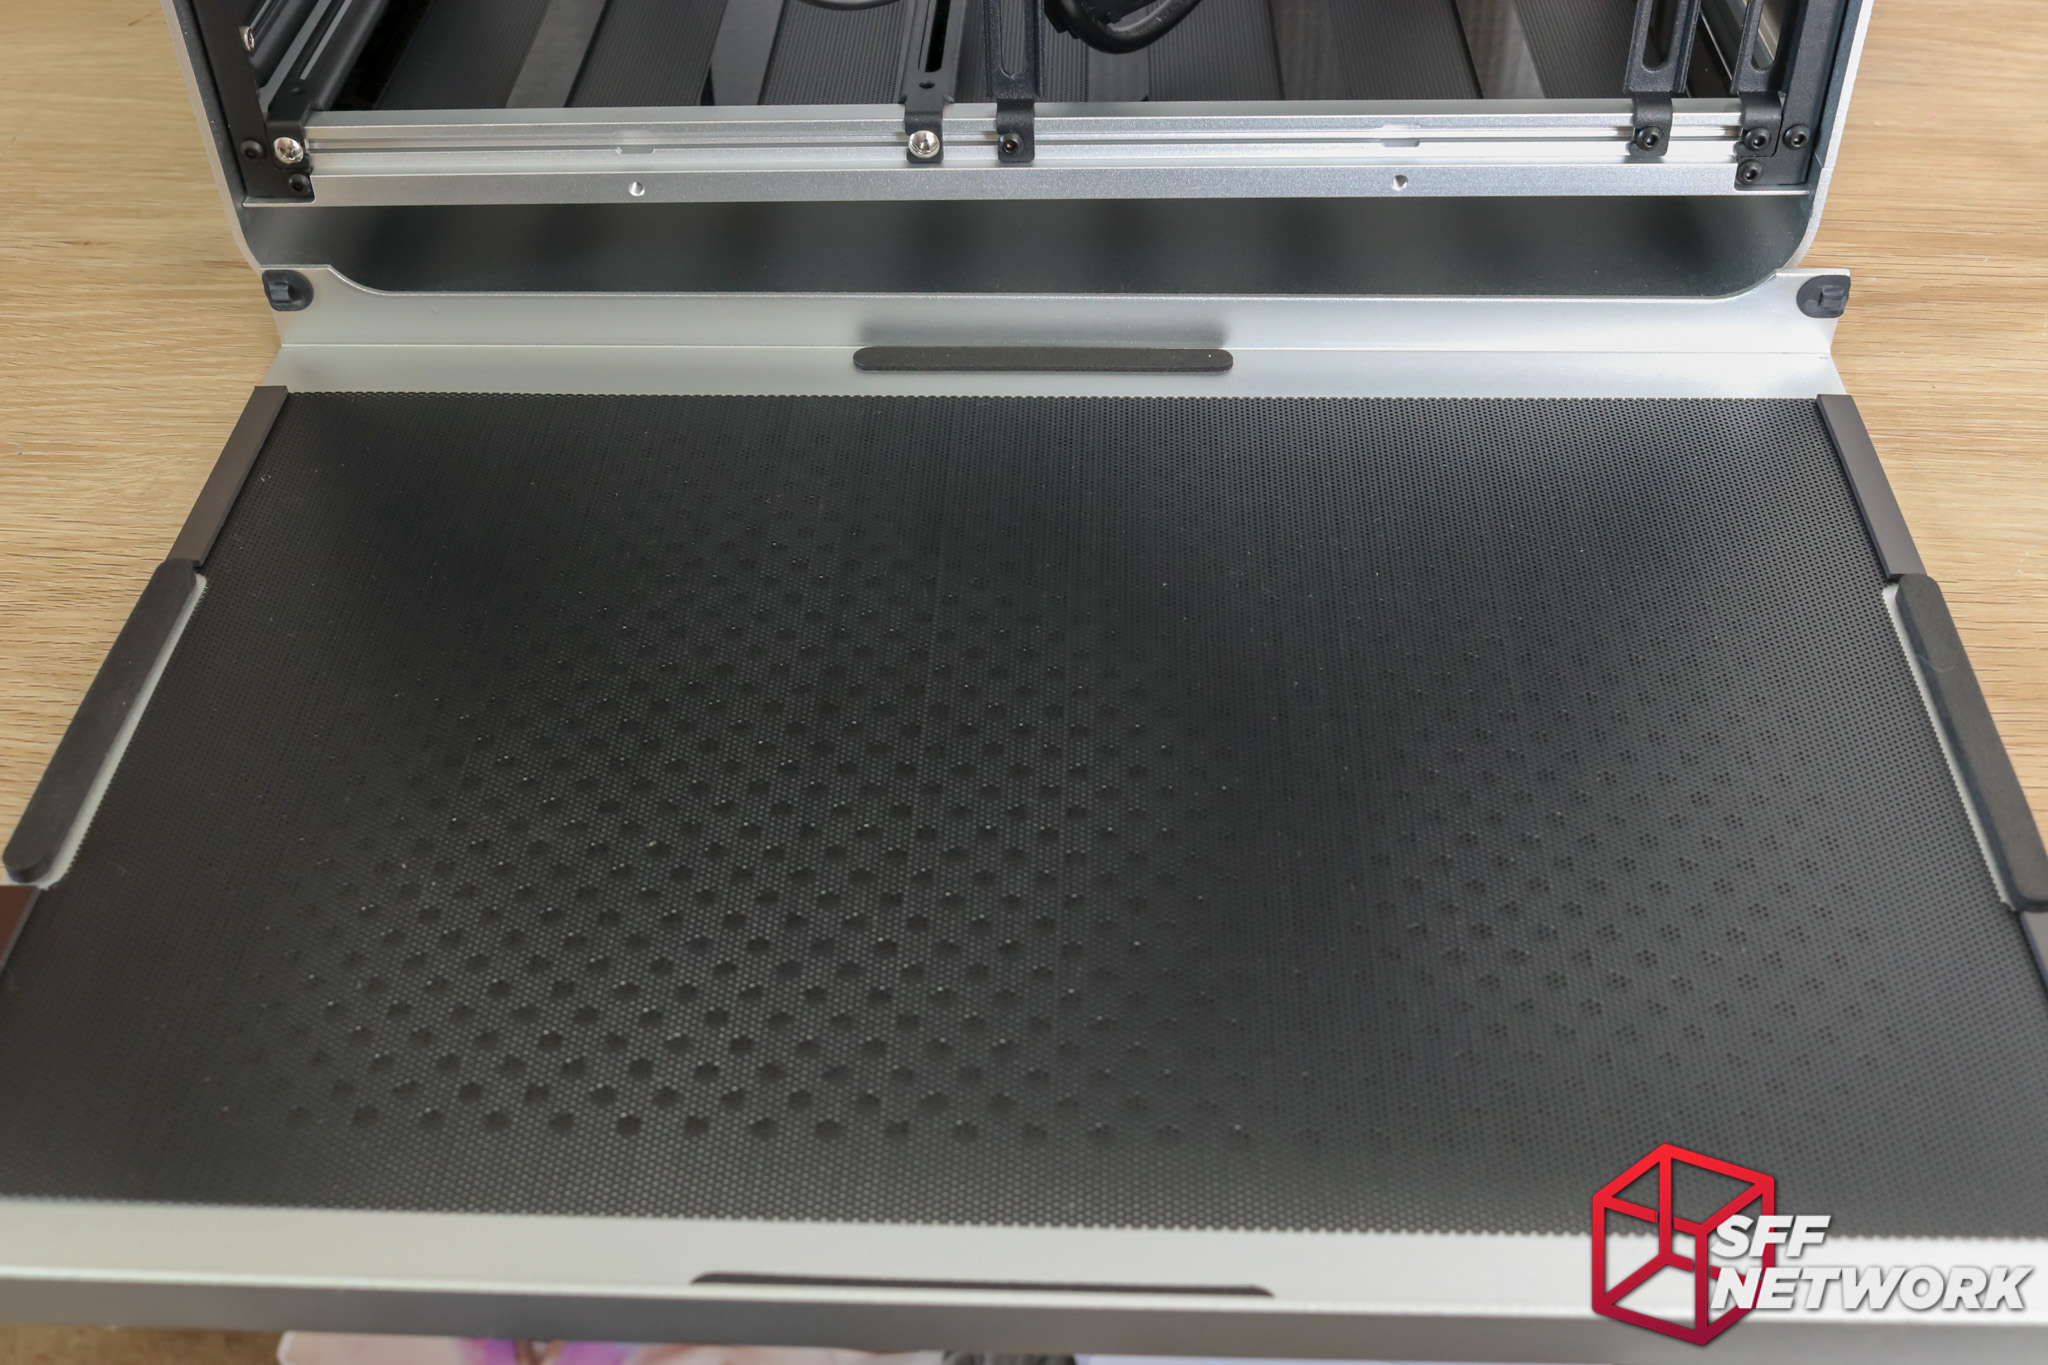
Another look at the top filtered panel.

And the bottom..
To the back, a completed system configuration.

Filter on, let’s get to testing.
The Testing
Using the test system detailed below, I put the case through a few tests to test that it had the cooling required to handle the hardware it can accommodate.
Using the test hardware, I first cranked all the fans up to 100% to remove the BIOS control of cooling – an easy way to mess up results. After this, I ran Prime95 in Blend mode until the system reached a stable temperature for 10 minutes. After this, I loaded up FurMark and cranked GPU torture test into the chassis. Again, once this stabilised, I closed Prime95 and let the system cool to this final result.
The test system;
| CPU | Ryzen 5 1600X |
| Motherboard | ASRock AB350 Gaming-ITX/ac |
| Power Supply | SilverStone Nightjar NJ400-SXL |
| GPU | Sapphire R9-270X Vapor-X |
| RAM | Corsair Vengeance Pro RGB 16GB Kit, 2400 MHZ DDR4 |
| SSD | ADATA XPG 128GB |
| OS | Windows 10 Pro 64 Bit |
| Monitoring Software | HWMonitor, latest version as at writing |
| CPU Cooler | Raijintek Orcus 240 w/ Noctua Chromax fans, Noctua NH-D9L |
| GPU Cooler | Stock |
The Results
Let’s get the table out of the way!
Raijintek Orcus 240 |
CPU Temp (Delta T, Celsius) |
GPU Temp (Delta T, Celsius) |
| Idle | 5 | 9 |
| Prime95 Blend | 41 | 13 |
| FurMark | 17 | 56 |
| Both | 48 | 56 |
Noctua NH-D9L |
||
| Idle | 6 | 10 |
| Prime95 Blend | 51 | 21 |
| FurMark | 34 | 58 |
| Both | 51 | 58 |
So, how’d it do? Not bad! For a chassis that has no front intake, and no chassis fans installed, the Streacom DA2 handled the hefty hardware loadout fine! I designed this test as a worst case scenario – just the actual coolers themselves taking care of heat extraction. In a way, much like someone wishing to build a quiet system would go about things – a bare minimum of fans.
The DA2 copes admirably with combined heat loads – with only a moderate temperature increases to components that aren’t loaded – just absorbing heat from the other components.
Even with the fans at 100% fan speed, the system was still very quiet – the solid chassis absorbing any resonances present.
Accessories
During the writing of this review, Streacom let me know as to a couple of accessories that are in the works – namely a tempered glass side panel, and a vertical GPU kit. No pictures at this time – the document was marked “for internal use” only!
Firstly, the tempered glass panel – “TG2” uses 4mm thick tempered glass. The tempered glass is adhered to an aluminium backing – making attachment to the chassis easier. The kit includes two panels – so you can showcase your entire build.
Secondly, a vertical GPU kit – consisting of a replacement rear panel, flexible riser and mounting hardware. This kit means that the DA2 can support triple slot cards in this orientation. The vertical orientation means that in slots 1 and 2 (and 3 in the case of triple slot cards), the CPU has 60mm of cooler headroom. In slots 2 and 3, you get 80mm of headroom.
If you have any ideas for further accessories, let Streacom know in the comments – enthusiasts learning from enthusiasts!
The Conclusion
Streacom has produced a chassis in the DA2 that trades blows with the contemporaries in the current SFF market – an admirable achievement. Taking cues from the market, Streacom has created a chassis that would fit in on any enthusiast’s desk.
That’s not to say the chassis is without flaws. The rubber side panel retainers/dampeners detach too easily for my liking, and that power input location – I’m not a fan. The major flaw, however, is that the case has been delayed numerous times so far – with Streacom citing QC issues as the causal factor. However, the end is in sight, with retailers such as QuietPC.com citing mid-December availability!
Overall, the Streacom DA2 is a case I can recommend to anyone looking for a mid-sized SFF case with oodles of flexibility. A svelte, S4M-esque performer this isn’t, but it allows showcase builds and performance builds alike. Great build quality (as always from Streacom), considered design and subtle aesthetics means that the Streacom DA2 gets my SFF Network Recommended product award!
Pros
- Subtle design
- SFX as primary PSU design parameter
- Adequate cooling
- Included accessories are a great choice
Cons
- Mains power input location
- The aforementioned delays
Niggles
- Rubber side panel retainers pop off too easily
Thoughts? Discuss them in the forum.
This review sample was provided by Streacom.
Here at SmallFormFactor.net we give manufacturers the ability to be part of the community. We offer a right to reply to our hardware reviews. If a manufacturer responds with any feedback or corrections, their comments will be posted here.